Setup time: 5 Min
Create Integration
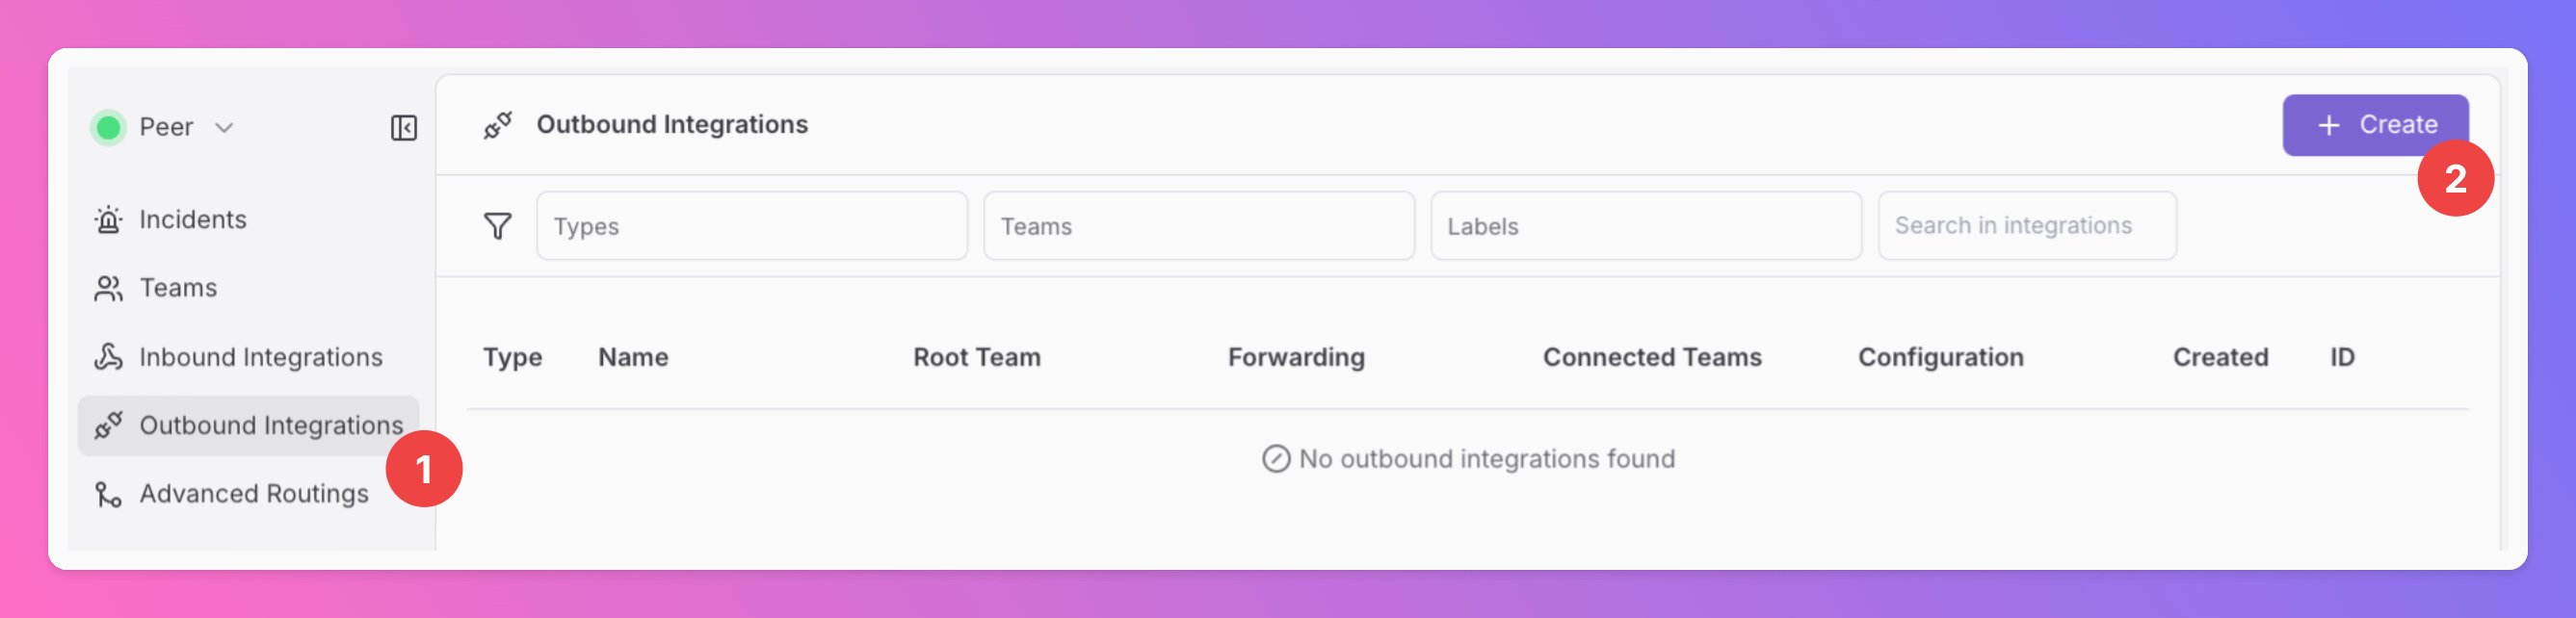
- Click on the
Outbound Integrationstab. - Click on
+ Create.
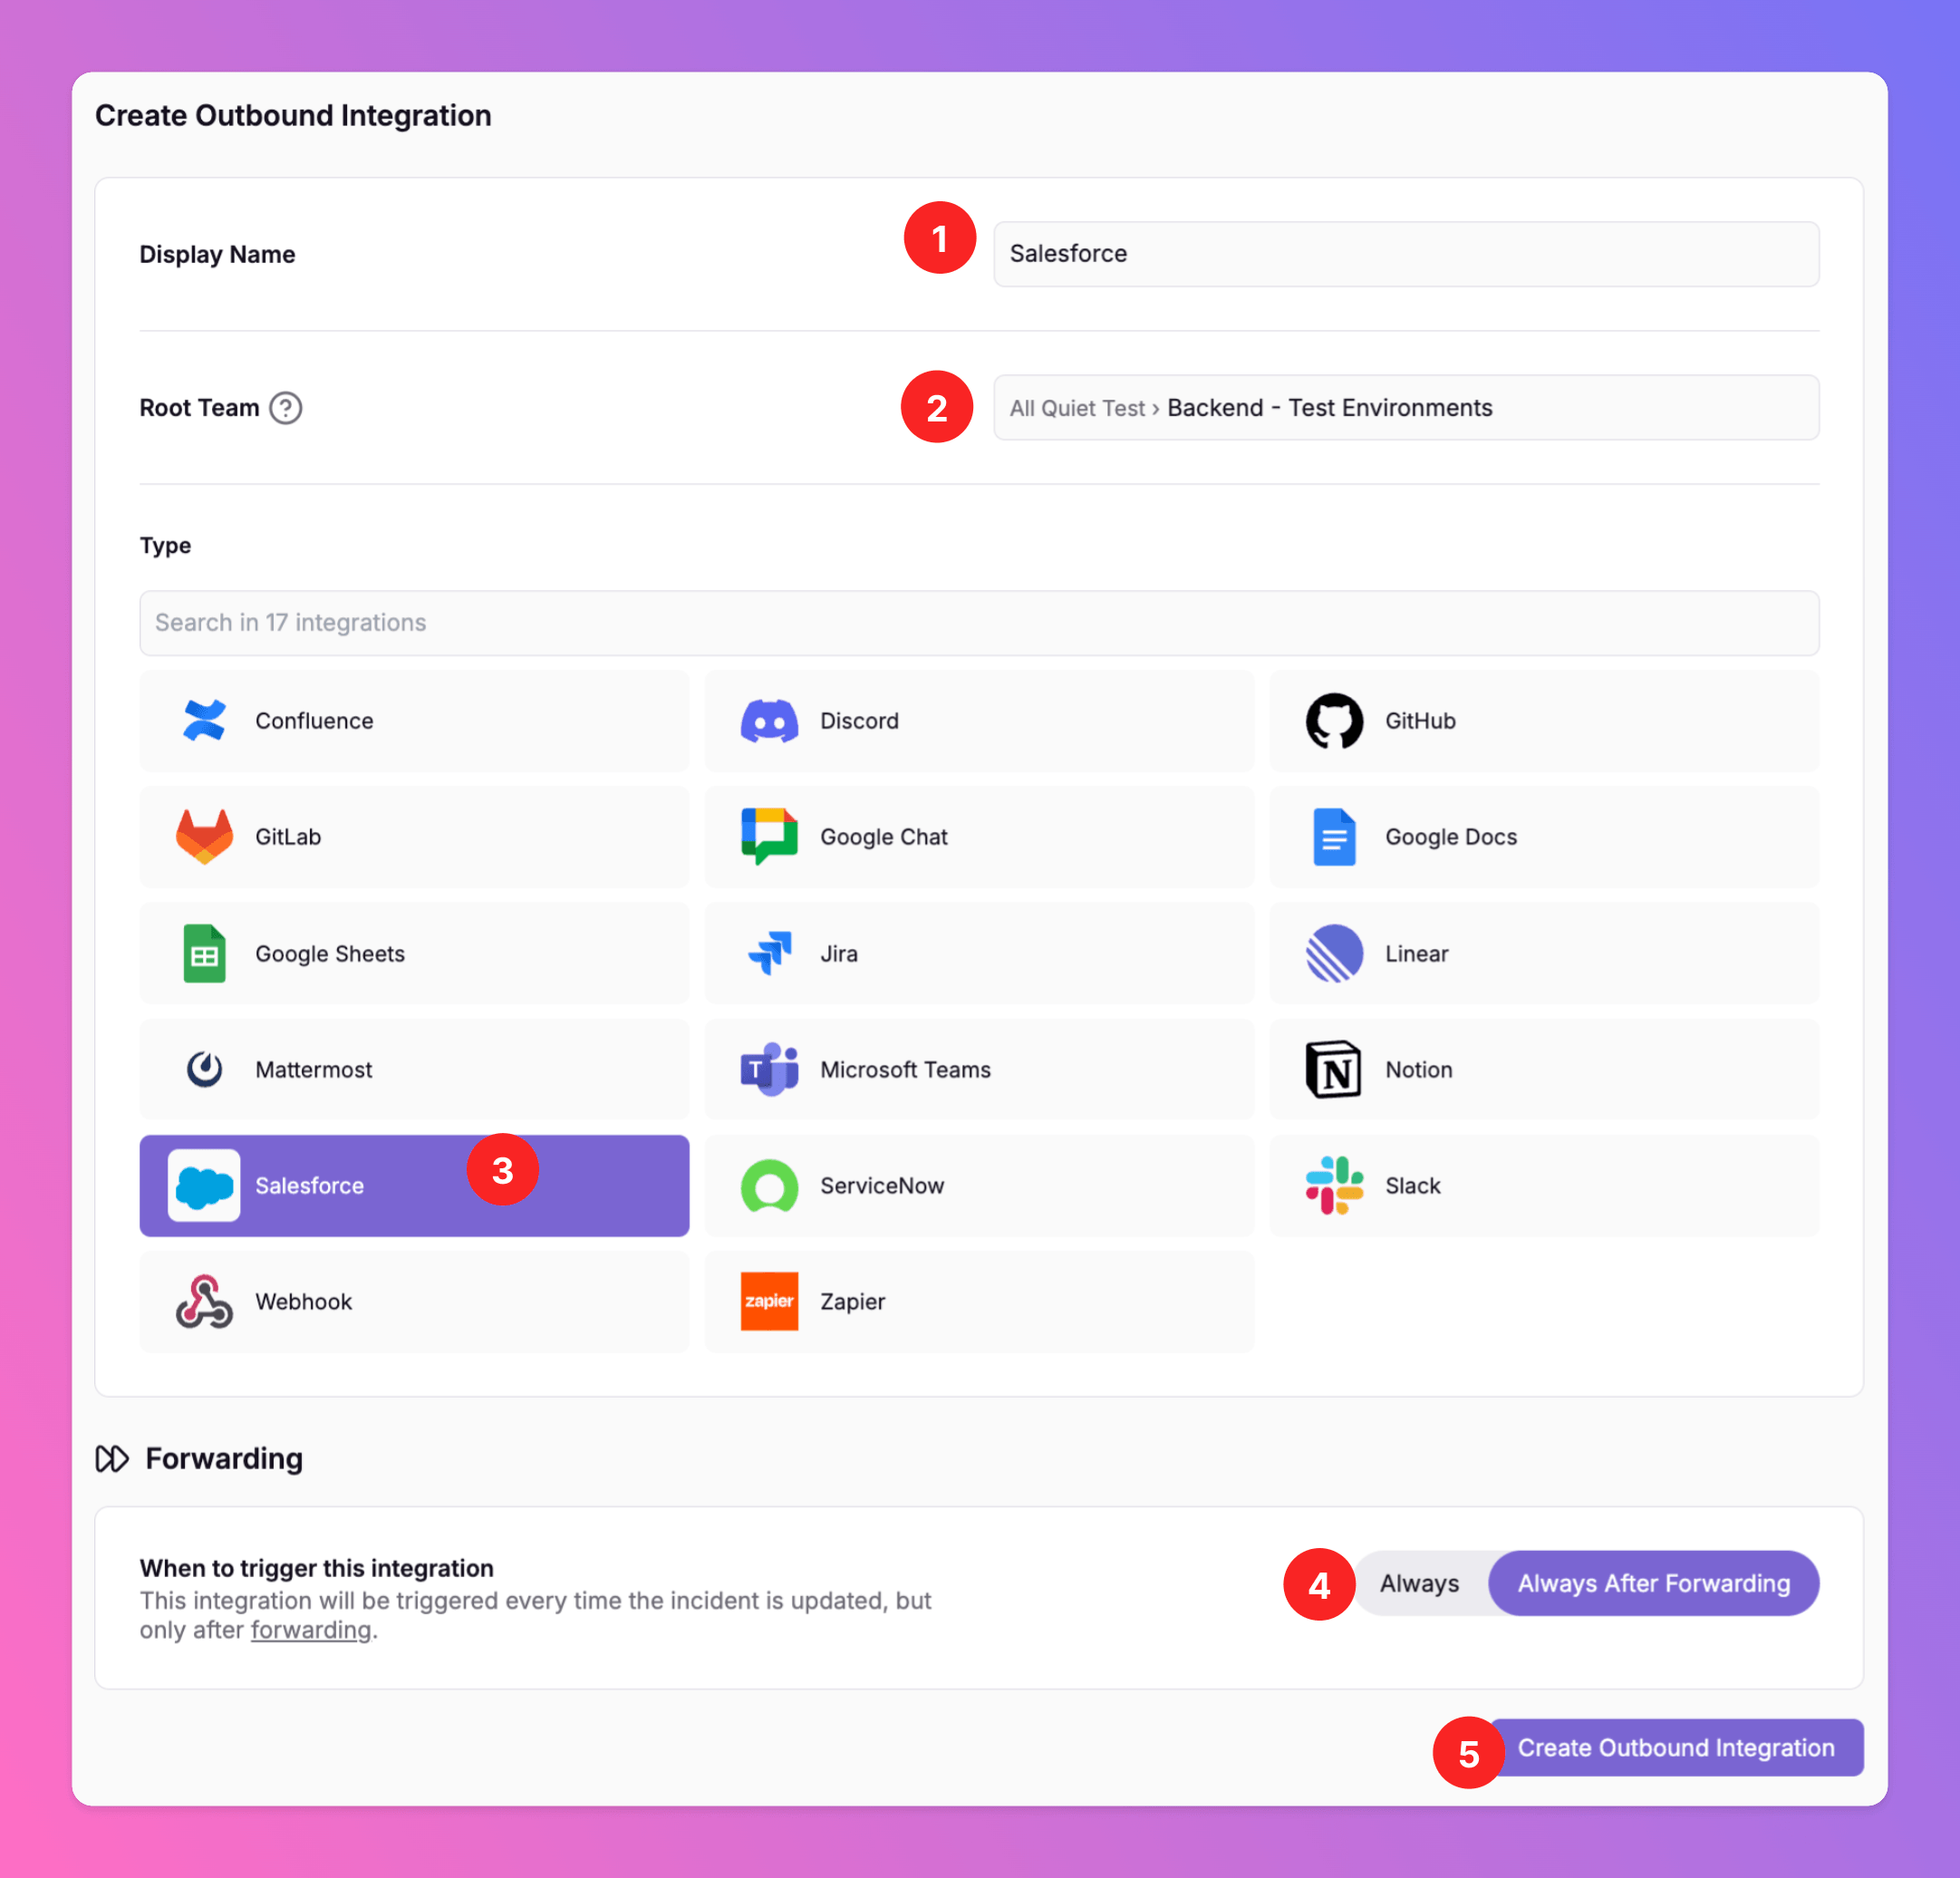
- Enter a
Display Namefor your integration, e.g. “Salesforce”. - Select a
Root Team.For Organizations with Pro and Enterprise plan: This is going to be the root team of your integration. You will be able to add additional teams in the next step. - Select
Salesforceas the integration’s type. - Forwarding settings:
- Default:
Always After Forwarding- Salesforce cases will only be created if users manually forward specific incidents or if you set up advanced routing rules for your Salesforce integration that automatically forward incidents in specific scenarios. - Alternative:
Alwayswill automatically forward all incidents to Salesforce and create cases, unless excluded by additional advanced routing rules.
- Default:
- Click
Create Outbound Integration.
Add All Quiet to Your Salesforce Org
Once you’ve successfully created your new outbound integration, you’ll automatically be redirected to itsSettings page.
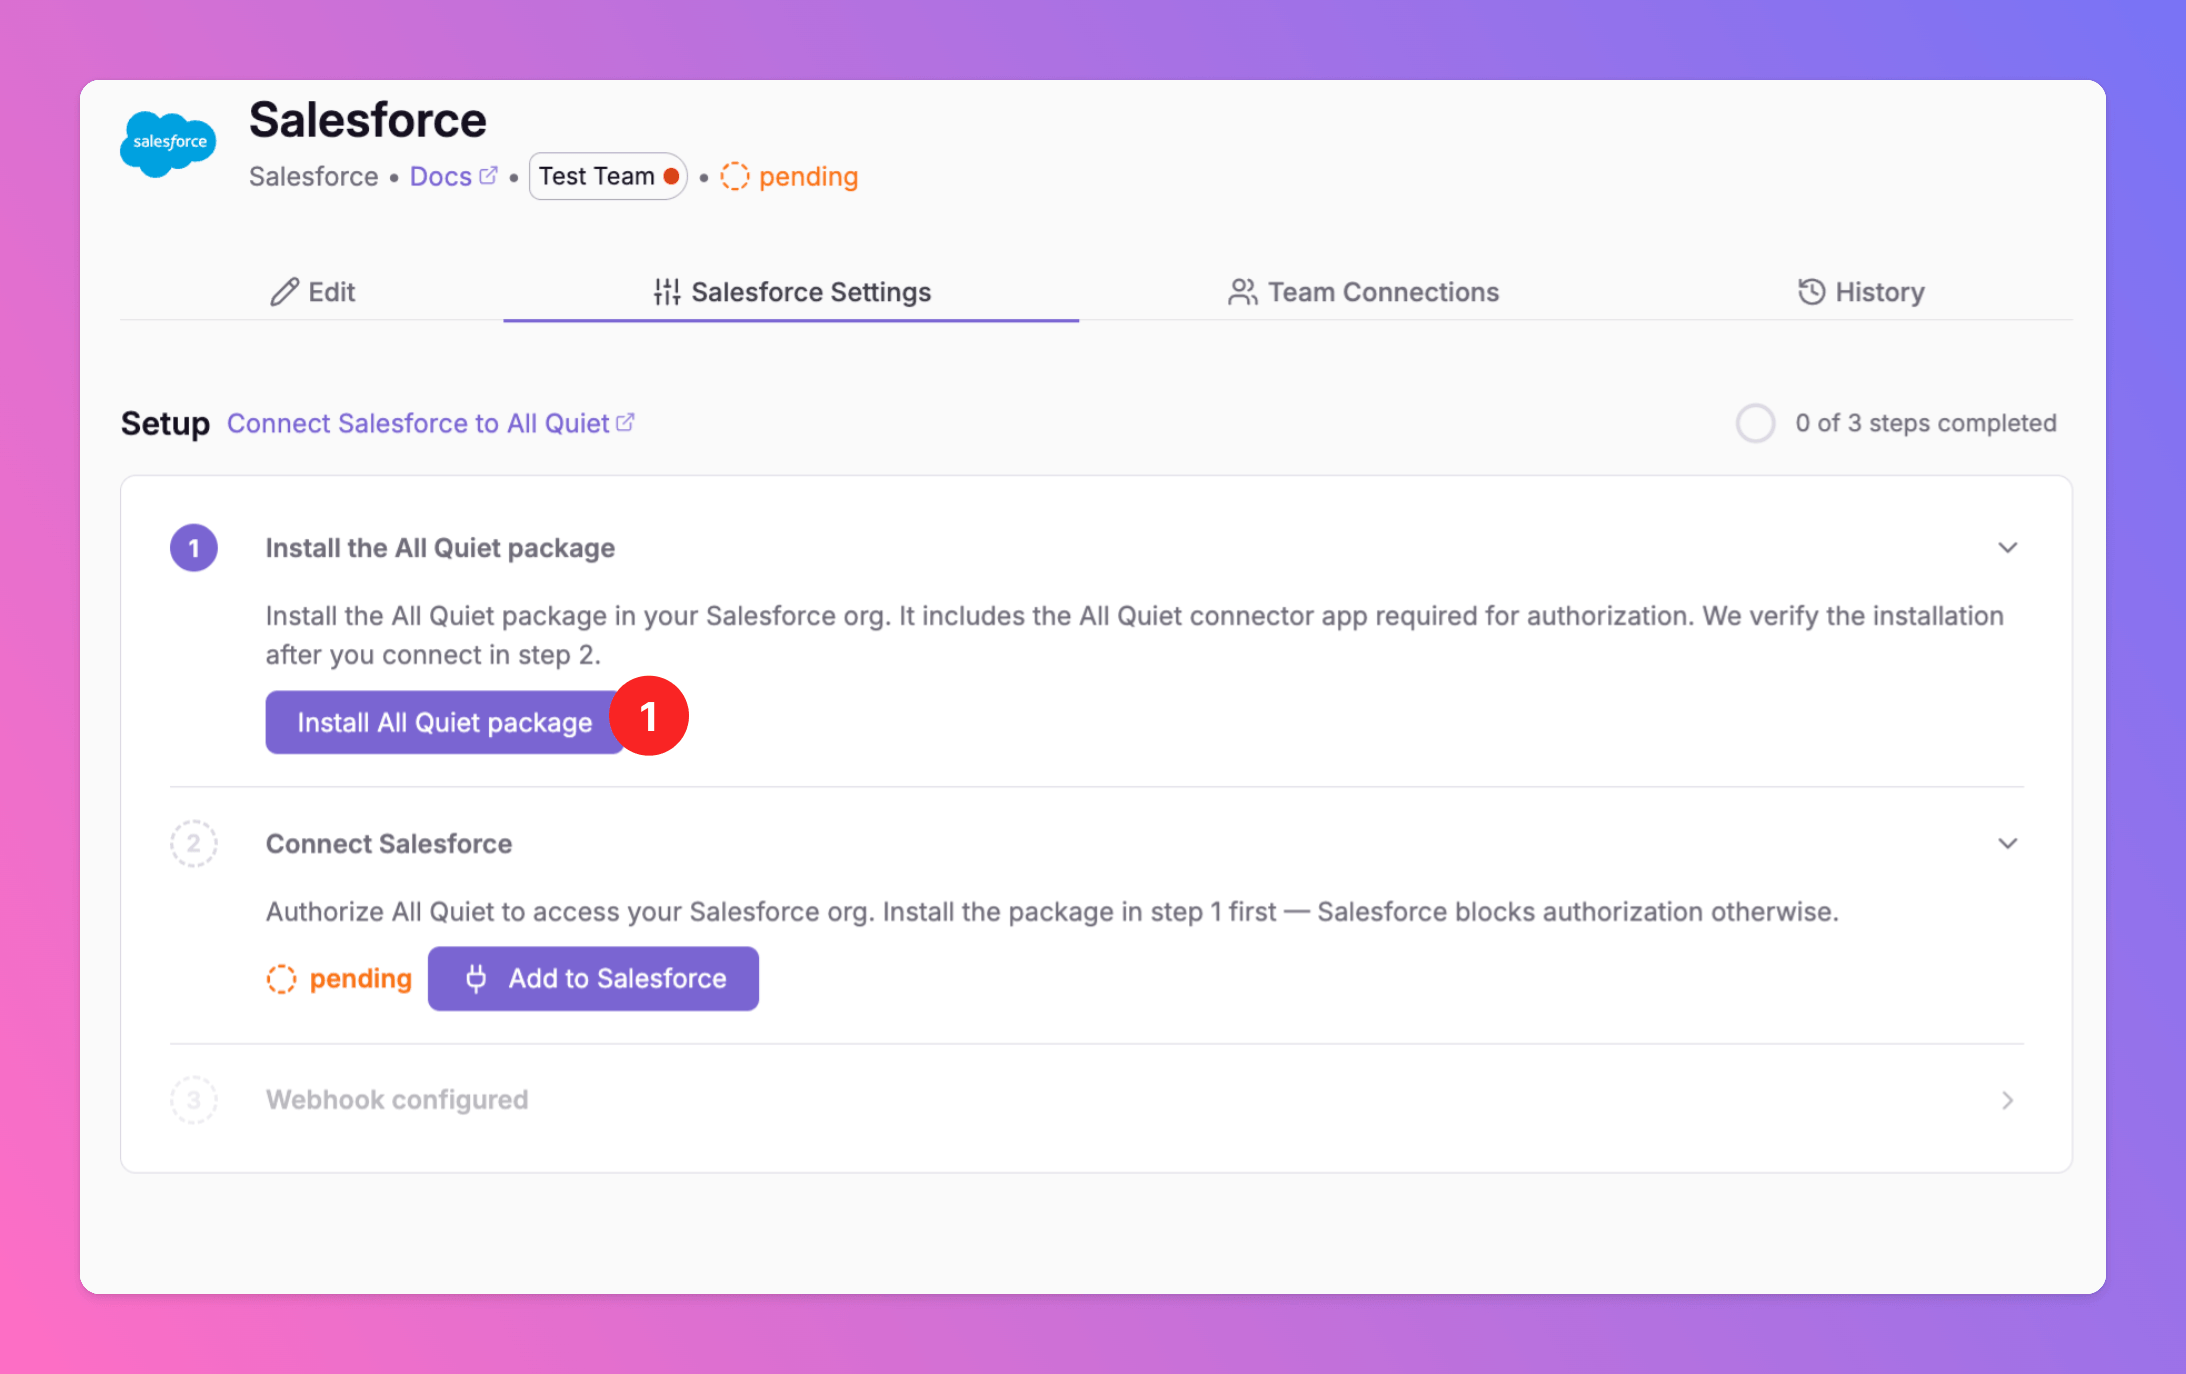
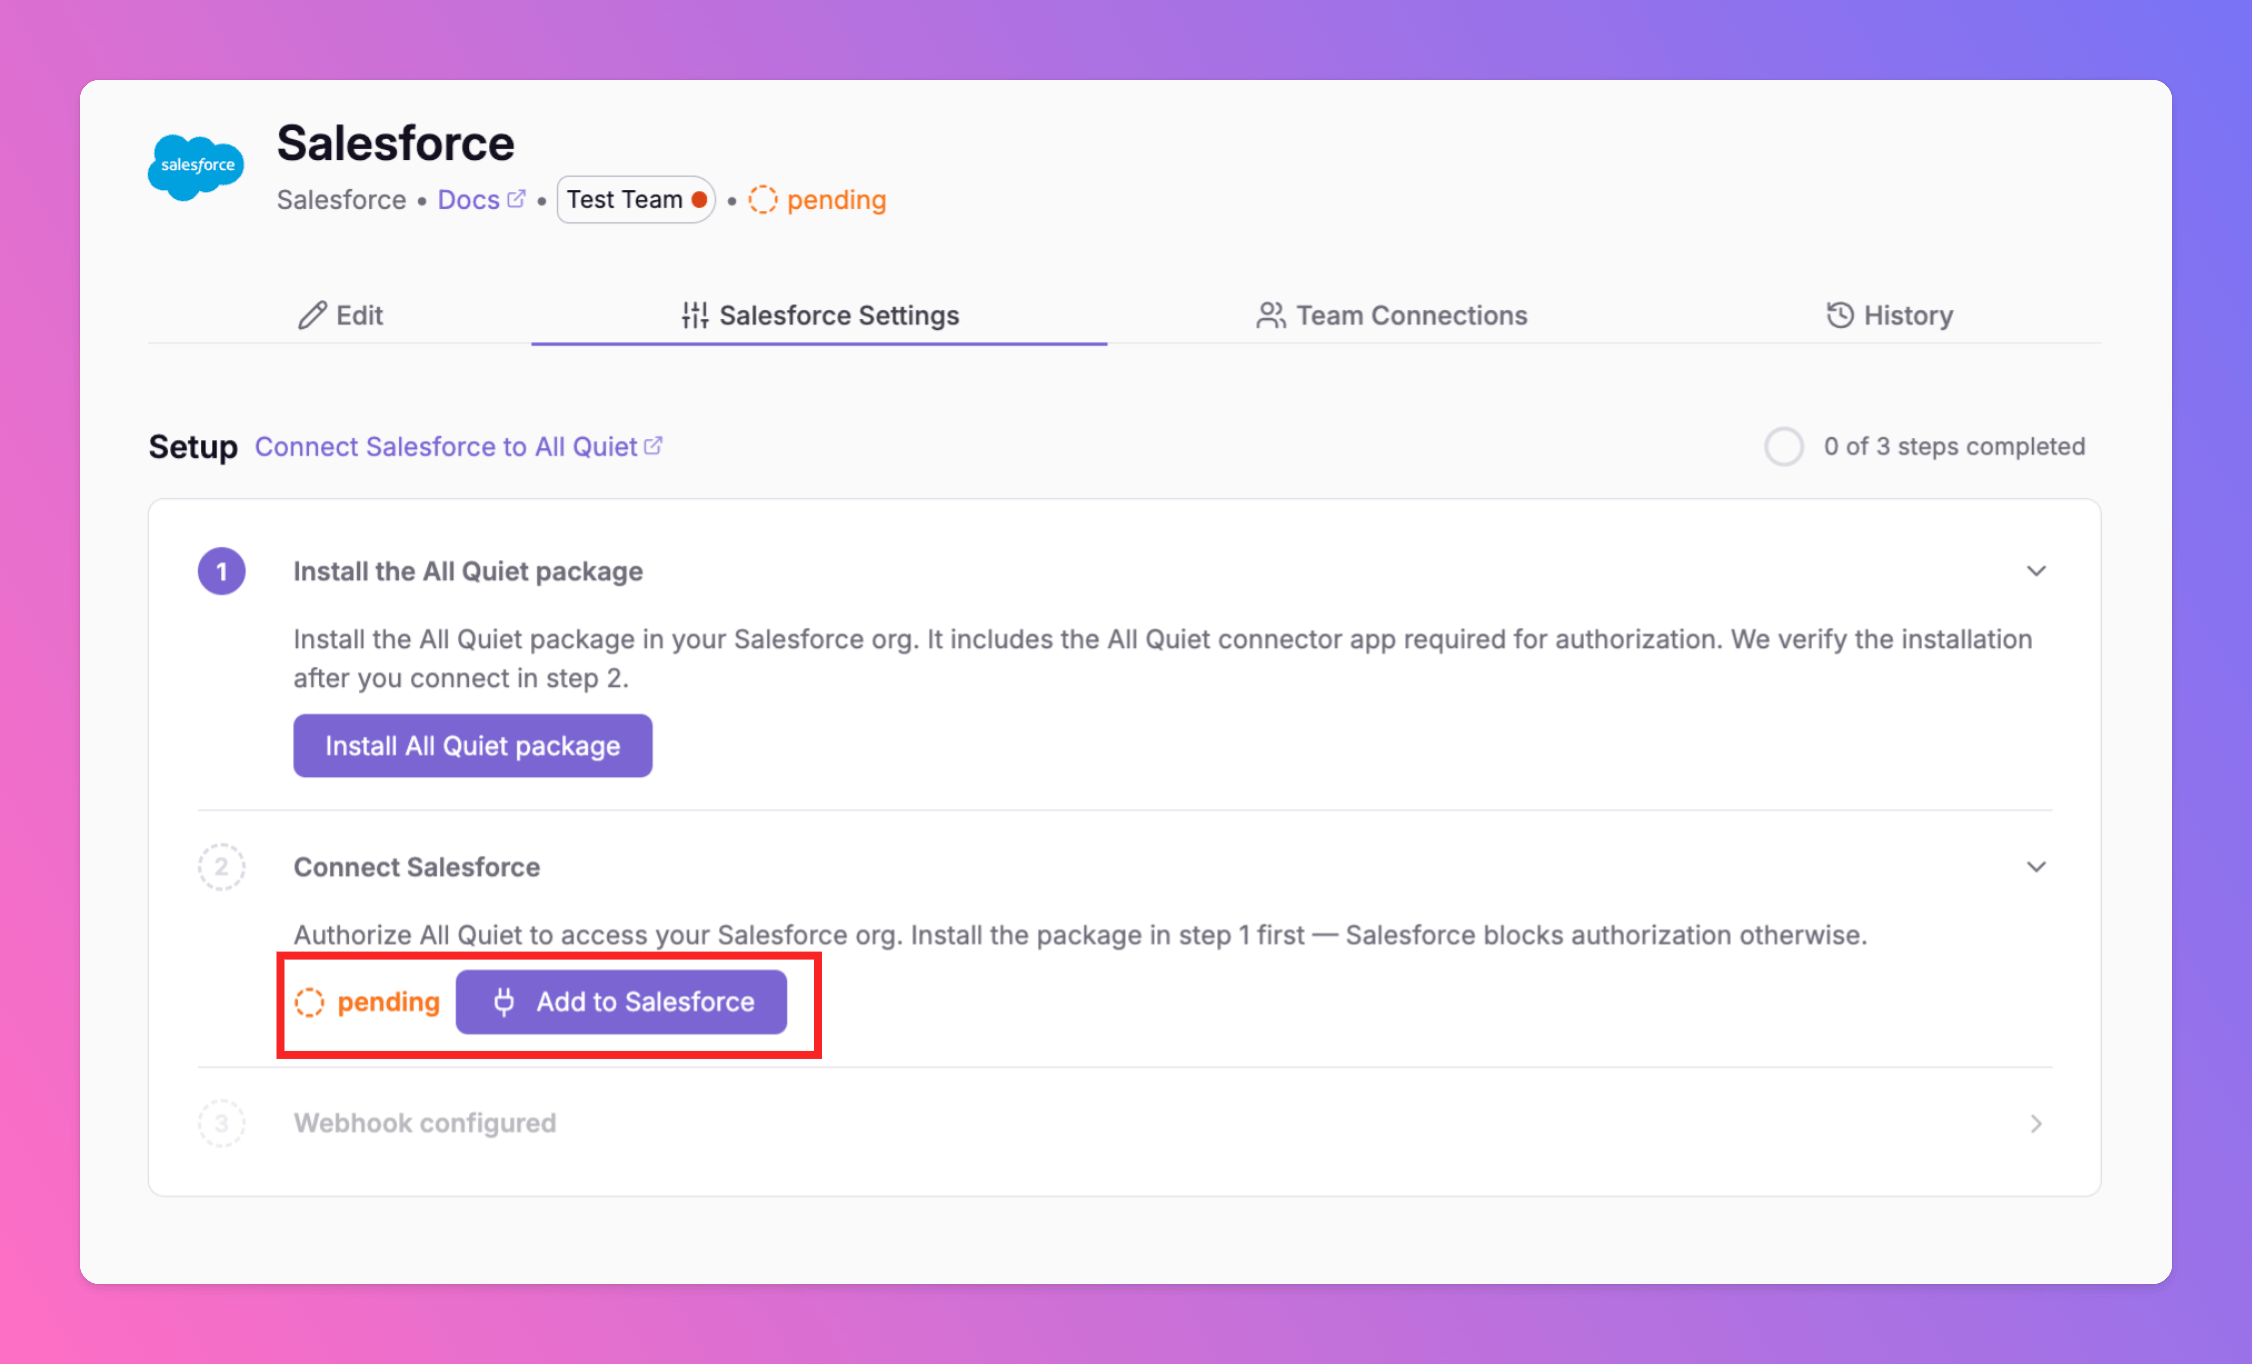
Observe that the installation status of the All Quiet integration is still pending.
To complete the integration with Salesforce, we first need to install the All Quiet package in your Salesforce org. Click Install All Quiet package.
Install for All Users and Click Install.
If you don’t have the necessary permissions, reach ouut to one of your salesforce admins
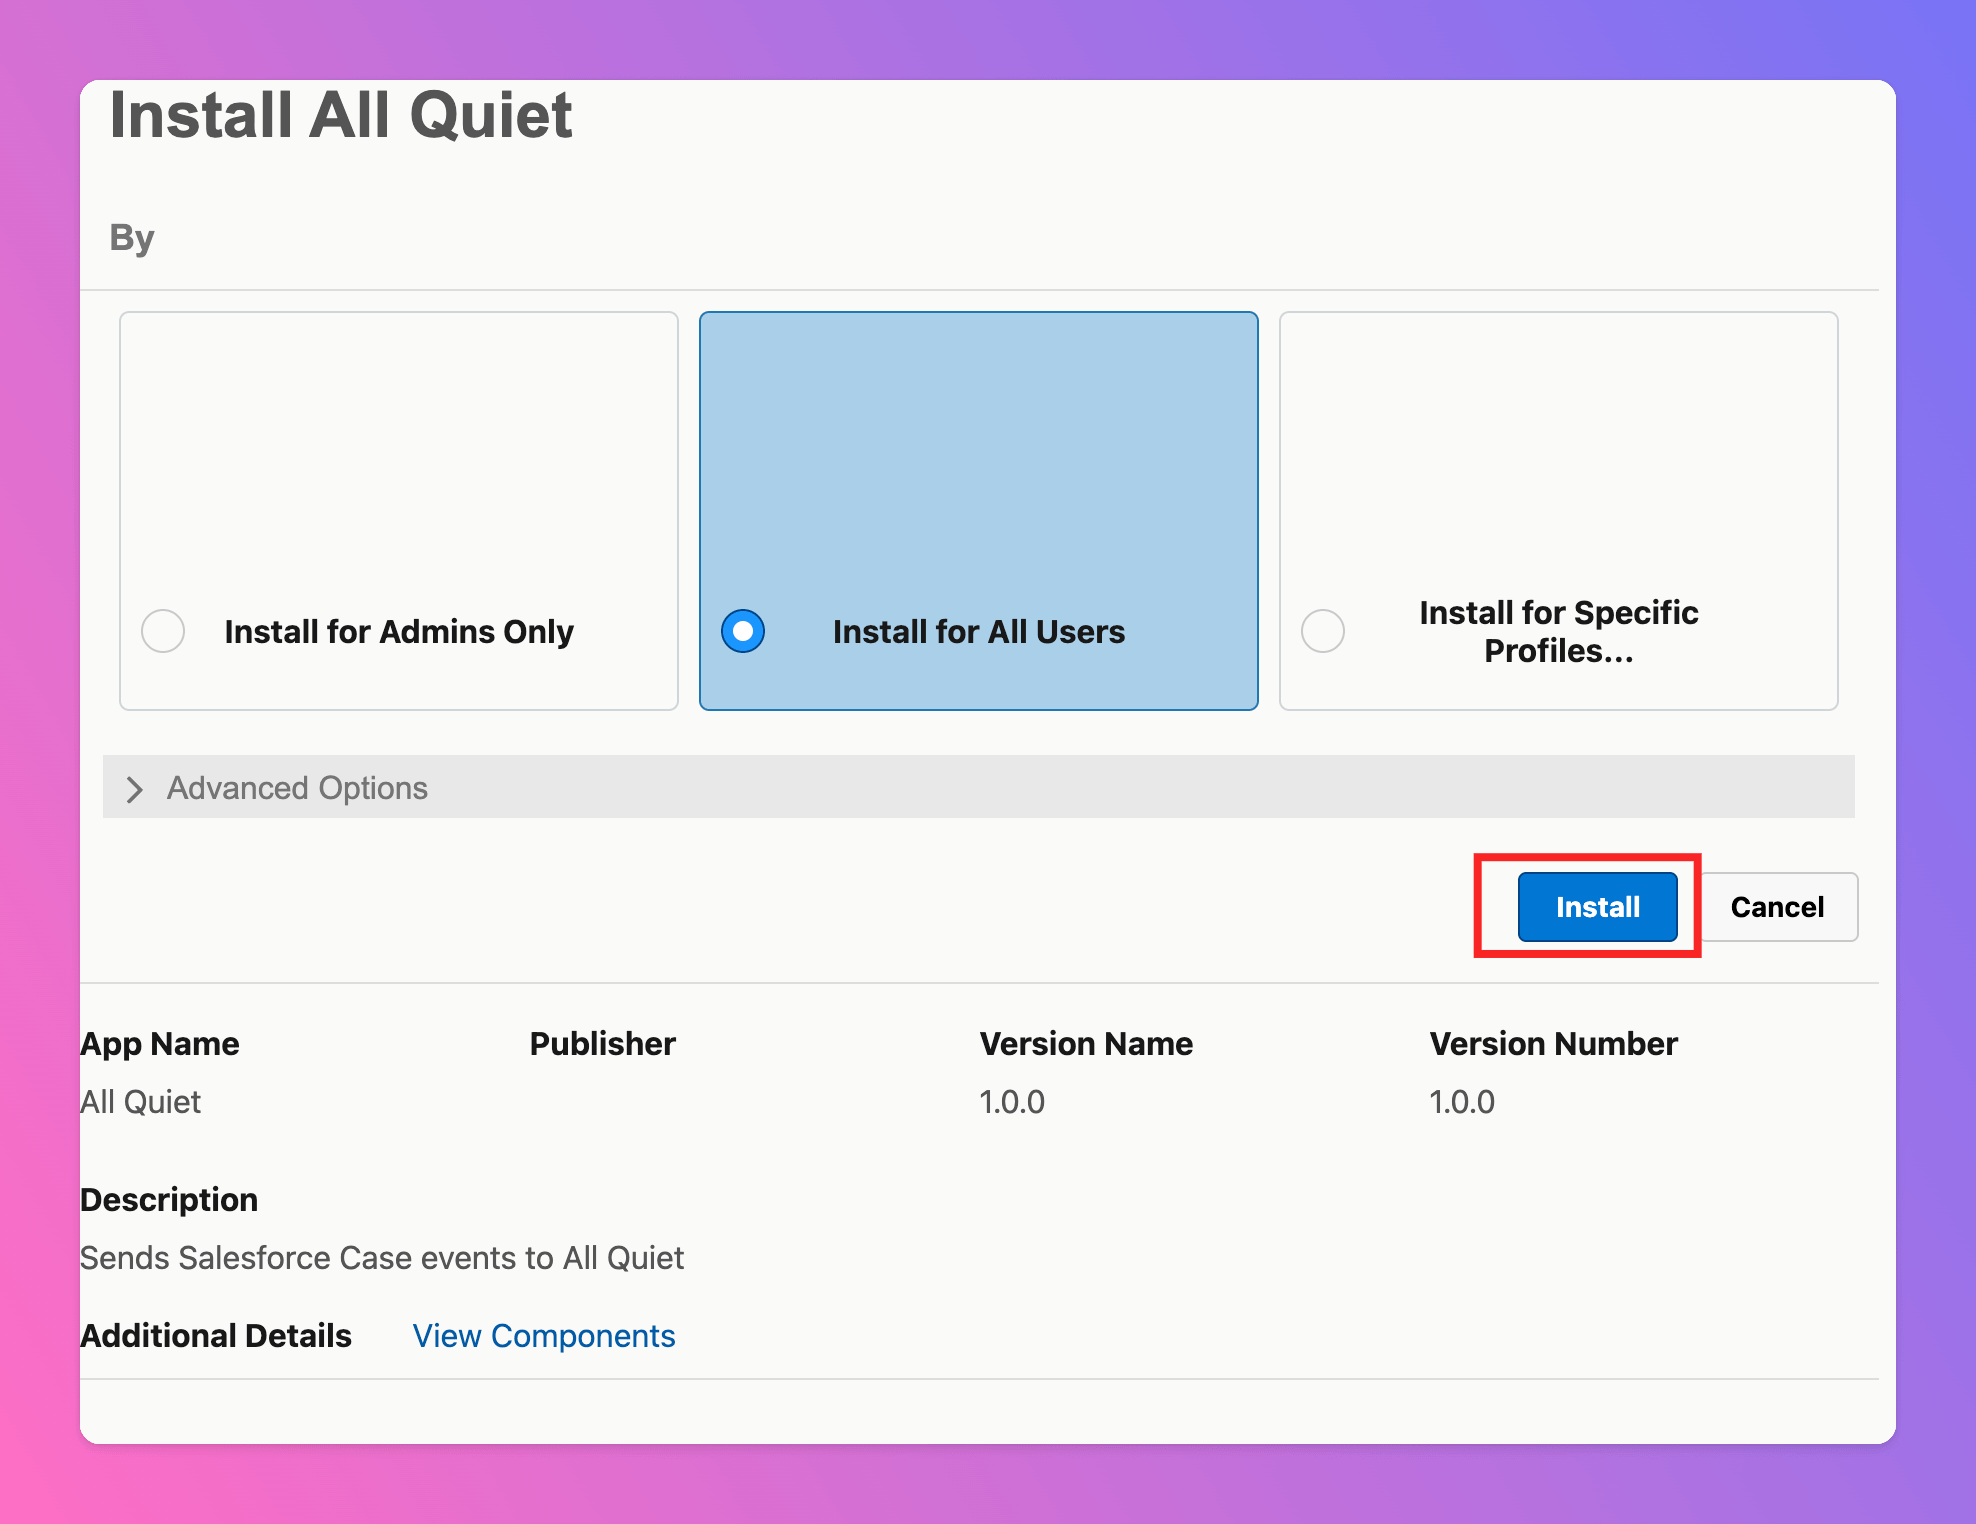
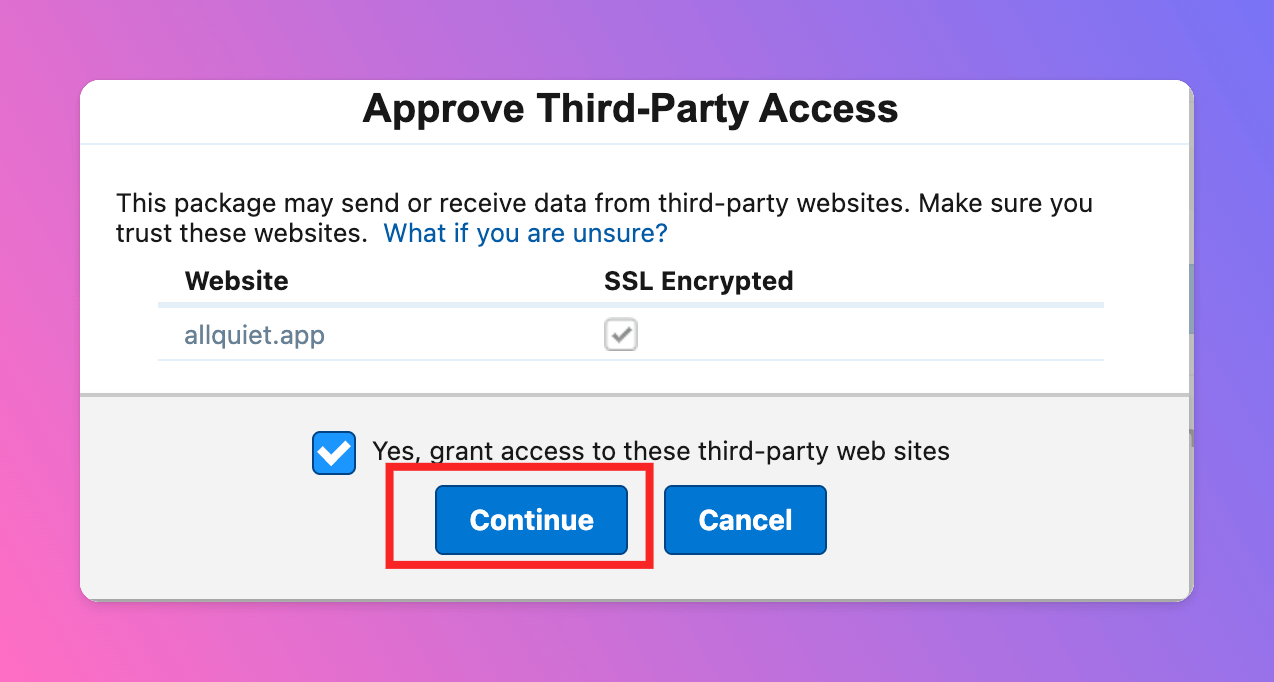
Salesforce settings page in All Quiet.
Now, it’s time to connect All Quiet to your Salesforce org. In this step, we’ll verify the previous package installation.
Click Add to Salesforce to continue.
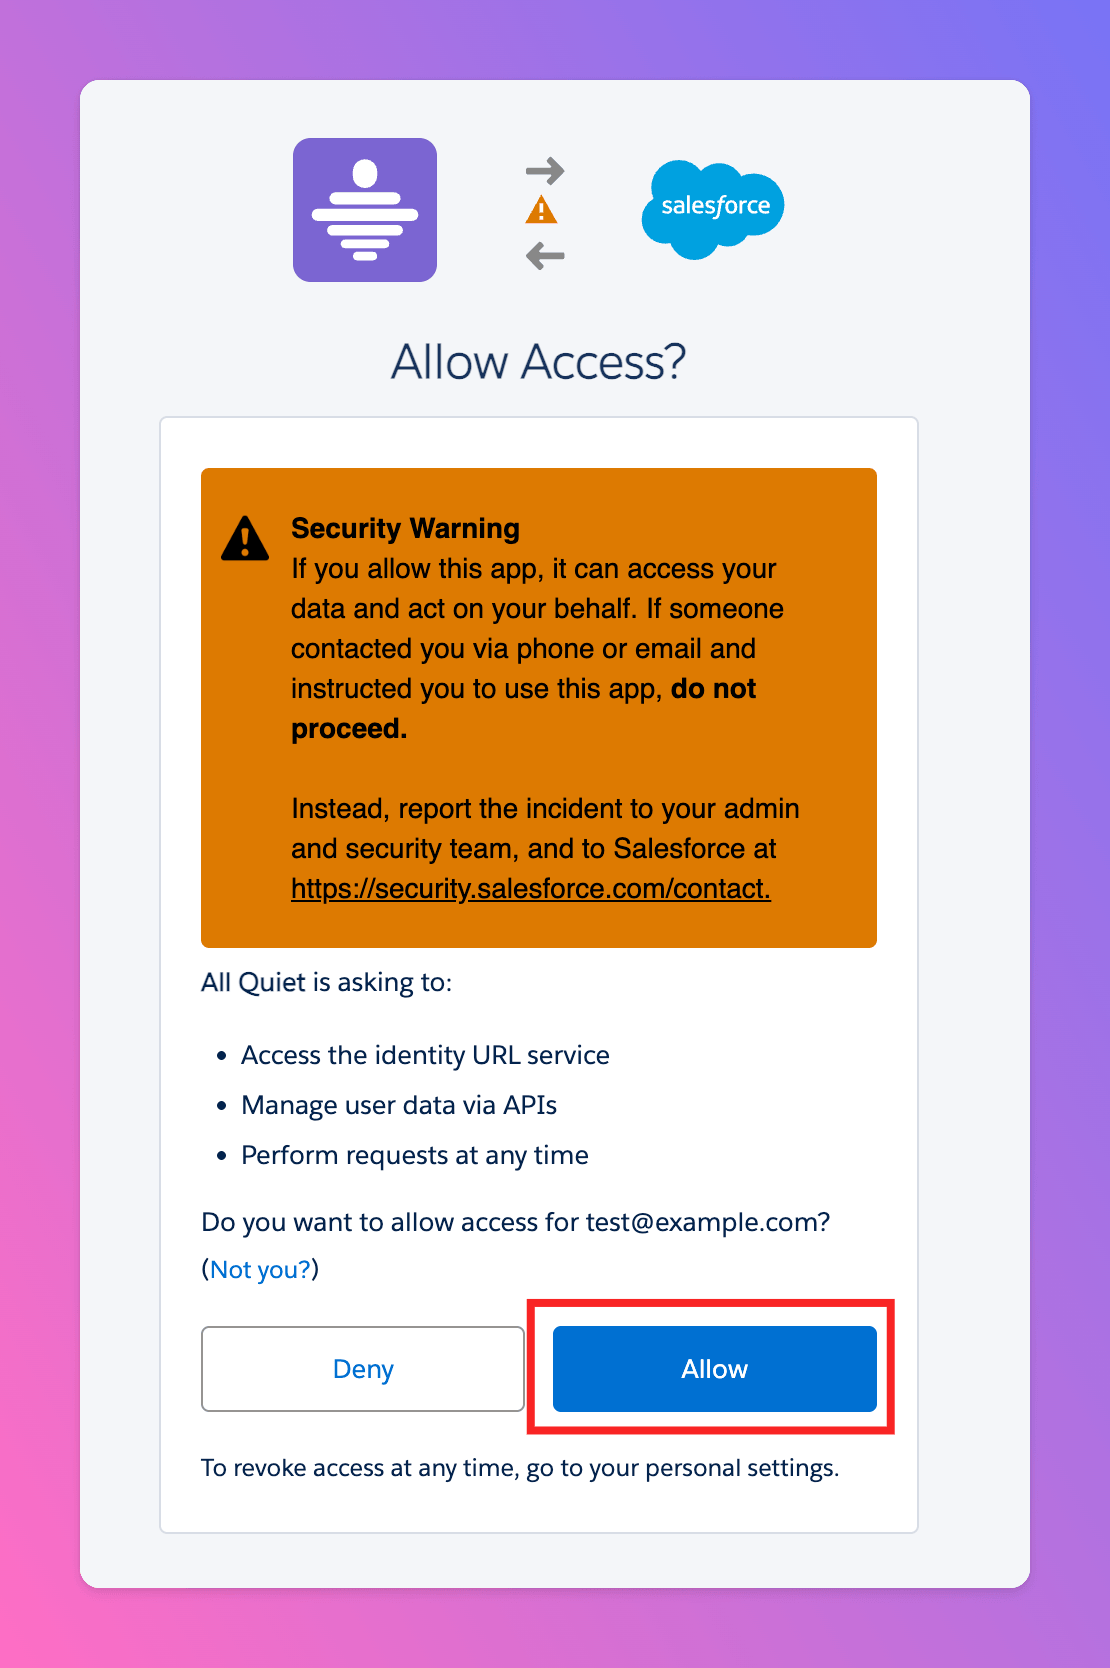
Allow to connect All Quiet and Salesforce and to grant All Quiet the necessary permissions to your Salesforce org.
Configure Outbound Integration
You’re forwarded to All Quiet, again. You should see that the connection was successful. This means that the package was installed, that the necessary permissions were granted and that the webhook configuration was created (the webhoook is generated automatically). Multiple installations are possible. You can add multiple All Quiet integrations to your Salesforce org. However, they all share the same webhook configuration. This means that all All Quiet incidents will be created in the same Salesforce queue.
In the
Edit tab, you can change general settings like the integration’s Forwarding settings. You can also enable Anonymize Outbound Logs (disabled by default). When enabled, activity log entries for this integration are stored without descriptions, external identifiers, error details, and payload data. Only operational metadata such as operation, outcome, and HTTP status is kept.Only for Pro and Enterprise plan - Manage your
Team Connections: The root team is pre-selected, and you can add the integration to further teams within the root team’s organization. Team Administrators can add / remove those teams they are an Administrator in, Organization Administrators & Organization Owners can manage the connections to all teams of the organization. 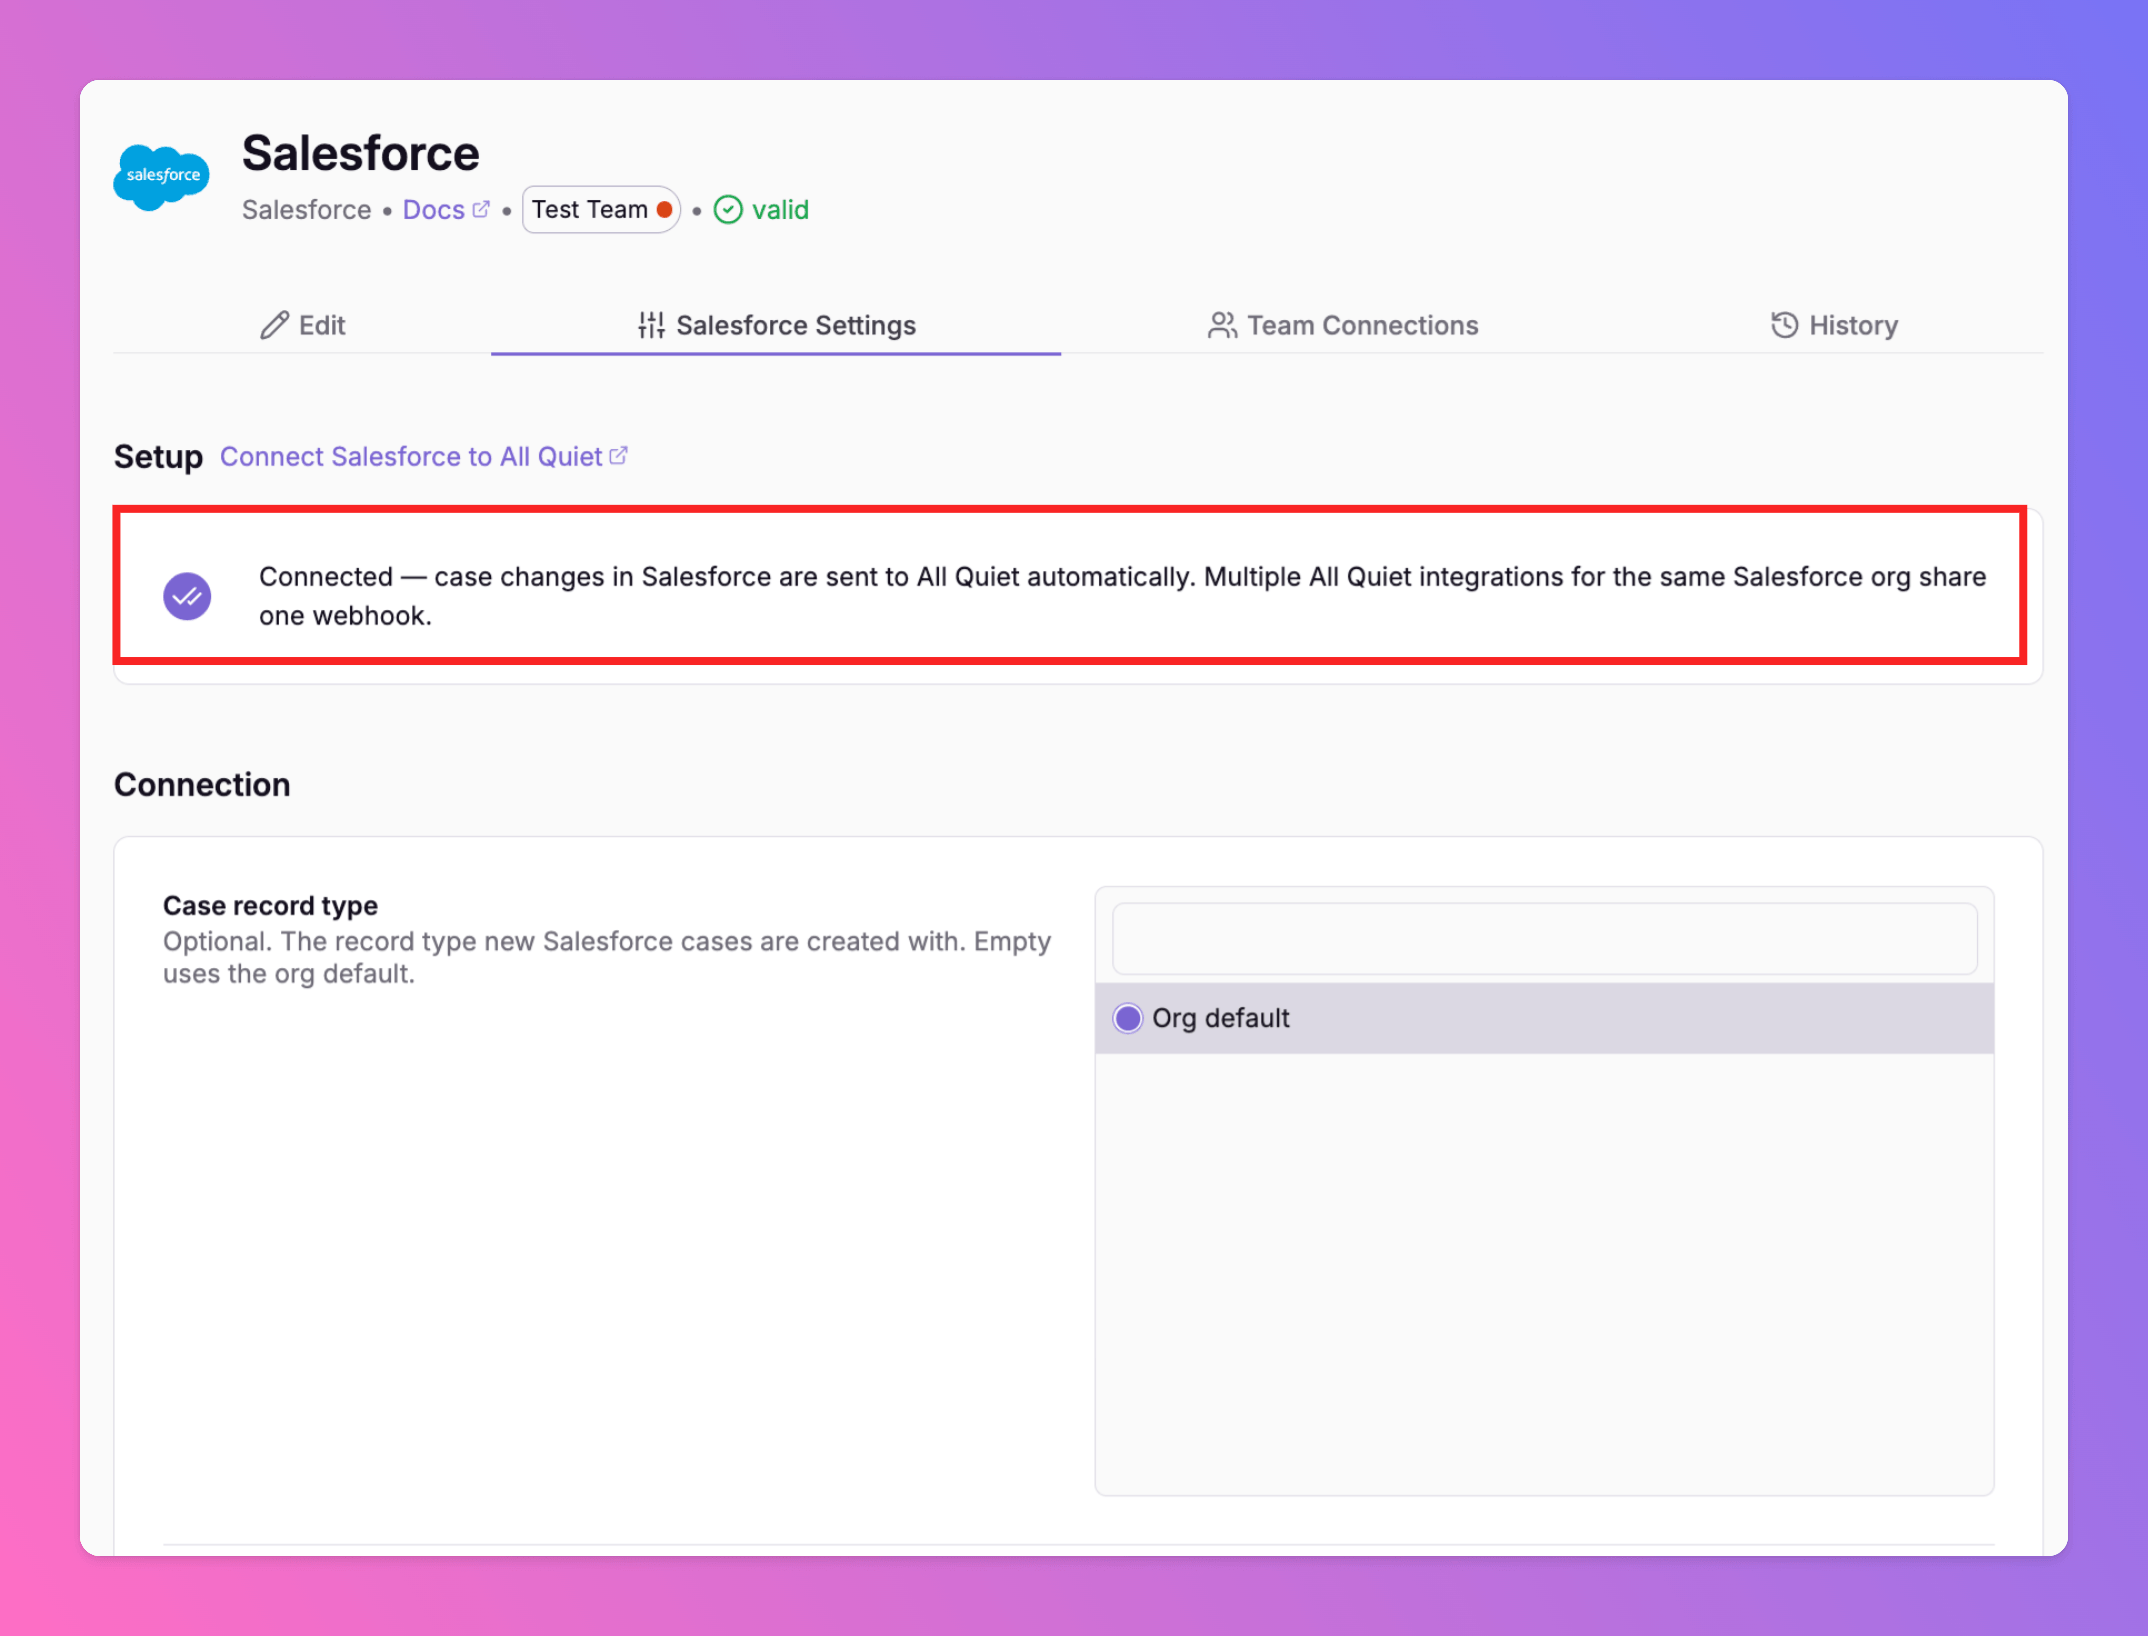
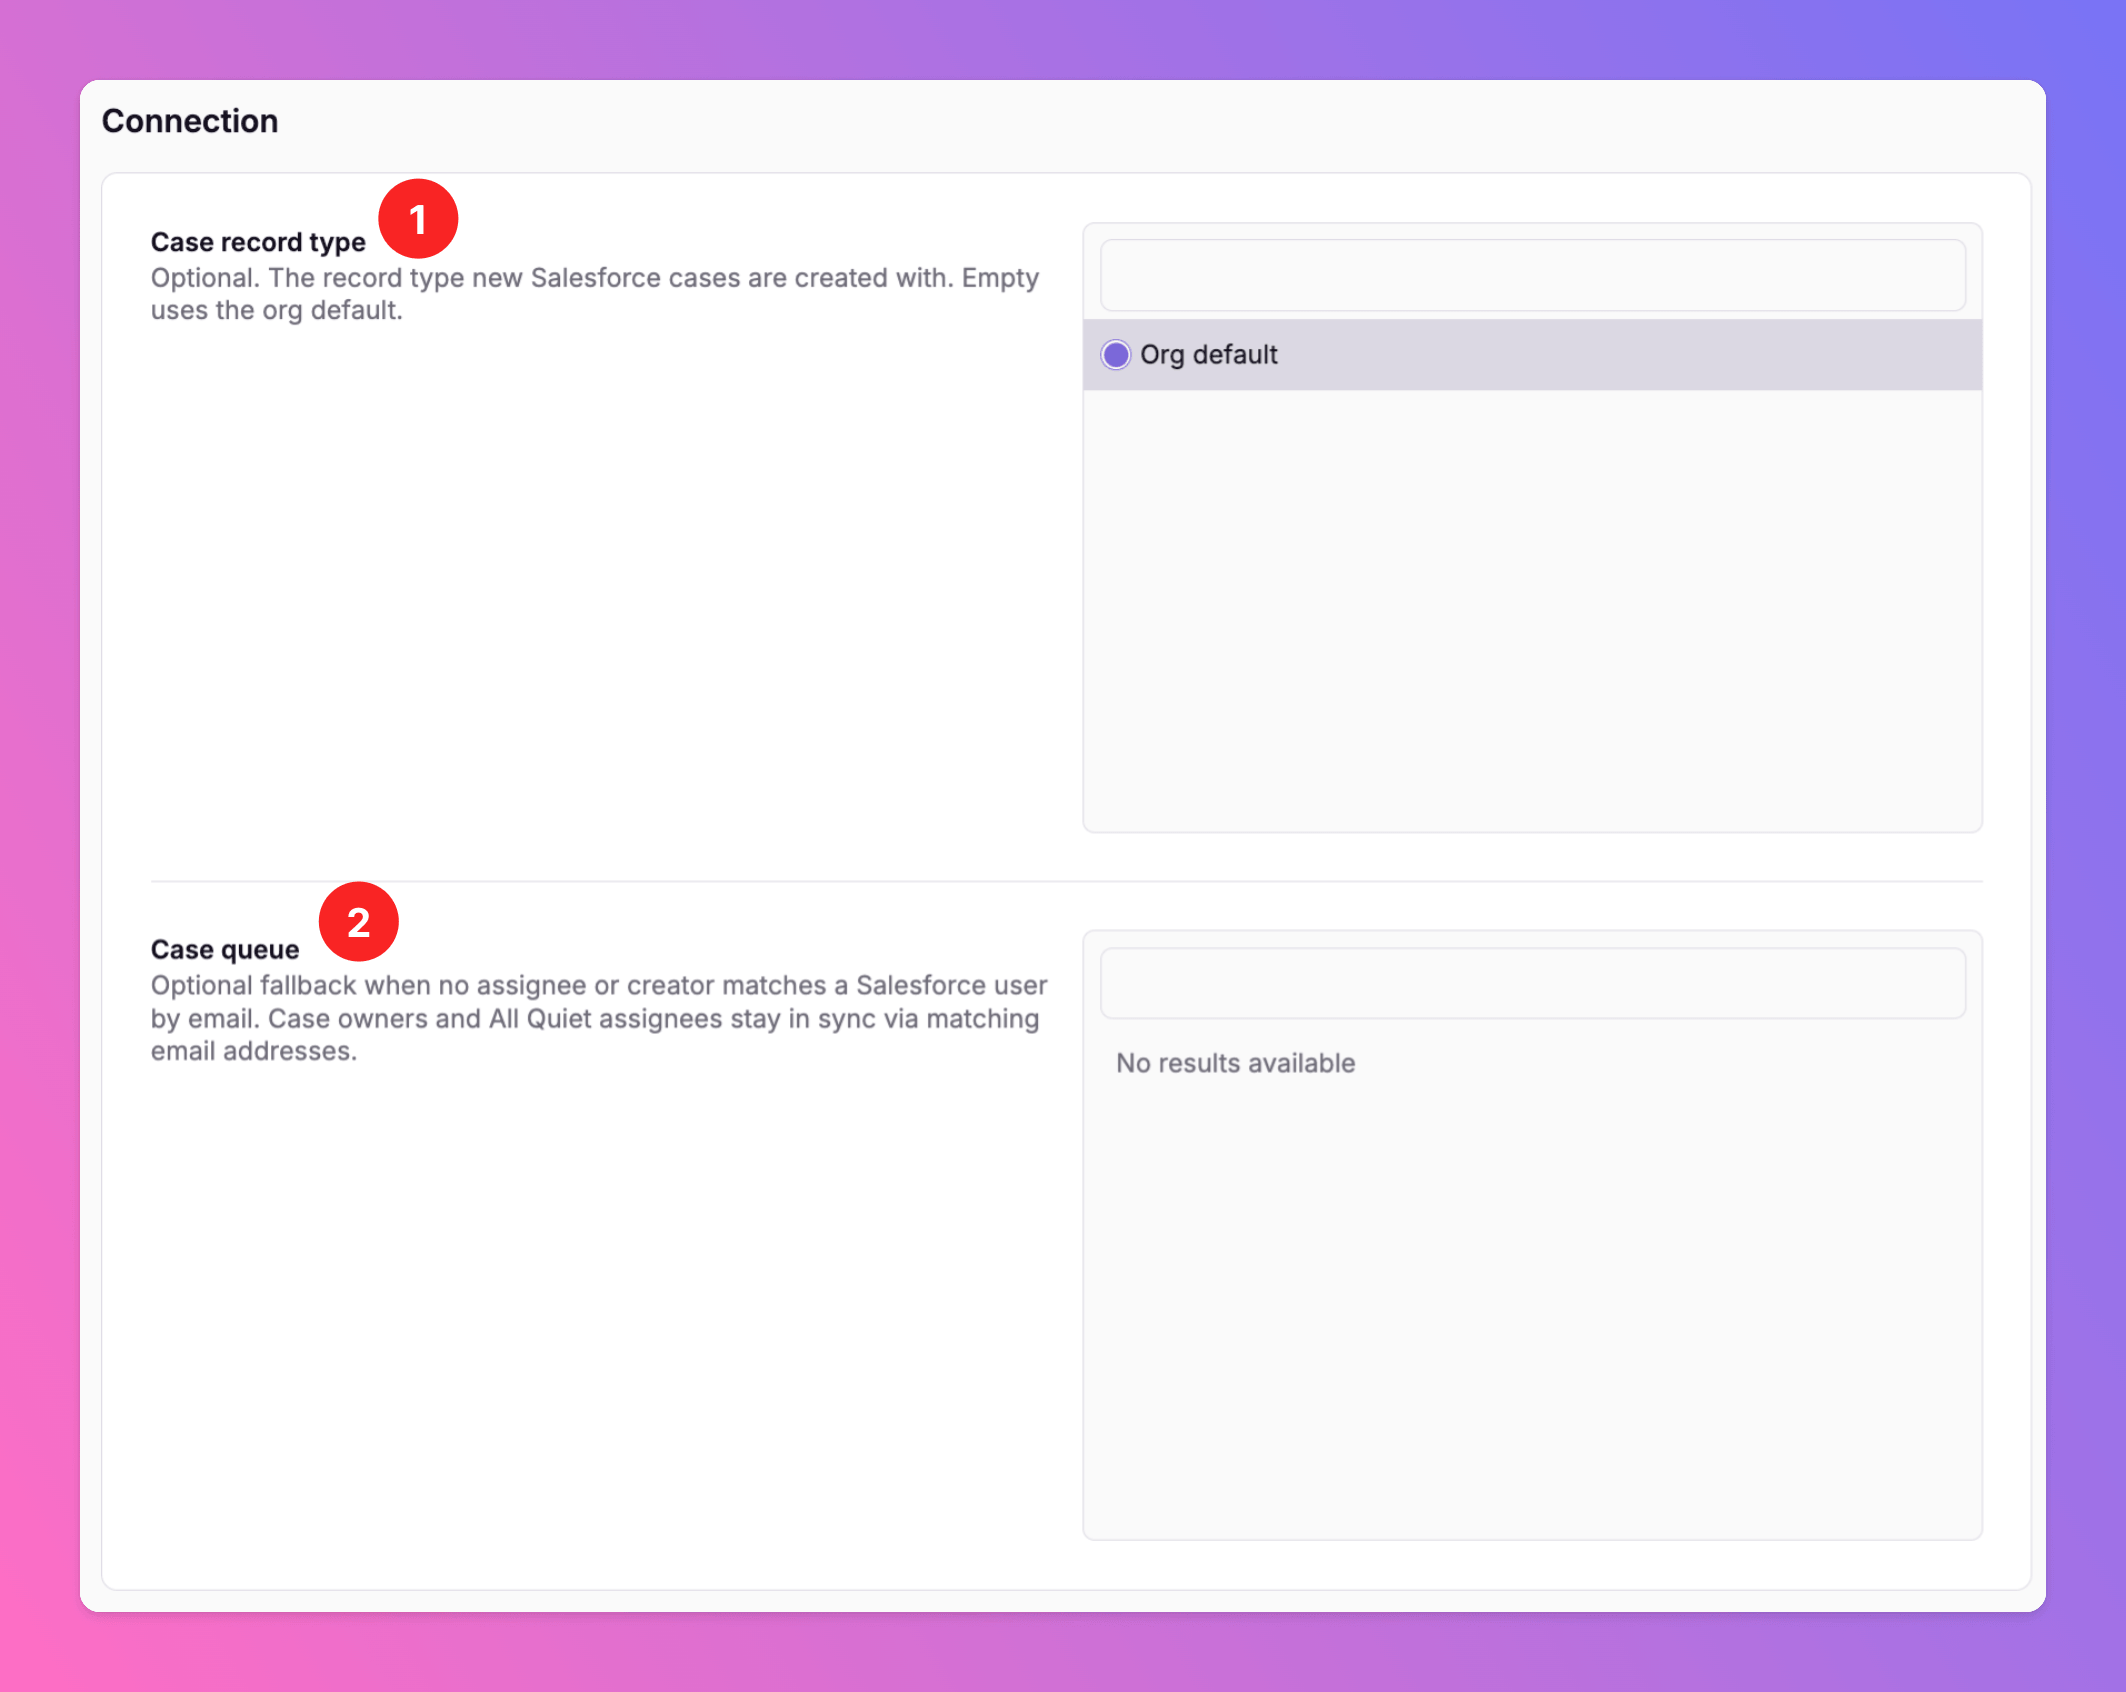
- You can select the record type new Salesforce cases should be created with from All Quiet incidents.
- Assignees stay in sync between All Quiet incidents and Salesforce cases by matching email address. When an incident is assigned in All Quiet, All Quiet looks up the Salesforce user with the same email and sets them as the case assignee (and the other way around when the case assignee changes in Salesforce). If no matching assignee or creator is found in Salesforce, you can select a fallback via the
Case queuefield.
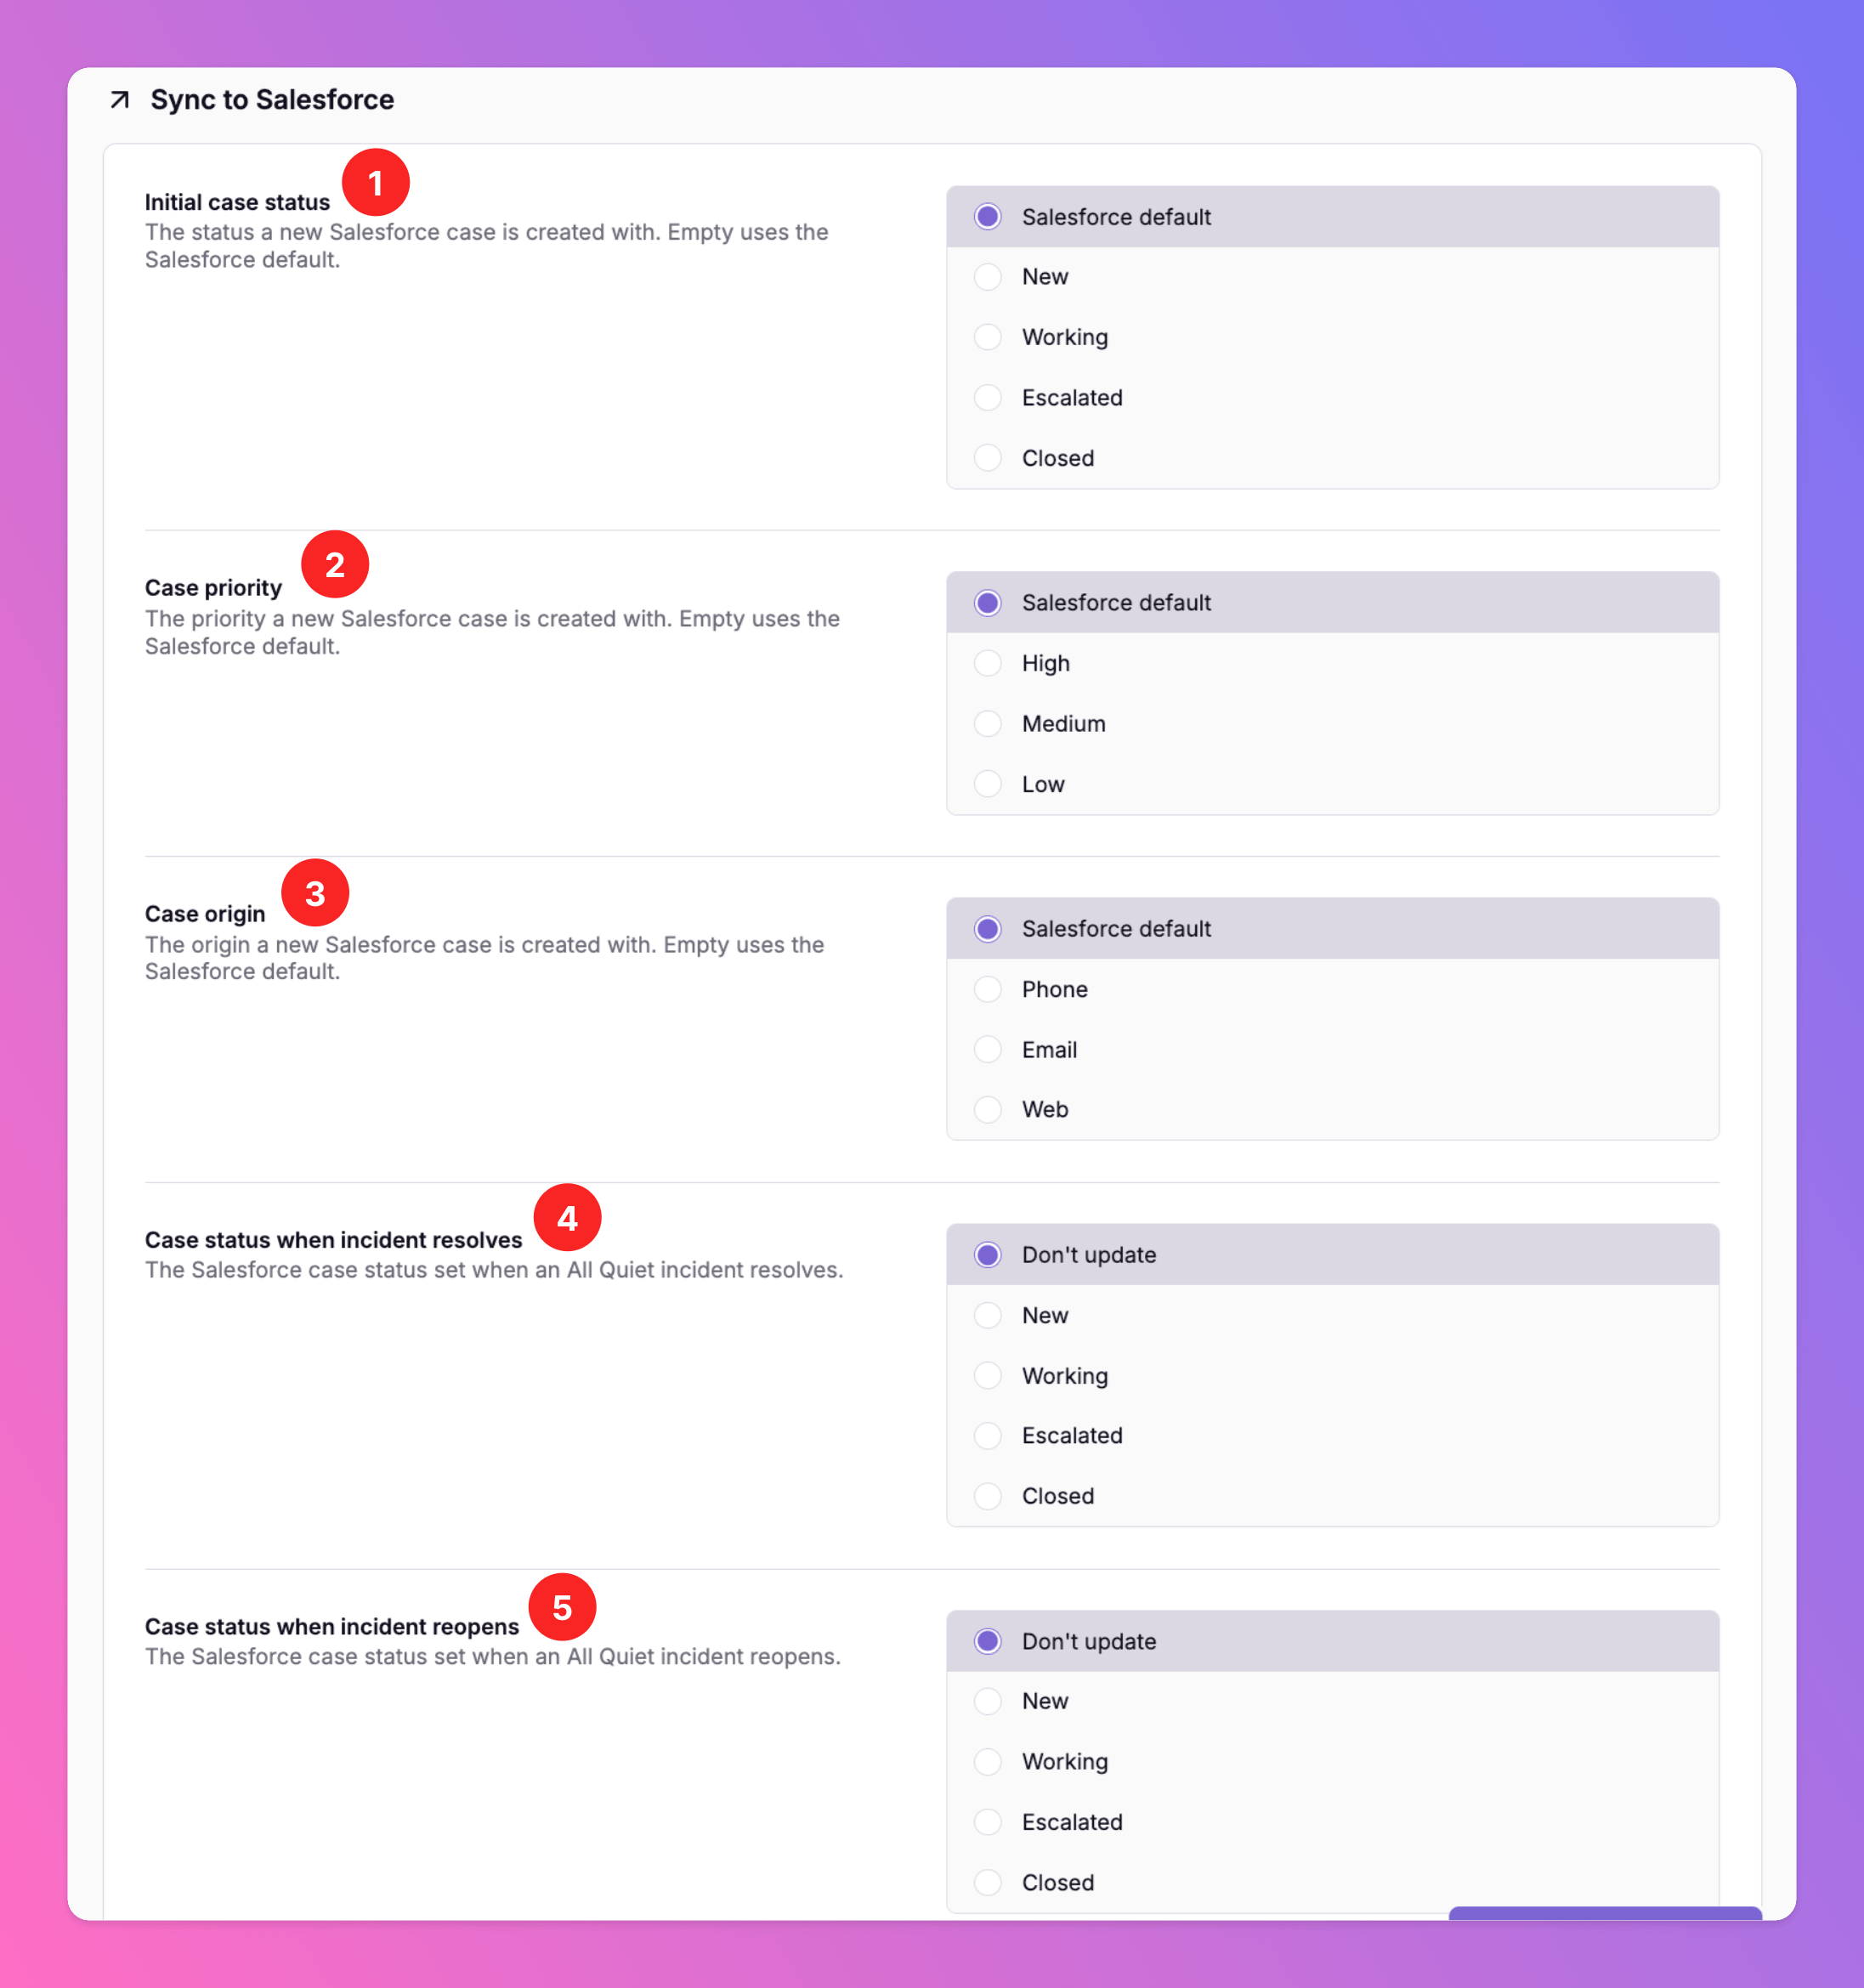
Initial case status: Select the Salesforce case status you want to set for new cases created from All Quiet incidents.Case priority: The priority a new Salesforce case is created with. If left empty, Salesforce uses the default priority of the selected record type’s support process.- Add a
Case origin: Select the Salesforce case origin you want to set for new cases created from All Quiet incidents. - Select if the
Case Statusshould be updated if anAll Quietincident is resolved. Per default, we don’t update the case status if an incident is resolved. - Select if the
Case Statusshould be updated if anAll Quietincident is reopened. Per default, we don’t update the case status if an incident is reopened.
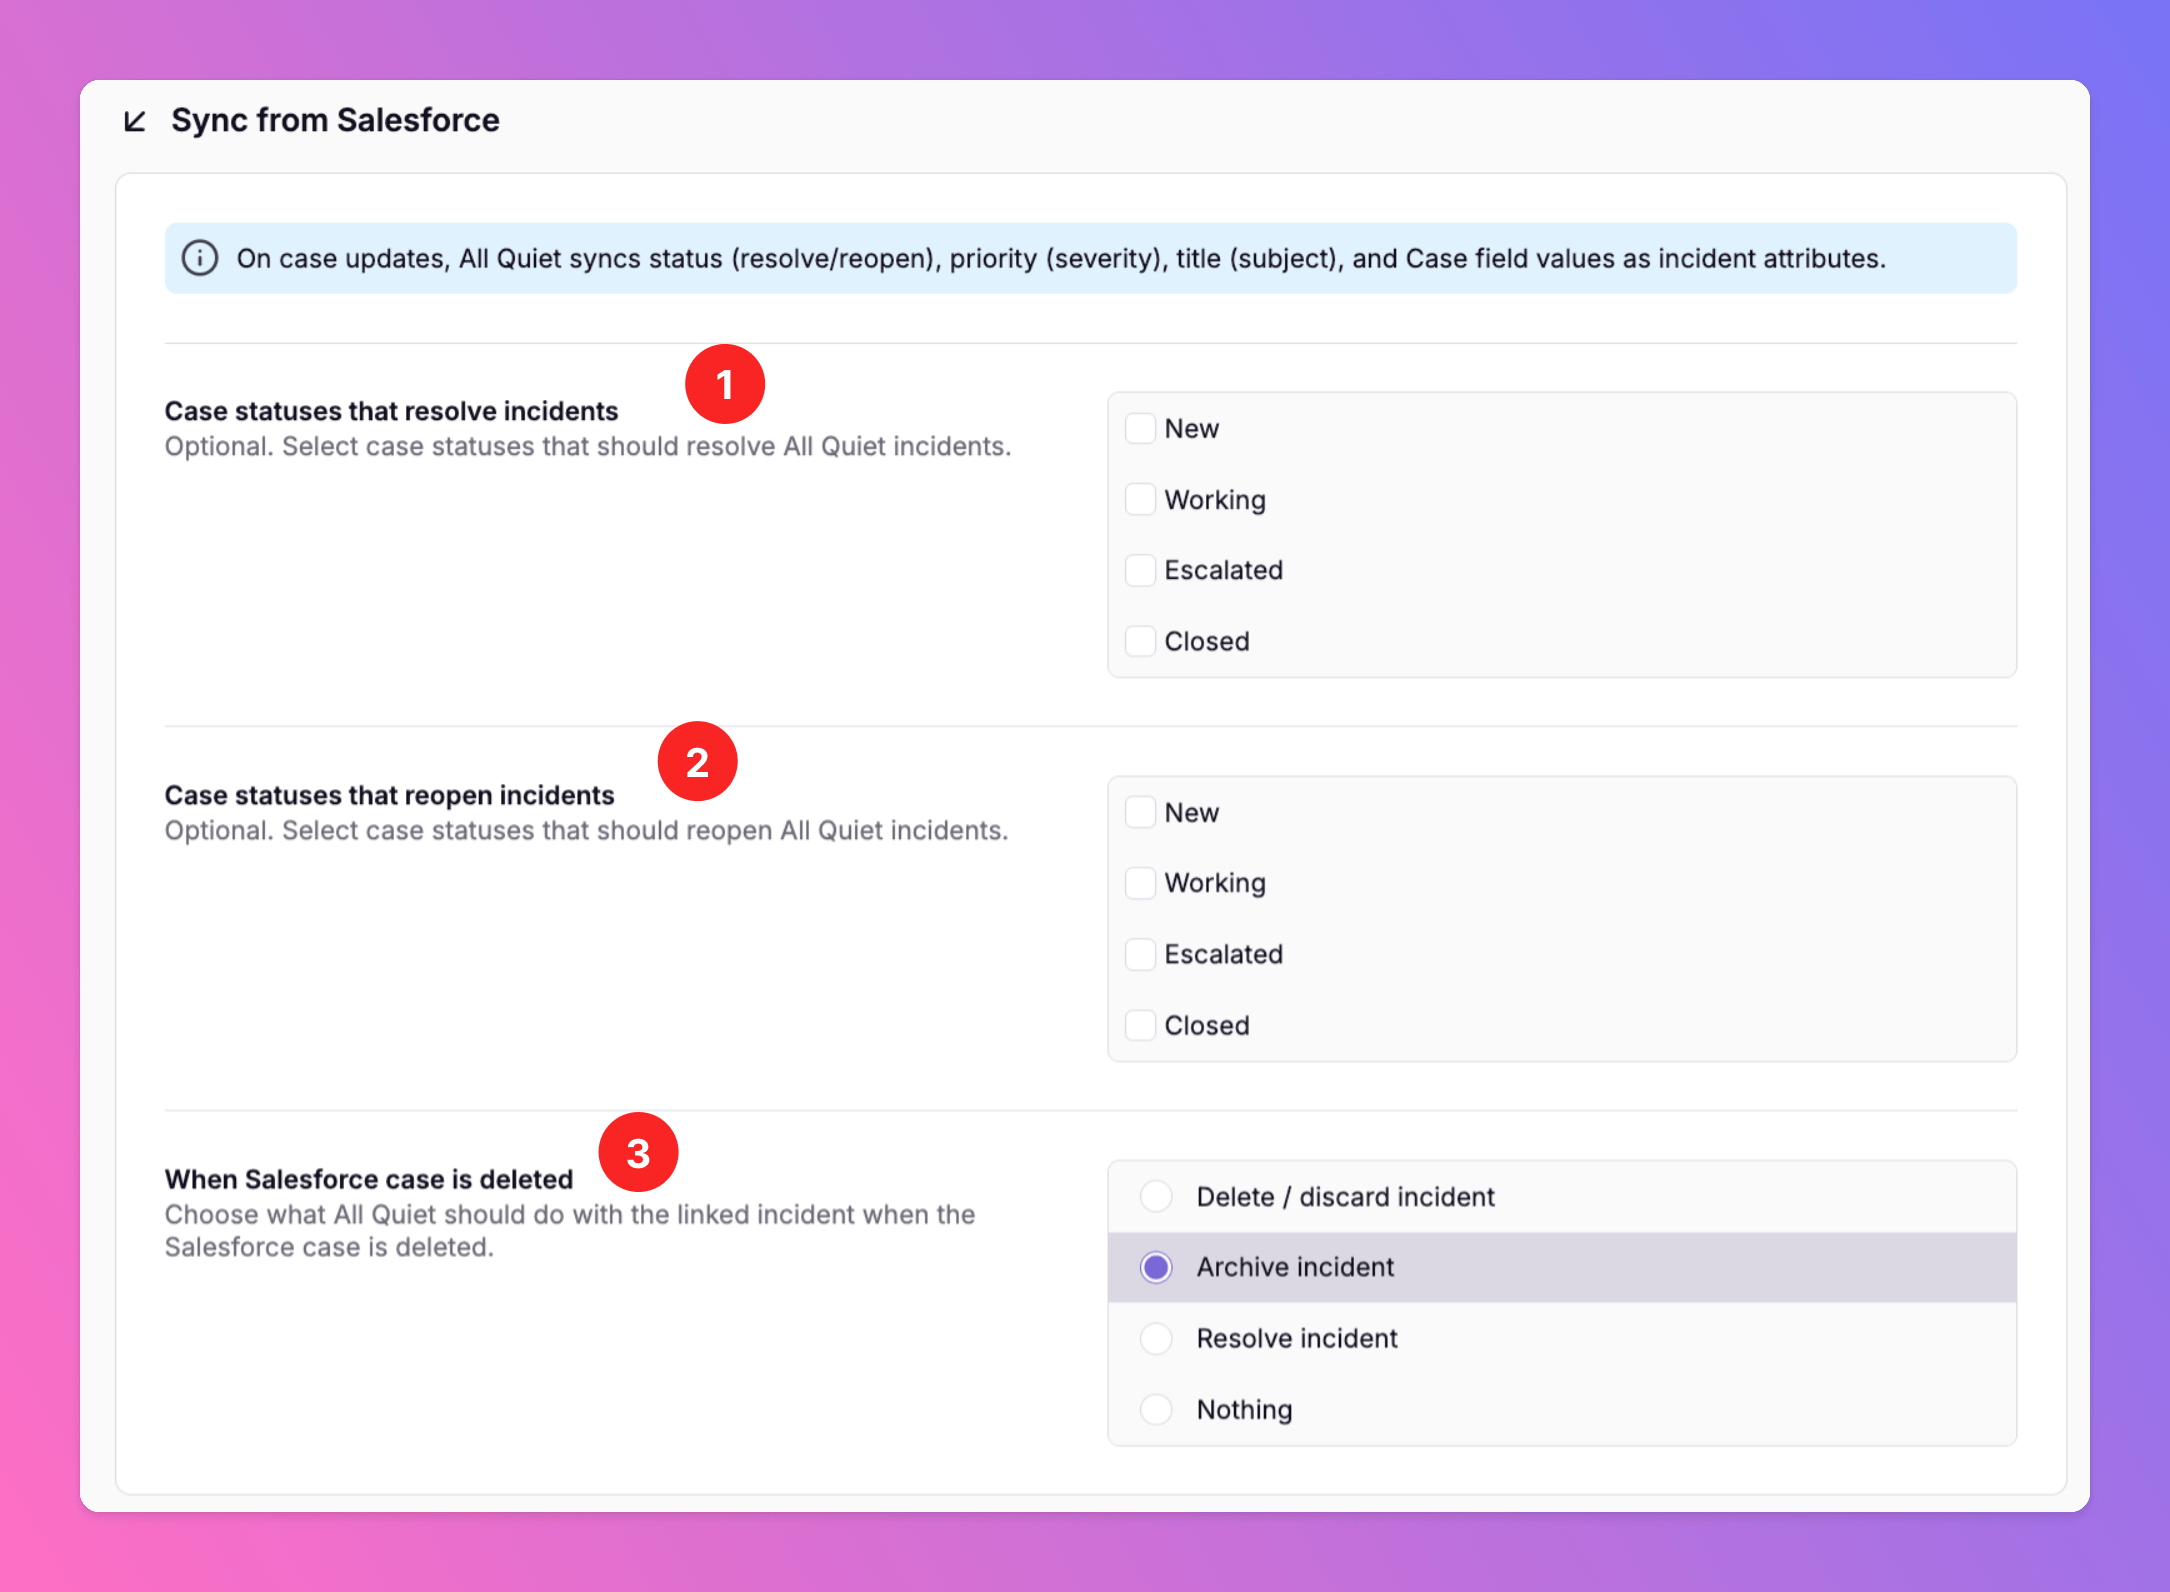
Case statuses that resolve an incident: Select the Salesforce case statuses that should resolve an incident in All Quiet.Case statuses that reopen an incident: Select the Salesforce case statuses that should reopen an incident in All Quiet.When Salesforce case is deleted: Select what should happen to an All Quiet incident if the Salesforce case is deleted.
If you decide to save & stop here, your Salesforce Outbound Integration with All Quiet is ready to go. Depending on your setup, All Quiet incidents will now automatically create cases in Salesforce or can be forwarded manually to your Salesforce org. The statuses will be synced based on your selection.
Create All Quiet Incidents From Salesforce
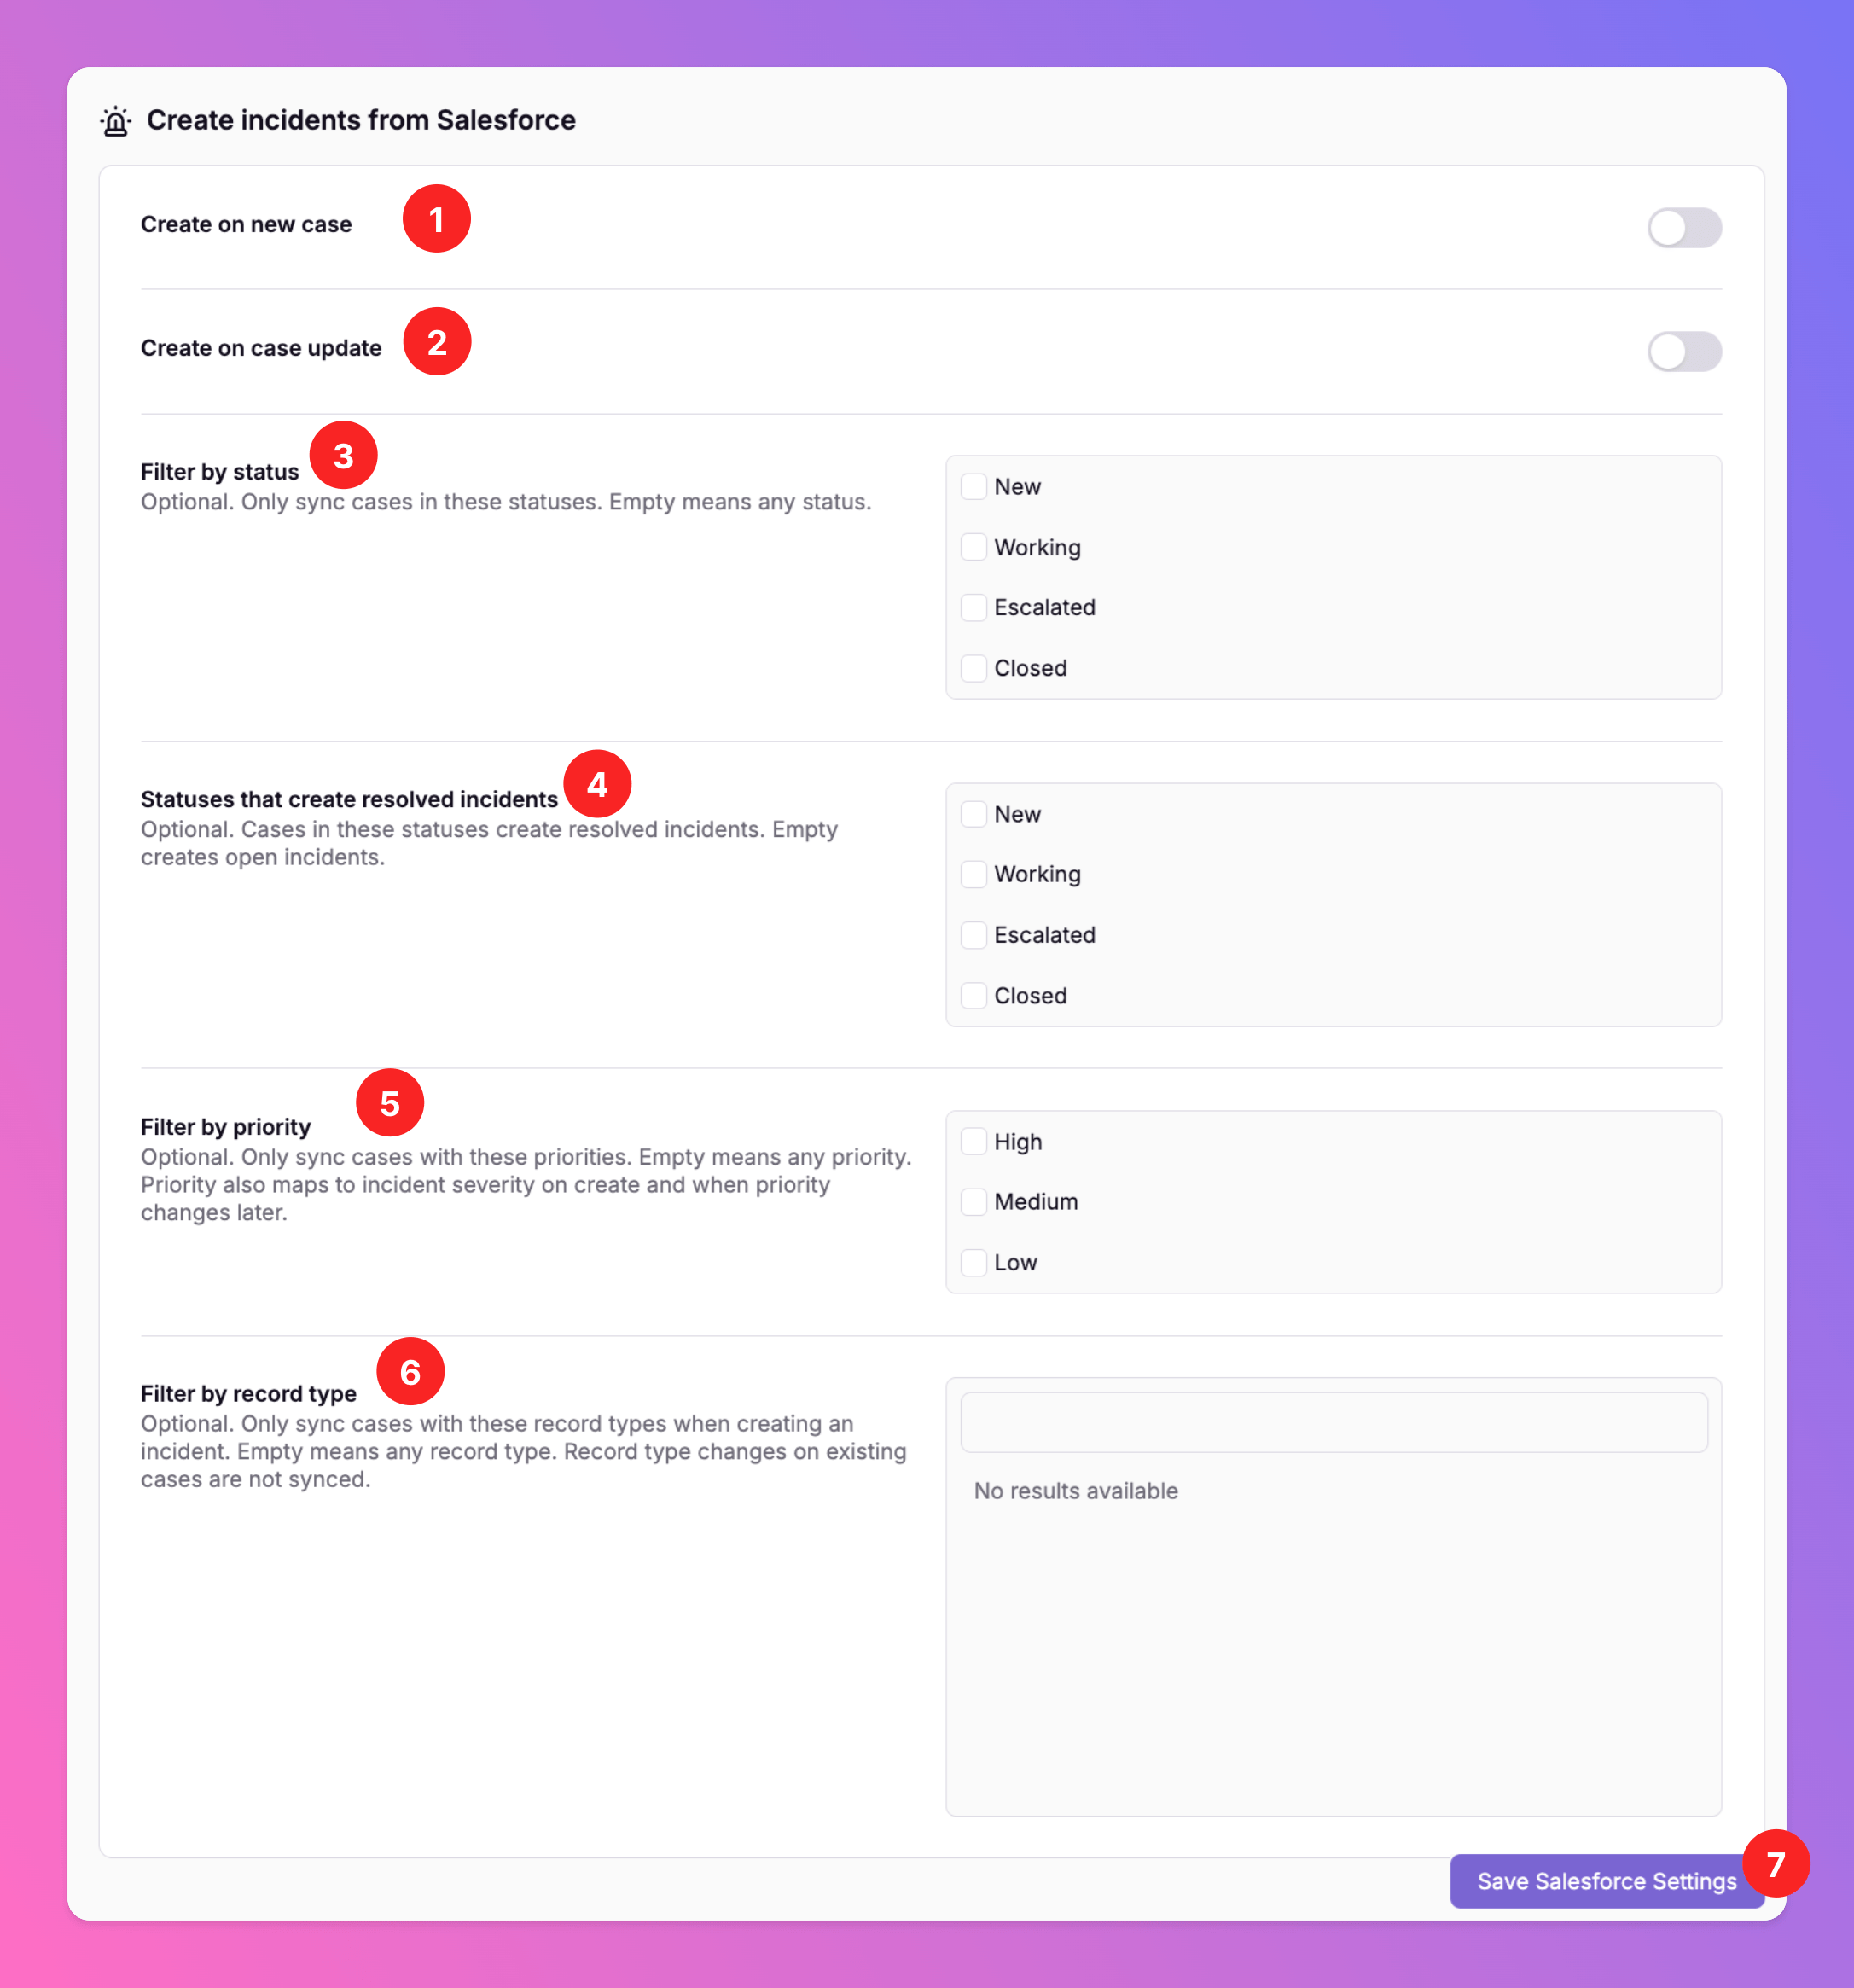
This feature is basically the Salesforce Inbound Integration. You can create All Quiet incidents from Salesforce cases. Here’s how it works: For Pro and Enterprise plan users: No matter which teams you added in
Team Connections when setting up the outbound integration, all All Quiet incidents will always be created in the integration’s root team.Create Incidents From Salesforce
To create Incidents from Salesforce activate Enable Incident Creation and / or Enable Incident Creation on Update. Otherwise, Salesforce Cases will not create new All Quiet incidents at all.
Enable on new case: All Quiet incidents will be created when creating a Salesforce case matching the criteria below.Enable on case update: All Quiet incidents will be created when updating an existing Salesforce case to match the criteria below.- You can select if only Salesforce Cases that are created in / updated to a certain status will create an All Quiet incident. If omitted, incidents will be created no matter of the status.
- You can select if Salesforce Cases that are created with / updated to a certain status will create resolved All Quiet incidents. If omitted, incidents will always be created in
Openstate. - You can select if only Salesforce Cases that are created with / updated to a certain priority will create an All Quiet incident. If omitted, incidents will be created no matter the priority.
- Optionally you can only create incidents for cases that have a certain
record type. If omitted, incidents will be created for all record types. - Make sure to
Saveyour settings.