Setup time: 5 Min
Create Outbound Integration
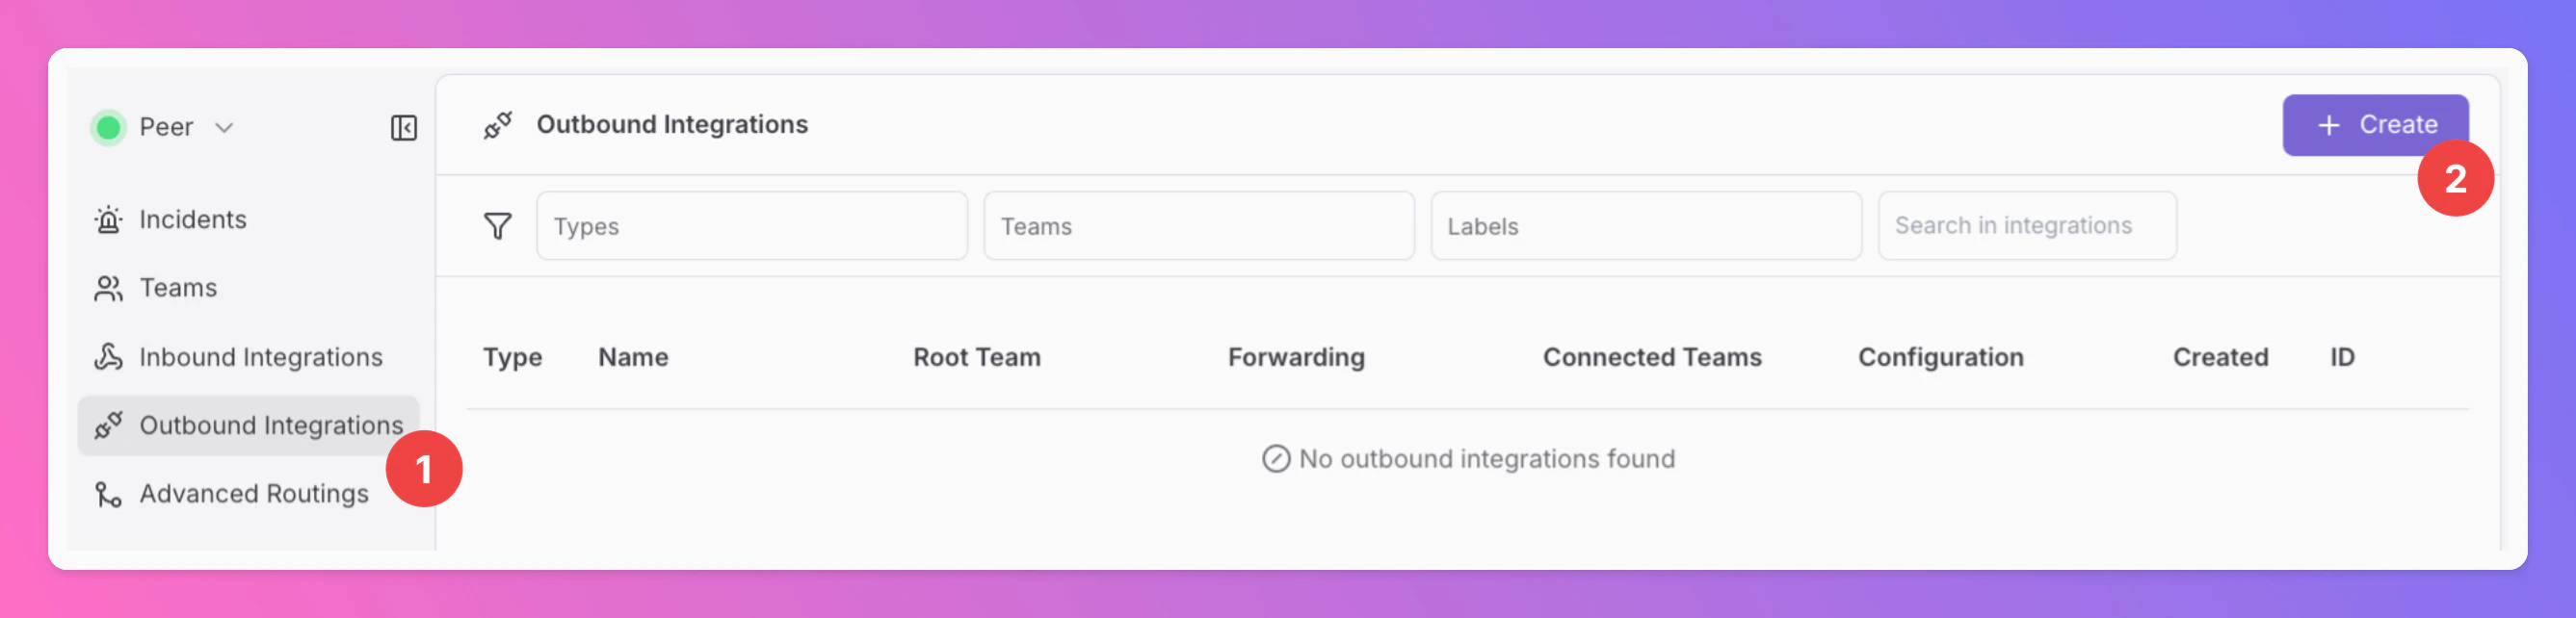
- Click on the
Outbound Integrationstab. - Click on
+ Create.
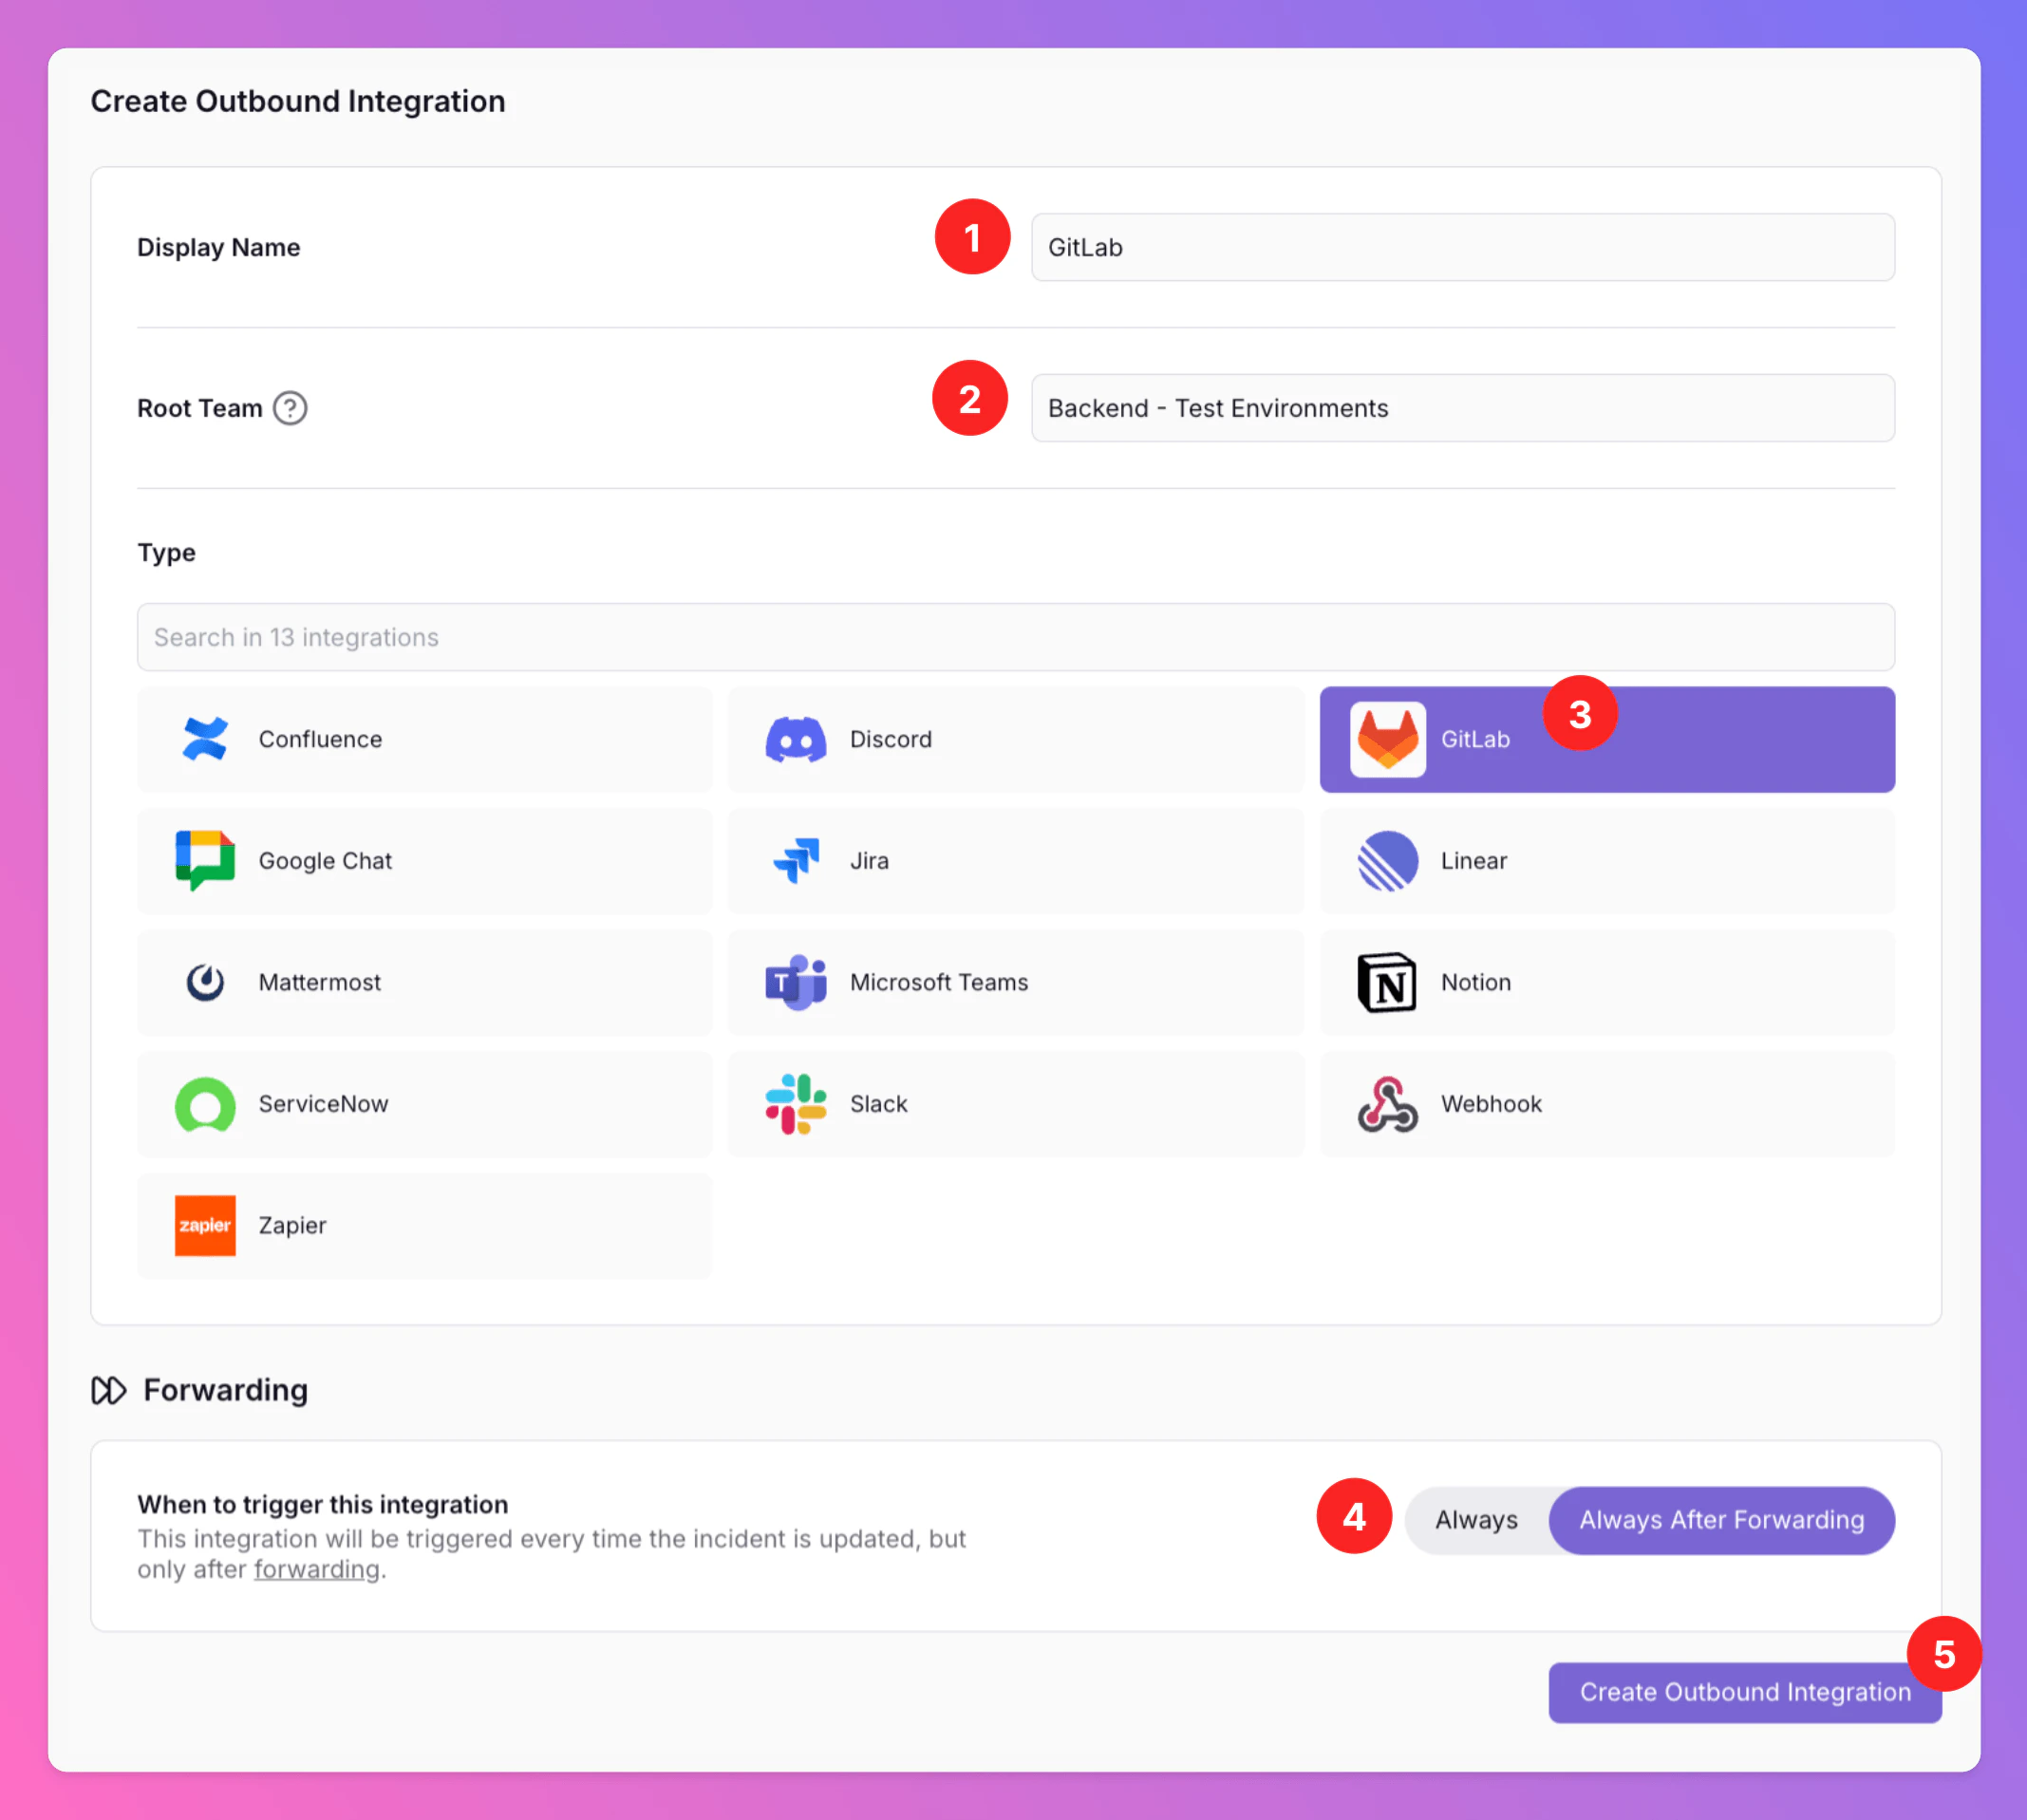
- Enter a
Display Namefor your integration, e.g. “GitLab”. - Select a
Team.For Organizations with Pro and Enterprise plan: This is going to be the root team of your integration. You will be able to add additional teams in the next step. - Select
GitLabas the integration’s type. - Forwarding settings:
- Default:
Always After Forwarding- GitLab work items will only be created if users manually forward specific incidents or if you set up advanced routing rules for your GitLab integration that automatically forward incidents in specific scenarios. - Alternative:
Alwayswill automatically forward all incidents to GitLab and create work items, unless excluded by additional advanced routing rules.
- Default:
- Click
Create Outbound Integration.
Add All Quiet to your GitLab workspace
Once you’ve successfully created your new outbound integration, you’ll automatically be redirected to itsGitlab Settings page.
- Observe that the installation status of the All Quiet integration is still
pending. - To complete the integration with GitLab, click on
Add to GitLabto authenticate the integration.
In the
Edit tab, you can change general settings like the integration’s Forwarding settings.Only for Pro and Enterprise plan - Manage your
Team Connections: The root team is pre-selected, and you can add the integration to further teams within the root team’s organization. Team Administrators can add / remove those teams they are an Administrator in, Organization Administrators & Organization Owners can manage the connections to all teams of the organization. 
Configure Outbound Integration
If oAuth with GitLab is successful, you are redirected back to your GitLab integration’s details page in All Quiet. Next, you need to configure the integration.Í- As you can see, the Installation Status changed to
installed. - Select the GitLab namespace / group / project you want to forward All Quiet incidents to (options depend on your GitLab setup).
- Configure how new GitLab work items should be created (for example work item type, Ílabels and default state).
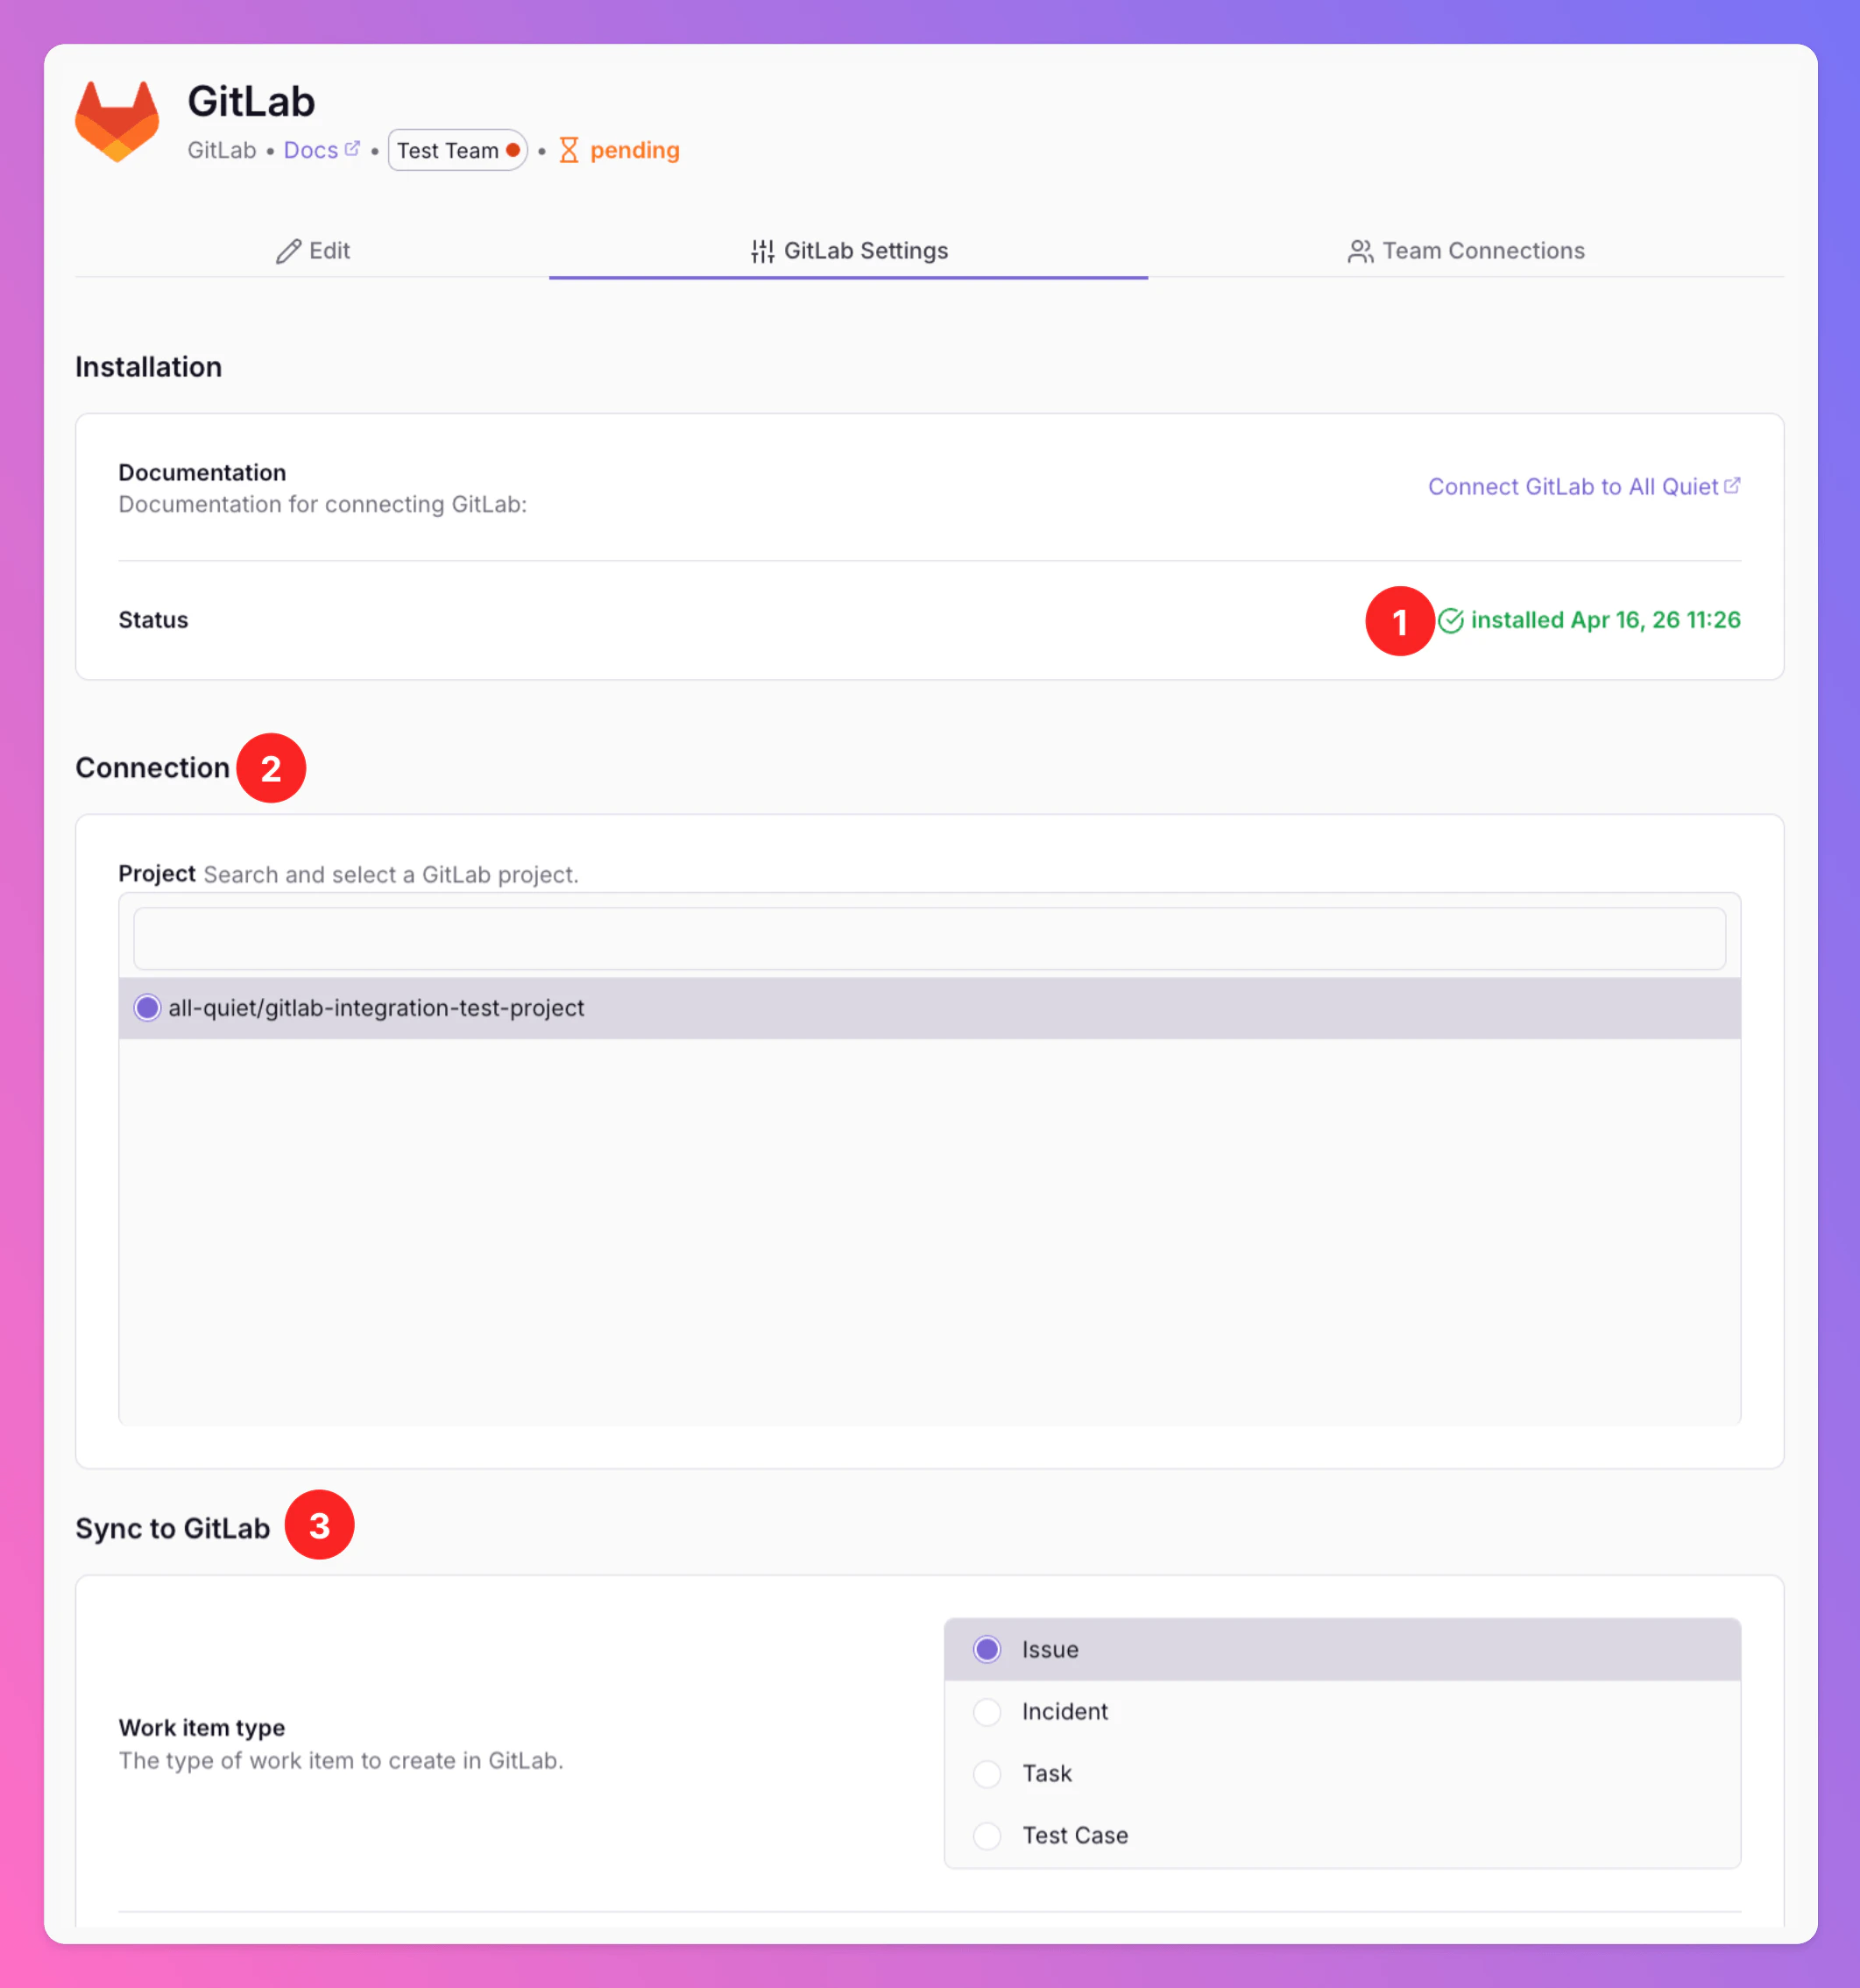
- Select the GitLab work item type you want to create for new All Quiet incidents.
- Select the initial state for new work items created from All Quiet incidents.
- Select the GitLab labels you want to add to new work items created from All Quiet incidents.
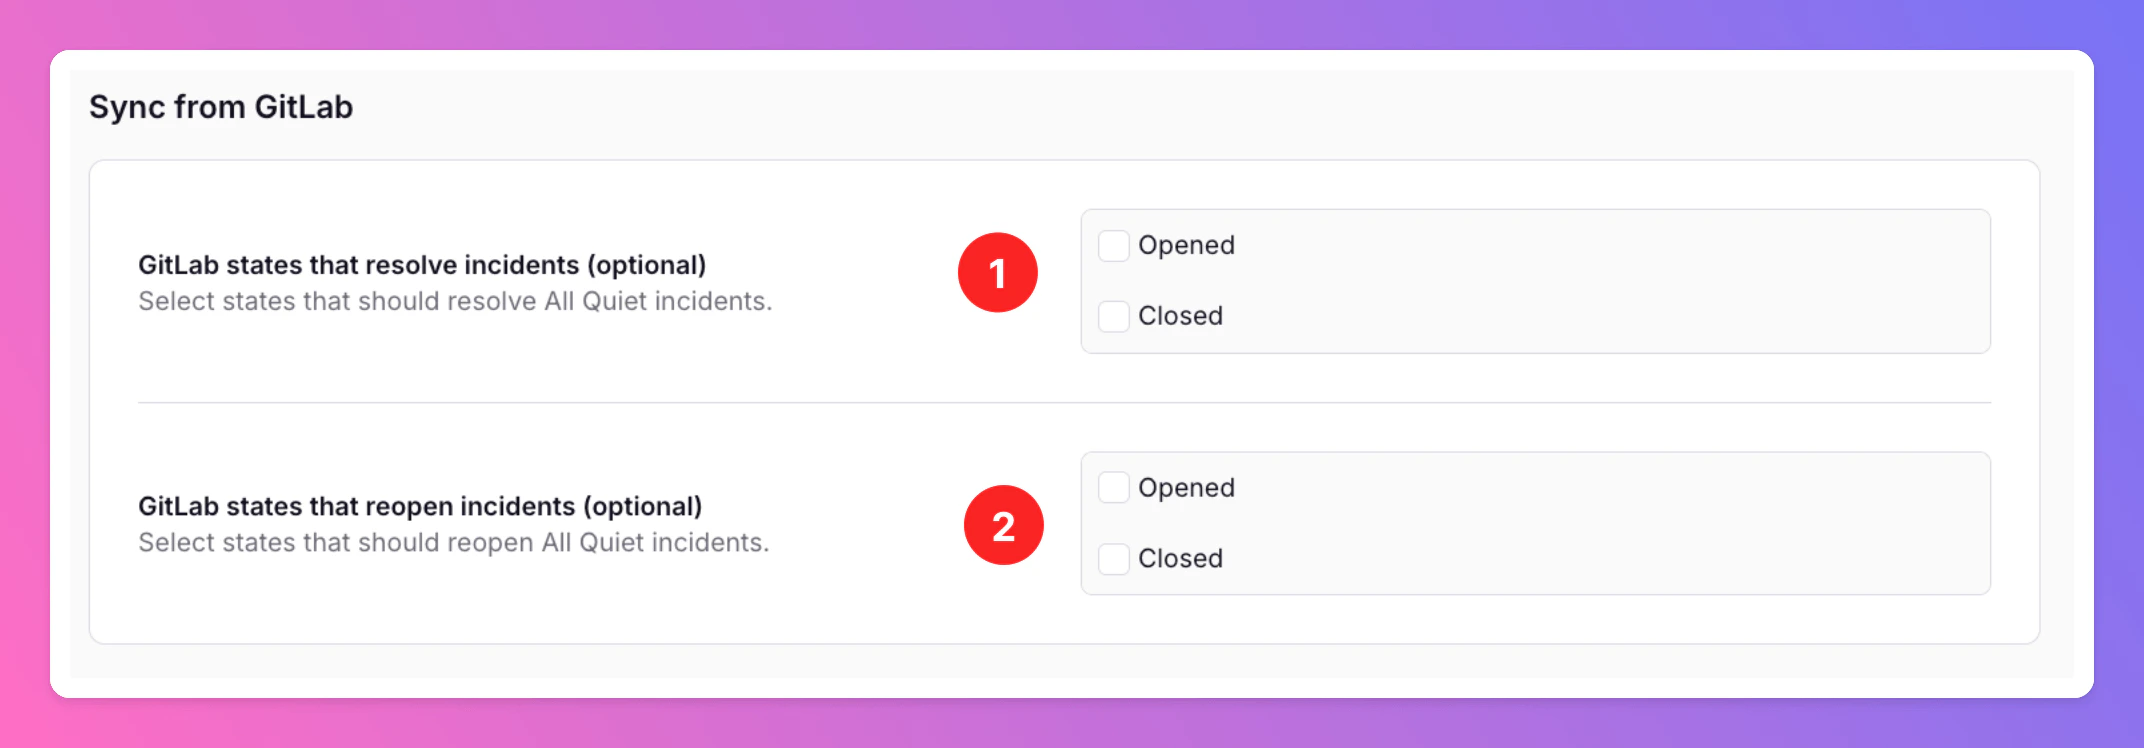
- Select the GitLab work item state you want to set after resolving an incident in All Quiet.
- Select the GitLab work item state you want to set after re-opening an incident in All Quiet.
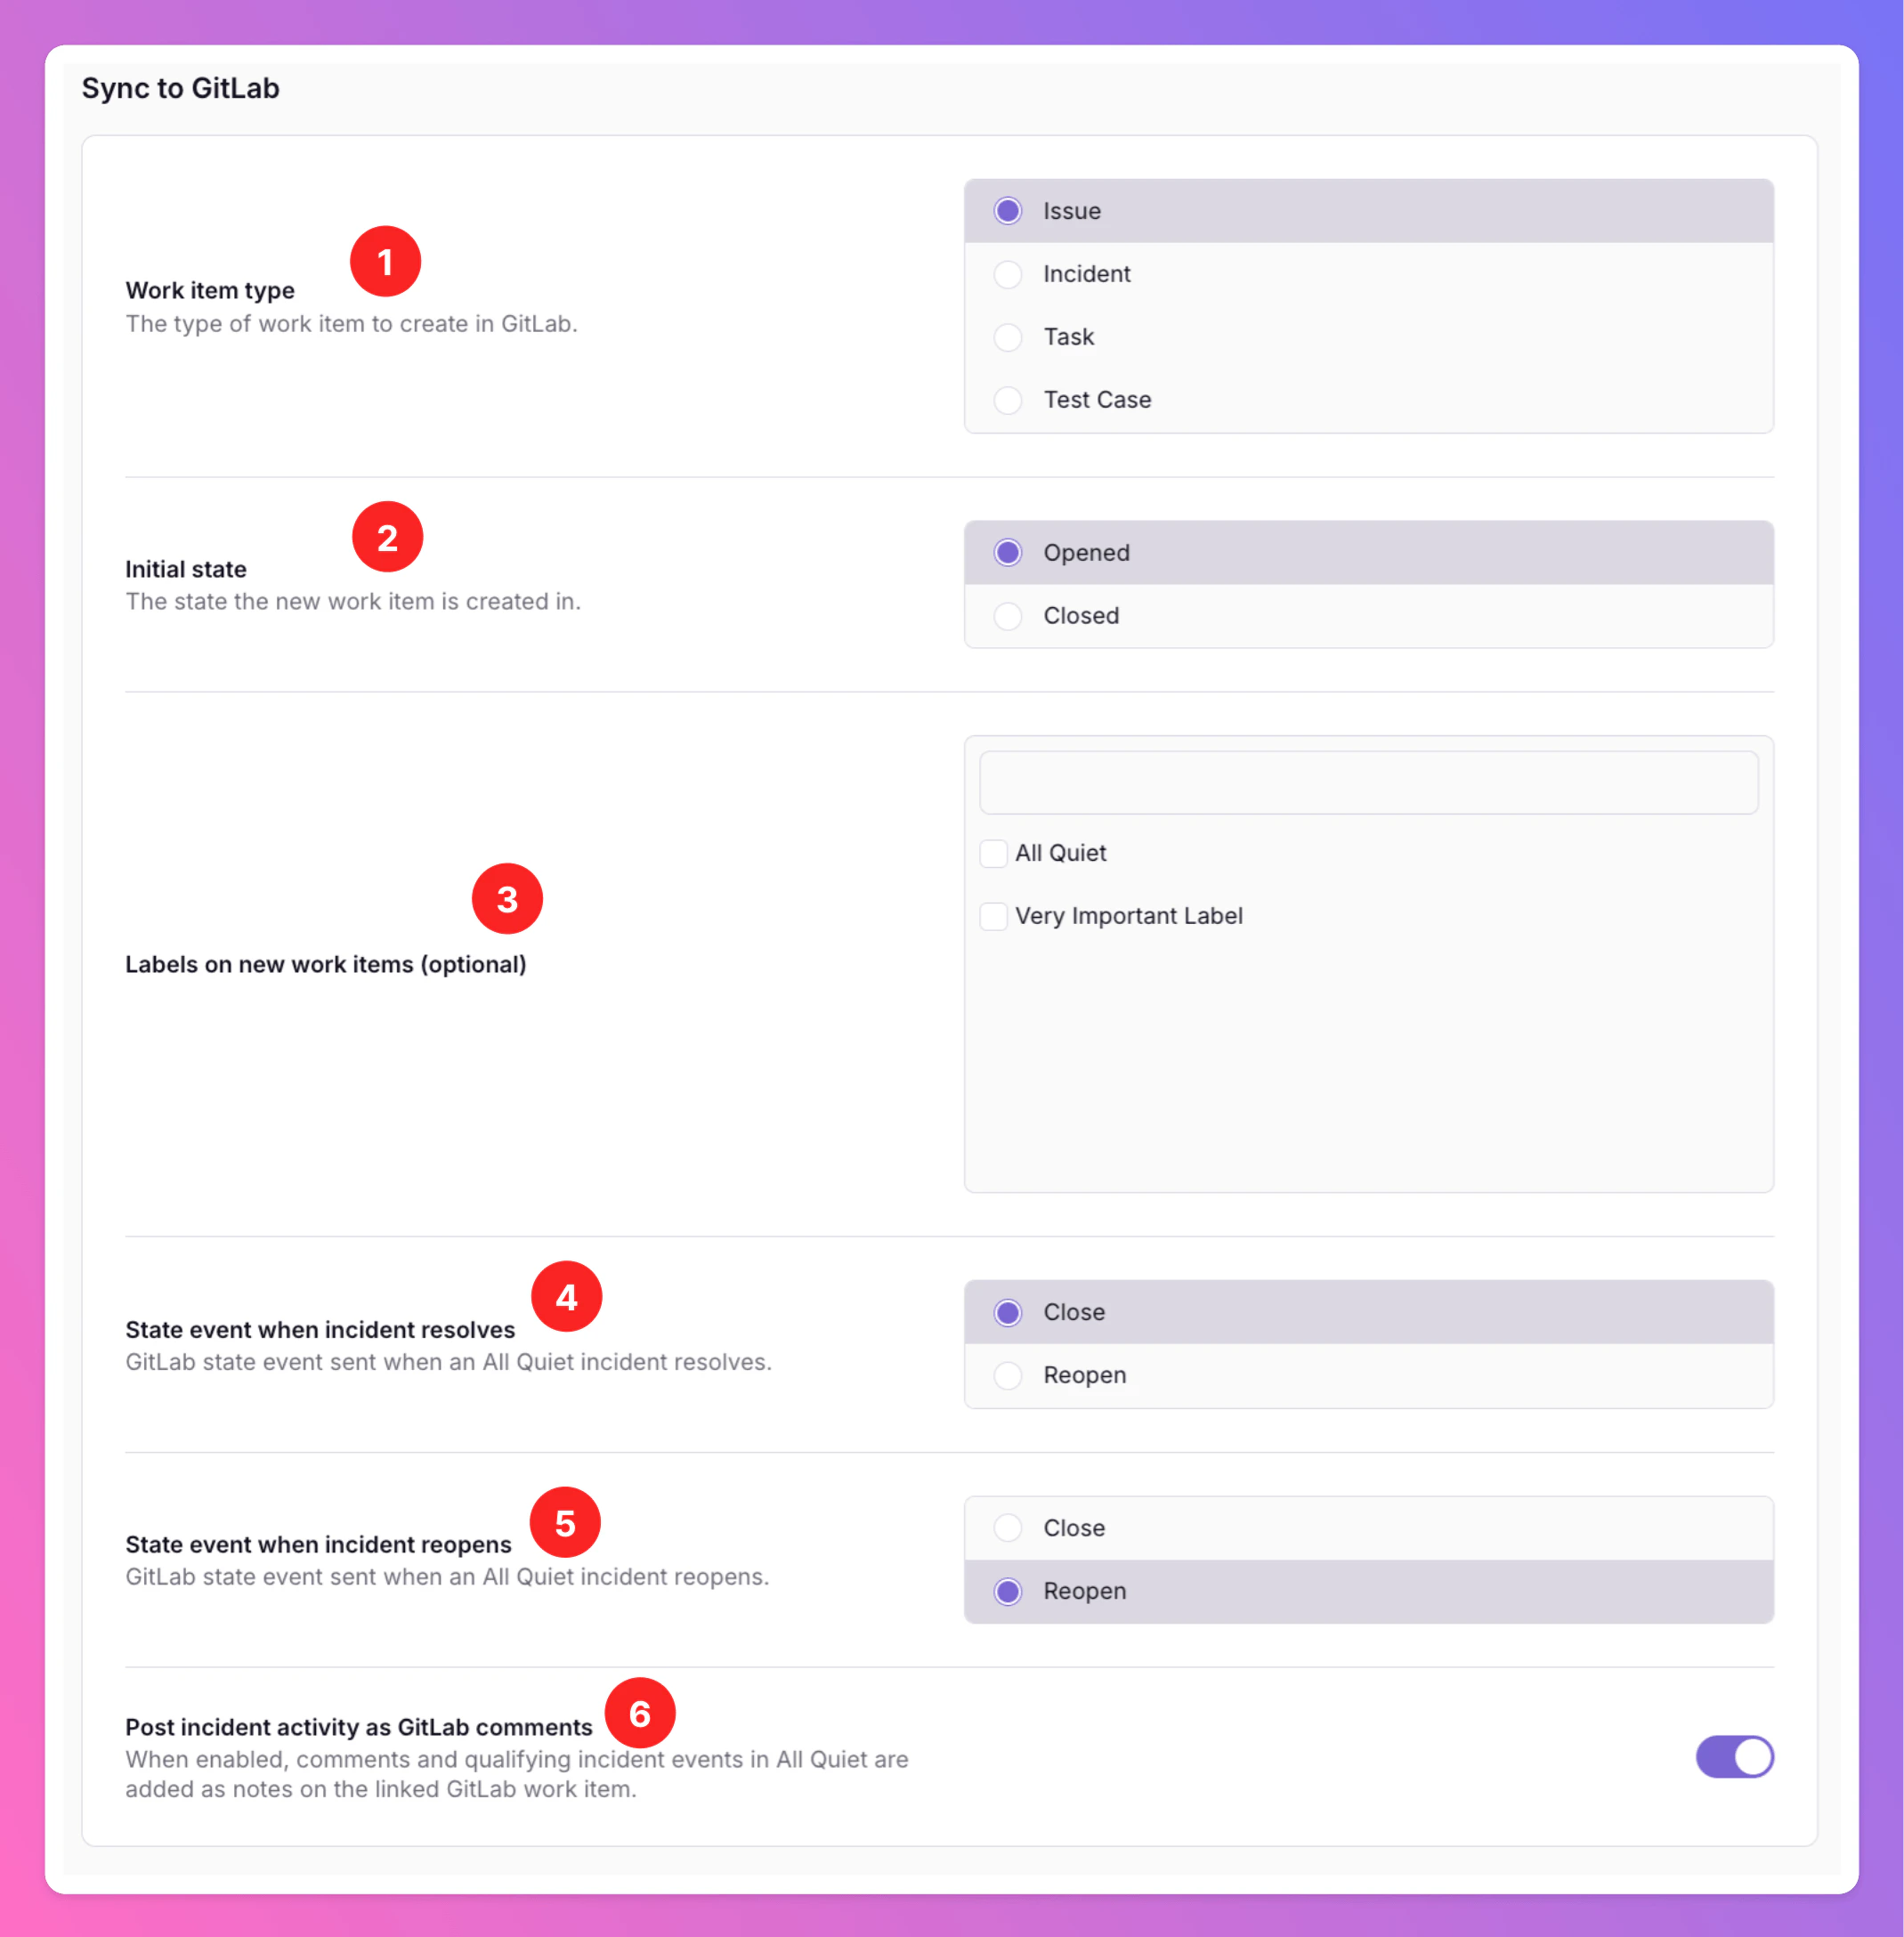
- Select the GitLab state that sets an incident to
Resolvedin All Quiet. - Select the GitLab state that sets an incident to
Reopenedin All Quiet.
If you decide to save & stop here, your GitLab Outbound Integration with All Quiet is ready to go. Depending on your setup, All Quiet incidents will now automatically create work items in GitLab or can be forwarded manually to GitLab. The states will be synced based on your selection.
Create All Quiet Incidents From GitLab
This feature is basically the GitLab inbound integration. You can create All Quiet incidents from GitLab work items. Here’s how it works:For Pro and Enterprise plan users: No matter which teams you added in
Team Connections when setting up the outbound integration, all All Quiet incidents will always be created in the integration’s root team.Create Incidents From GitLab
To create incidents from GitLab:
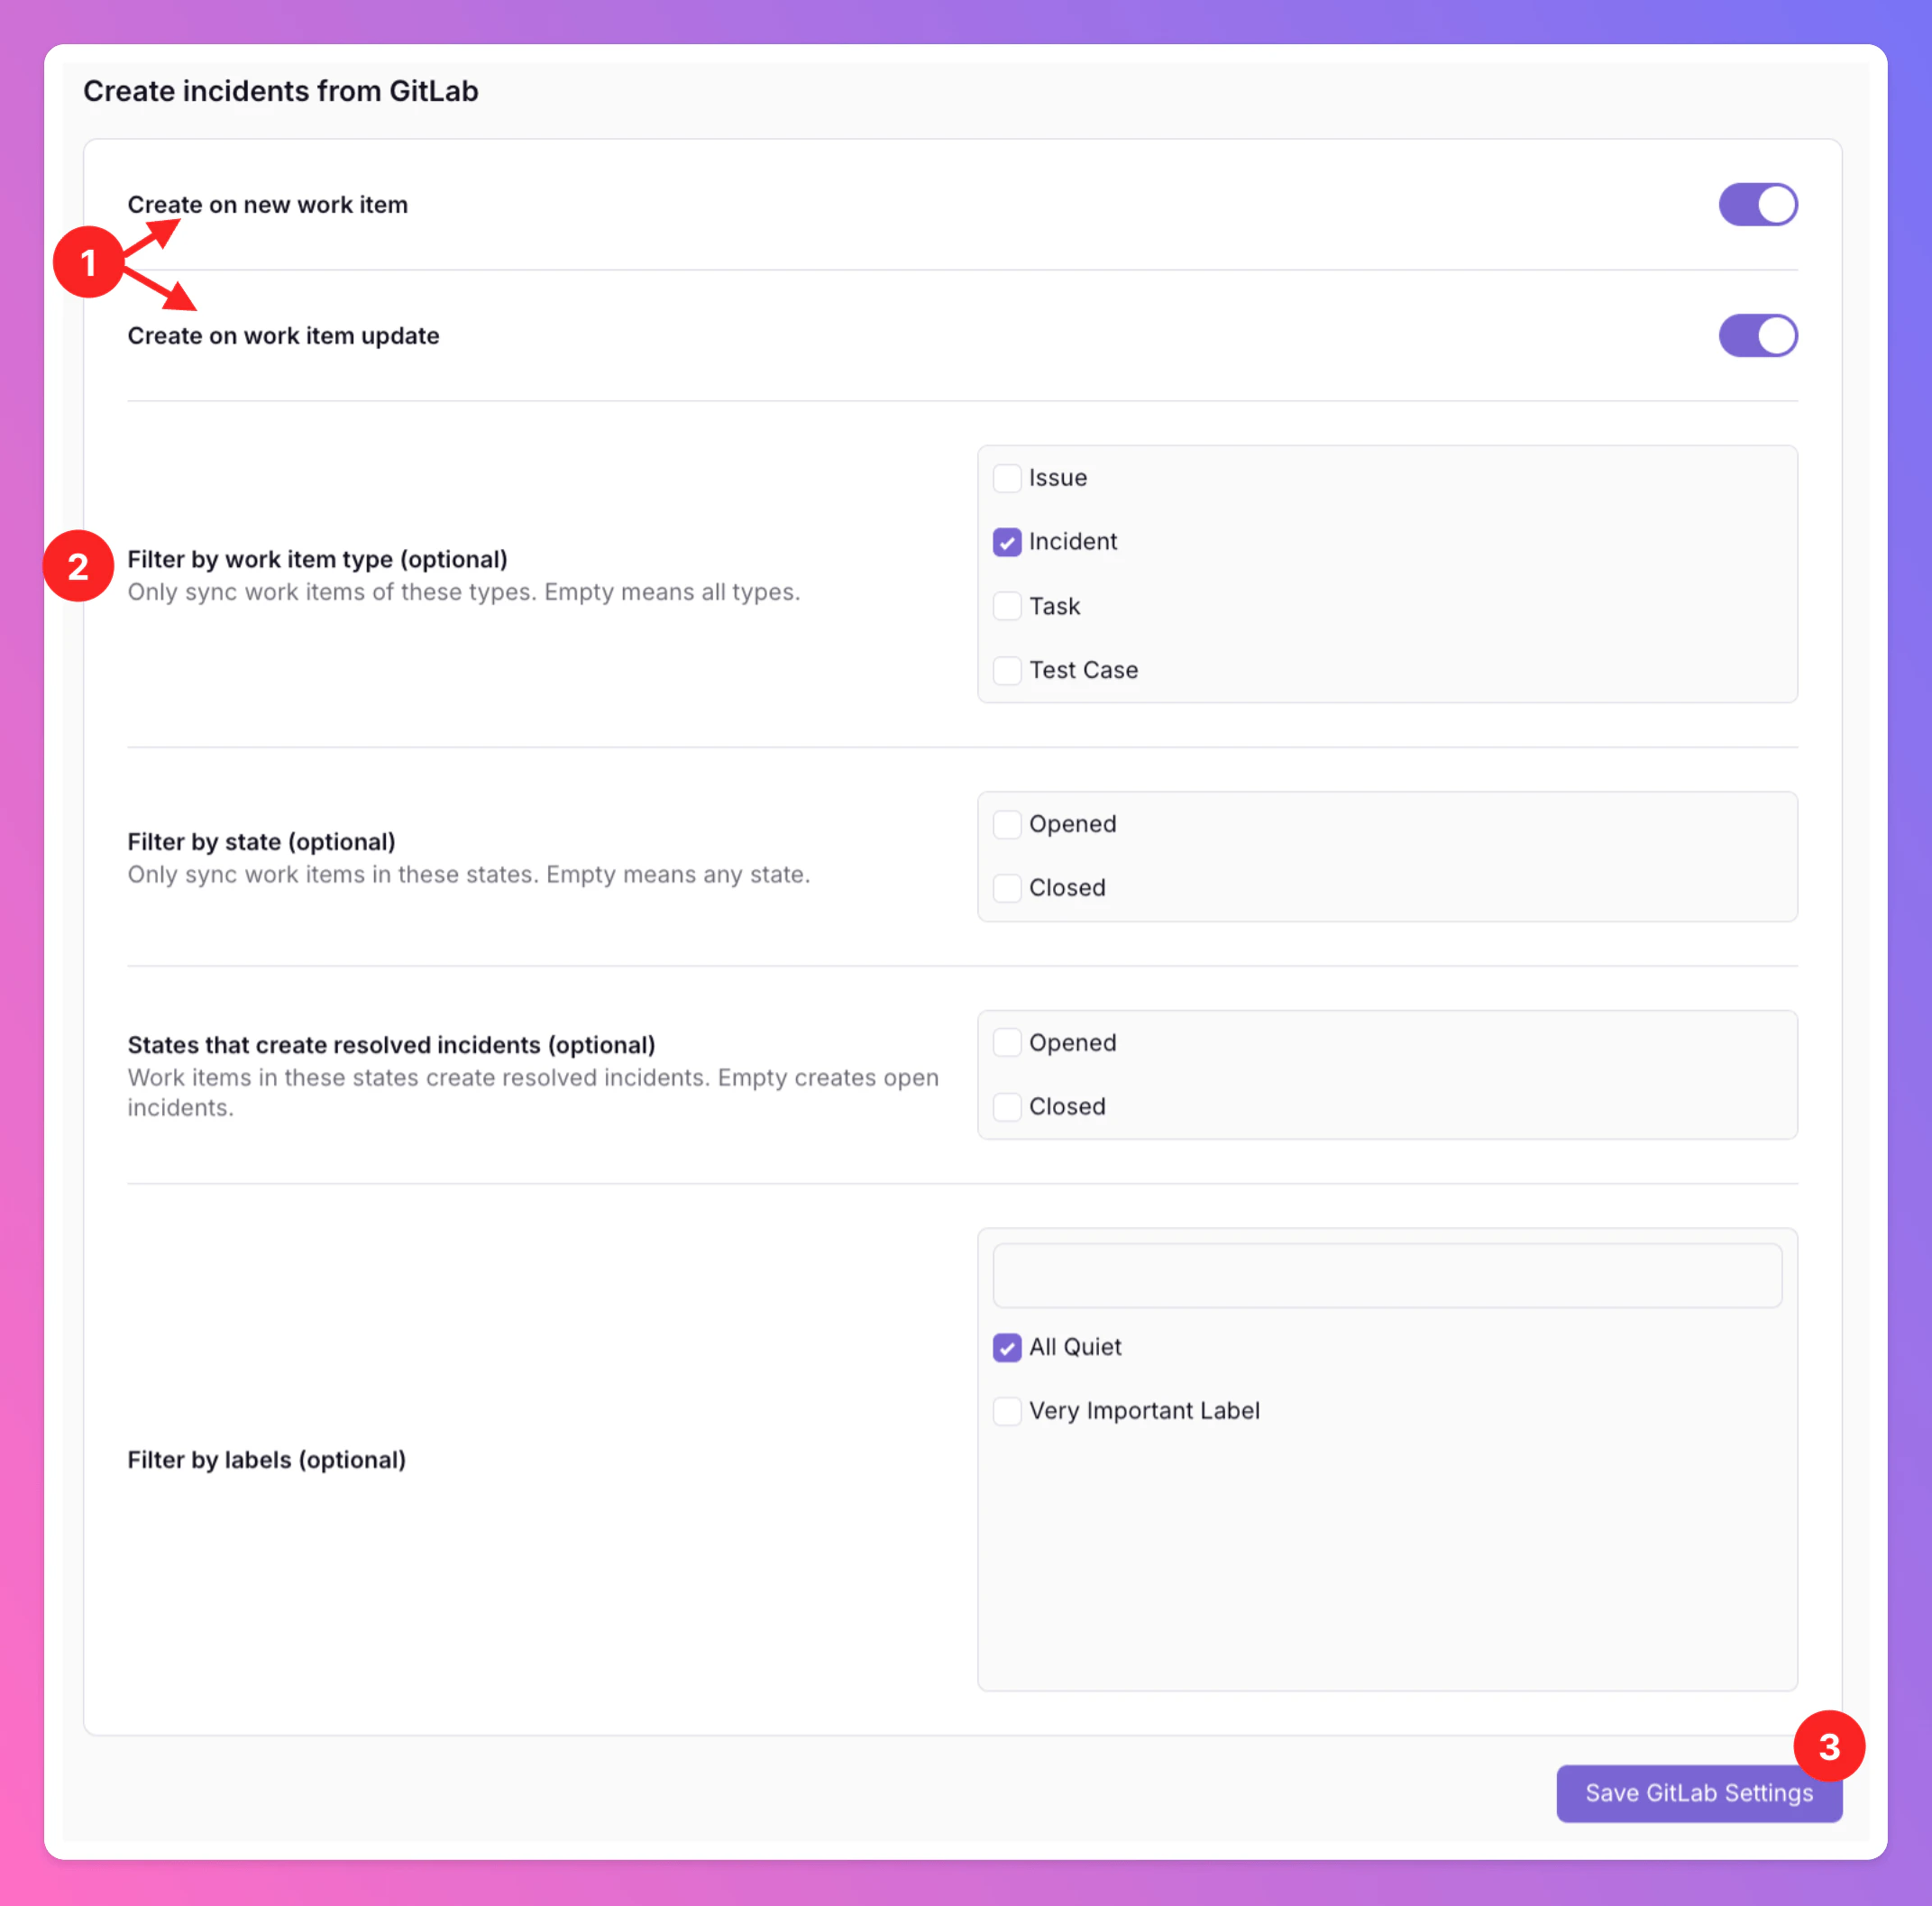
- Activate
Create on new work itemand / orCreate on work item updateÍ. Otherwise, GitLab work items will not create new All Quiet incidents at all.- Enable
Create on new work item: All Quiet incidents will be created when creating a GitLab work item matching the criteria below. - Enable
Create on work item update: All Quiet incidents will be created when updating an existing GitLab work item to match the criteria below.
- Enable
- Optionally, restrict incident creation to GitLab work items that match specific criteria (for example work item type, state or specific labels), depending on your setup.
Save GitLabsettings.
You have successfully enabled the GitLab inbound integration. To manage your settings, open your GitLab integration details page.