Setup time: 5 Min
1. Create Elastic Integration on All Quiet
Sign in to your All Quiet account.Create Integration
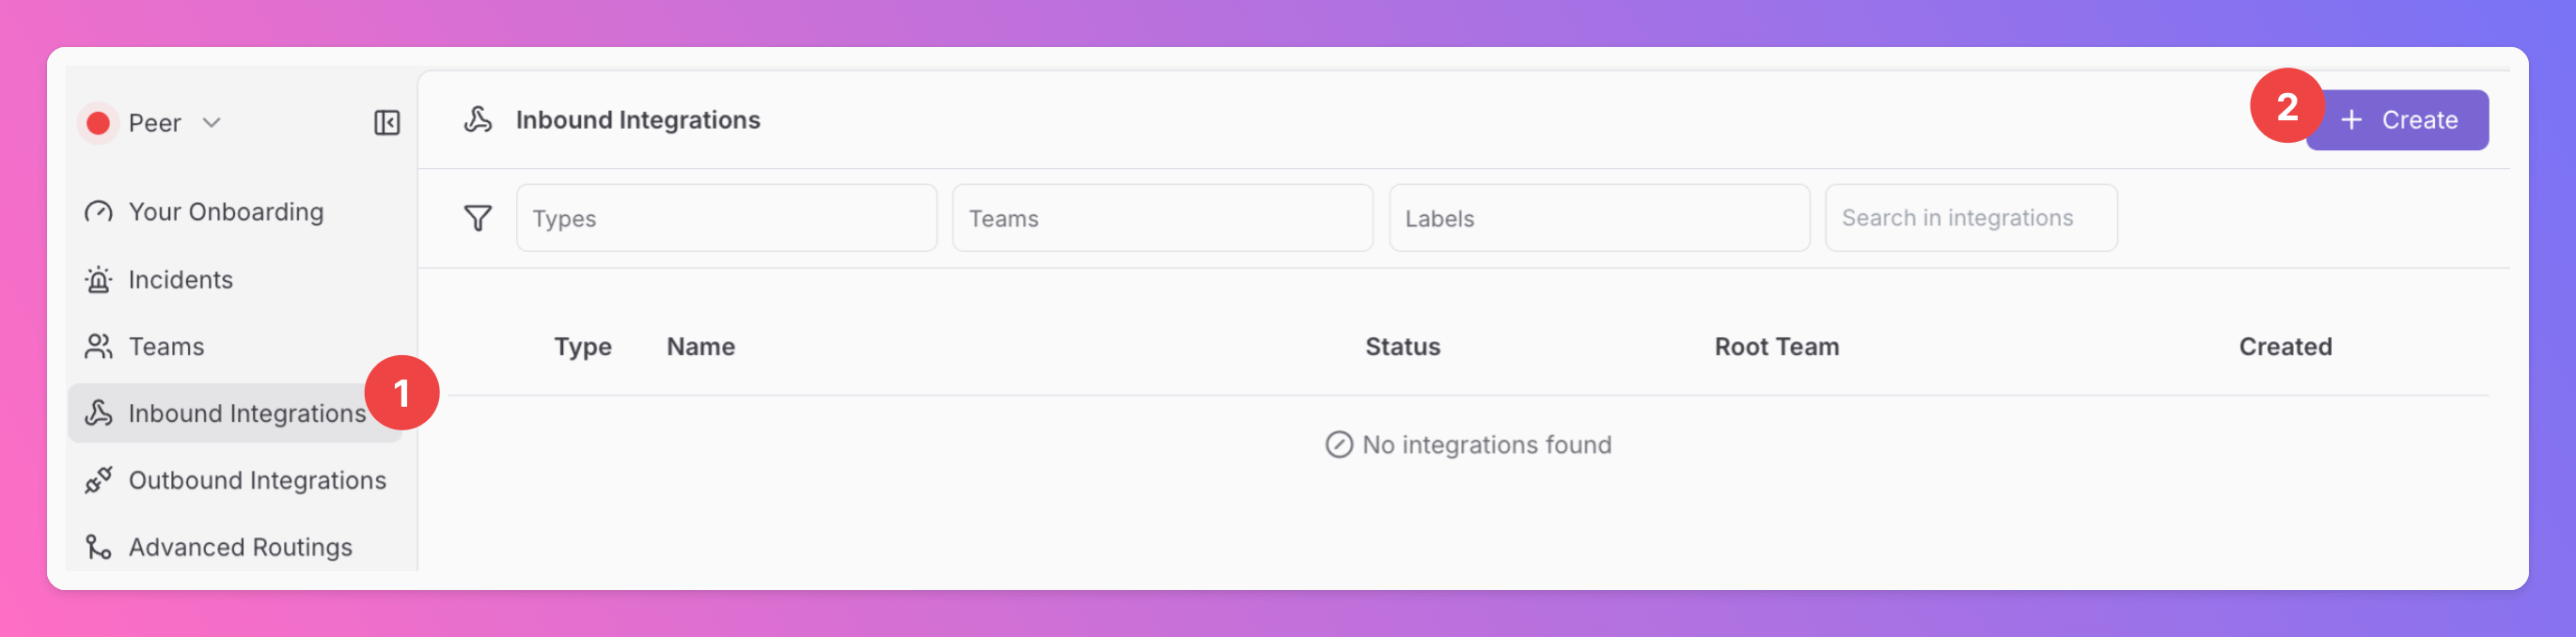
- Click on the
Inbound Integrationstab. - Click on
+ Create.
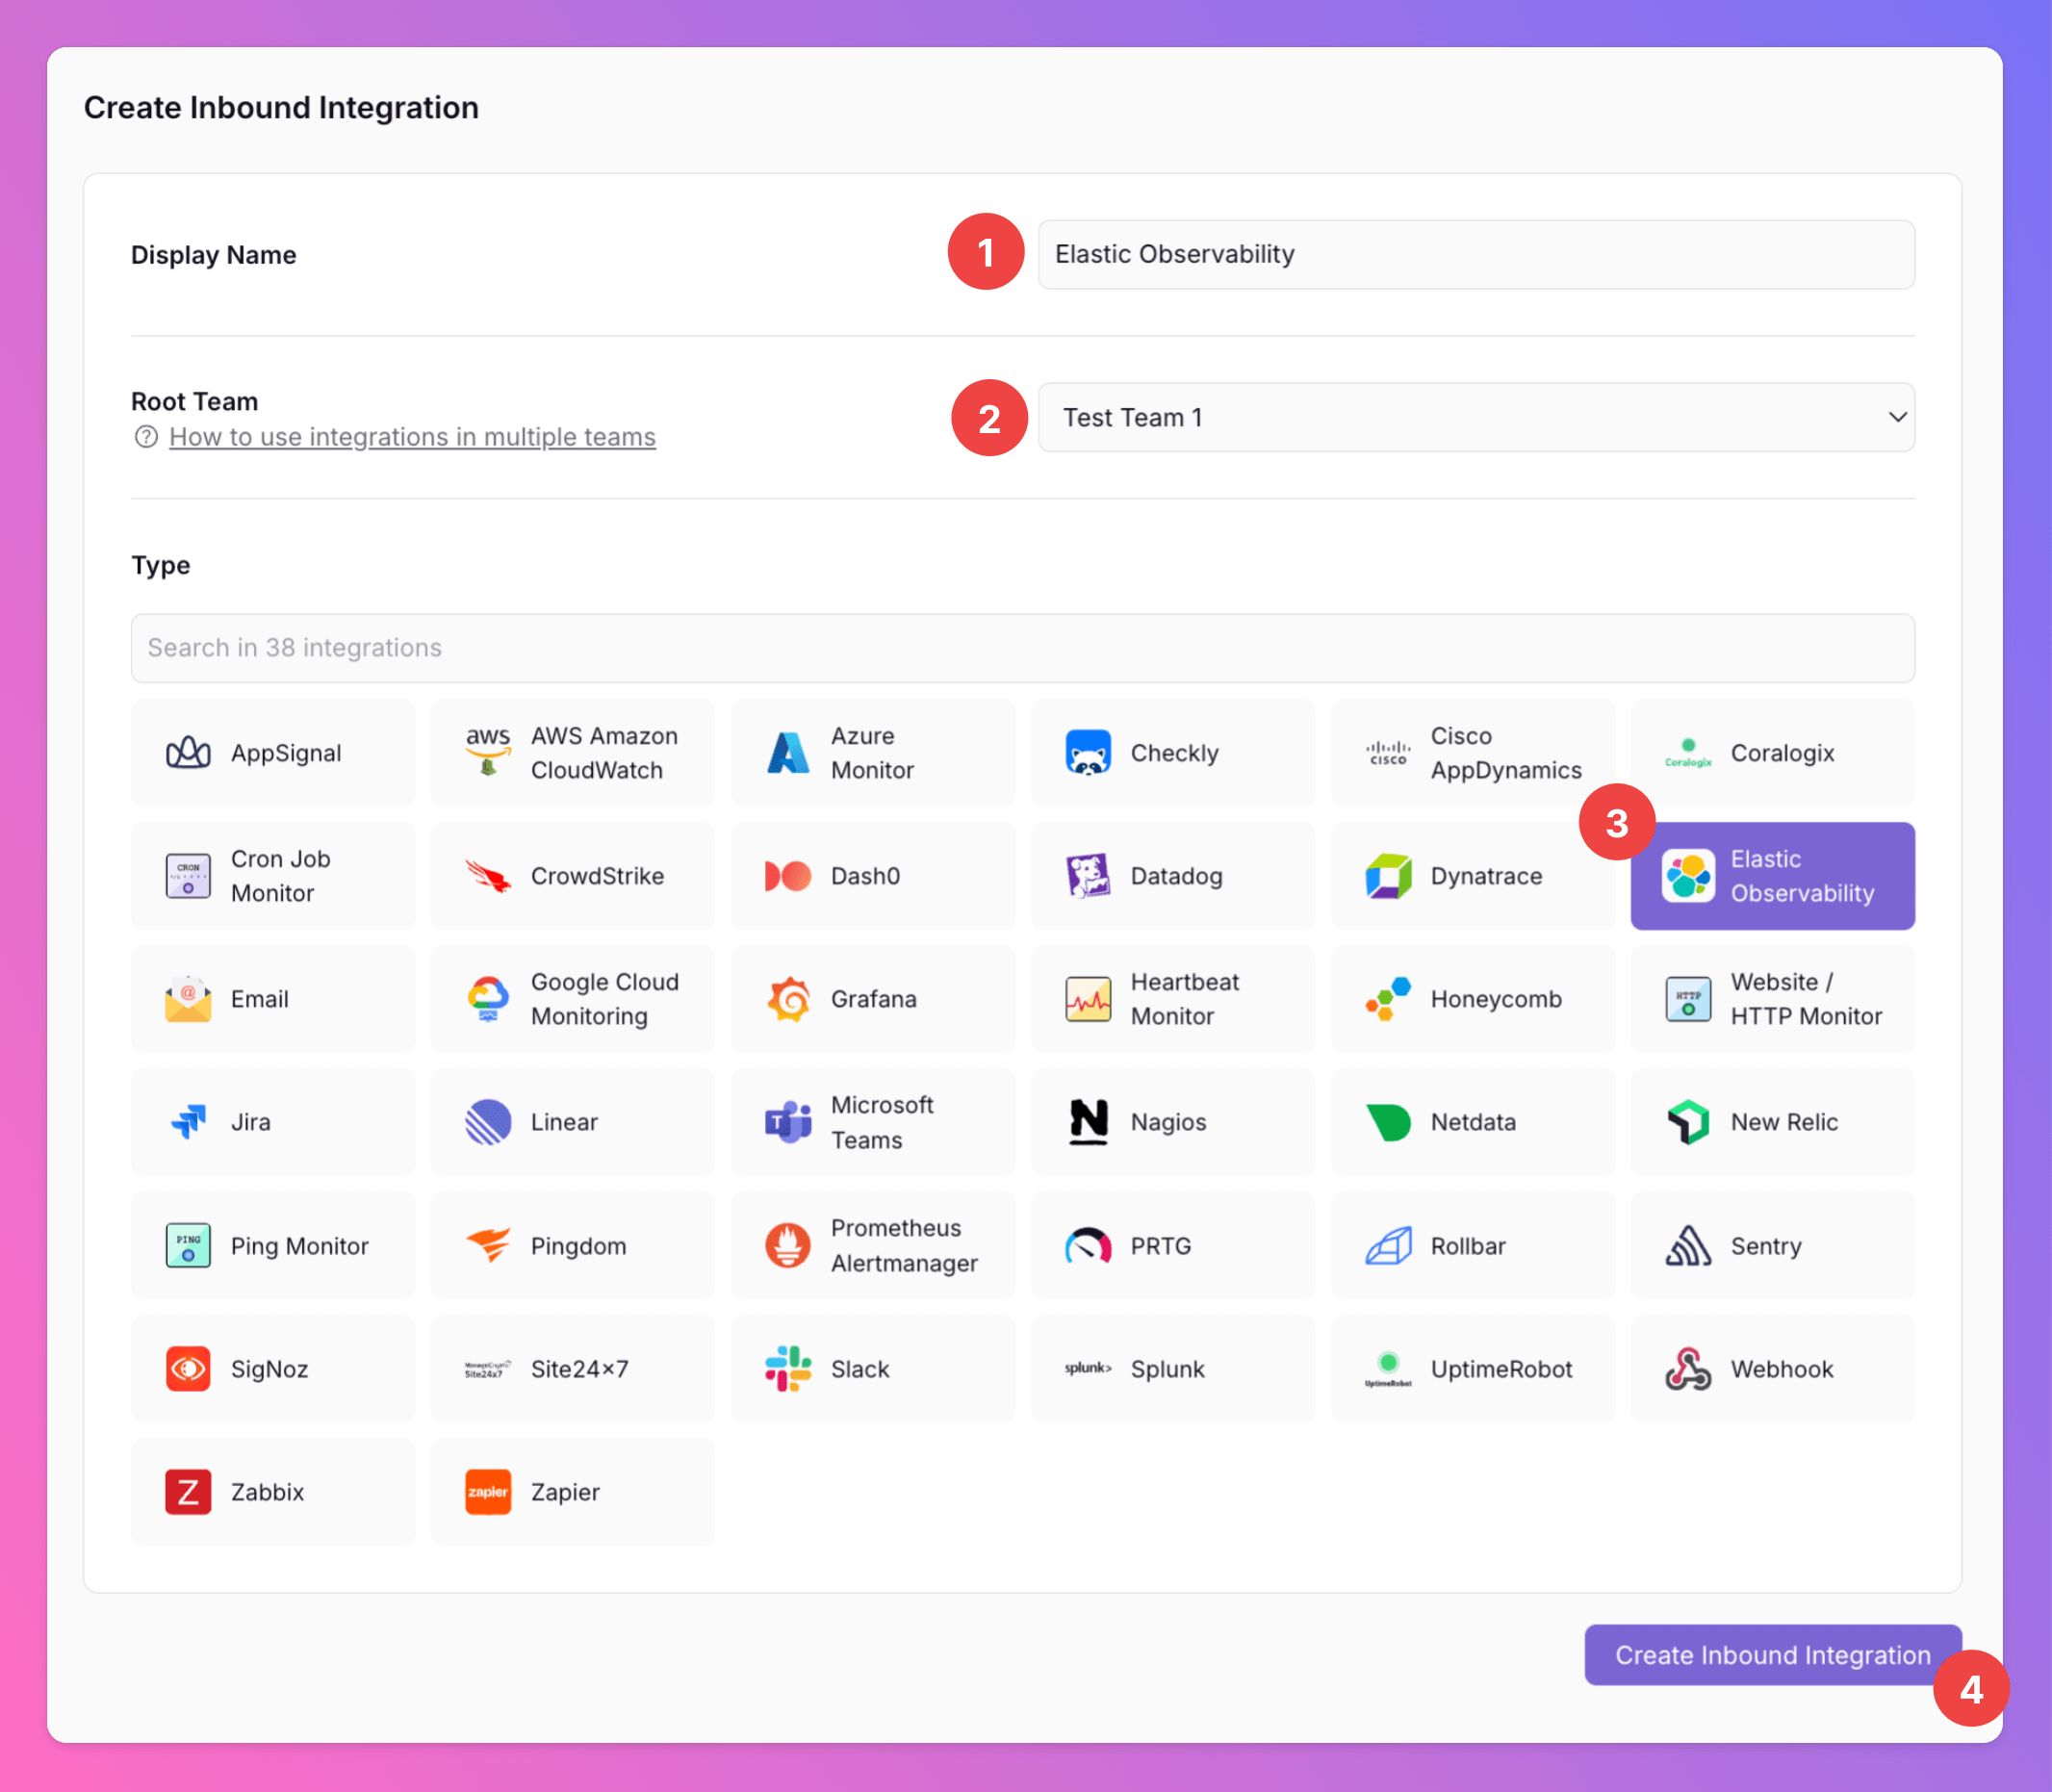
Select Elastic Observability as the Integration’s Type
- Enter a
Display Namefor your integration, e.g. “Elastic Observability”. - Select a
Team. - Select
Elastic Observabilityas the integration’s type. - Click
Create Inbound Integration.
Get the All Quiet Webhook URL
After creating the integration on All Quiet, you can view the unique All Quiet Webhook URL of your Elastic integration. You will require it in step 2 when configuring the custom integration on Elastic.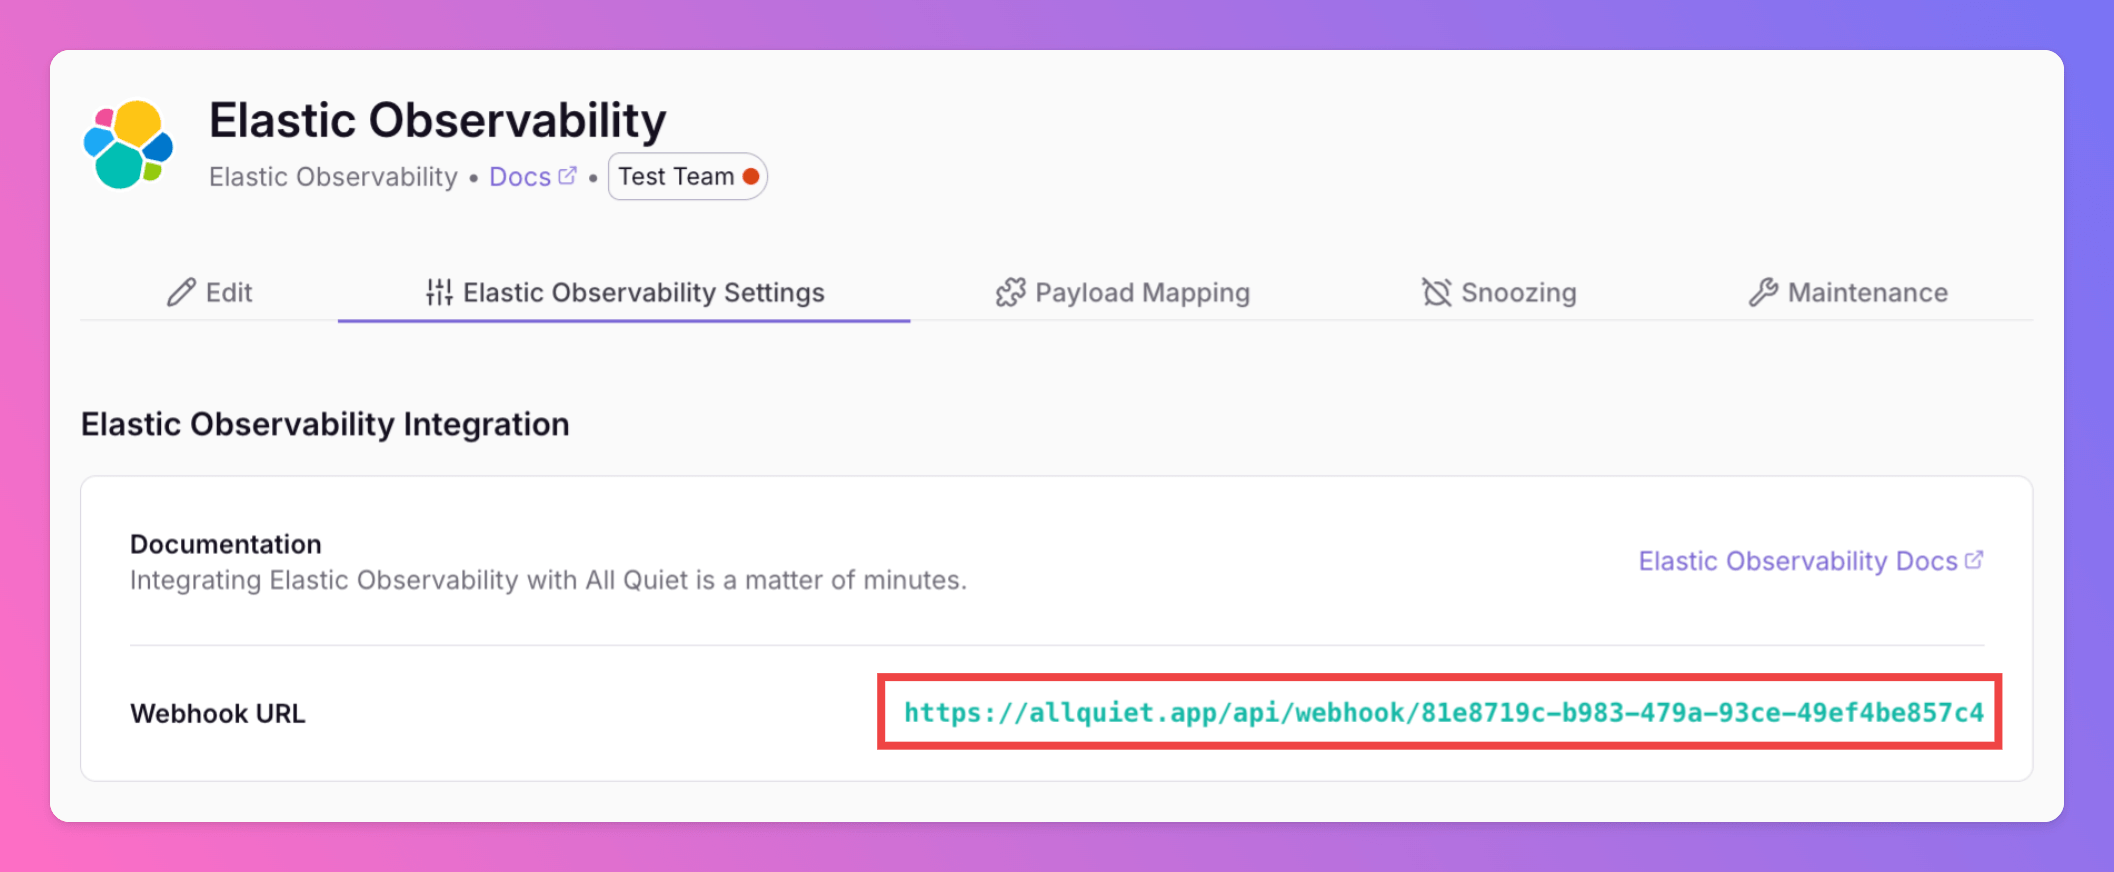
Optionally toggle
Enable additional Authentication & Security below the webhook URL to restrict who can POST payloads.- IP Filter — Allow requests only from specific IPs or CIDR ranges. Failed checks return 404 Not Found.
- Bearer authentication — Require
Authorization: Bearer YOUR_TOKEN. Missing or invalid tokens return 401 Unauthorized.
2. Configure a custom integration with Elastic Observability
Once you’ve set up an integration of type “Elastic Observability” with All Quiet, the next step is connect your Elastic Observability Project with All Quiet to forward Alerts to All Quiet. Sign in to your Elastic account and open the project you want to connect with All Quiet.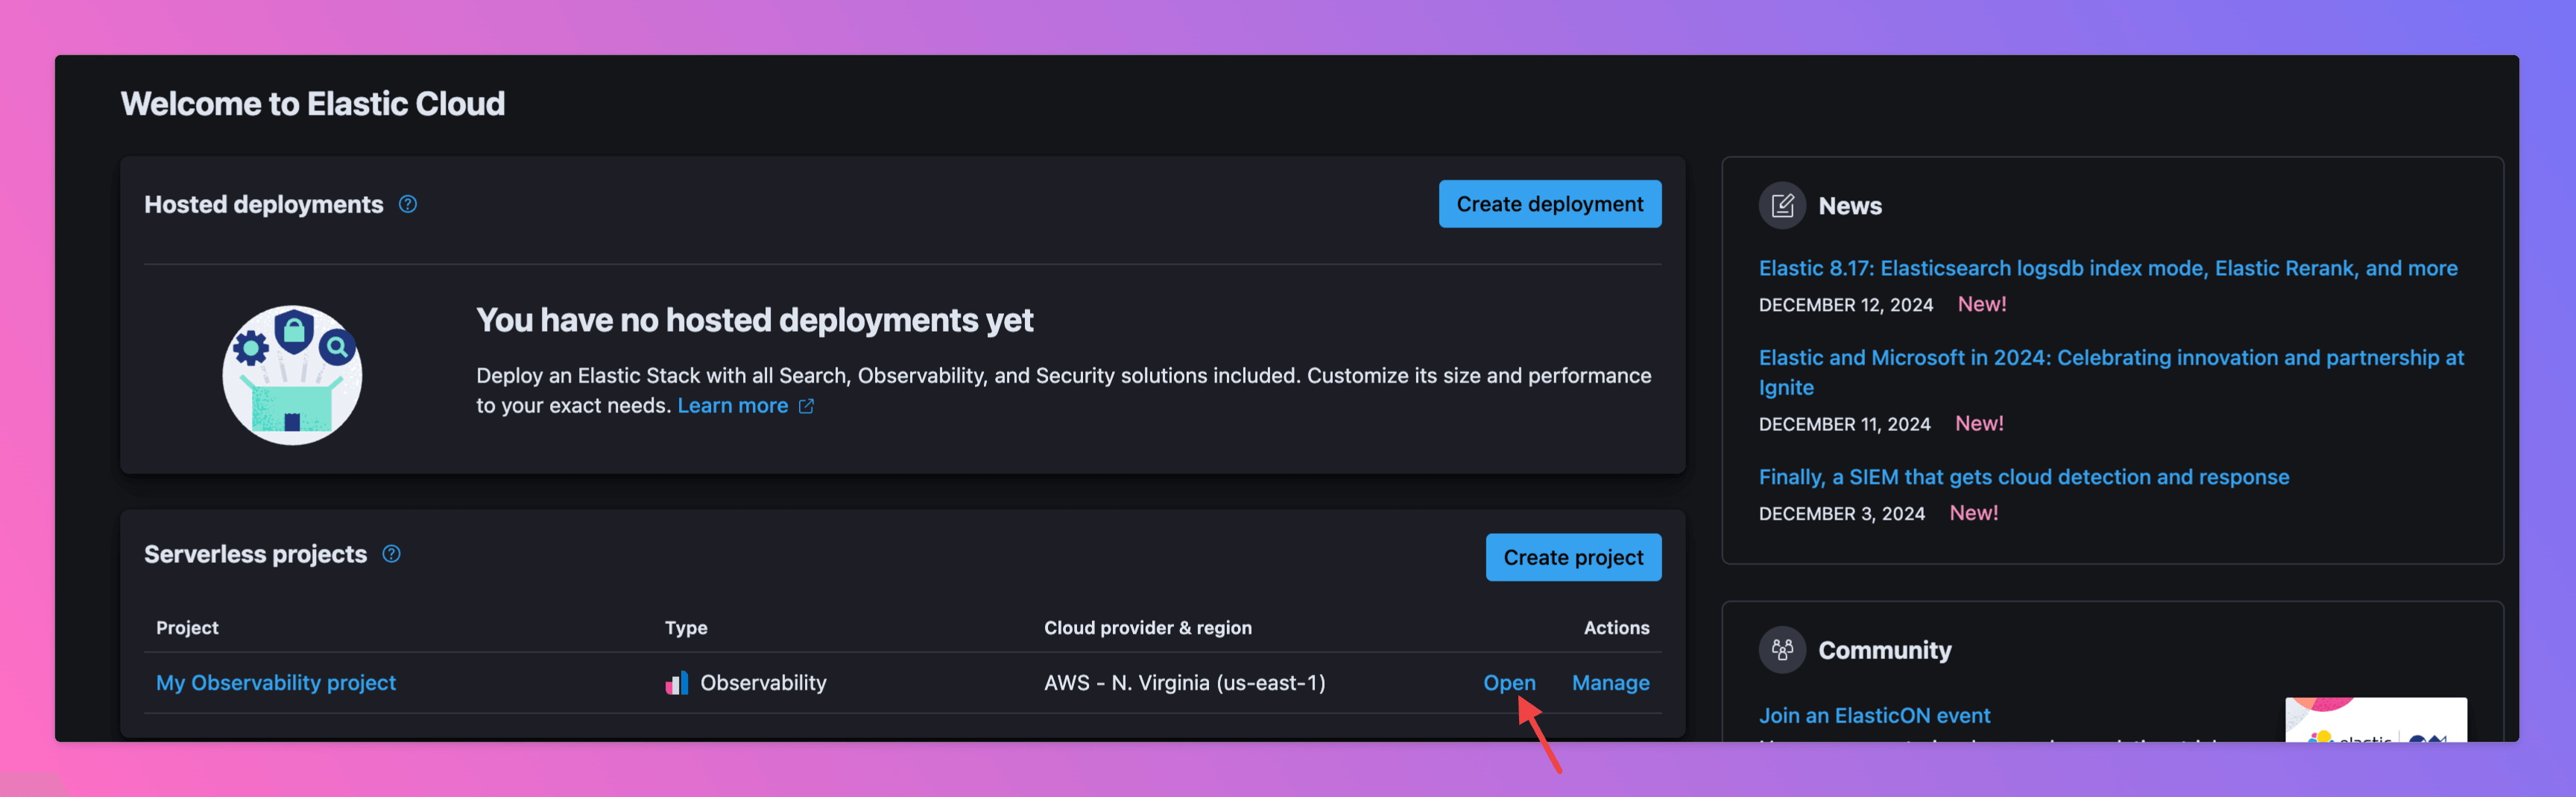
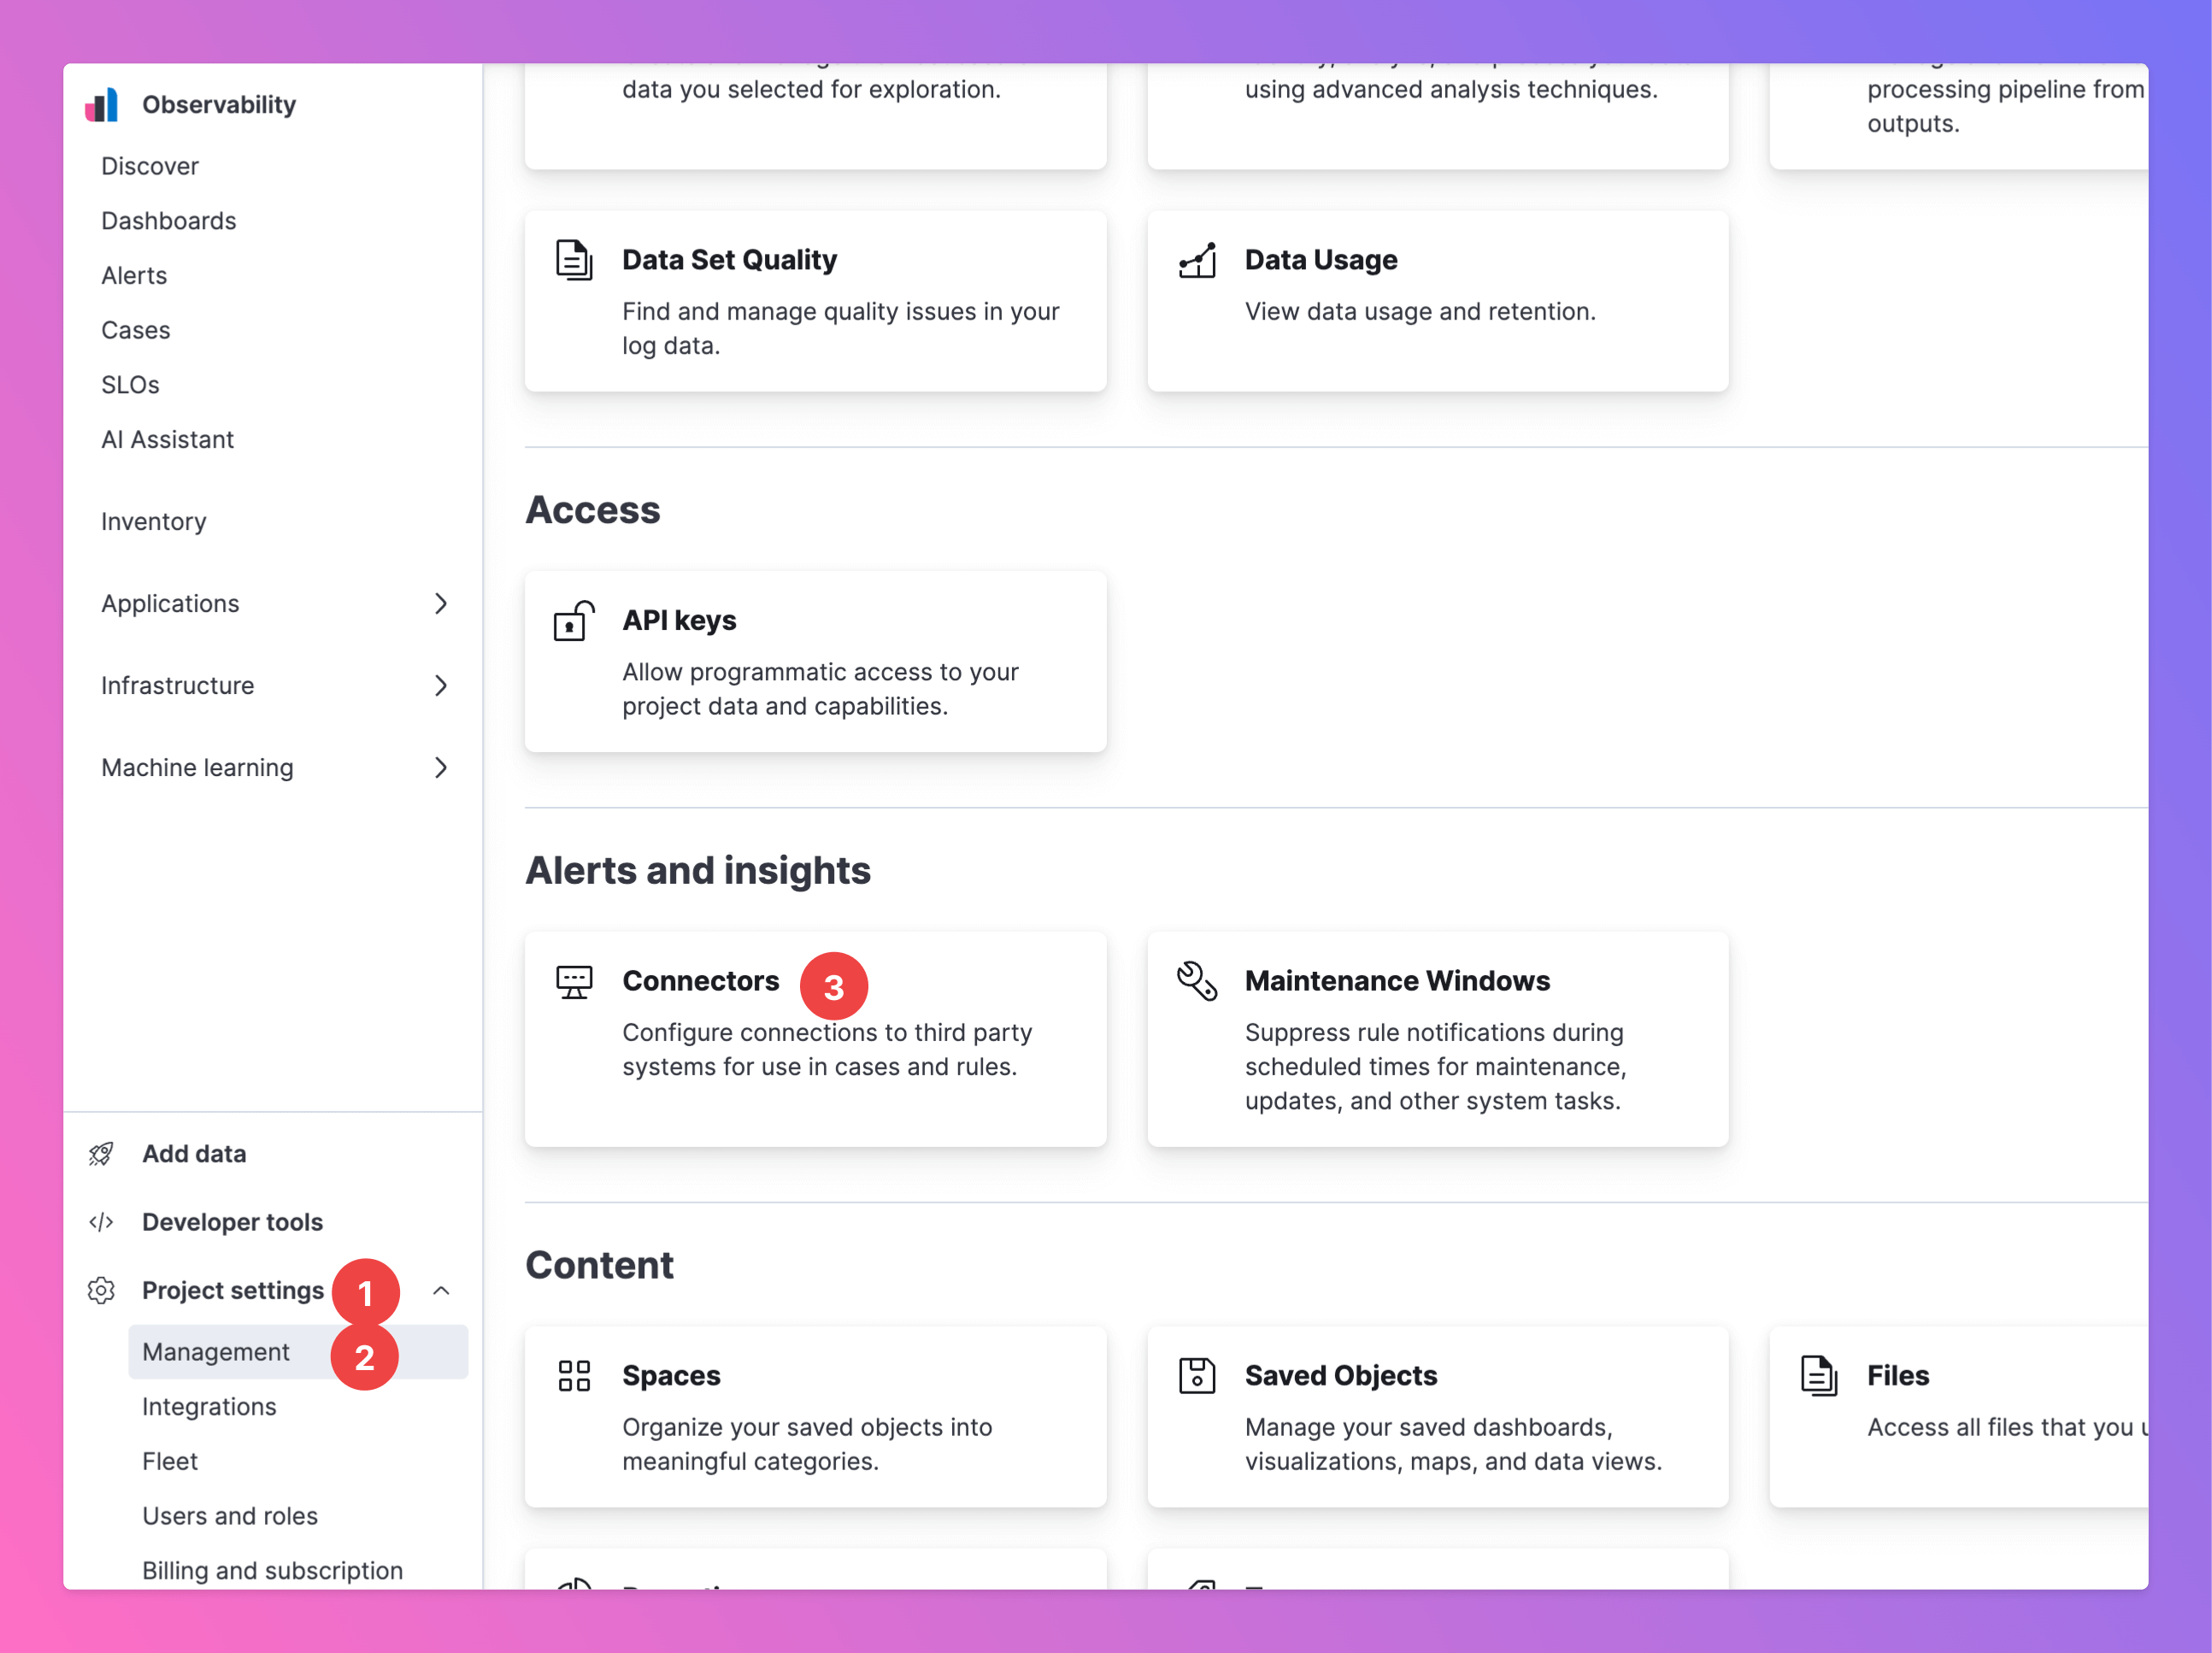
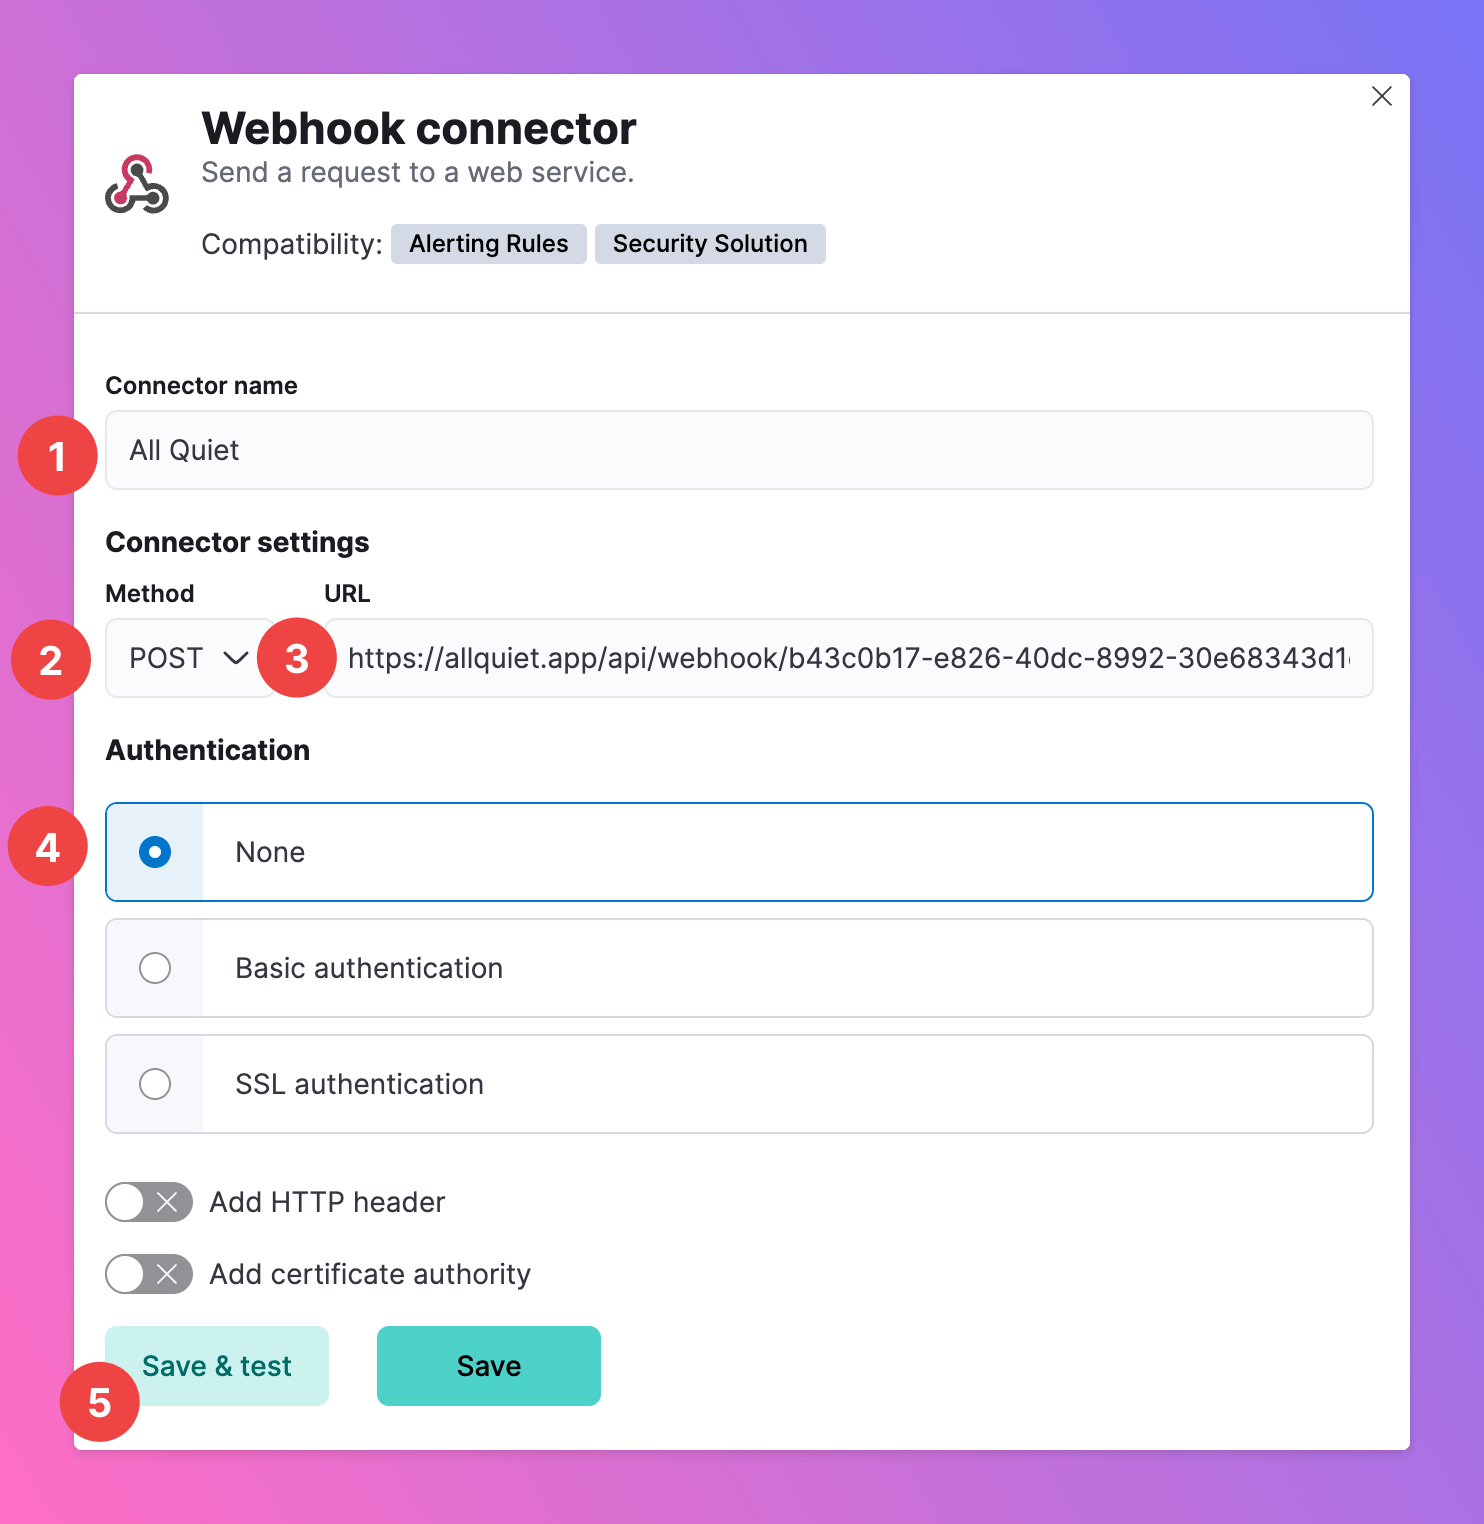
Create Connector
To send alerts to All Quiet, you first need to create a connection with All Quiet. Here’s how:- Click on
Project settings. - Then, select
Management. - In the Management section, select
Connectors.
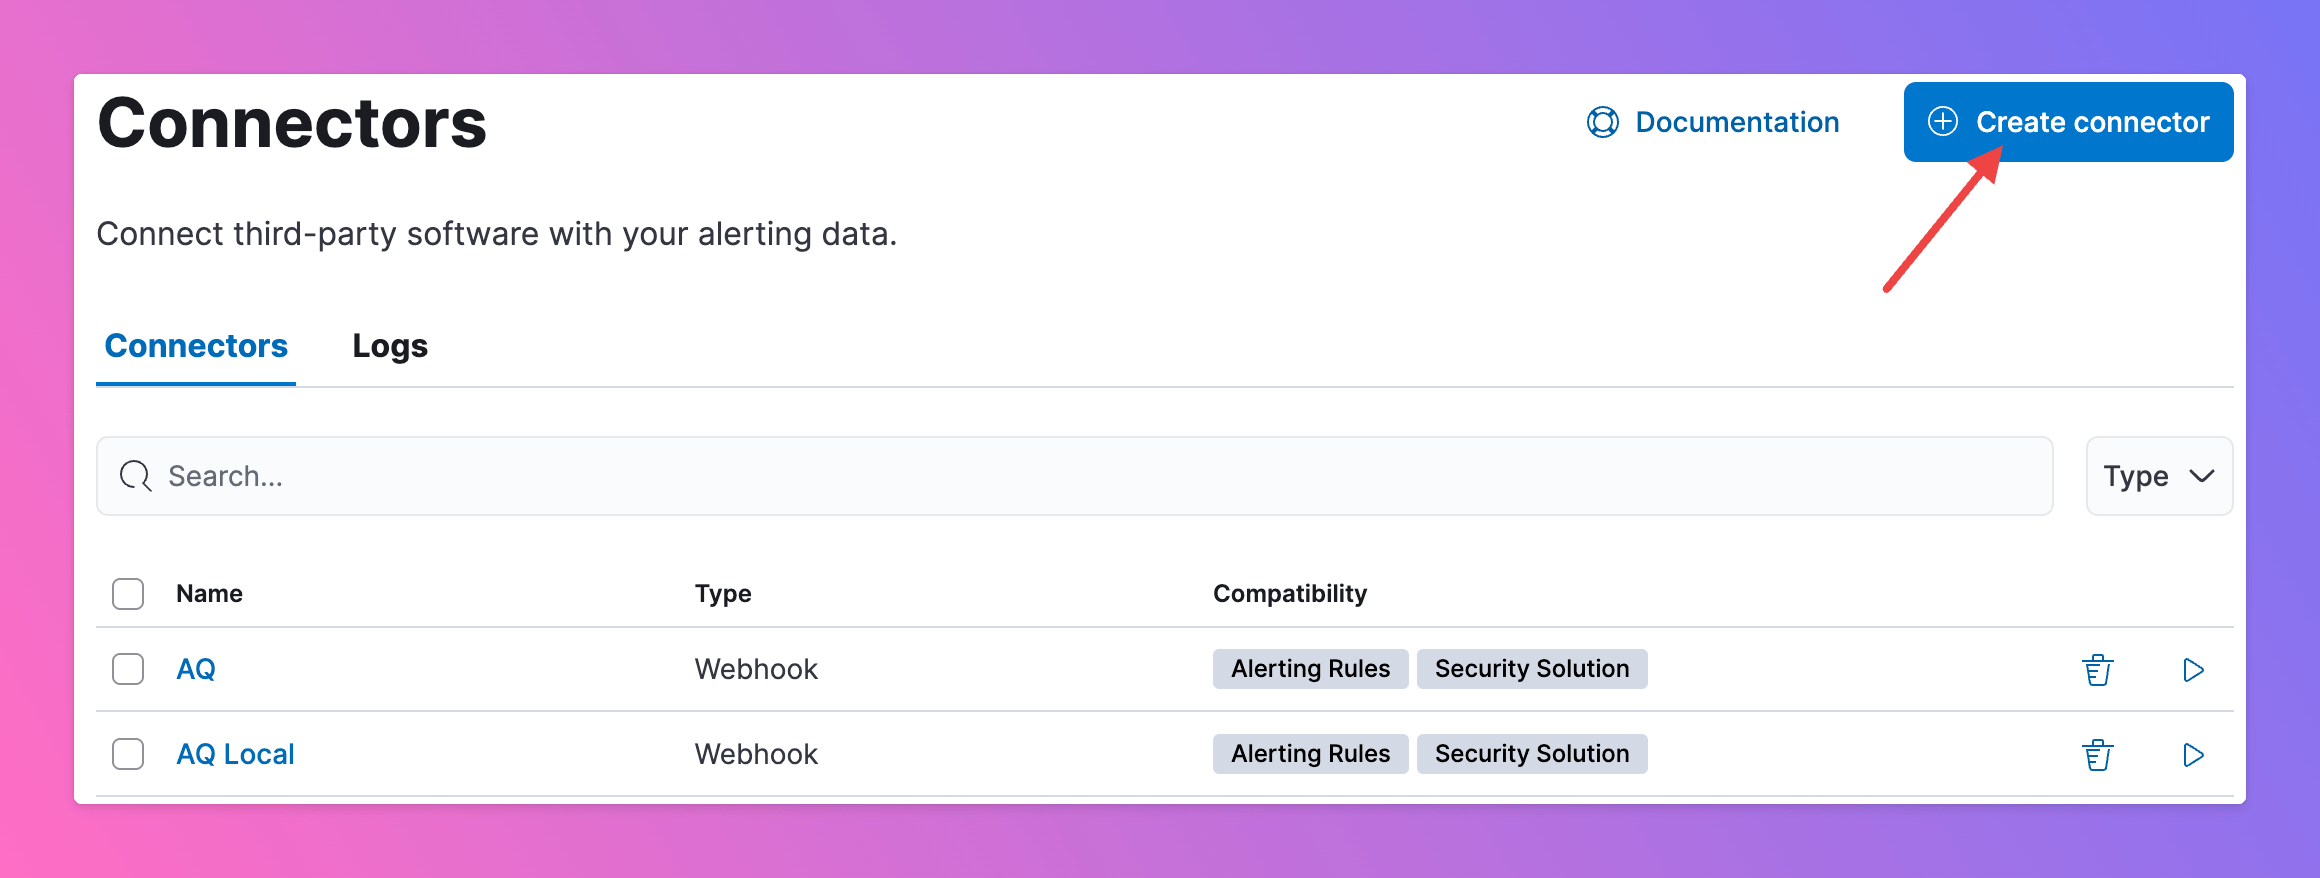
Create connector.
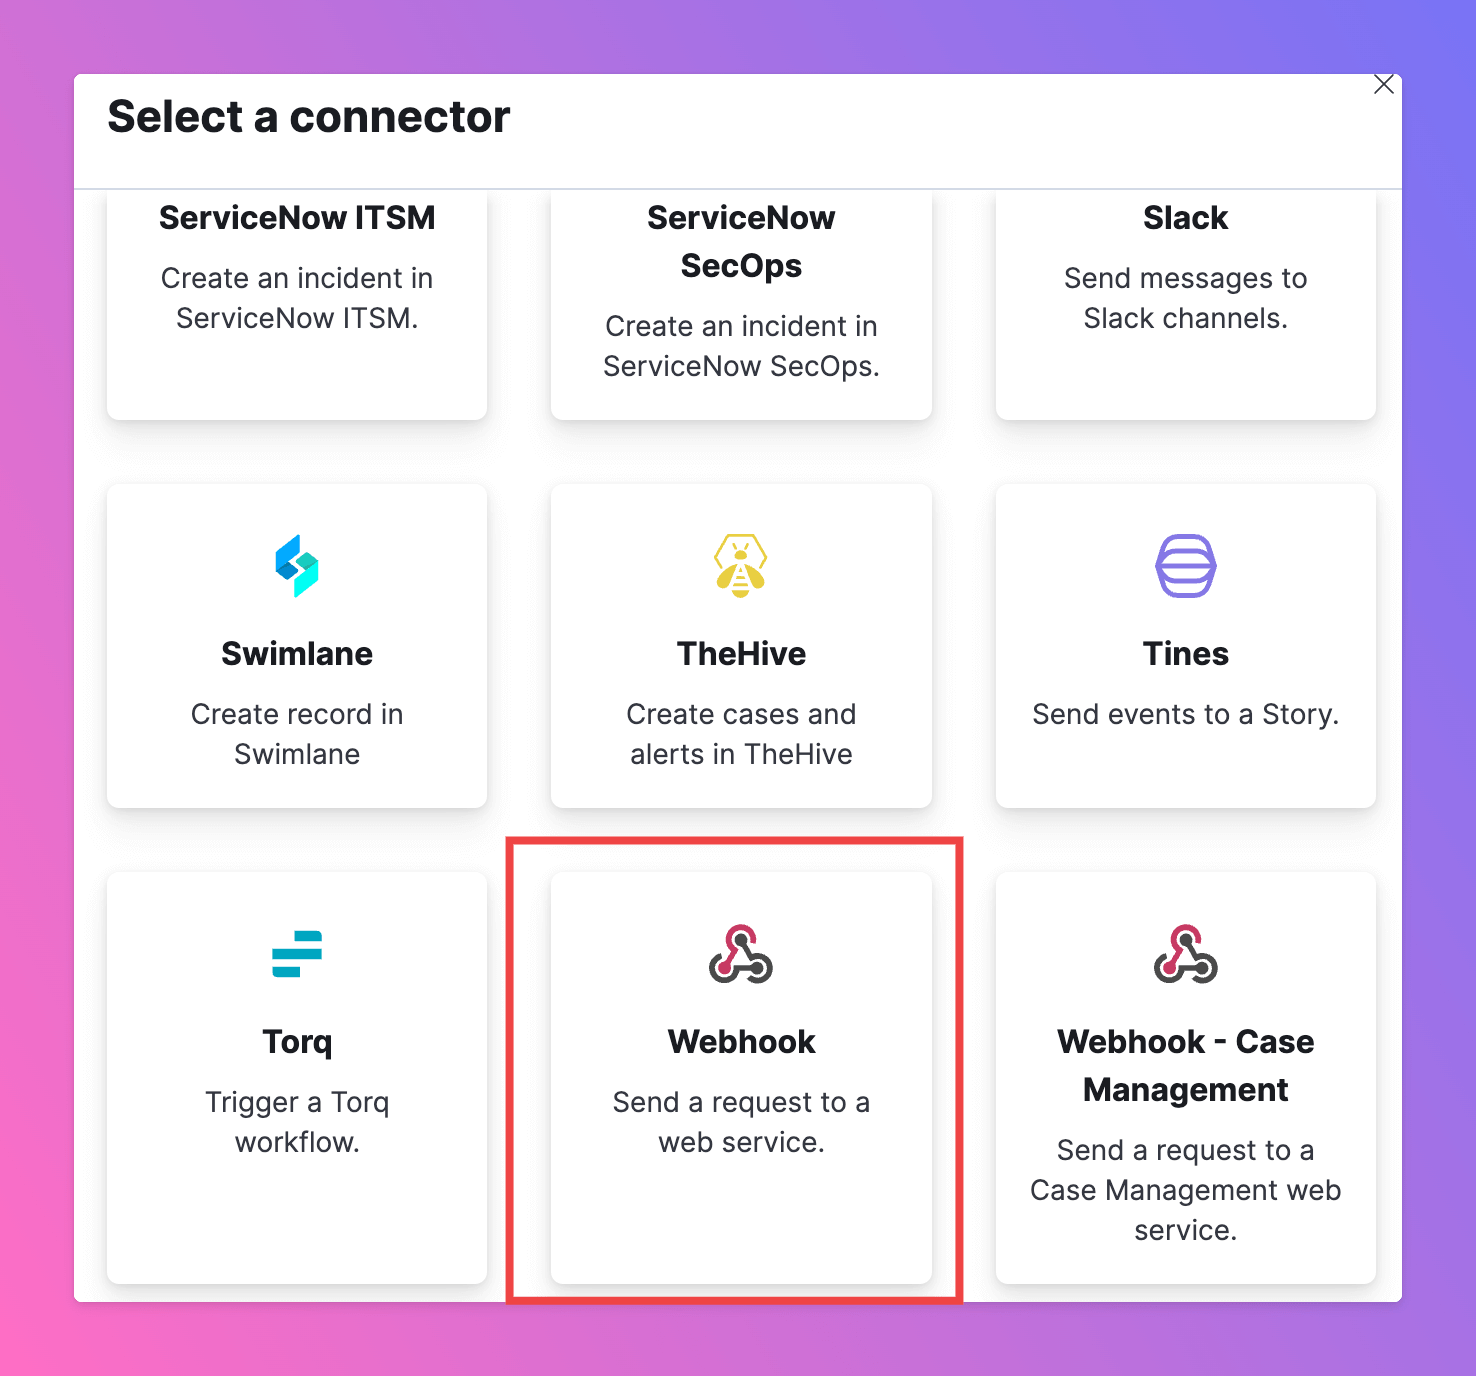
Webhook.
- Select a name, e.g.
All Quiet - As Method, select
Post. - As
URL, paste in the All Quiet Webhook URL you’ve obtained in step Get the All Quiet Webhook URL. - As authentication method, select
None. - Then, click
Save & Test. In the next step, we can check if the connection was successful.
- To test the connection, paste in the following body. You will also need it later when configuring rules for real alerts.
elastic-observability-payload
- Click
Run. - If the connection was establish, you will receive a sucess notification…
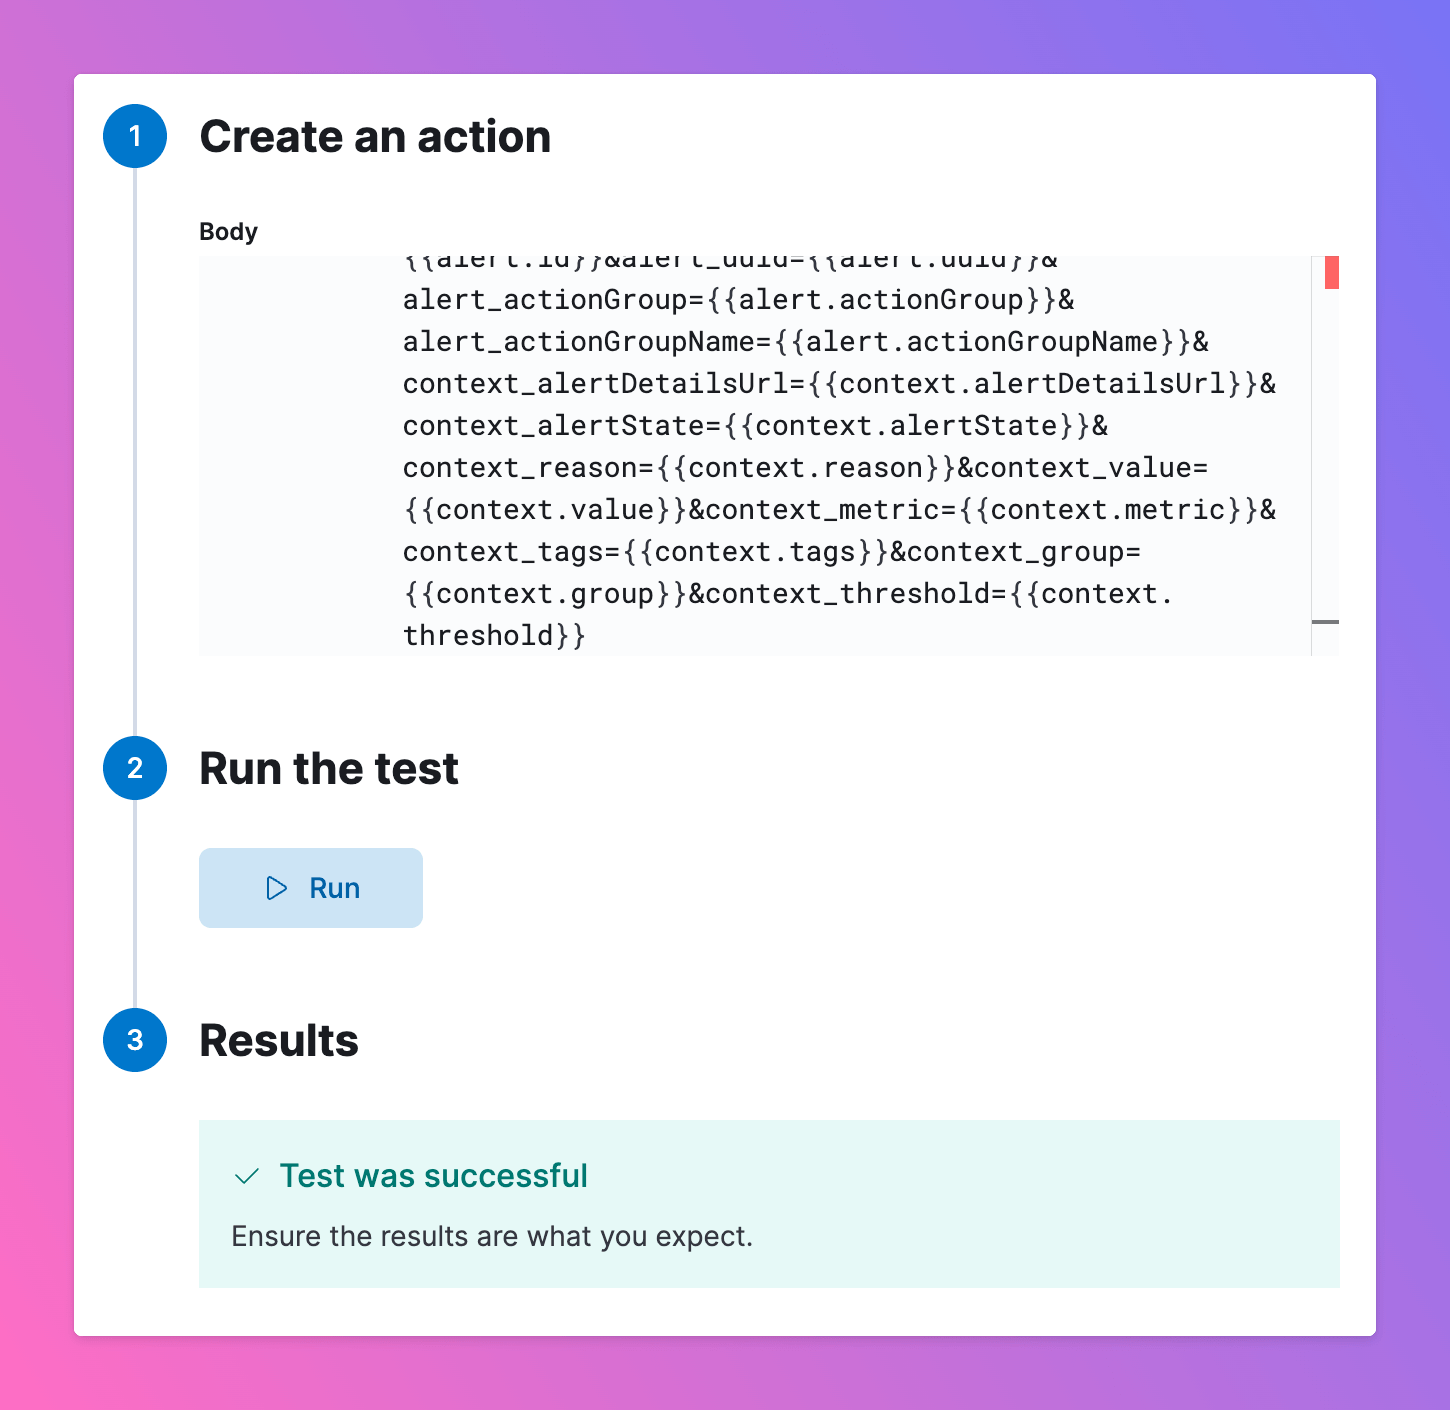
Please note since the’re no real data to fill the body, you will only see the variable names in this case.
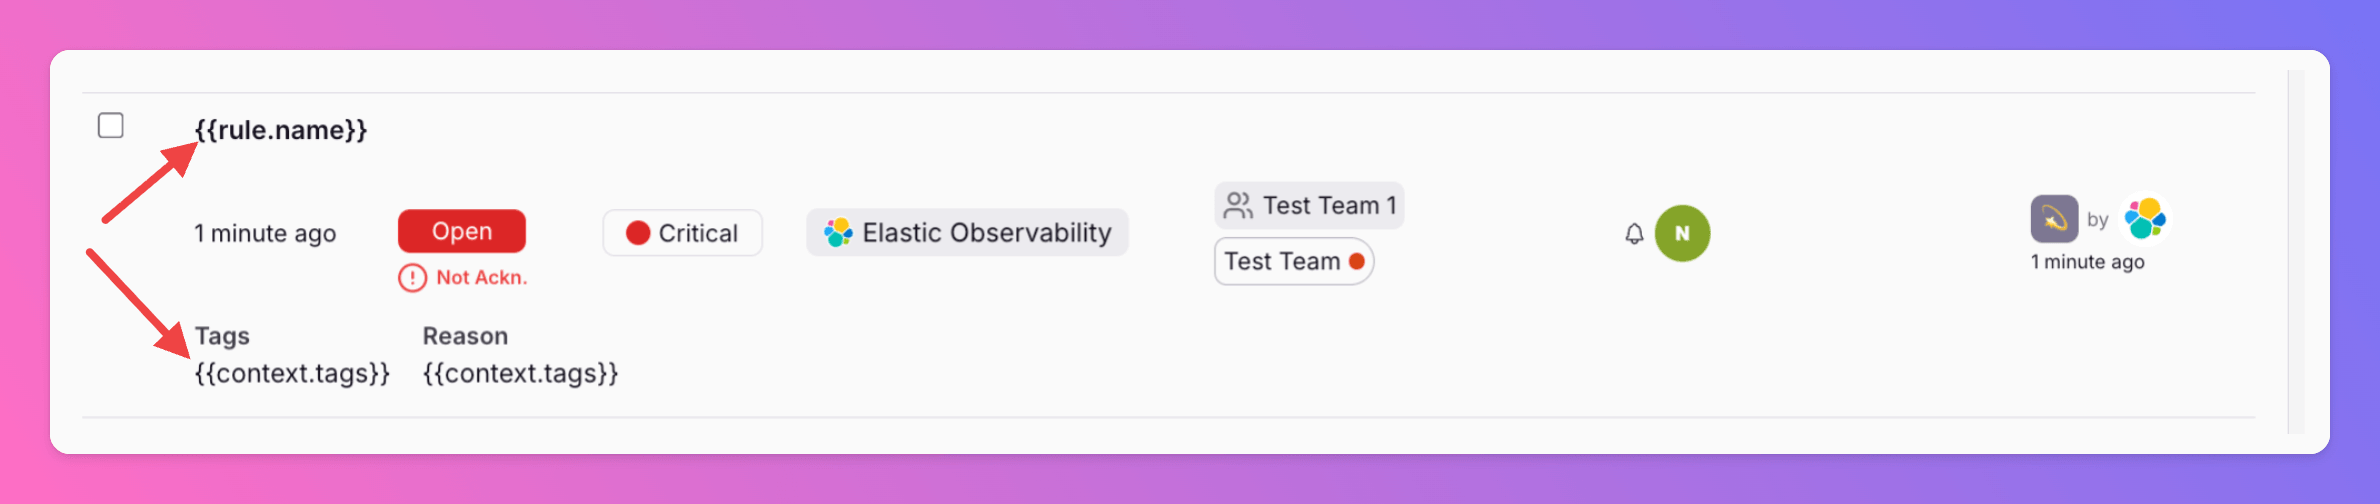
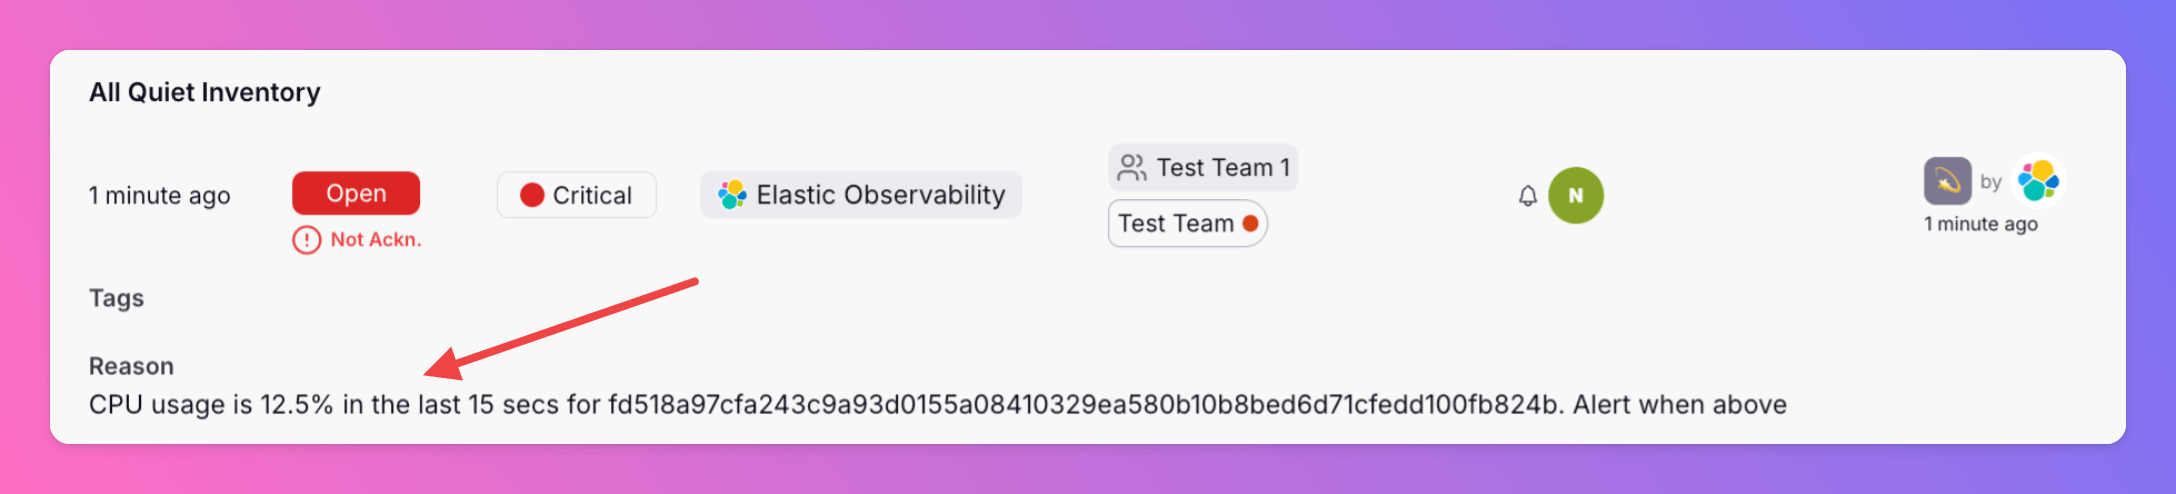
Create All Quiet Incidents From Elastic Observability Alerts
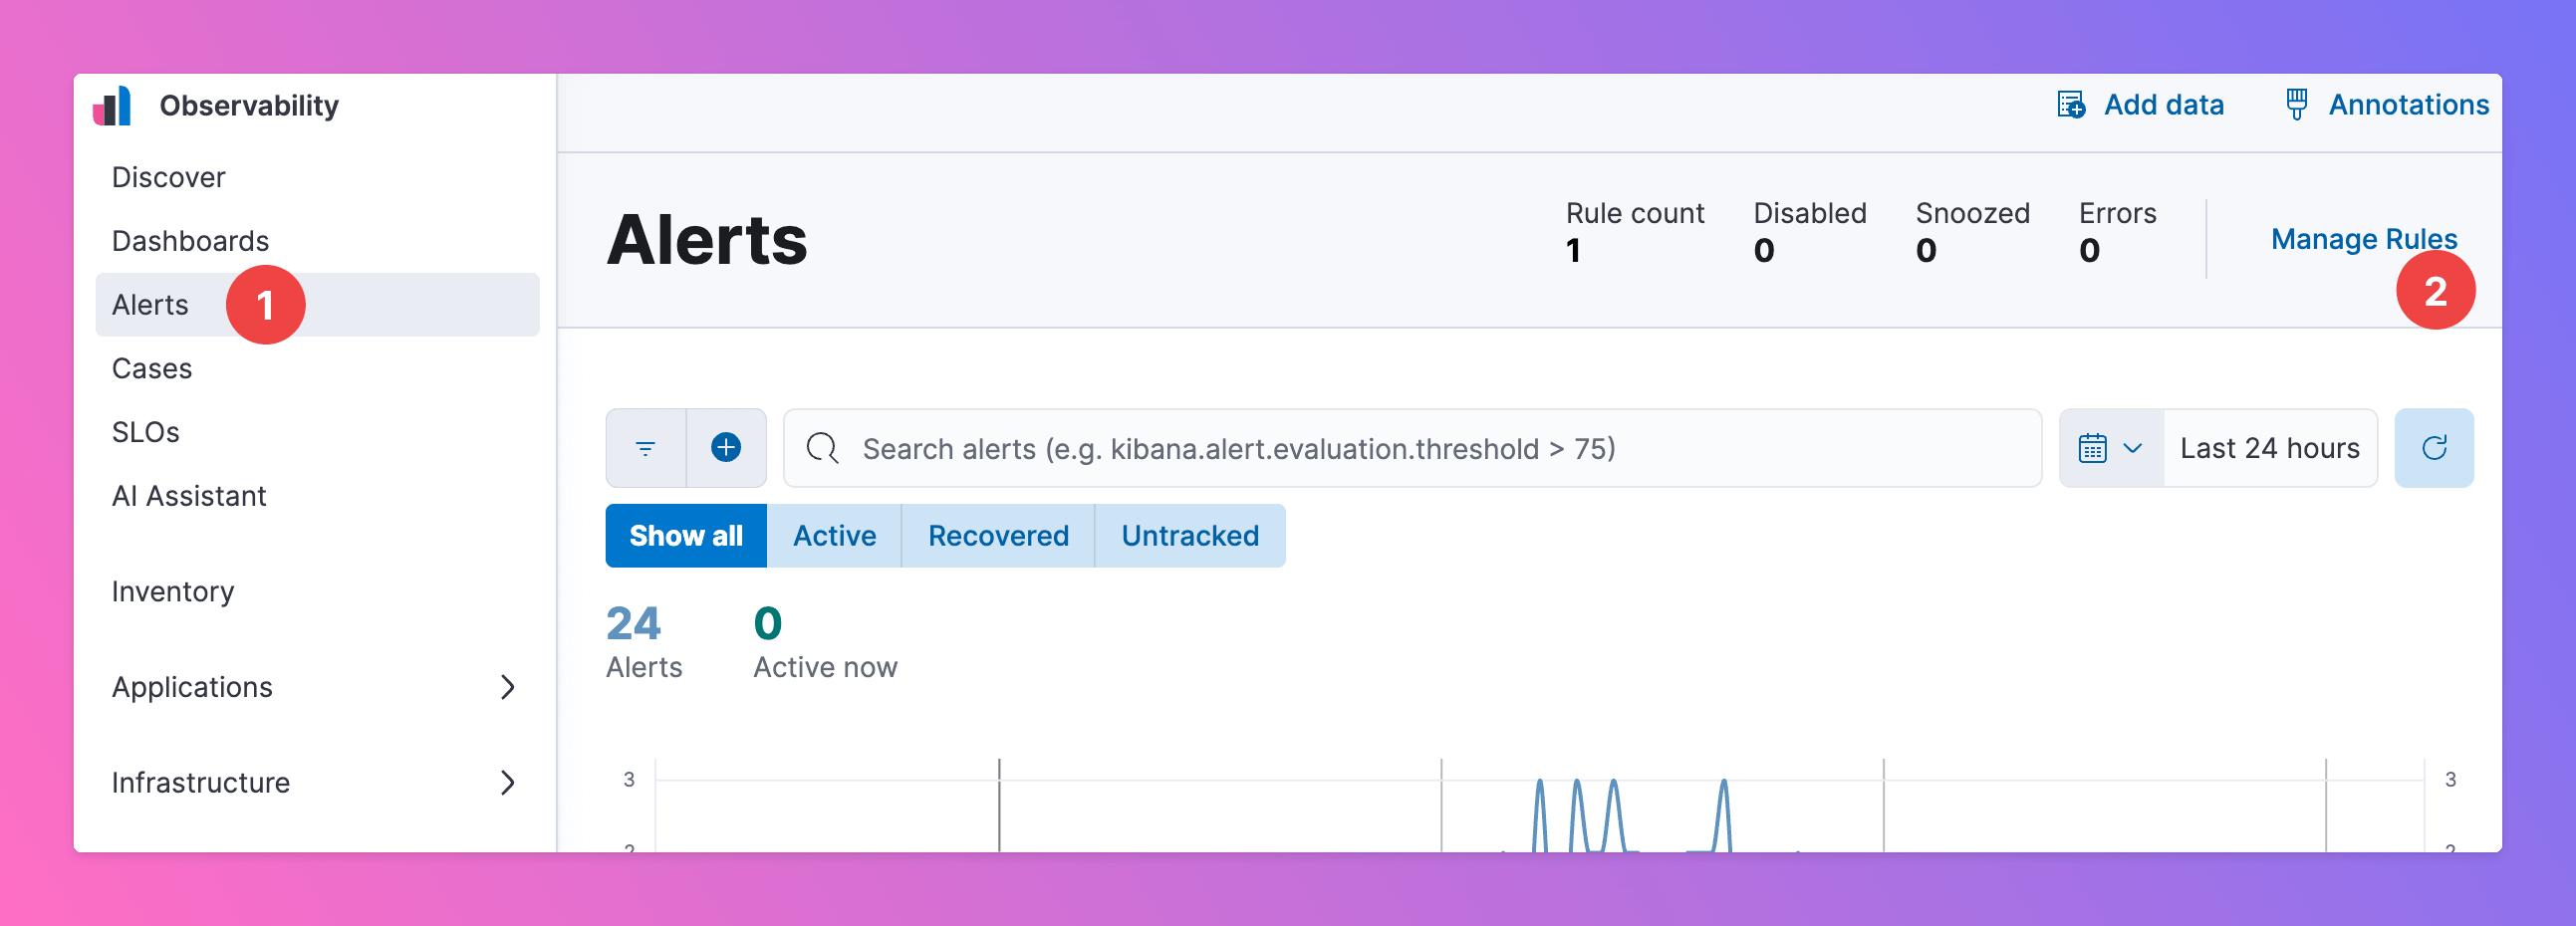
Now, we want to use the connector we just created to send real alerts to All Quiet. In the following, you can find an example how to set up an alerting rule for an incident in All Quiet. You can use your All Quiet connector for all your alerting rules in your Elastic Observability project and forward incidents to All Quiet.- First, Select
Alerts. - Click
Manage Rules.
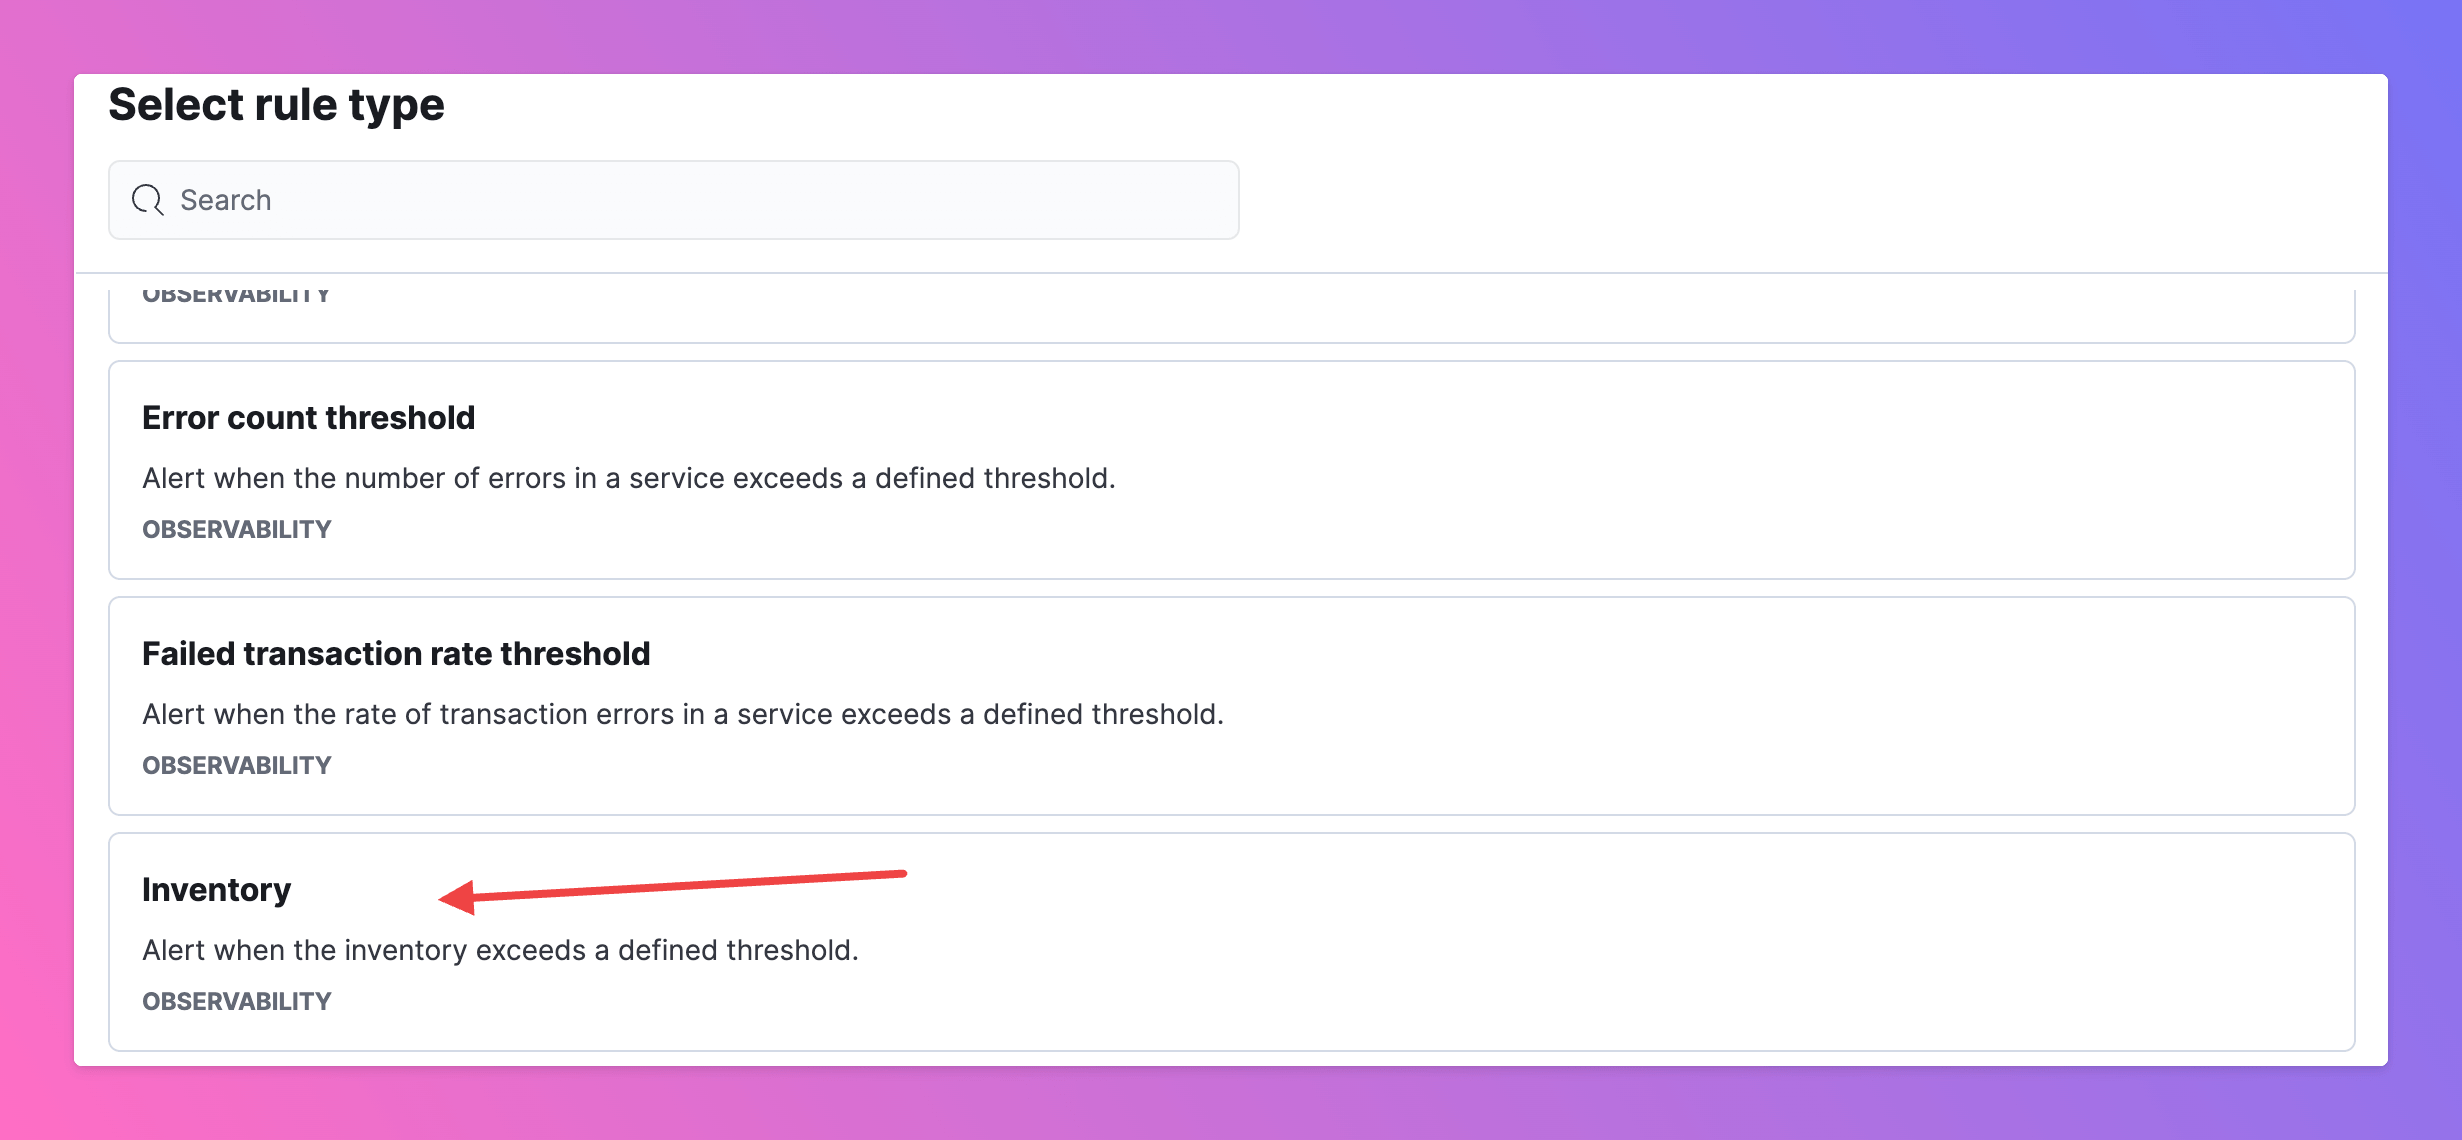
Inventory.
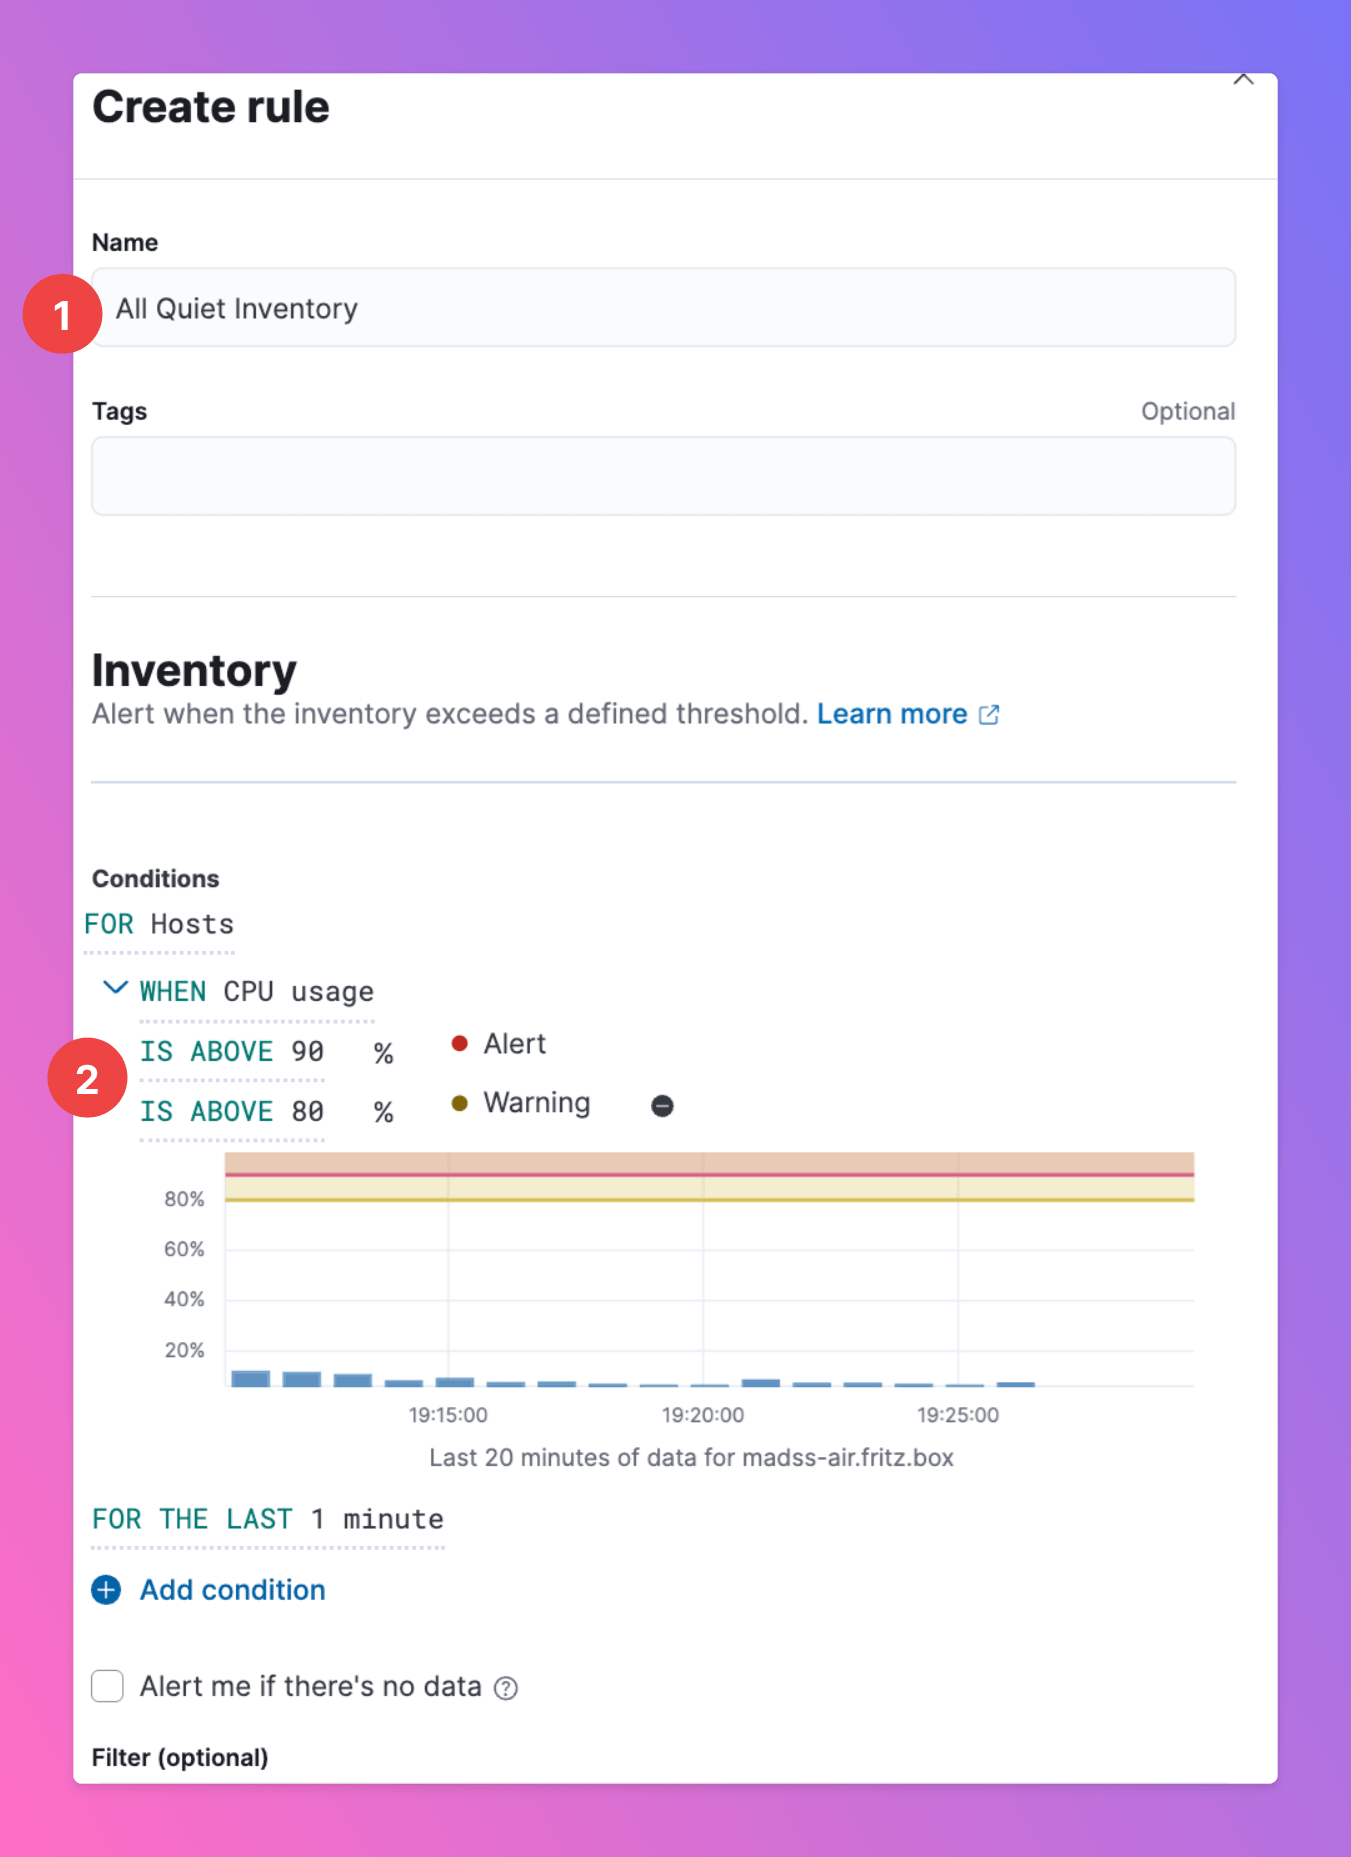
- Enter a
Nameand, optionallyTags. Note tha based on our pre-configured default mapping, this info will also be visible in All Quiet after an incident is created. - Select the conditions that trigger the rule. For “rule type”
Inventory, you can add aWarningThreshold. By default, these alerts will trigger an All Quiet incident of severity “Warning”, whyAlertwill trigger an incident withCriticalseverity.
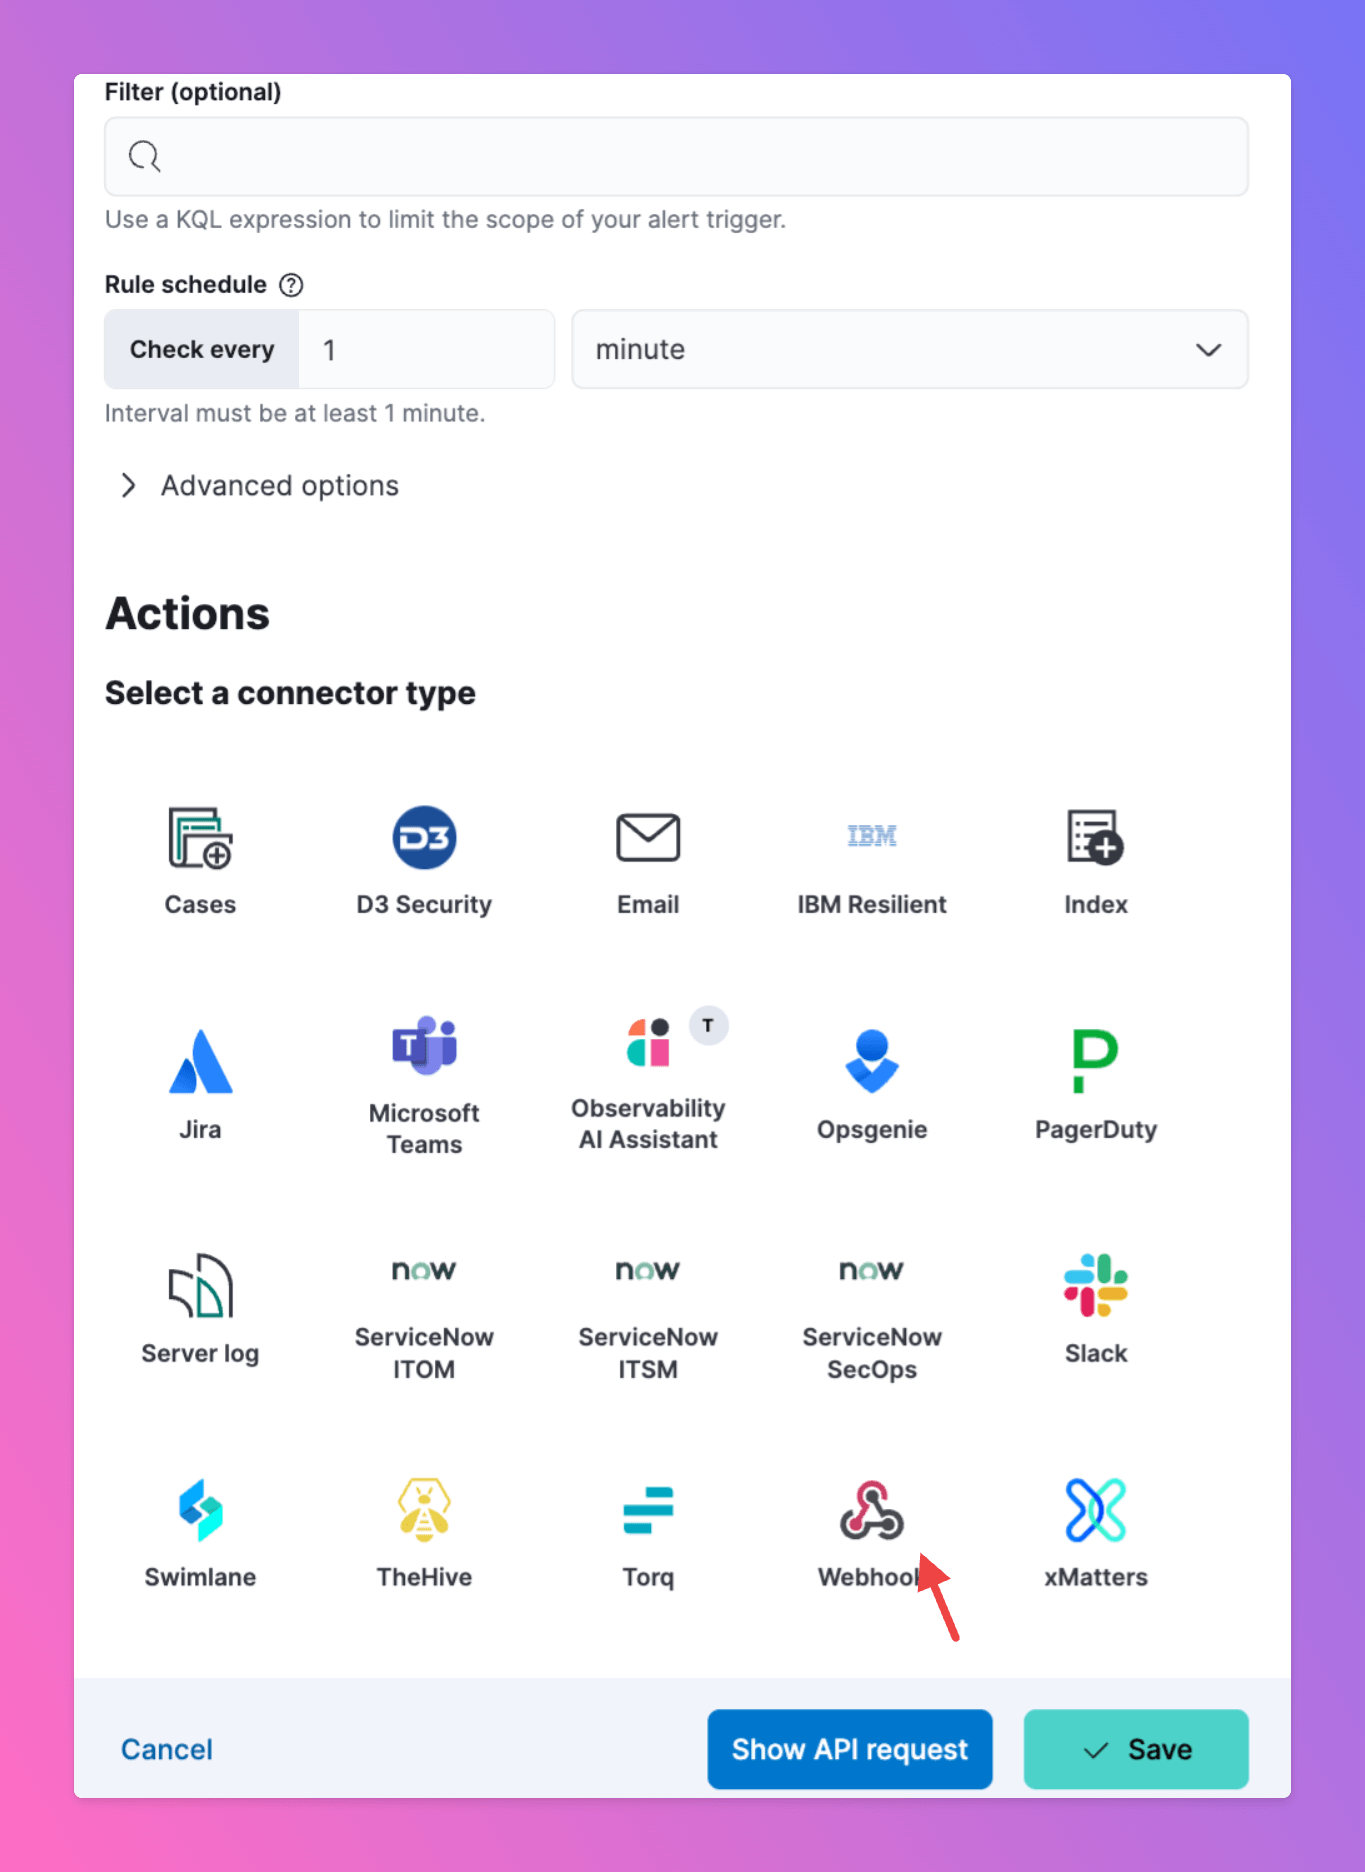
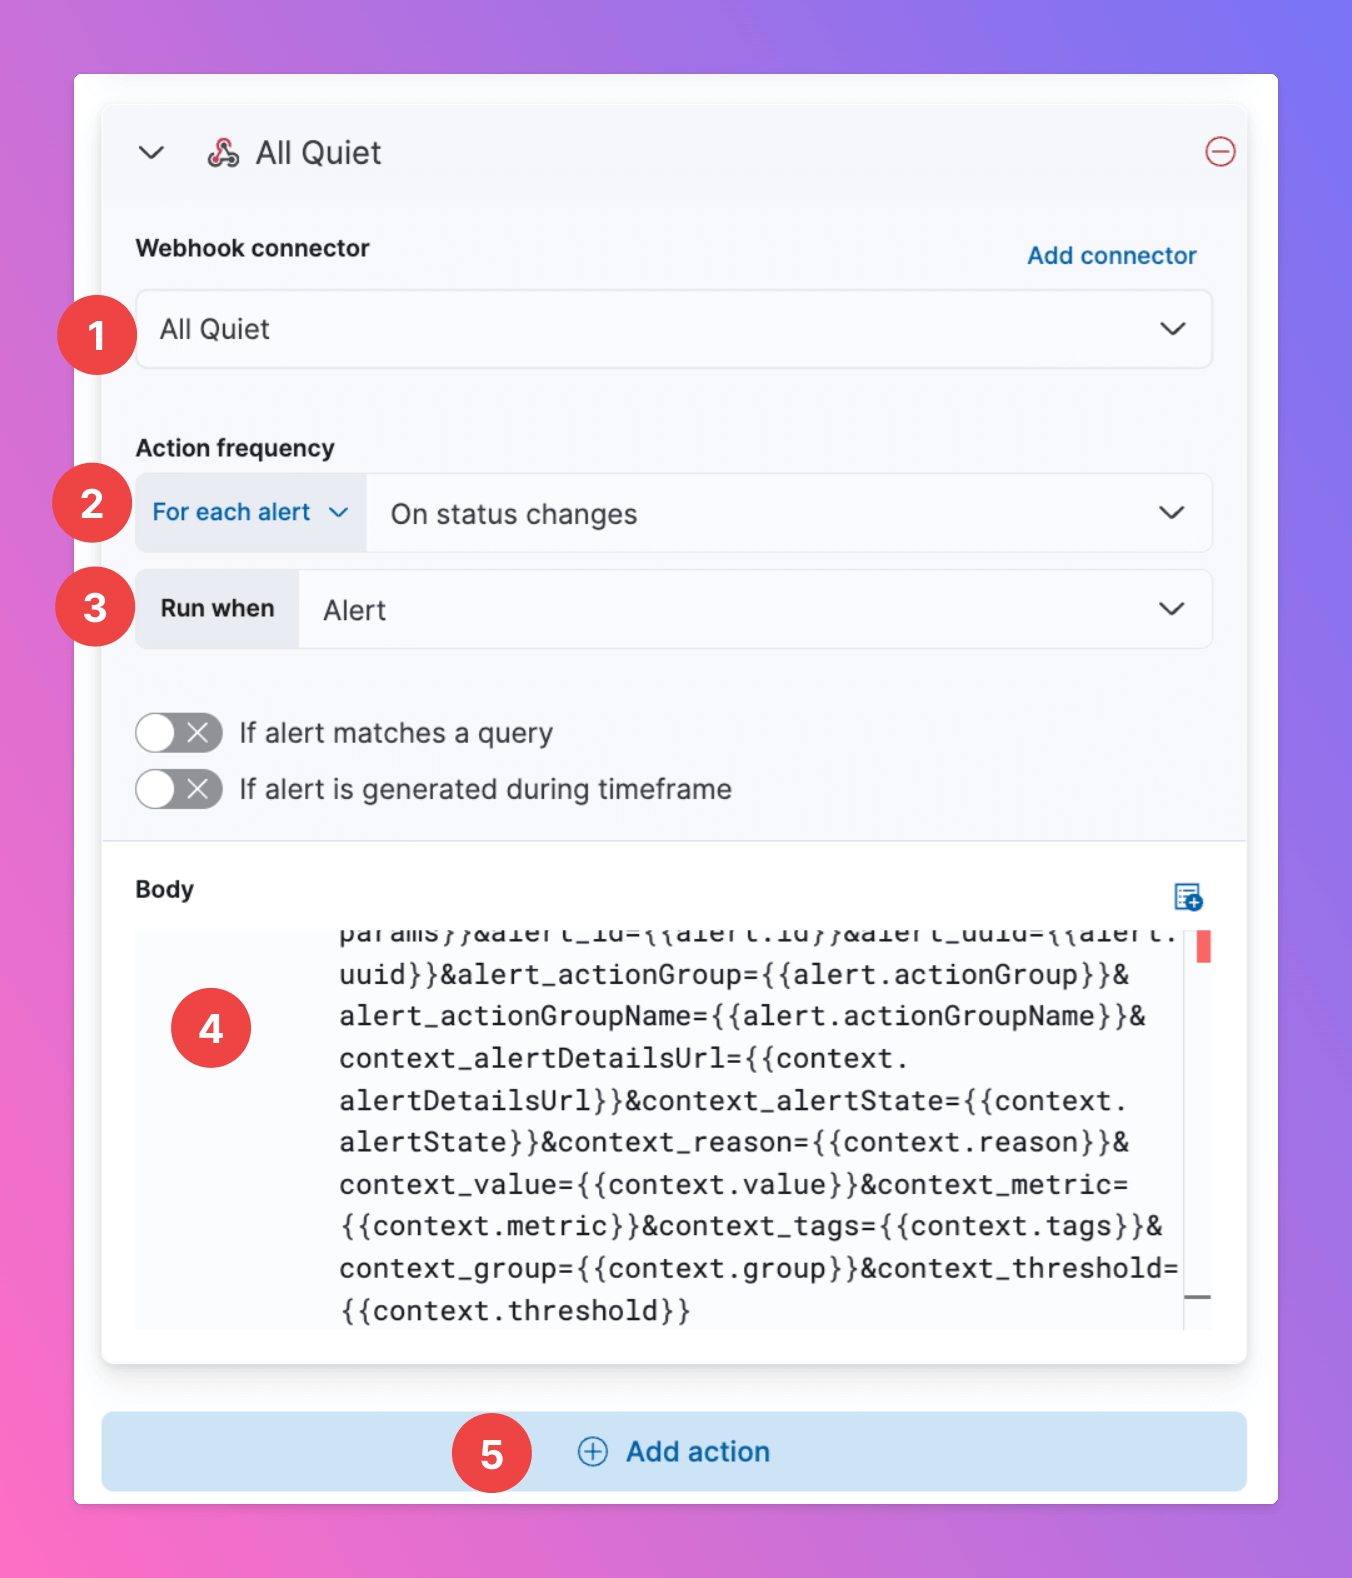
- Select the All Quiet Webhook connector you set up earlier.
- We recommend setting Action frequency to “For each alert” and “On status changes”. This means that the webhook will be triggered when the status is changed to the status selected in 3 and forward the new information to All Quiet.
- With this selection, the webhook is only triggered when the status changes to
Alert.Note that it will not be triggered if there’s a chance to another status (that’s why we added 5.) - Paste in this same
Bodyto send a payload that works in All Quiet.
elastic-observability-payload.json
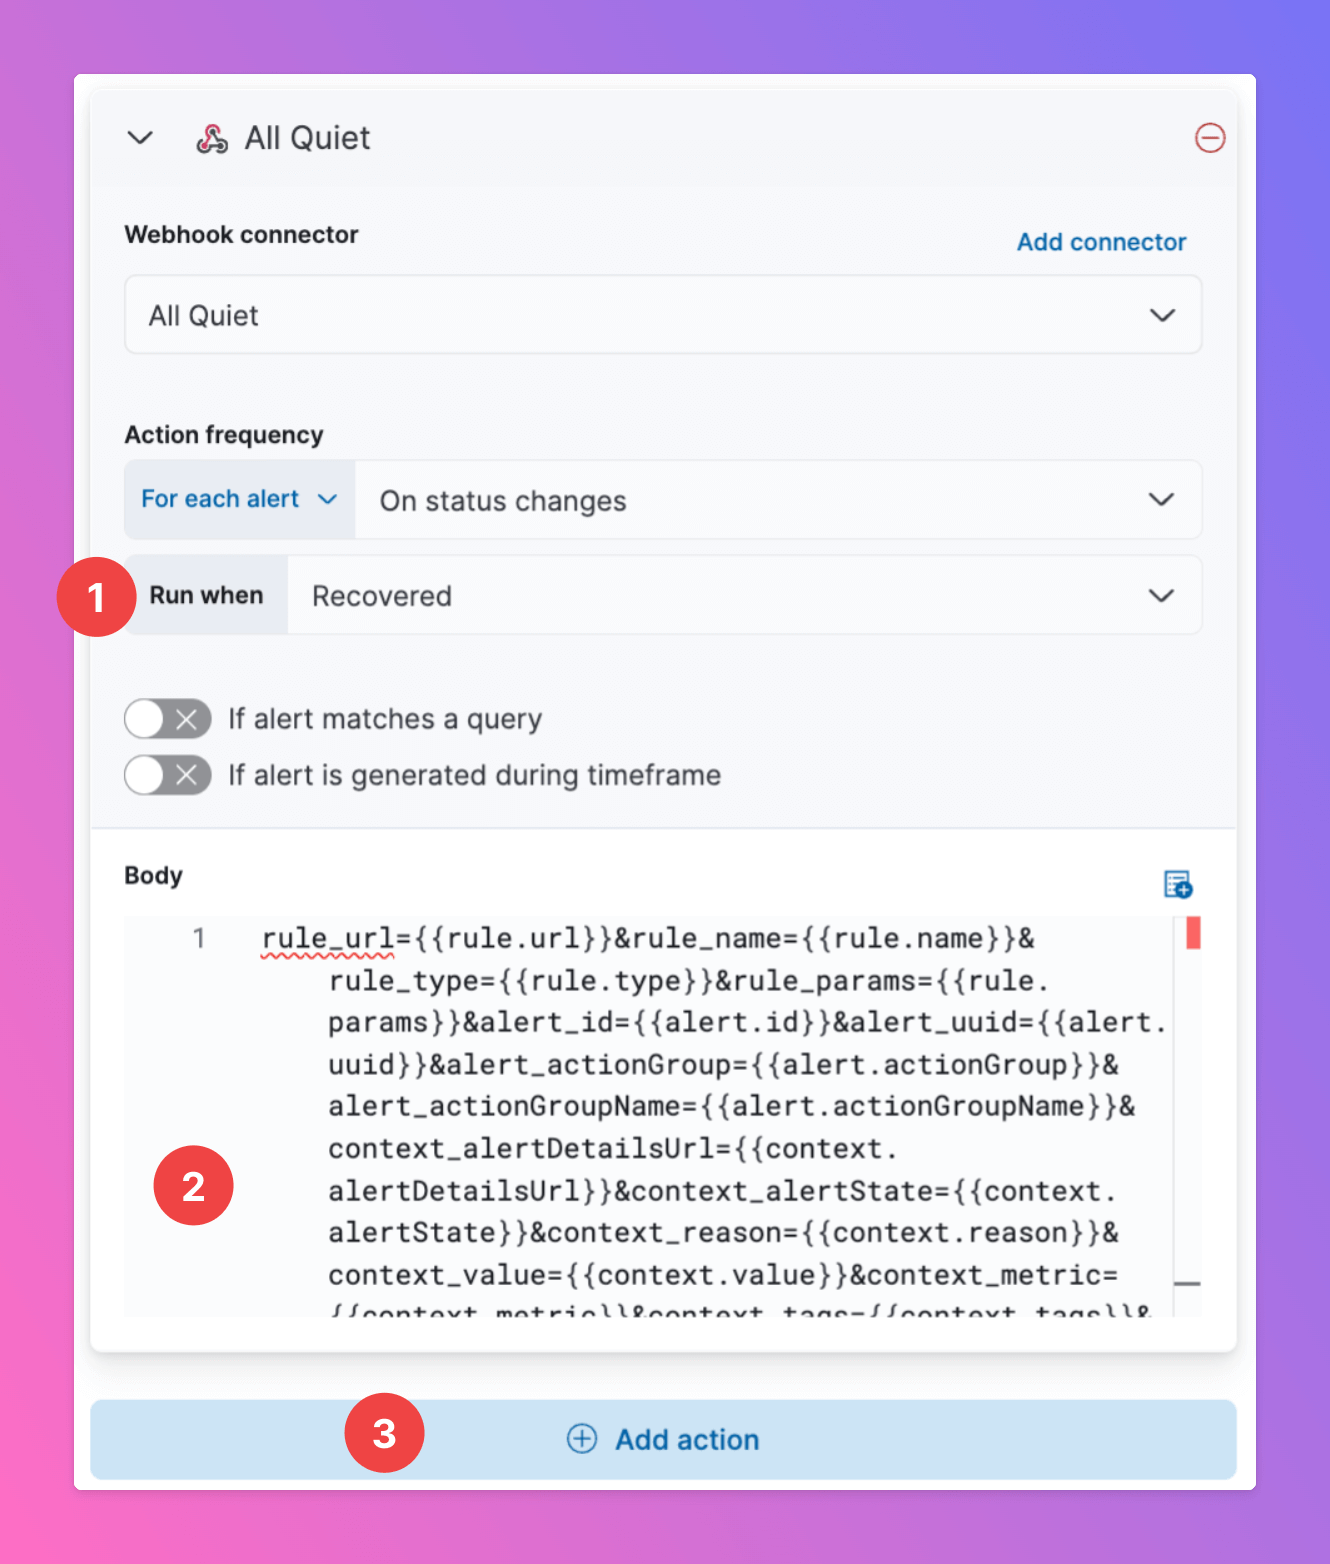
- As we also want to be updated when the status changes to
WarningorRecovered, we need to add 2 more actions in this case.
- Set up the same action as before, but change the status that makes it run, here
Recovered. - Paste in the same body.
- Add a third action for
Warning(only if you added aWarningcondition earlier).
Rules.
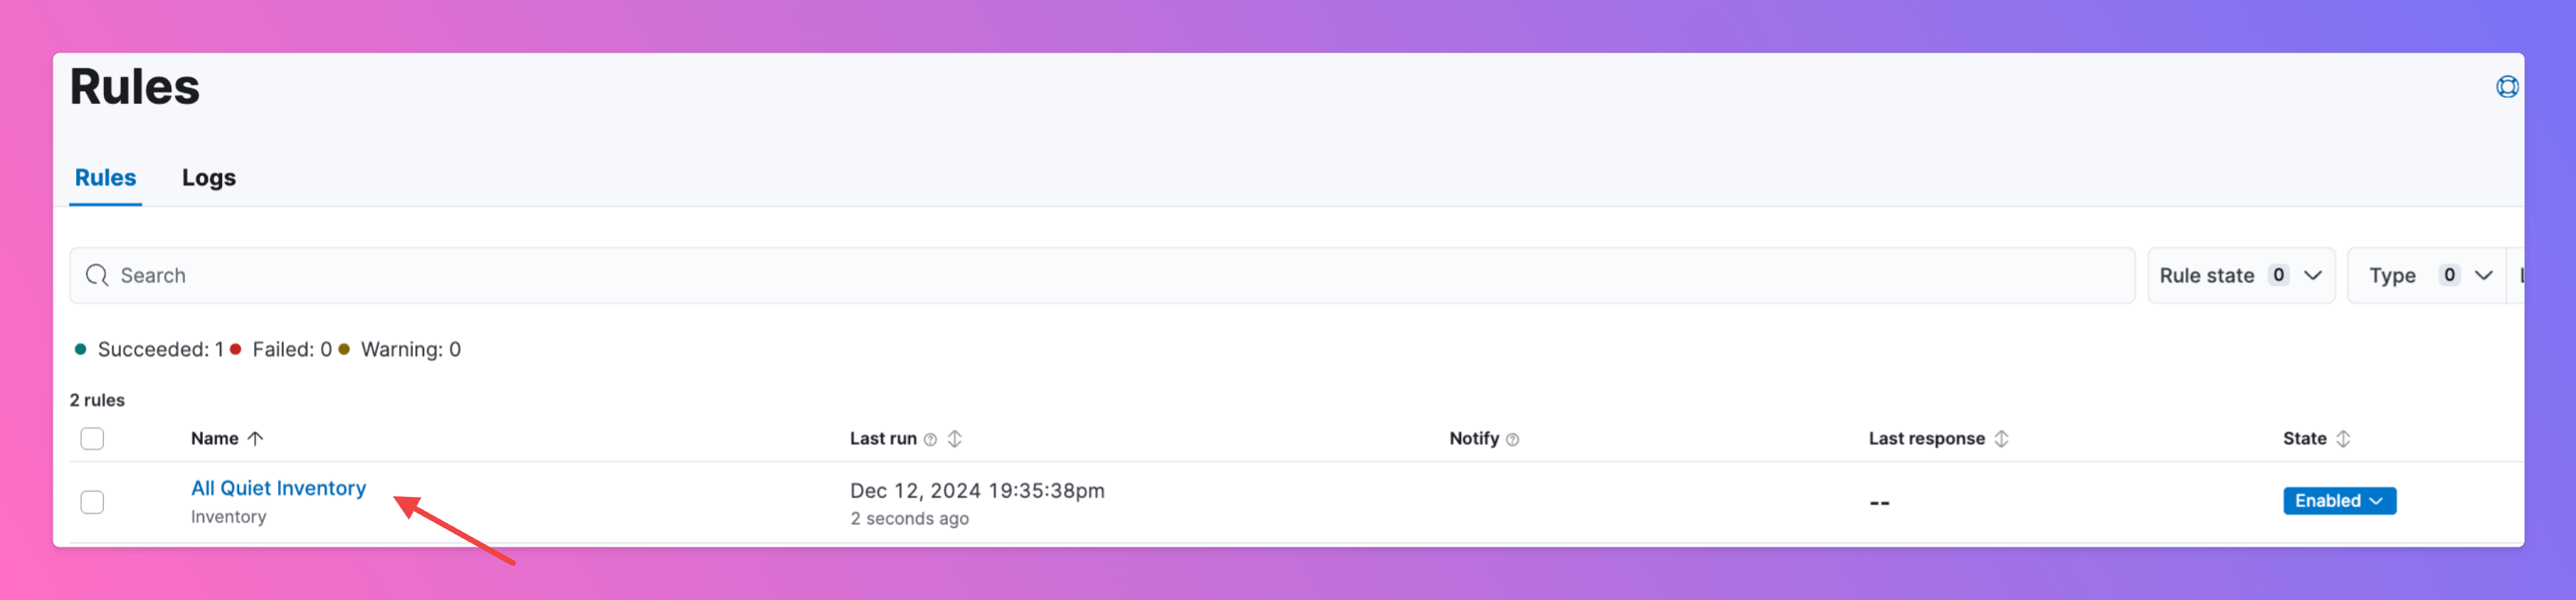
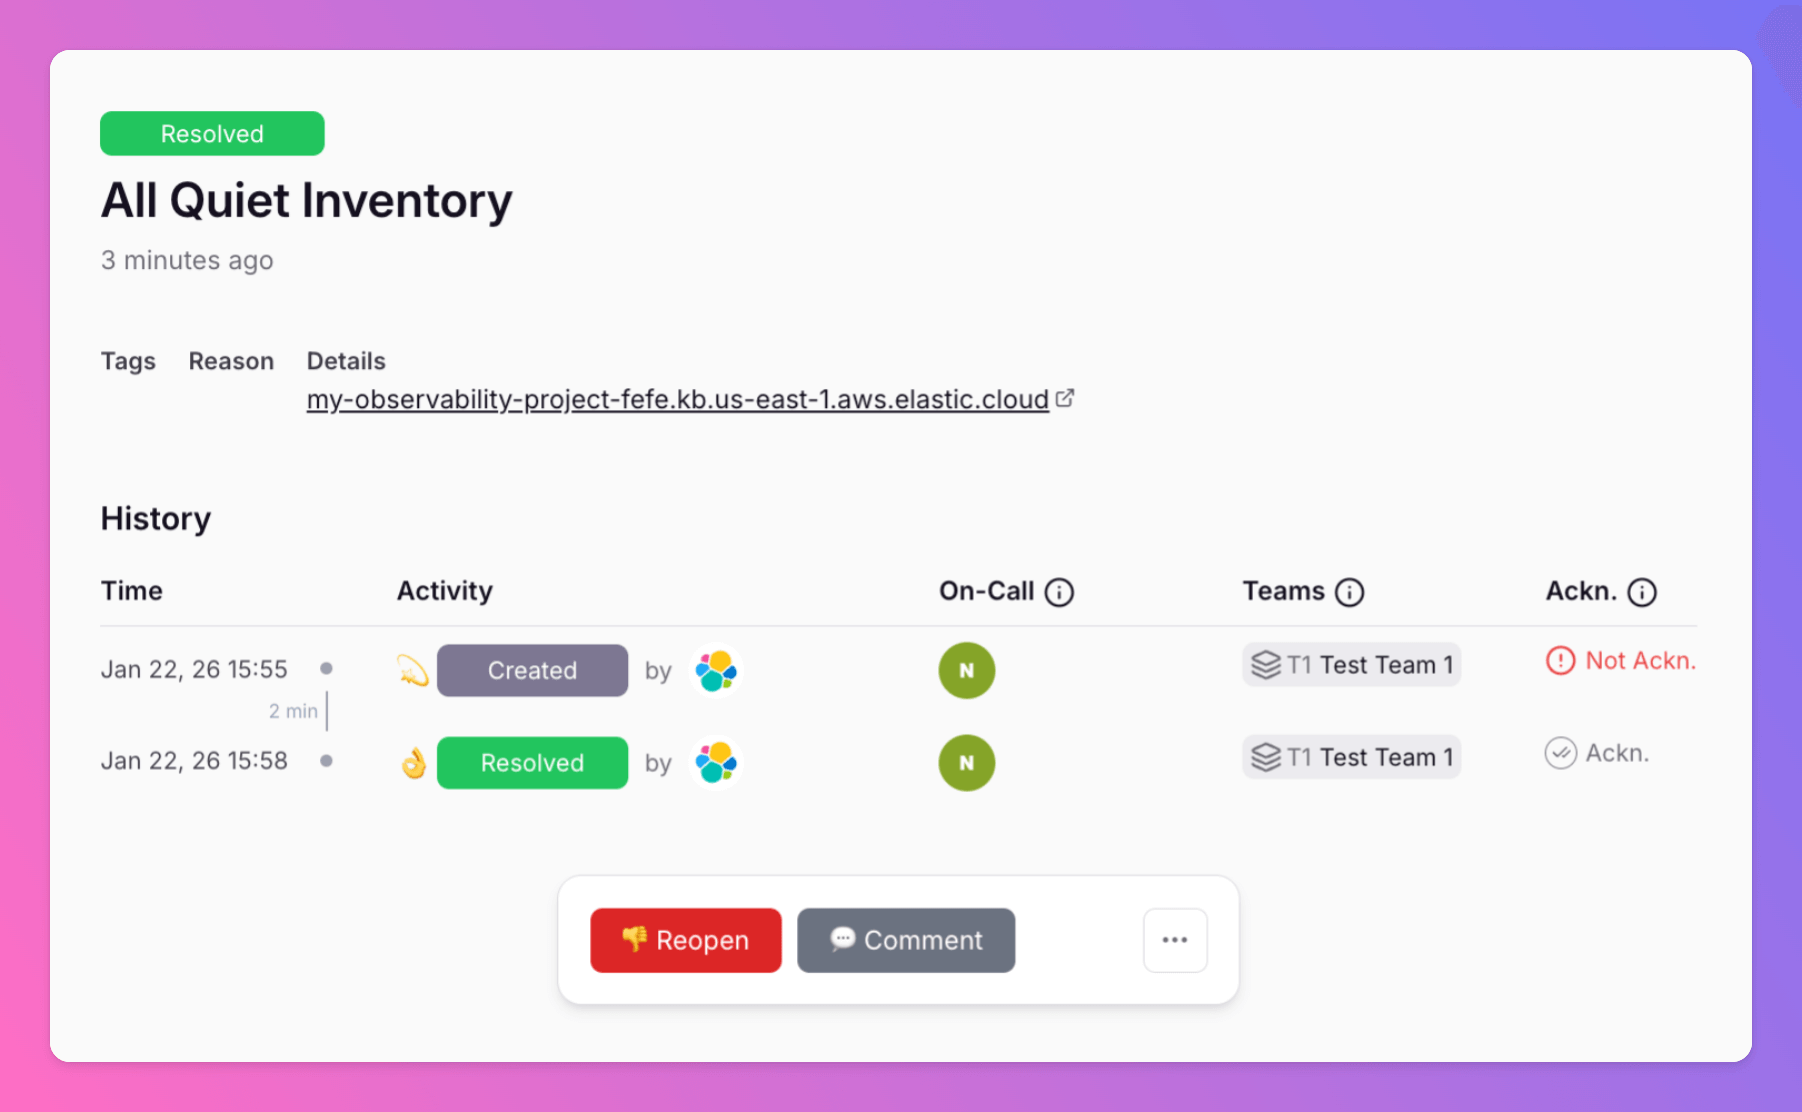
You have successfully connected All Quiet with your Elastic Observability project. Add the All Quiet connector as Action(s) to all your rules to forward all Alerts to All Quiet.
Recovered adding the extra action for recovered ensures the incident in All Quiet is also Resolved.