Connect Site24x7 to All Quiet
Integrate Site24x7 into All Quiet by using our custom integration.
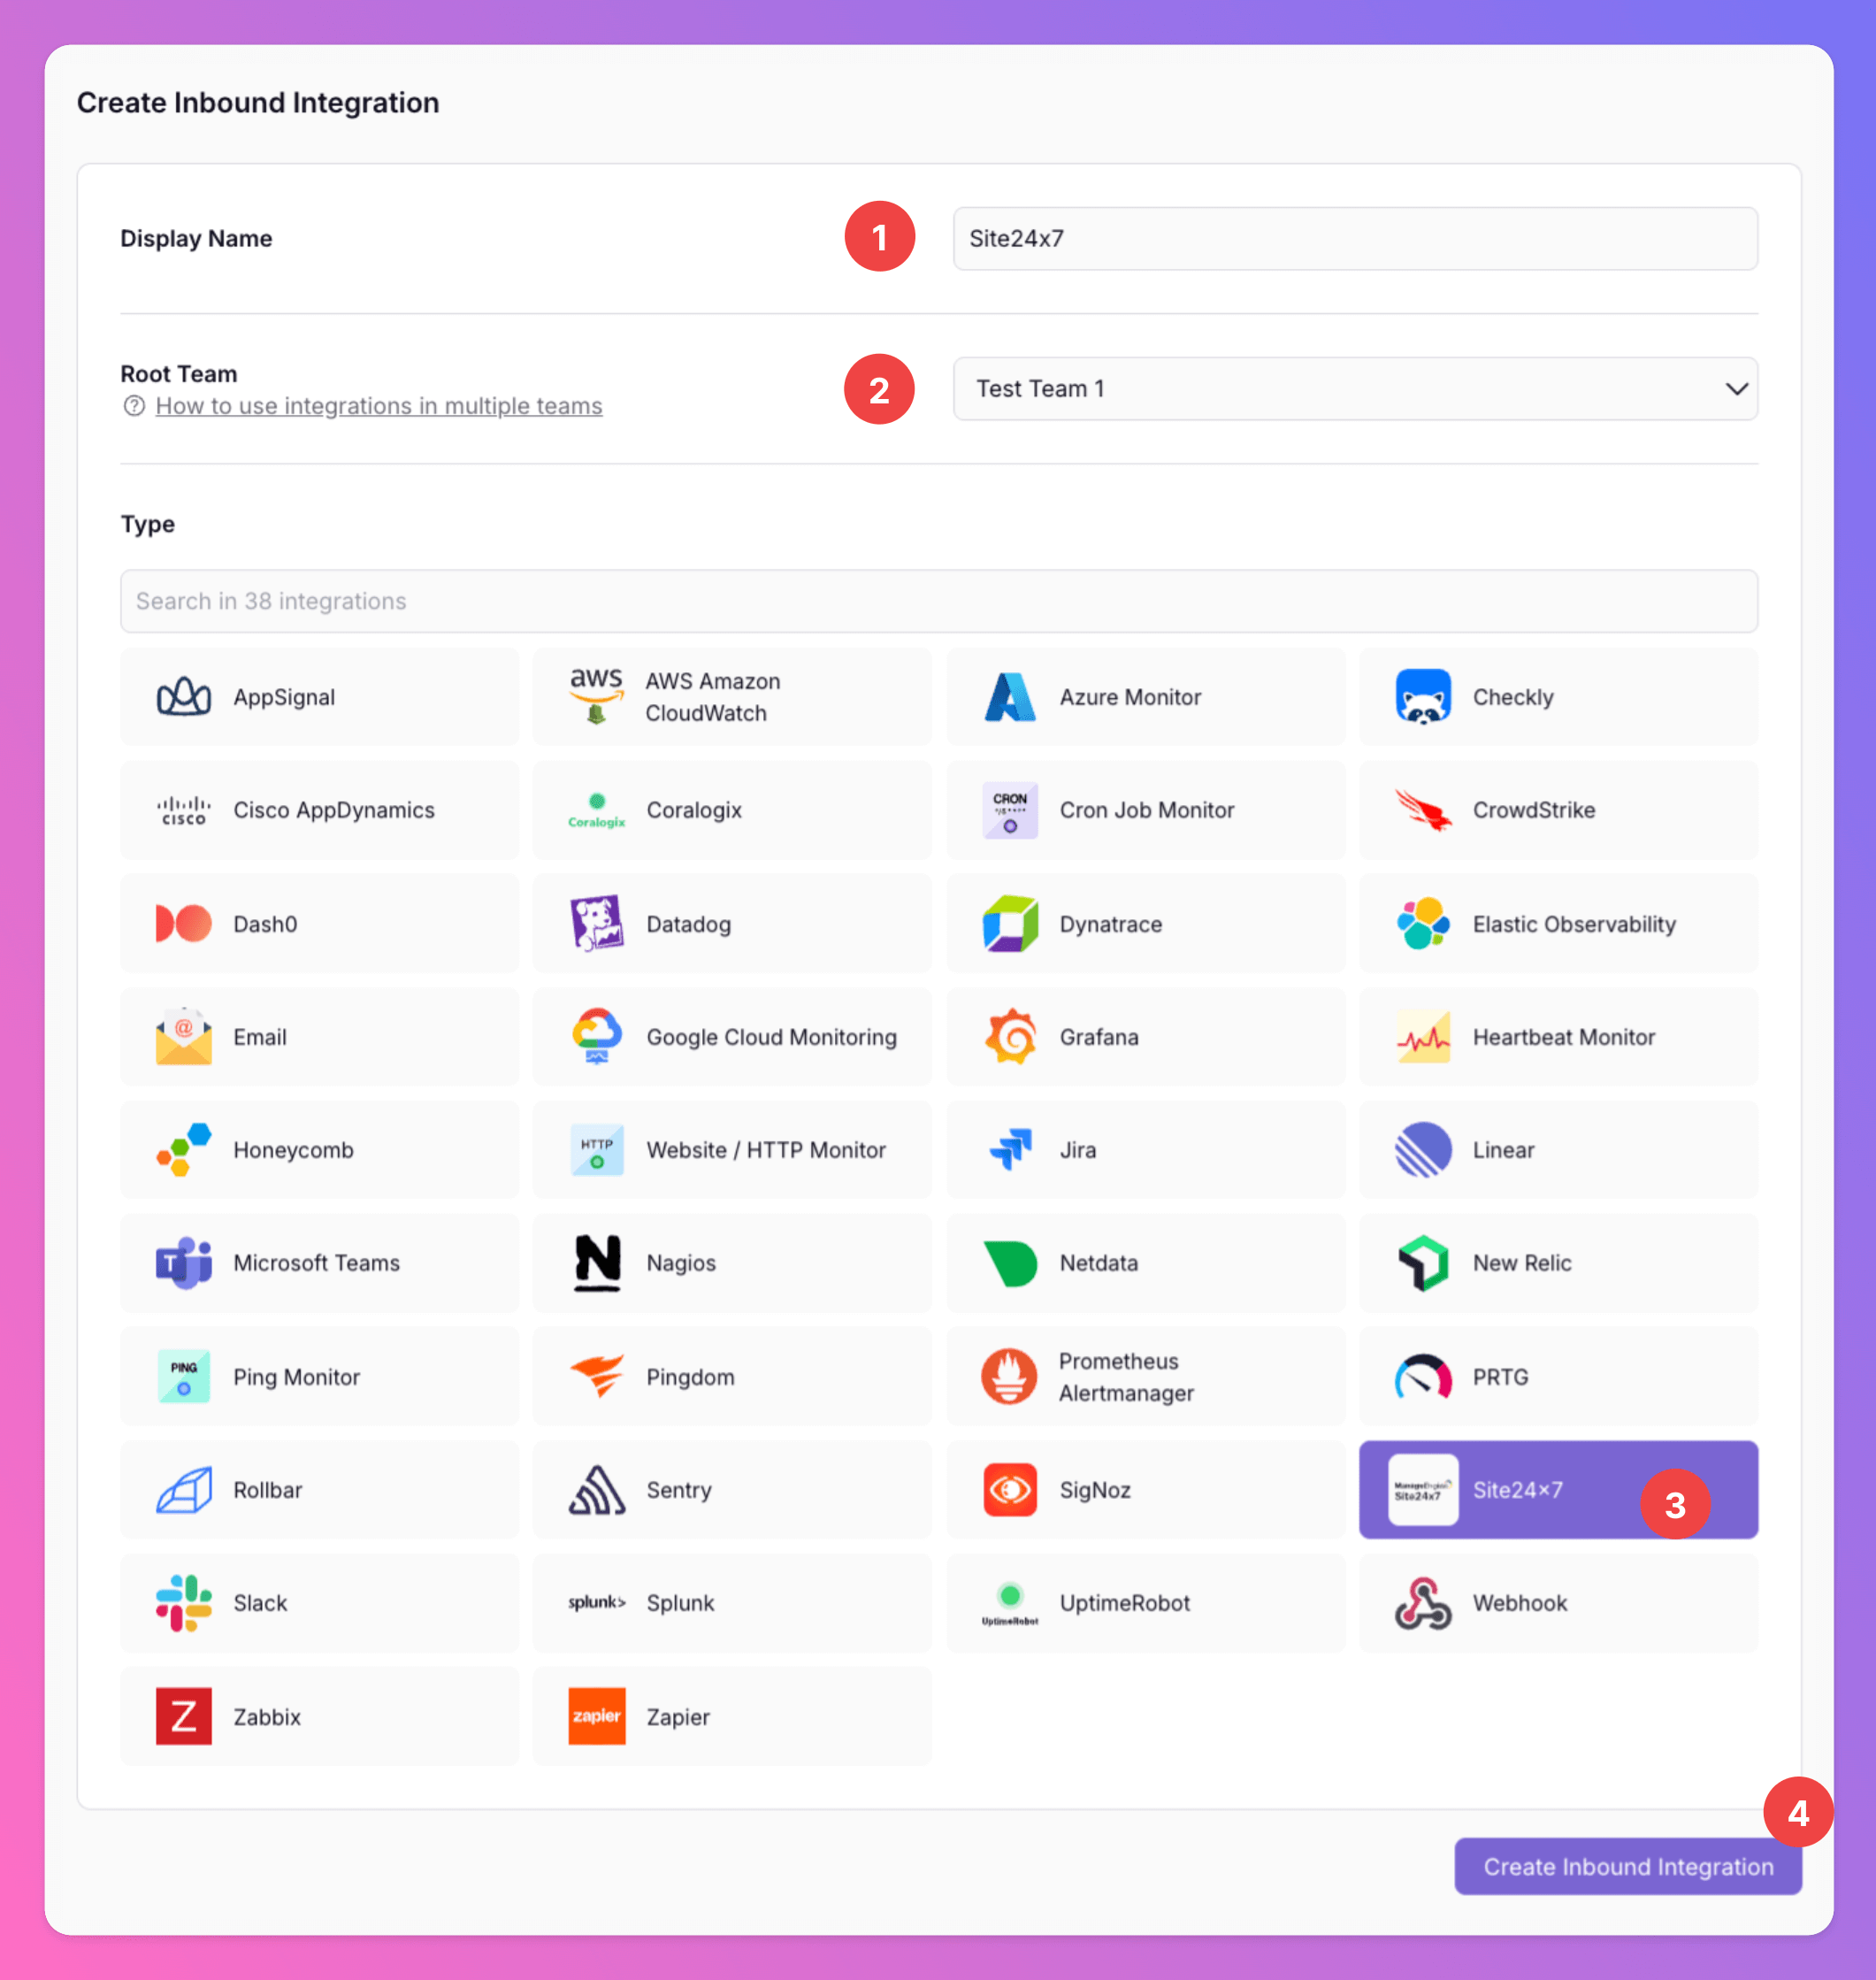
Integrations > Inbound
Tab.Create New Integration
.Display Name
for your integration, e.g. “Site24x7”.Team
you’d like to add the integration to.Site24x7
as the type.Create Inbound Integration
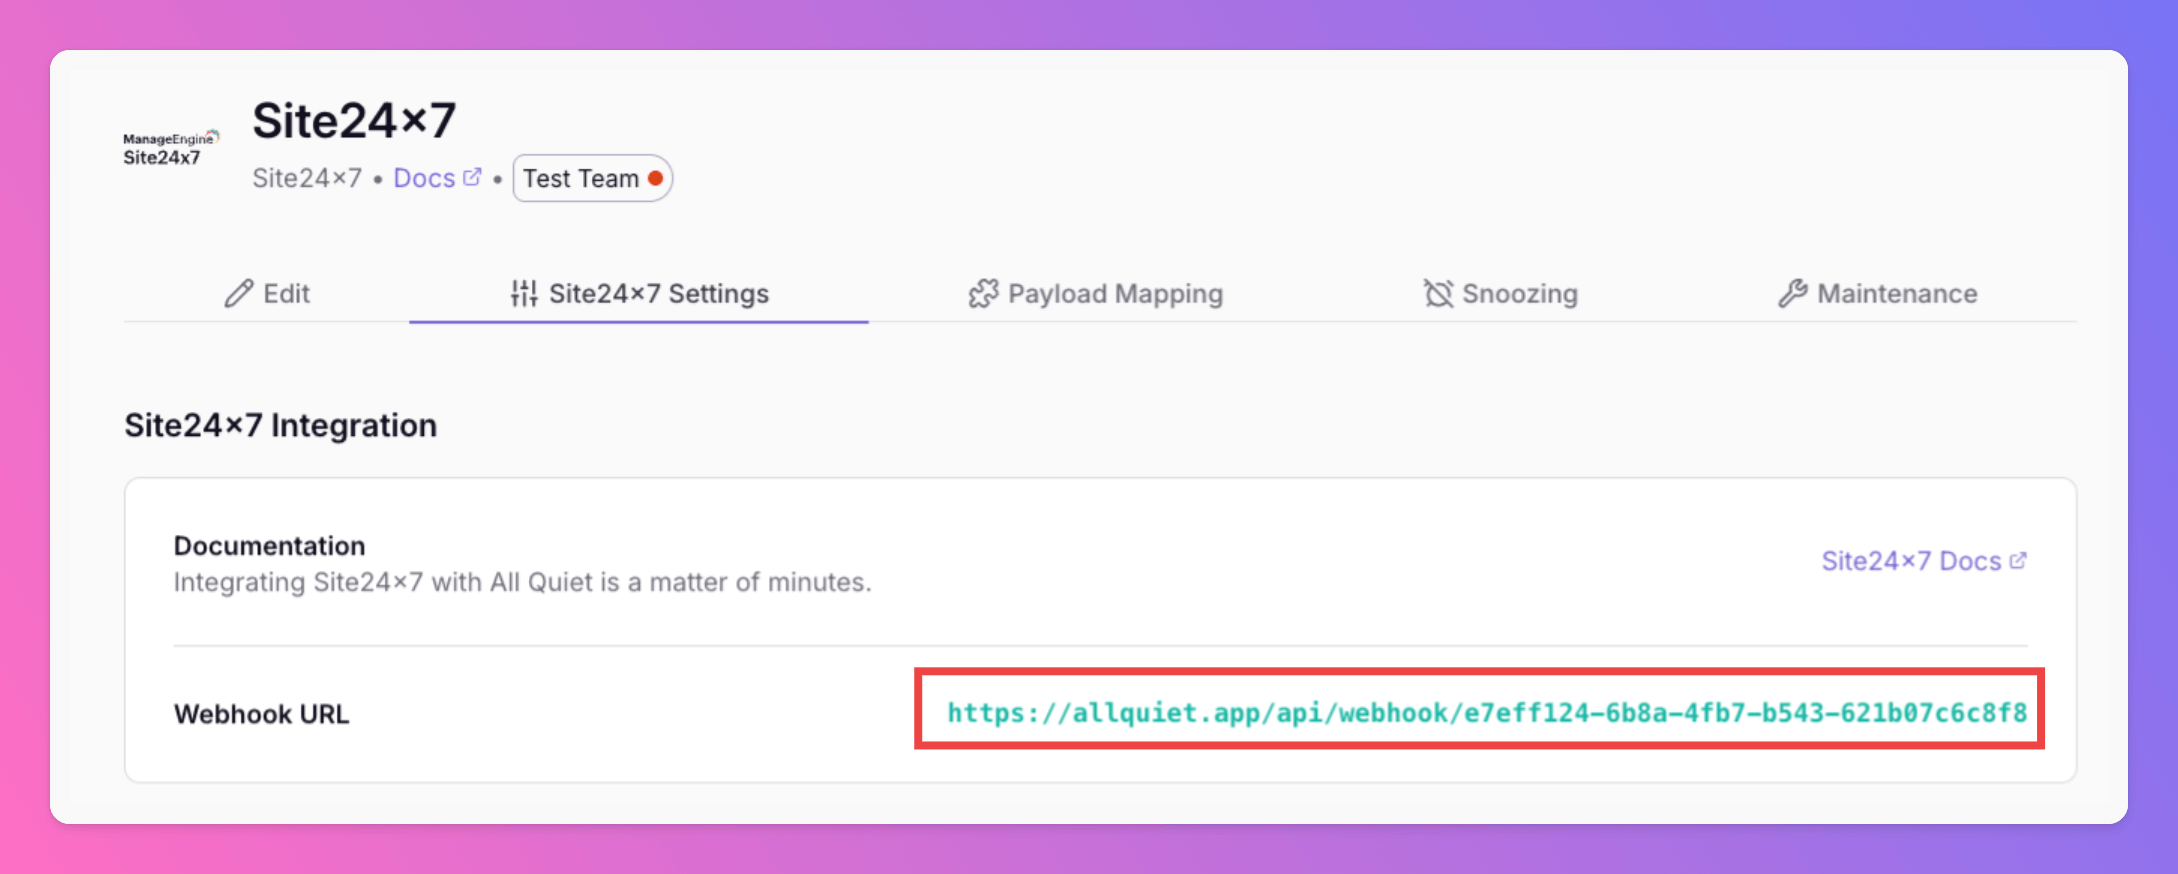
.After creating the integration on All Quiet, you can view and copy the webhook URL. You will require this URL in step 2 when configuring the integration on Site24x7’s website.
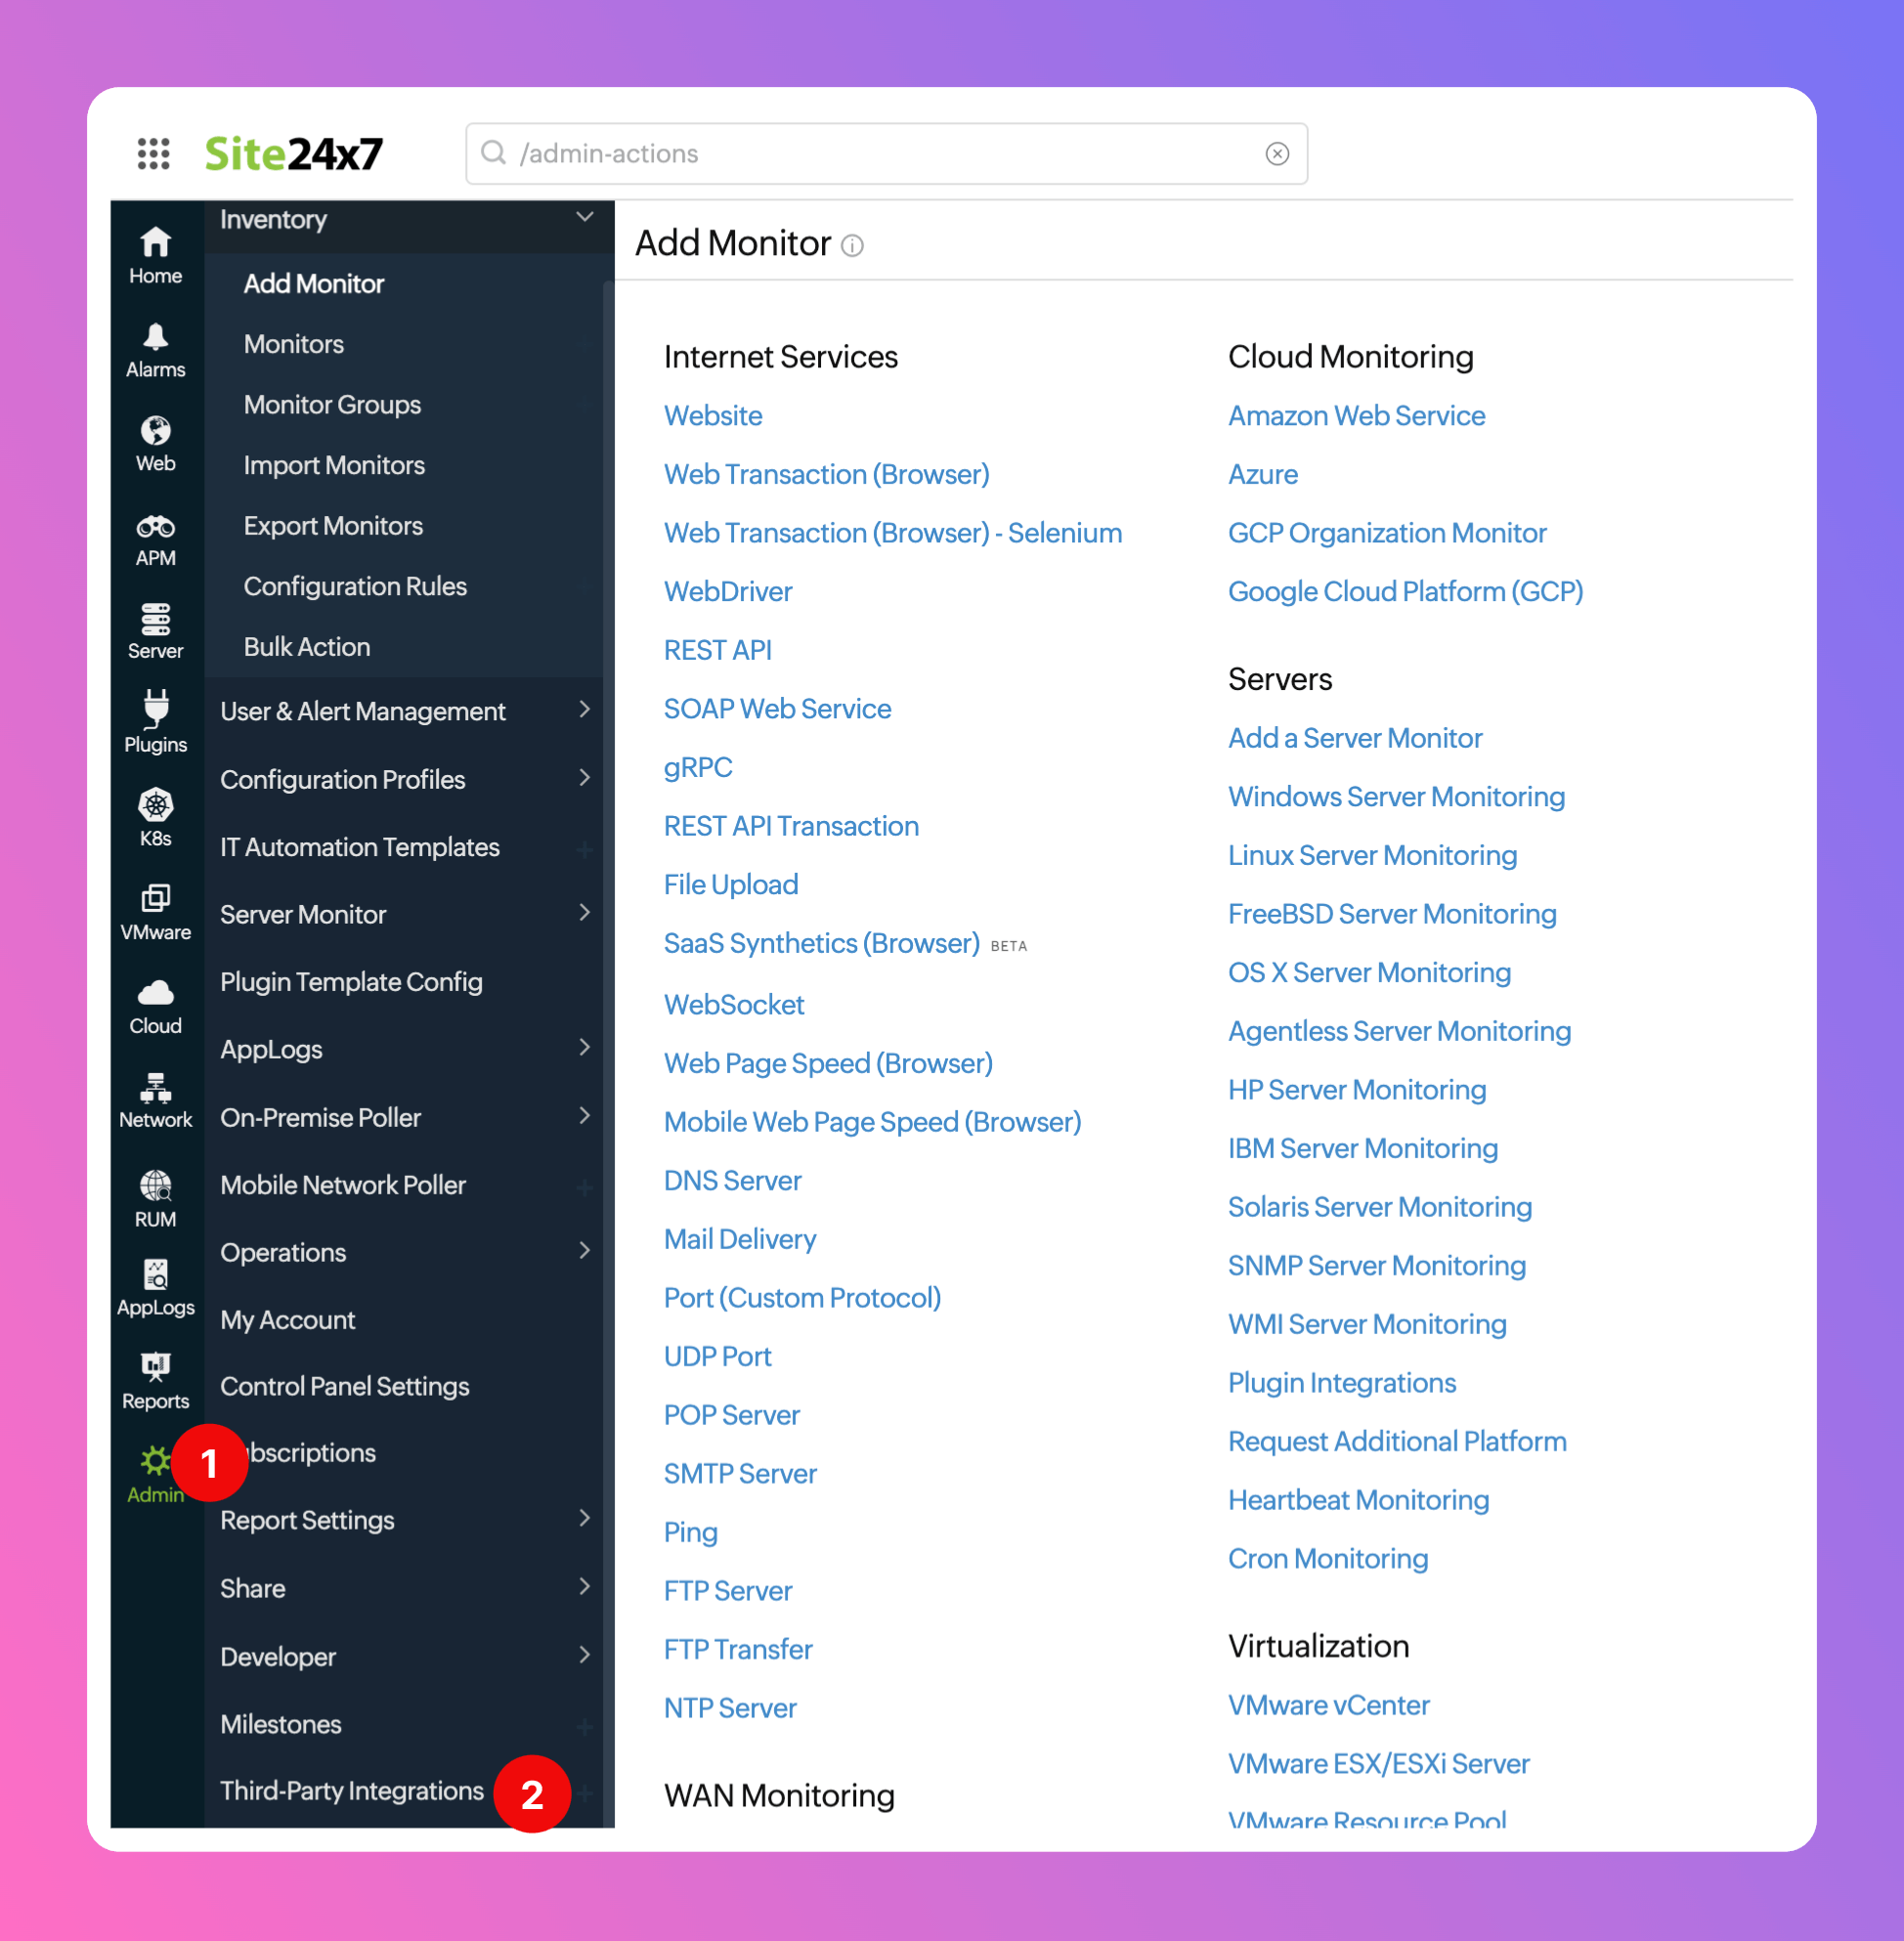
Sign in to your Site24x7 Account.
Admin
area.Third-Party Integrations
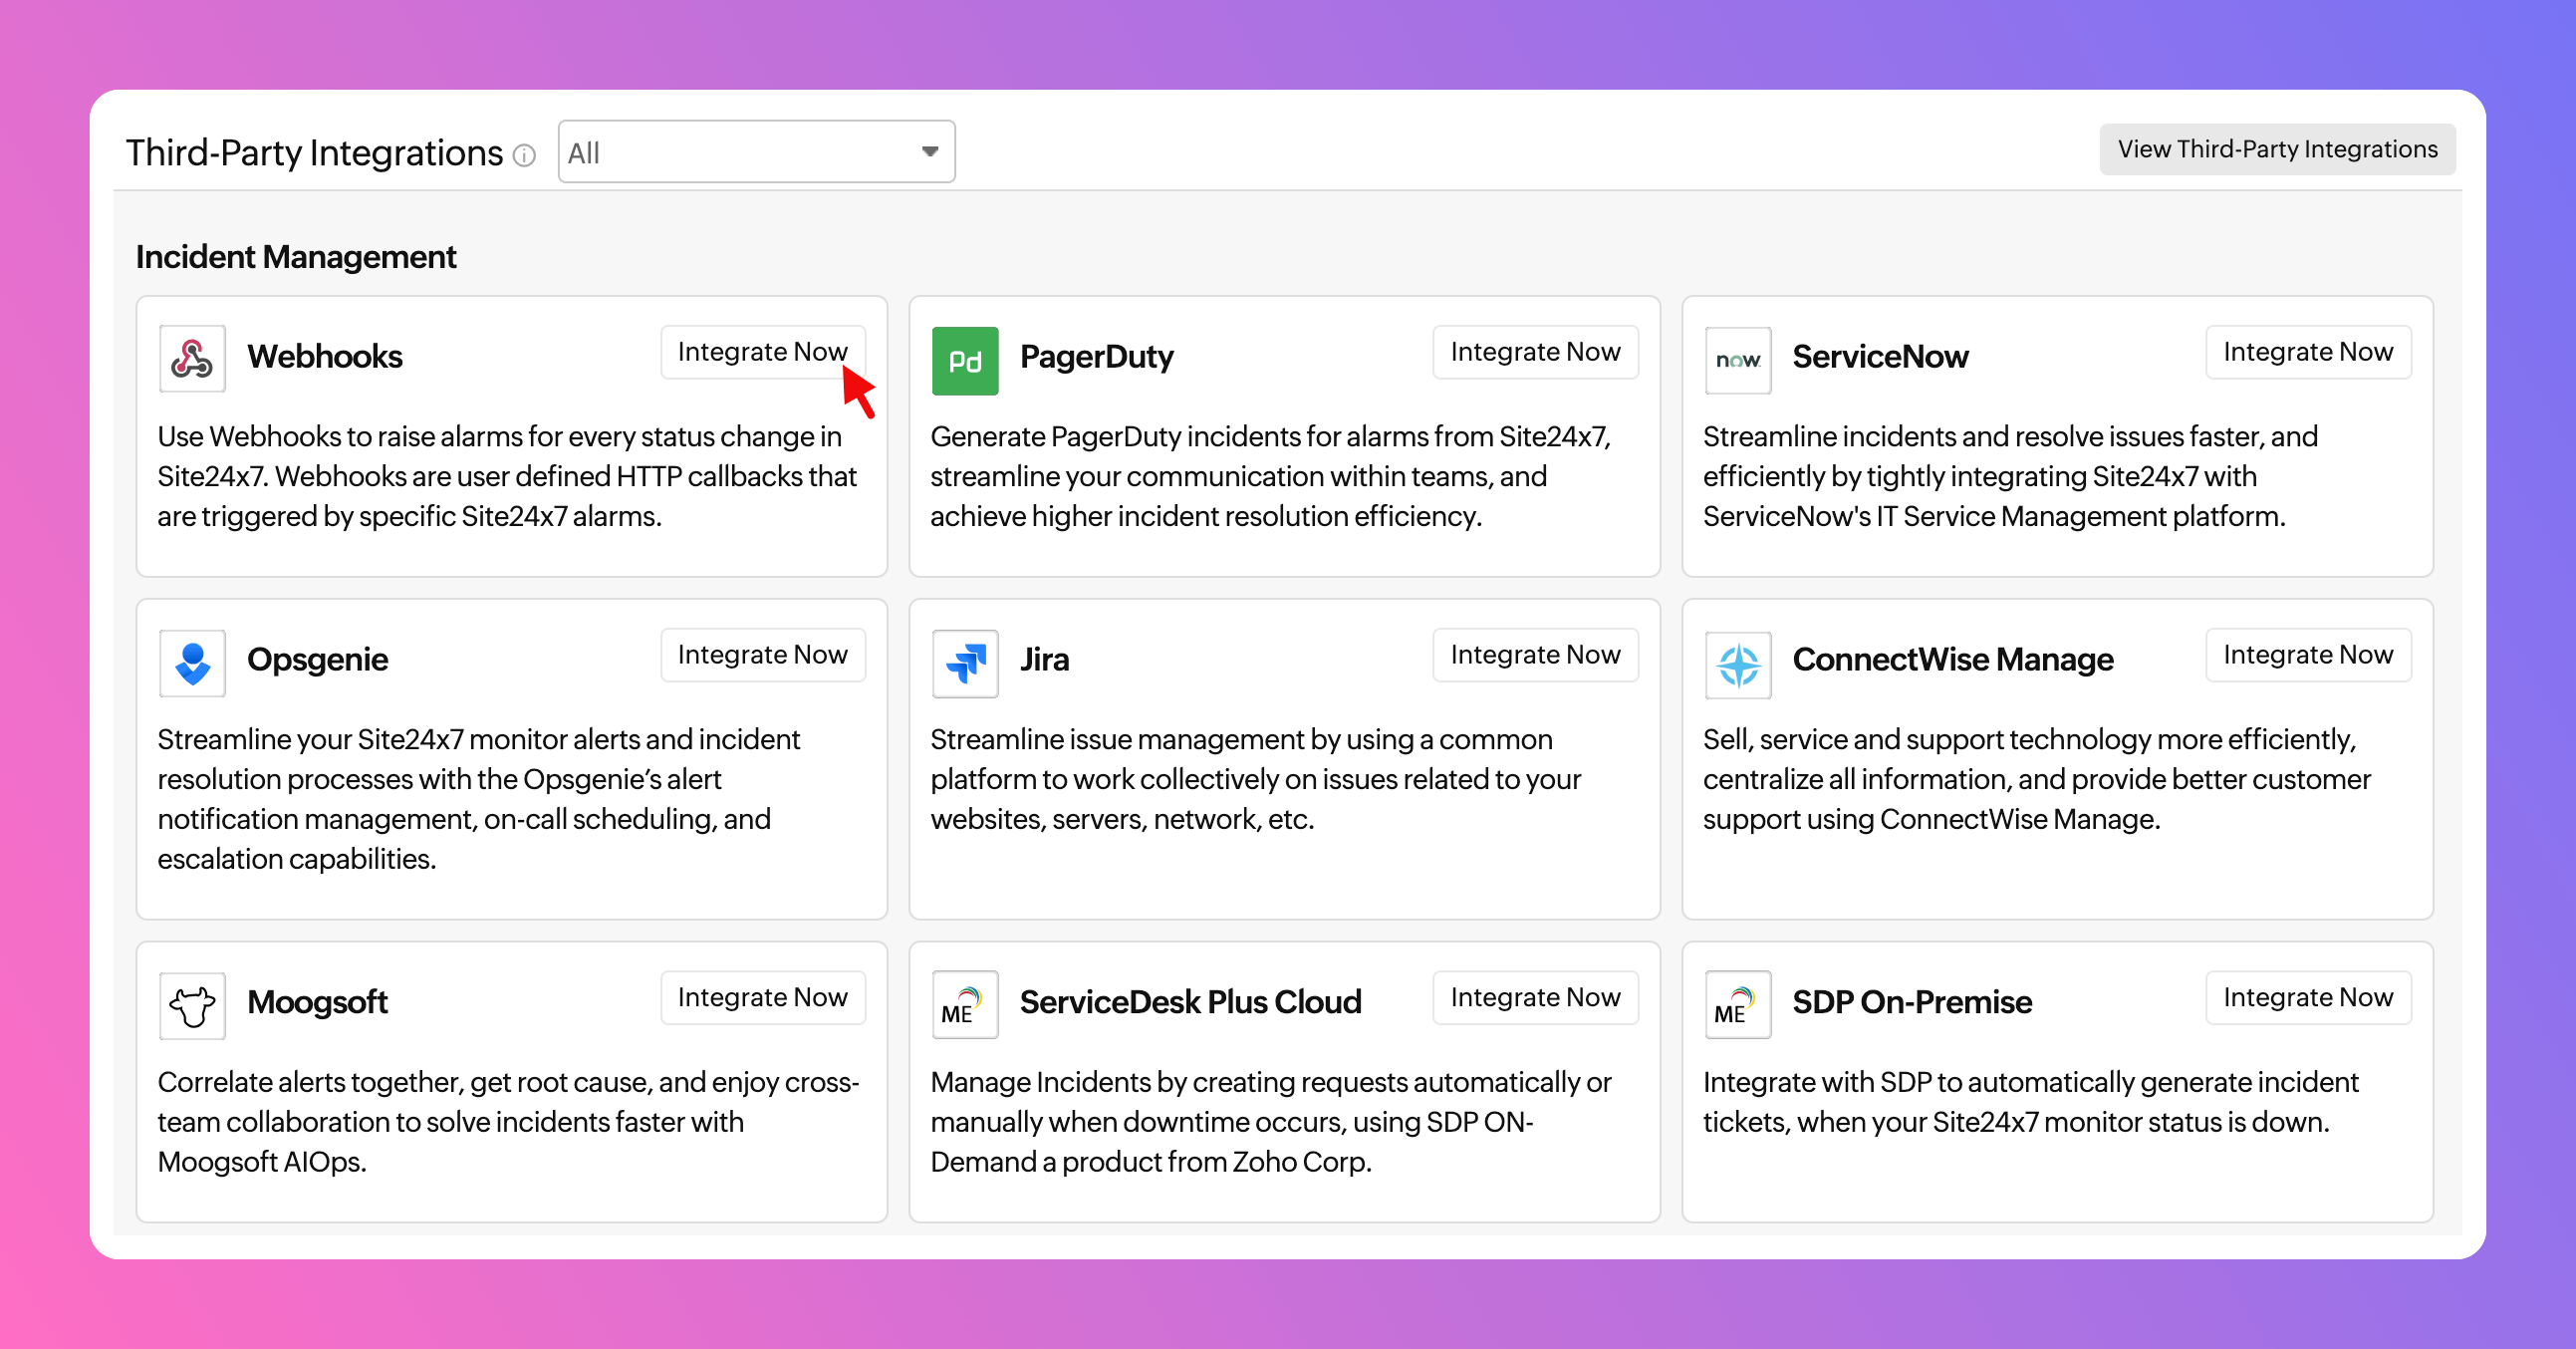
menu item.Our integration can be added via Webhooks
.
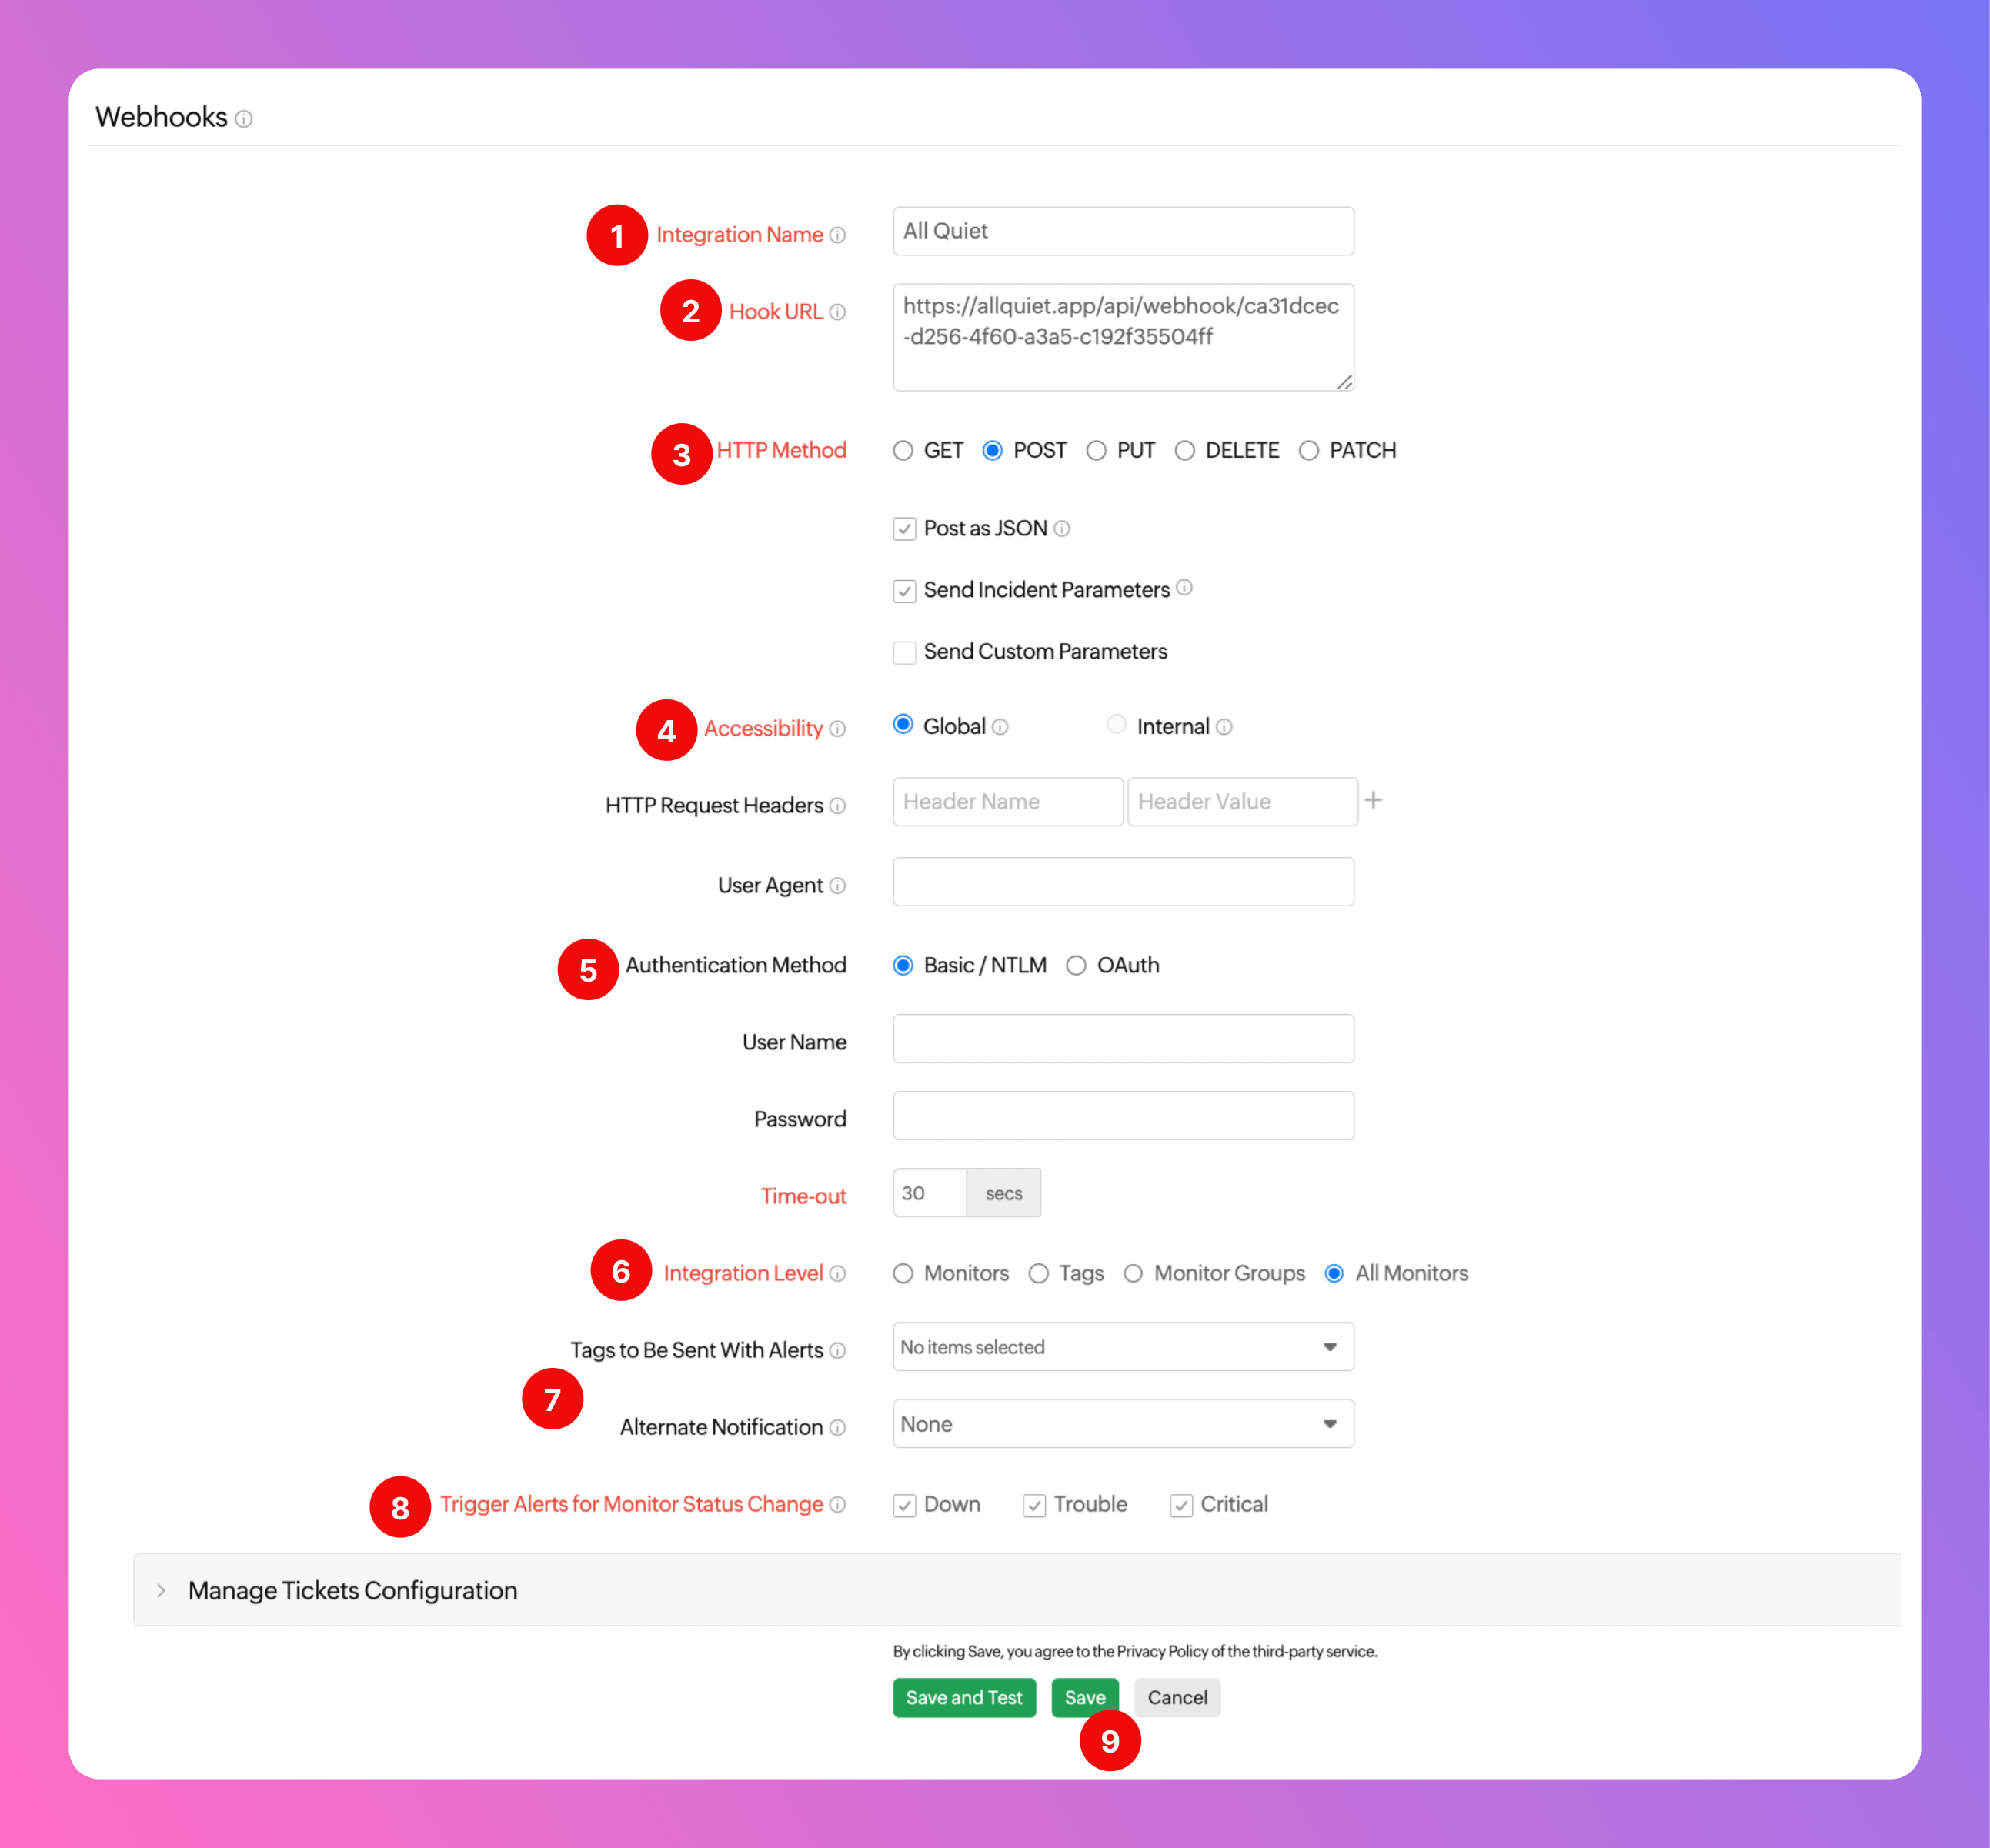
Integration Name
, like “All Quiet”.Hook URL
, paste in the All Quiet webhook URL you’ve obtained in step Get The All Quiet Webhook URL.HTTP Method
, select “POST” and activate Post as JSON
and Send Incident Paramenters
checkboxes. If you like to, you can also add Send Custom Parameters
.Accessibility
, select “Global”.Authentification Method
, select Basic / NTLM
. No User Name
or Password
required.Integration Level
: Select, from which Monitors you would like to send information to All Quiet. Here, we selected All Monitors
.Tags to Be Sent With Alerts
and Alternate Notification
, you can go ahead and customize your case. Here, we selected the default settings.Trigger Alerts for Monitor Status Change
: Select the type(s) of status change(s) you’d like to trigger an All Quiet alert with.Save
the webhook.After the integration is created, you can
Open the All Quiet Web App and navigate to the “Incidents” overview. You will see the test incident created by Site24x7.
Looking to customize the fields of your incidents by adjusting the pre-built payload mapping? Simply head over to the “Payload” tab within your integration and make the necessary edits to the mapping. For detailed guidance, you may check out our [payload mapping documentation](Looking to customize the fields of your incidents by adjusting the pre-built payload mapping? Simply head over to the “Payload” tab within your integration and make the necessary edits to the mapping. For detailed guidance, you may check out our payload mapping documentation.
allquiet_integration_mapping
resource for the Site24x7 integration. Simply copy the syntax to your .tf file and tailor the resource to your team’s needs!Connect Site24x7 to All Quiet
Integrate Site24x7 into All Quiet by using our custom integration.
Integrations > Inbound
Tab.Create New Integration
.Display Name
for your integration, e.g. “Site24x7”.Team
you’d like to add the integration to.Site24x7
as the type.Create Inbound Integration
.After creating the integration on All Quiet, you can view and copy the webhook URL. You will require this URL in step 2 when configuring the integration on Site24x7’s website.
Sign in to your Site24x7 Account.
Admin
area.Third-Party Integrations
menu item.Our integration can be added via Webhooks
.
Integration Name
, like “All Quiet”.Hook URL
, paste in the All Quiet webhook URL you’ve obtained in step Get The All Quiet Webhook URL.HTTP Method
, select “POST” and activate Post as JSON
and Send Incident Paramenters
checkboxes. If you like to, you can also add Send Custom Parameters
.Accessibility
, select “Global”.Authentification Method
, select Basic / NTLM
. No User Name
or Password
required.Integration Level
: Select, from which Monitors you would like to send information to All Quiet. Here, we selected All Monitors
.Tags to Be Sent With Alerts
and Alternate Notification
, you can go ahead and customize your case. Here, we selected the default settings.Trigger Alerts for Monitor Status Change
: Select the type(s) of status change(s) you’d like to trigger an All Quiet alert with.Save
the webhook.After the integration is created, you can
Open the All Quiet Web App and navigate to the “Incidents” overview. You will see the test incident created by Site24x7.
Looking to customize the fields of your incidents by adjusting the pre-built payload mapping? Simply head over to the “Payload” tab within your integration and make the necessary edits to the mapping. For detailed guidance, you may check out our [payload mapping documentation](Looking to customize the fields of your incidents by adjusting the pre-built payload mapping? Simply head over to the “Payload” tab within your integration and make the necessary edits to the mapping. For detailed guidance, you may check out our payload mapping documentation.
allquiet_integration_mapping
resource for the Site24x7 integration. Simply copy the syntax to your .tf file and tailor the resource to your team’s needs!