Setup time: 3 Min
1. Create Splunk Integration on All Quiet
Sign in to your All Quiet account.Create Integration
- Click on the
Inbound Integrationstab. - Click on
+ Create.

Select Splunk as the integration’s type
- Enter a
Display Namefor your integration, e.g. “Splunk”. - Select a
Team. - Select
Splunkas the integration’s type. - Click
Create Inbound Integration.
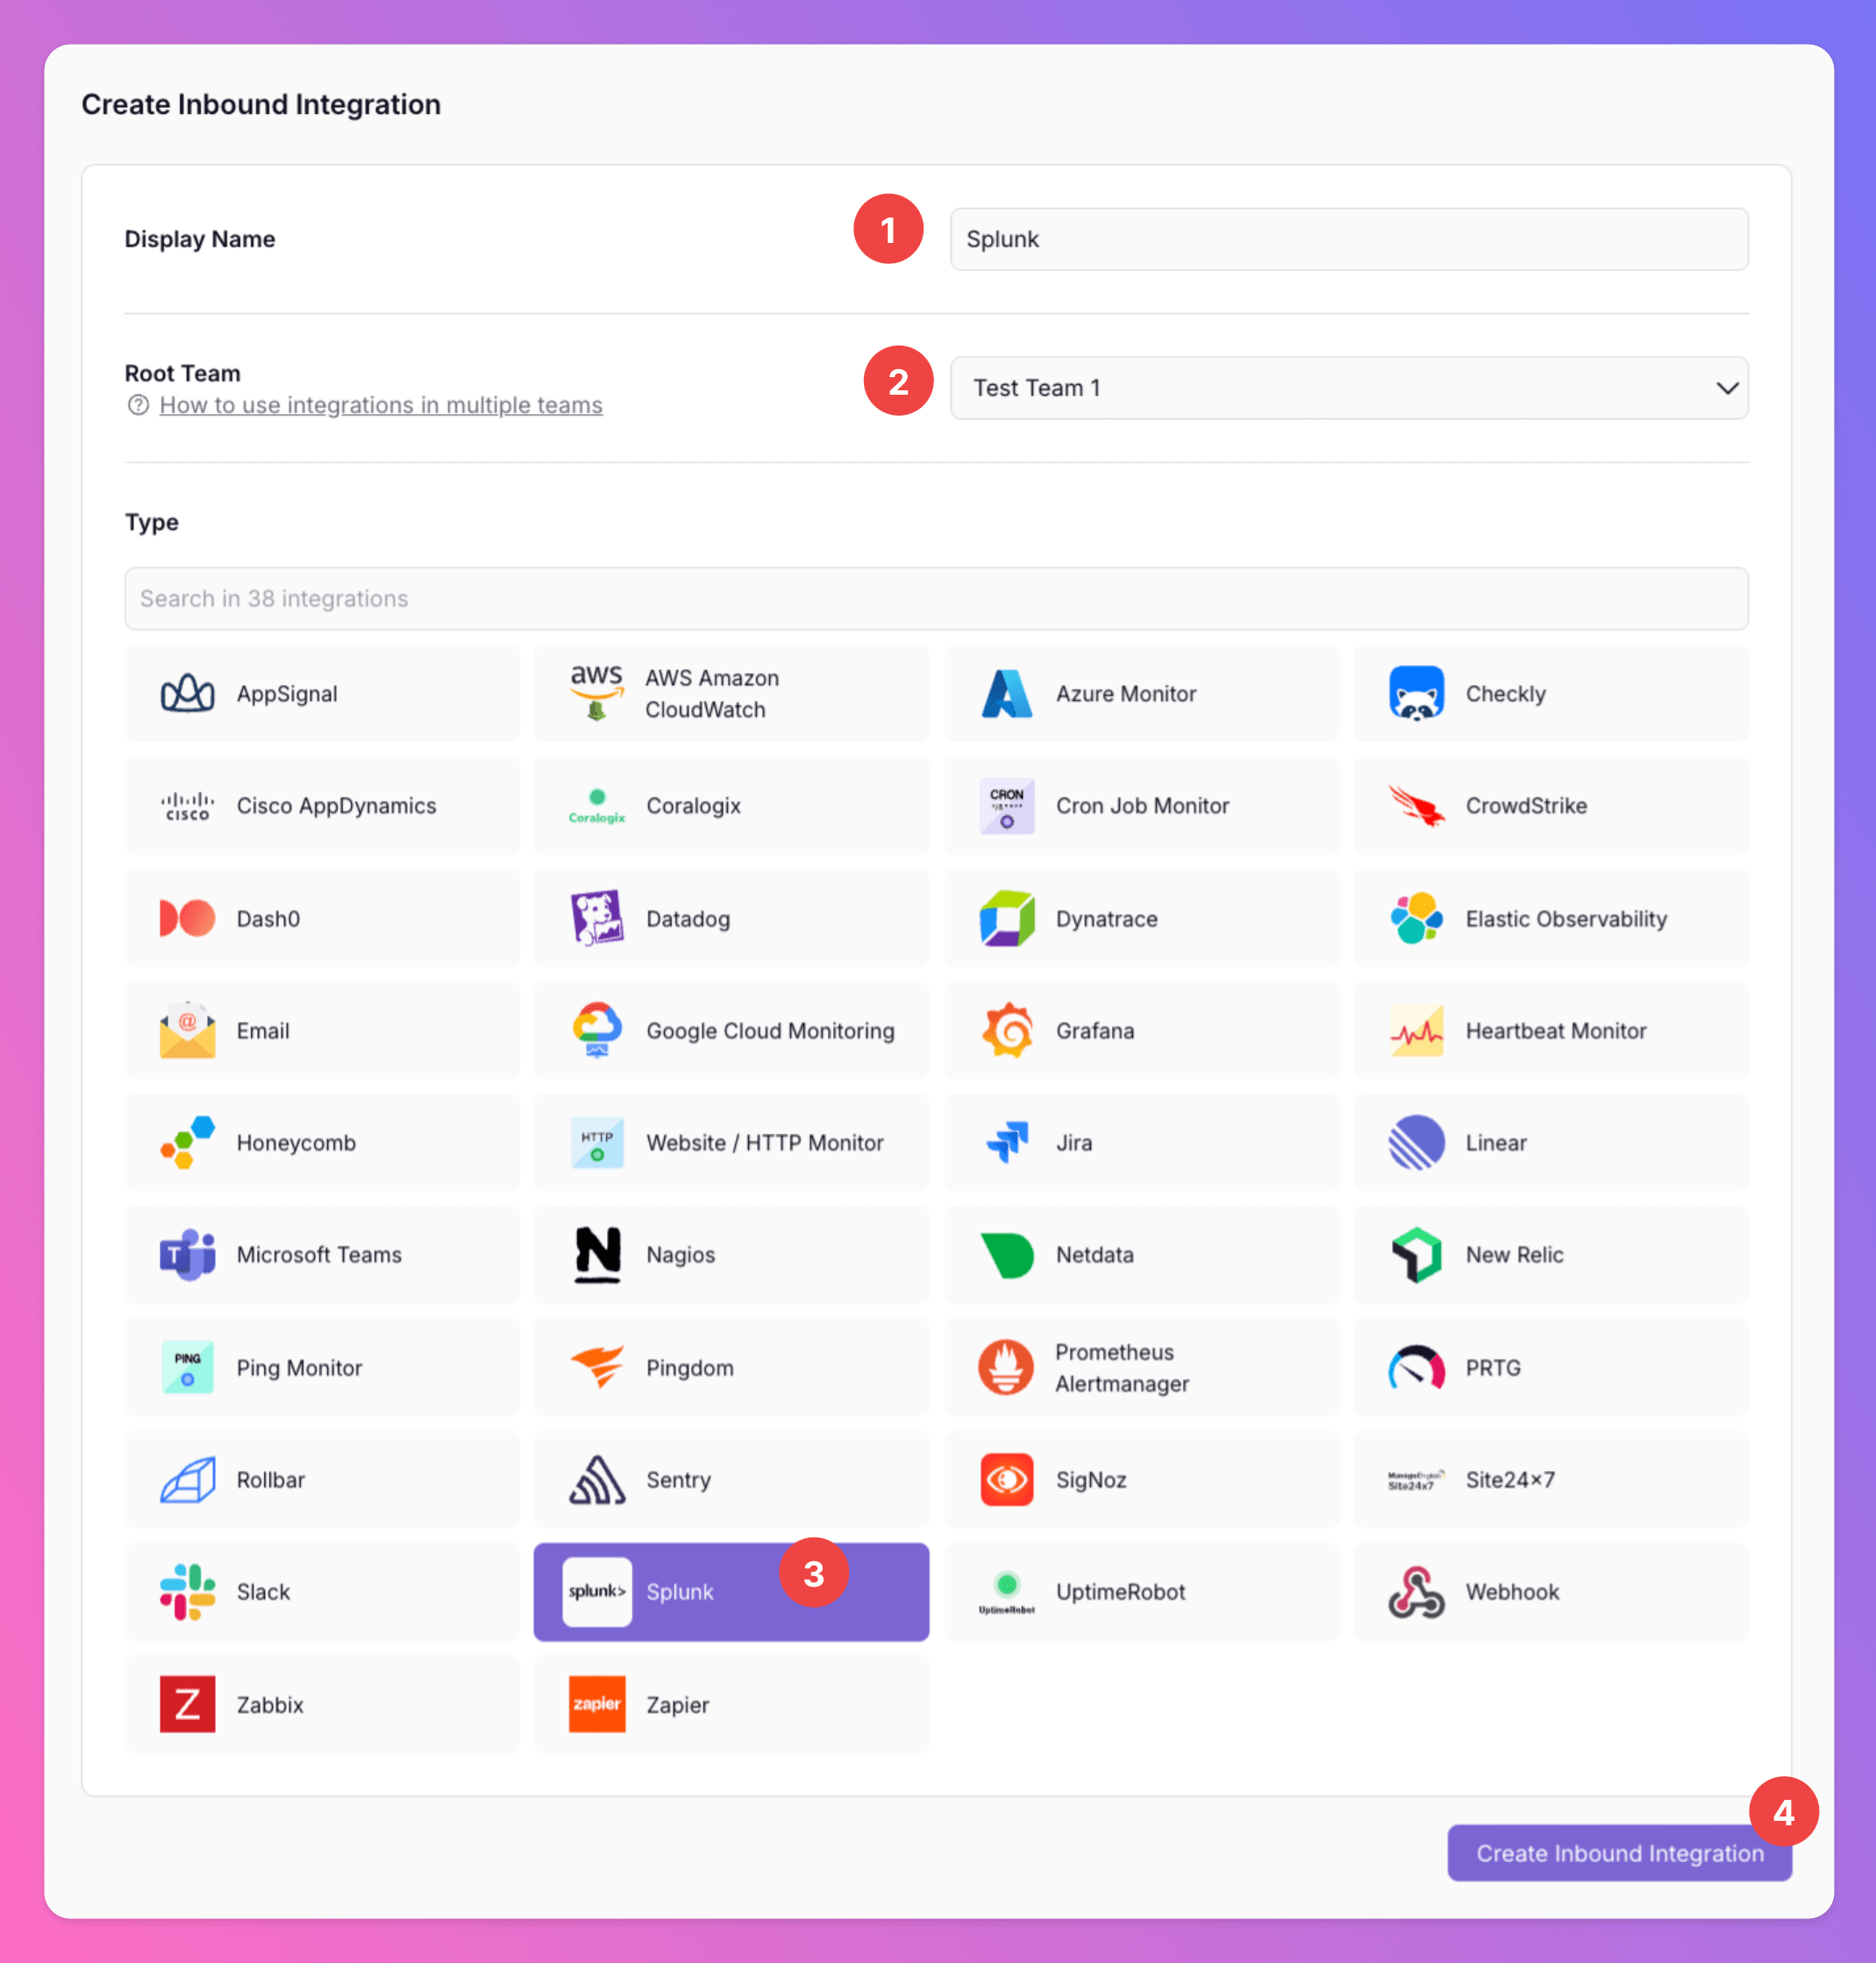
Get the All Quiet Webhook URL
After creating the integration on All Quiet, you can view and copy the webhook URL. You will require this URL in step 2 when configuring the custom integration on Splunk.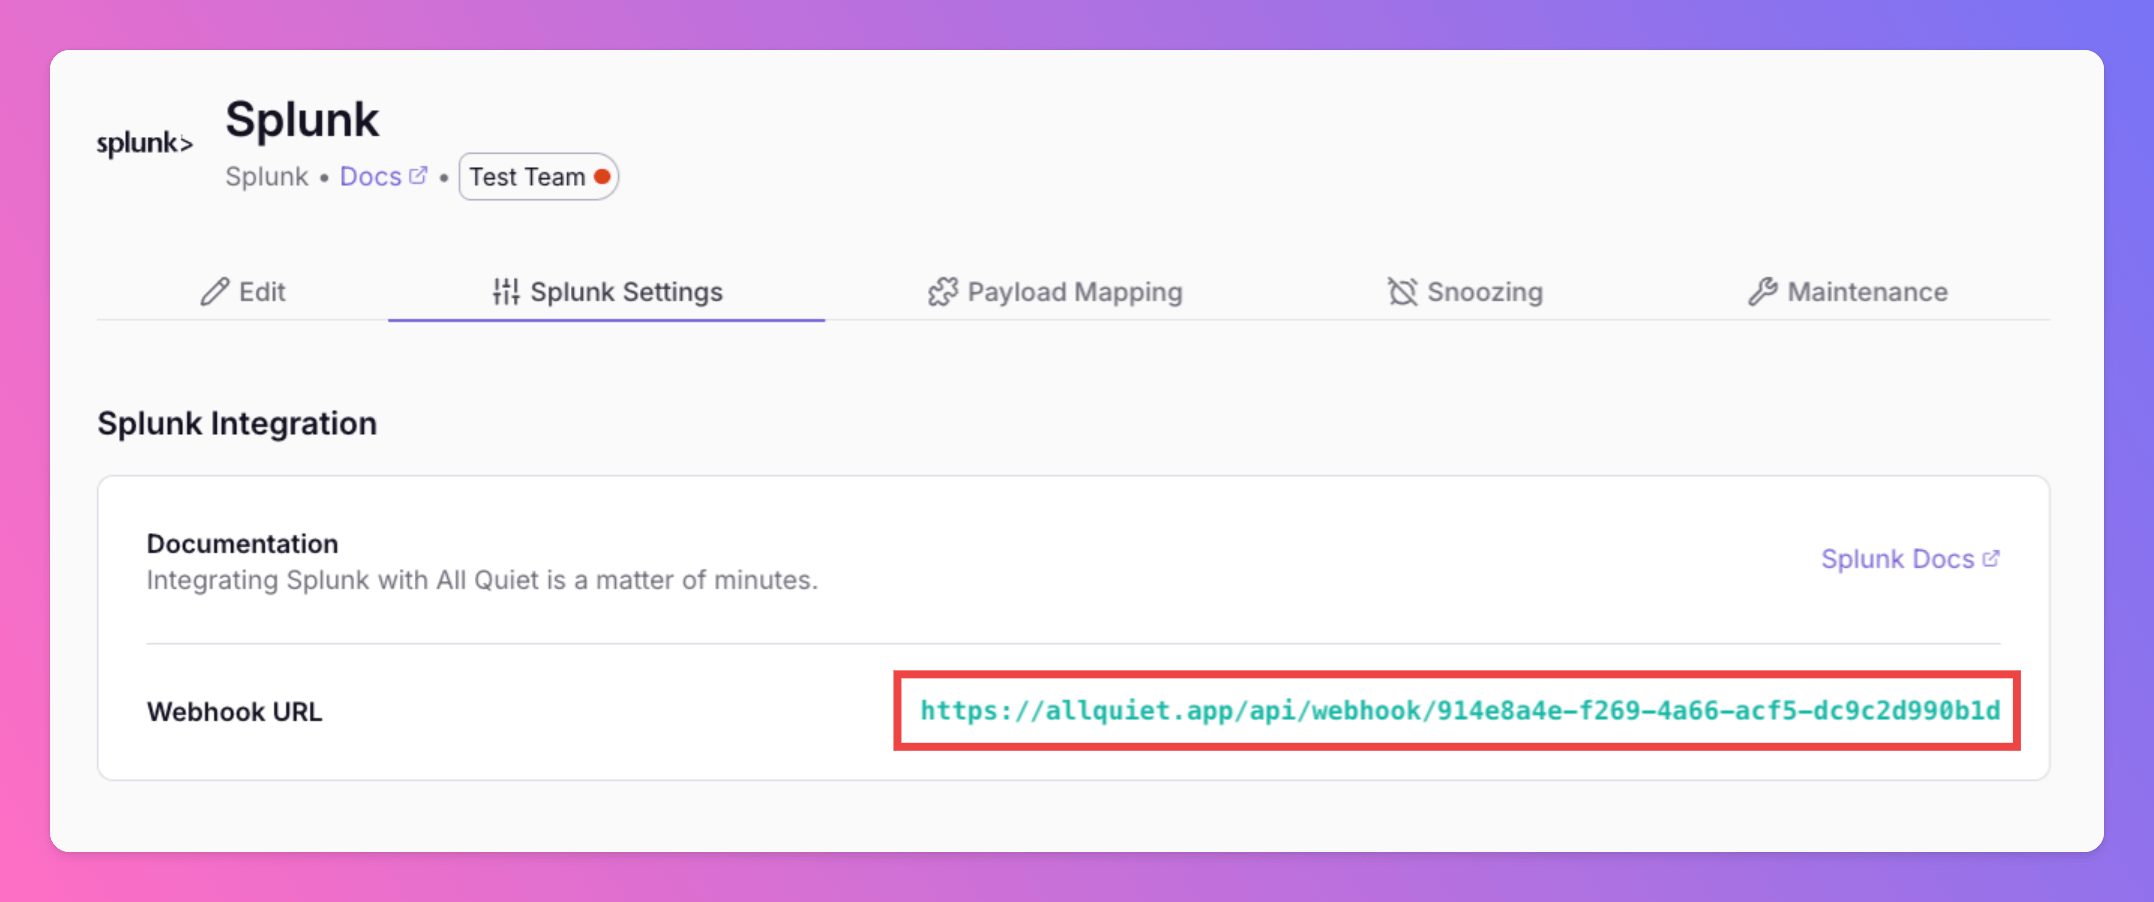
2. Configure the Integration with Splunk
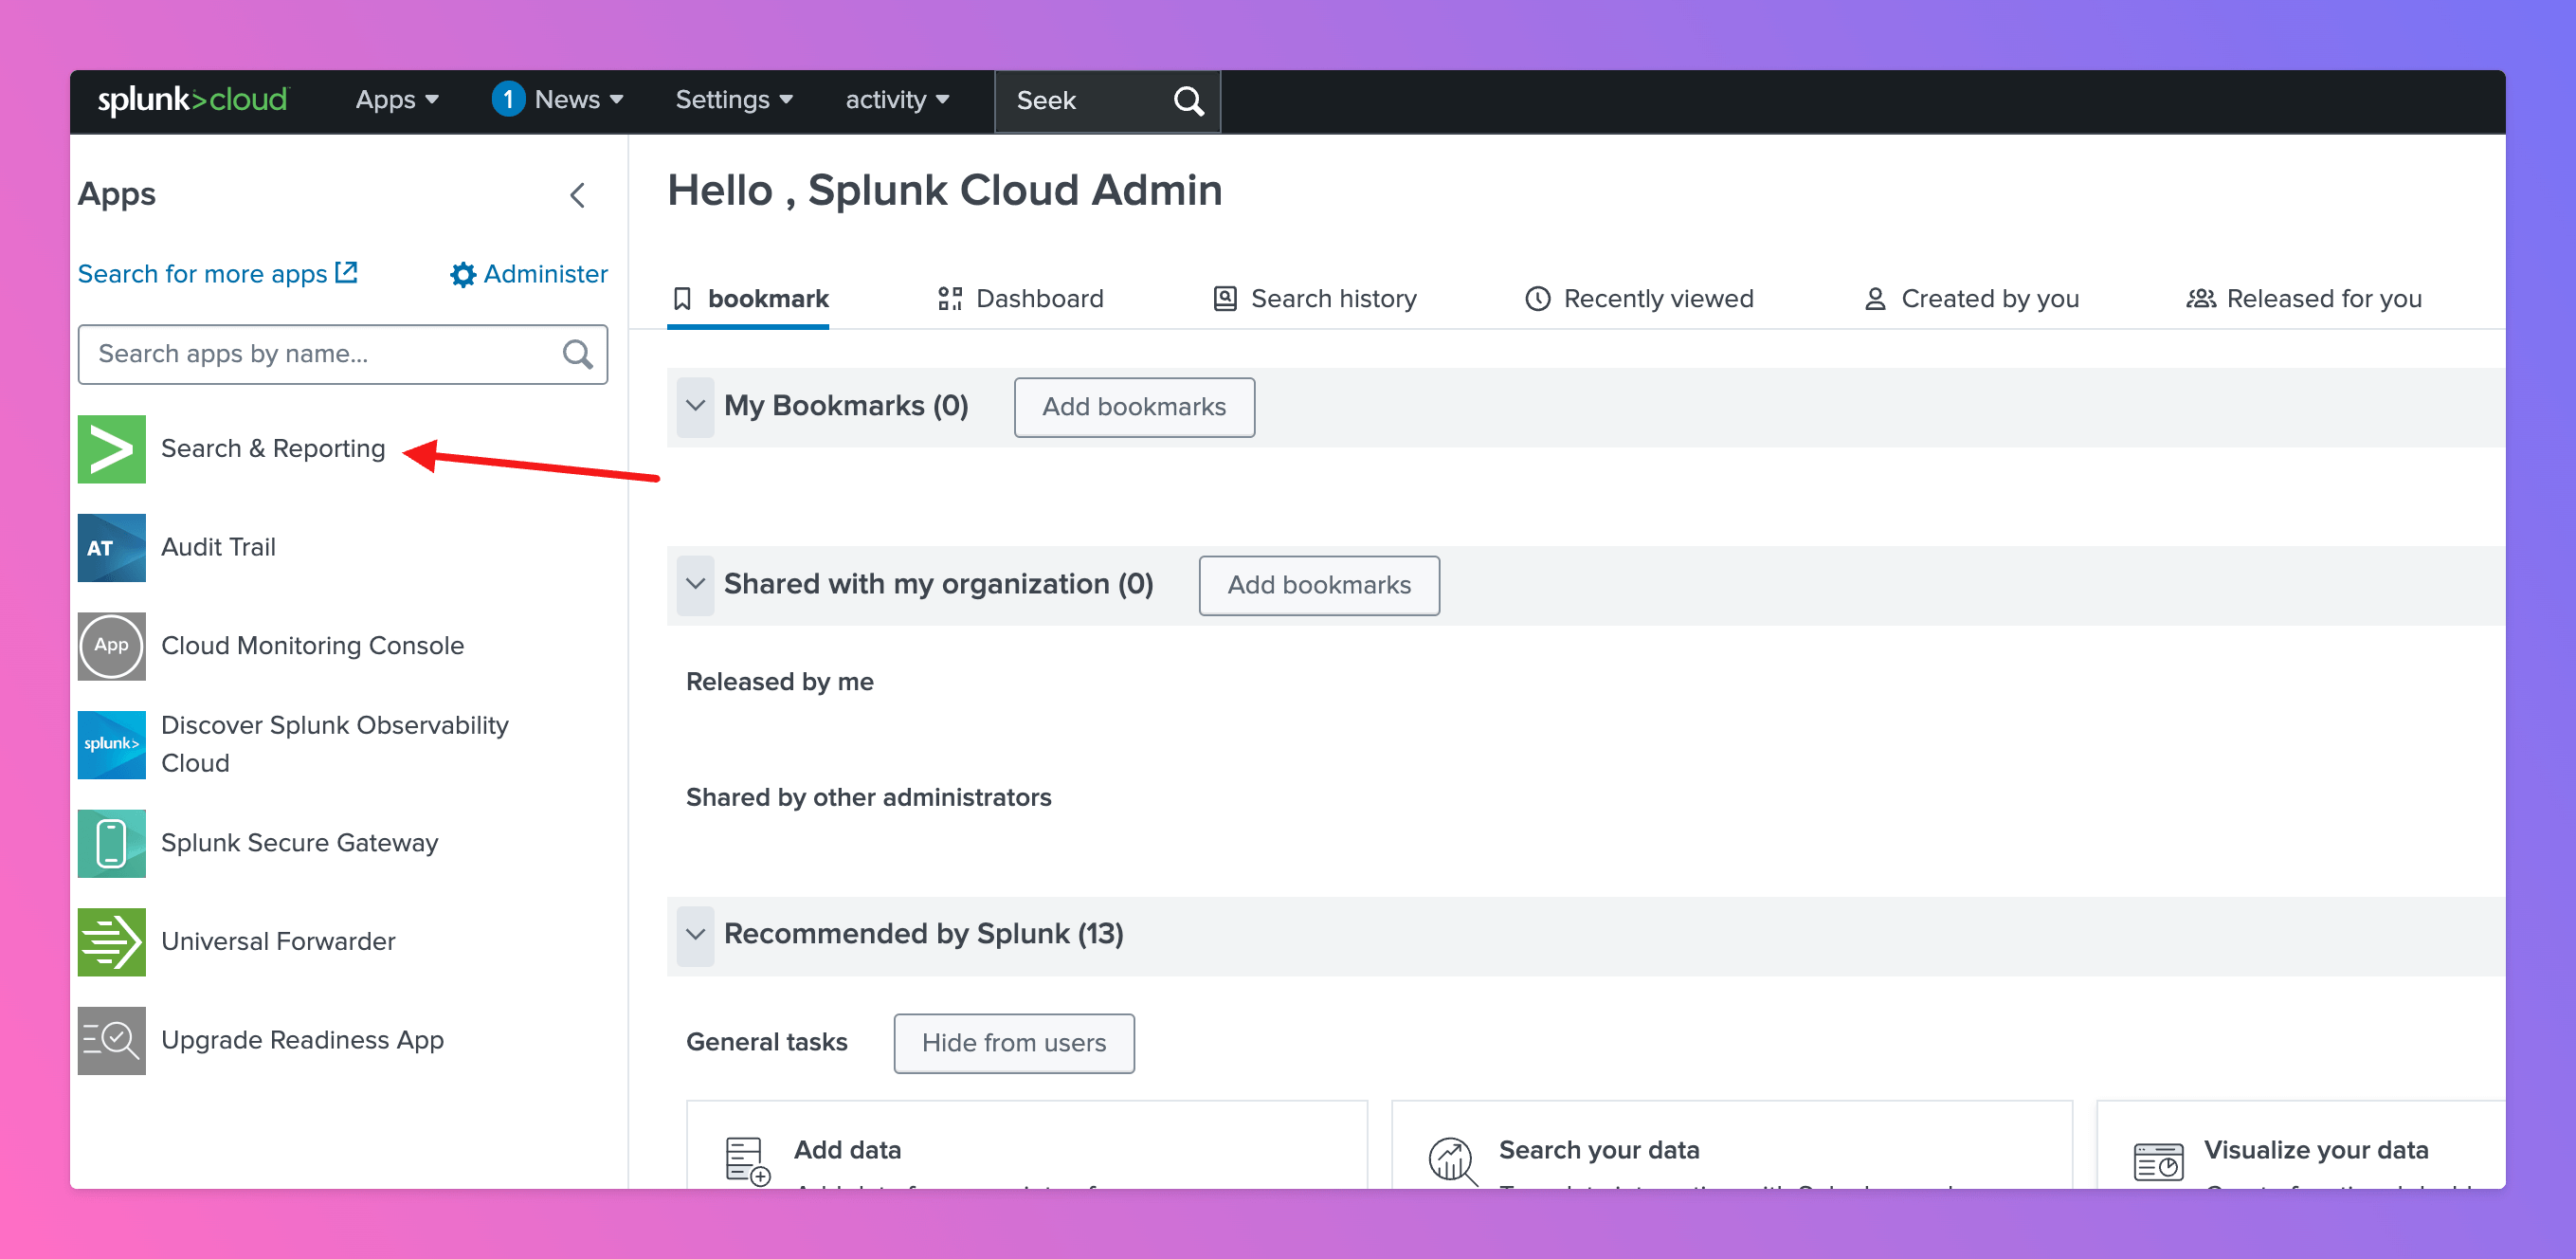
Once you’ve set up an integration of type “Splunk” with All Quiet, the next crucial steps involve configuring a splunk search for specific log entries to define a notification and connecting it with All Quiet via the Webhook URL. First, you need to sign in to your Splunk Account.- From the home screen, navigate to
Search & Reporting.
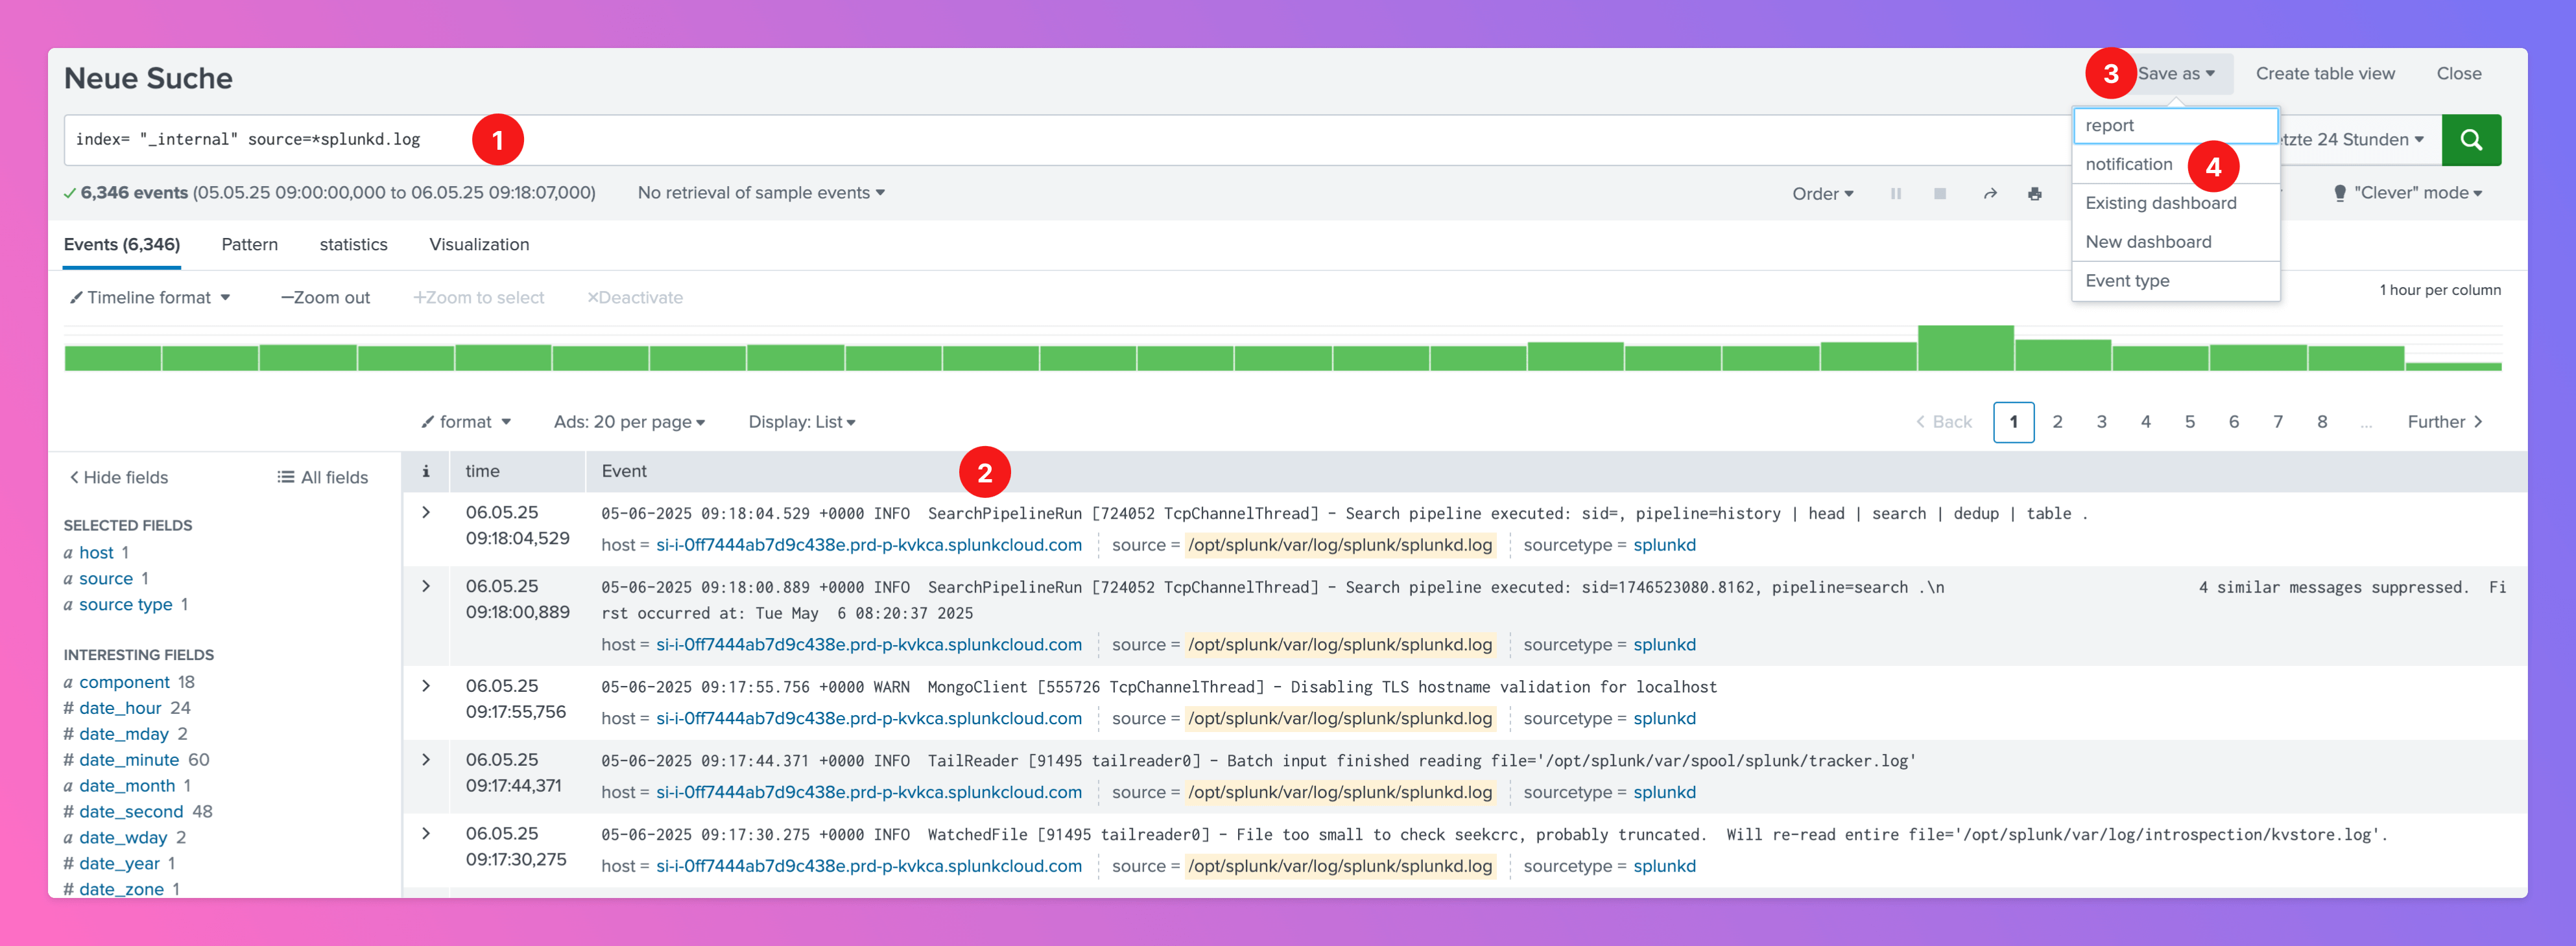
- Create a search for search entries you want to use to create an All Quiet incident under specific circumstances.
- Find the search results, below.
- Click
Save as - Select Save as
notification.
- Define a
Titlefor a notification. Optionally, you can add a description. - Select the permissions.
- Define the
Notification Type. - Based on the
Notification Type, you can define aTrigger. - Add a
WebhookasTrigger action. - As
URL, paste in the All Quiet Webhook URL you’ve obtained in step Get the All Quiet Webhook URL. - Save the notification.
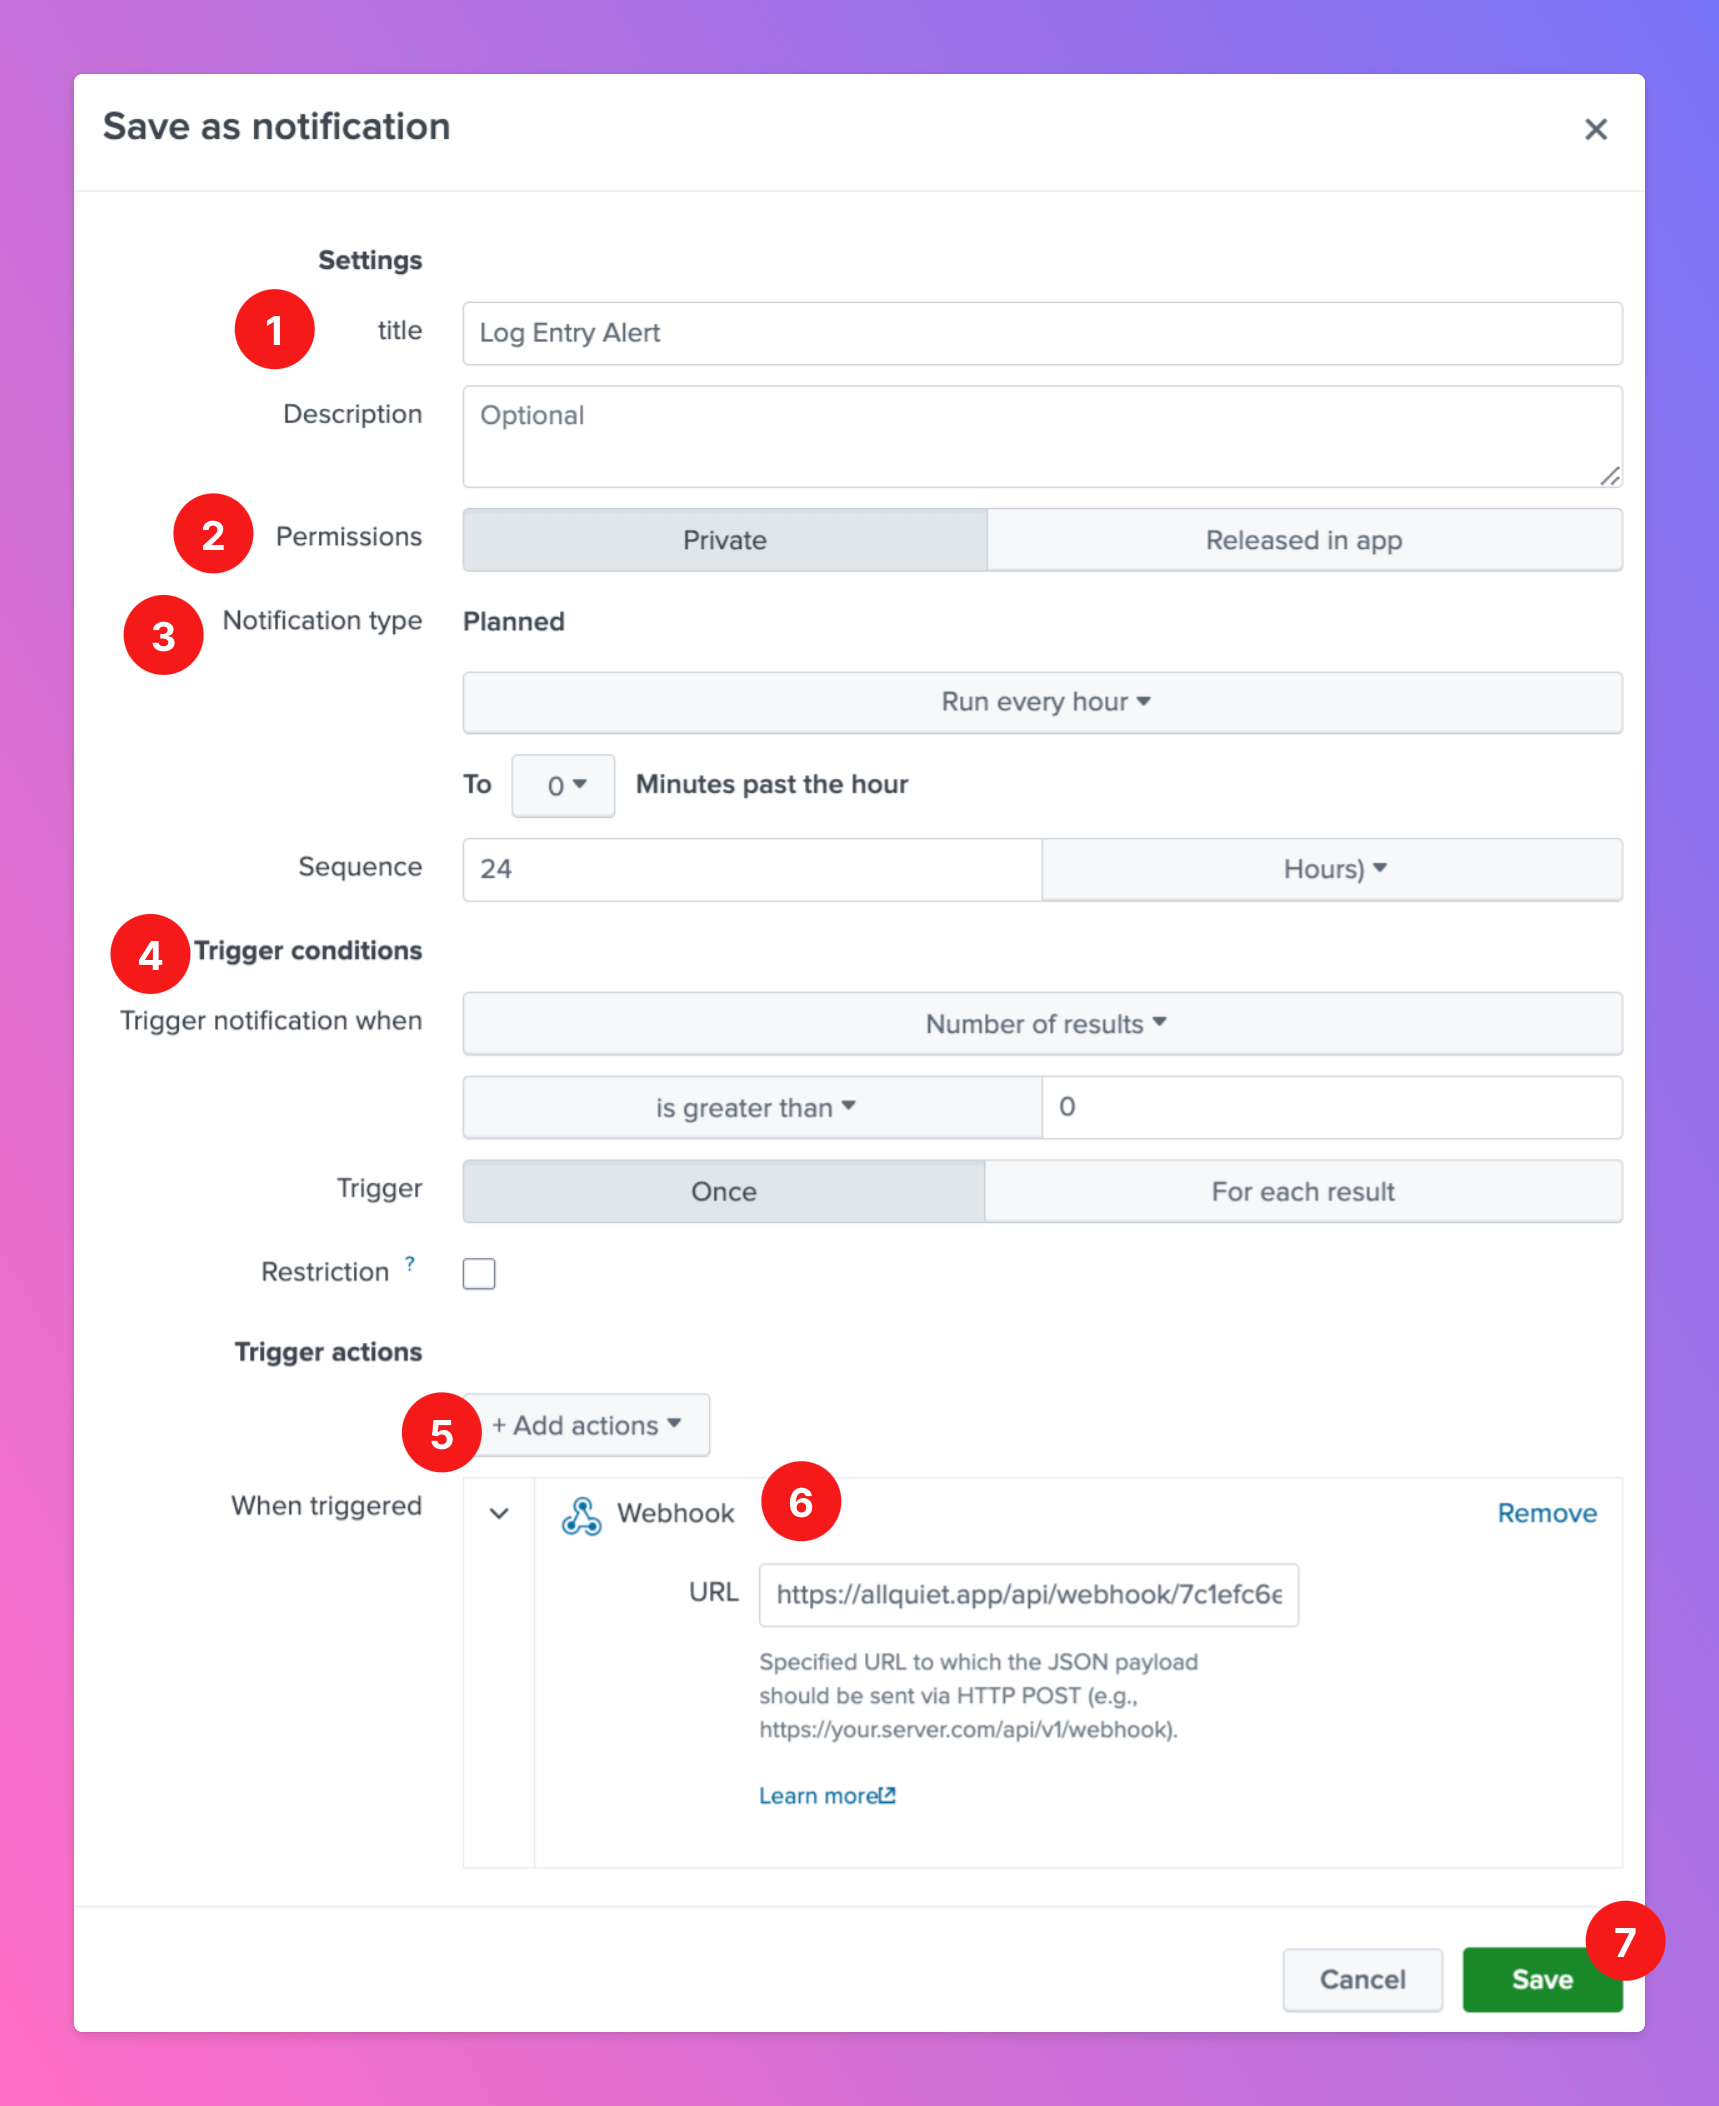
You’re ready to go. If you set up your integration this way, Splunk will send alerts to All Quiet.
Unfortunately, Splunk notifications do not fire resolve events.