Setup time: 5 Min
1. Create an integration on All Quiet
Create a Datadog integration
- Click on the
Inbound Integrationstab. - Click on
+ Create.

Select Datadog as the integration’s type
- Enter a
Display Namefor your integration, e.g. “Datadog”. - Select a
Team. - Select
Datadogas the integration’s type. - Click
Create Inbound Integration.

Get the All Quiet webhook URL
Copy your integration’s webhook URL. You’ll need it later on the Datadog platform to connect Datadog alerts with All Quiet.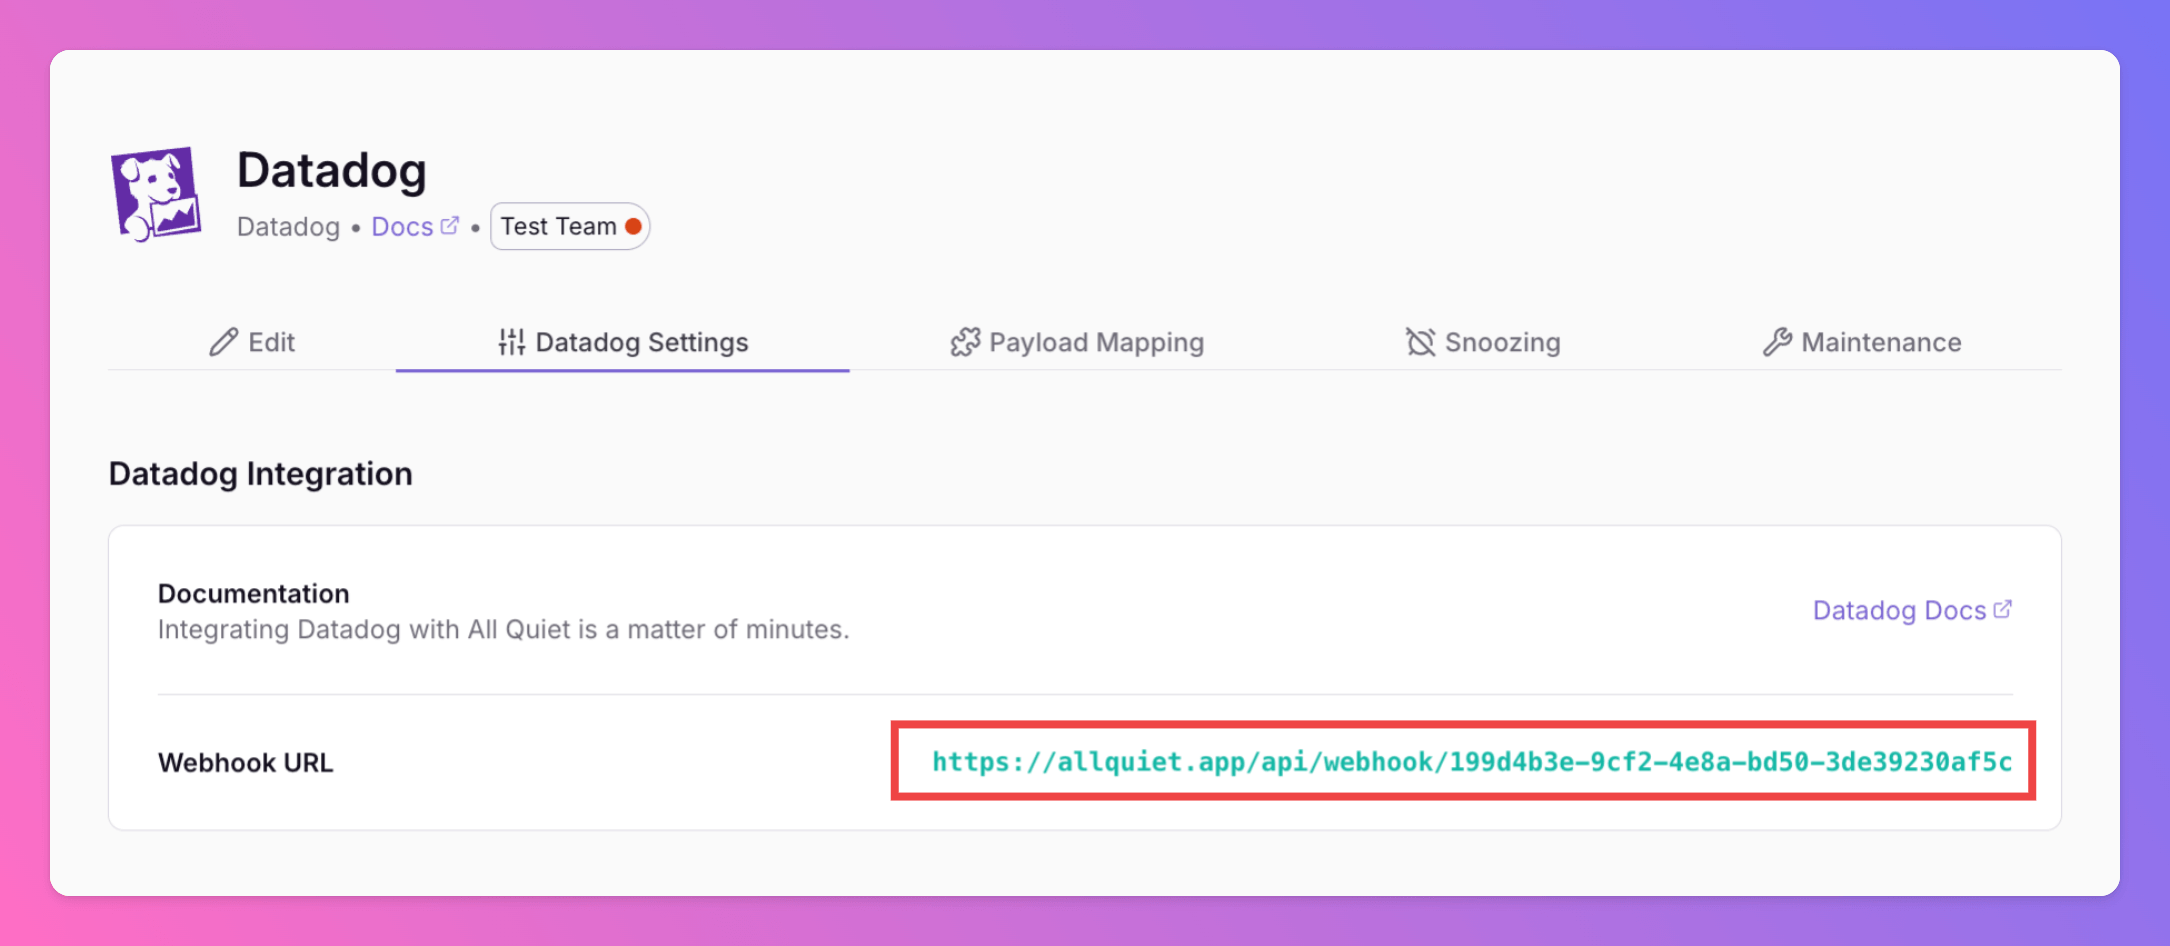
Optionally toggle
Enable additional Authentication & Security below the webhook URL to restrict who can POST payloads.- IP Filter — Allow requests only from specific IPs or CIDR ranges. Failed checks return 404 Not Found.
- Bearer authentication — Require
Authorization: Bearer YOUR_TOKEN. Missing or invalid tokens return 401 Unauthorized.
2. Configure DataDog
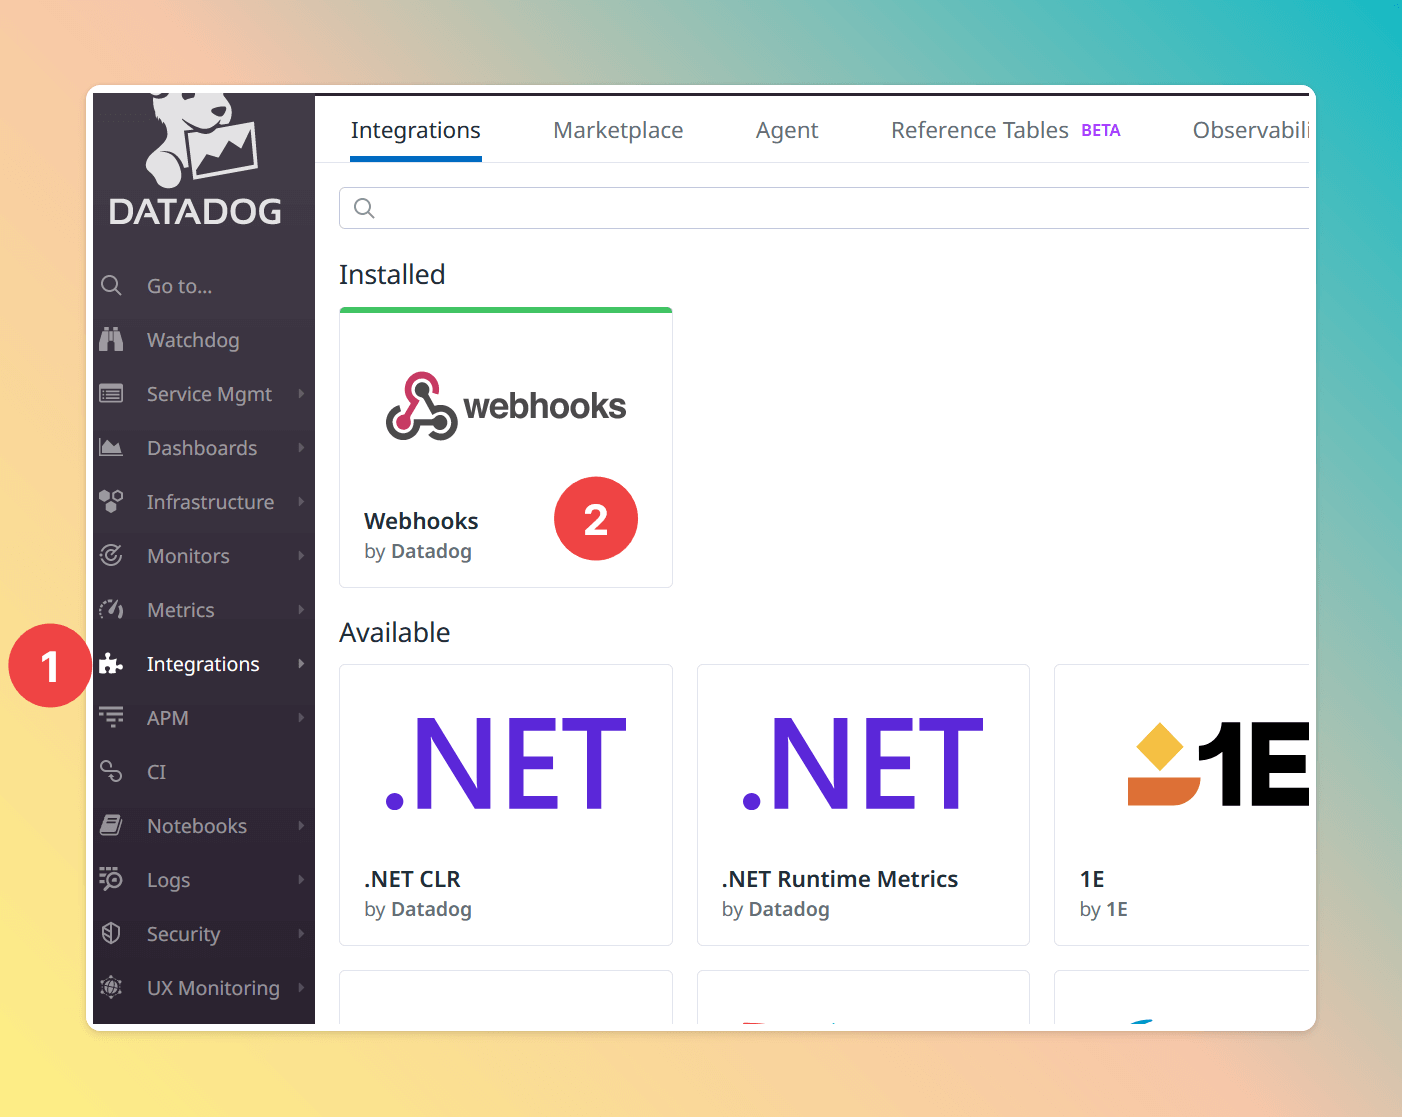
The following steps will be done on the Datadog platform. So, log in to Datadog with your account.Install Webhooks integration
- In the navigation menu, click on
Integrations - Install the
Webhooksintegration and configure it
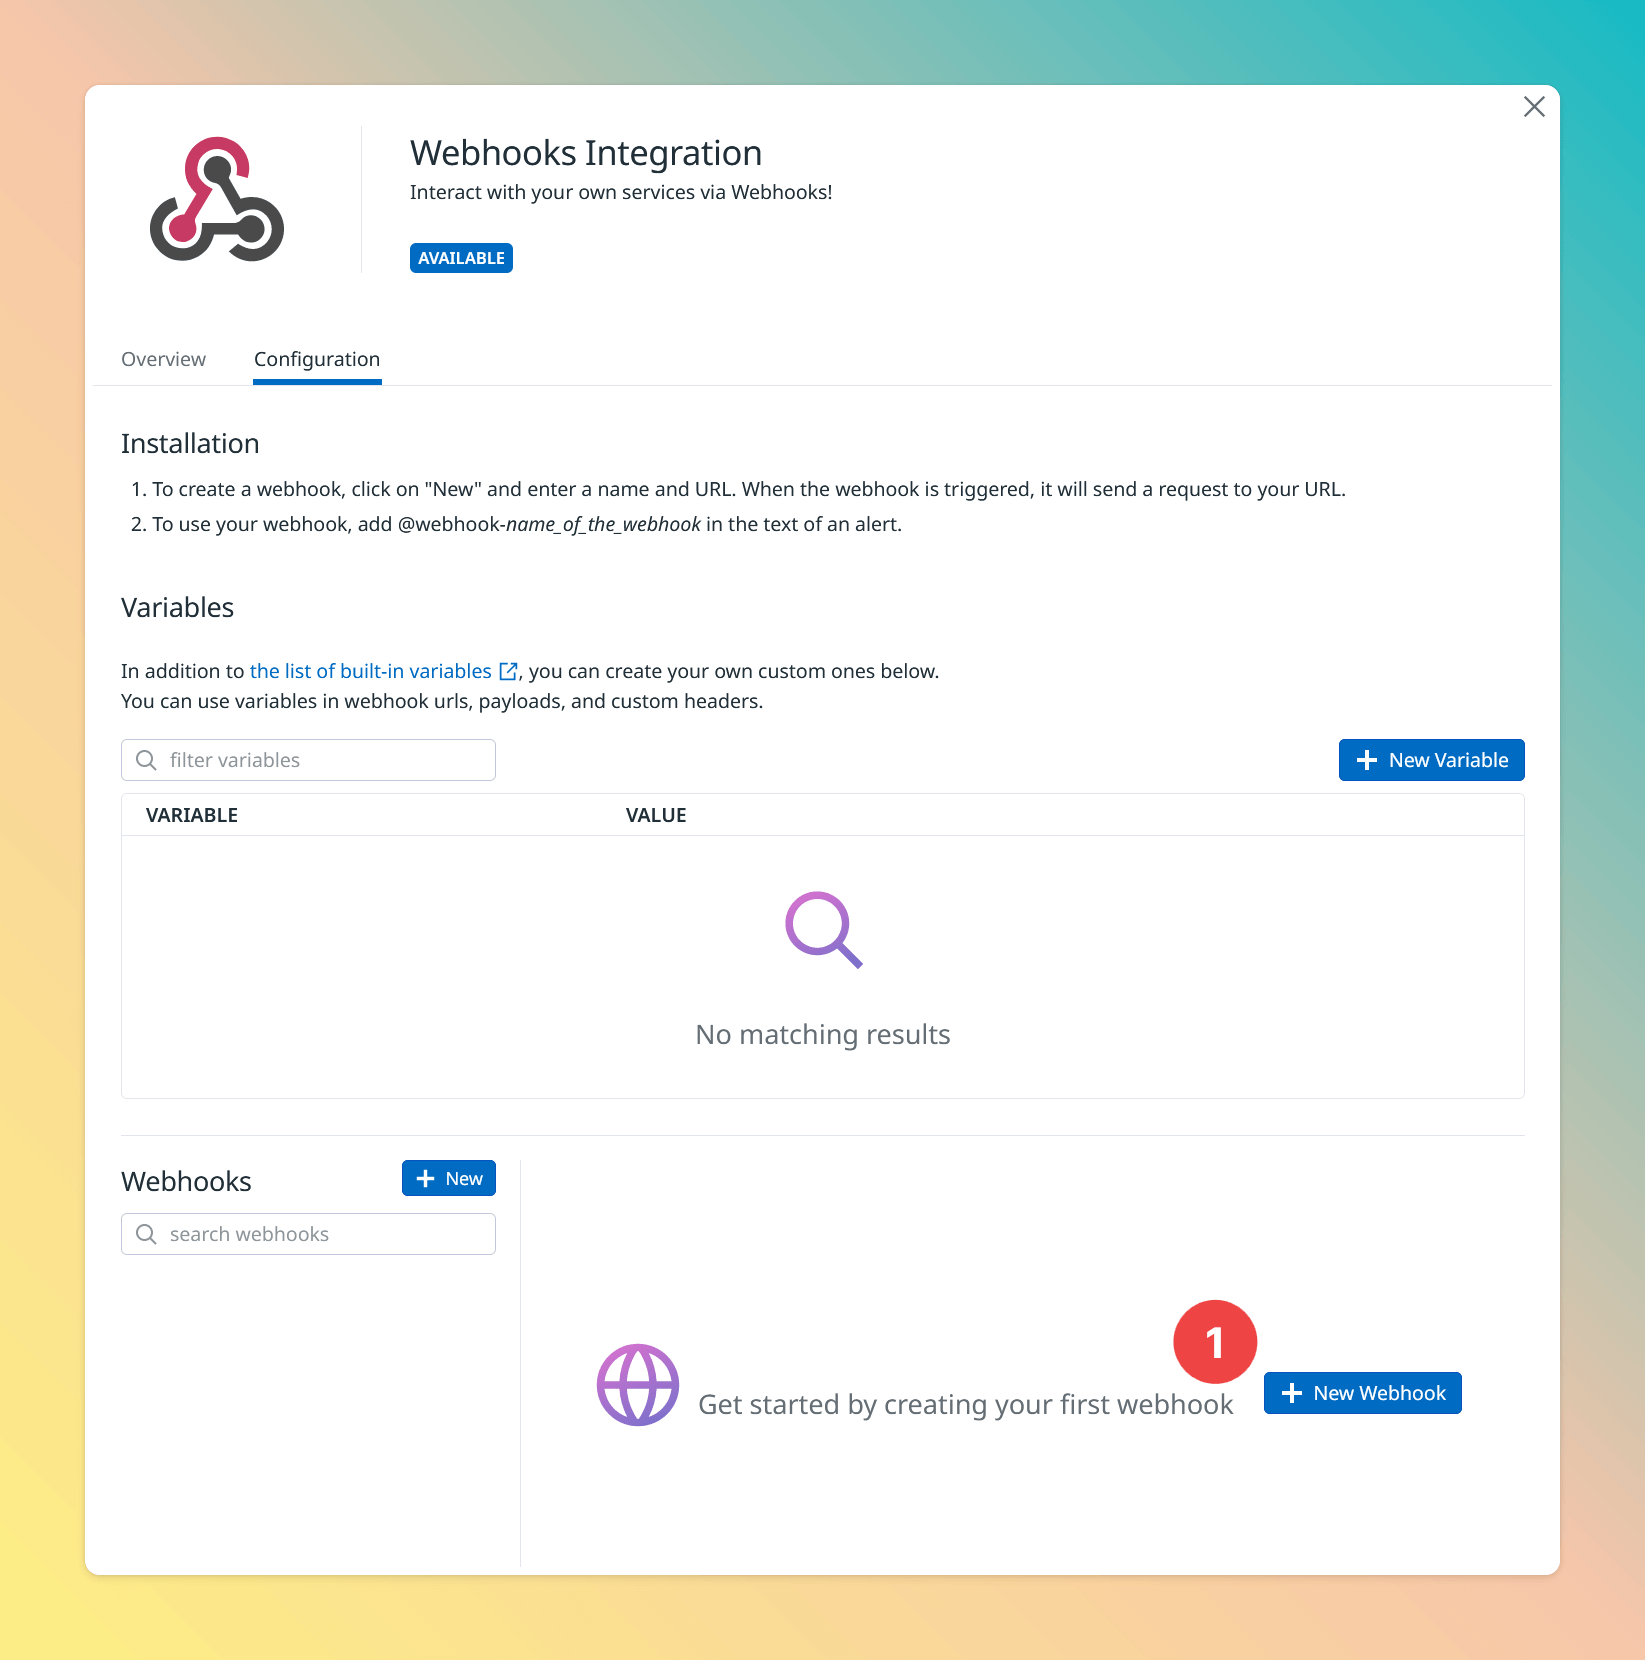
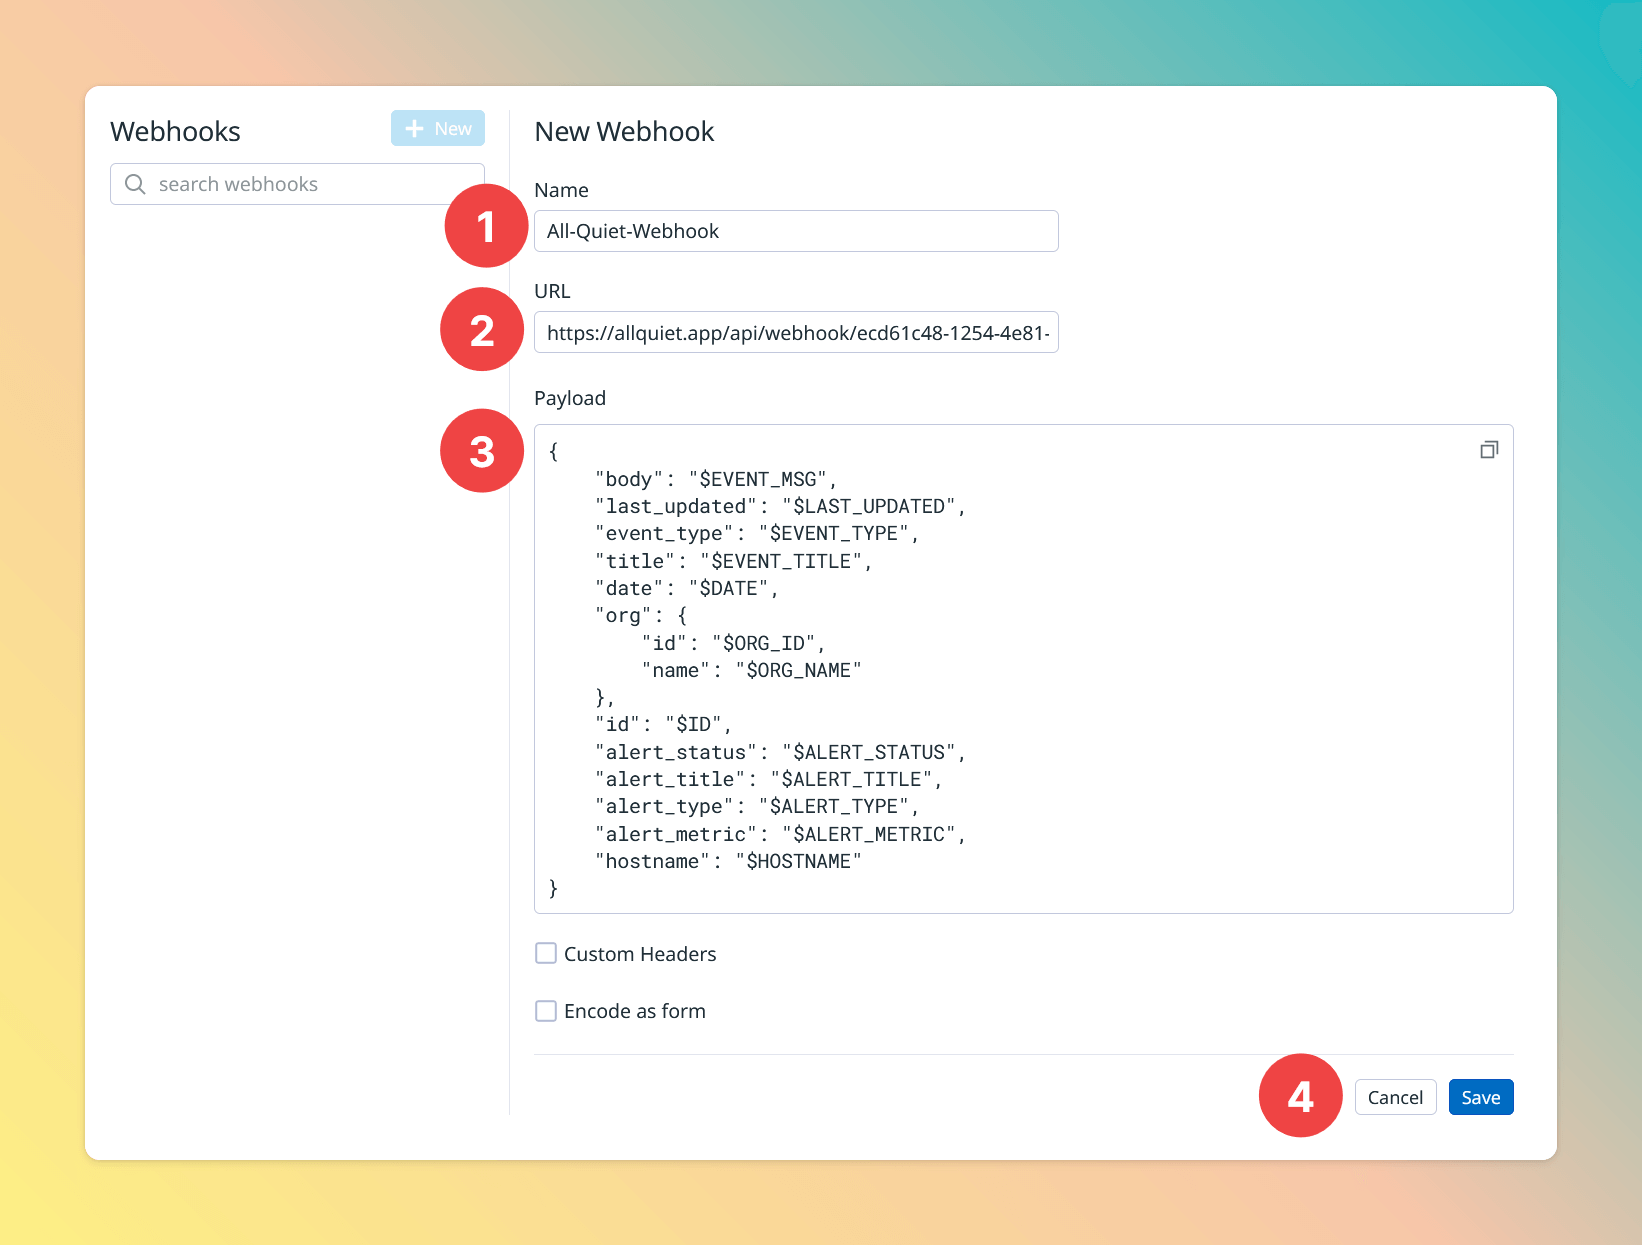
Create a new webhook
In theConfiguration tab, click on New Webhook
Configure DataDog webhook
- Give your webhook a name, e.g. “All-Quiet-Webhook”
- Paste in the All Quiet webhook URL you’ve obtained in step Get The All Quiet Webhook URL.
- Configure the payload that Datadog should send to All Quiet. You can copy & paste the JSON snippet
datadog-payload.jsonprovided below. - Finally, save the integration.
datadog-payload.json
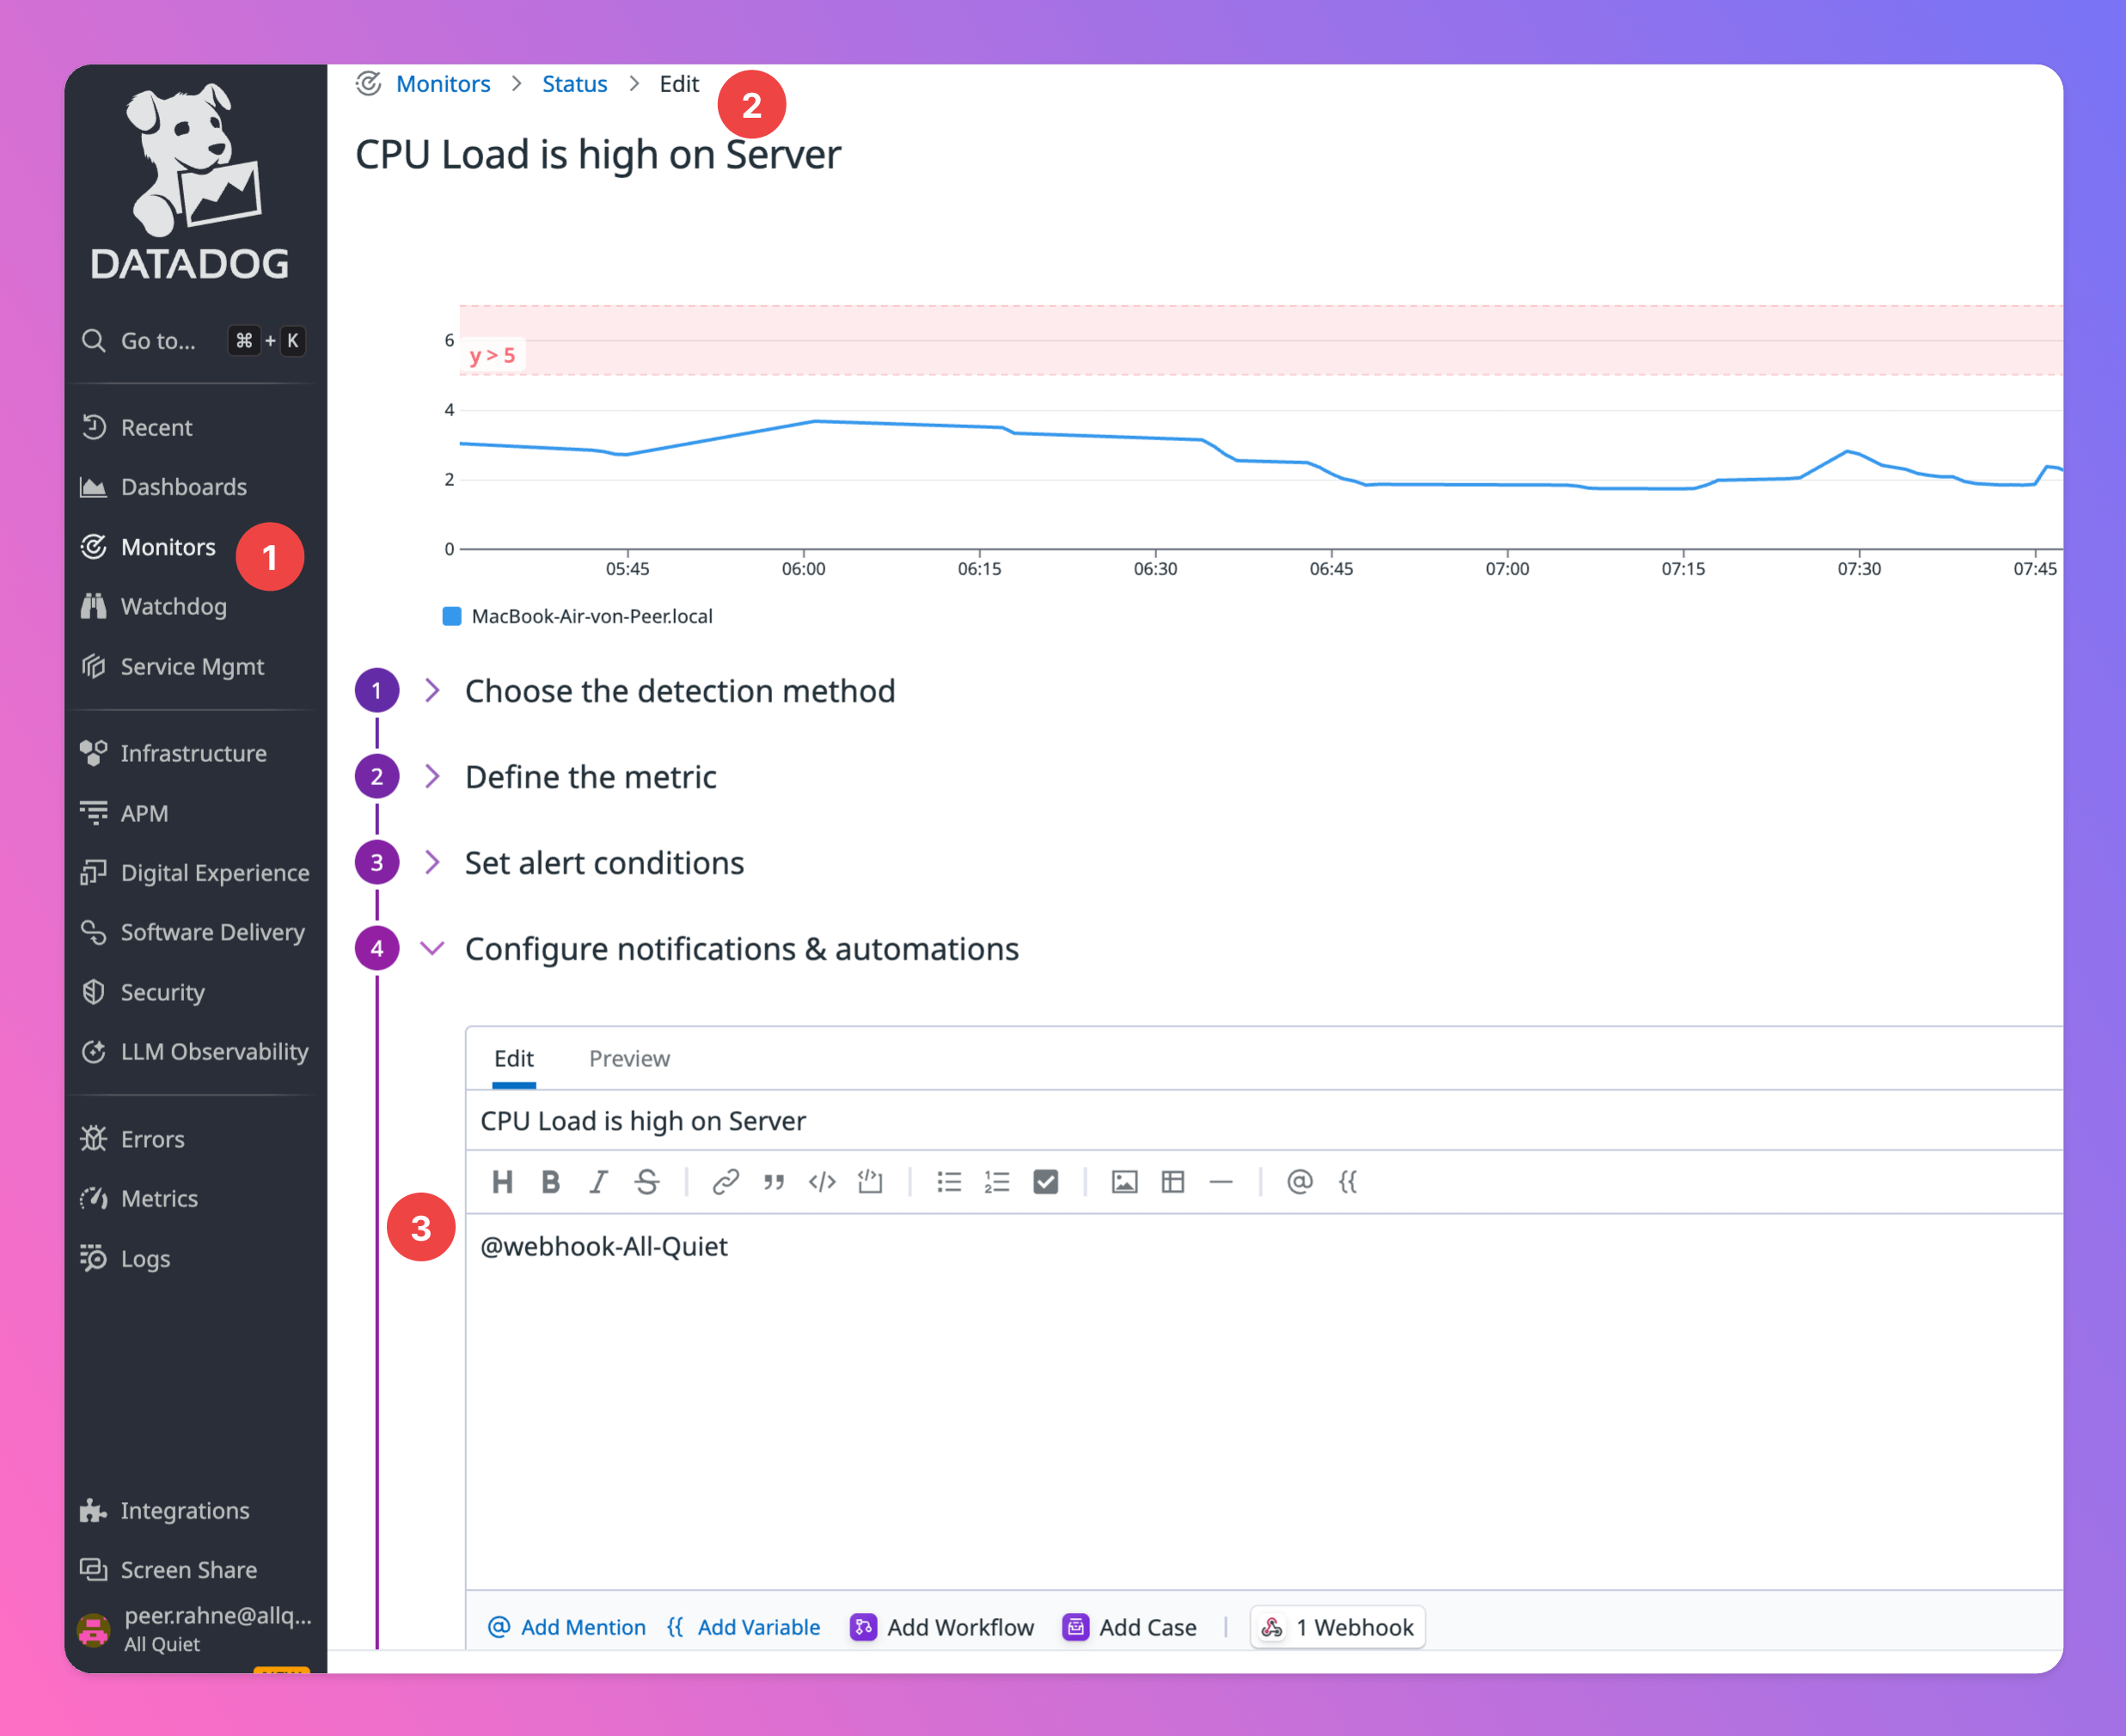
Configure your monitor
- Click on
Monitors - Select one of your monitors and open its edit page. In this example, the monitor’s name was “My Watchdog Monitor”.
- In the subsection “Configure notifications & automations”, tag your newly created hook with “@webhook-Your-Webhook-Name”. This will tell Datadog to use your webhook integration as a notification destination.
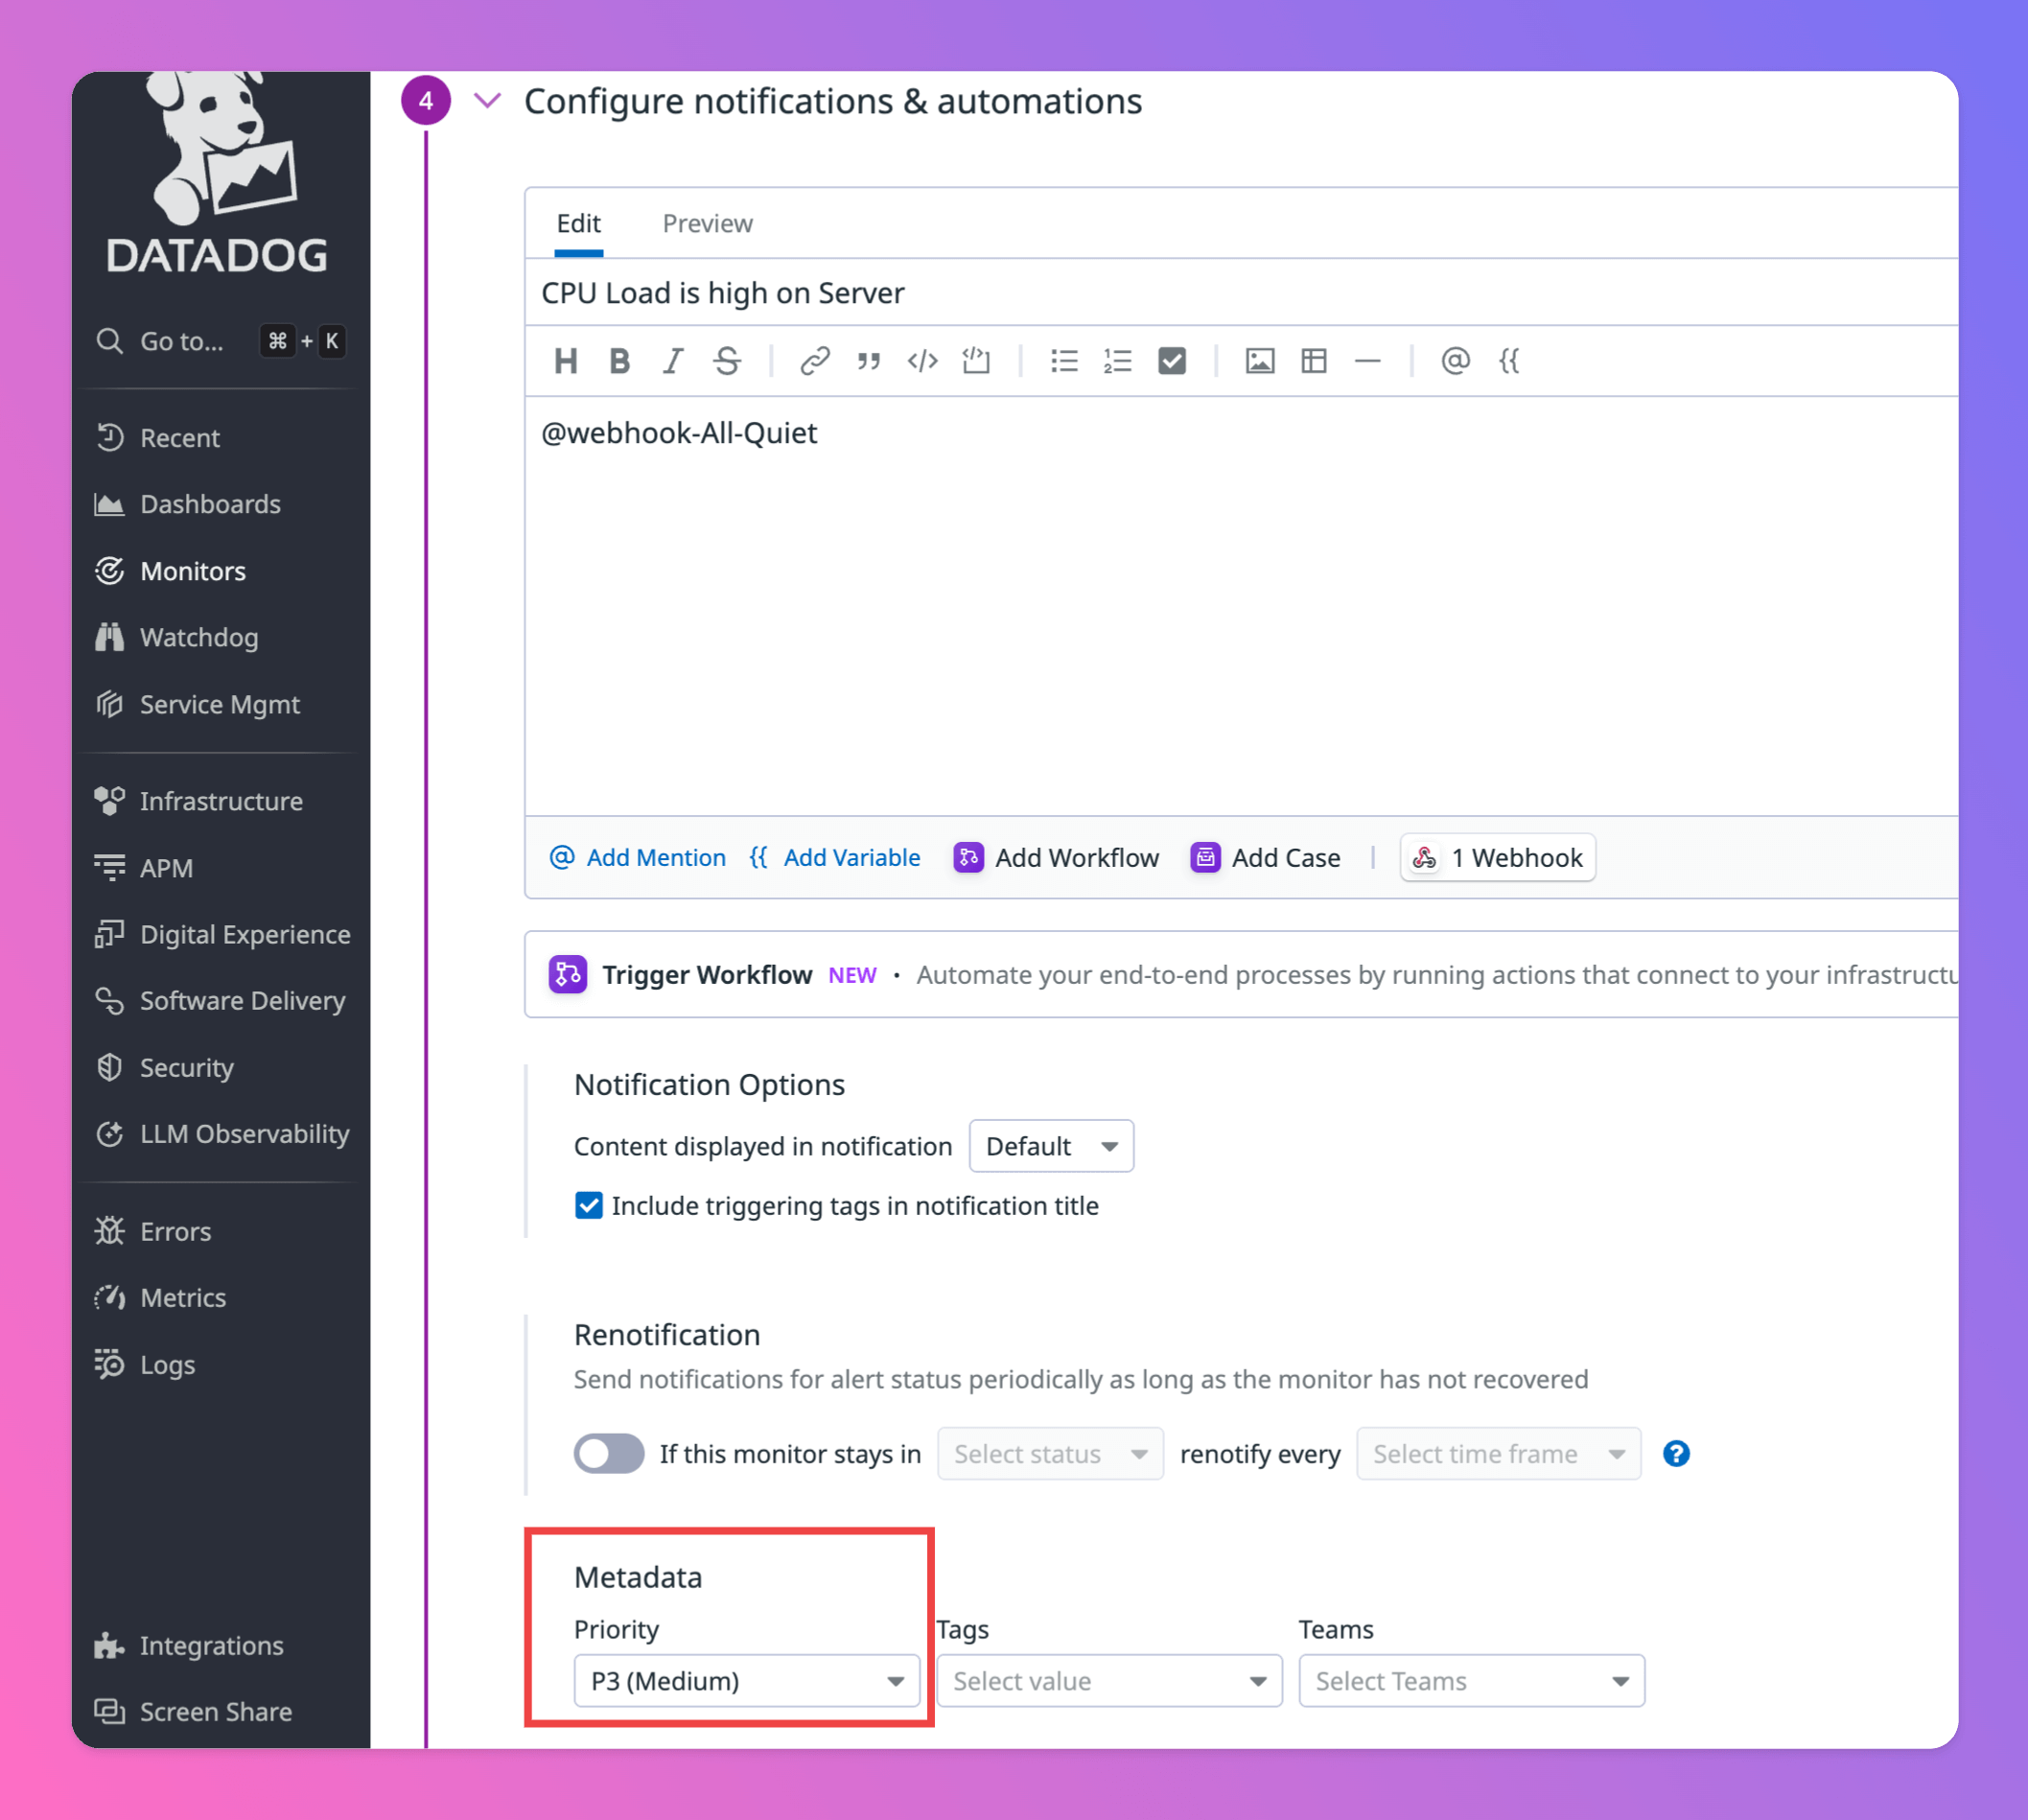
Set your monitor’s priority
- Within step “Configure notifications & automations”, scroll down to section “Metadata”
- You’ll find a select box to set the priority of your monitor.
P1,P2will map to severityCriticalP3,P4will map to severityWarningP5will map to severityMinor- If you don’t specify a priority, the incident’s severity will be
Critical
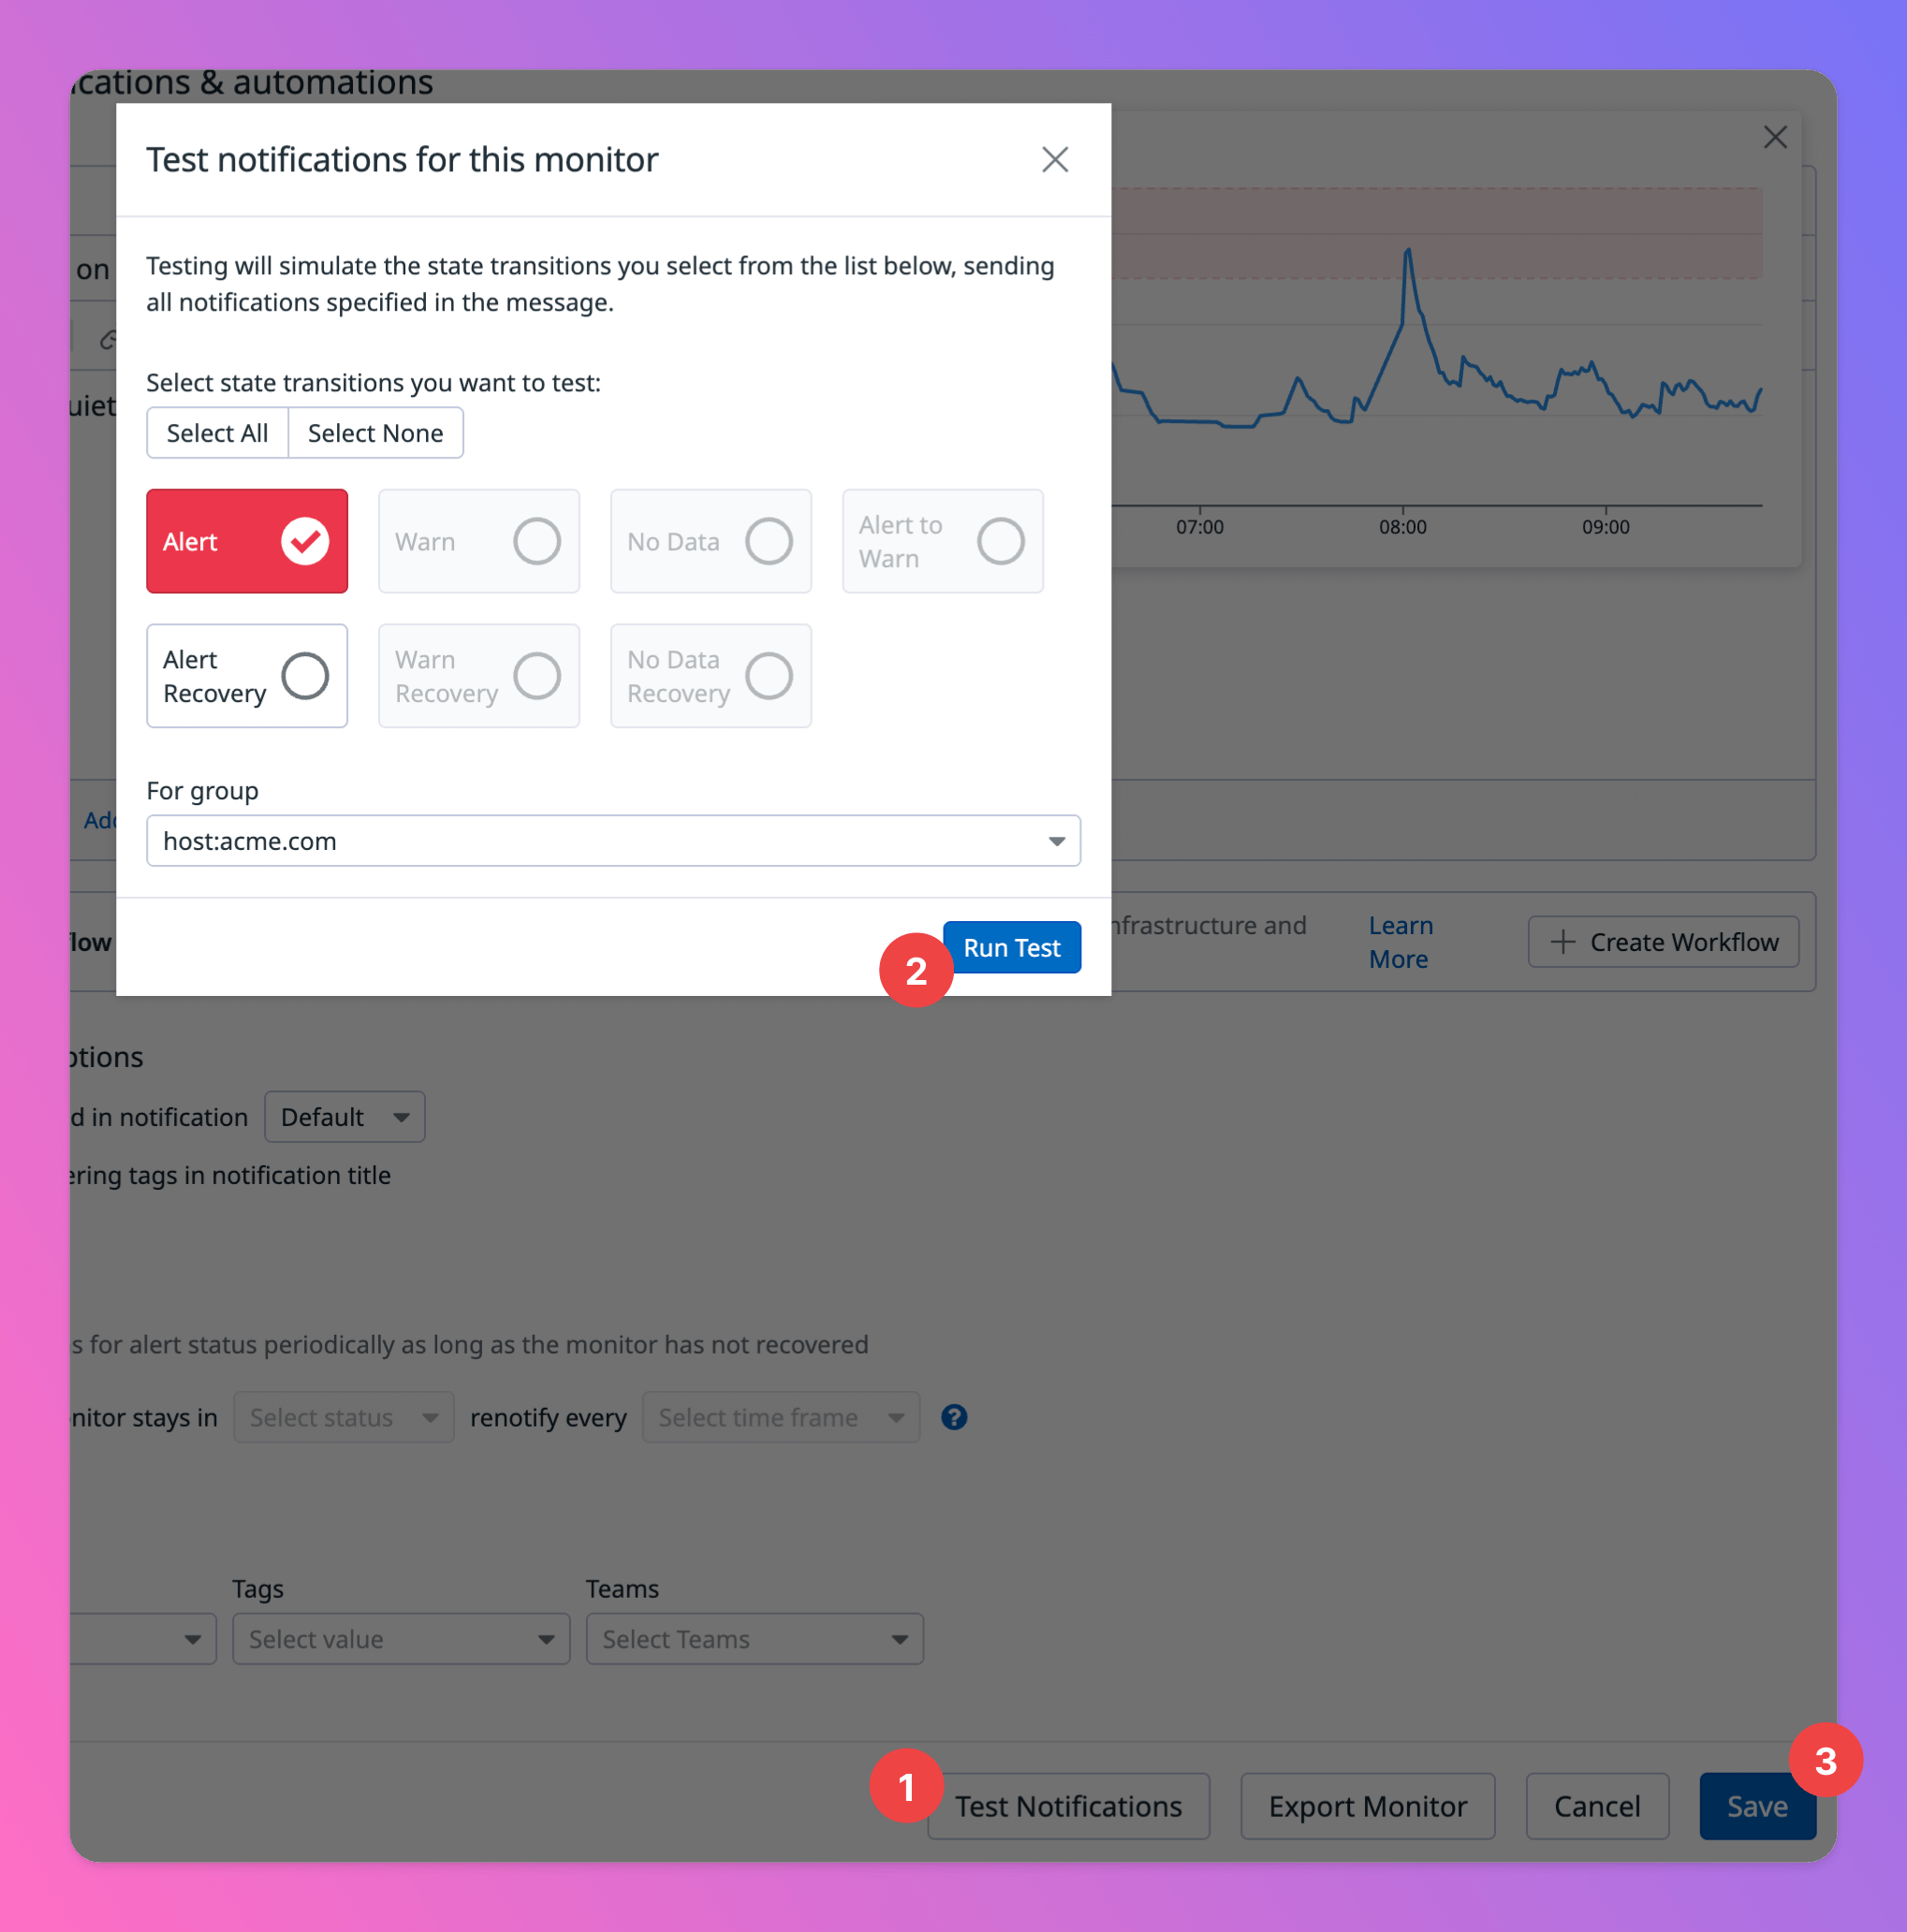
3. Test Notifications
These steps are important to successfully test your Datadog integration on the All Quiet side.- Click on
Test notificationsat the very bottom of the edit page. - Select
Alertand click onRun Testto send out notifications to your newly created All Quiet integration. - Finally, don’t forget to
Saveyour integration!
Datadog’s notifications with Webhooks are now successfully integrated into All
Quiet, offering enhanced incident management capabilities and efficient policy
management through an intuitive interface.
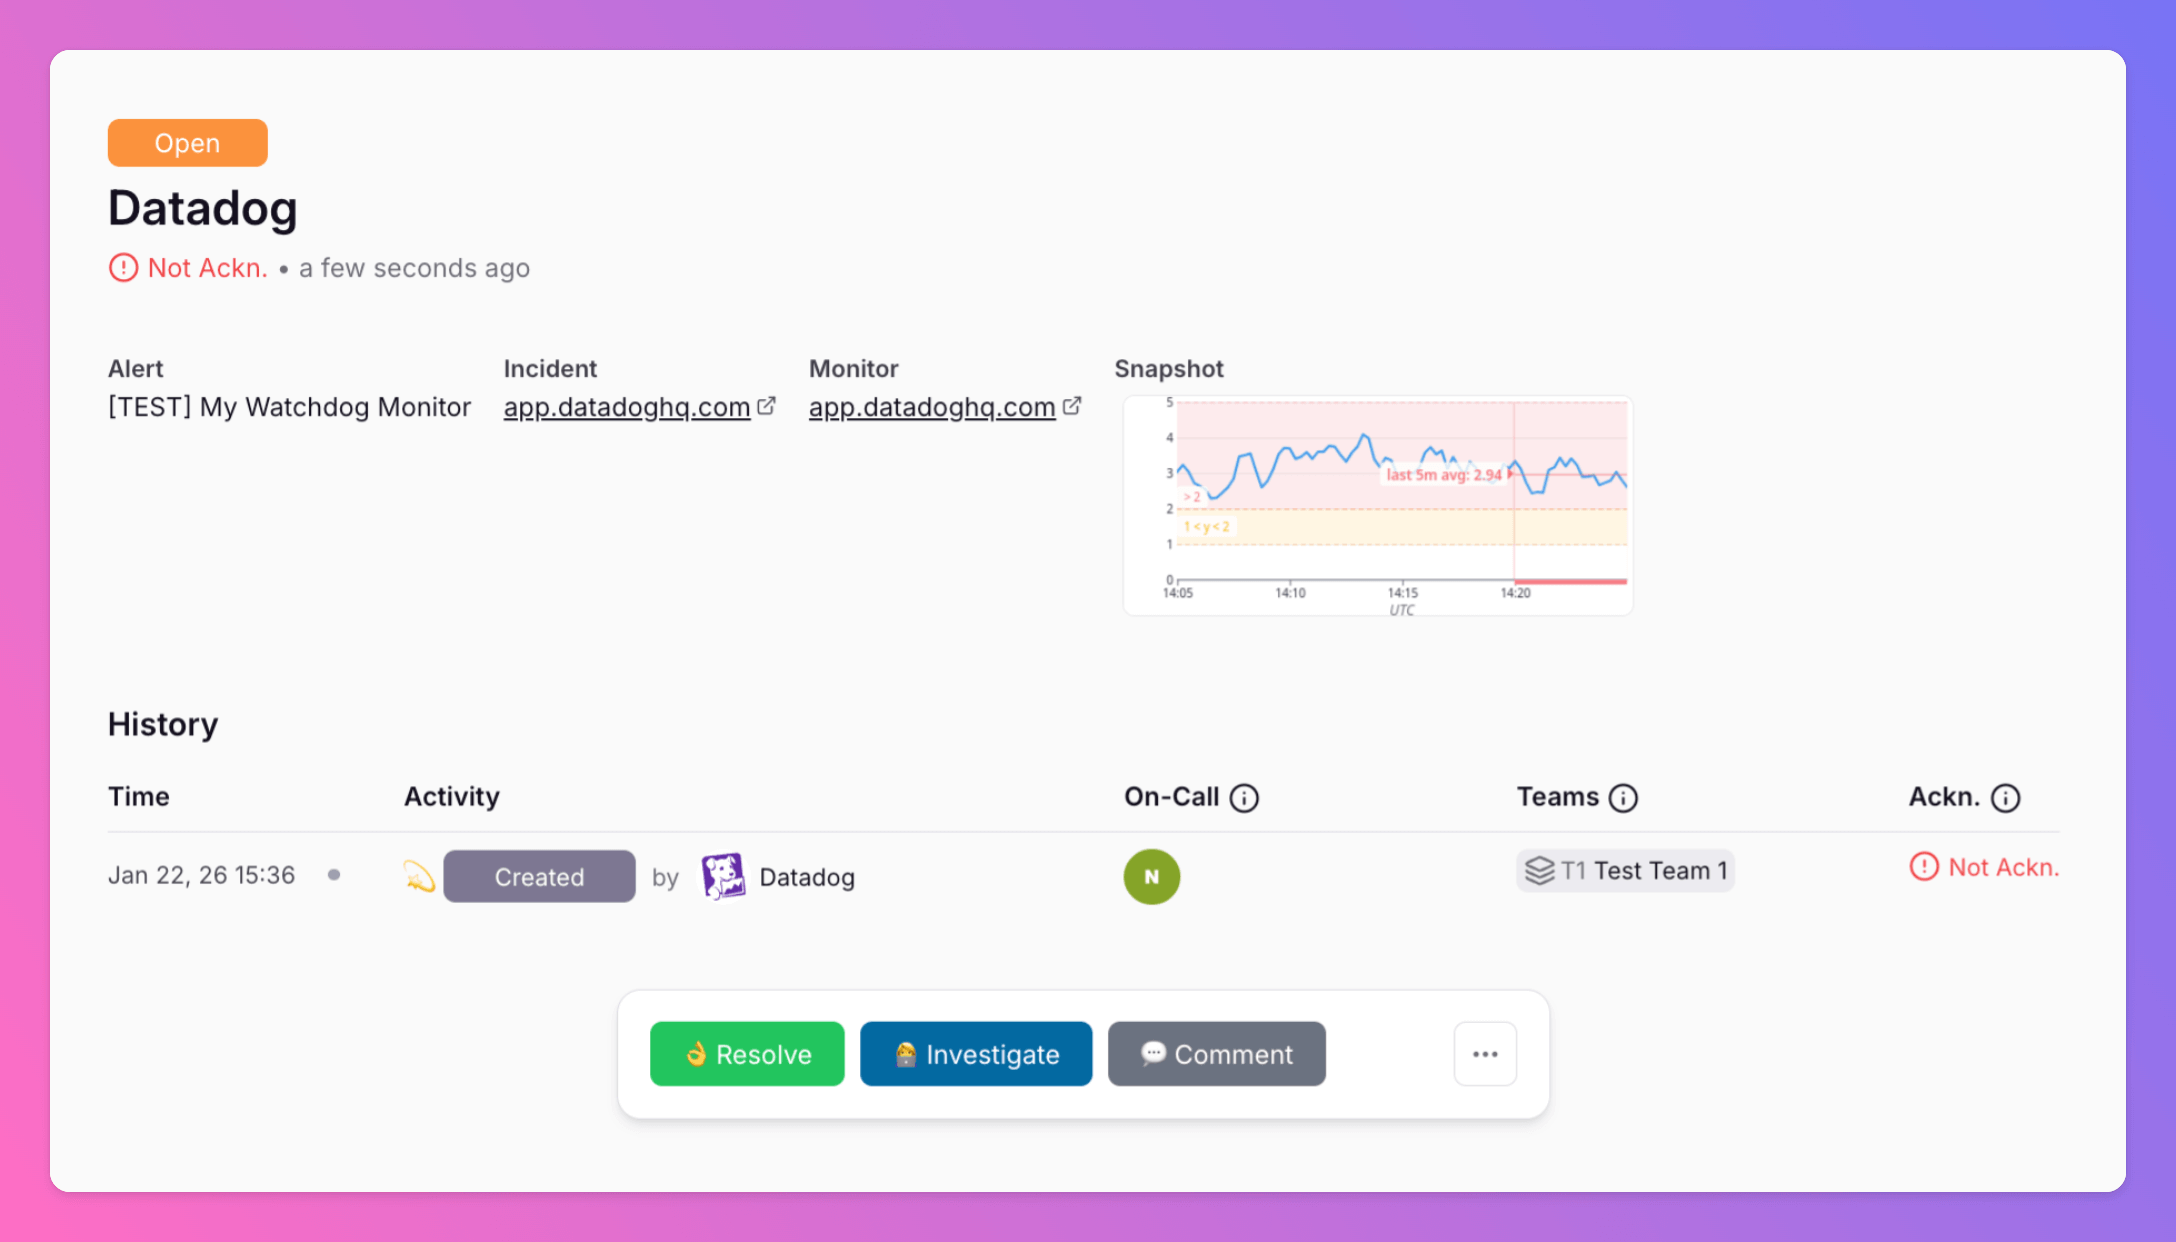
Datadog Alert as All Quiet Incident
You’re done. 🥳 The next steps are merely there to verify if everything’s setup correctly! Go back to the All Quiet Web App and navigate to the “Incidents” overview. You will see the test incident created by Datadog. Open the details page to see the incident created. If you are missing anything, you can adjust the Alert on Datadog to send the info required and map it against an All Quiet incident in the payload mapping section of your Datadog inbound integration page on All Quiet.