Setup time: 3 Min
1. Create Sentry Integration on All Quiet
Create a Sentry integration
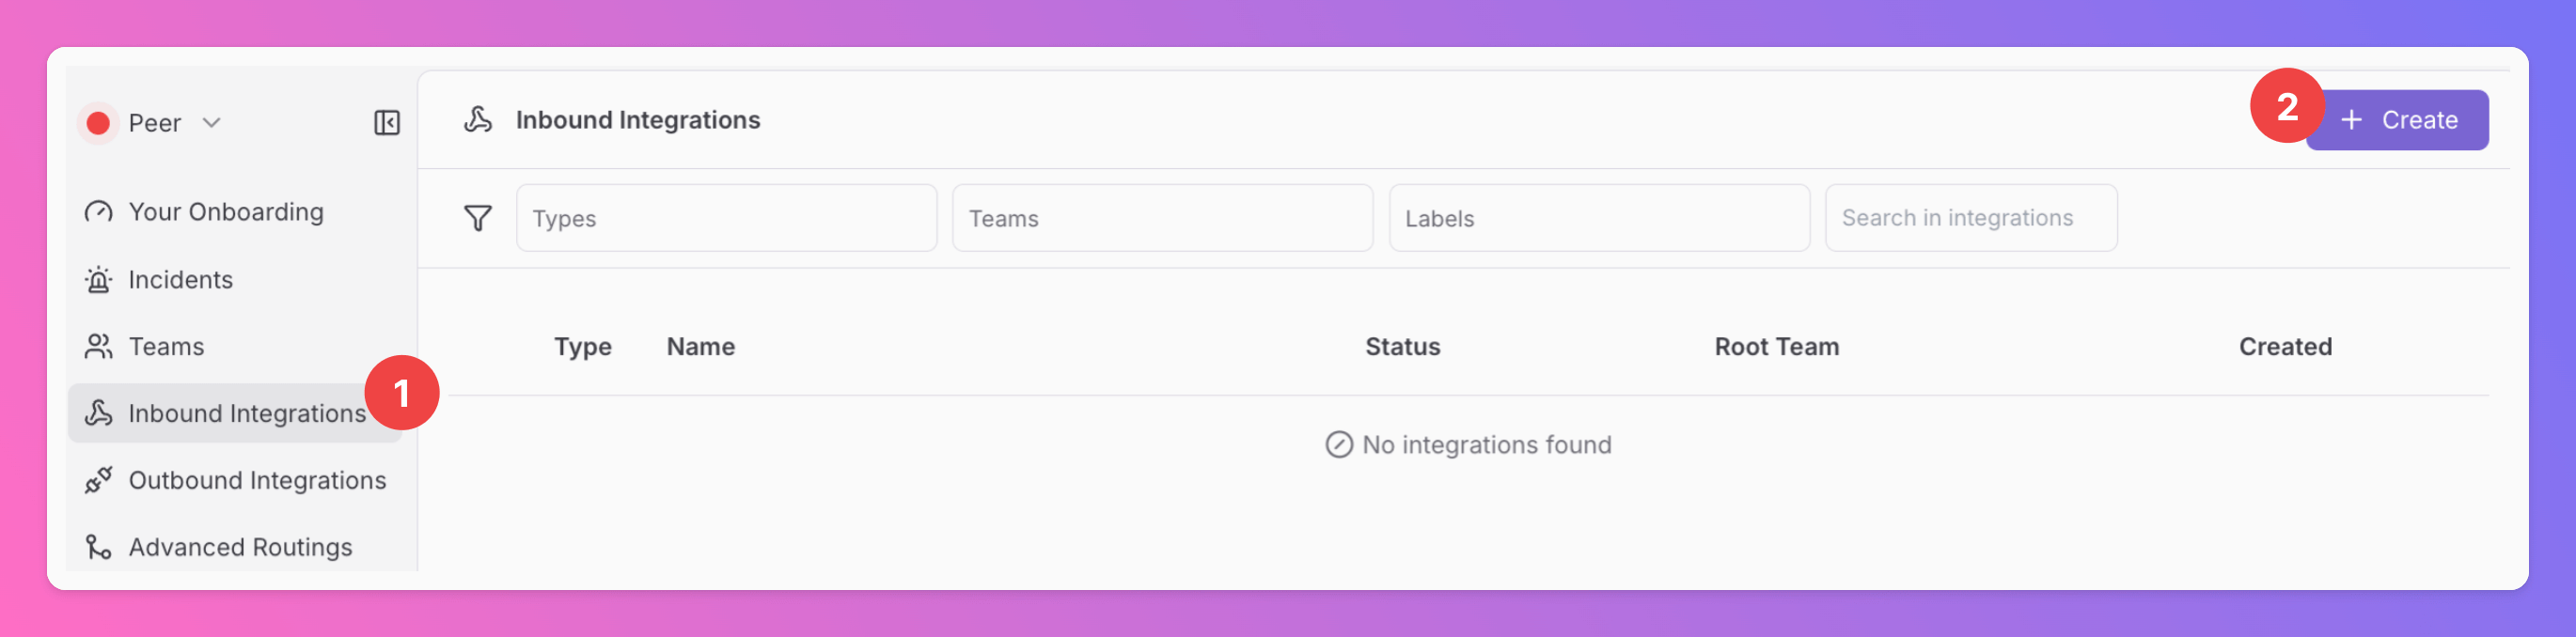
- Click on the
Inbound Integrationstab. - Click on
+ Create.
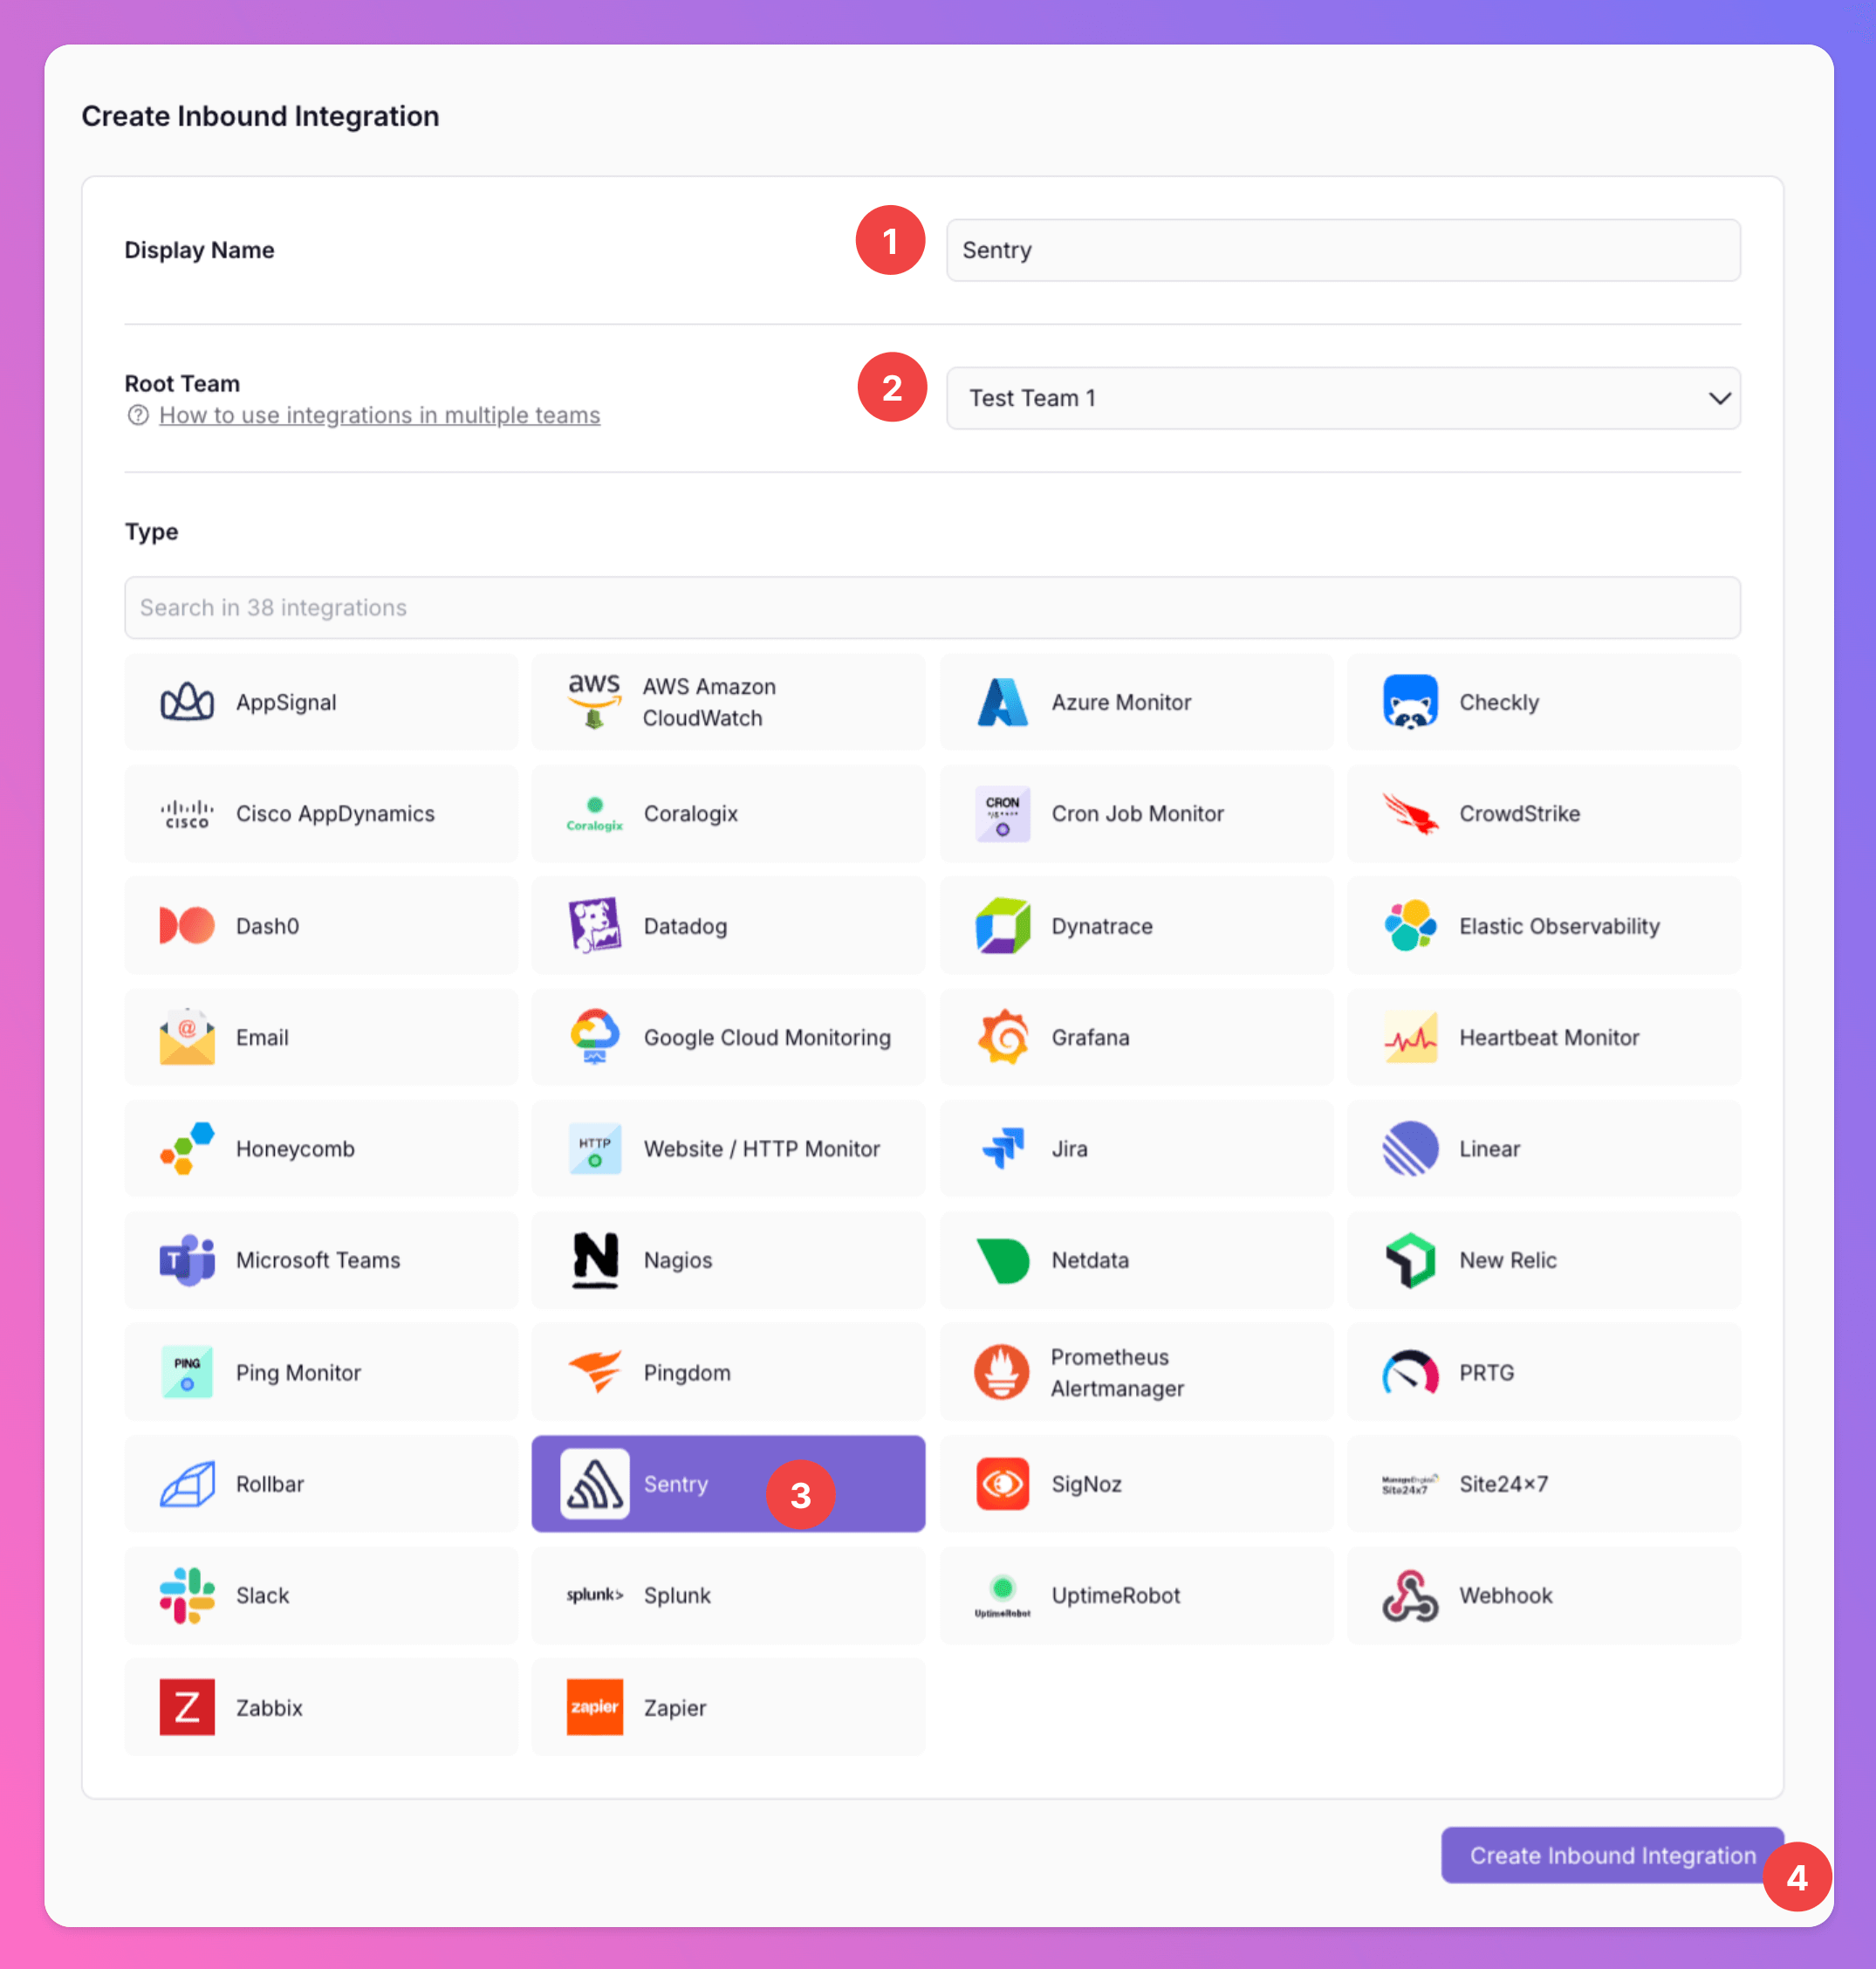
Select Sentry for the integration’s type
- Enter a
Display Namefor your integration, e.g. “Sentry”. - Select a
Team. - Select
Sentryas the integration’s type. - Click
Create Inbound Integration.
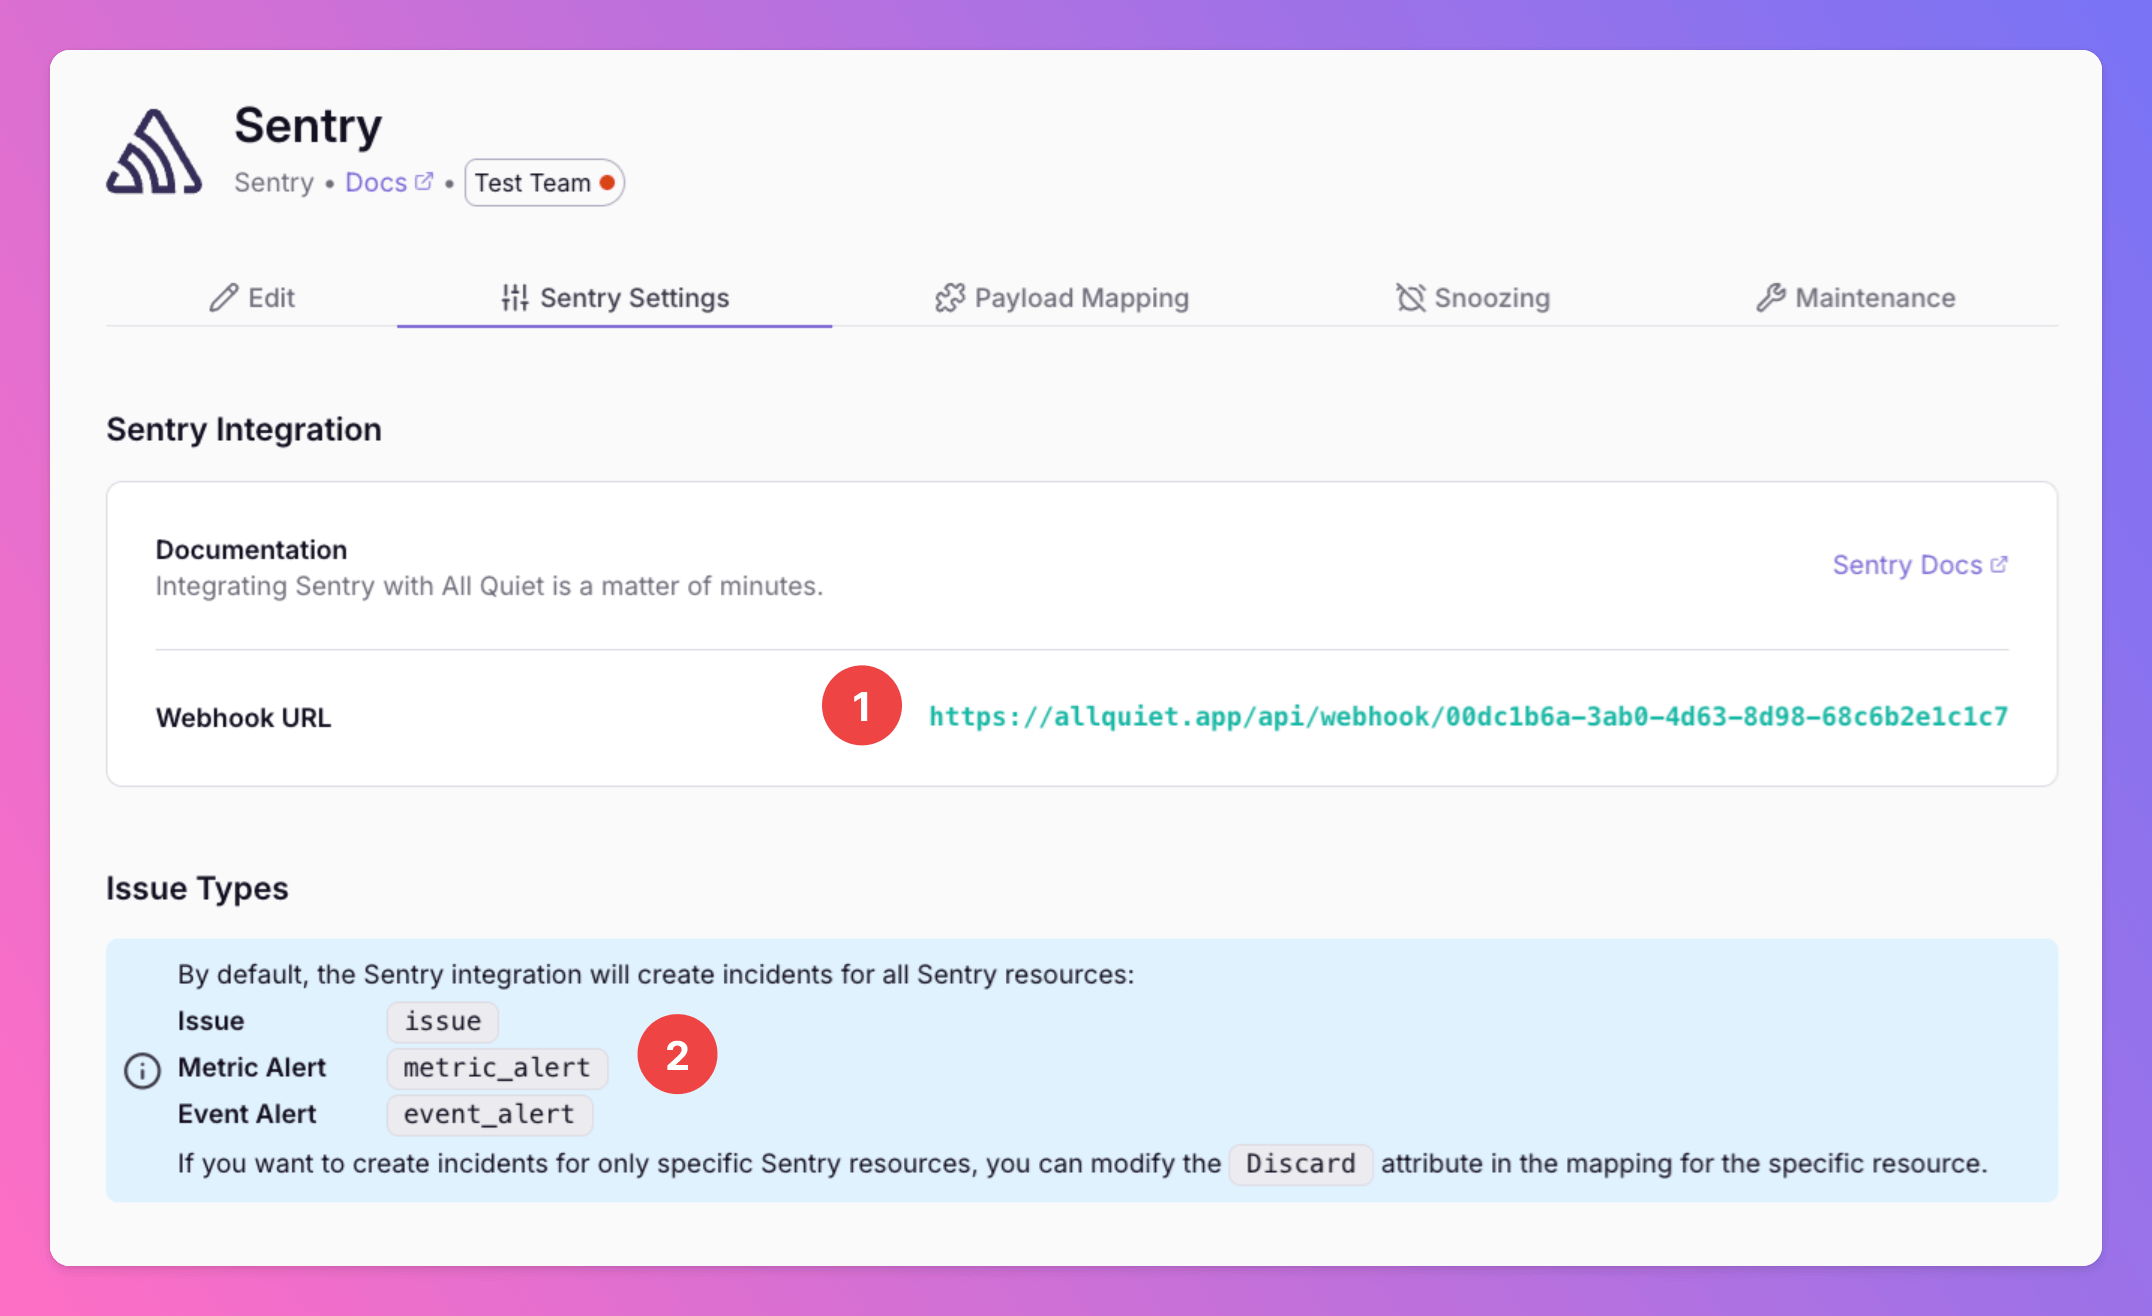
Get the All Quiet webhook URL
After creating the Sentry integration on All Quiet- you can view and copy the webhook URL. You will require this URL in step 2 when configuring the custom integration on Sentry.
- By default, the Sentry integration will create incidents for all Sentry resources. If you want to create incidents for only specific Sentry resources, you can modify the Discard attribute in the mapping for the specific resource.
Optionally toggle
Enable additional Authentication & Security below the webhook URL to restrict who can POST payloads.- IP Filter — Allow requests only from specific IPs or CIDR ranges. Failed checks return 404 Not Found.
- Bearer authentication — Require
Authorization: Bearer YOUR_TOKEN. Missing or invalid tokens return 401 Unauthorized.
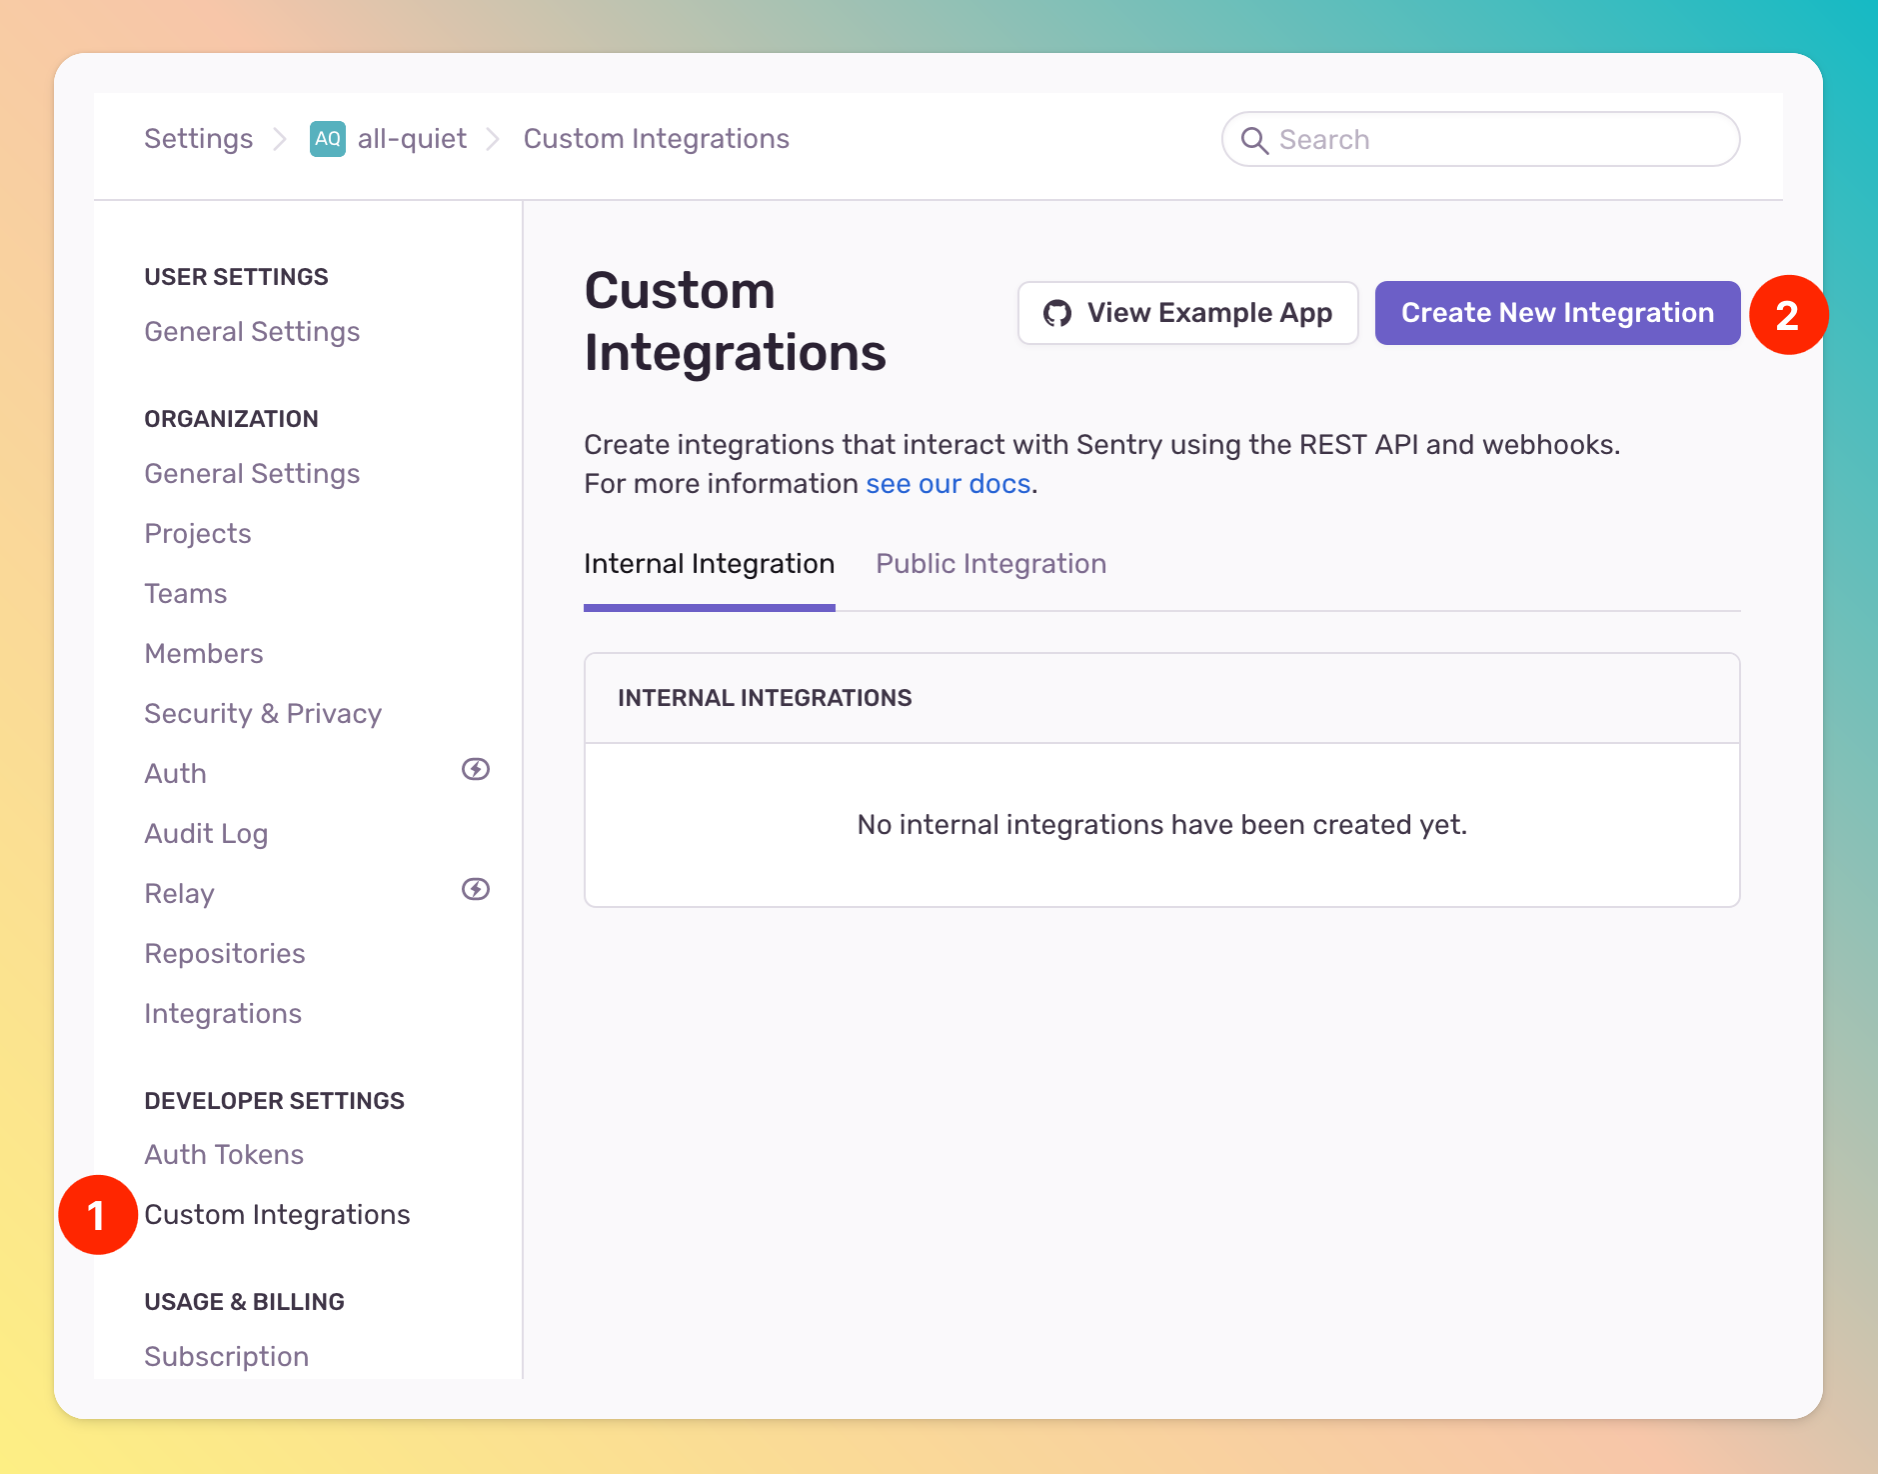
2. Create a custom integration on Sentry
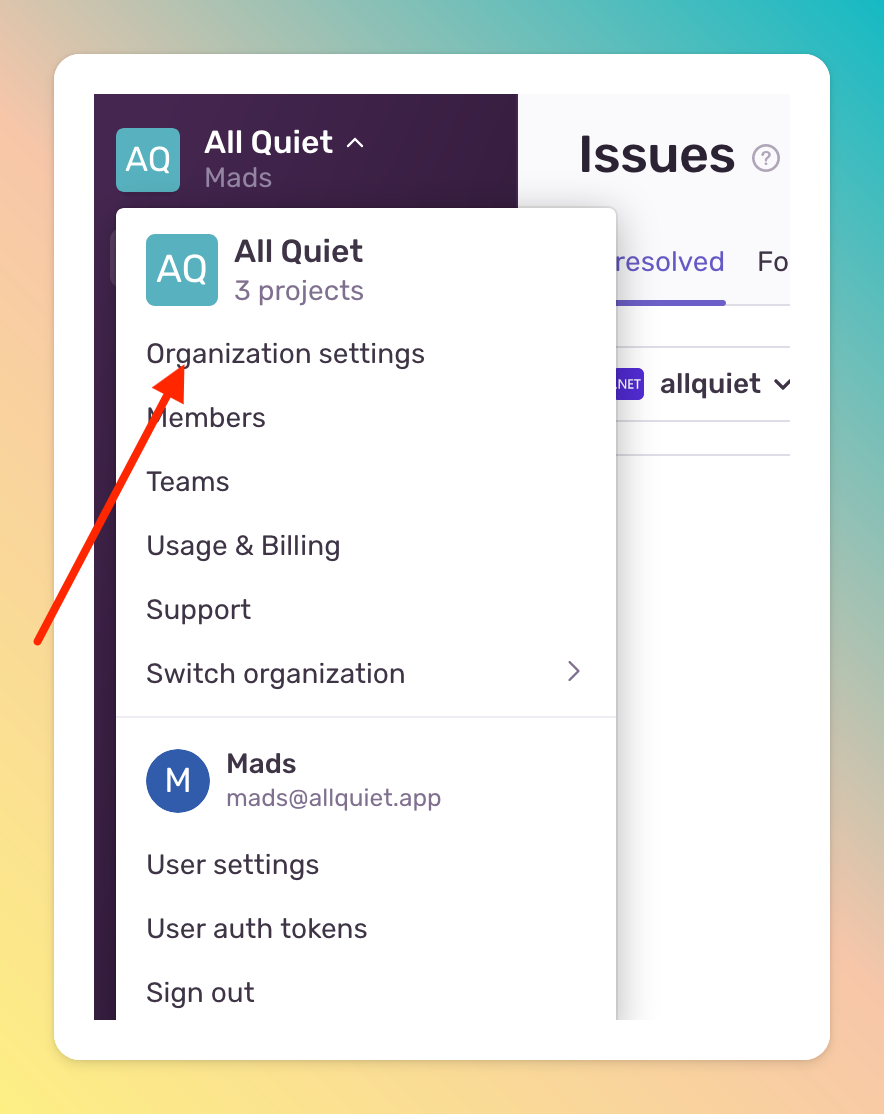
Open your Sentry, click on your Account and navigate toOrganization settings.
- Navigate to
Developer Settings -> Custom Integrations - Click
Create New Integration.
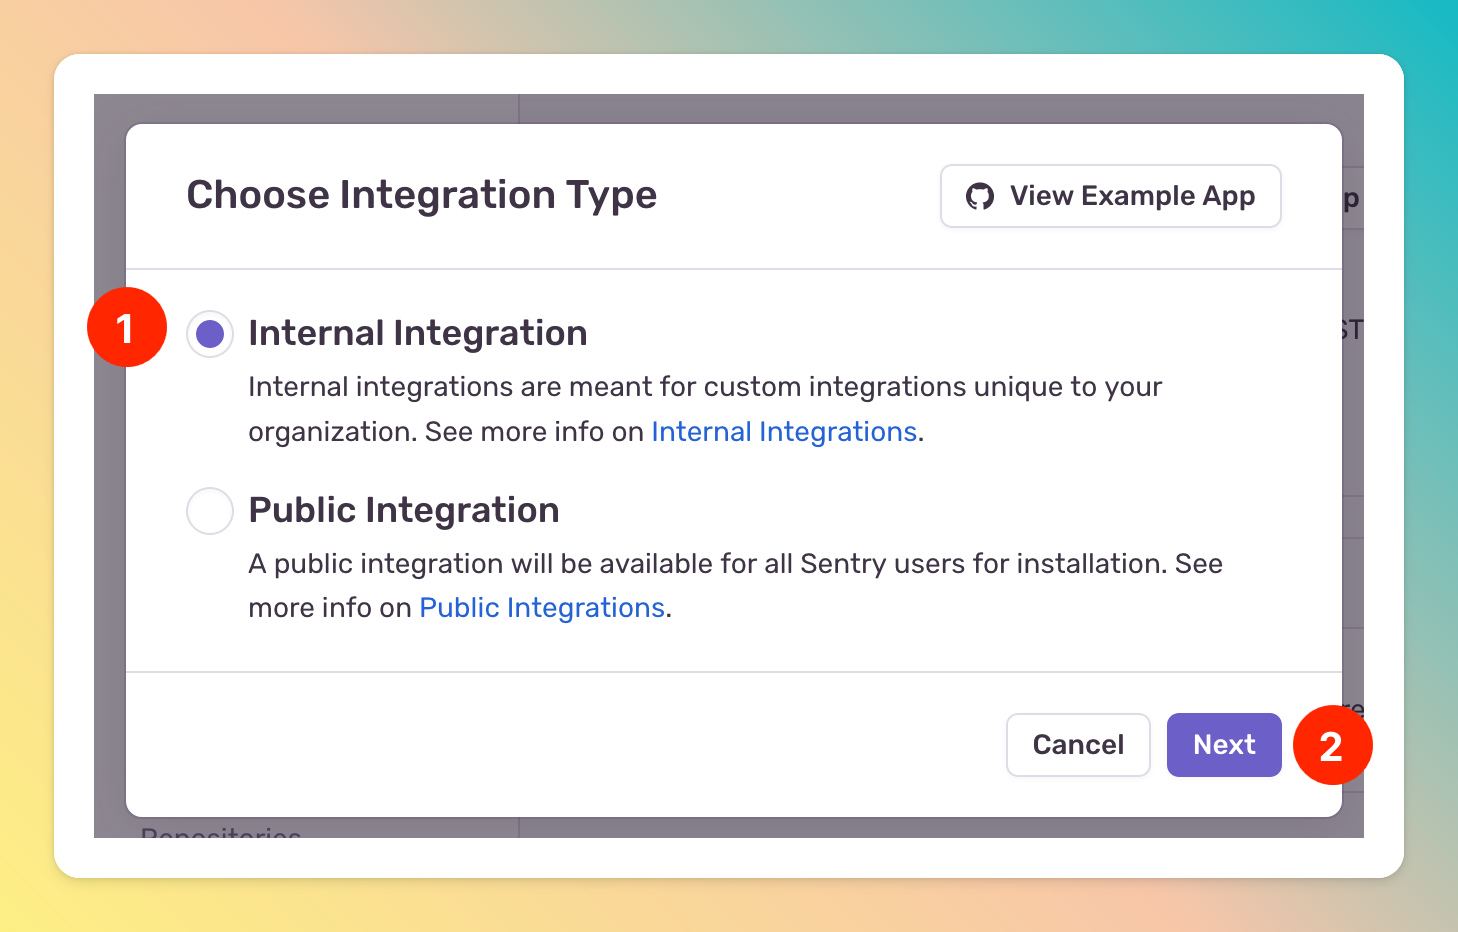
- Choose
Internal Integration - Click
Next
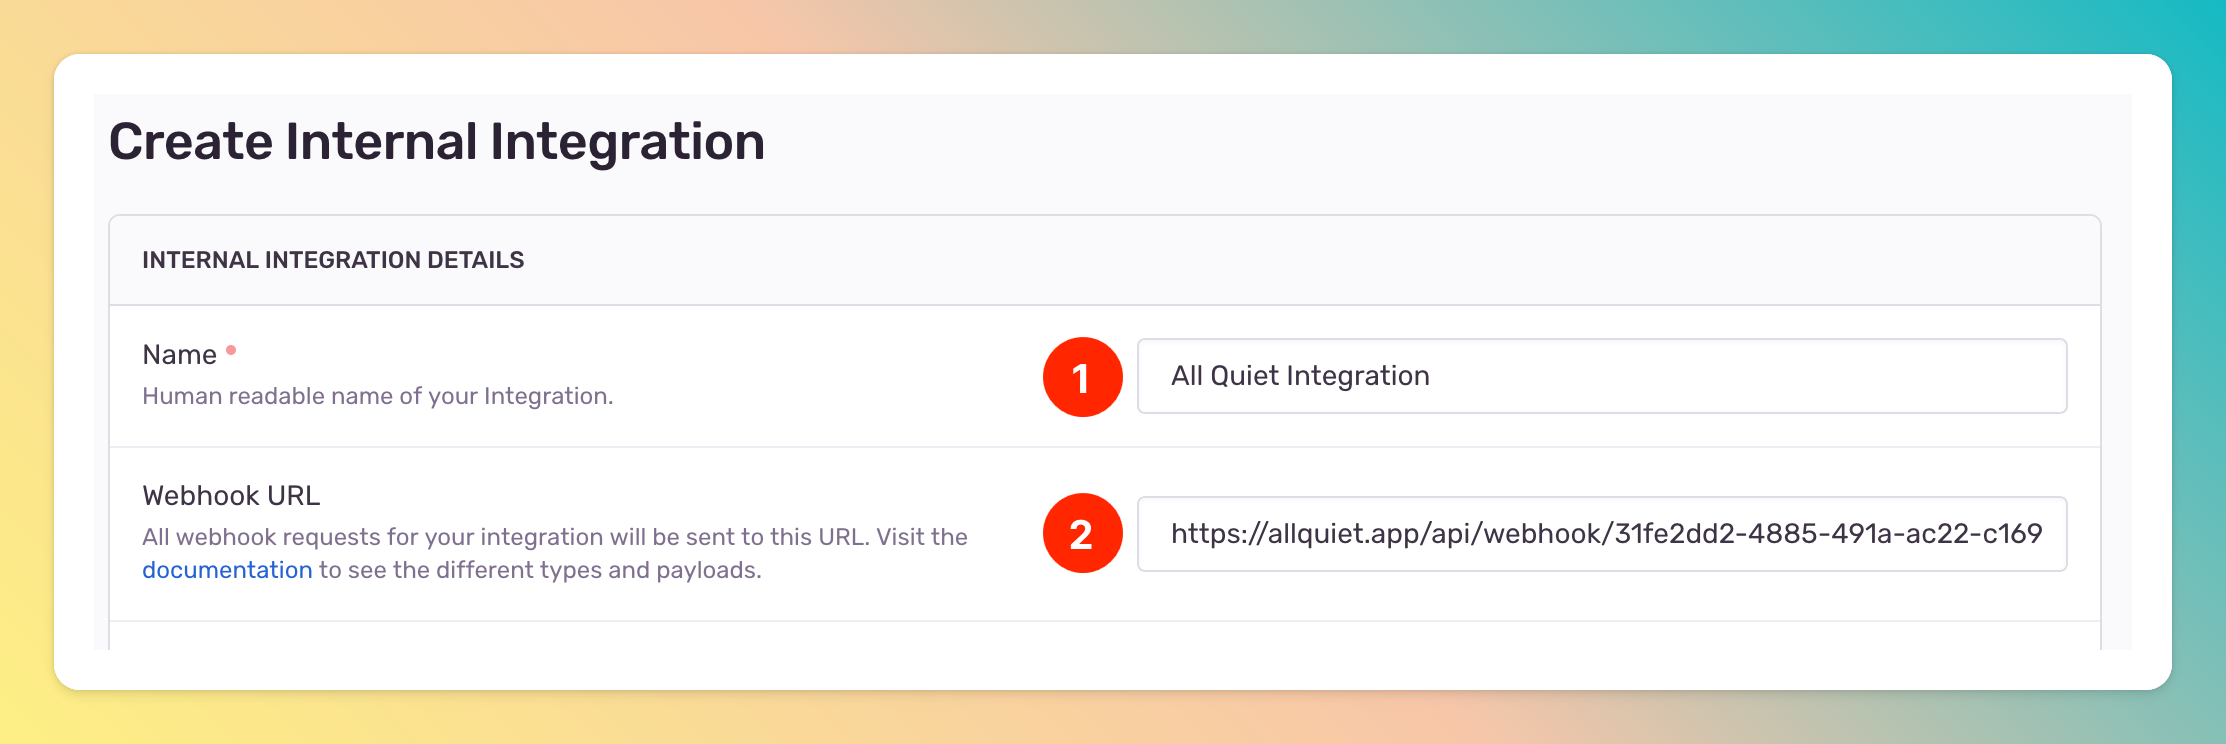
- Enter a name for your integration
- Paste in the All Quiet webhook URL you’ve obtained in step Get The All Quiet Webhook URL.
- Select
Readpermissions forIssue & Event - Select
issueforWebhooks - Click
Save Changesto finally create the custom integration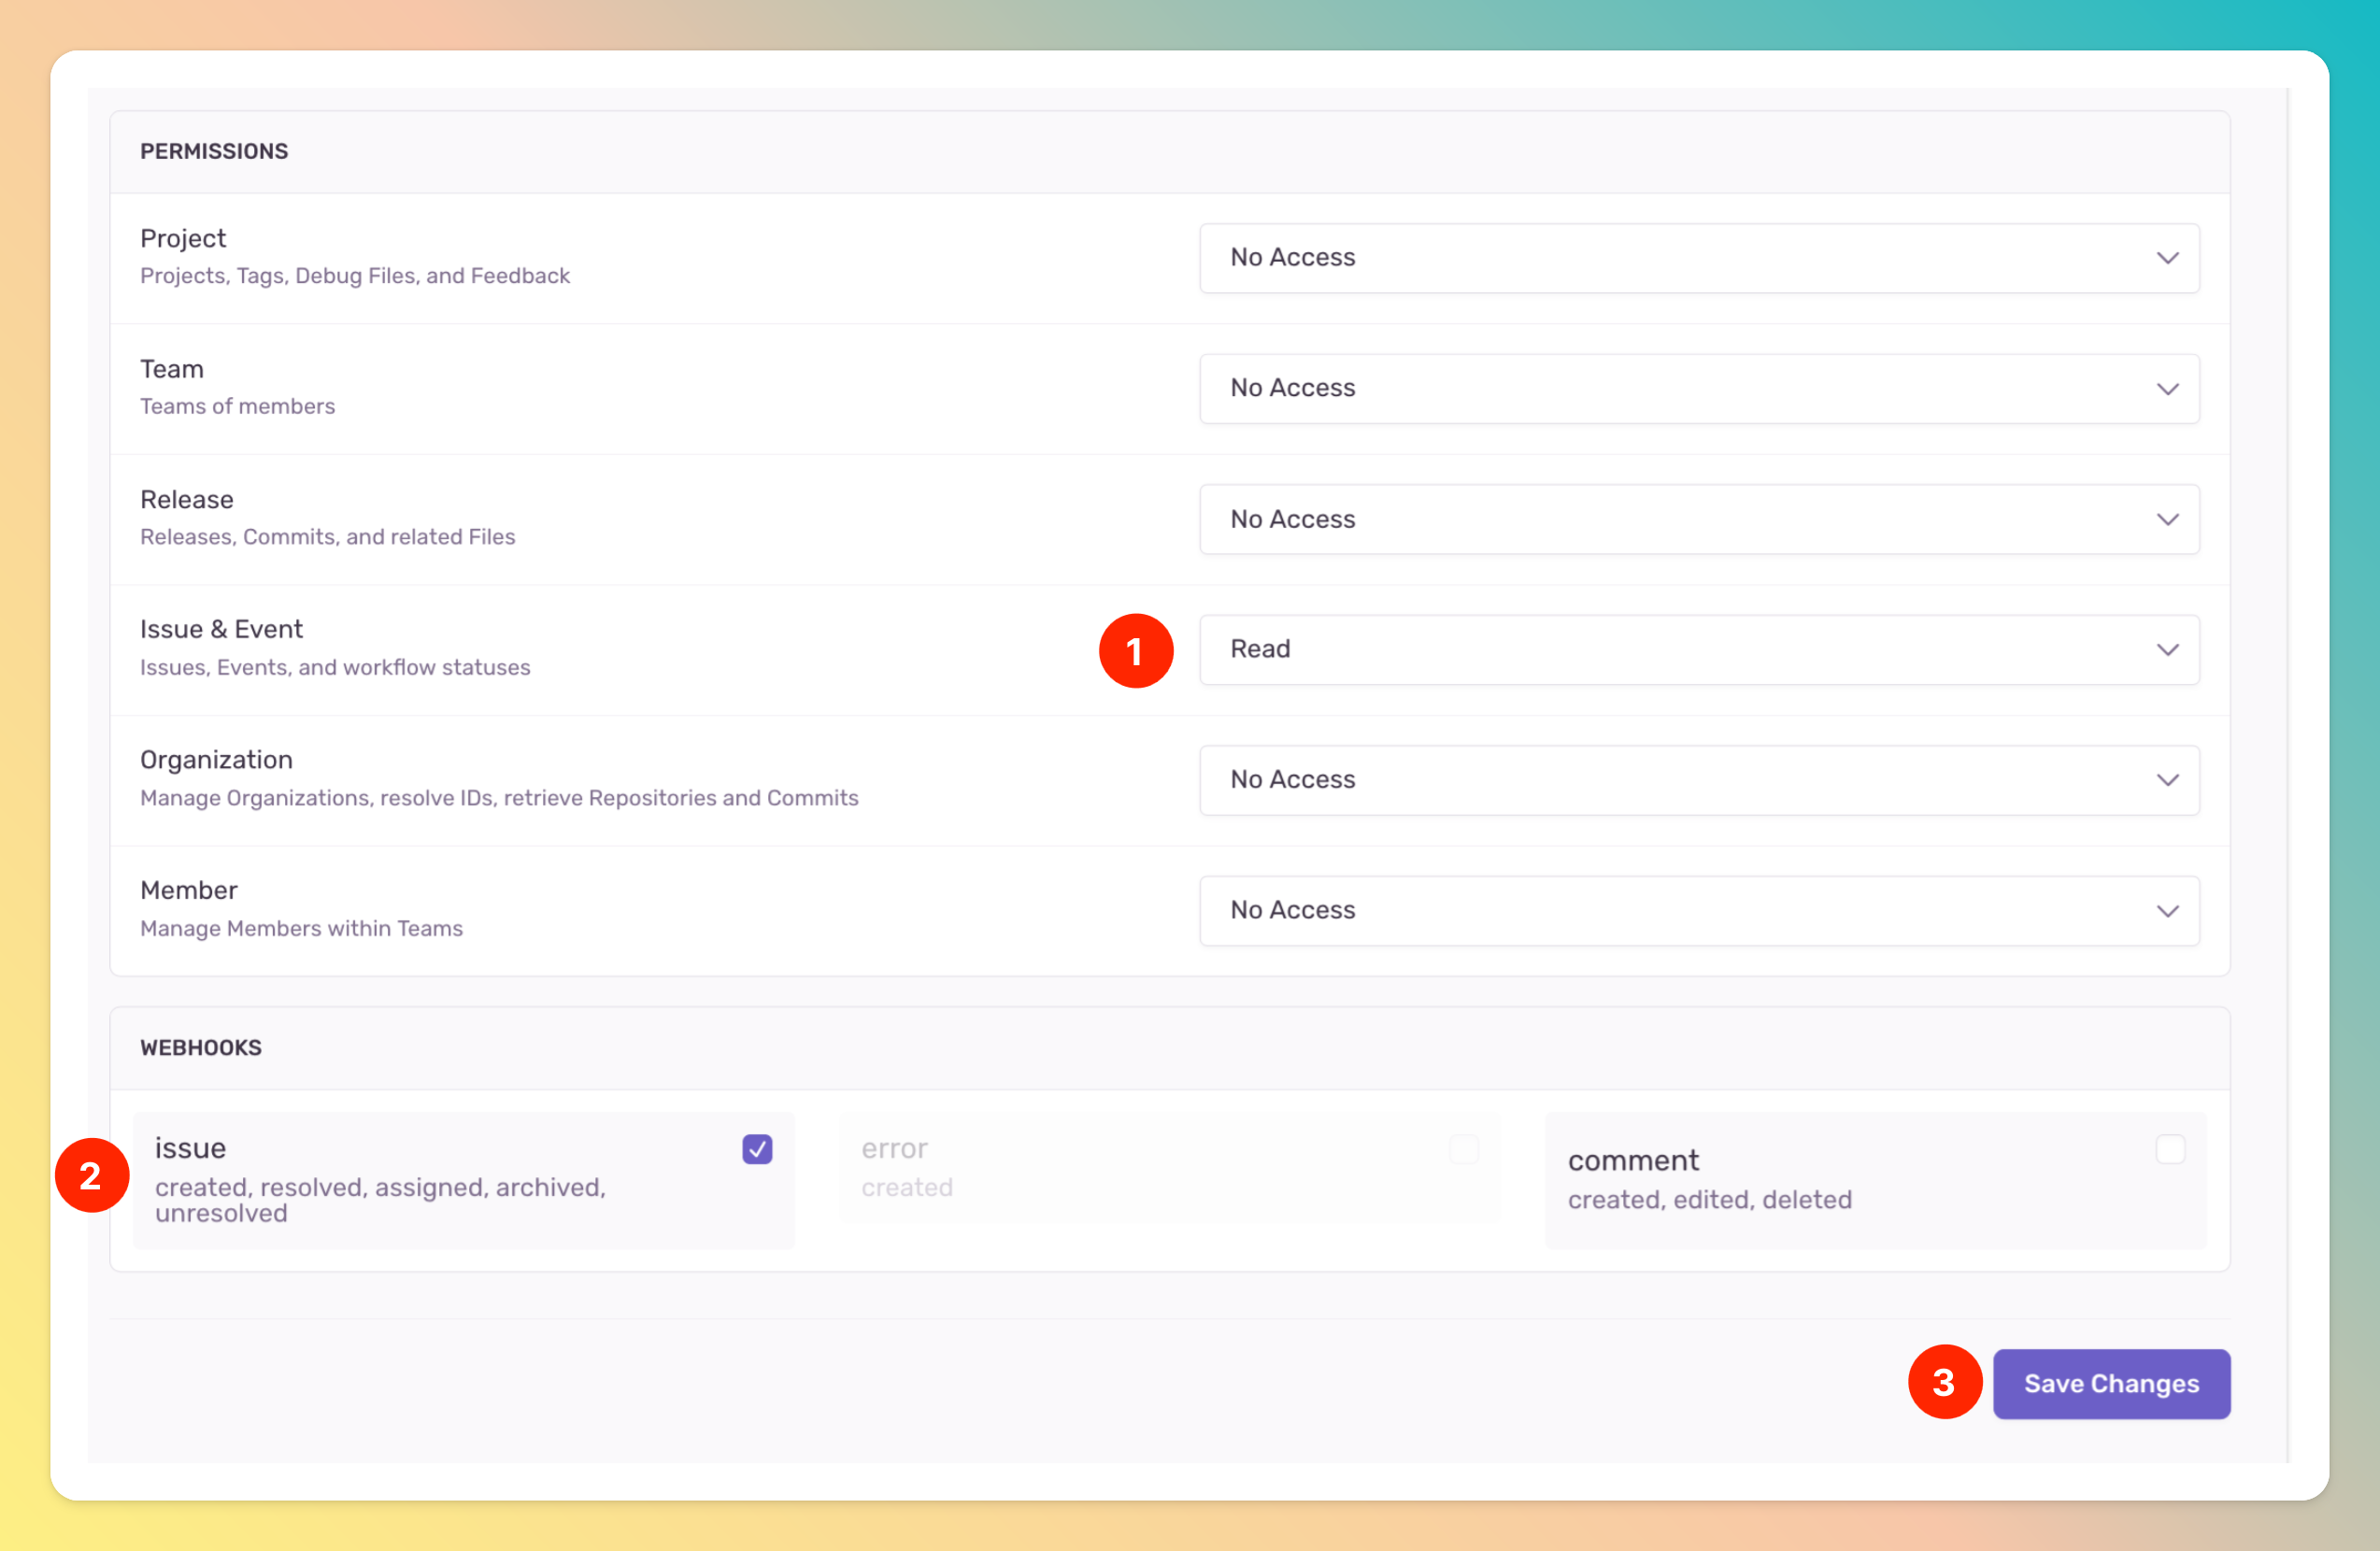
Sentry is now successfully integrated with All Quiet. To test if everythoing works as expected you can interact with any issue in Sentry, e.g. “Resolve” or “Reopen” an existing issue.