Setup time: 5 Min
1. Create Zabbix Integration on All Quiet
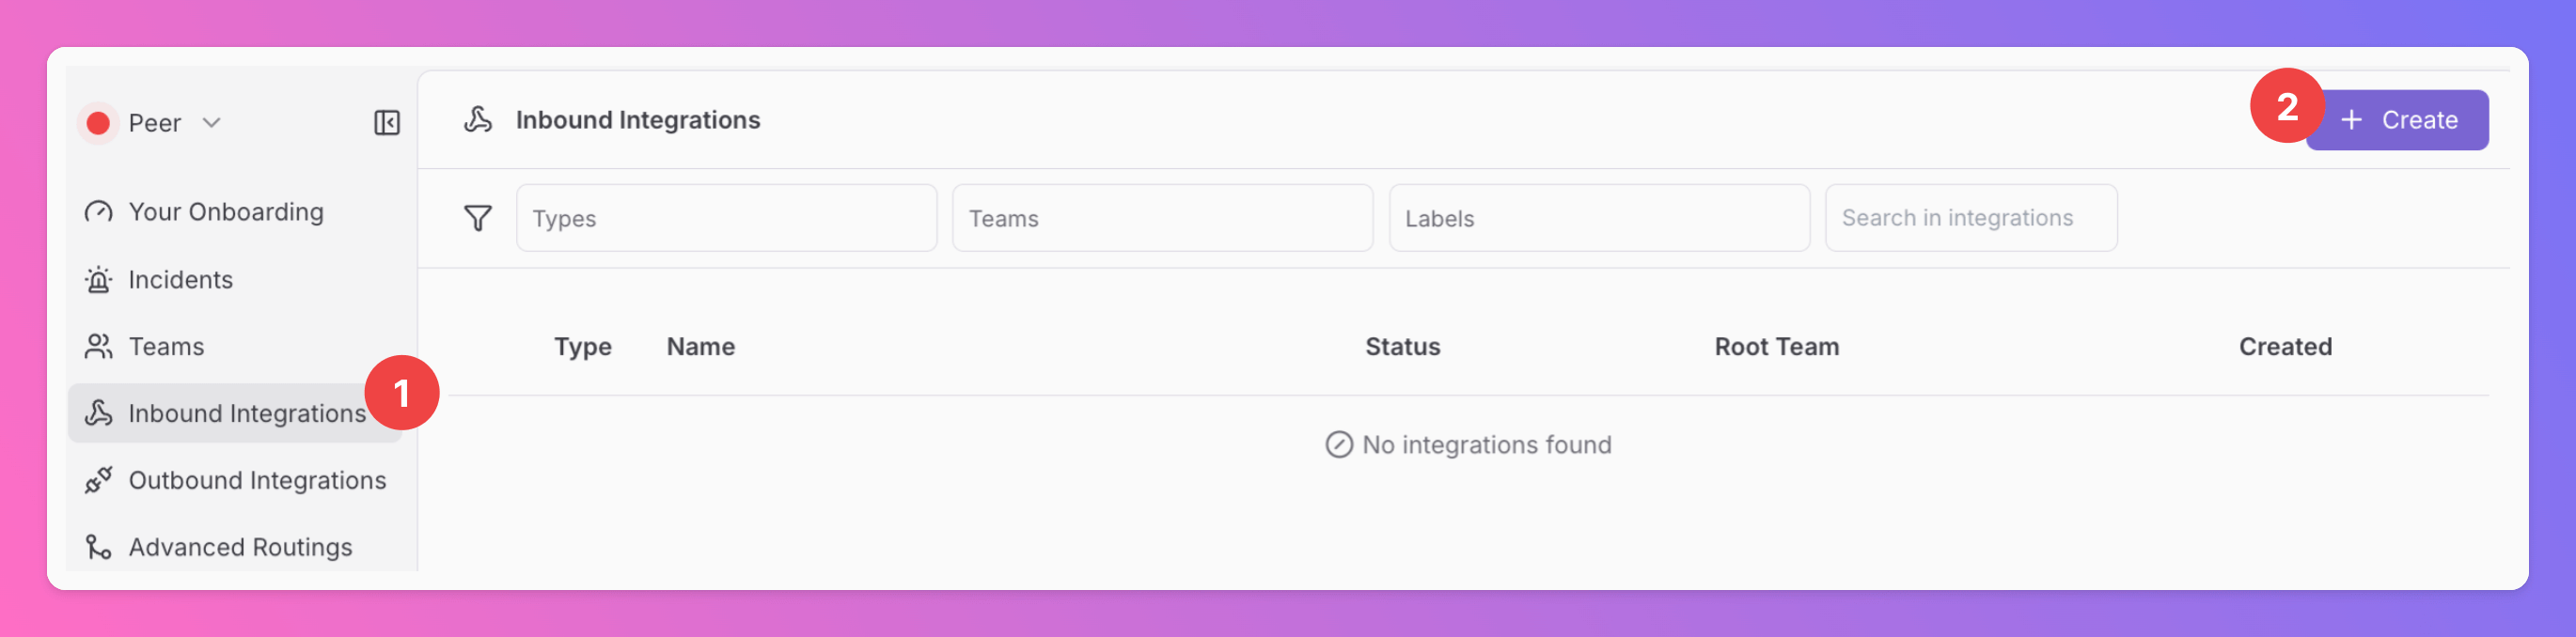
Sign in to your All Quiet account.Create Integration
- Click on the
Inbound Integrationstab. - Click on
+ Create.
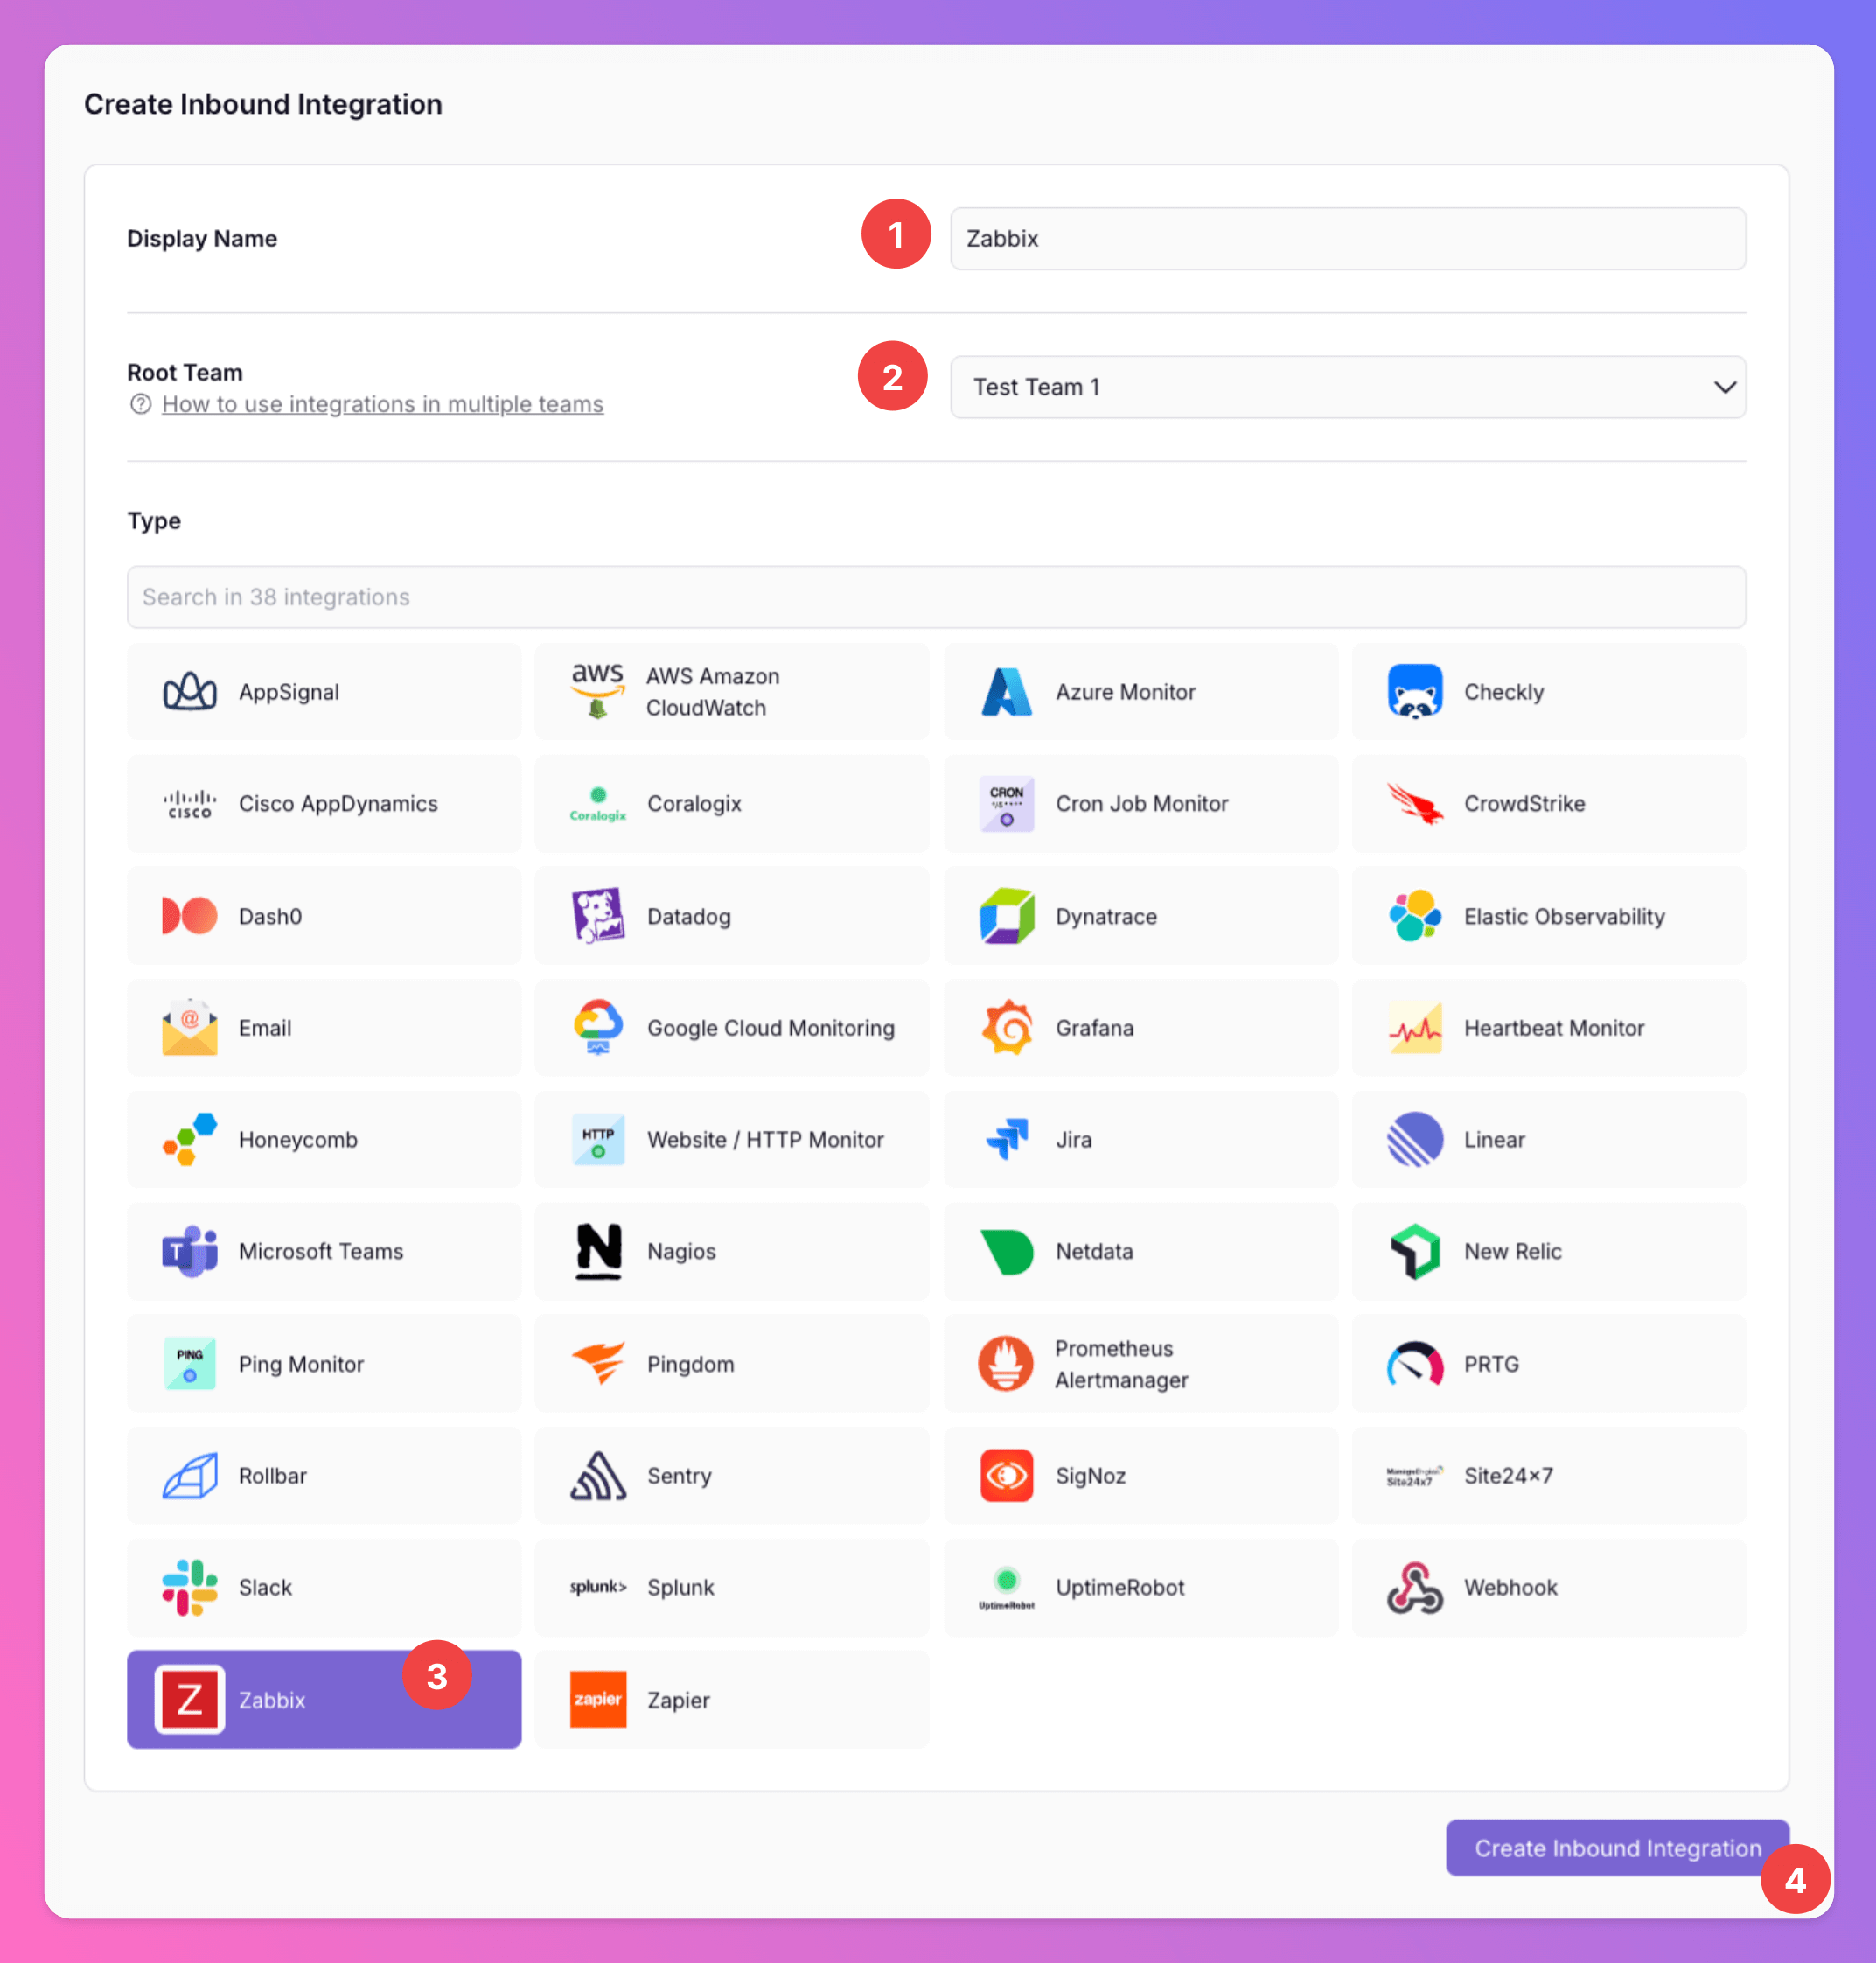
Select Zabbix as the integration’s type
- Enter a
Display Namefor your integration, e.g. “Zabbix”. - Select a
Team. - Select
Zabbixas the integration’s type. - Click
Create Inbound Integration.
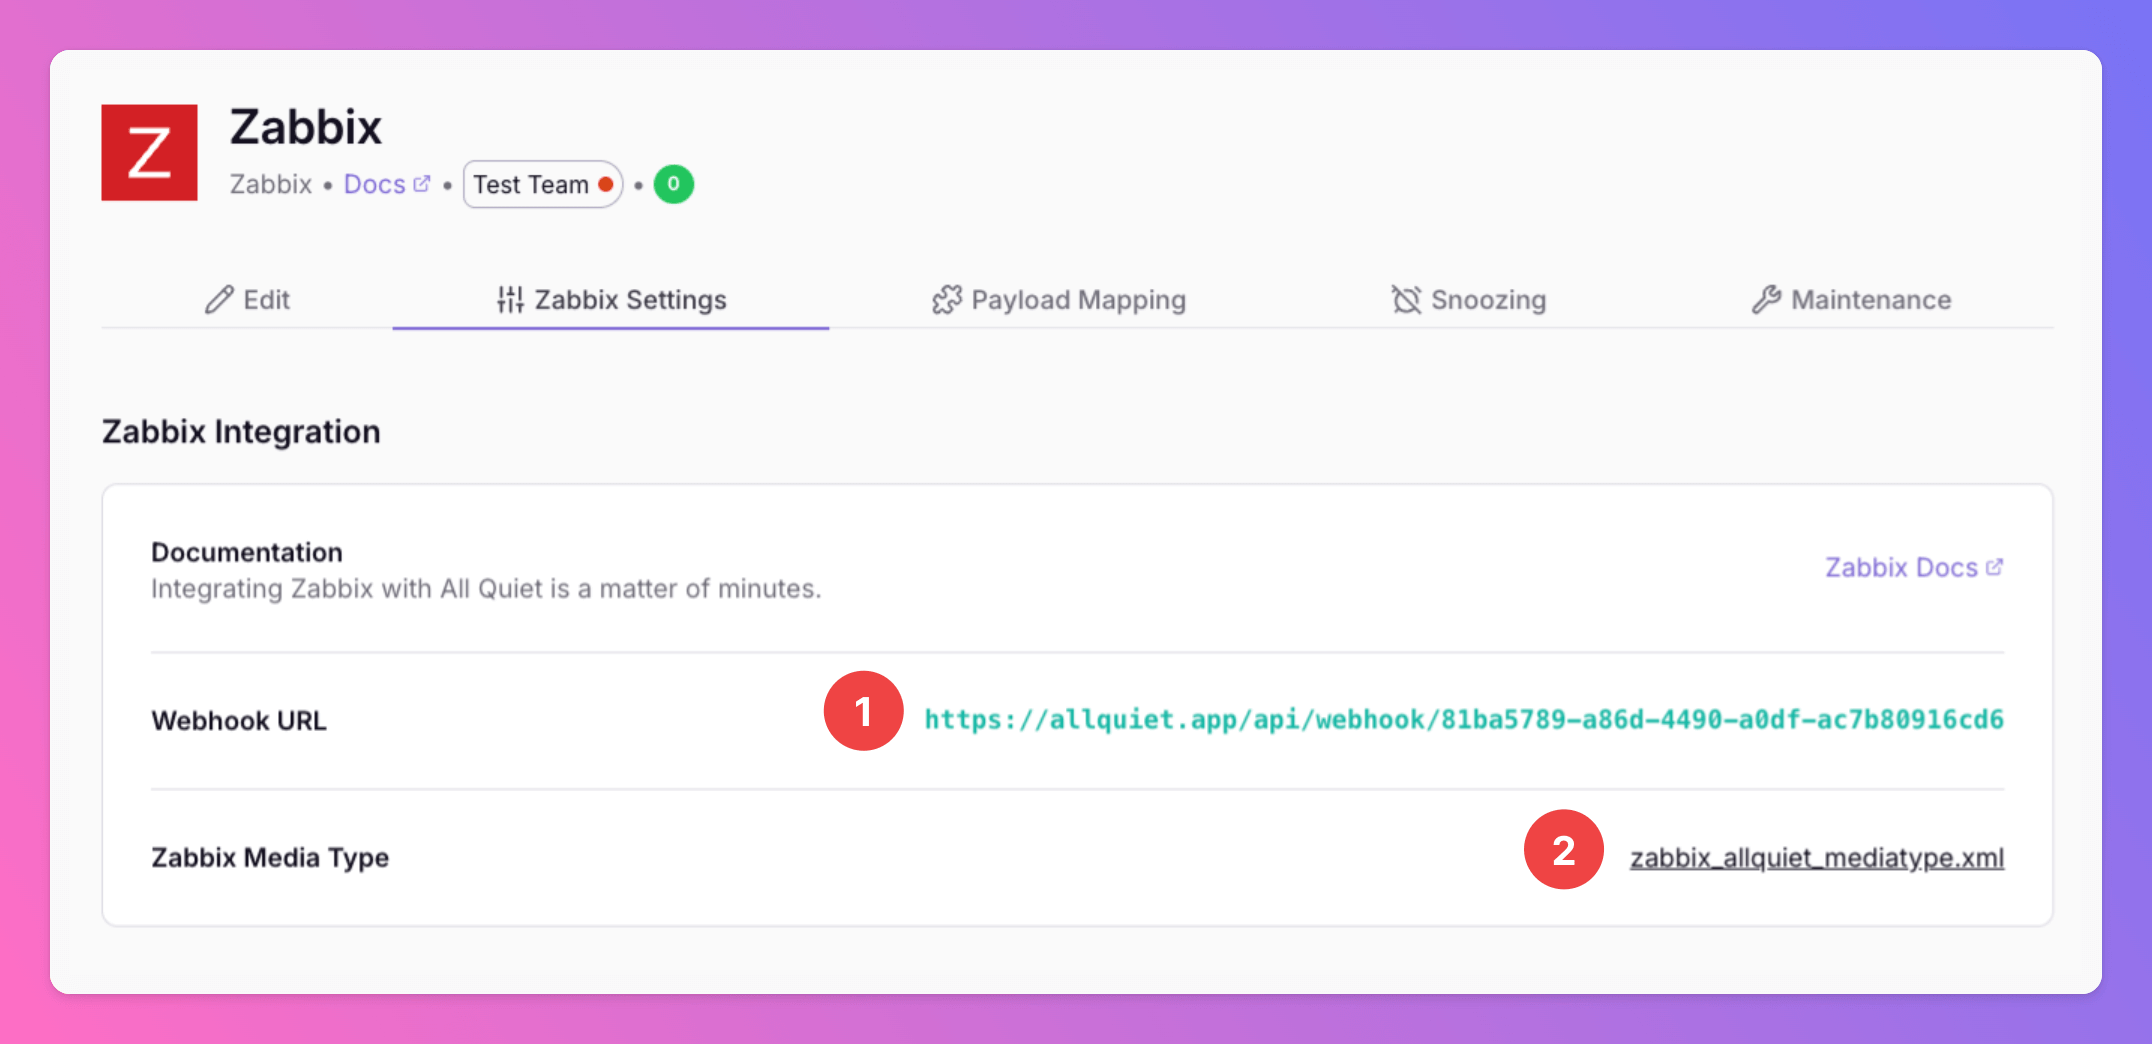
Copy Webhook URL and Download Media Type
After creating the integration on All Quiet- you can view and copy the webhook URL. You will require this URL in step 2 when configuring the custom integration on Zabbix.
- you can view the
Zabbix Media Typefile that you will need to upload in Zabbix in step 2. Download it.
Optionally toggle
Enable additional Authentication & Security below the webhook URL to restrict who can POST payloads.- IP Filter — Allow requests only from specific IPs or CIDR ranges. Failed checks return 404 Not Found.
- Bearer authentication — Require
Authorization: Bearer YOUR_TOKEN. Missing or invalid tokens return 401 Unauthorized.
2. Configure the Integration with Zabbix
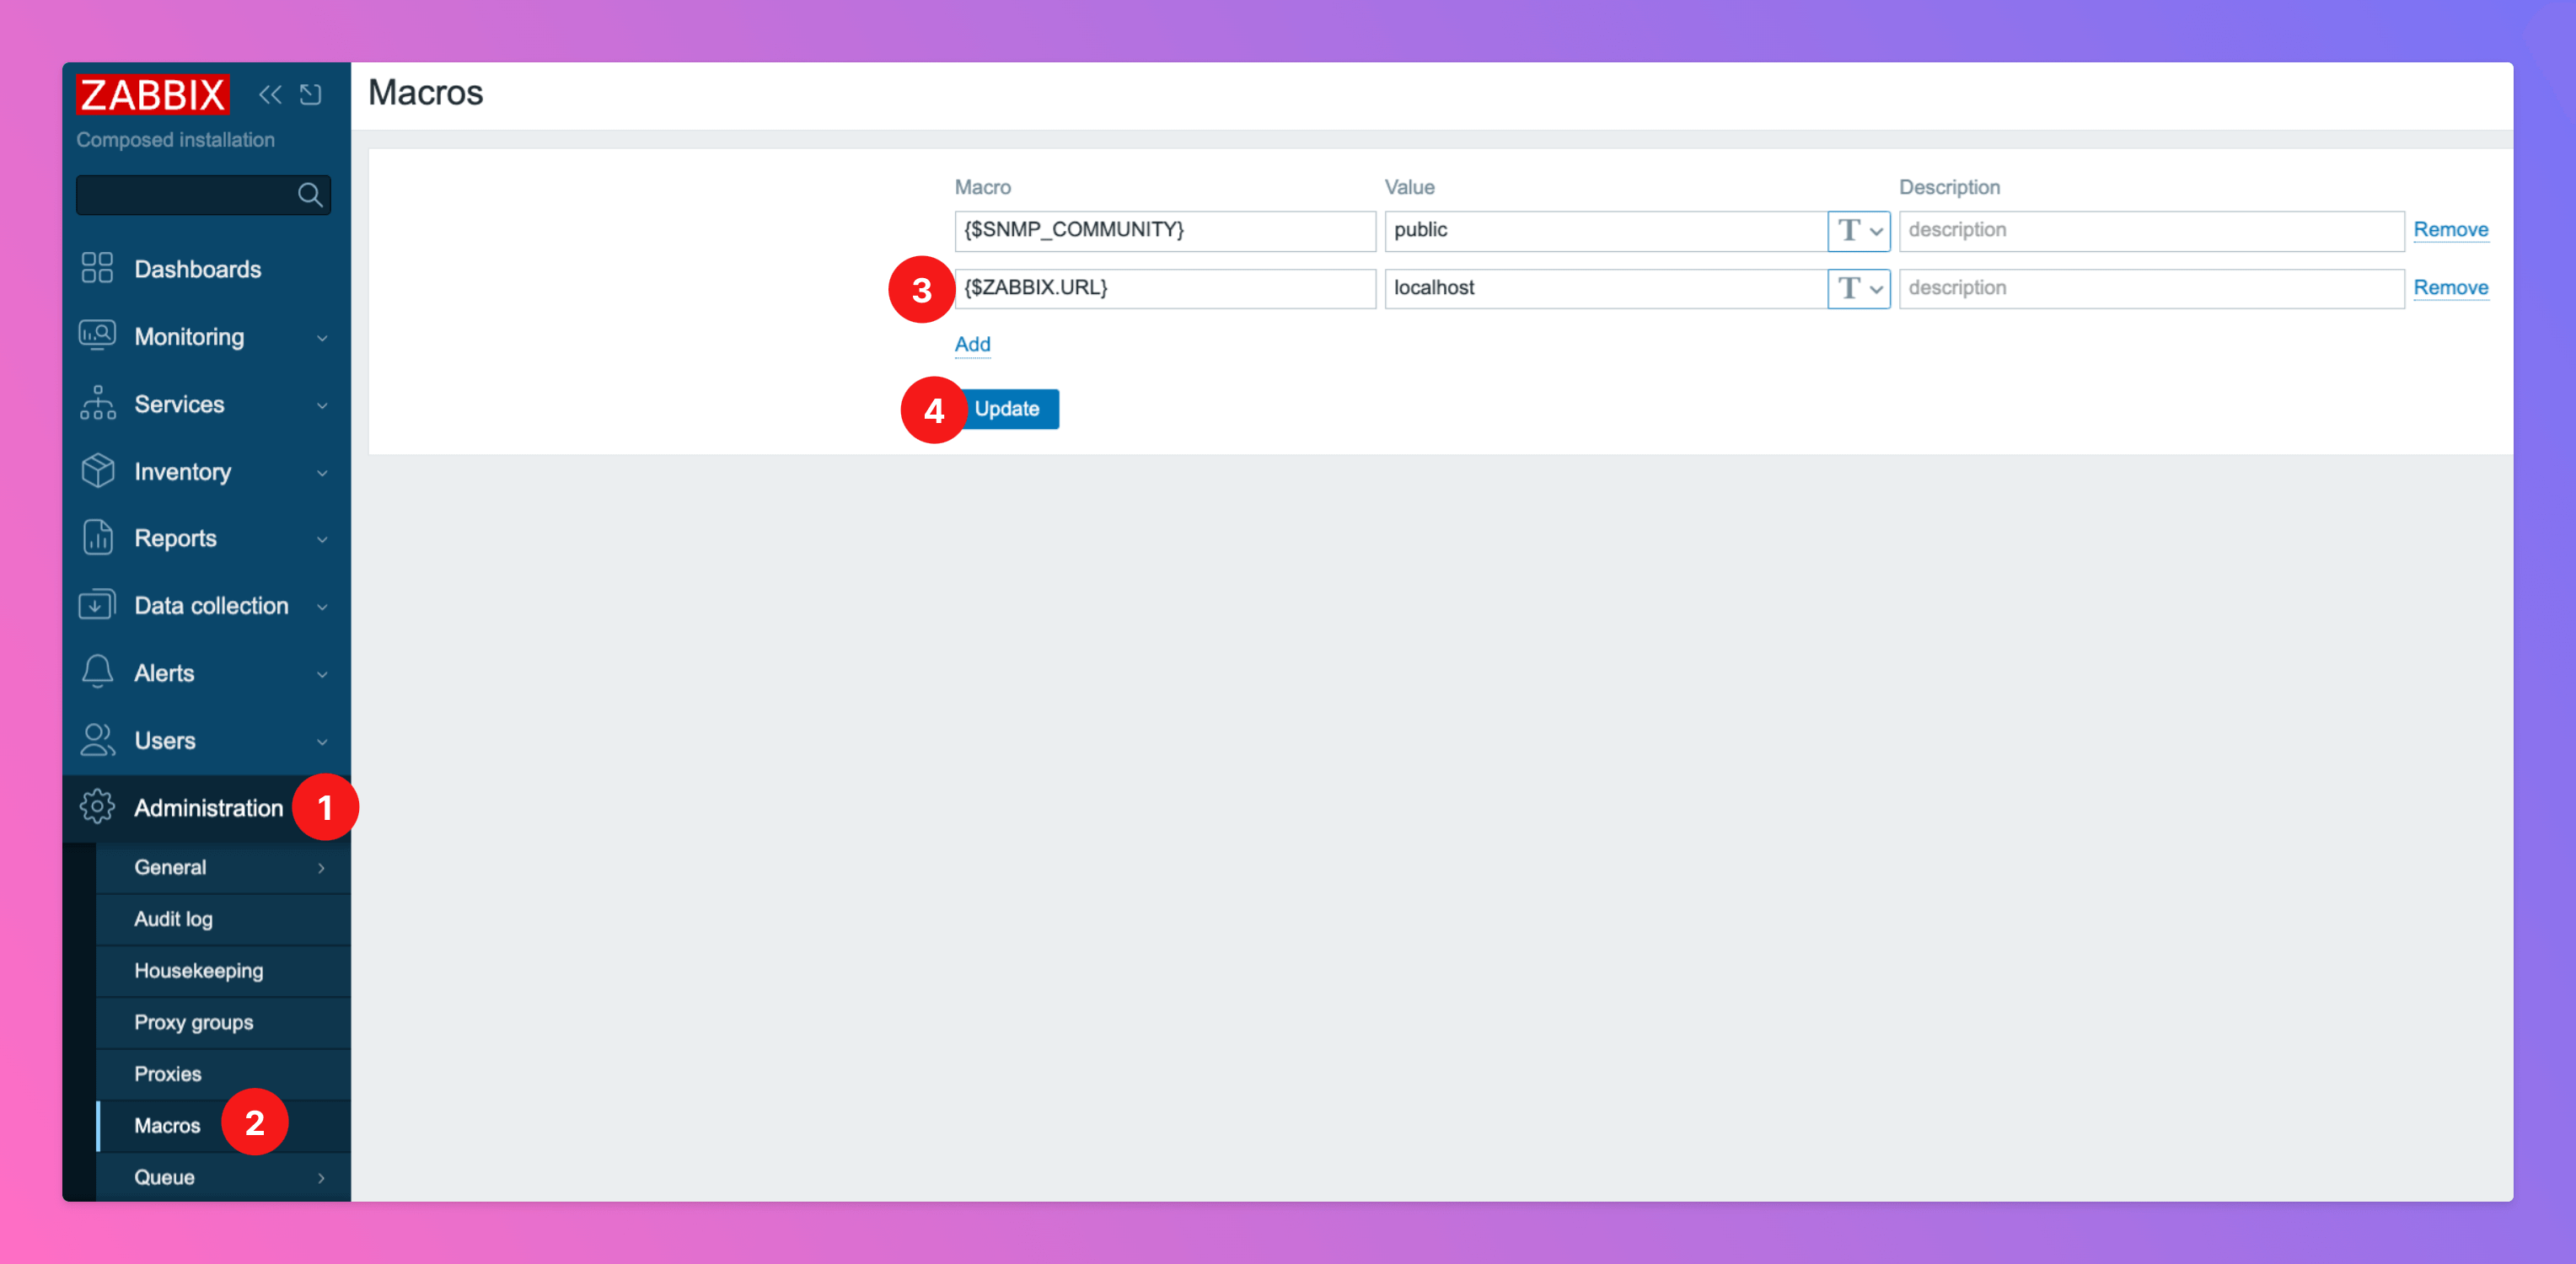
Once you’ve set up an integration of type “Zabbix” with All Quiet, the next crucial steps involve configuring a Zabbix user, connecting it with All Quiet via the Media Type and Webhook and adding it to the correct user group to be able to send alerts to All Quiet. First, you need to sign in to your Zabbix Account.Create Macro
We create a macro to always include the URL of the Zabbix alert in the related All Quiet incident.- Open
Administration Macros- Add Macro for {$ZABBIX.URL}. As
Value, enter your Zabbix frontend URL (https://…) - Click
Updateto save the macro.
Add All Quiet Media Type
Now, we add the All Quiet Media Type.- Open
Alerts Media Types- Select
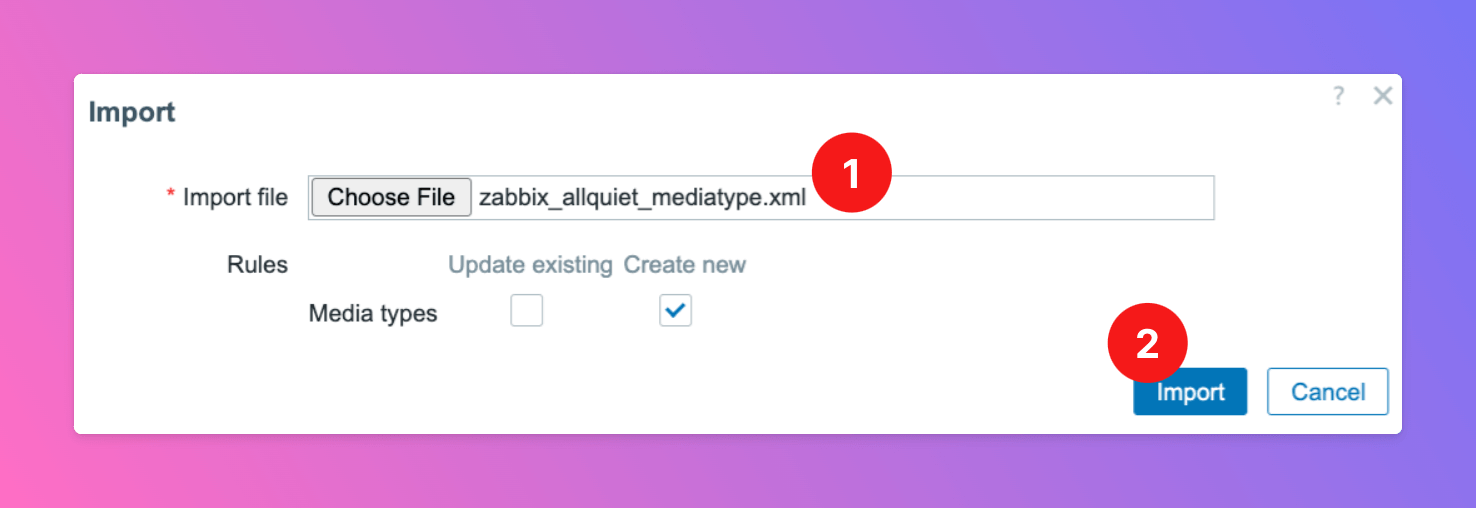
Import
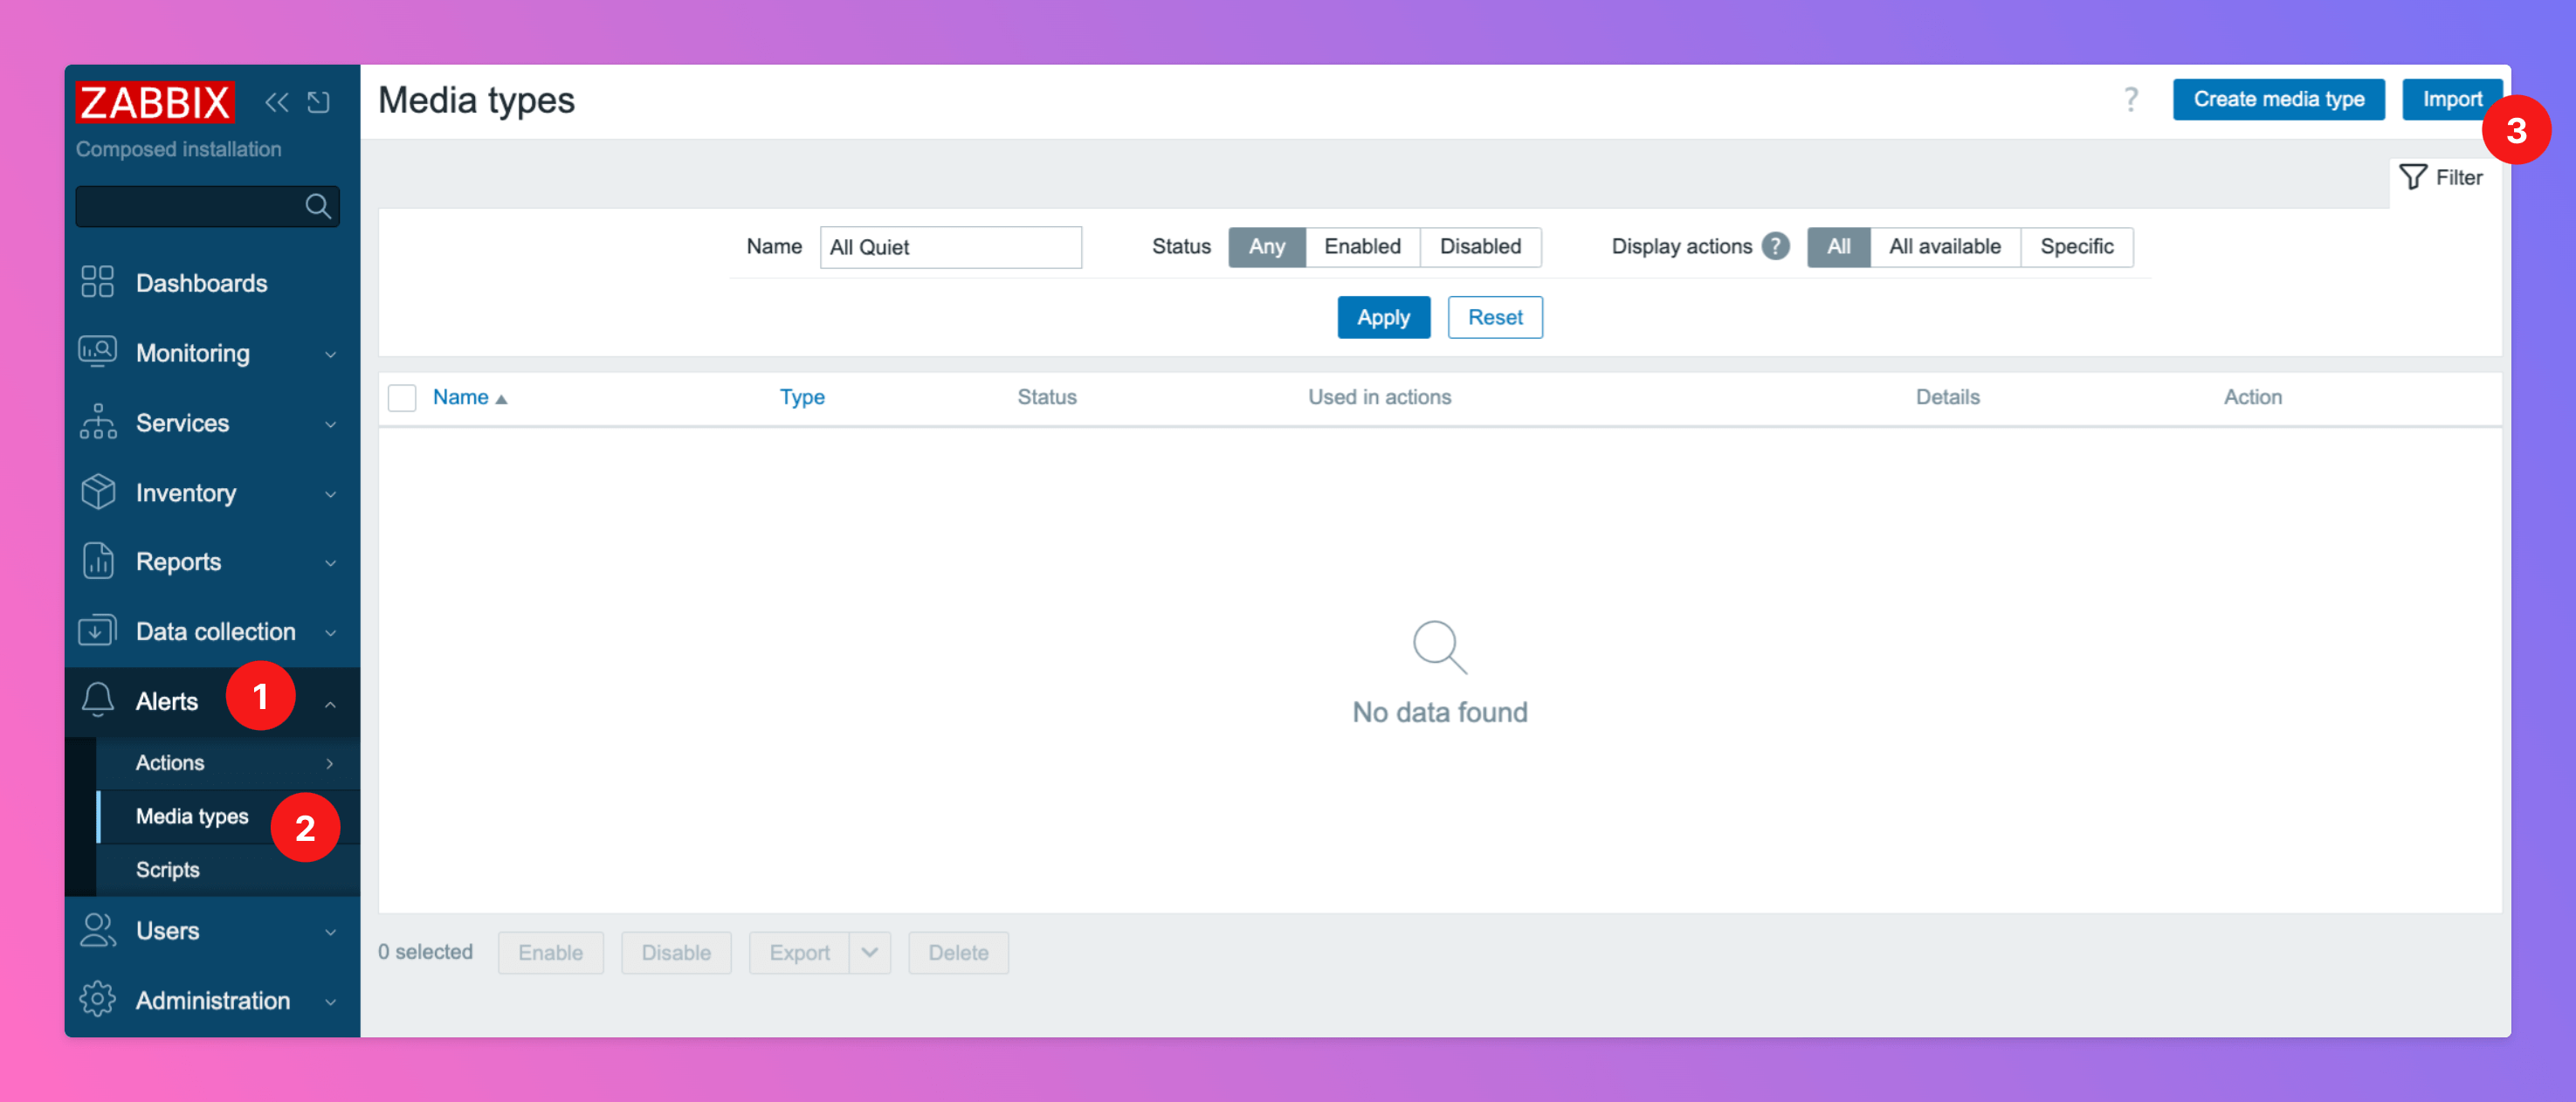
- Select the media type file you downloaded in step 1.
- Click
Import
Optional: extend the Zabbix Media Type XML File
If you notice that important information is missing in All Quiet, you can adjust the Zabbix Media Type XML to include additional parameters/macros, and then map them in All Quiet. 1. Add parameters to the Zabbix 7.0 media type XML For example, you may want to add the host group to the payload. Add this parameter inside the<parameters> section of the Media Type:
{TRIGGER.HOSTGROUP.NAME} for trigger notifications/webhooks.
2. Map it in All Quiet via payload mapping
Once Zabbix starts sending it, the inbound webhook JSON will contain:
jsonBody["TRIGGER.HOSTGROUP.NAME"]
In All Quiet’s mapping UI, map it using this JSONPath:
$.jsonBody['TRIGGER.HOSTGROUP.NAME']
You can map this into any All Quiet attribute you want to populate (for example a custom attribute you use for routing), without changing backend defaults.
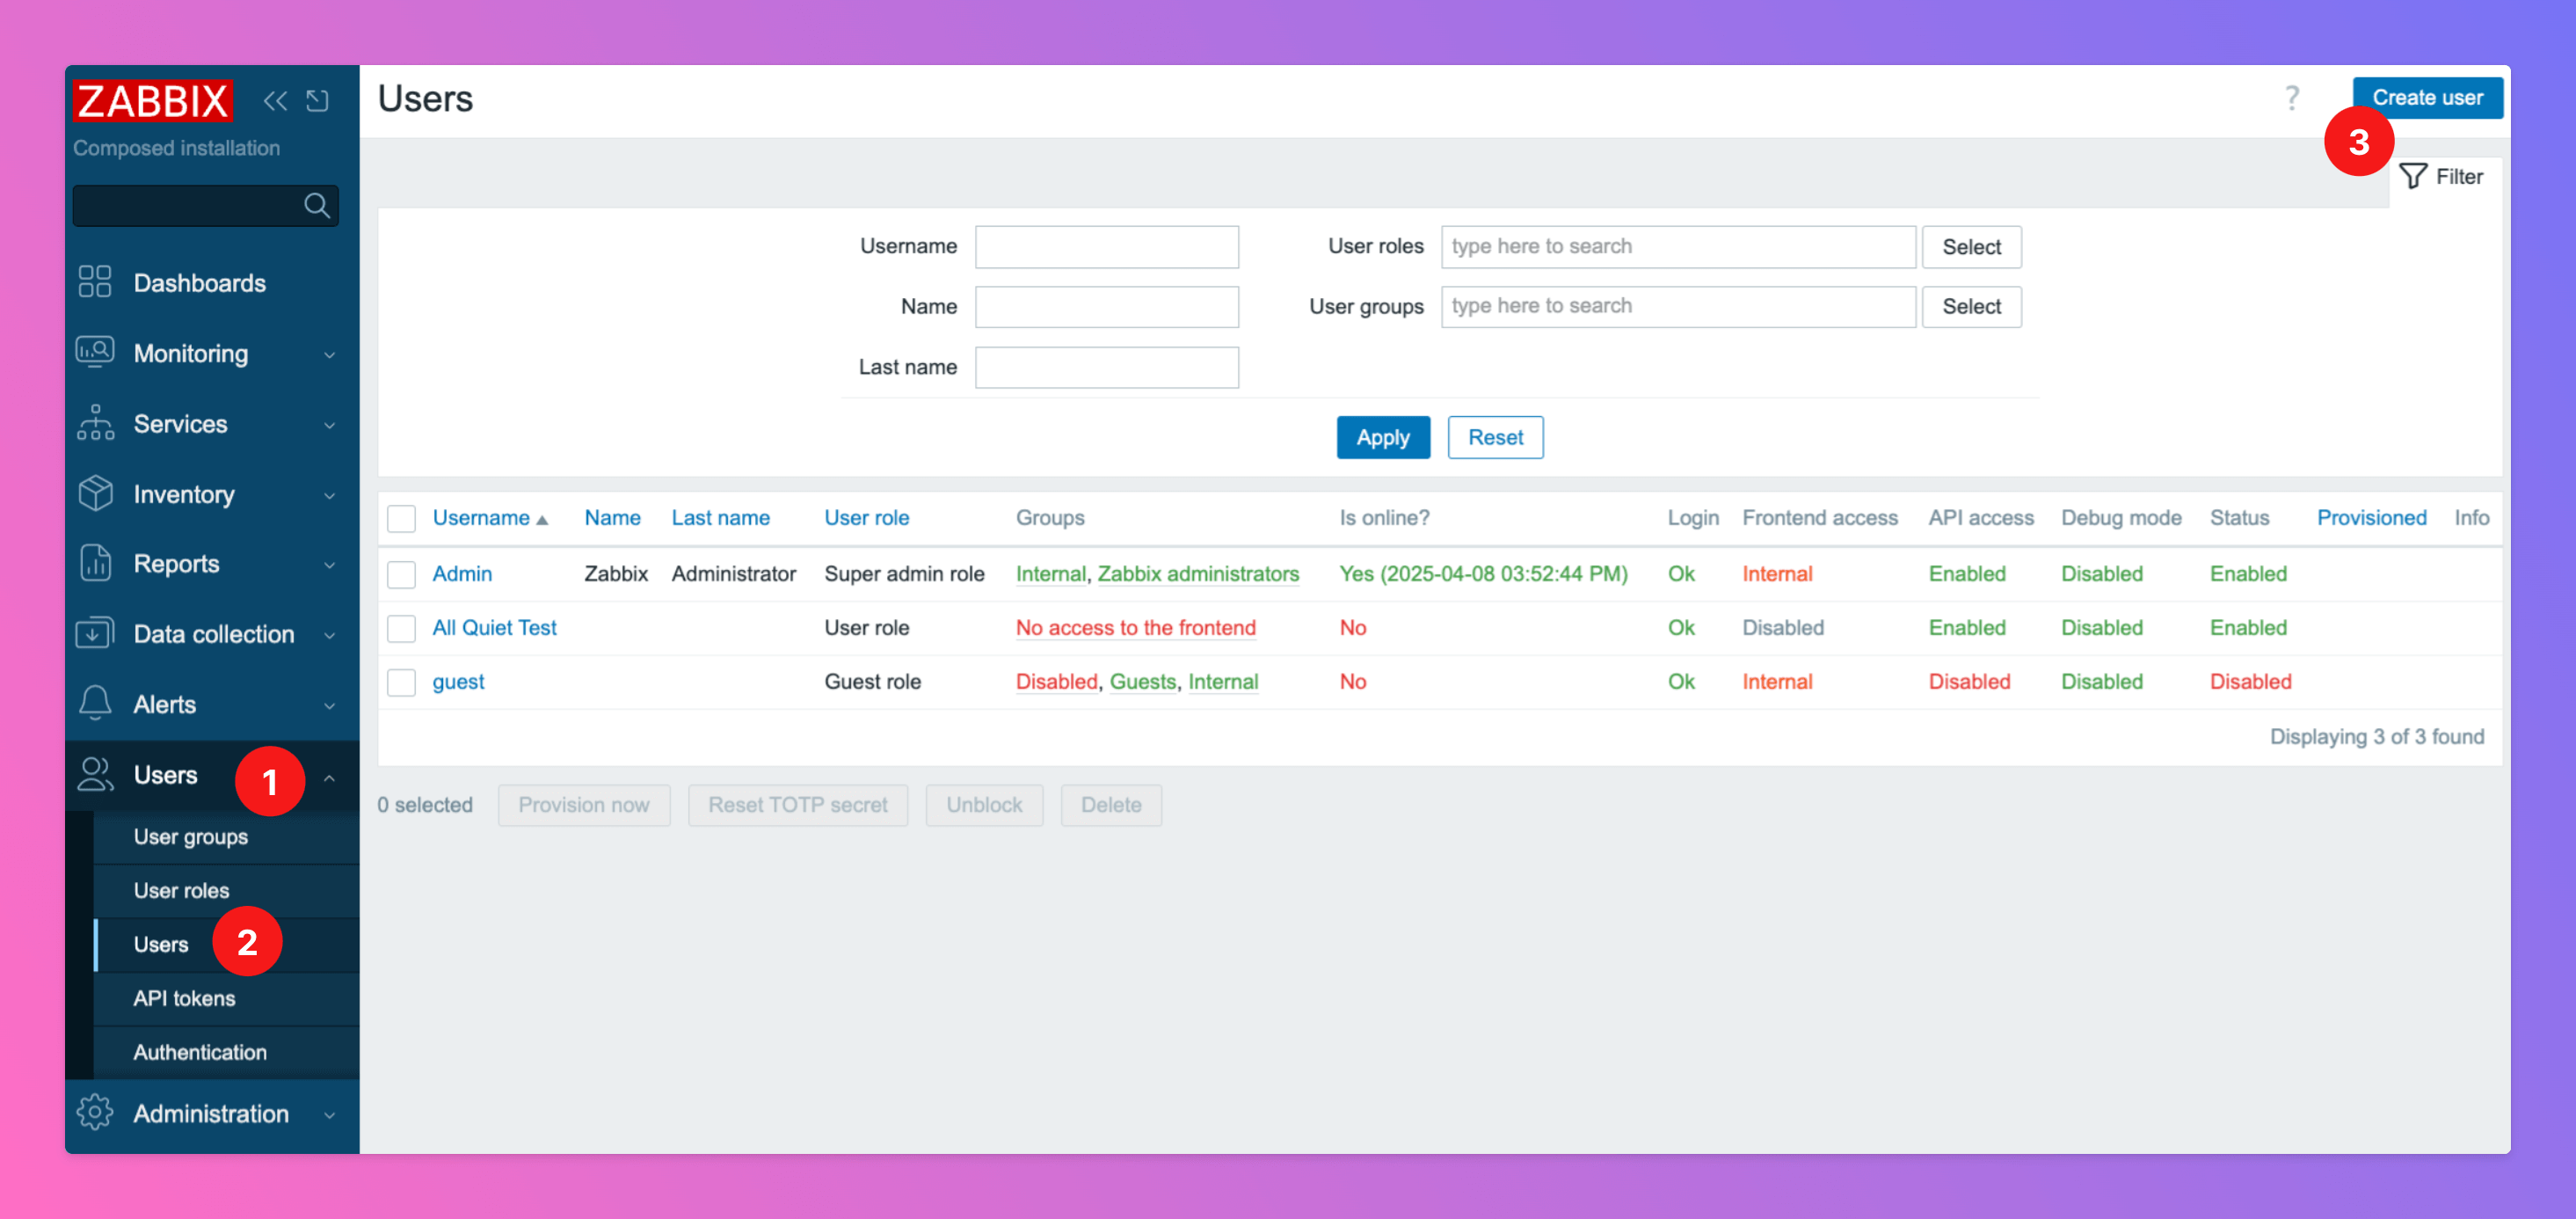
Create All Quiet User
Now, it’s time to create the All Quiet user.- Select section
Users - Again,
Users - Click
Create User
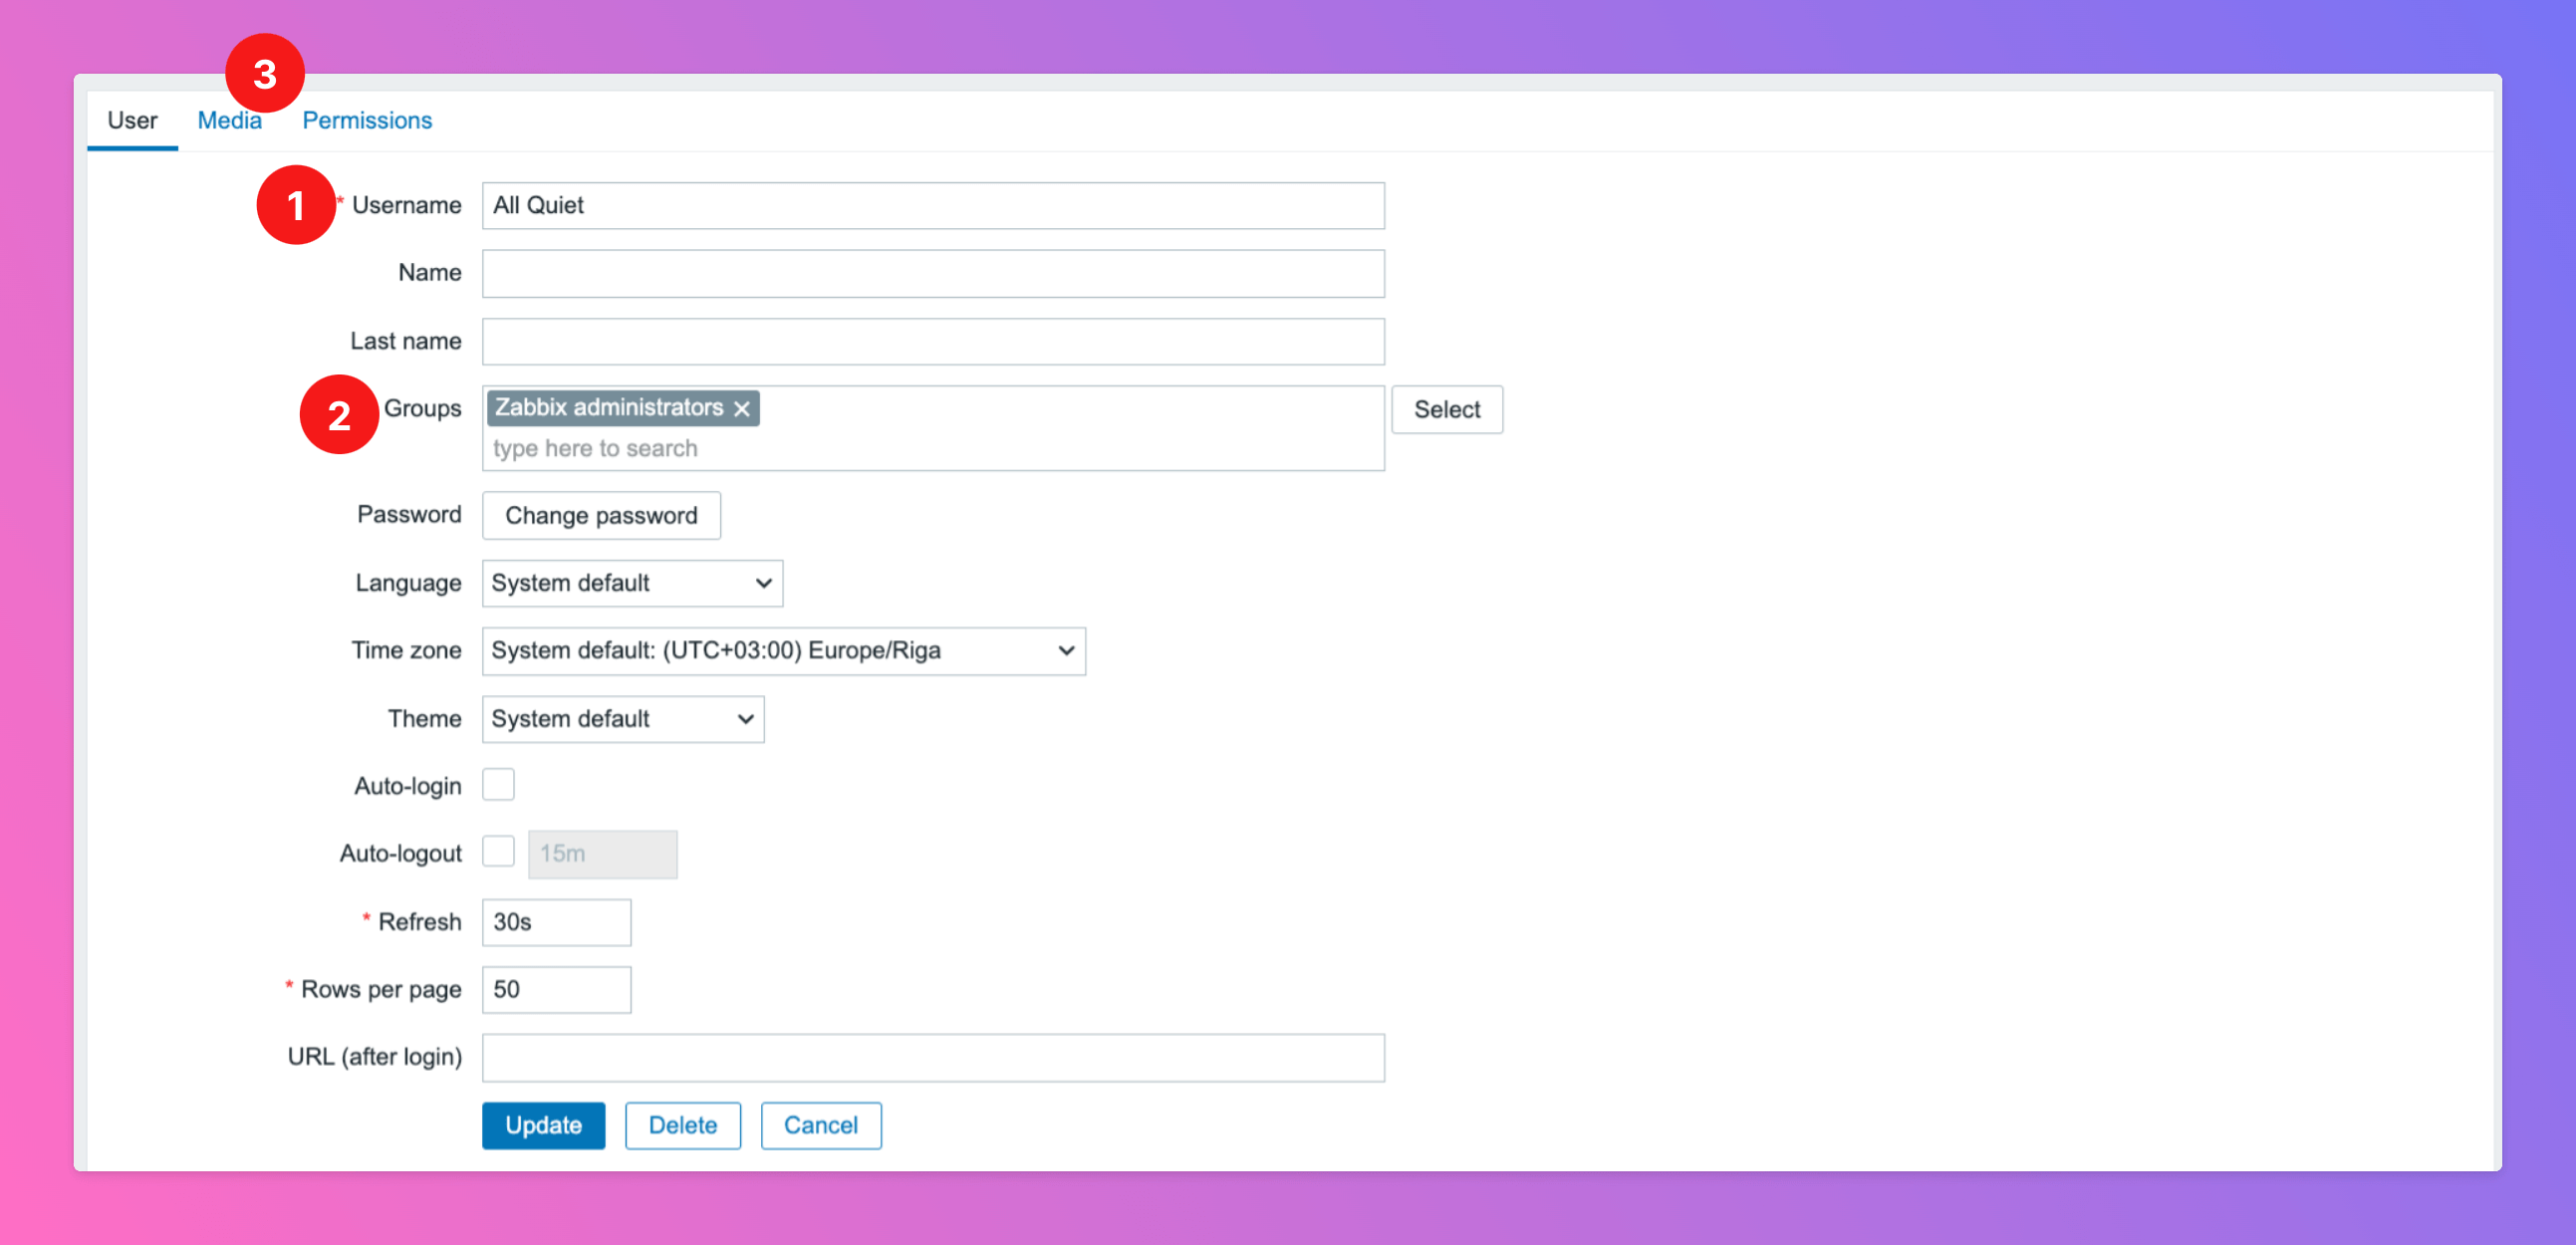
- Add a
Username, e.g. “All Quiet” and create a password. - Add the User to one of your User Groups have that read permissions for the host(s) you want to connect with All Quiet. We will show you how to do this later
- Switch to Tab
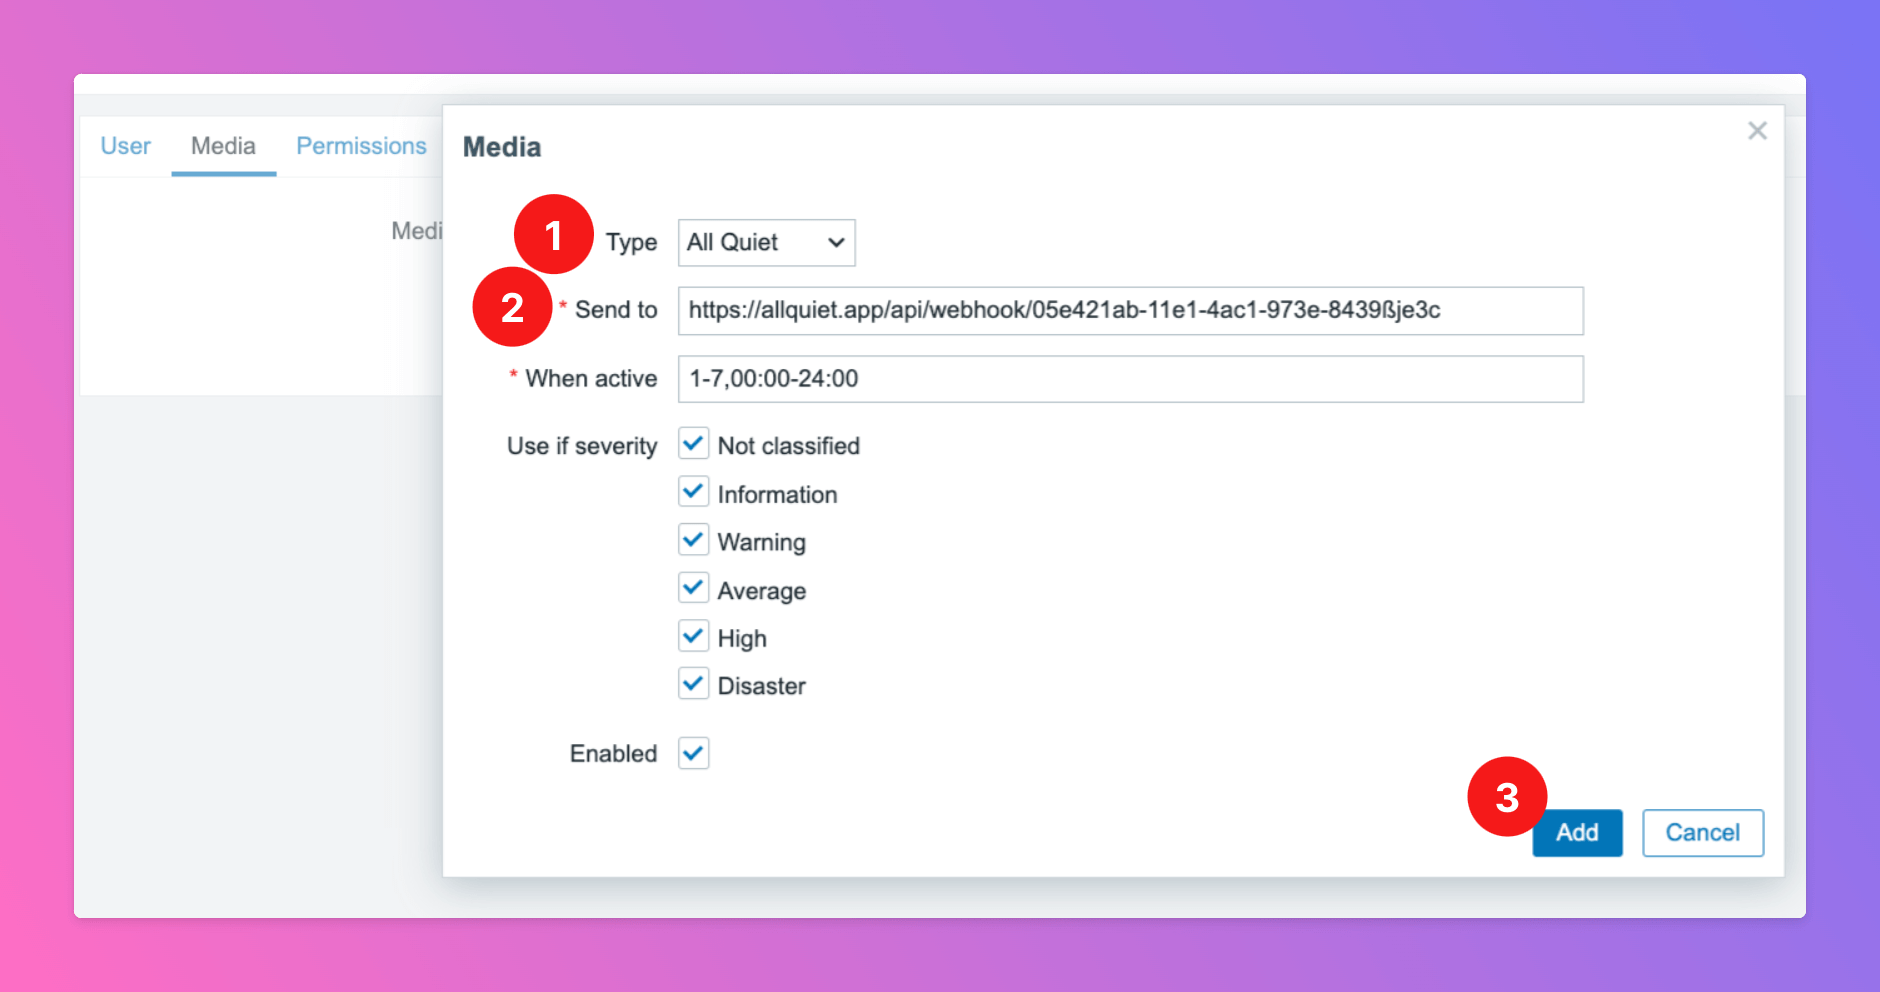
Media
Media, click add Media. This opens an overlay.
- Select Media Type
All Quietto use the Media Type we configured earlier. - As “Send to”, paste in the All Quiet webhook URL you’ve obtained in step Copy Webhook URL.
- Click
Add.
Update to create the user.
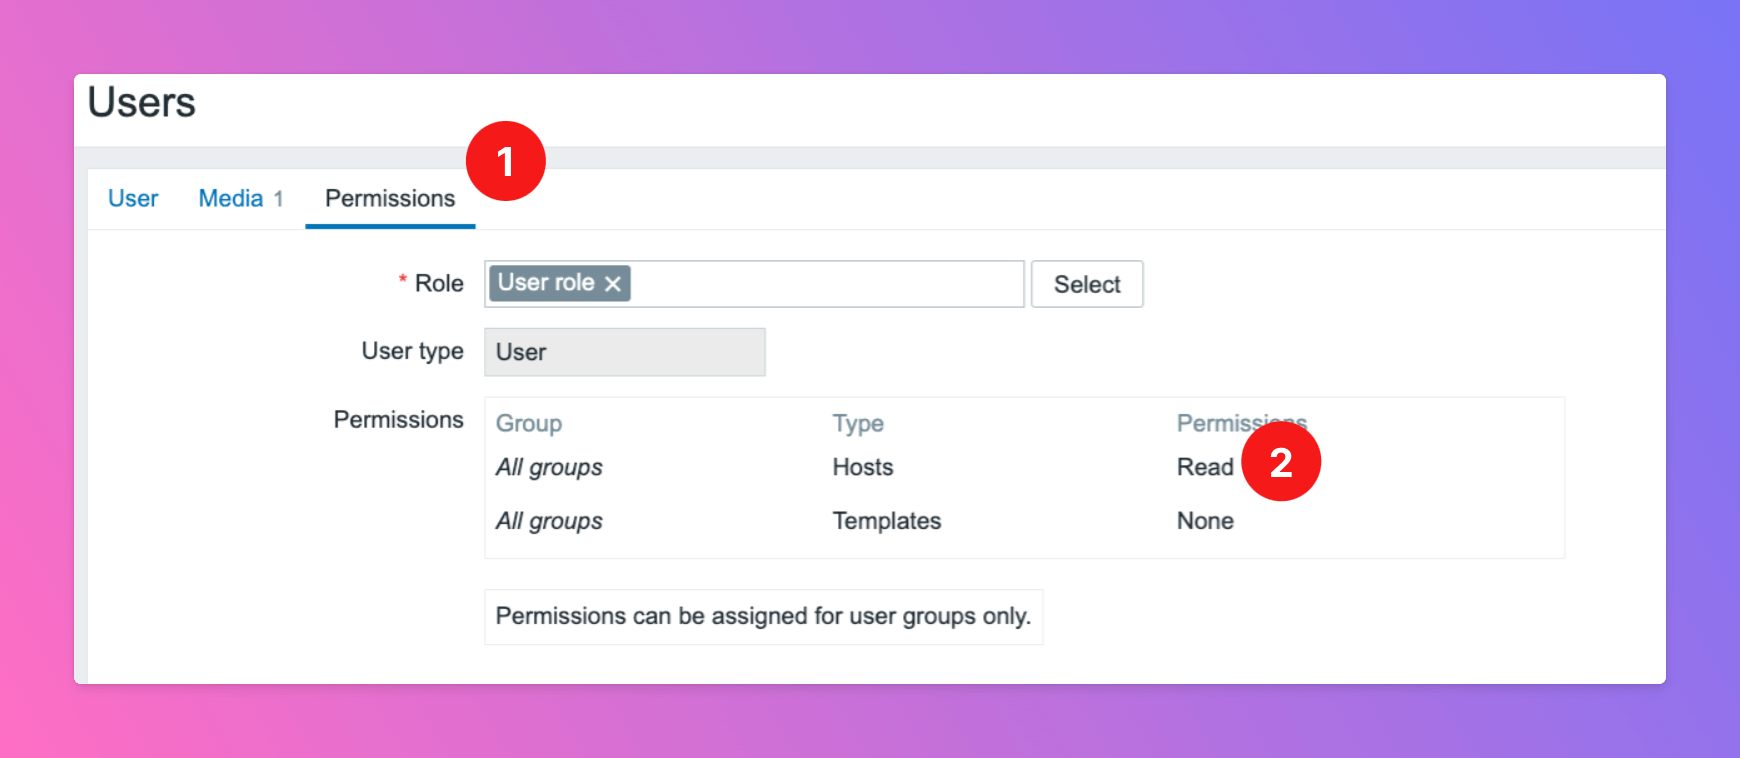
Ensure User Has Sufficient Permissions
As said earlier, we need to ensure that the user has sufficient permissions in order to be able to forward incidents to All Quiet.- We can check the user’s permissions by opening the
Permissionstab. - The user should have at least
Readpermissions for the hosts that should be forwarded.
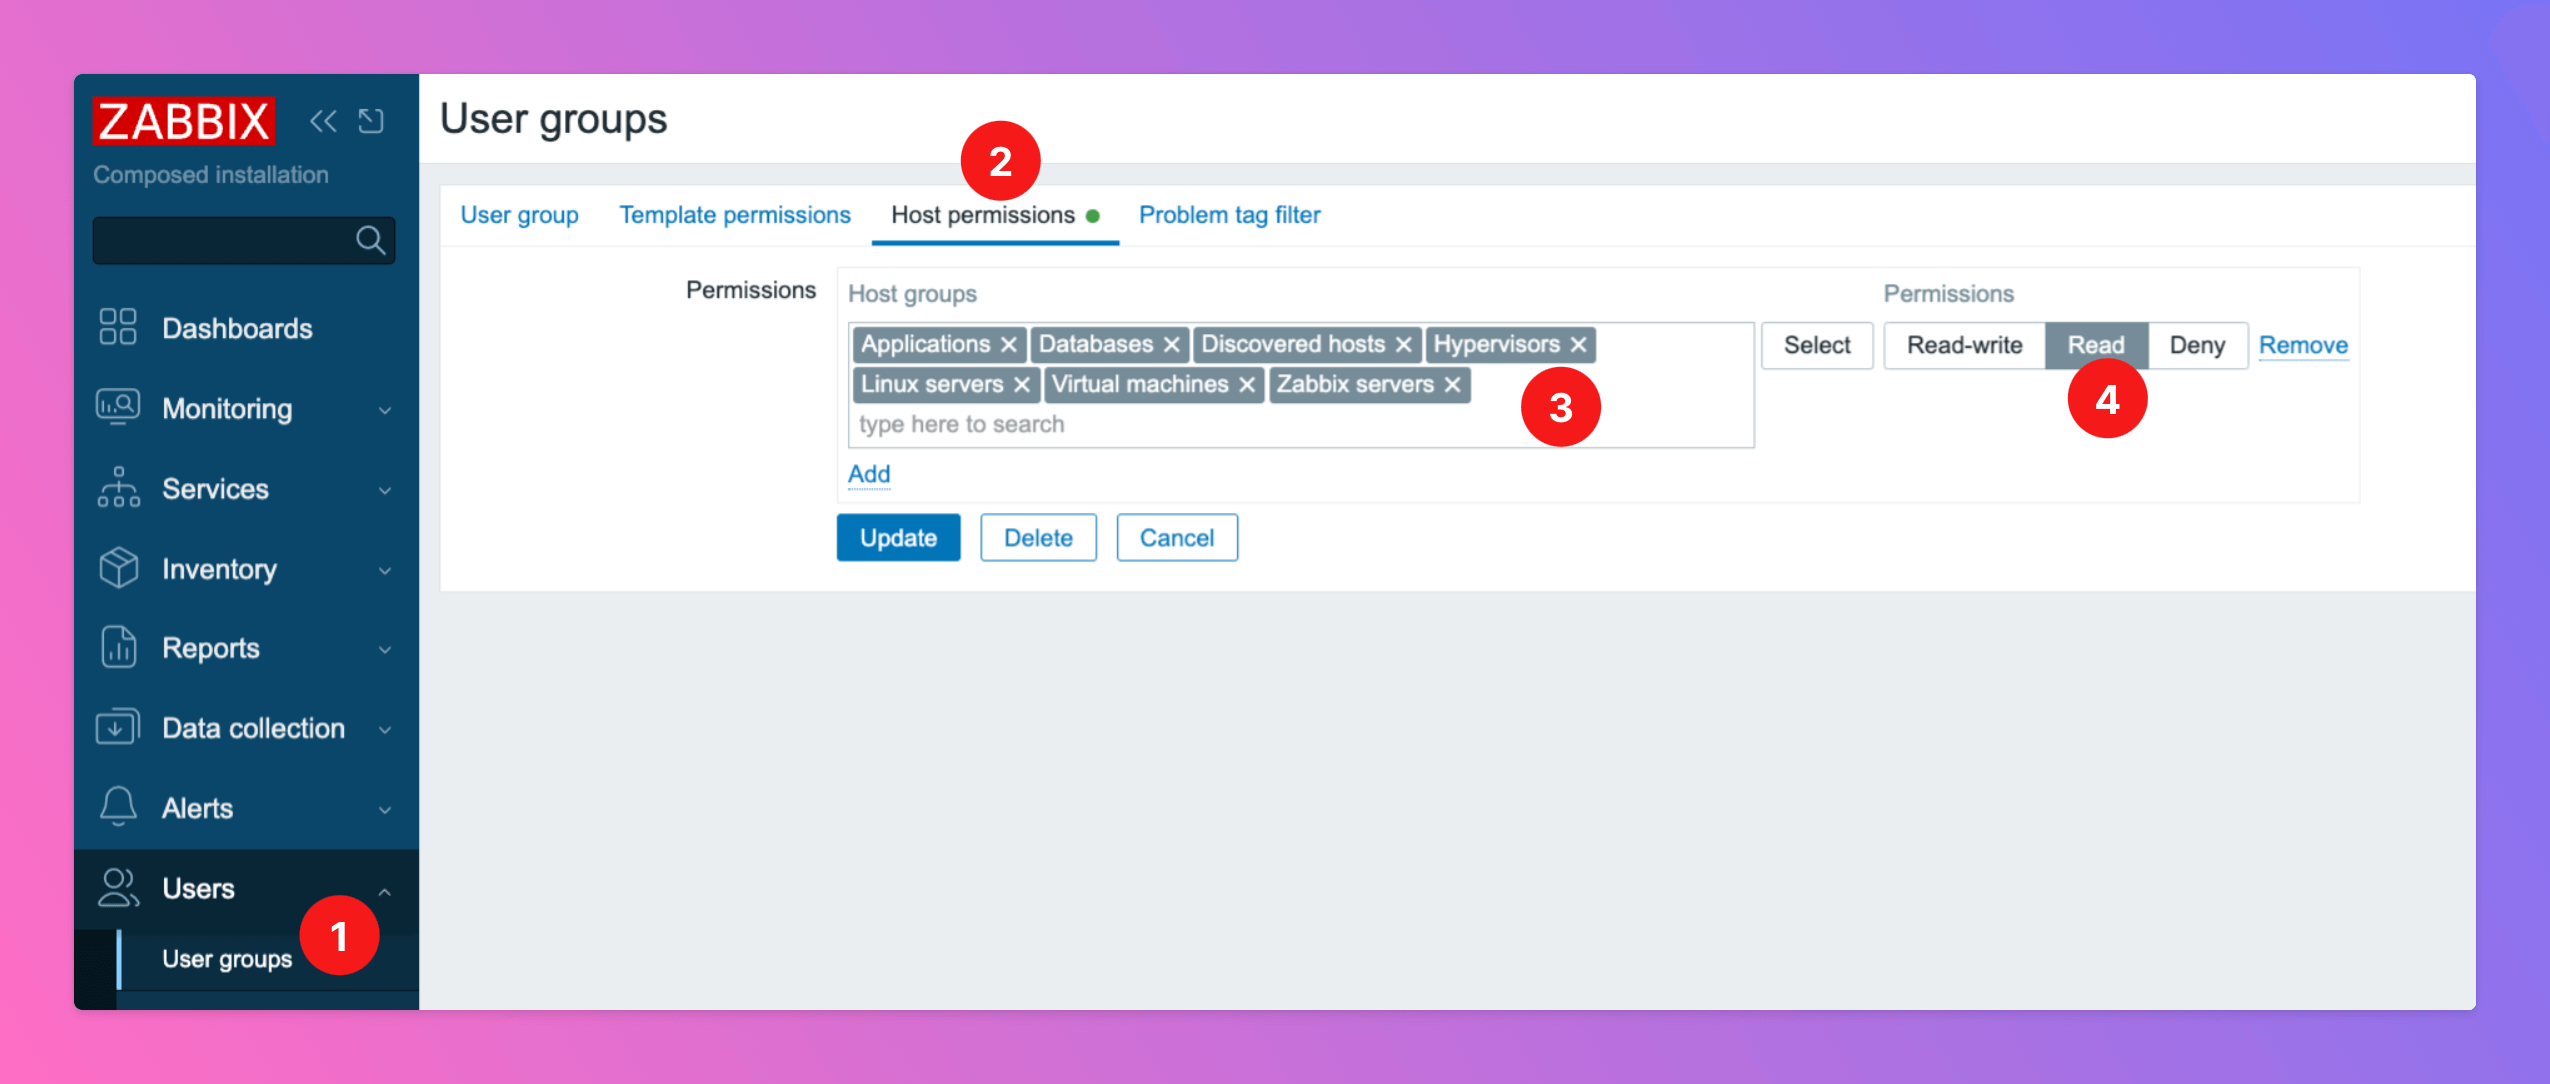
- Open
Users > User groups. - Open the tab
Host Permissions - You can add / remove hosts
- Make sure that the permissions are at least on
Readand clickUpdateto save your changes.
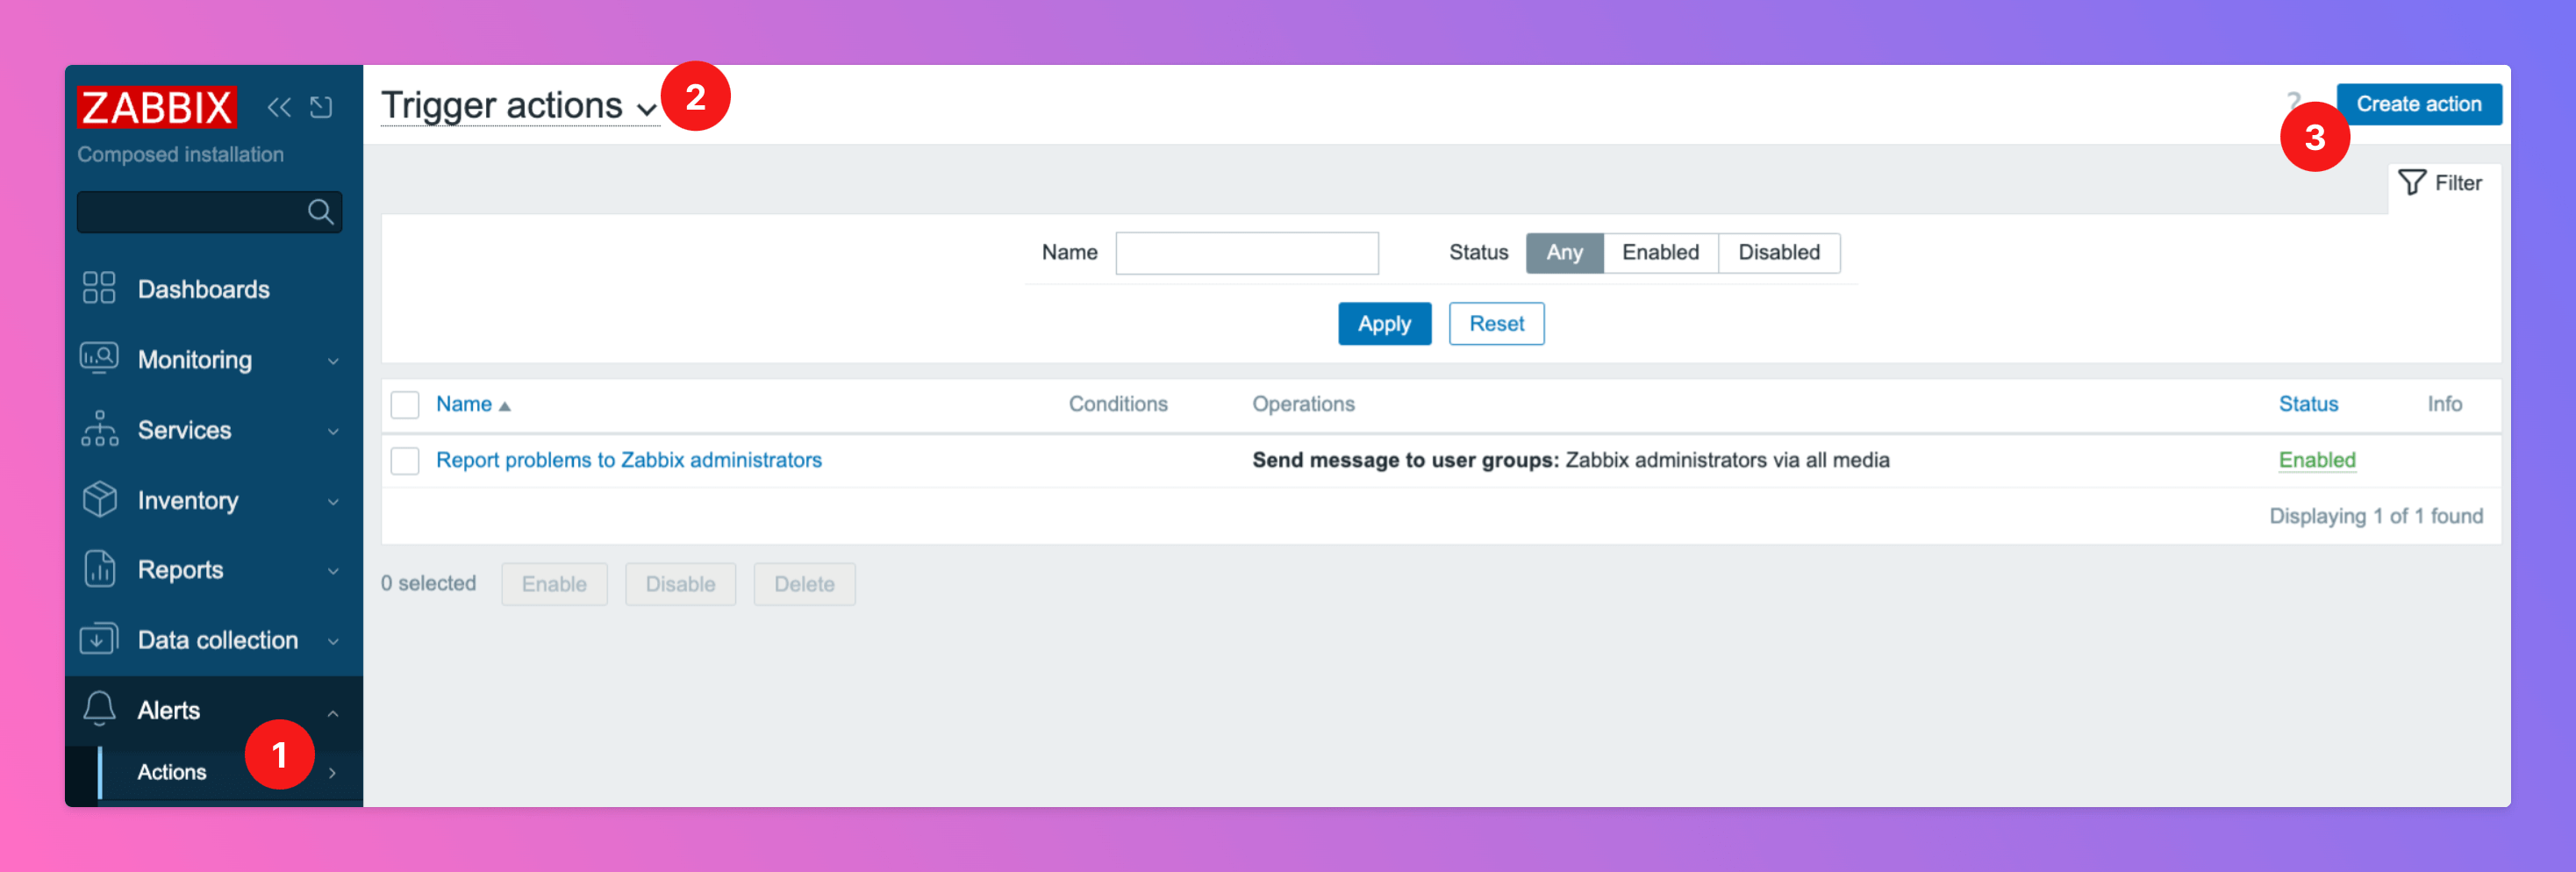
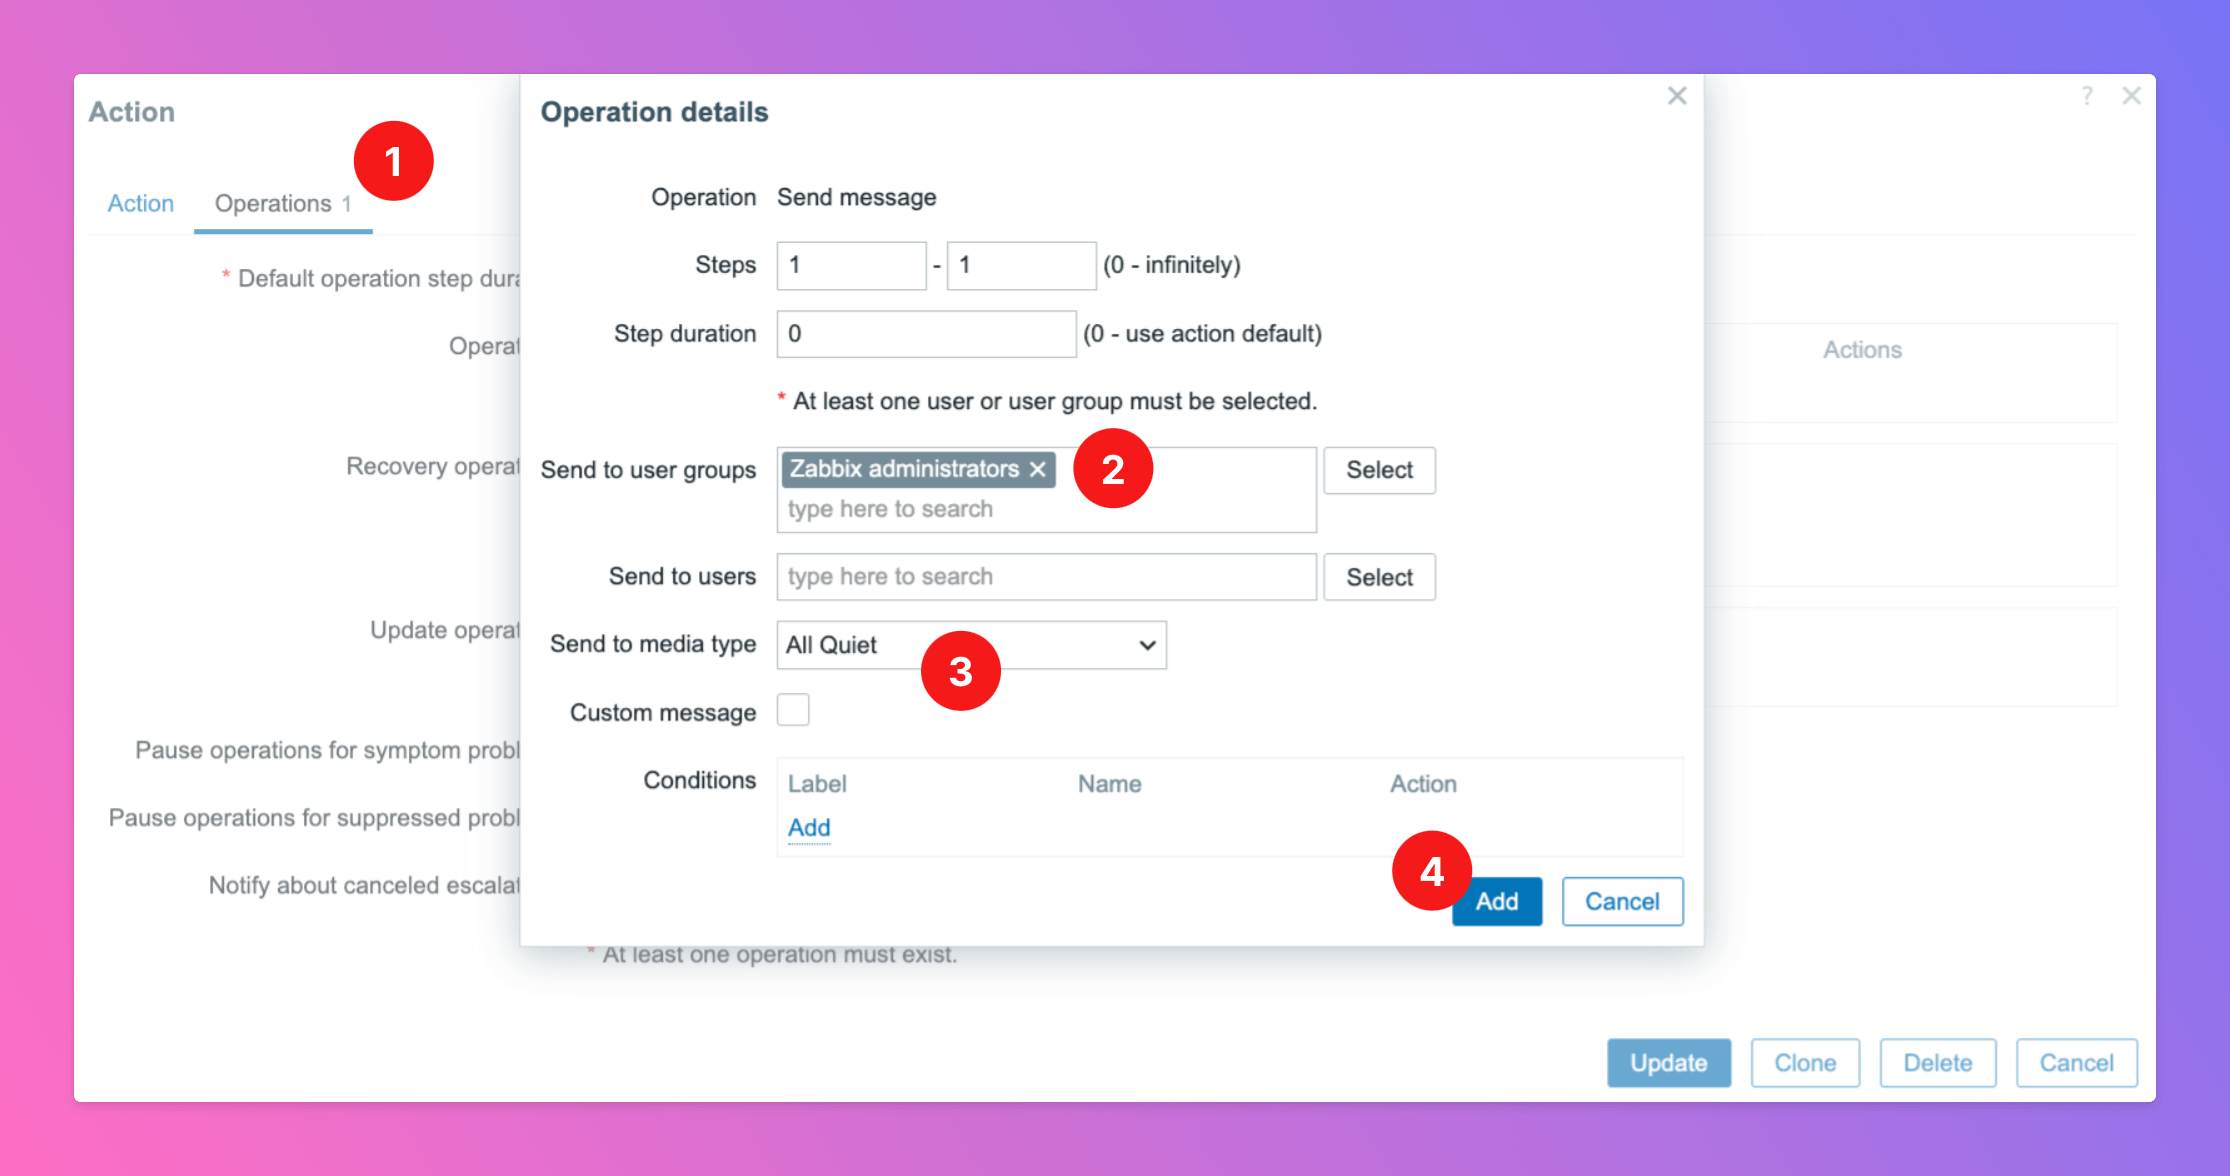
Create Trigger Action
Now it’s time to create a trigger to connect Zabbix alerts with All Quiet, using the user we just created.- Open
Alerts > Actions - Select `Trigger Actions“
- Create
Action
- open the tab
Operationsand clickAdd - in the overlay, make sure to select the
User Groupthat you added the All Quiet user to earlier - As
Media Type, select “All Quiet”. - Click
Add.
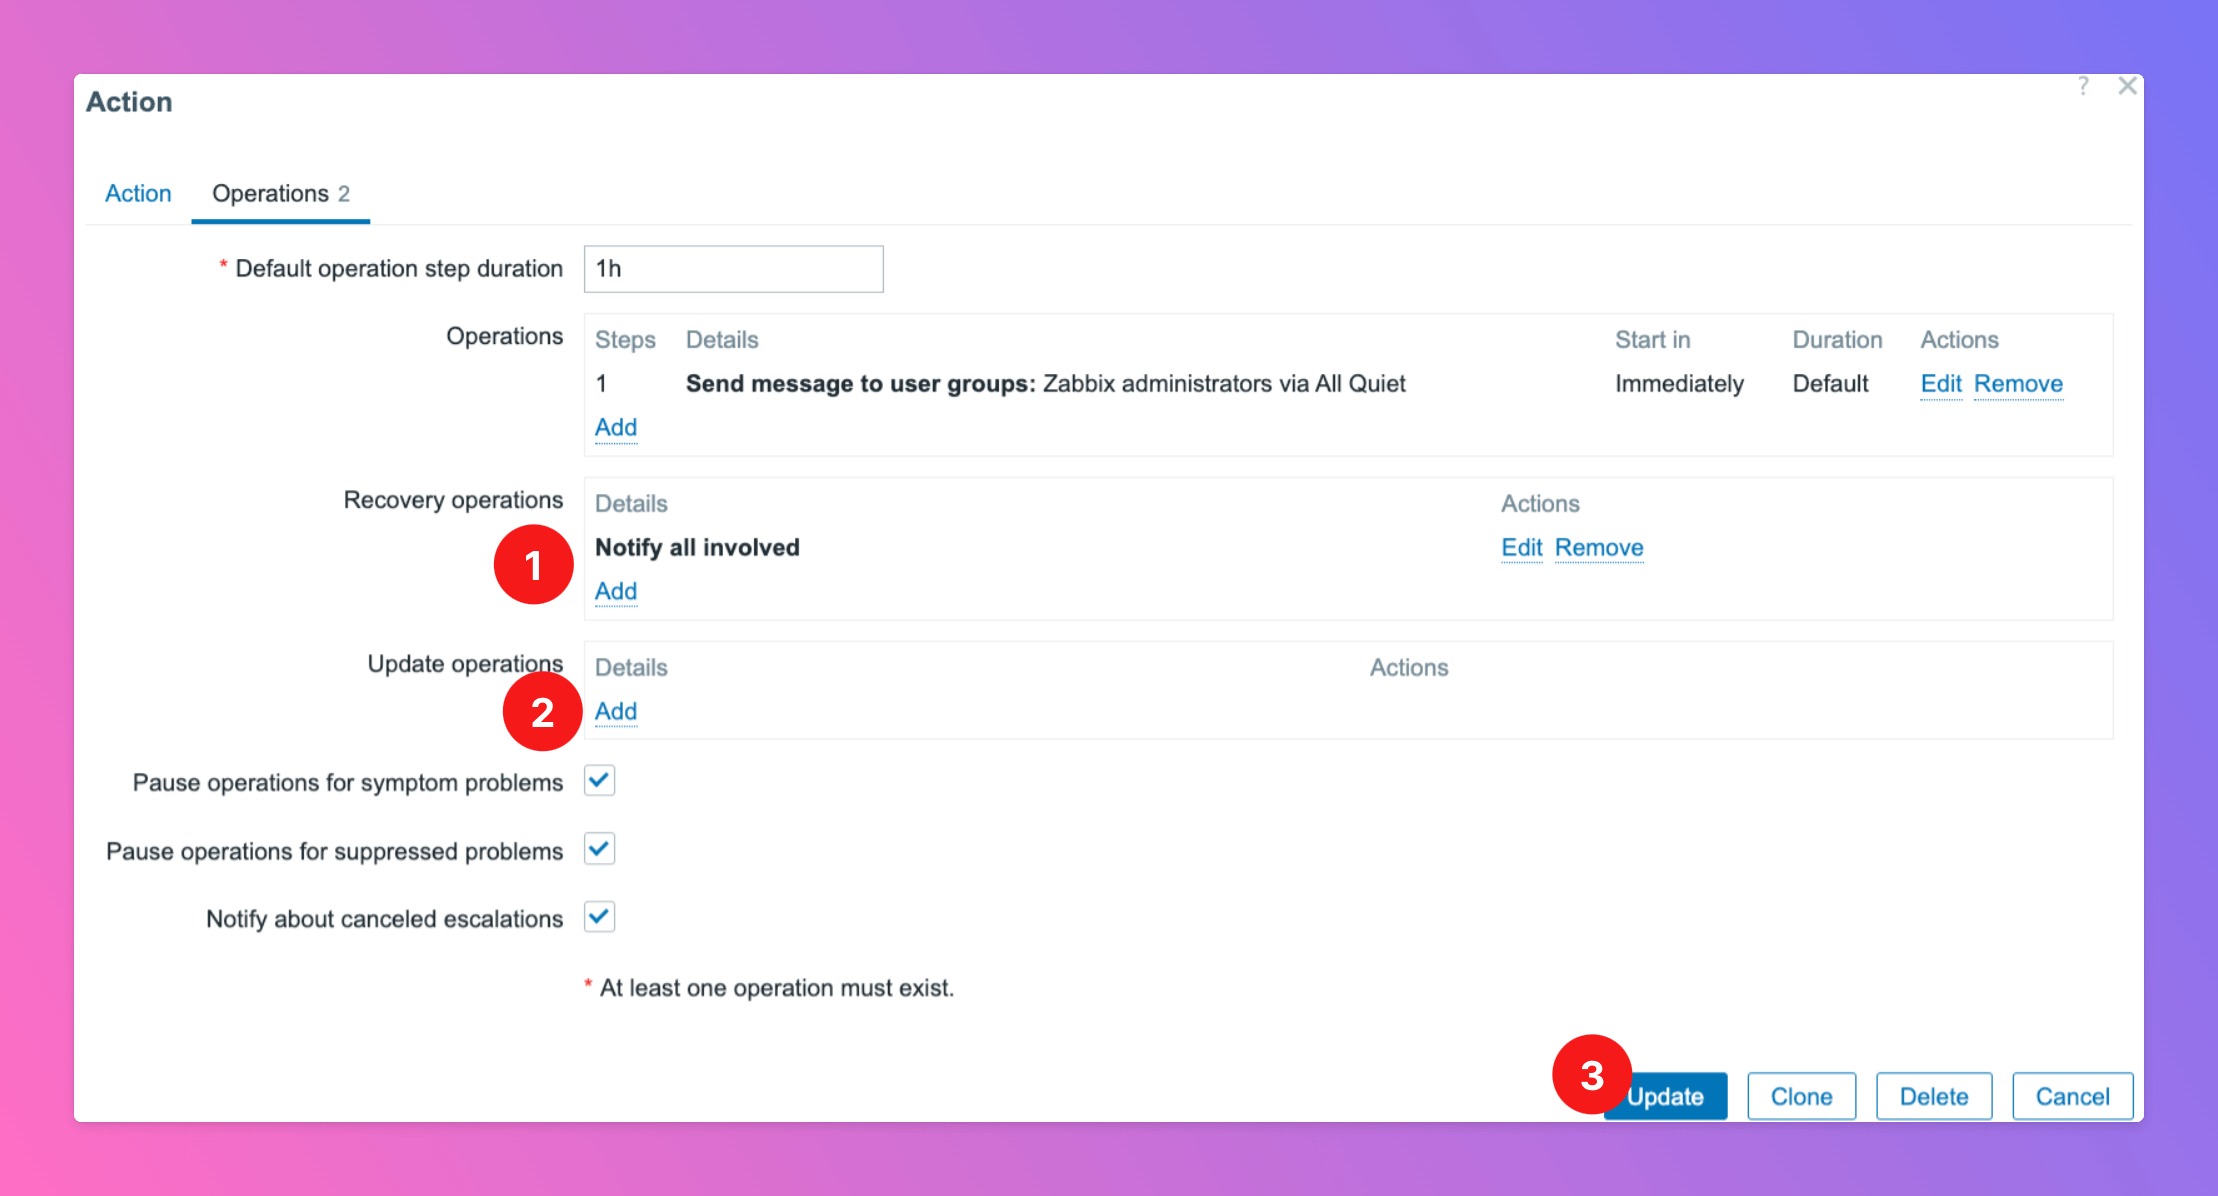
Operations above for Recovery operations (1) and Update operations (2). Click Update to save.
You’re ready to go. If you set up your integration this way, Zabbix will send alerts to All Quiet.
