Setup time: 3 Min
1. Add AppDynamics Integration to Your All Quiet Team
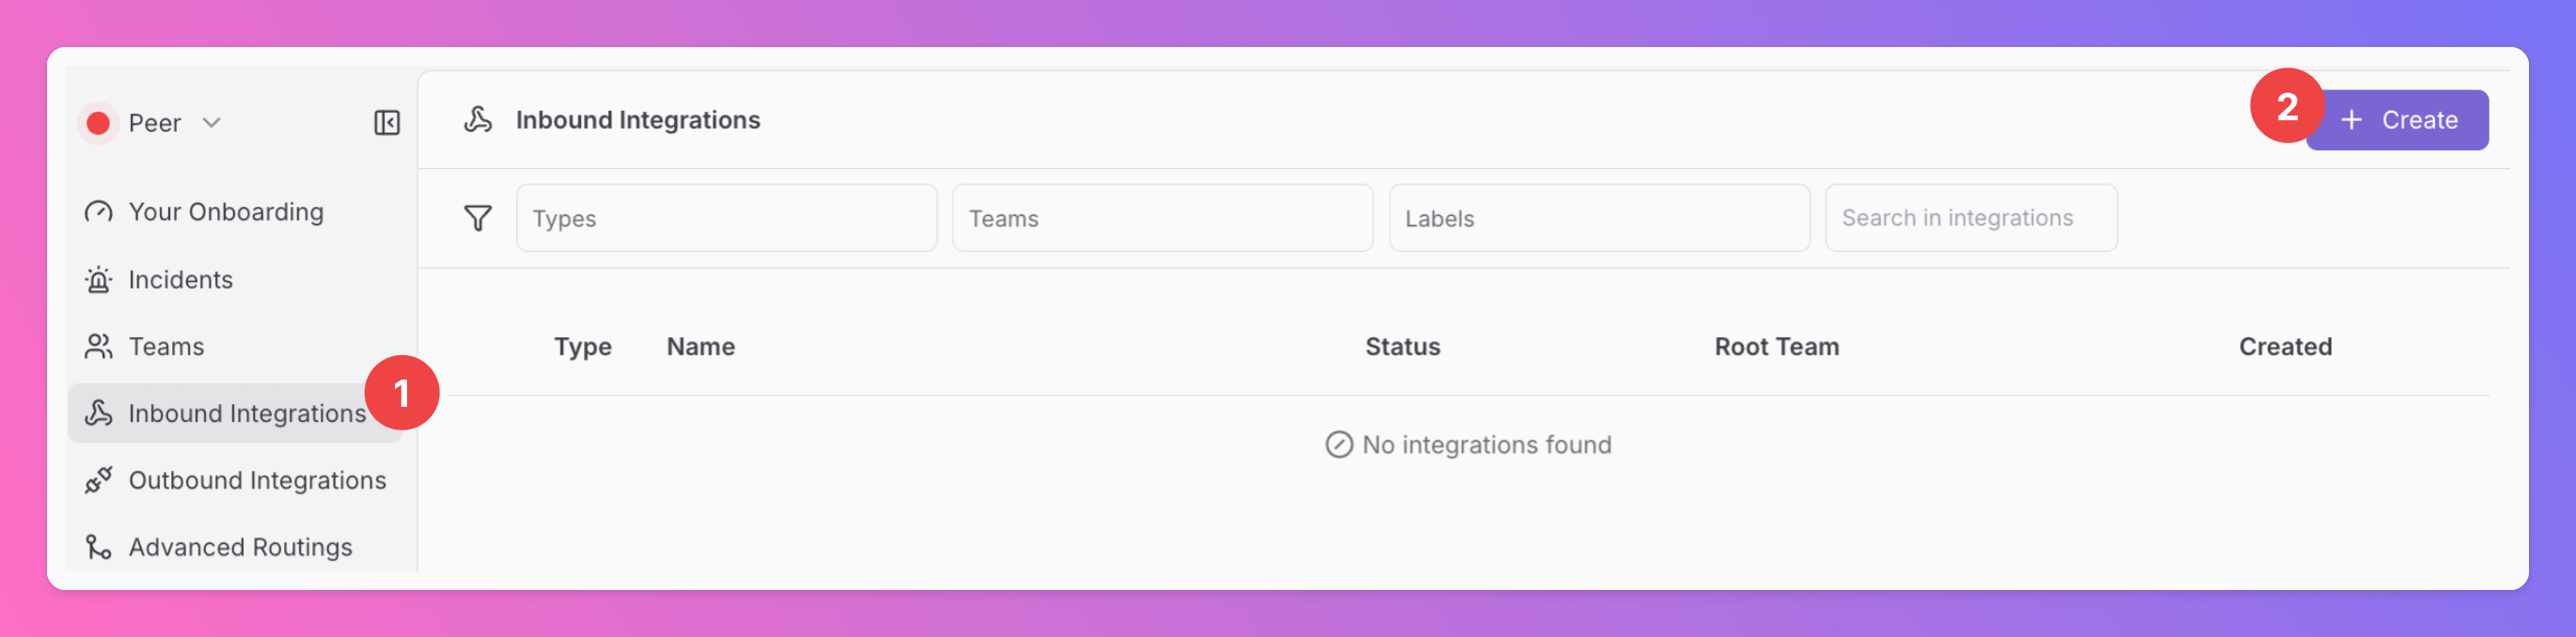
Create an AppDynamics integration
- Click on the
Inbound IntegrationsTab. - Click on
+ Create.
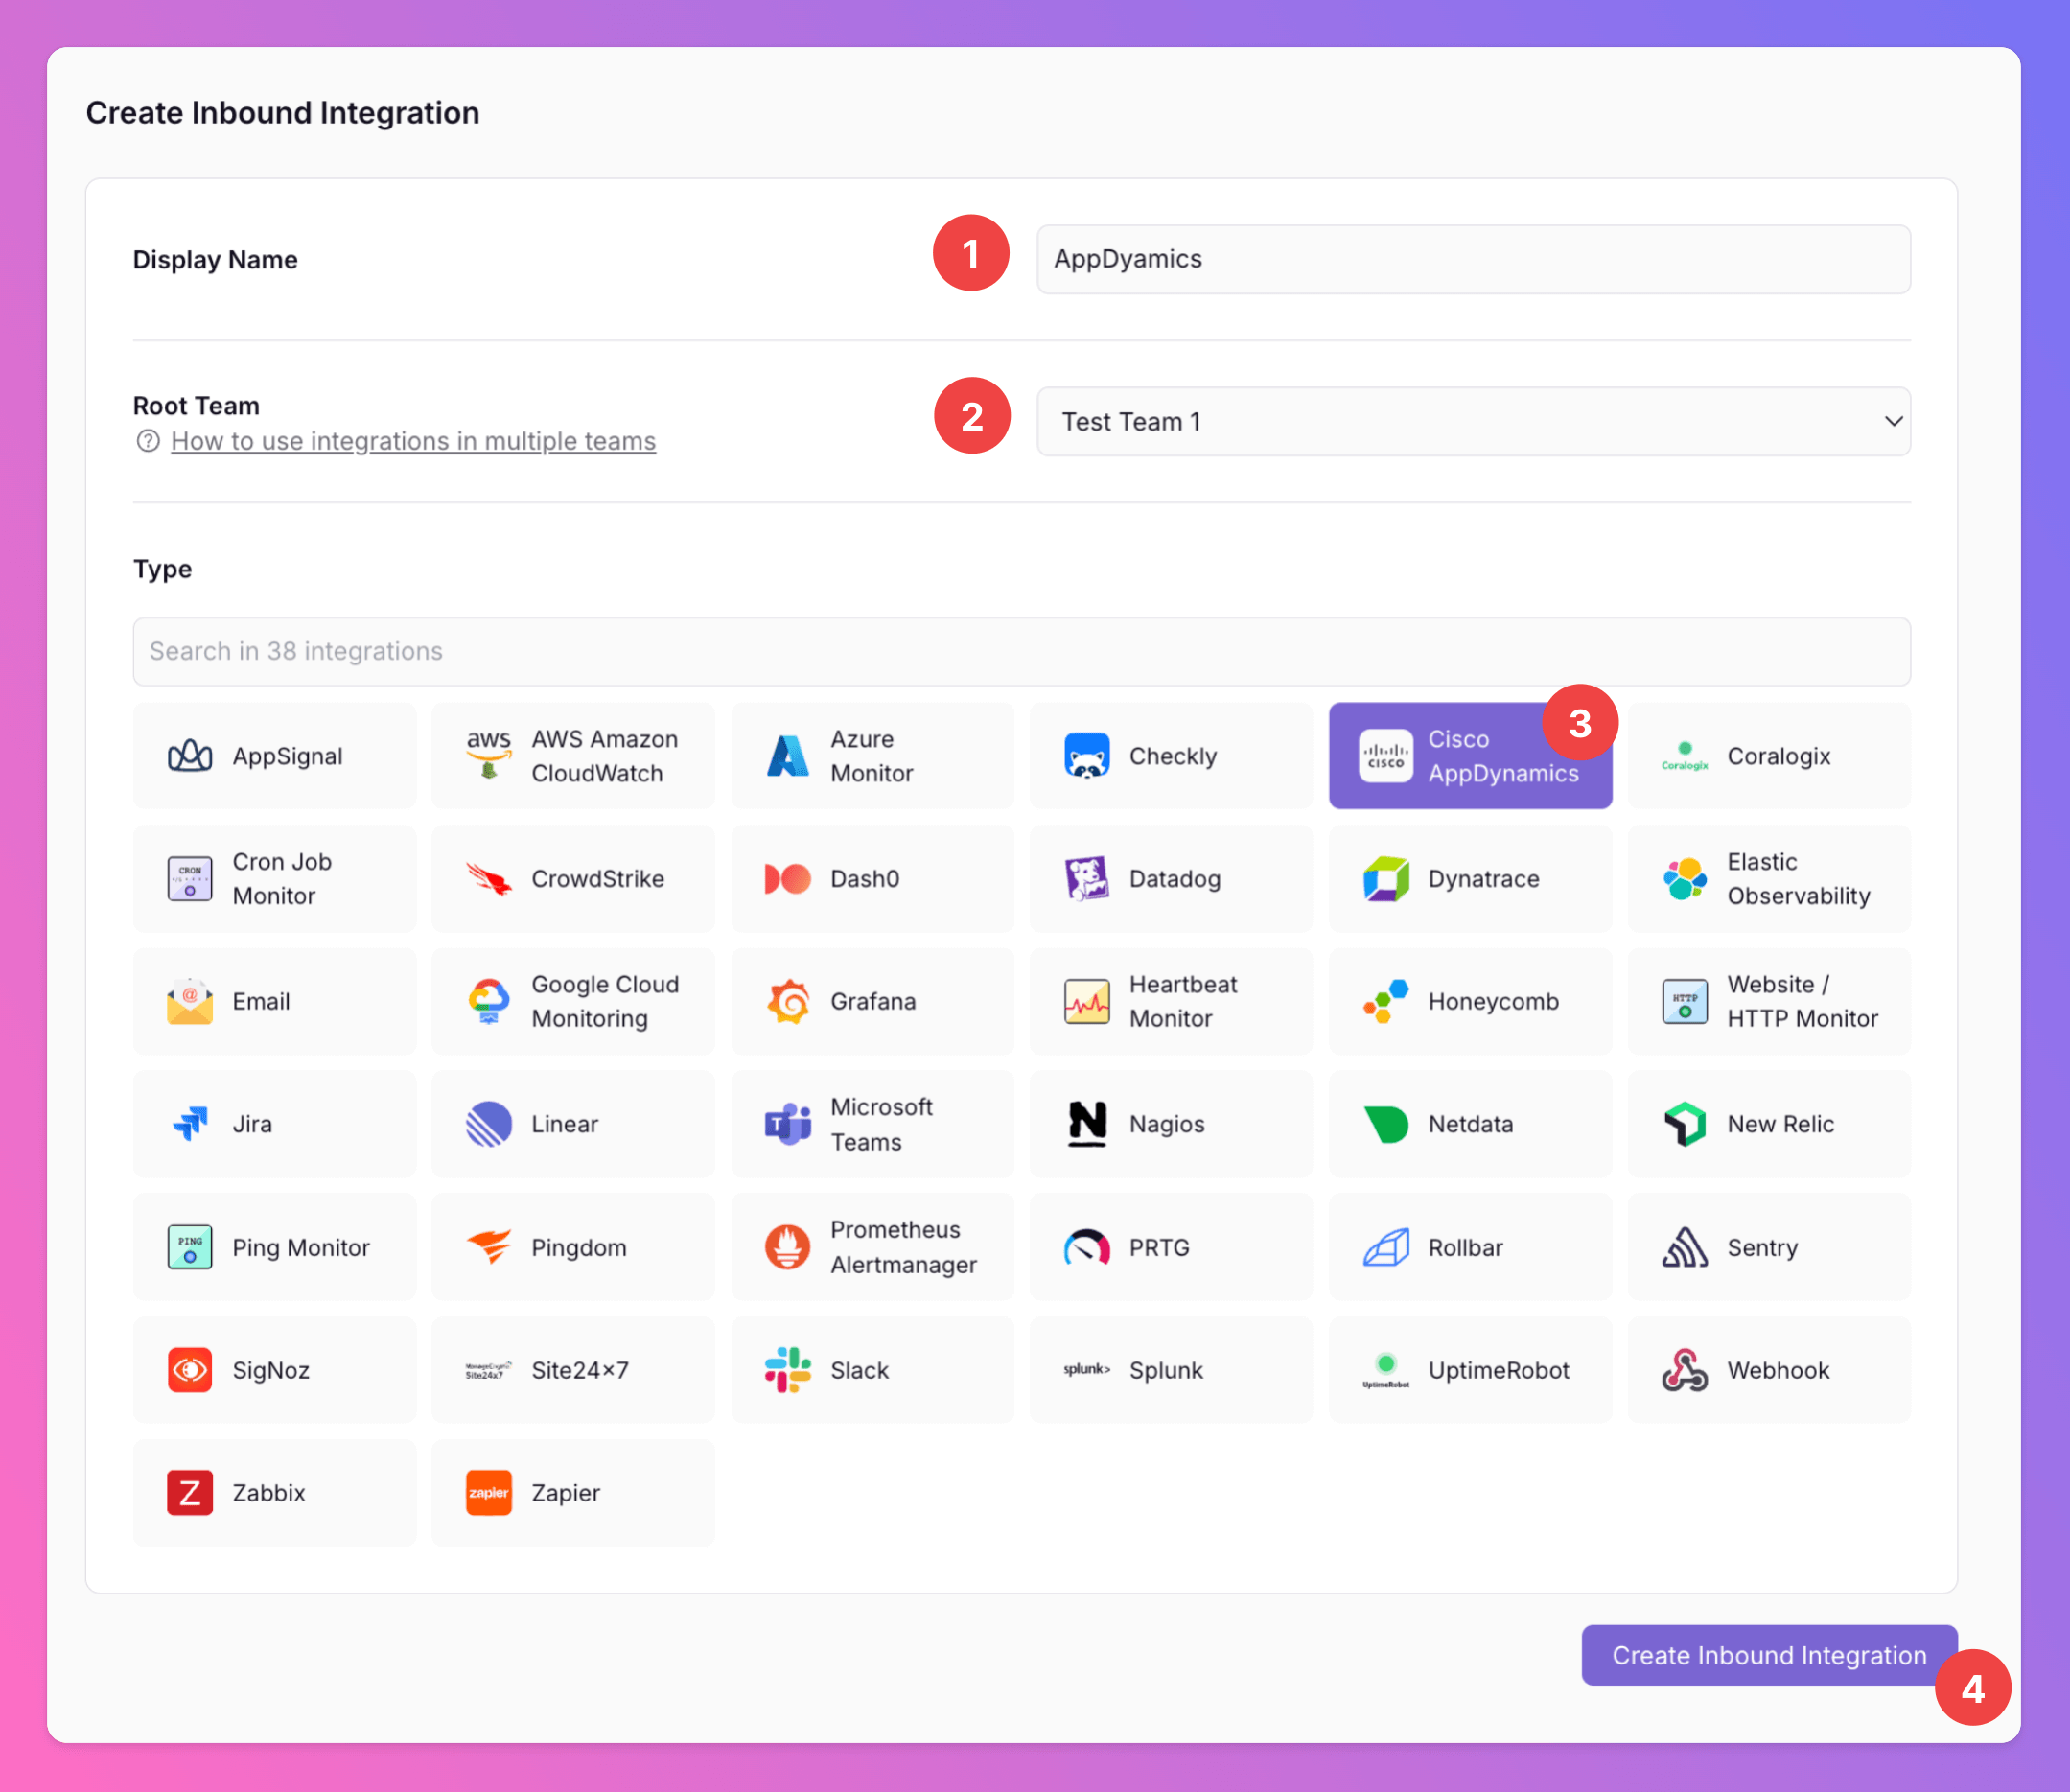
Select AppDynamics as the Integration’s Type
- Enter a
Display Namefor your AppDynamics integration, e.g. “AppDynamics”. - Pick the
Teamyou’d like to add the integration to. - Select
AppDynamicsas the type. - Click
Create Inbound Integration.
Get the All Quiet webhook URL
After creating the integration on All Quiet, you can view and copy the webhook URL. You will require this URL in step 2 when configuring the custom integration on AppDynamics.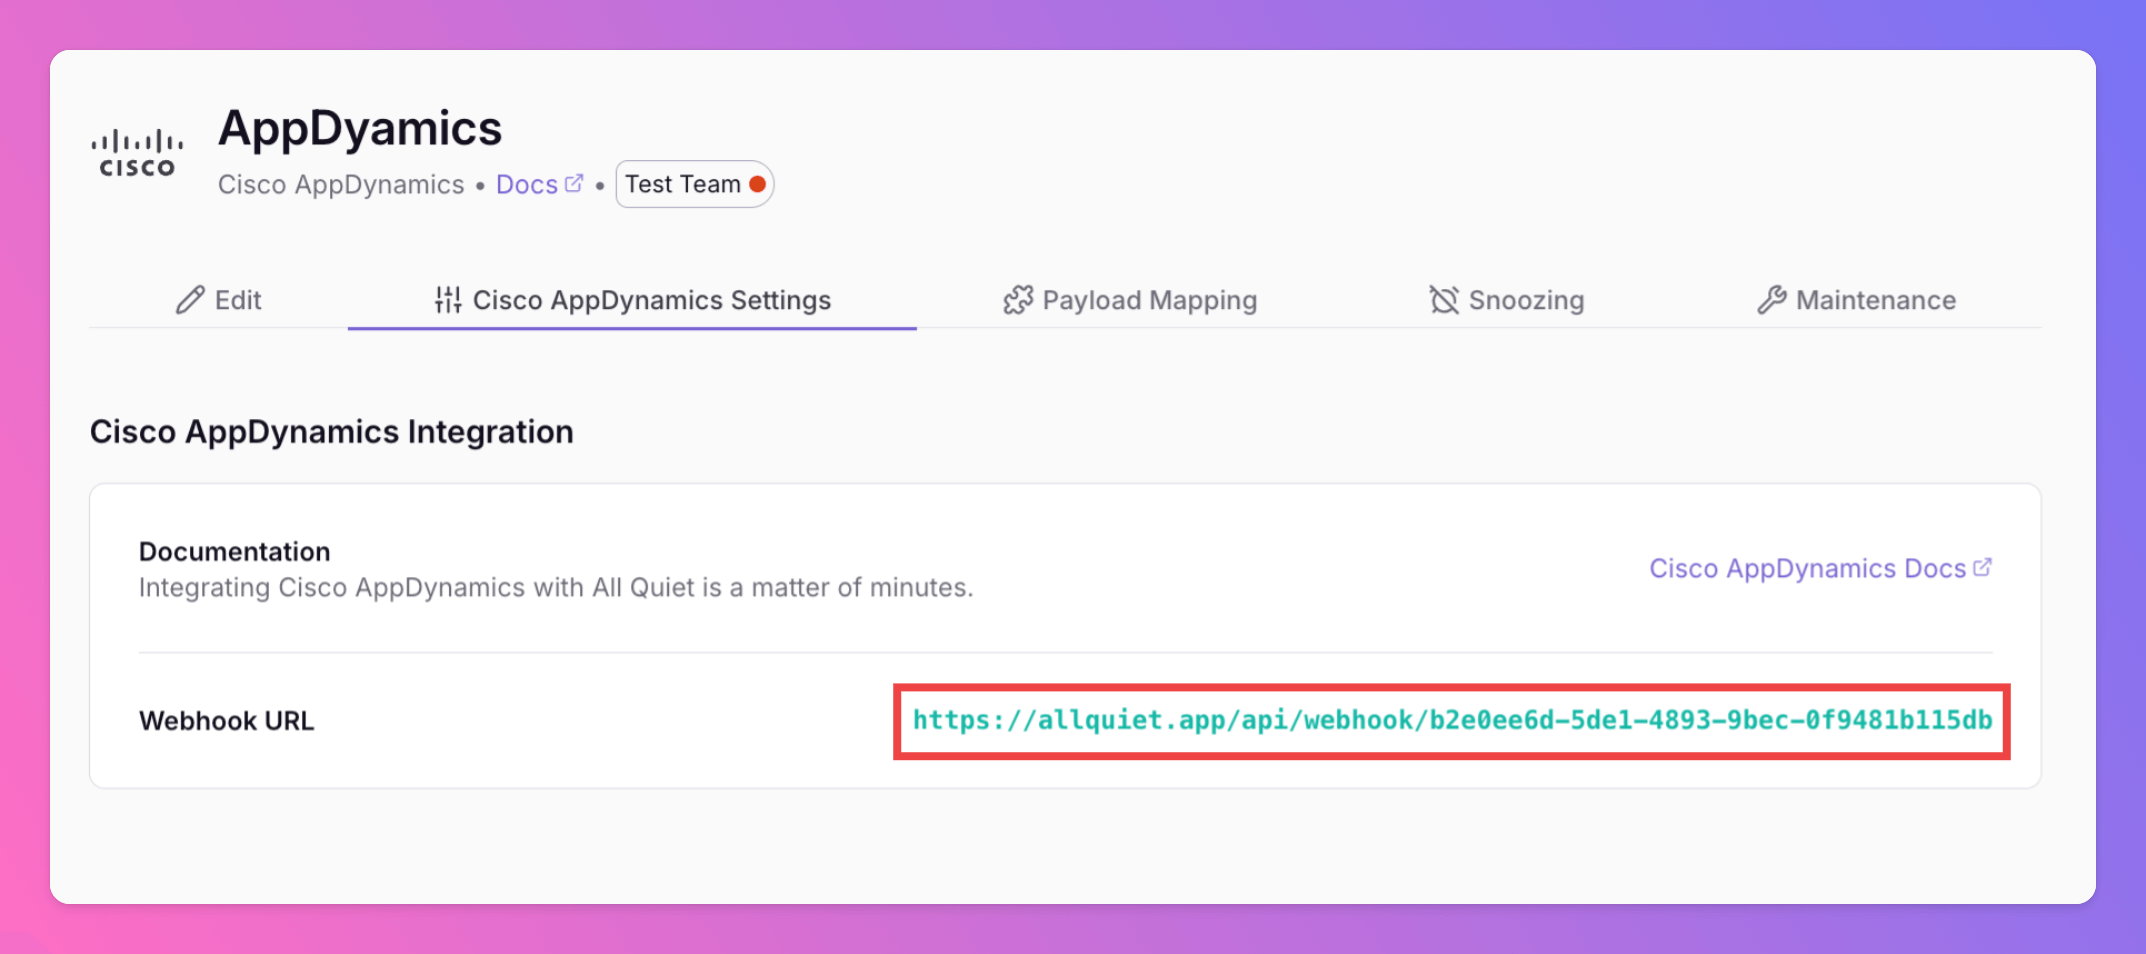
Optionally toggle
Enable additional Authentication & Security below the webhook URL to restrict who can POST payloads.- IP Filter — Allow requests only from specific IPs or CIDR ranges. Failed checks return 404 Not Found.
- Bearer authentication — Require
Authorization: Bearer YOUR_TOKEN. Missing or invalid tokens return 401 Unauthorized.
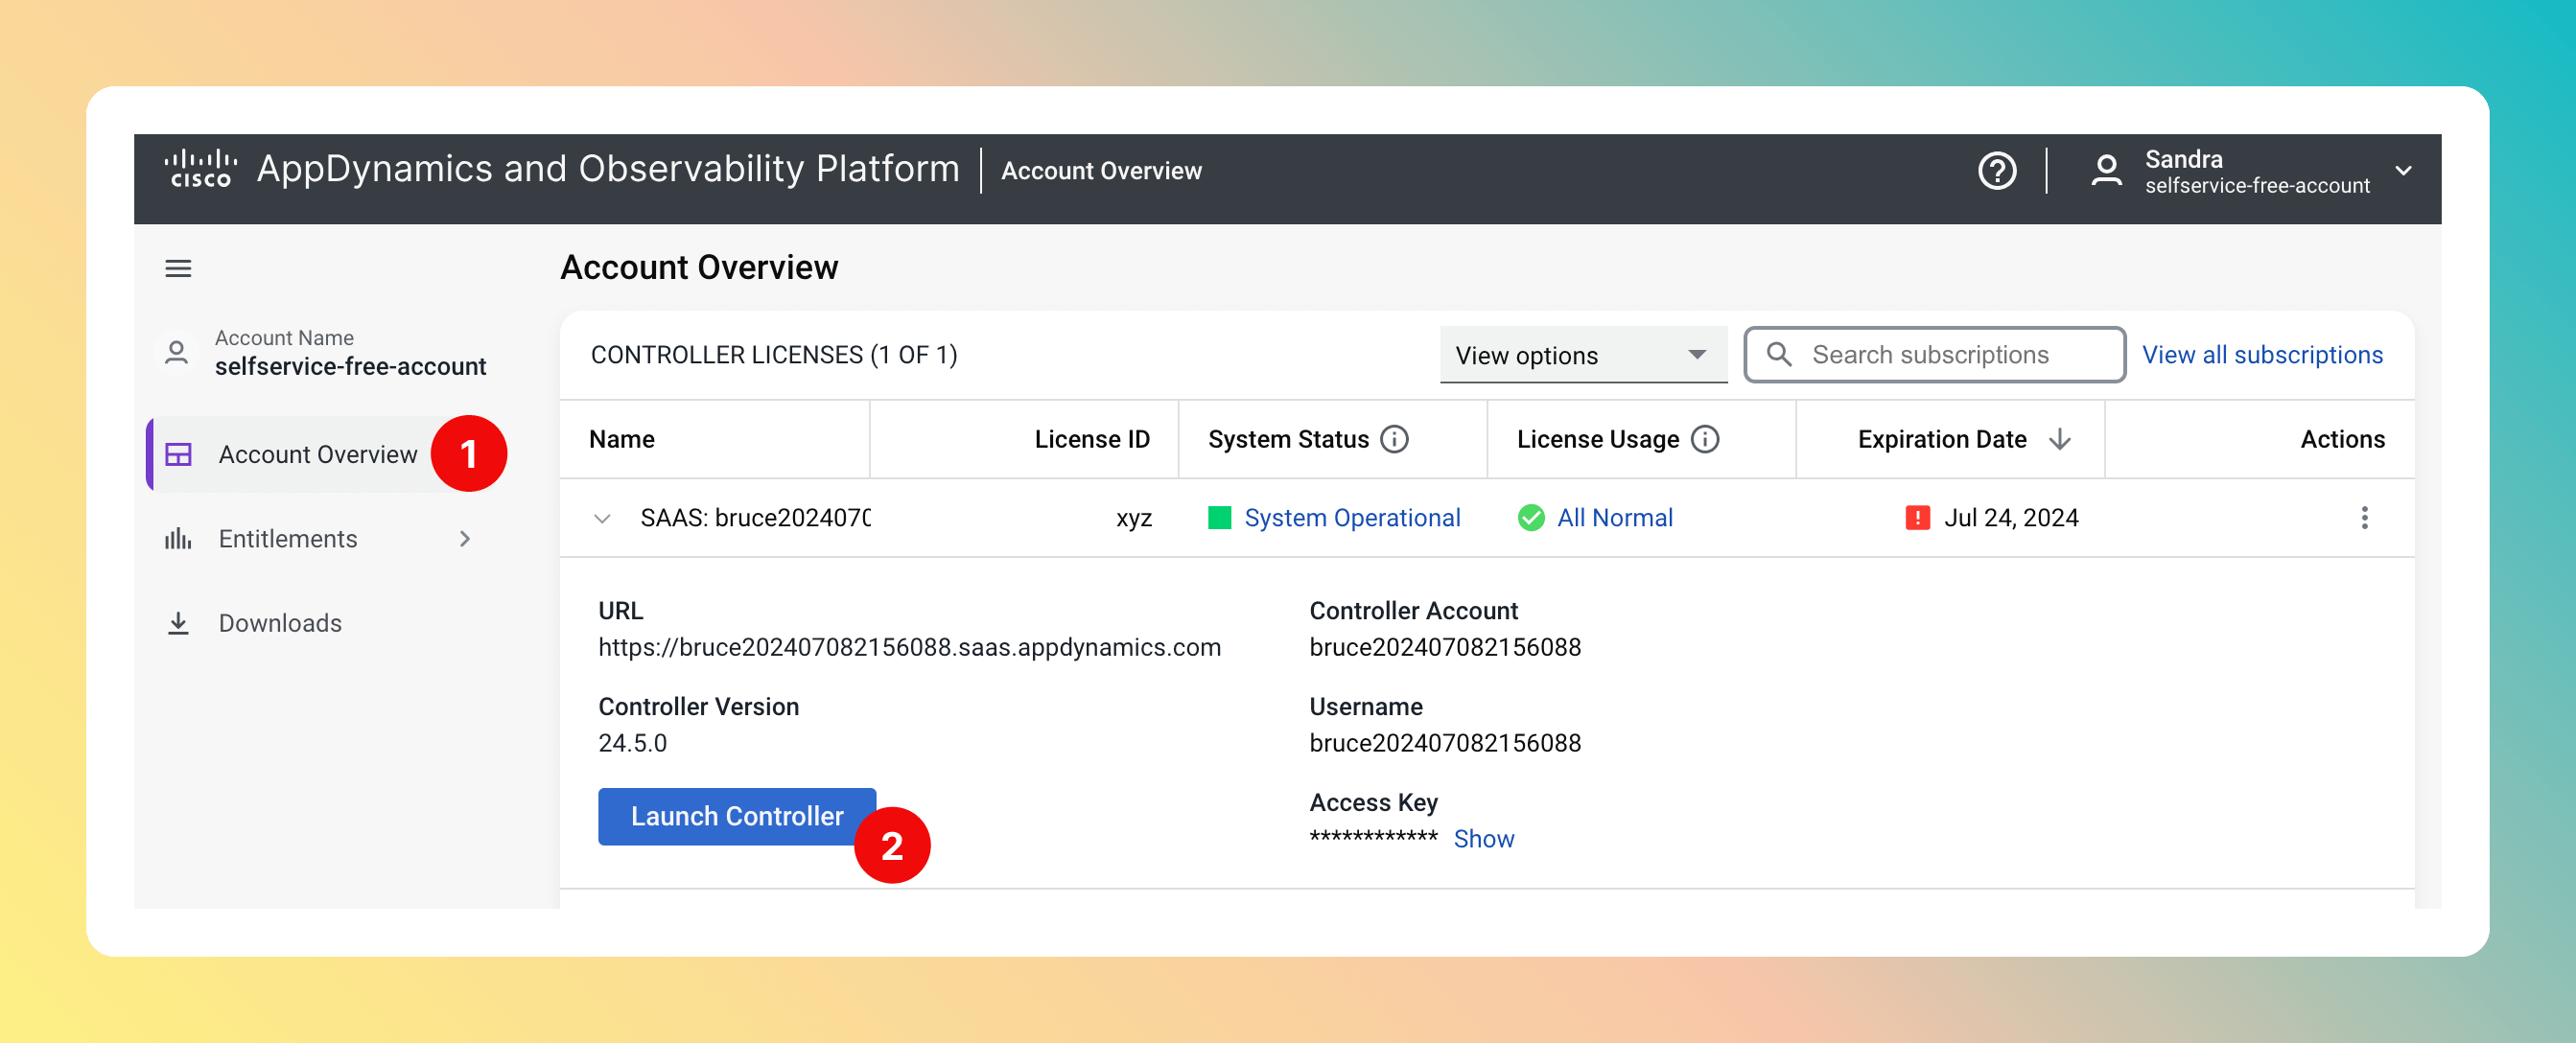
2. Create a custom integration on AppDynamics
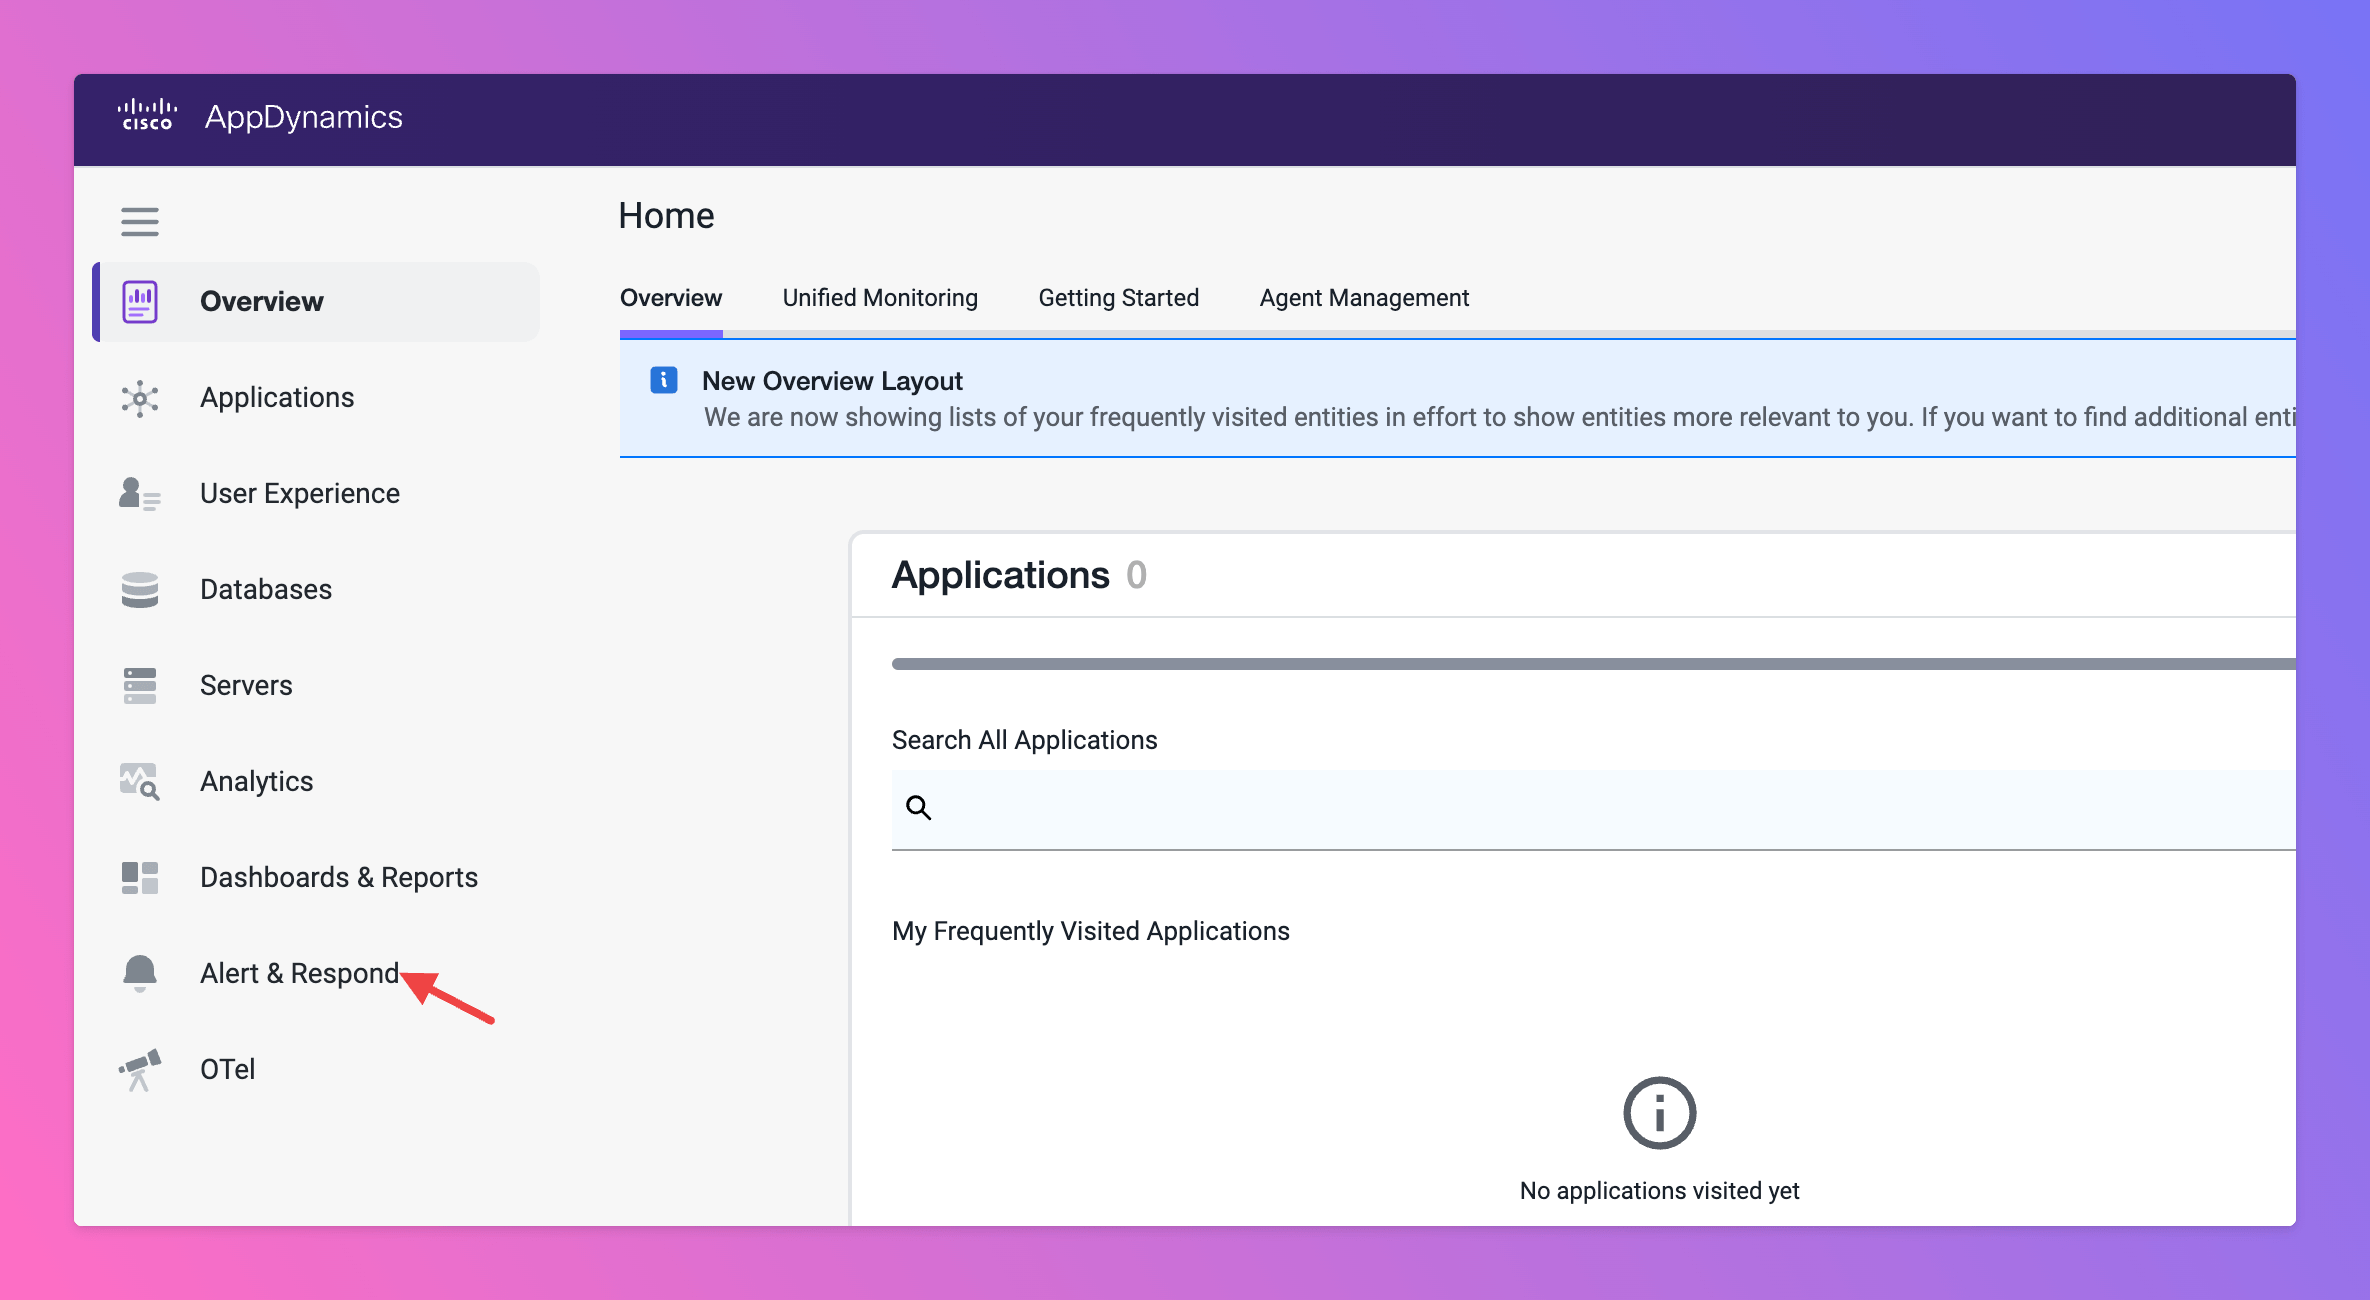
Sign in to your AppDynamics Account.- Open
Account Overview Launch Controller.
Alert & Respond page.
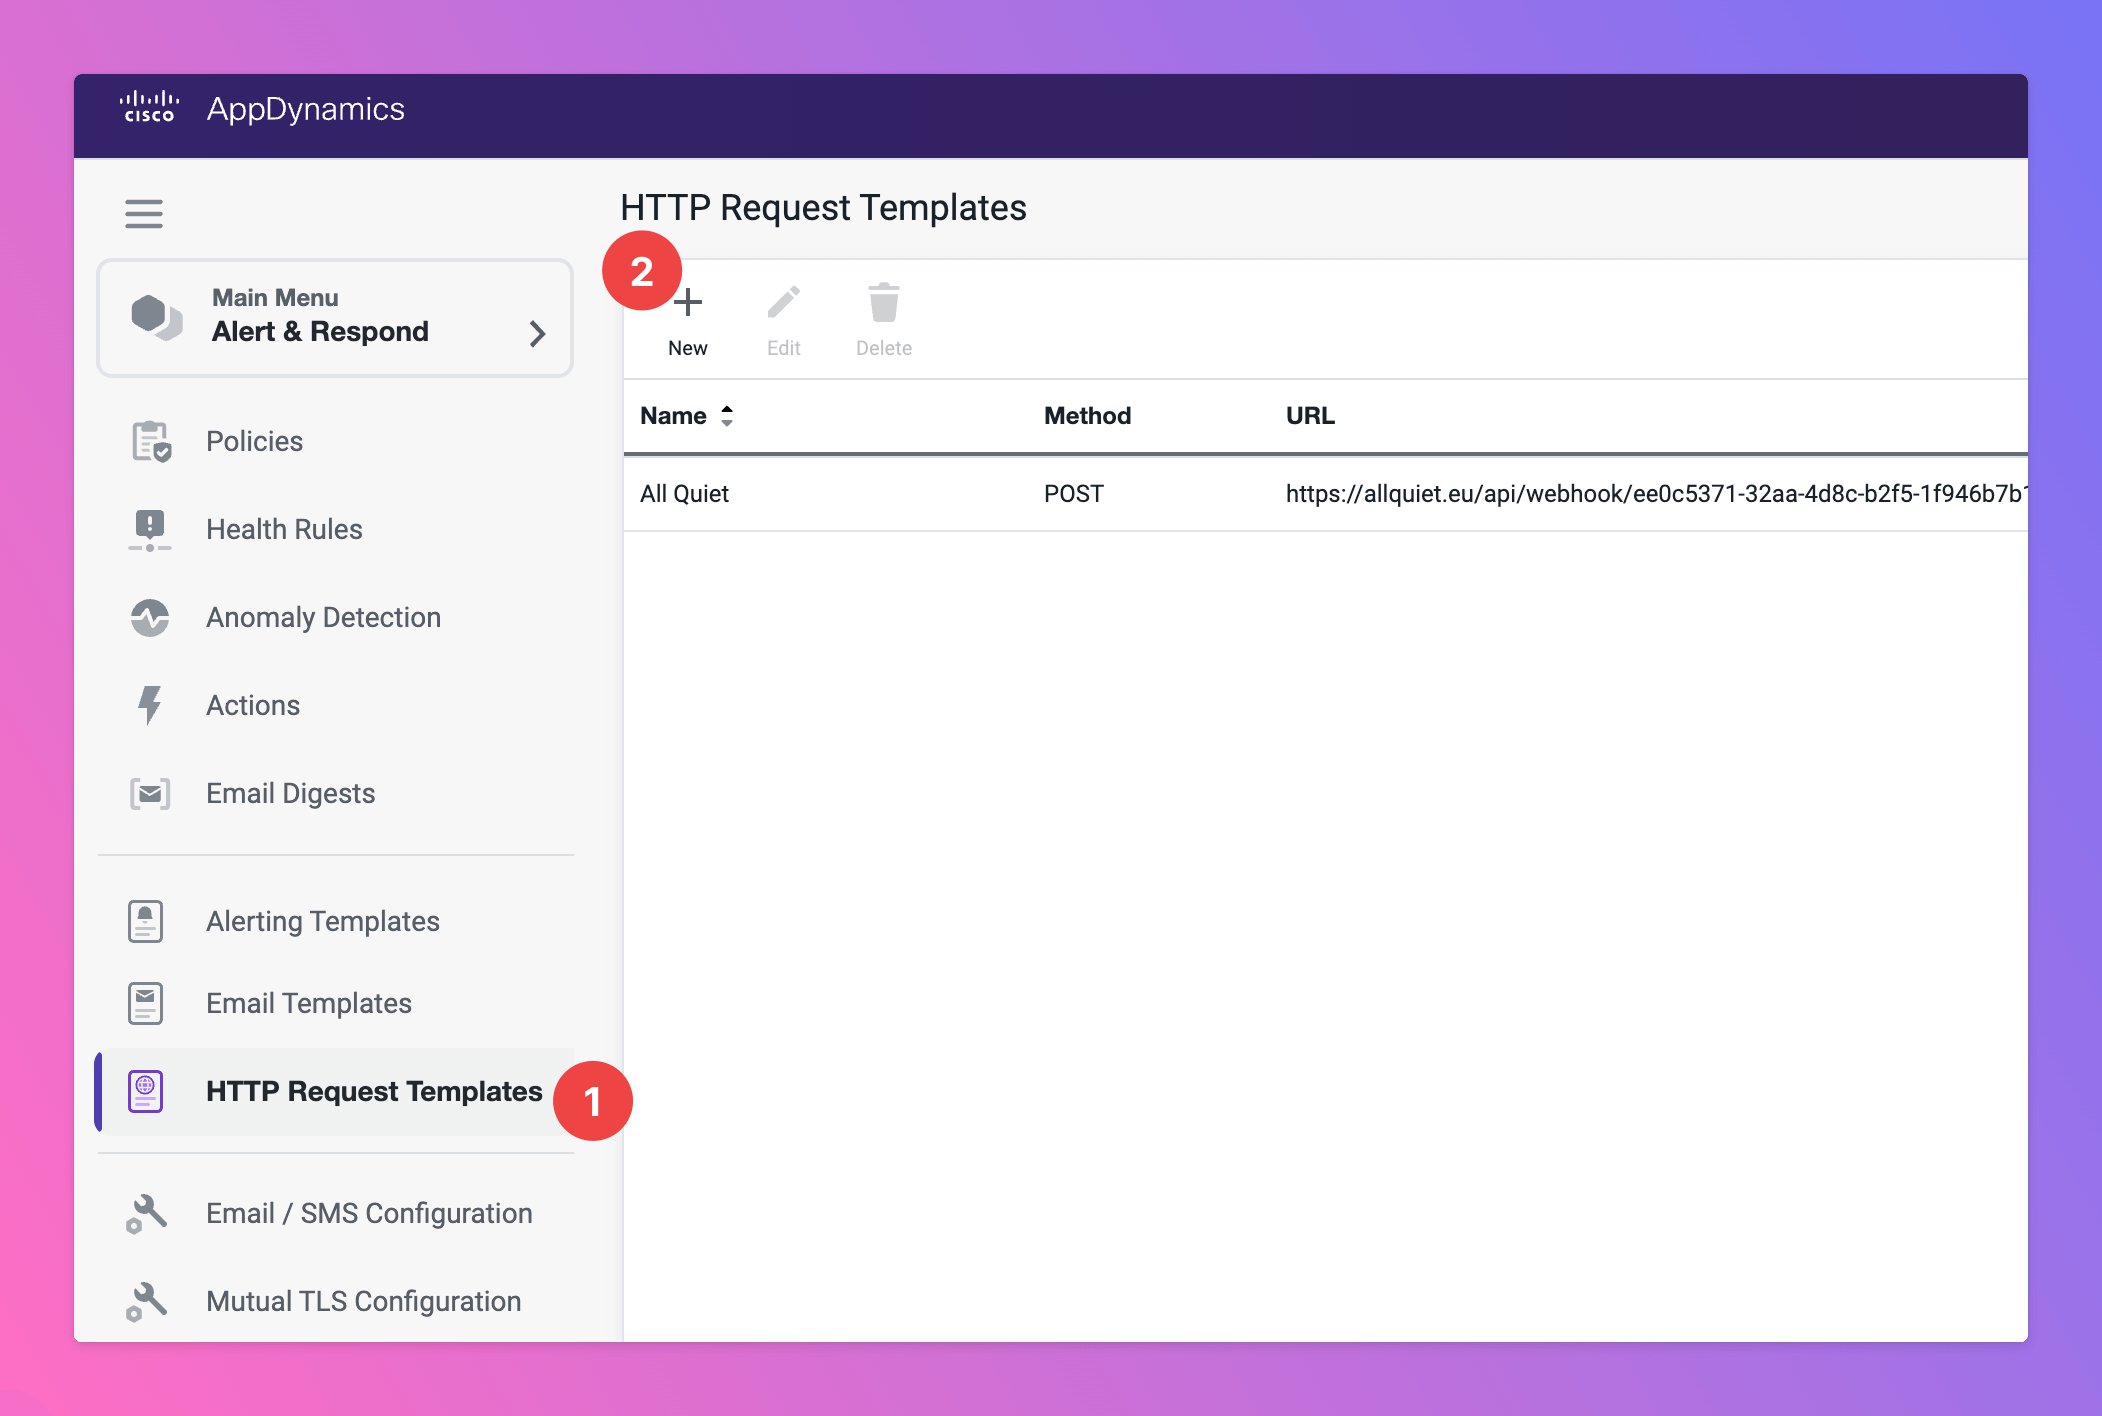
- Open
HTTP Request Templatesin sitenav. - Start
Newtemplate.
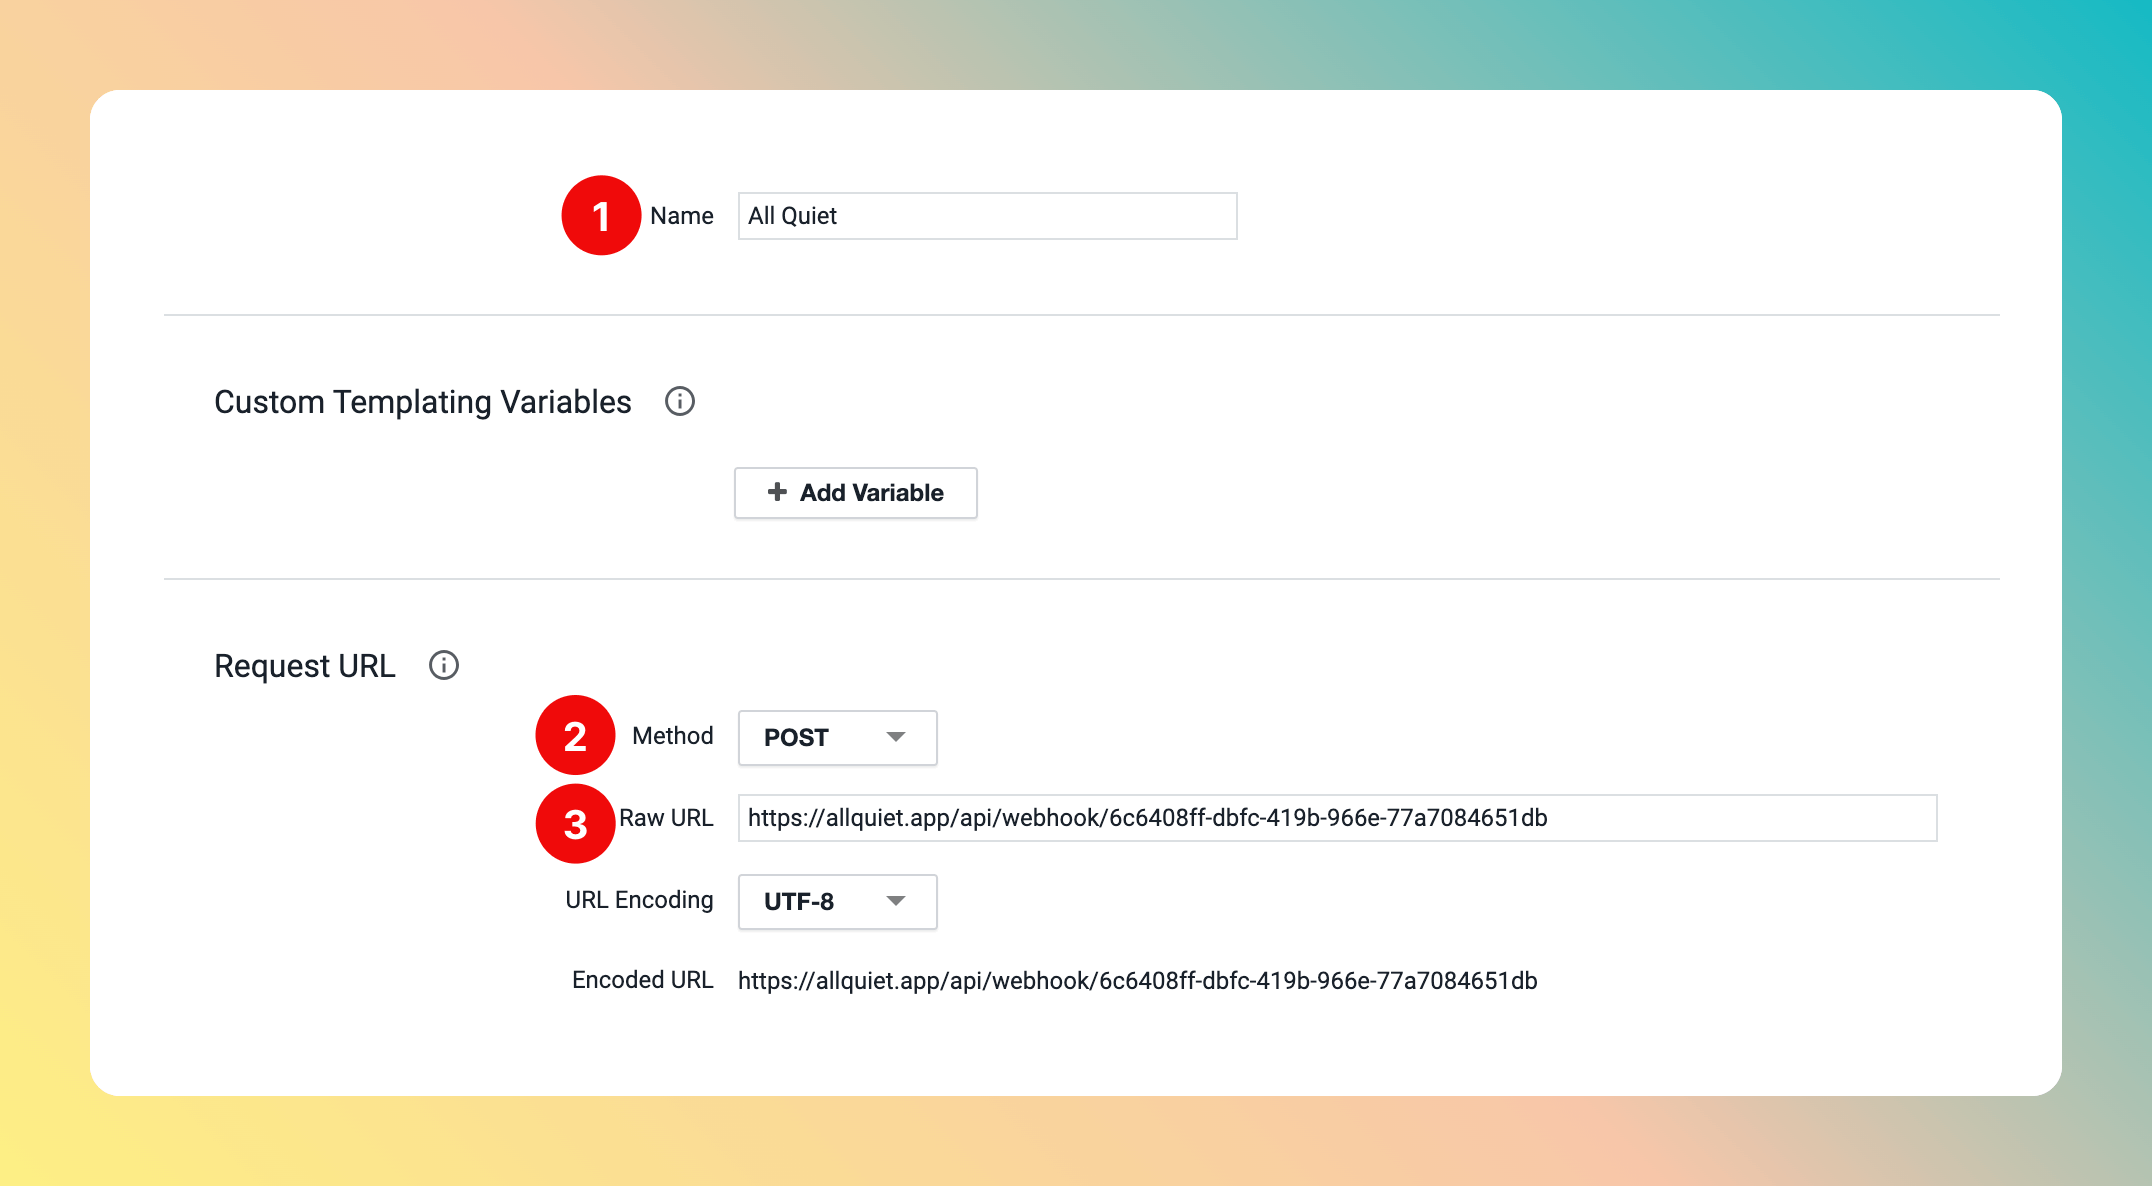
- Add a
Namefor your HTTP request template, like “All Quiet” - For the
Request URL, selectMethod“Post” - As
Raw URL, paste in the All Quiet webhook URL you’ve obtained in step Get The All Quiet Webhook URL.
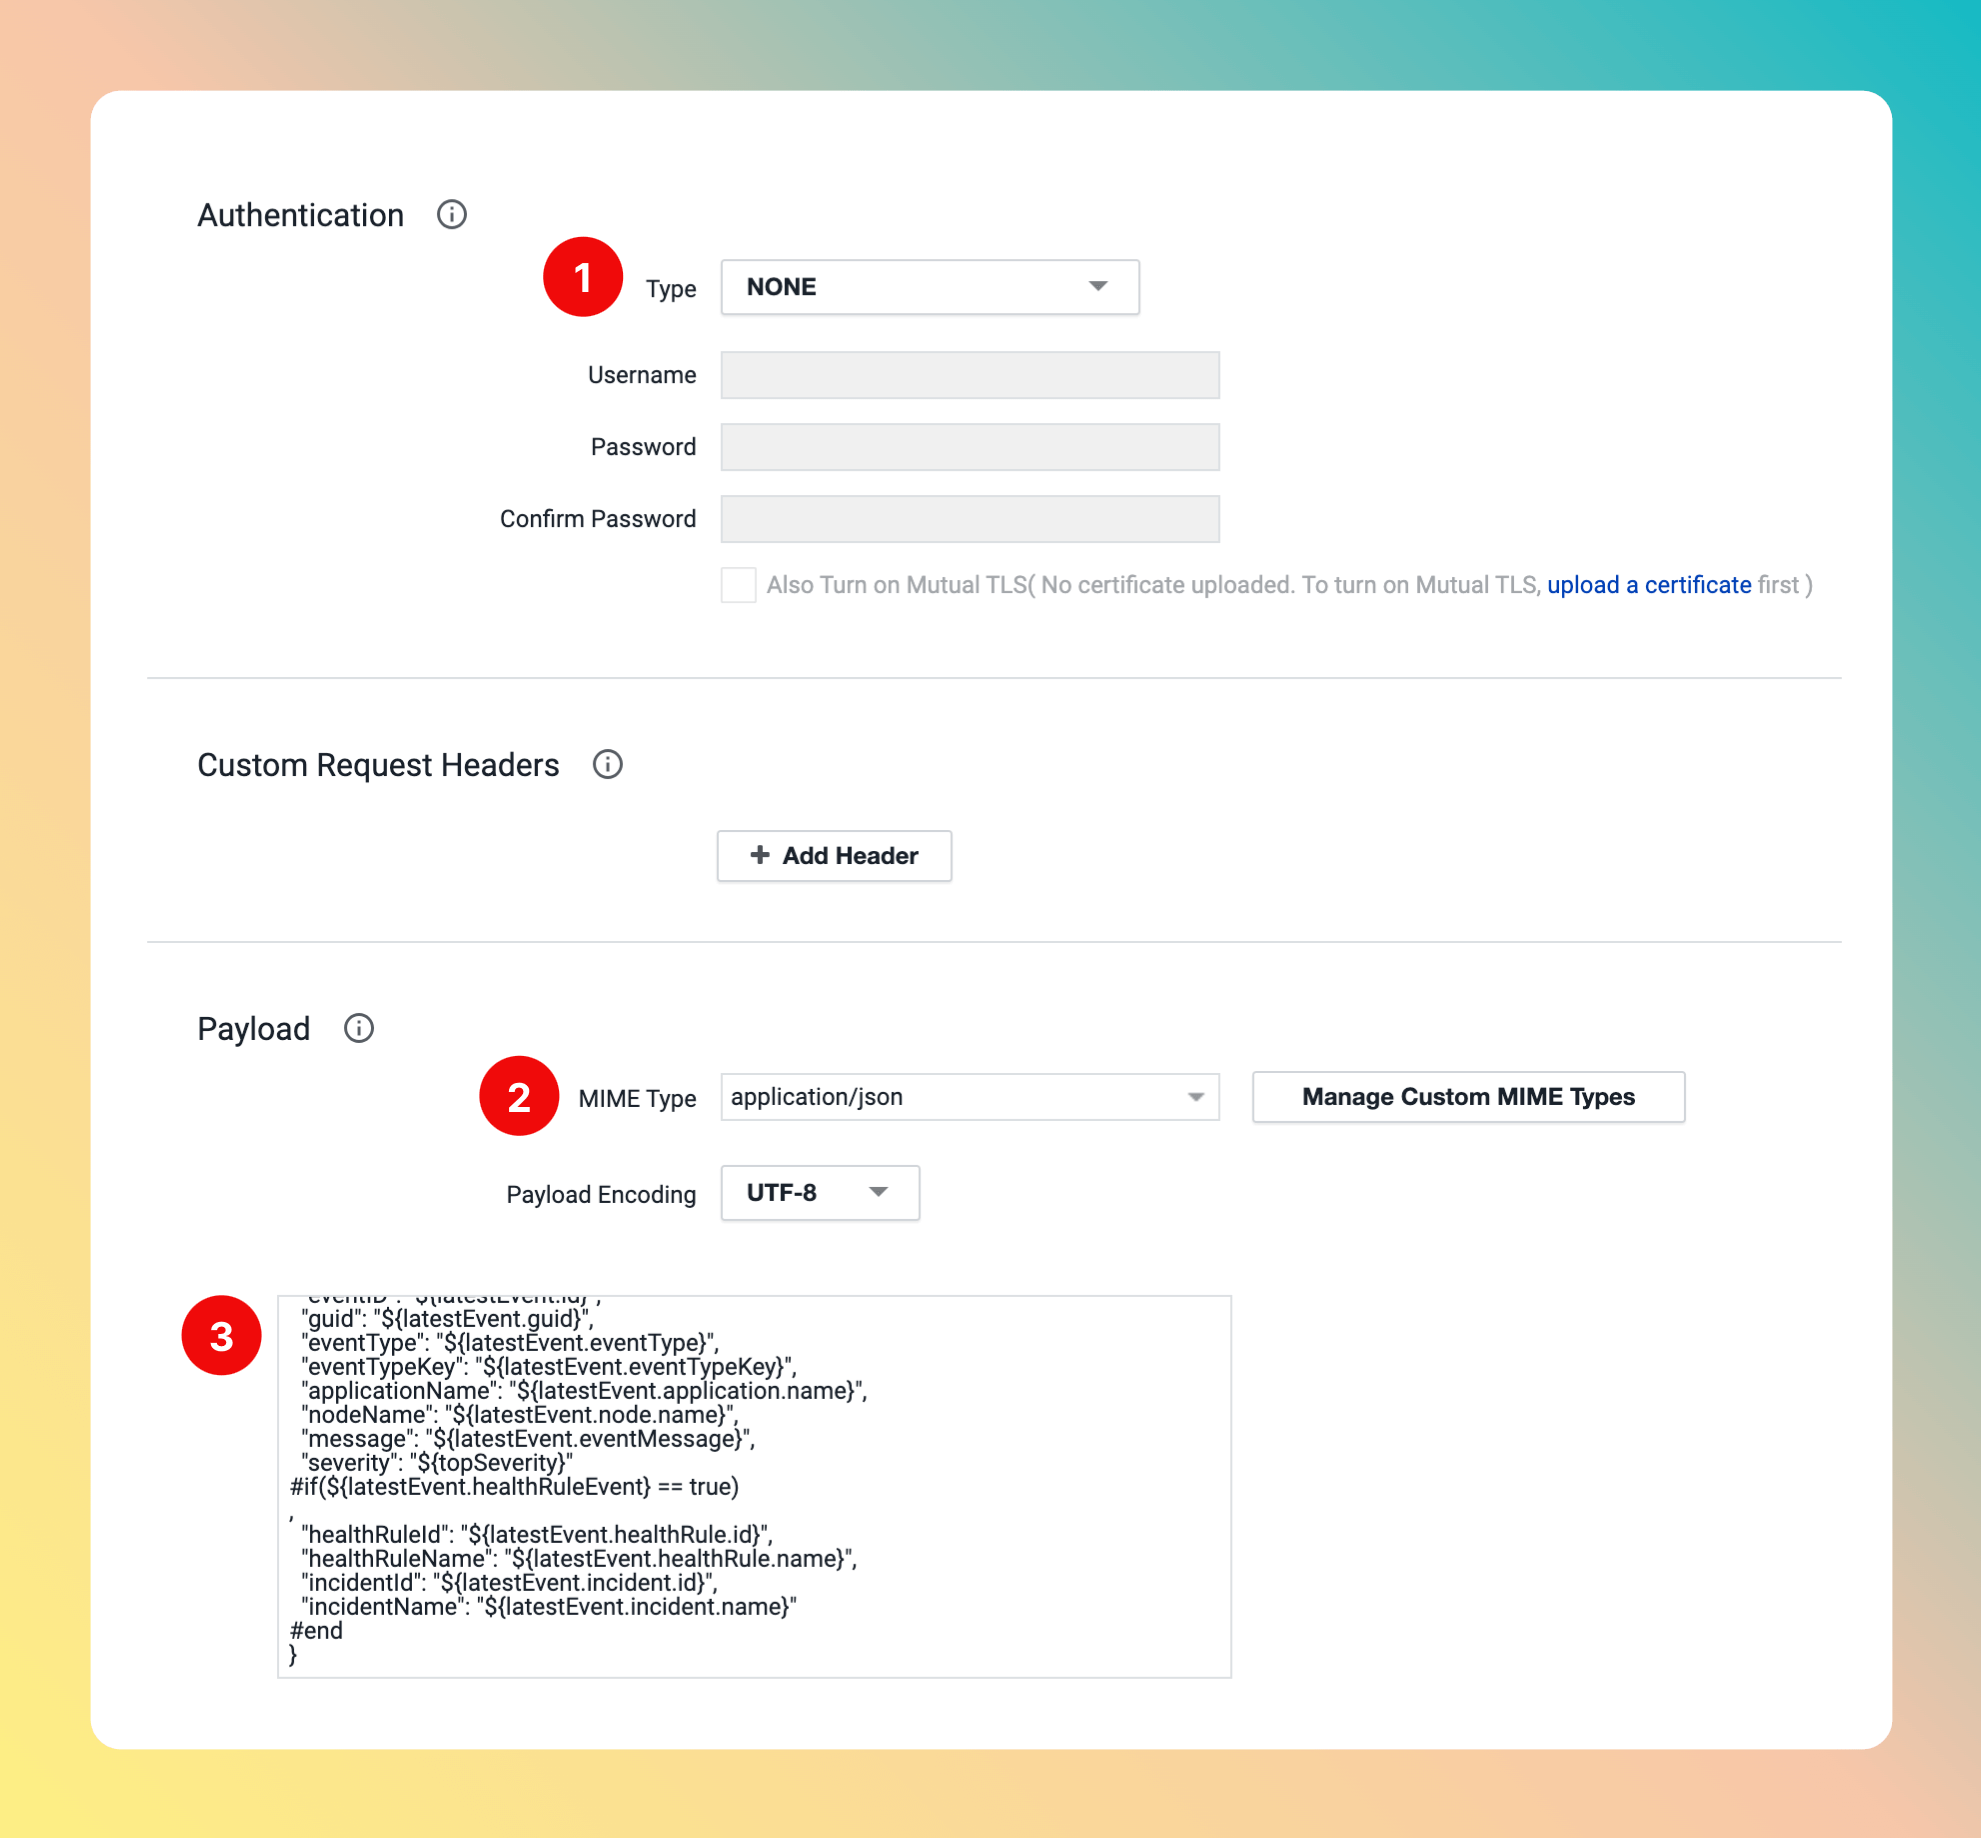
- As
AuthentificationType, select “NONE” - As
PayloadMIME Type, select “application/json” - Use the following
Payload
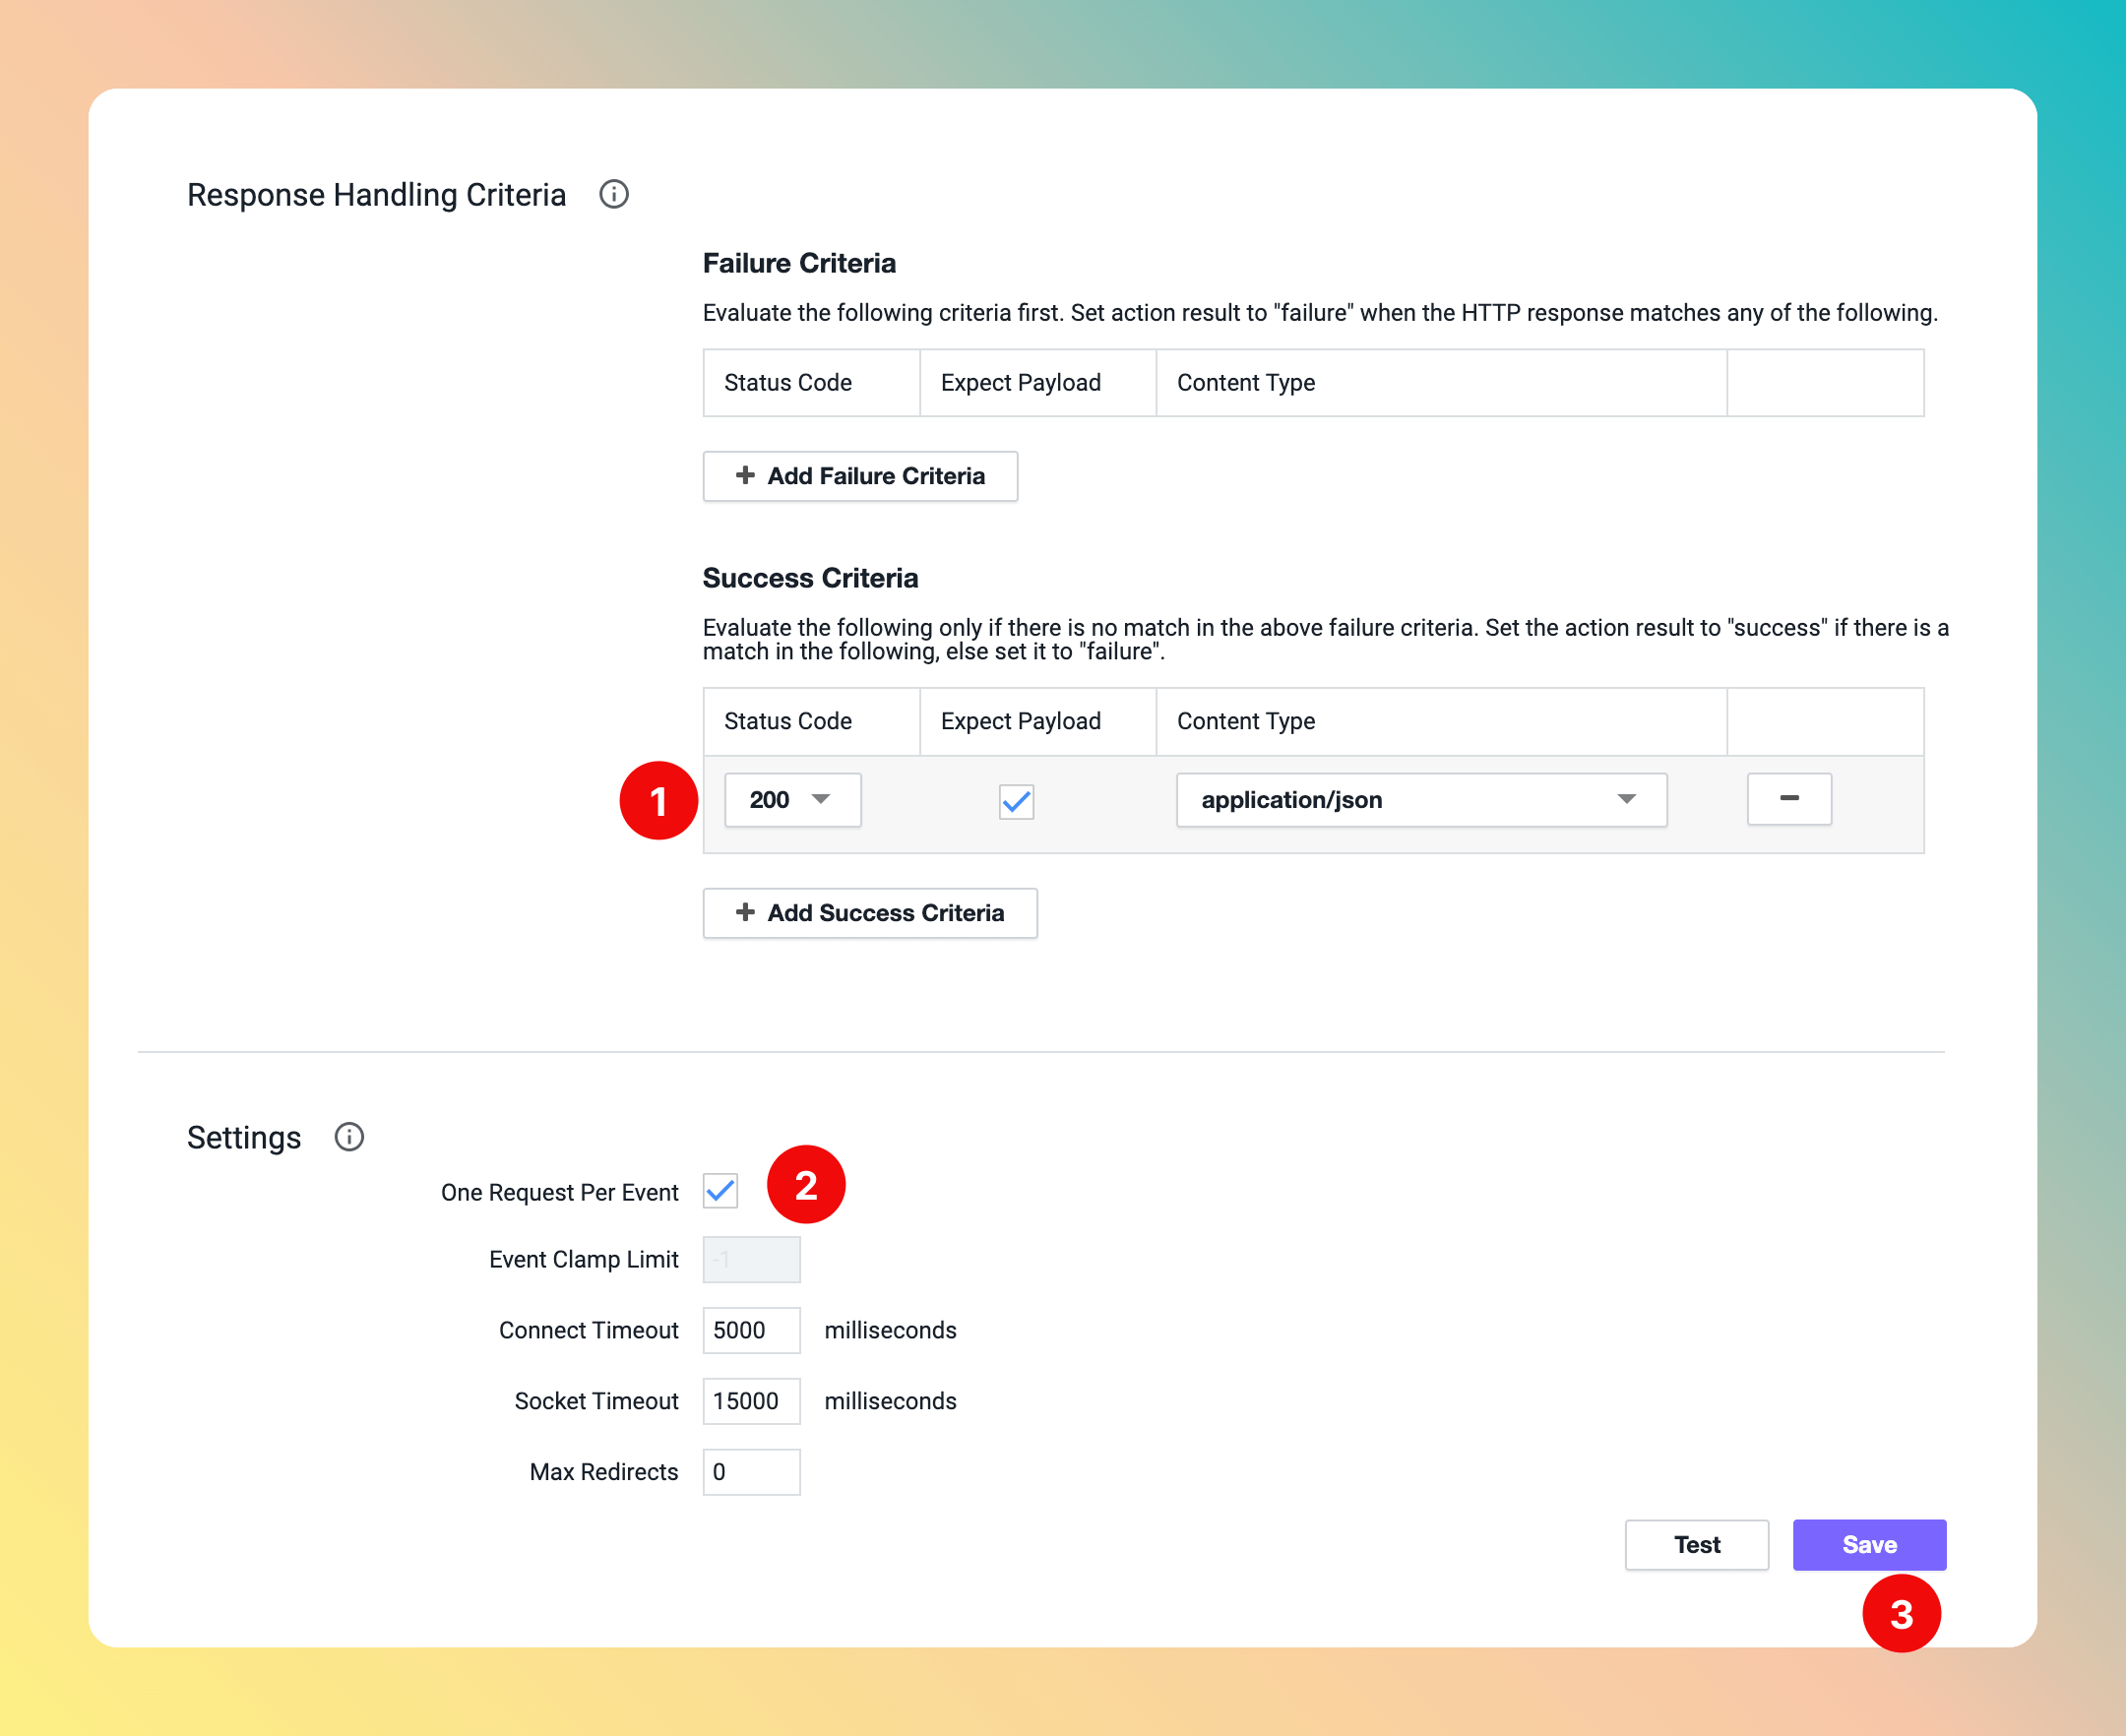
- In section
Response Handling Criteria, addSuccess CriteriawithStatus Code200 andContent Type“application/json”. - In
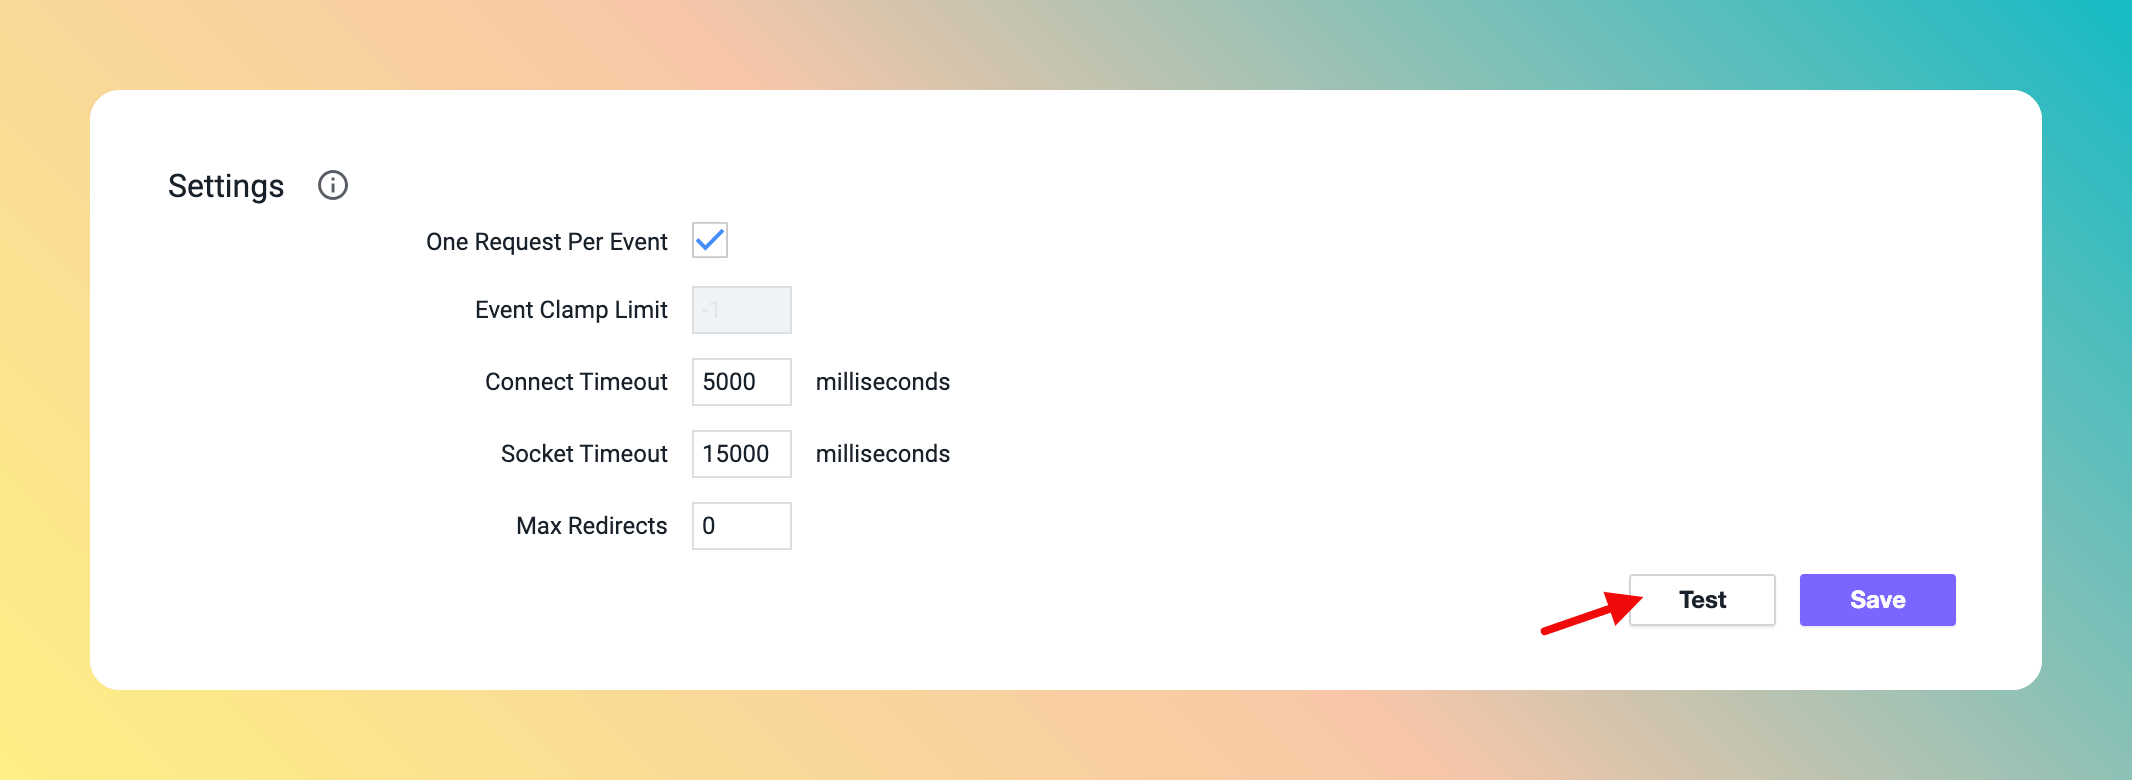
Settings, checkOne Request Per Eventbox. - Click on
Save.
Test.
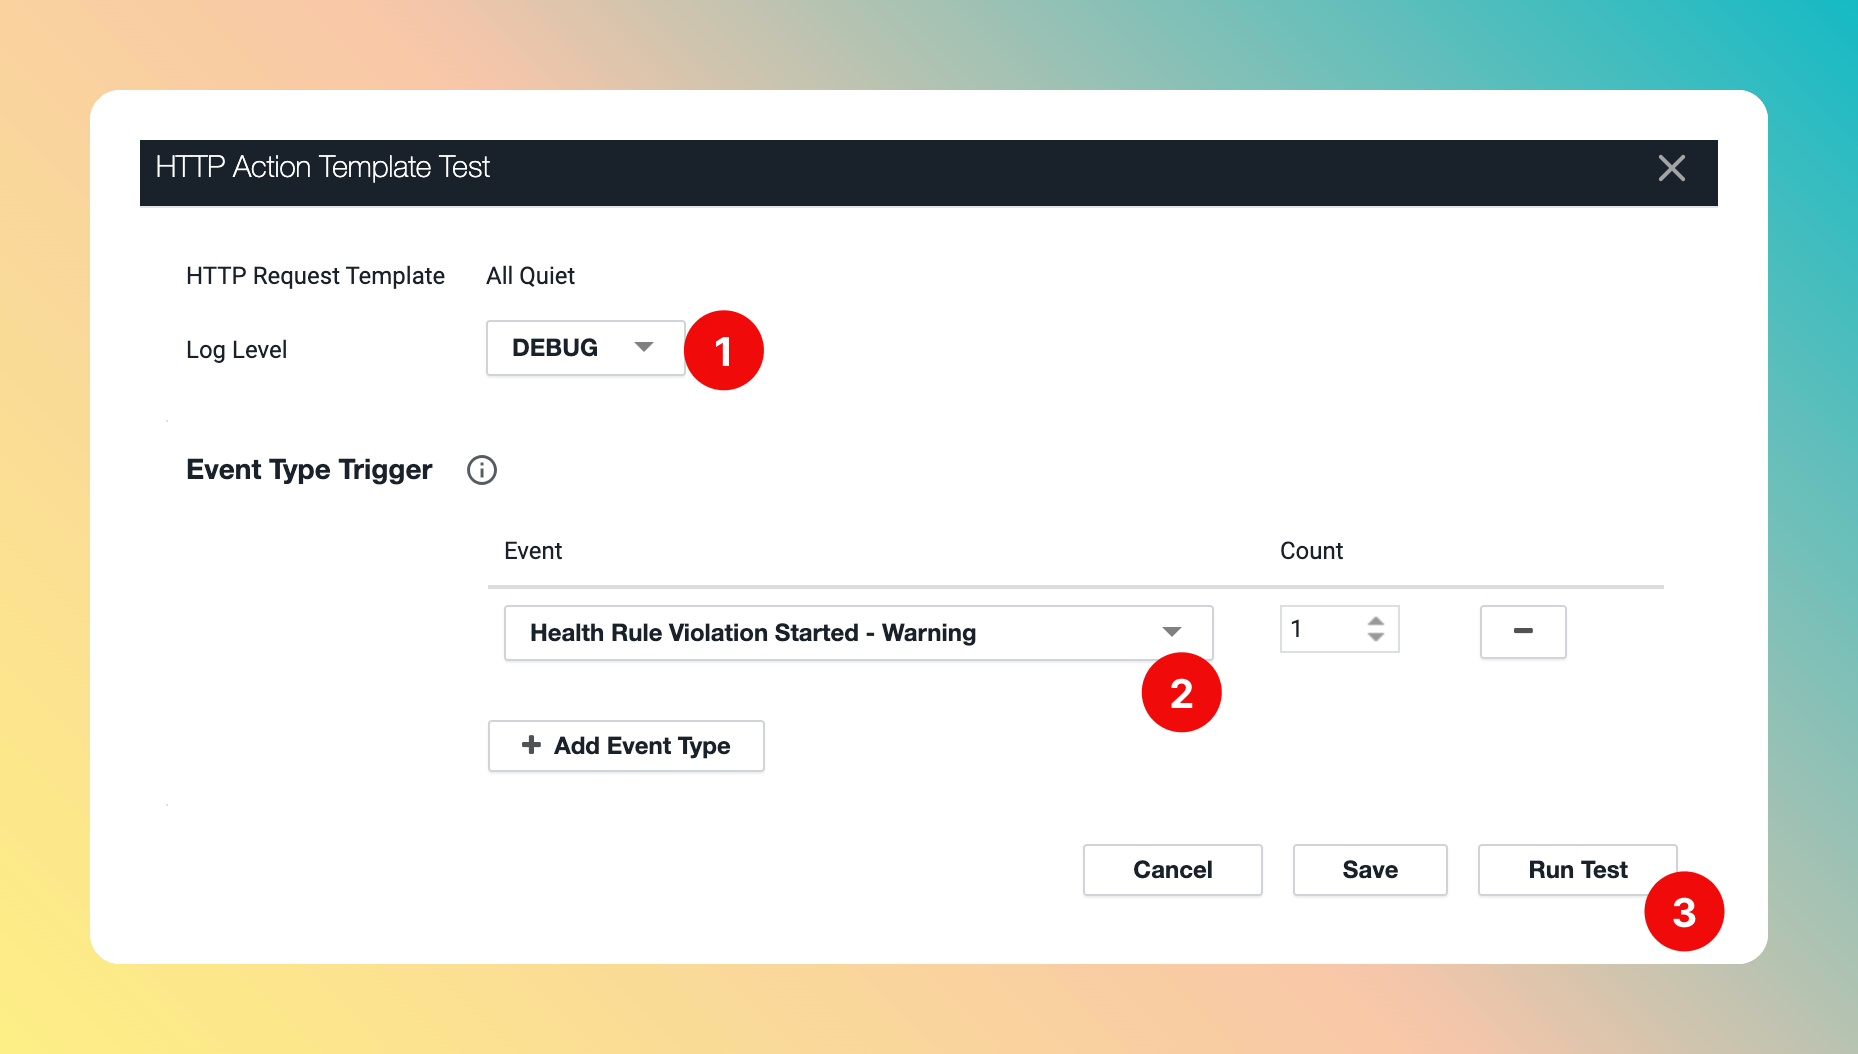
Log Level and Criteria.
- Select a
Log Level, like “Debug”. - Select an
Event Type Trigger. Here, we chose “Health Rule Violation Started - Warning”. This means we expect a new All Quiet Incident with Severity “Warning” when running the test. Run Test.


AppDynamics is now successfully integrated with All Quiet.