Setup time: 5 Min
Create Outbound Integration
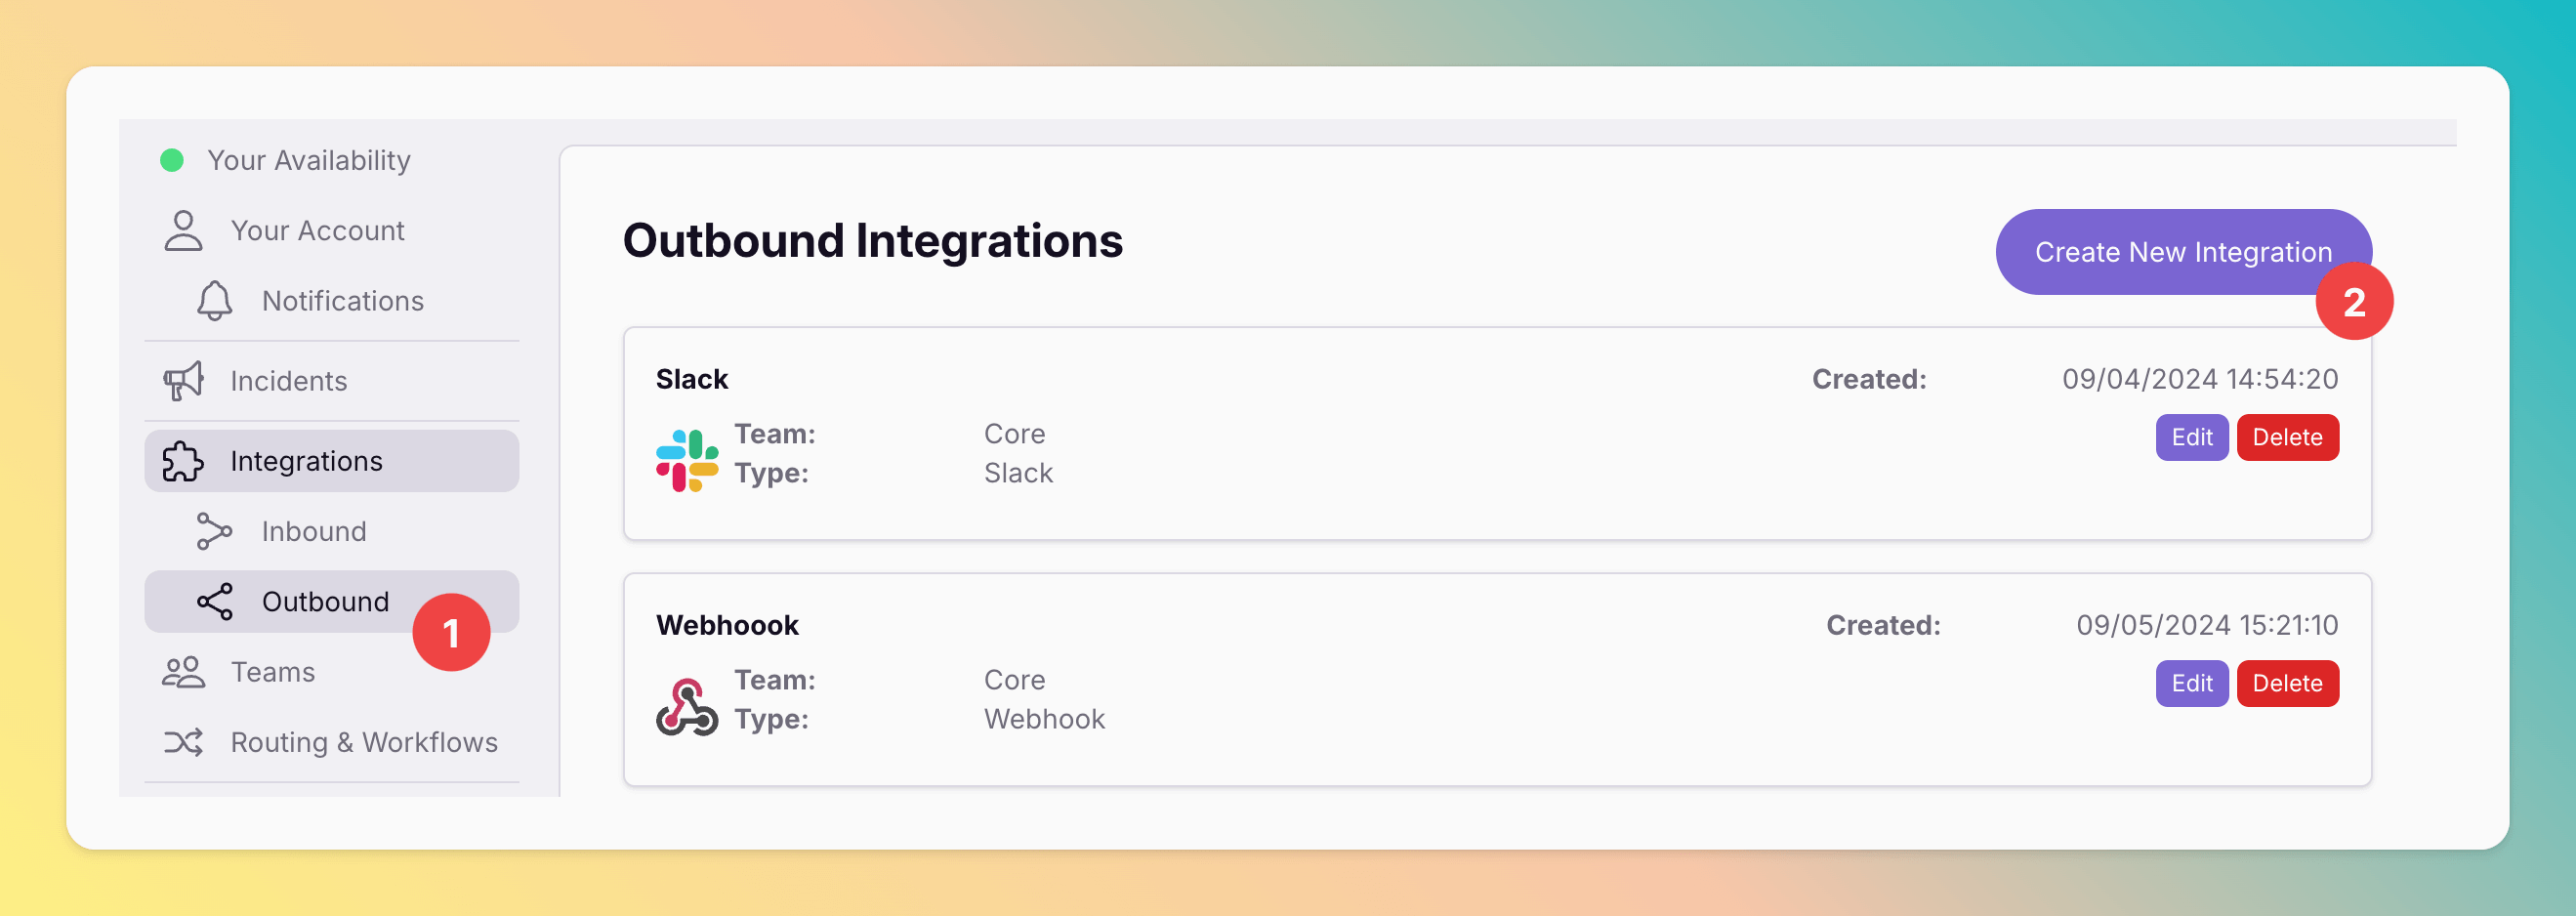
- Click on
Integrations > Outboundto navigate to the outbound integrations page. - Once you’re on the Outbound Integrations page, click on
Create New Integrationin the top-right corner.
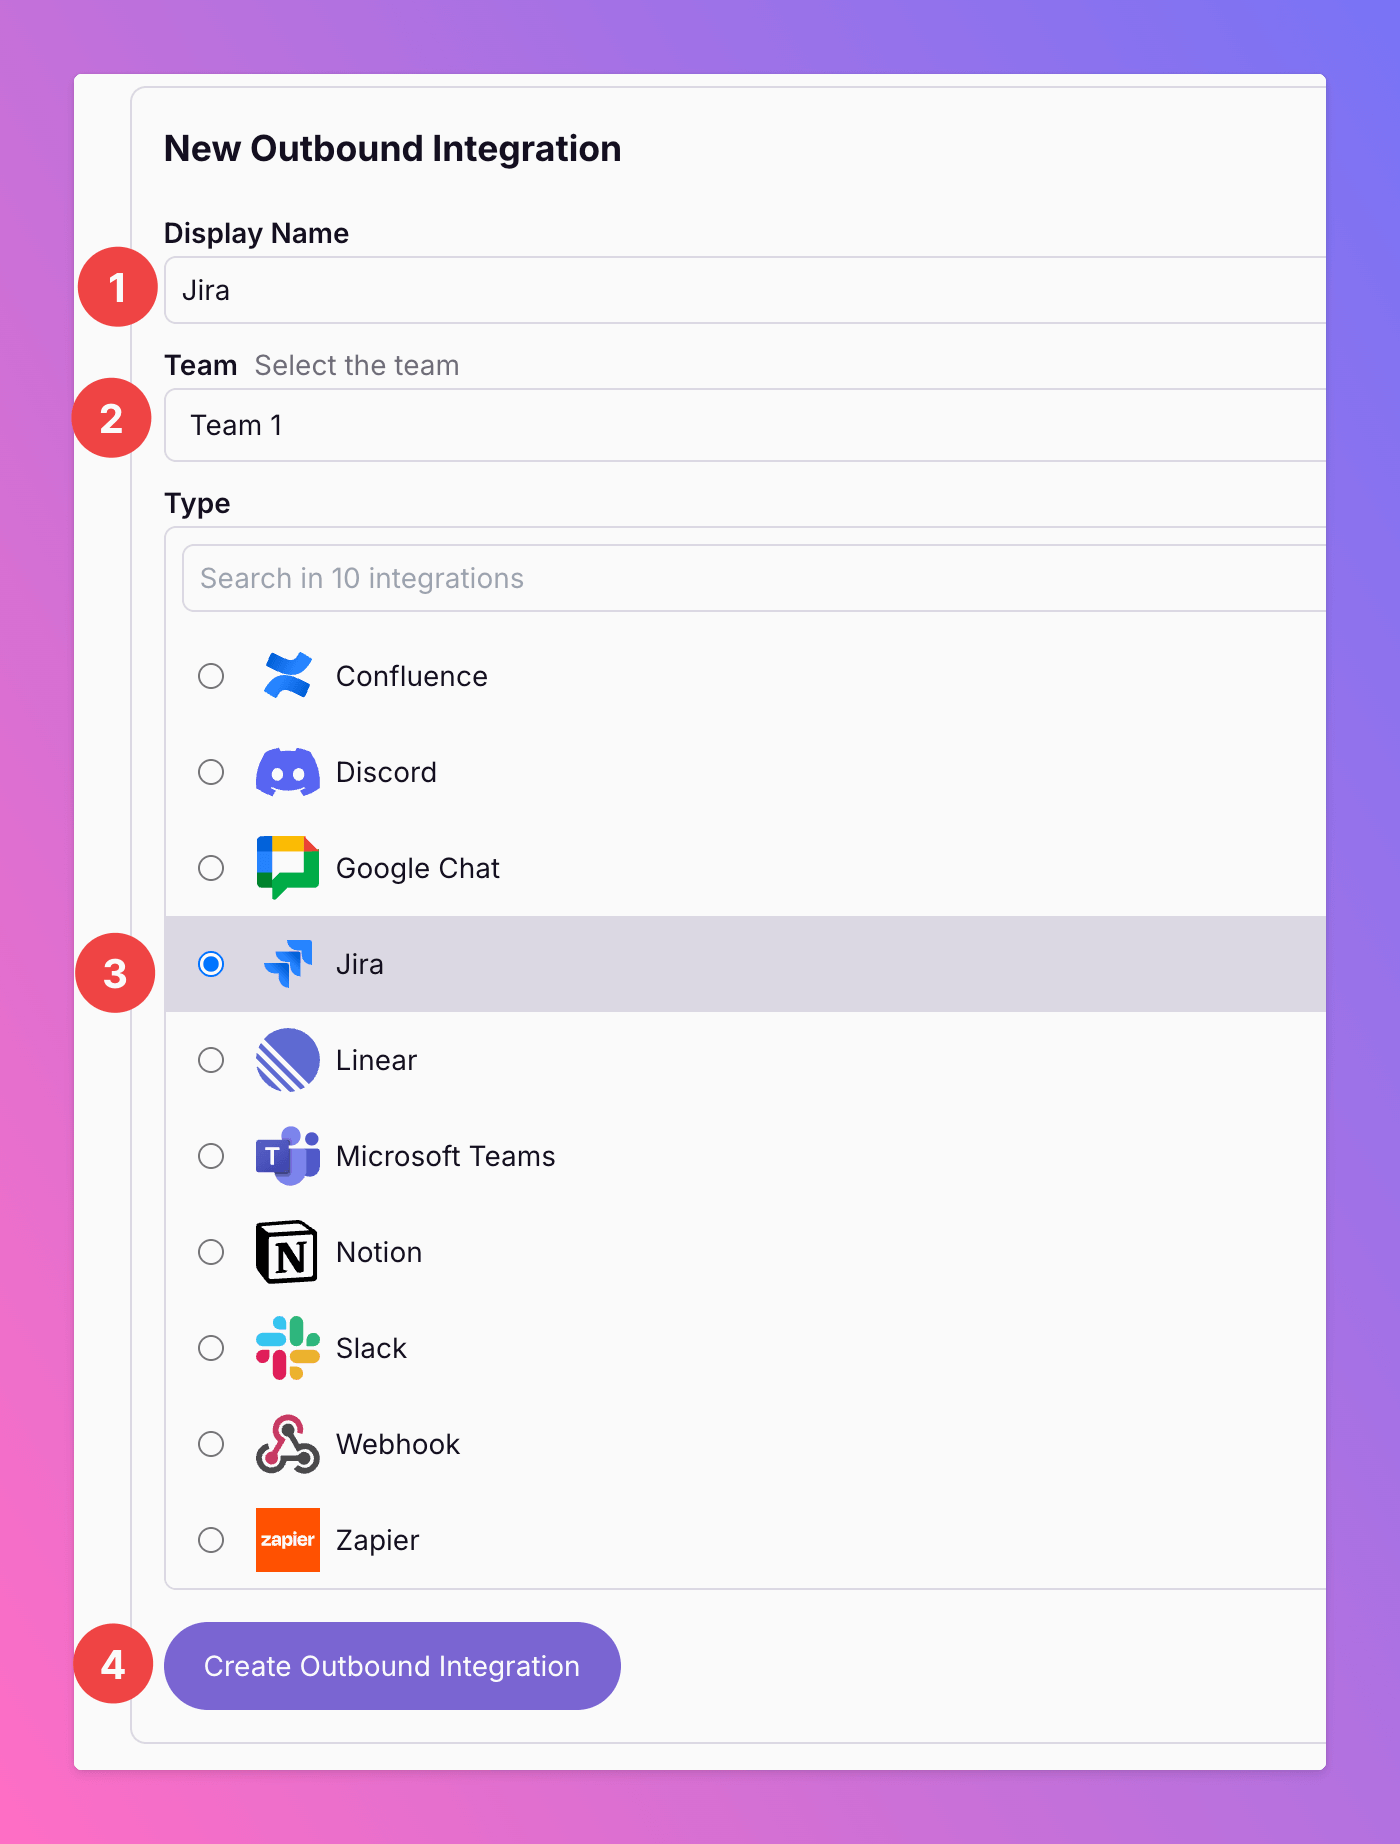
- Enter a name for your integration in the Display Name field, such as “Jira”.
- Select the team you want to add the integration to. For Organizations with Pro and Enterprise plan: This is going to be the root team of your integration. You will be able to add additional teams that will be able to create Jira issues in the next step.
- In the Type section, choose
Jirafrom the dropdown menu. - After filling in all required details, click on the
Create Outbound Integrationbutton to finalize the setup.
Add All Quiet to your Jira Space
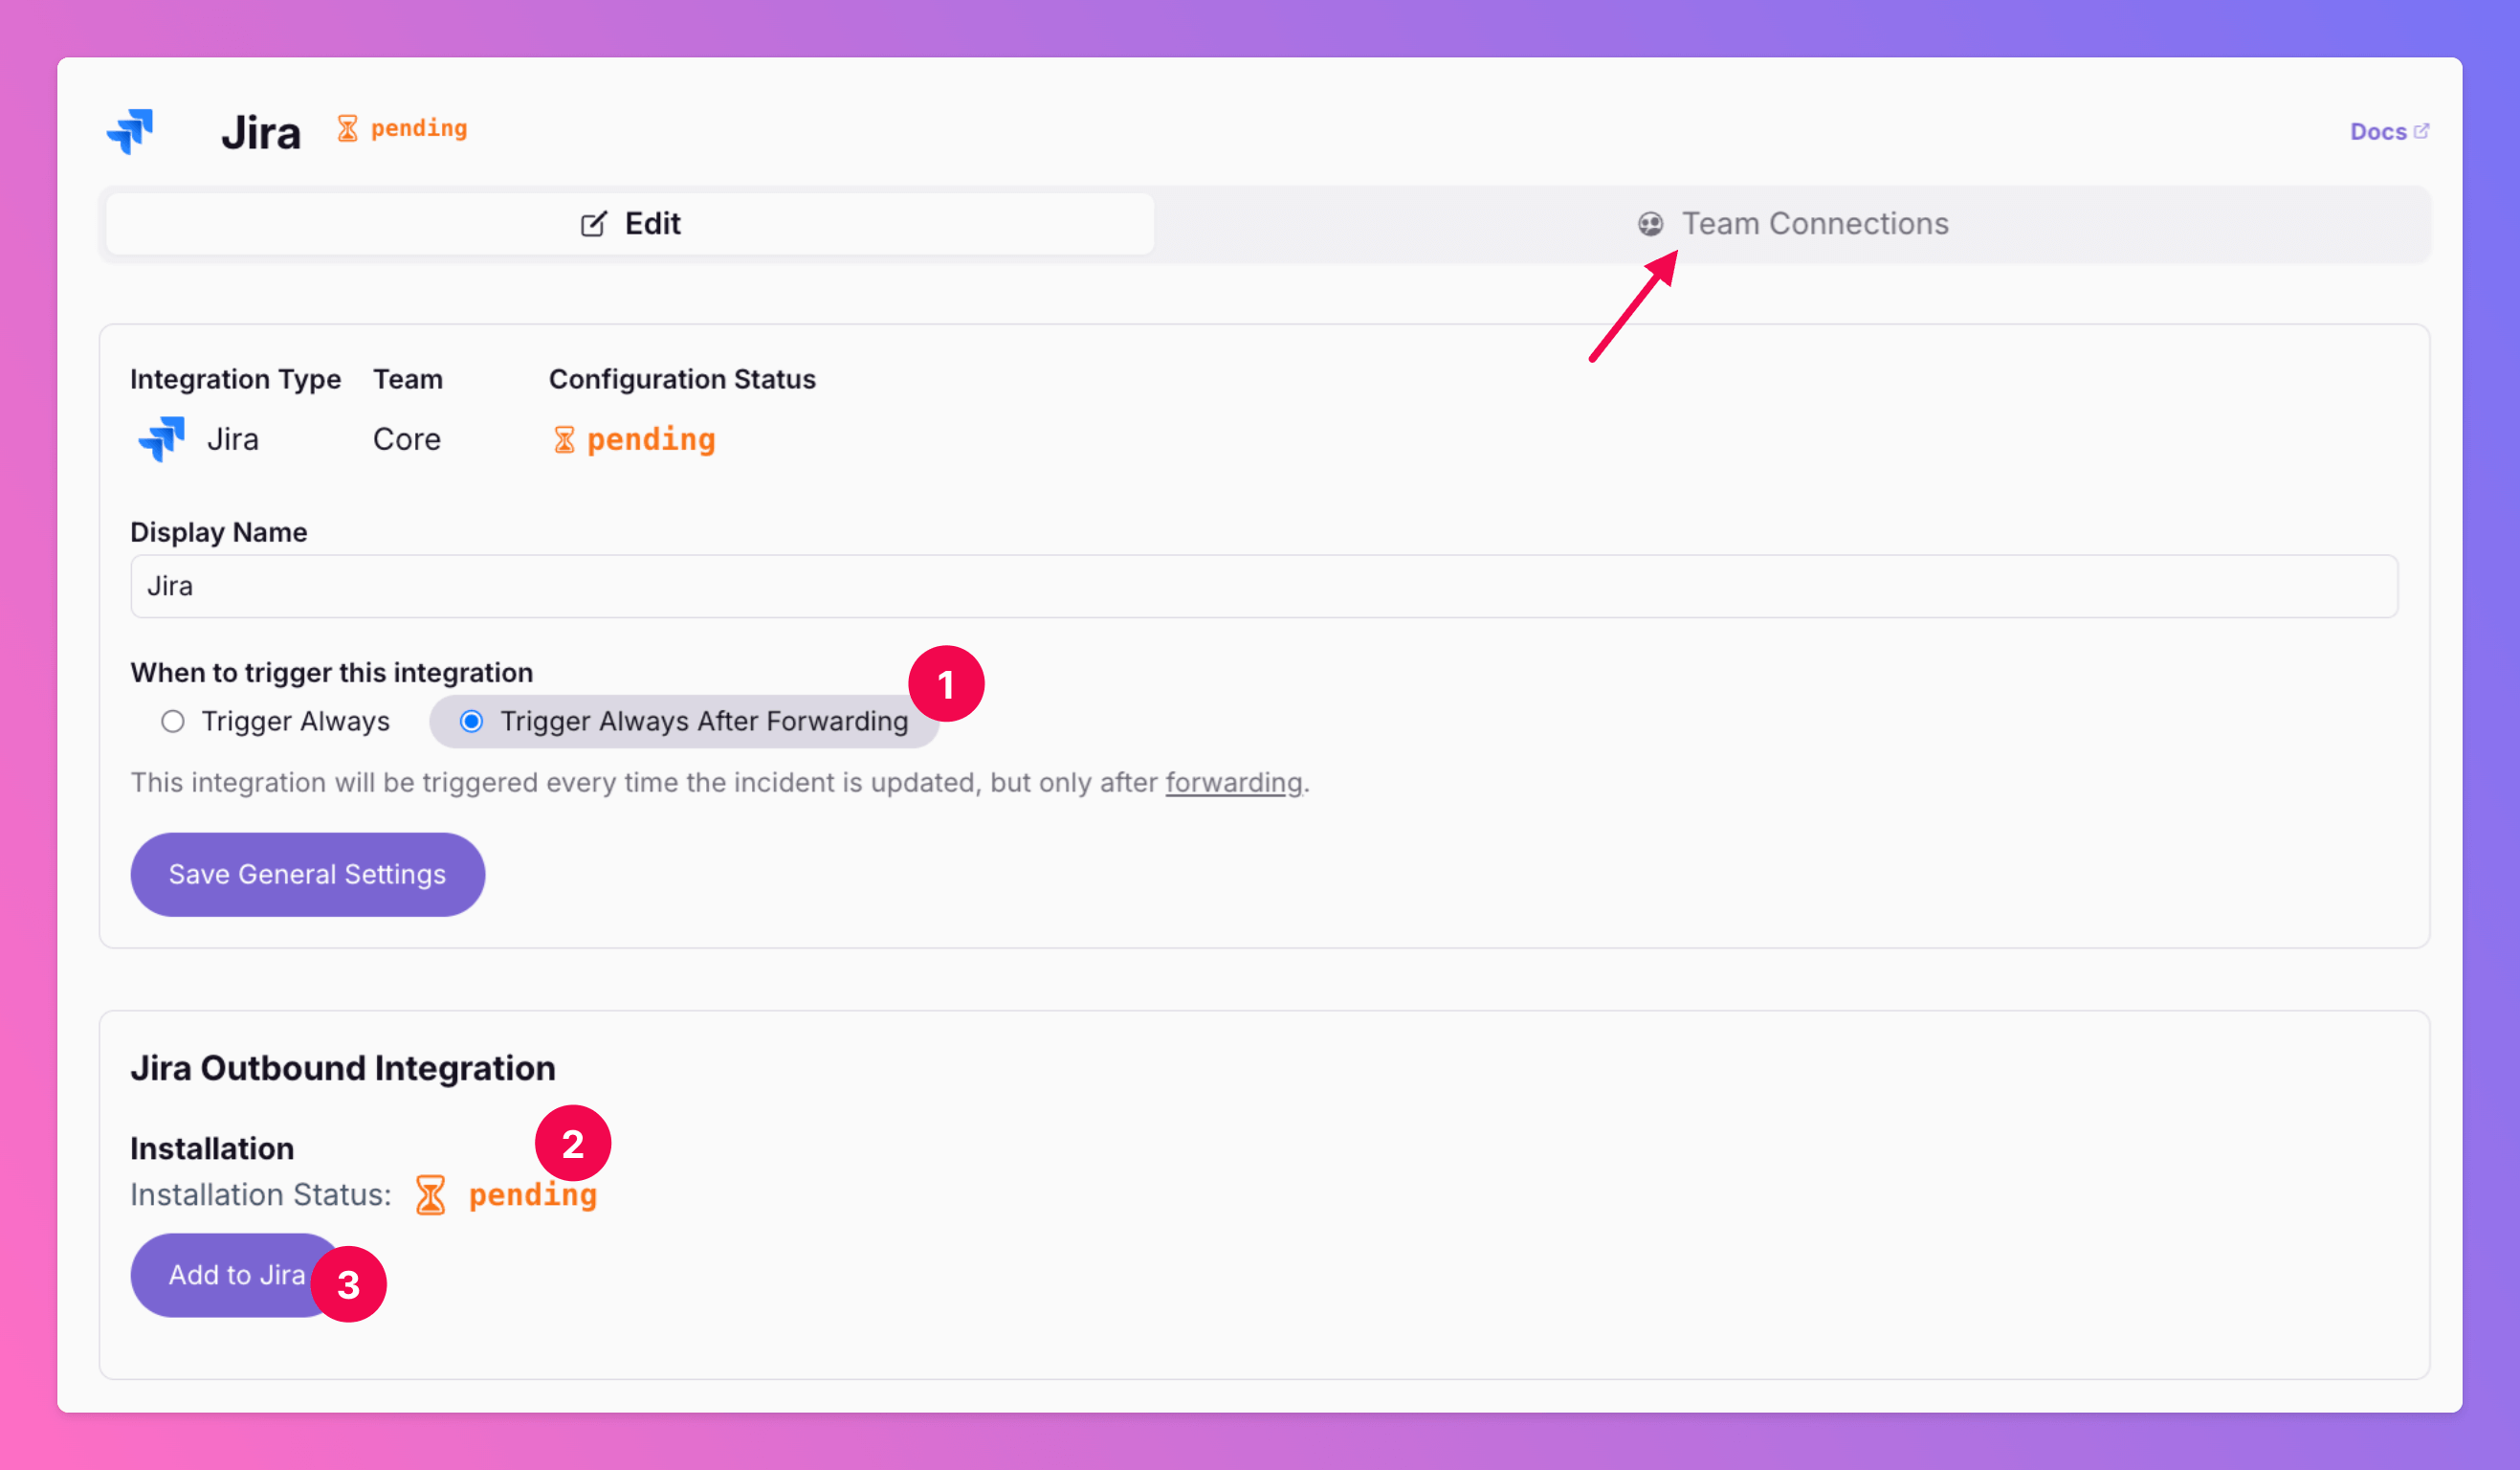
Once you’ve successfully created your new outbound integration, you’ll automatically be redirected to its details page.- The option
Trigger Always After Forwardingis enabled by default. This means, that we will not automatically forward incidents to create issues in your Jira project. Issues will only be created if users manually forward specific incidents or if you set up advanced routing rules for your Jira integration that automatically forward incidents in specific scenarios. If you enableTriggers Always, we will forward all incidents to Jira, unless excluded by additional advanced routing rules. You can change your selection anytime. - Observe that the installation status of the All Quiet integration is still pending.
- To complete the integration with your Jira project, click
Add to Jira.
Only for Pro and Enterprise plan - Connect the Integration with several teams: The root team is pre-selected, and you can add the integration to further teams within the root team’s organization. Team Administrators can add / remove those teams they are an admin in, Organization Administrators & Organization Owners can manage the connections to all teams of the organization.
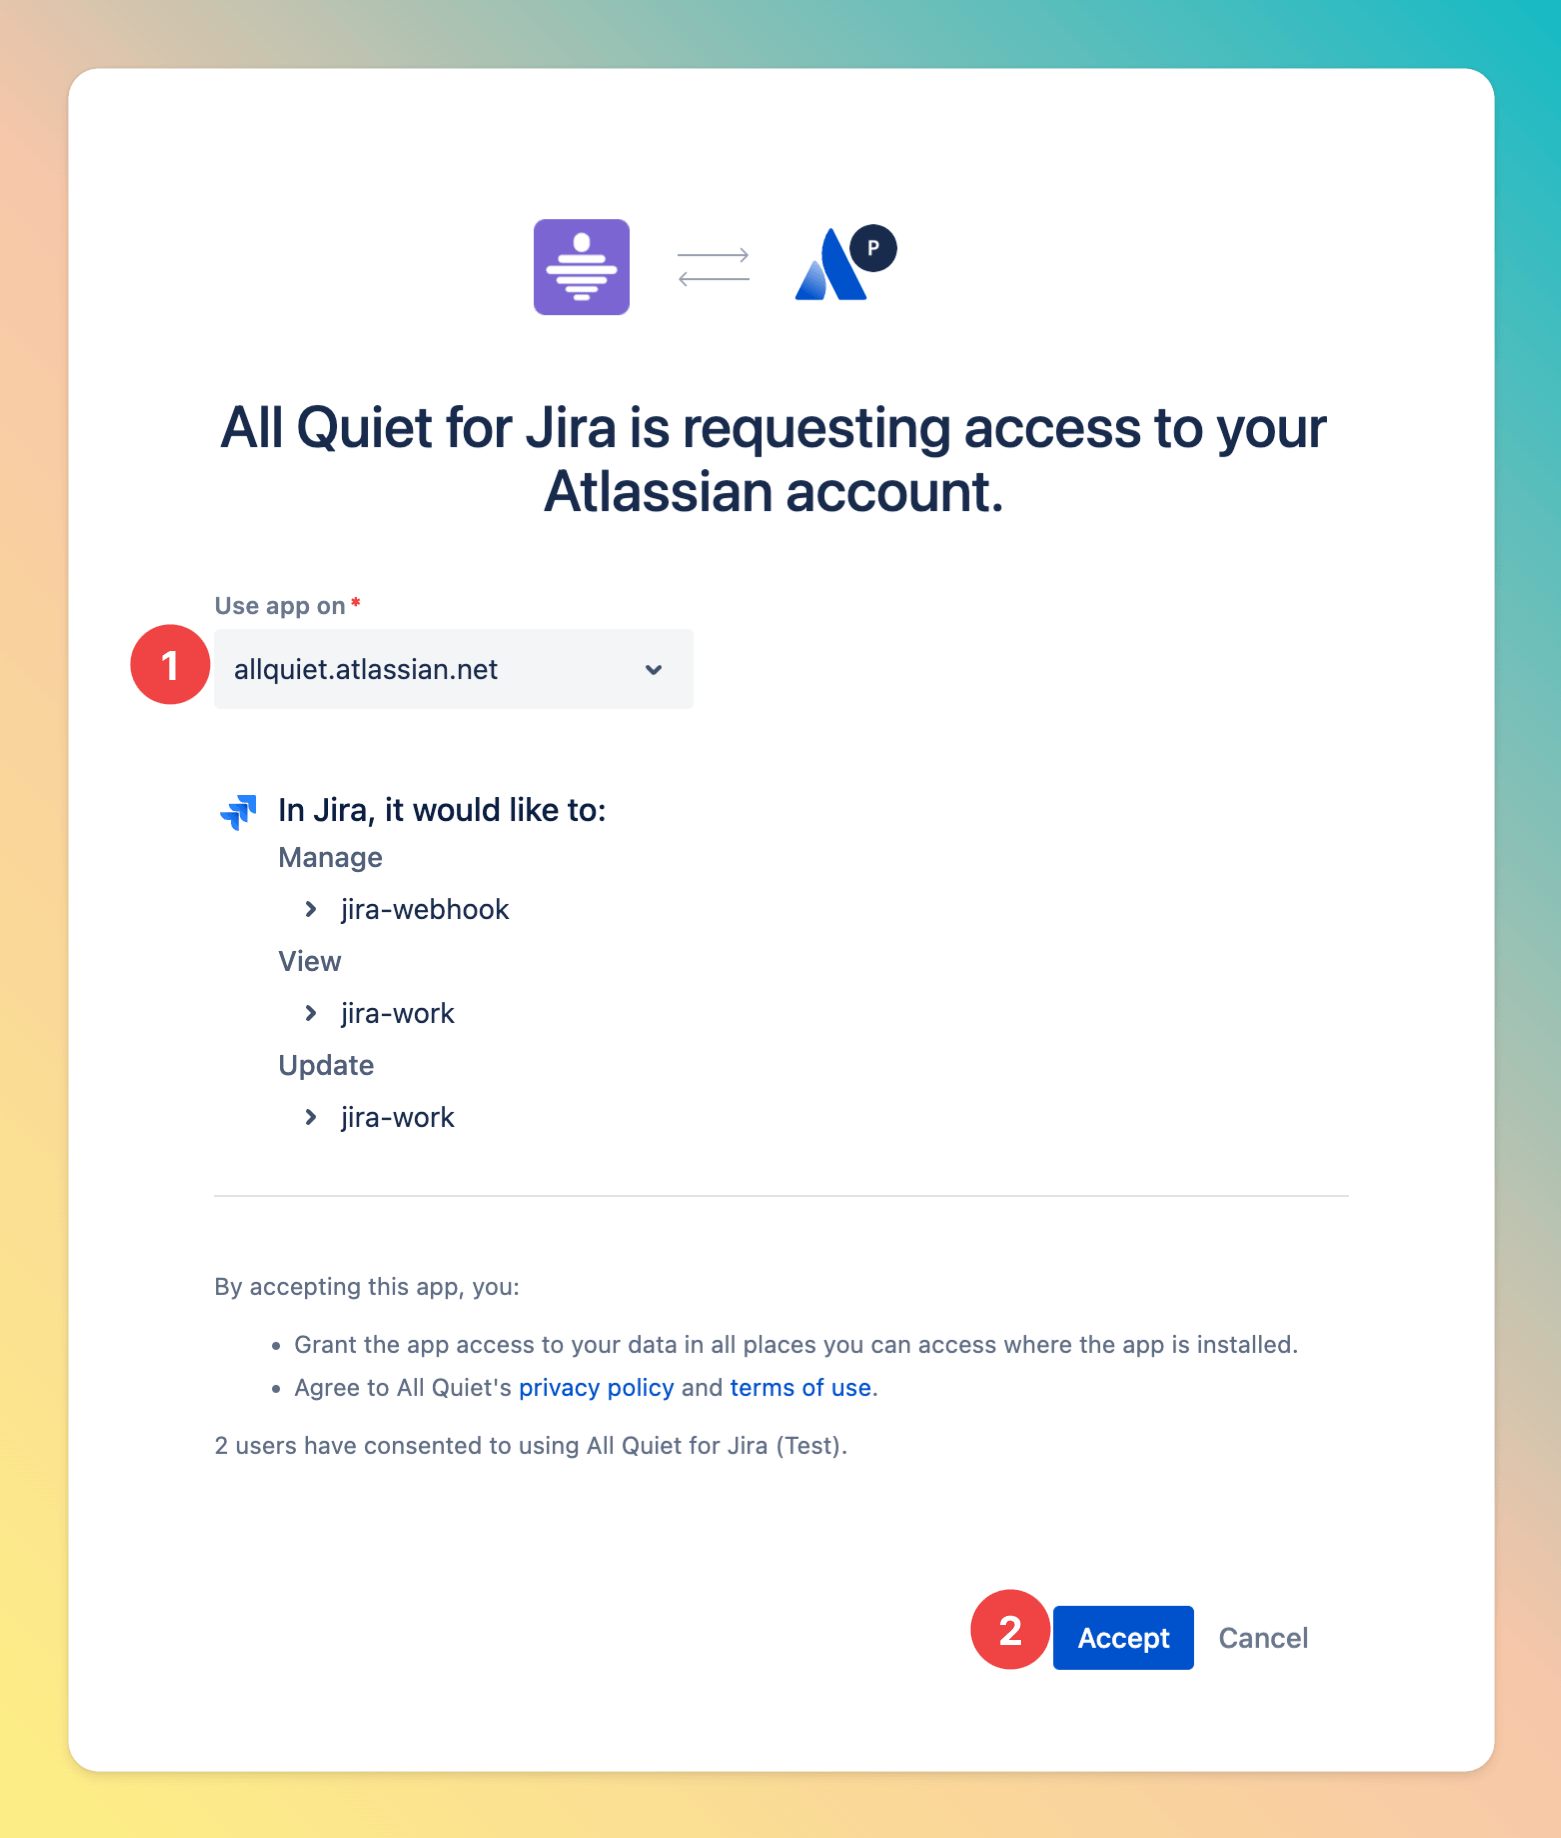
- If your Atlassian account is linked to more than one Jira site, select the site you want to connect All Quiet to.
- Click
Accept.
Configure Outbound Integration
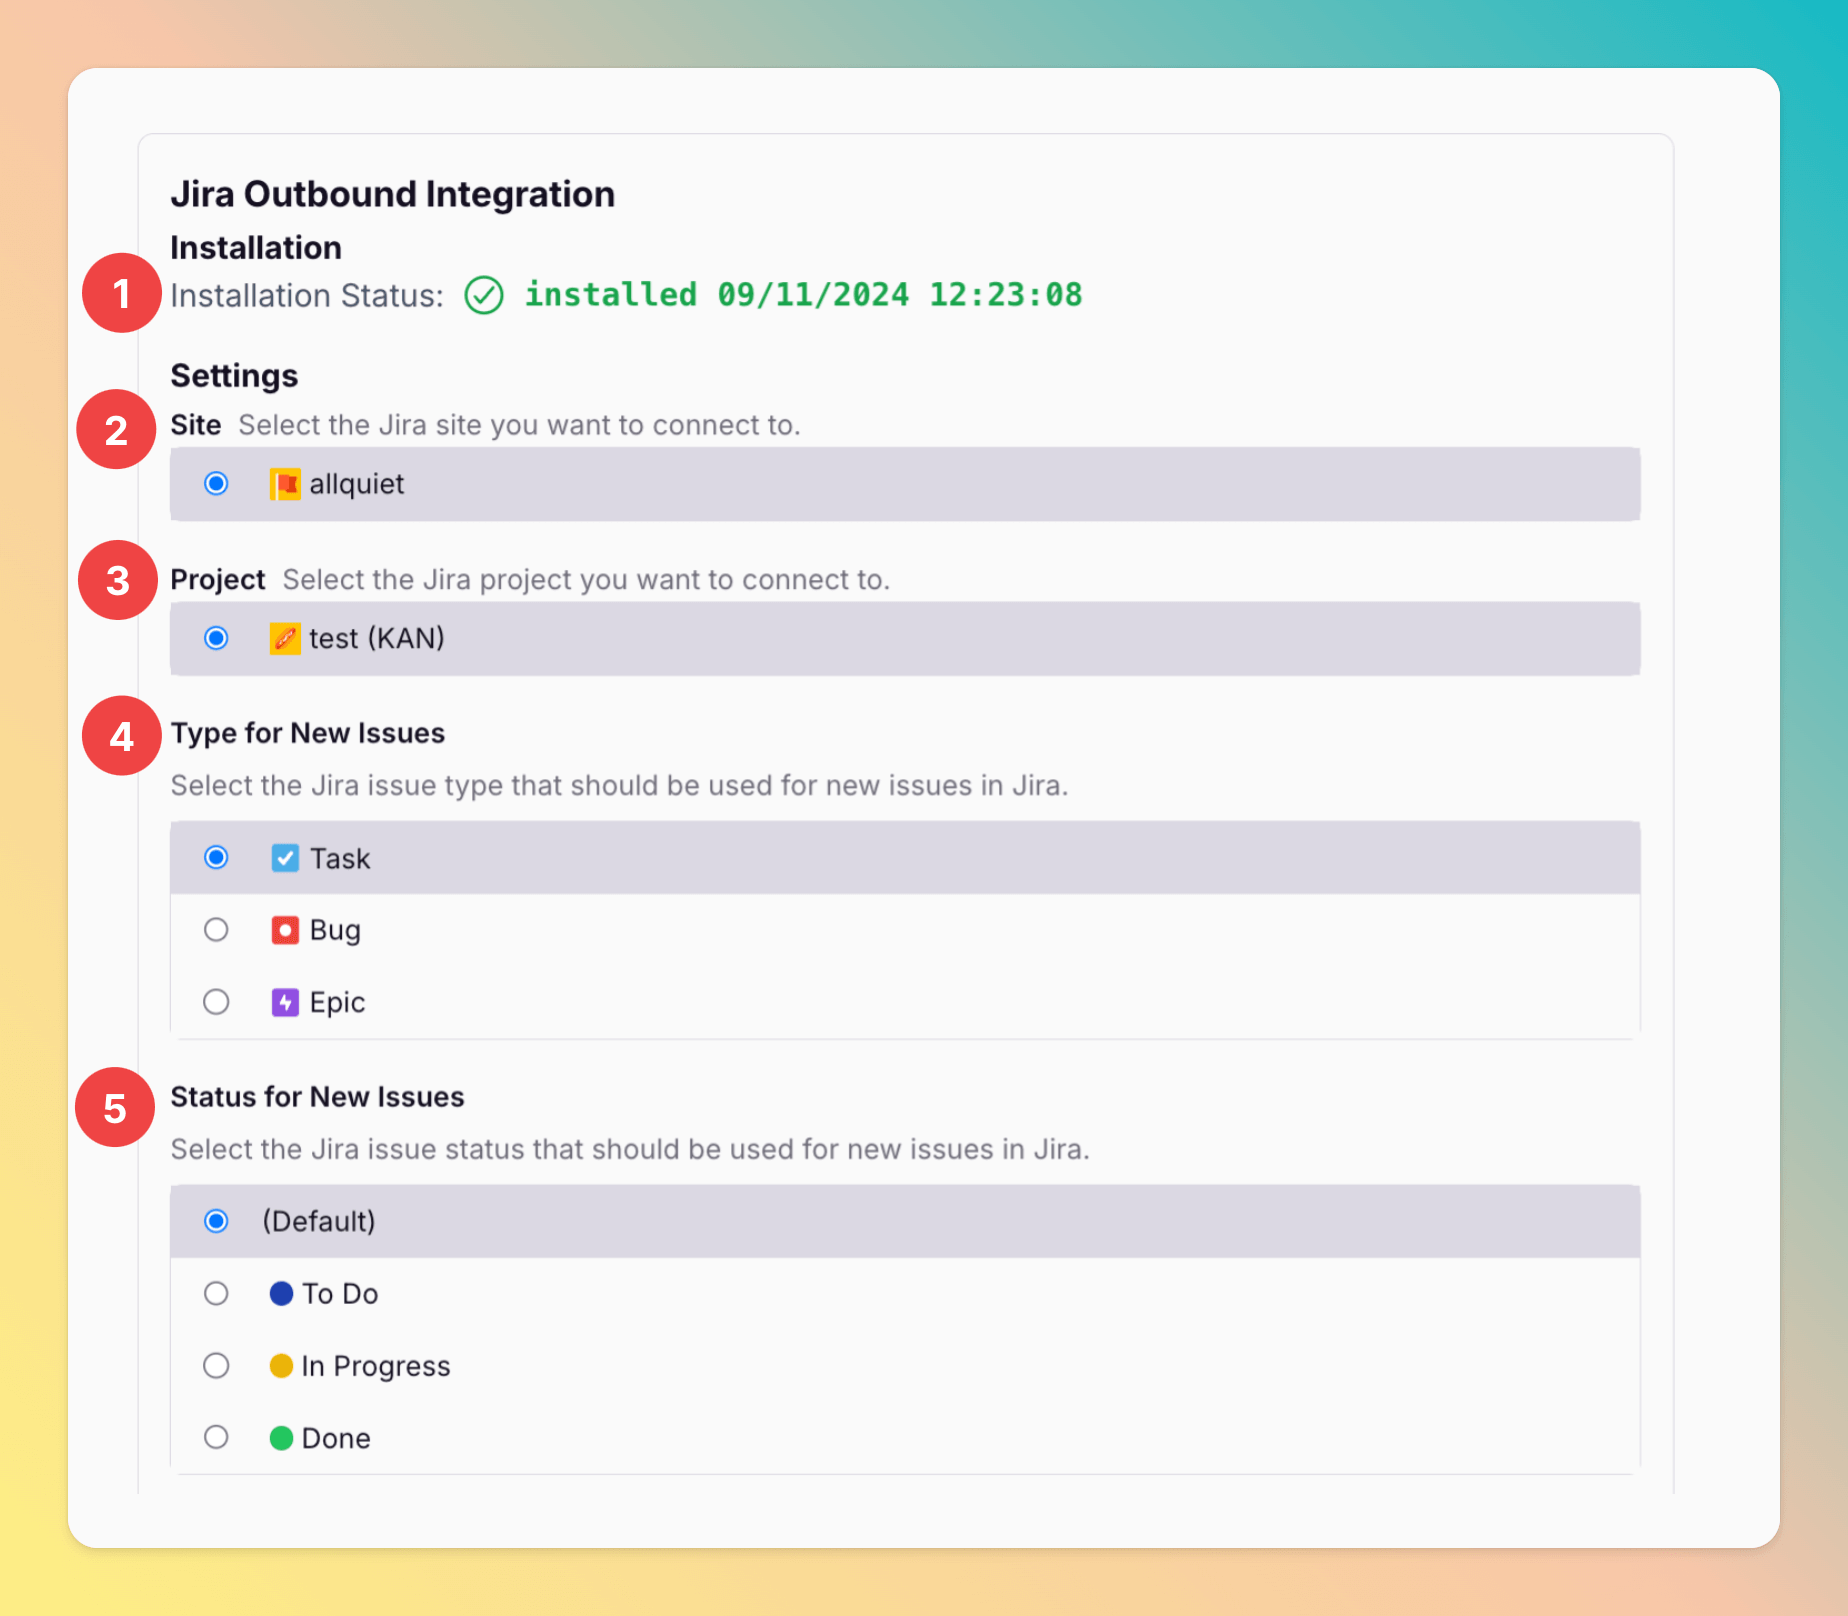
Then, your are redirected back to your Jira integration’s details page in All Quiet. Next, you need to configure the integration.- As you can see, the Installation Status changed to
installed. - Select the Jira Site you want to forward the All Quiet incidents to. You can only select sites your granted All Quiet permission to (see prior step).
- Select the Jira project in which you want to create issues based on All Quiet incidents.
- Select the
Issue Type for New Issues. This defines the type of issue that is created from an All Quiet incident. - You can add a
Status for New Issuescreated from All Quiet incidents. If you don’t add a status, we use the default status from your Jira settings.
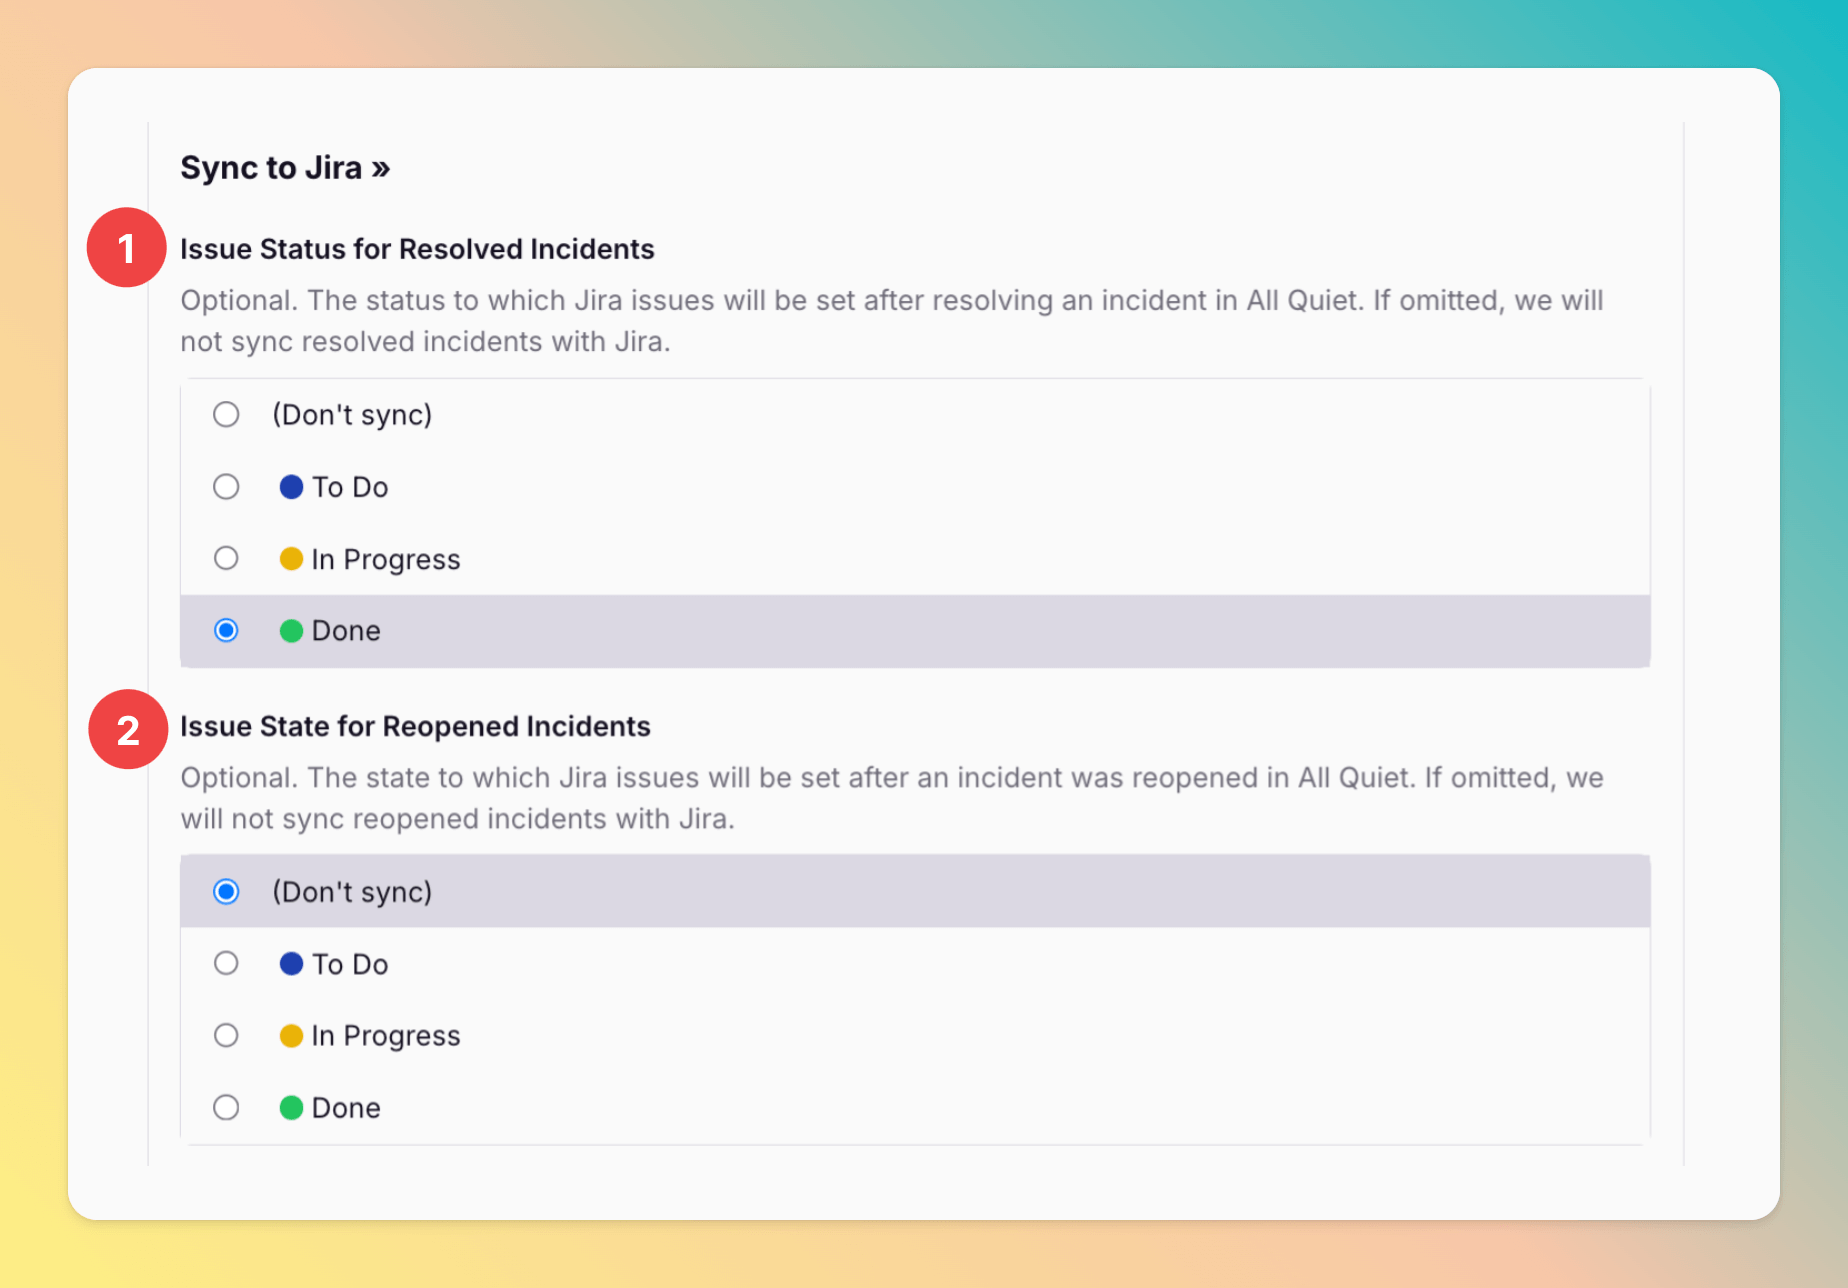
- Select the Jira issue status you want to set after resolving an incident in All Quiet.
- Select the Jira issue status you want to set after re-opening an incident in All Quiet.
- Select the Jira status that sets an incident to
Resolvedin All Quiet. - Select the Jira status that sets an incident to
Reopenedin All Quiet.
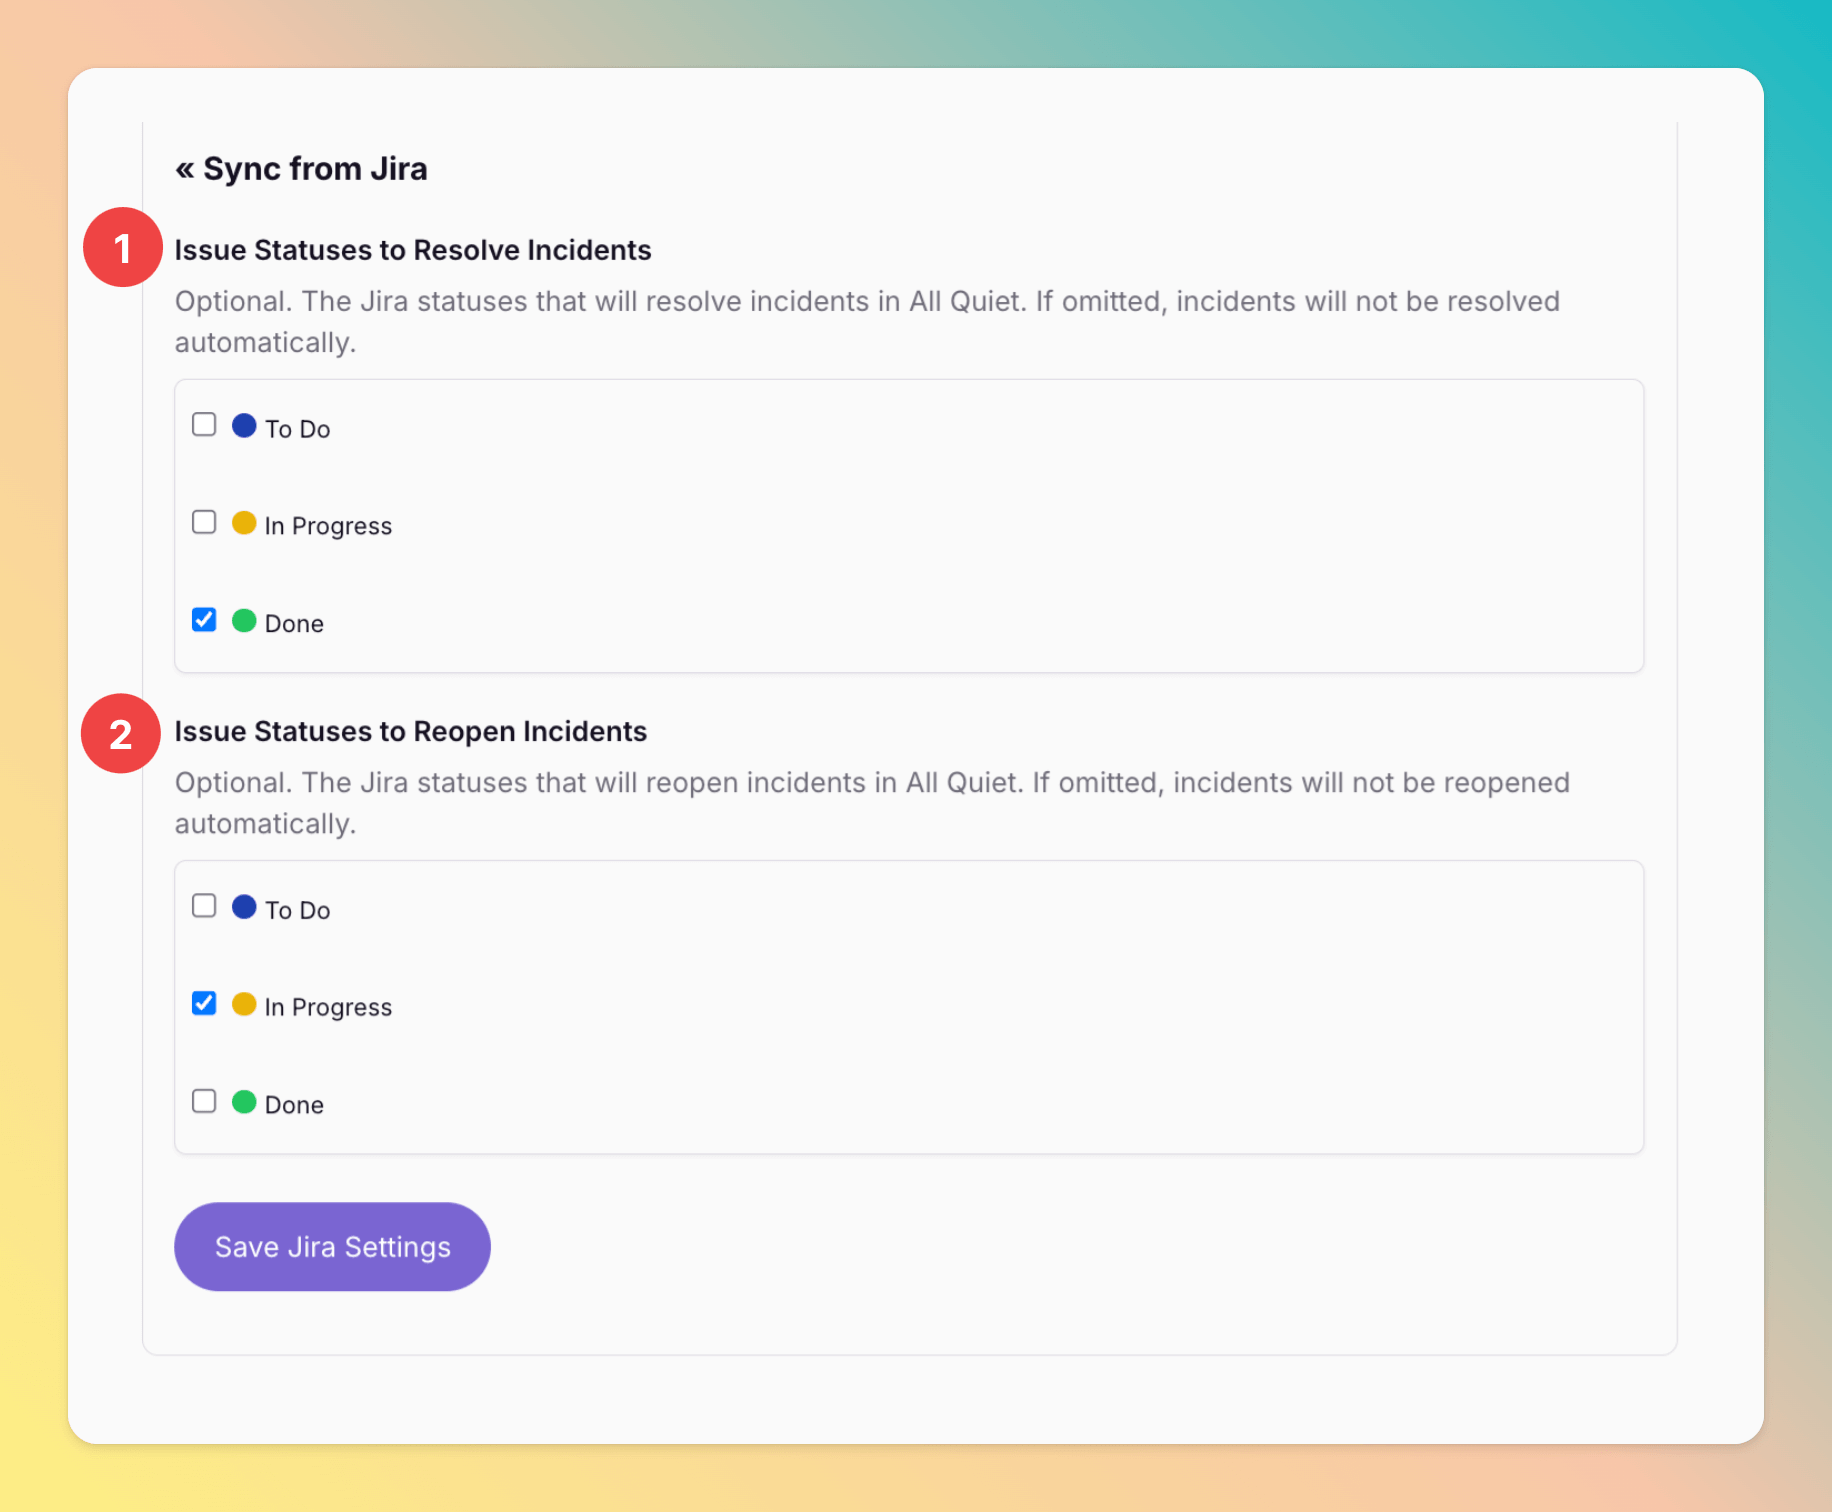
If you decide to save & stop here, your Jira Outbound Integration with All Quiet is ready to go. Depending on your setup, All Quiet incidents will now automatically create issues in Jira or can be forwarded manually to your Jira projects. The states will be synced based on your selection.
Create All Quiet Incidents From Jira
This feature is basically the Jira Inbound Integration. You can create All Quiet incidents from Jira issues. Here’s how it works: For Pro and Enterprise plan users: No matter which teams you added when setting up the outbound integration, all All Quiet incidents will always be created in the integration’s root team.
<< Sync from Jira
To create Incidents from Jira
- Activate
Enable Incident Creationand / orEnable Incident Creation on Update. Otherwise, Jira Issues will not create new All Quiet incidents at all.Enable Incident Creation: All Quiet incidents will be created when creating a Jira issue matching the criteria below.Enable Incident Creation on Update: All Quiet incidents will be created when updating an existing Jira issue to match the criteria below.
- You can select if only Jira Issues that are created in a certain status will create an All Quiet incident. If omitted, incidents will be created no matter of the state.
- You can select if only Jira Issues that are created with a certain type (Task, Bug…) will create an All Quiet incident. If omitted, incidents will be created no matter the issue type.
- You can select if only Jira Issues that are created with a certain priority will create an All Quiet incident. If omitted, incidents will be created no matter the priority.
No Priority,Highest&Highwill create All Quiet incidents withCriticalseverityMediumpriority will create All Quiet incidents withWarningseverityLow&Lowestpriority will create All Quiet incidents withMinorseverity
- You can select if only Jira Issues that are created with certain labels will create an All Quiet incident. If omitted, incidents will be created no matter the label.
- You can select if Jira Issues that are created in a certain state will create resolved All Quiet incidents. If omitted, incidents will be always be created in open state.
Save Jira Settings.
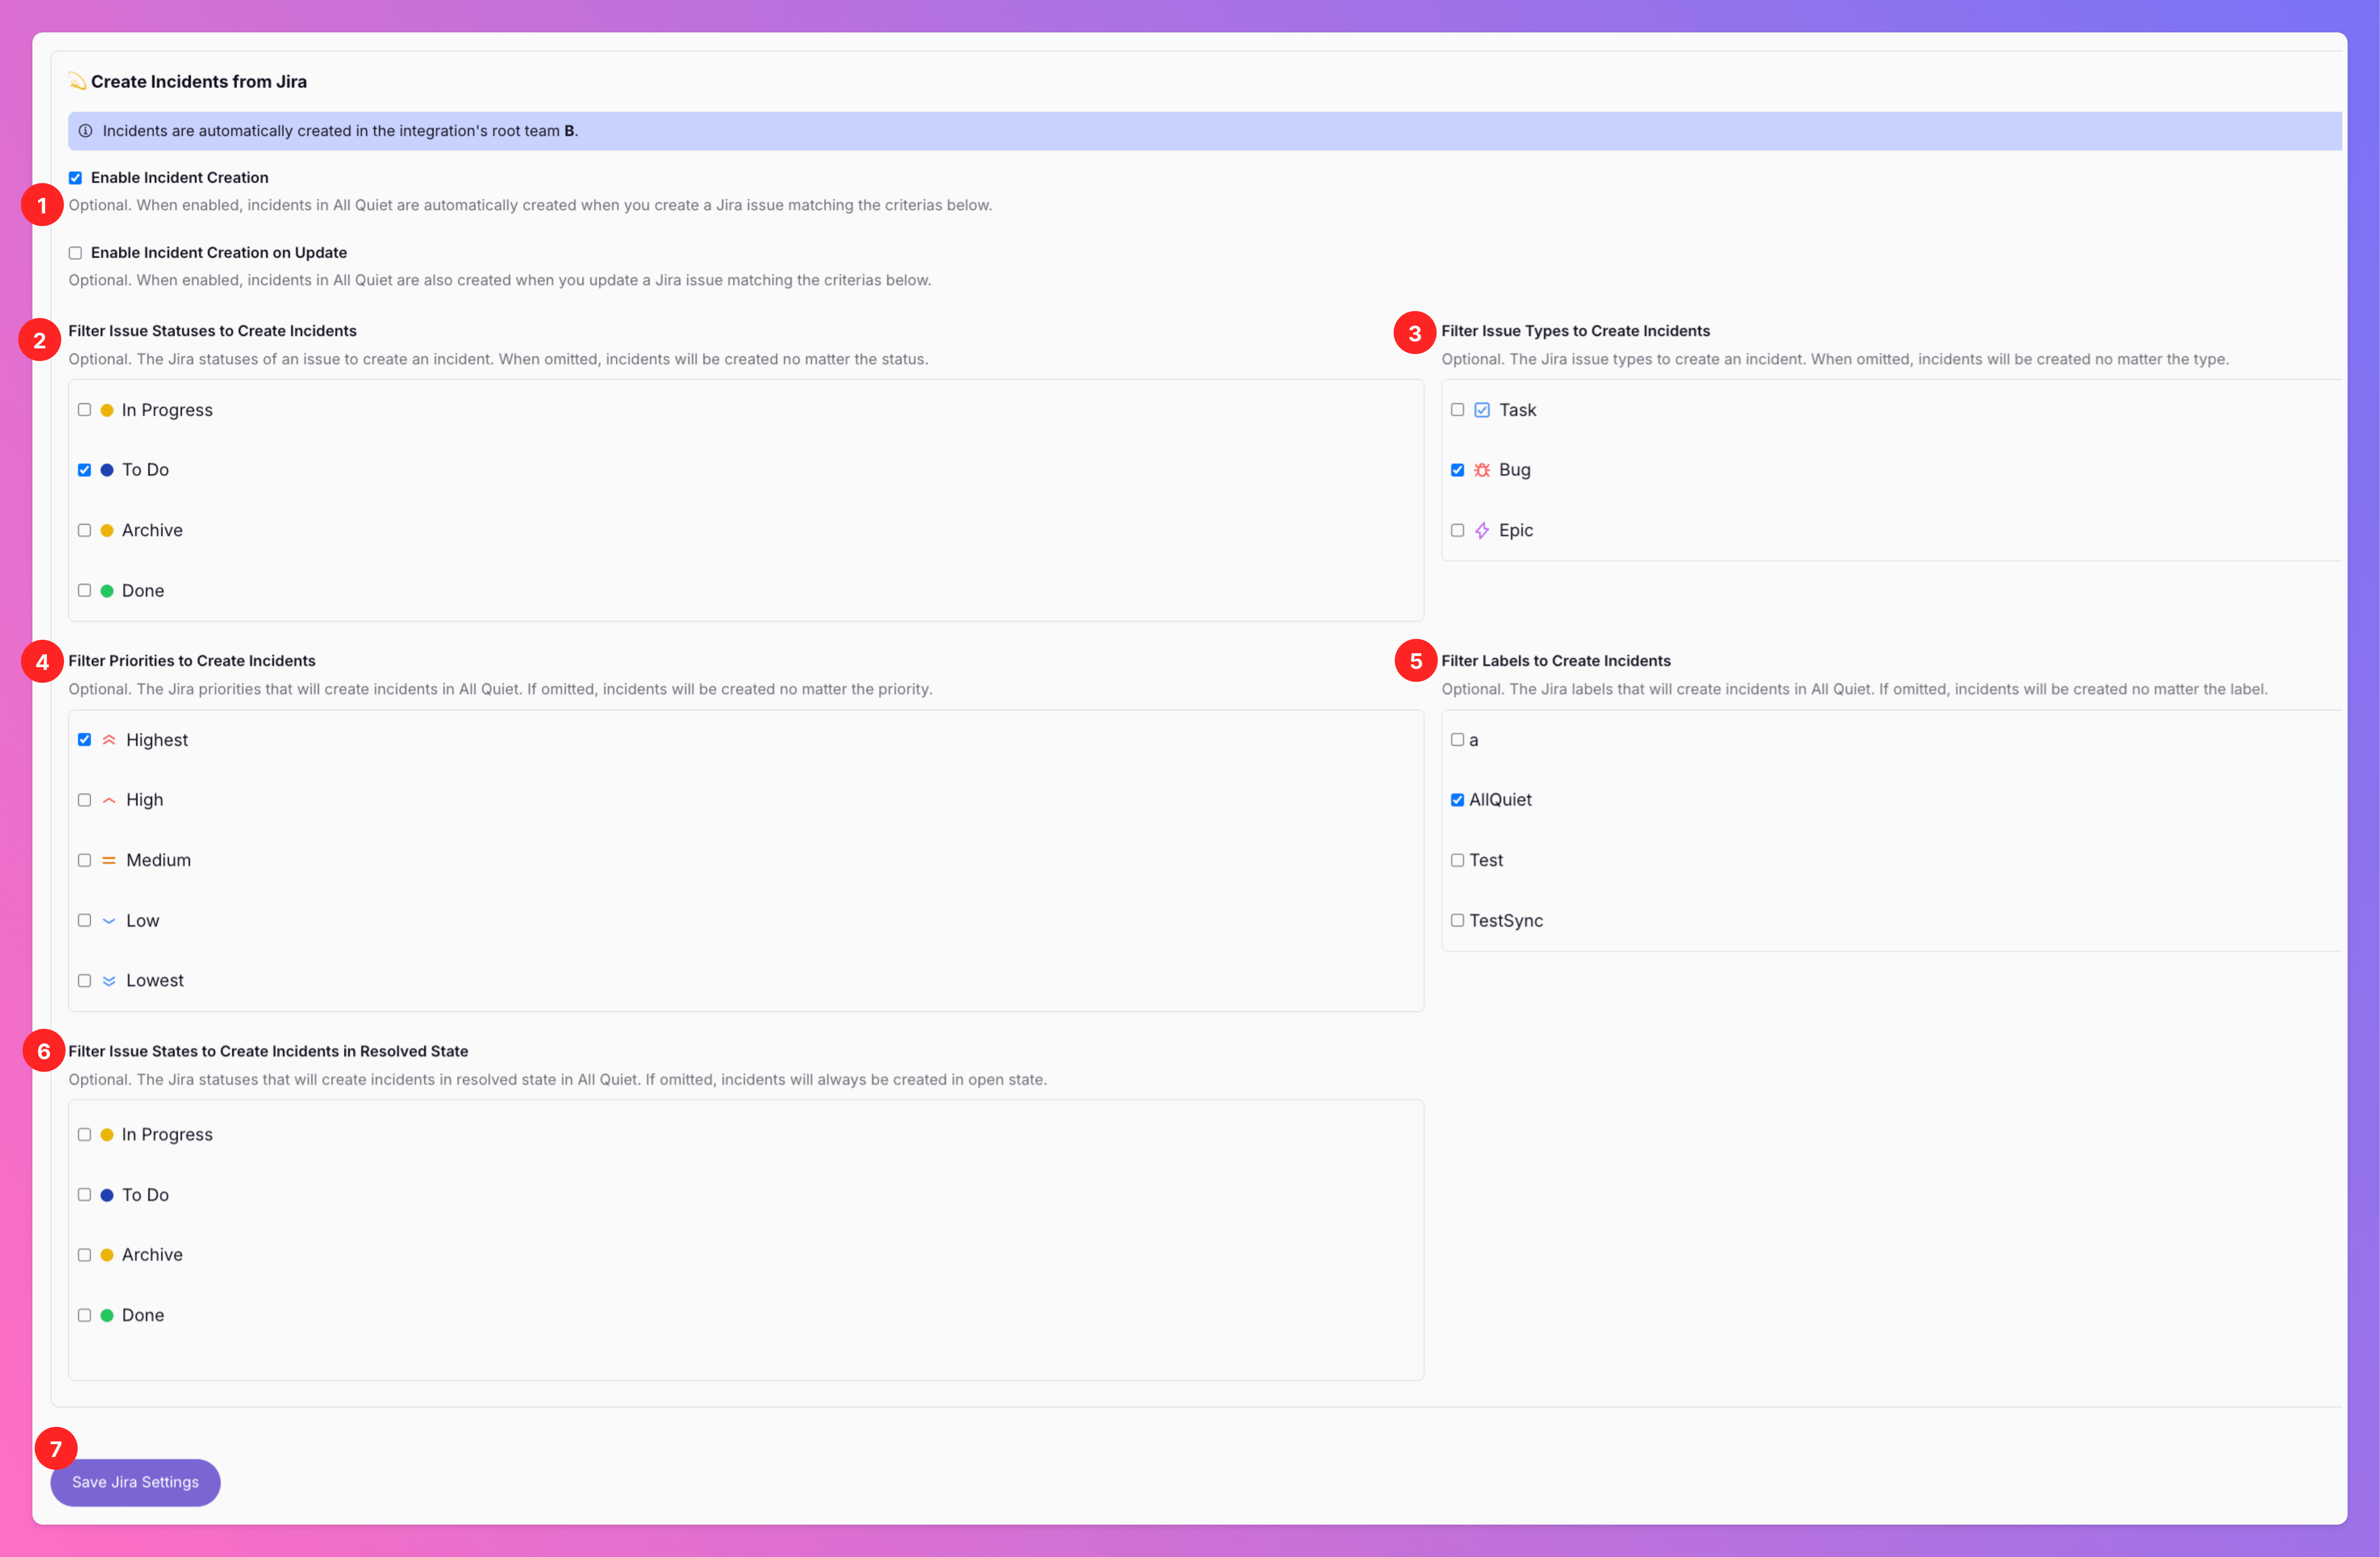
You have successfully created the Jira Inbound Integration. To manage your settings, open your Jira Outbound Integration details page.
