Setup time: 4 Min
Create Email Integrations
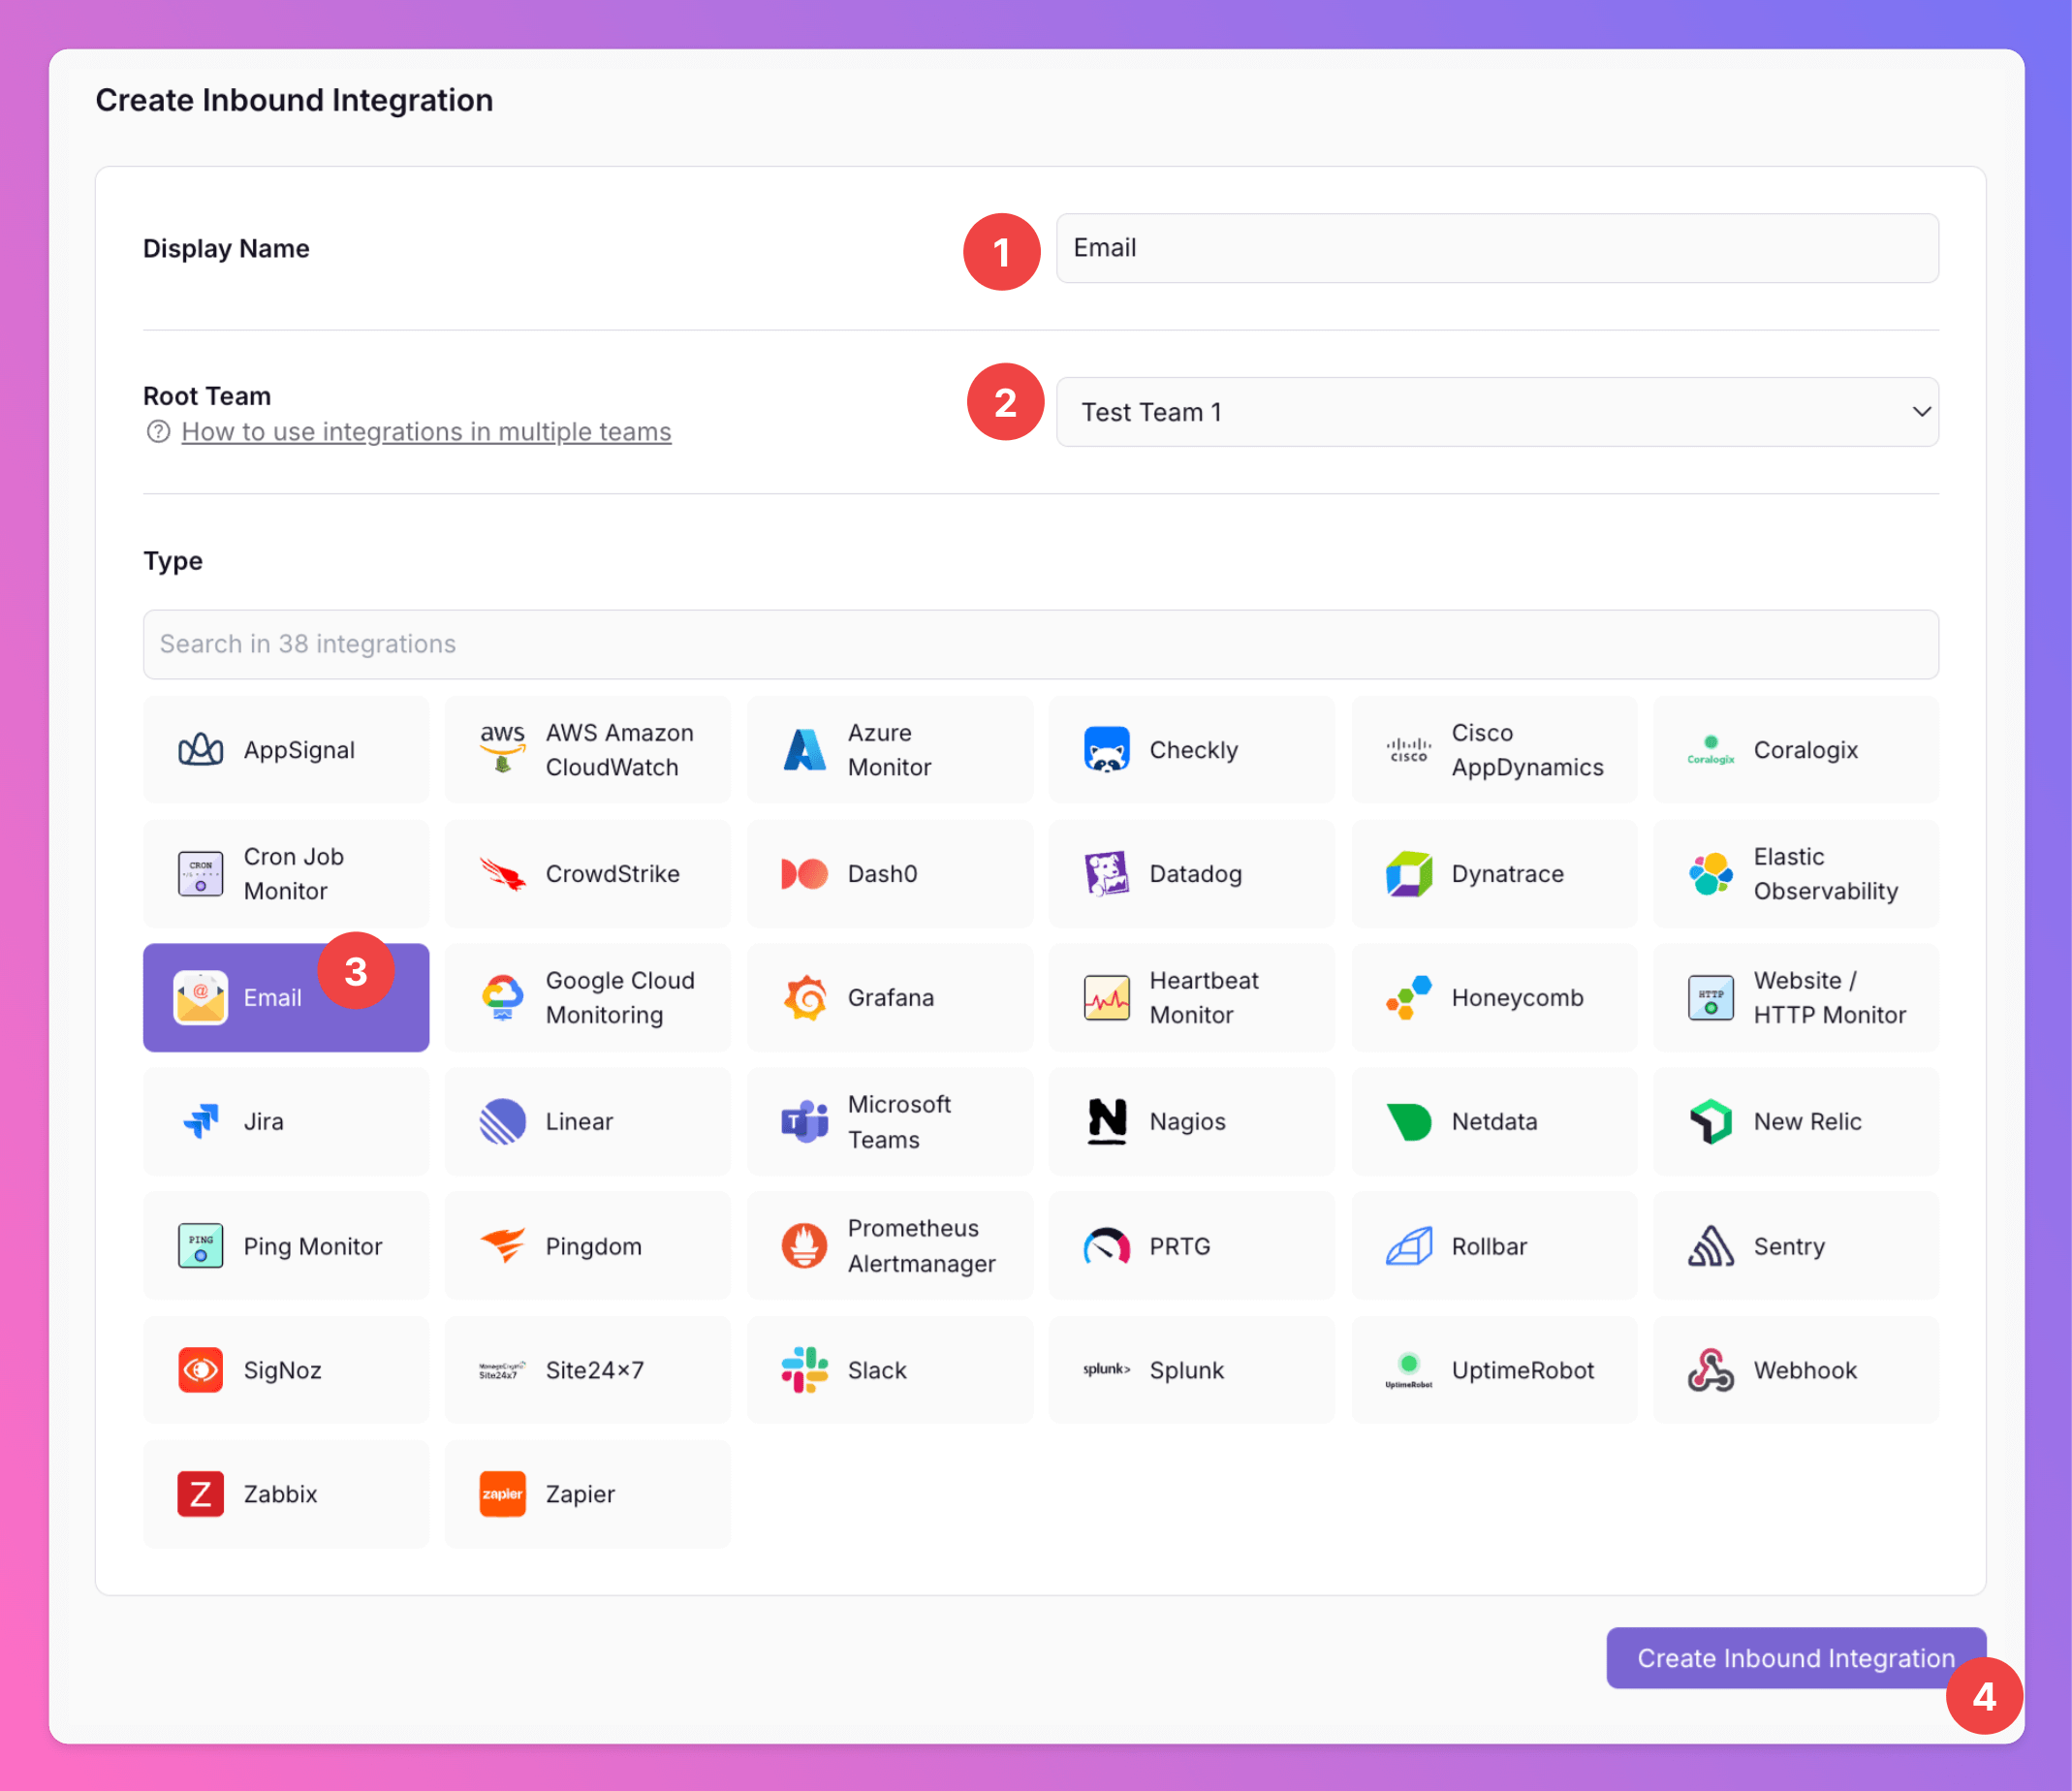
- Click on the
Inbound Integrationstab. - Click on
+ Create.

- Enter a
Display Namefor your integration, e.g. “Email”. - Select a
Team. - Select
Emailas the integration’s type. - Click
Create Inbound Integration.
Individual Email Recipient
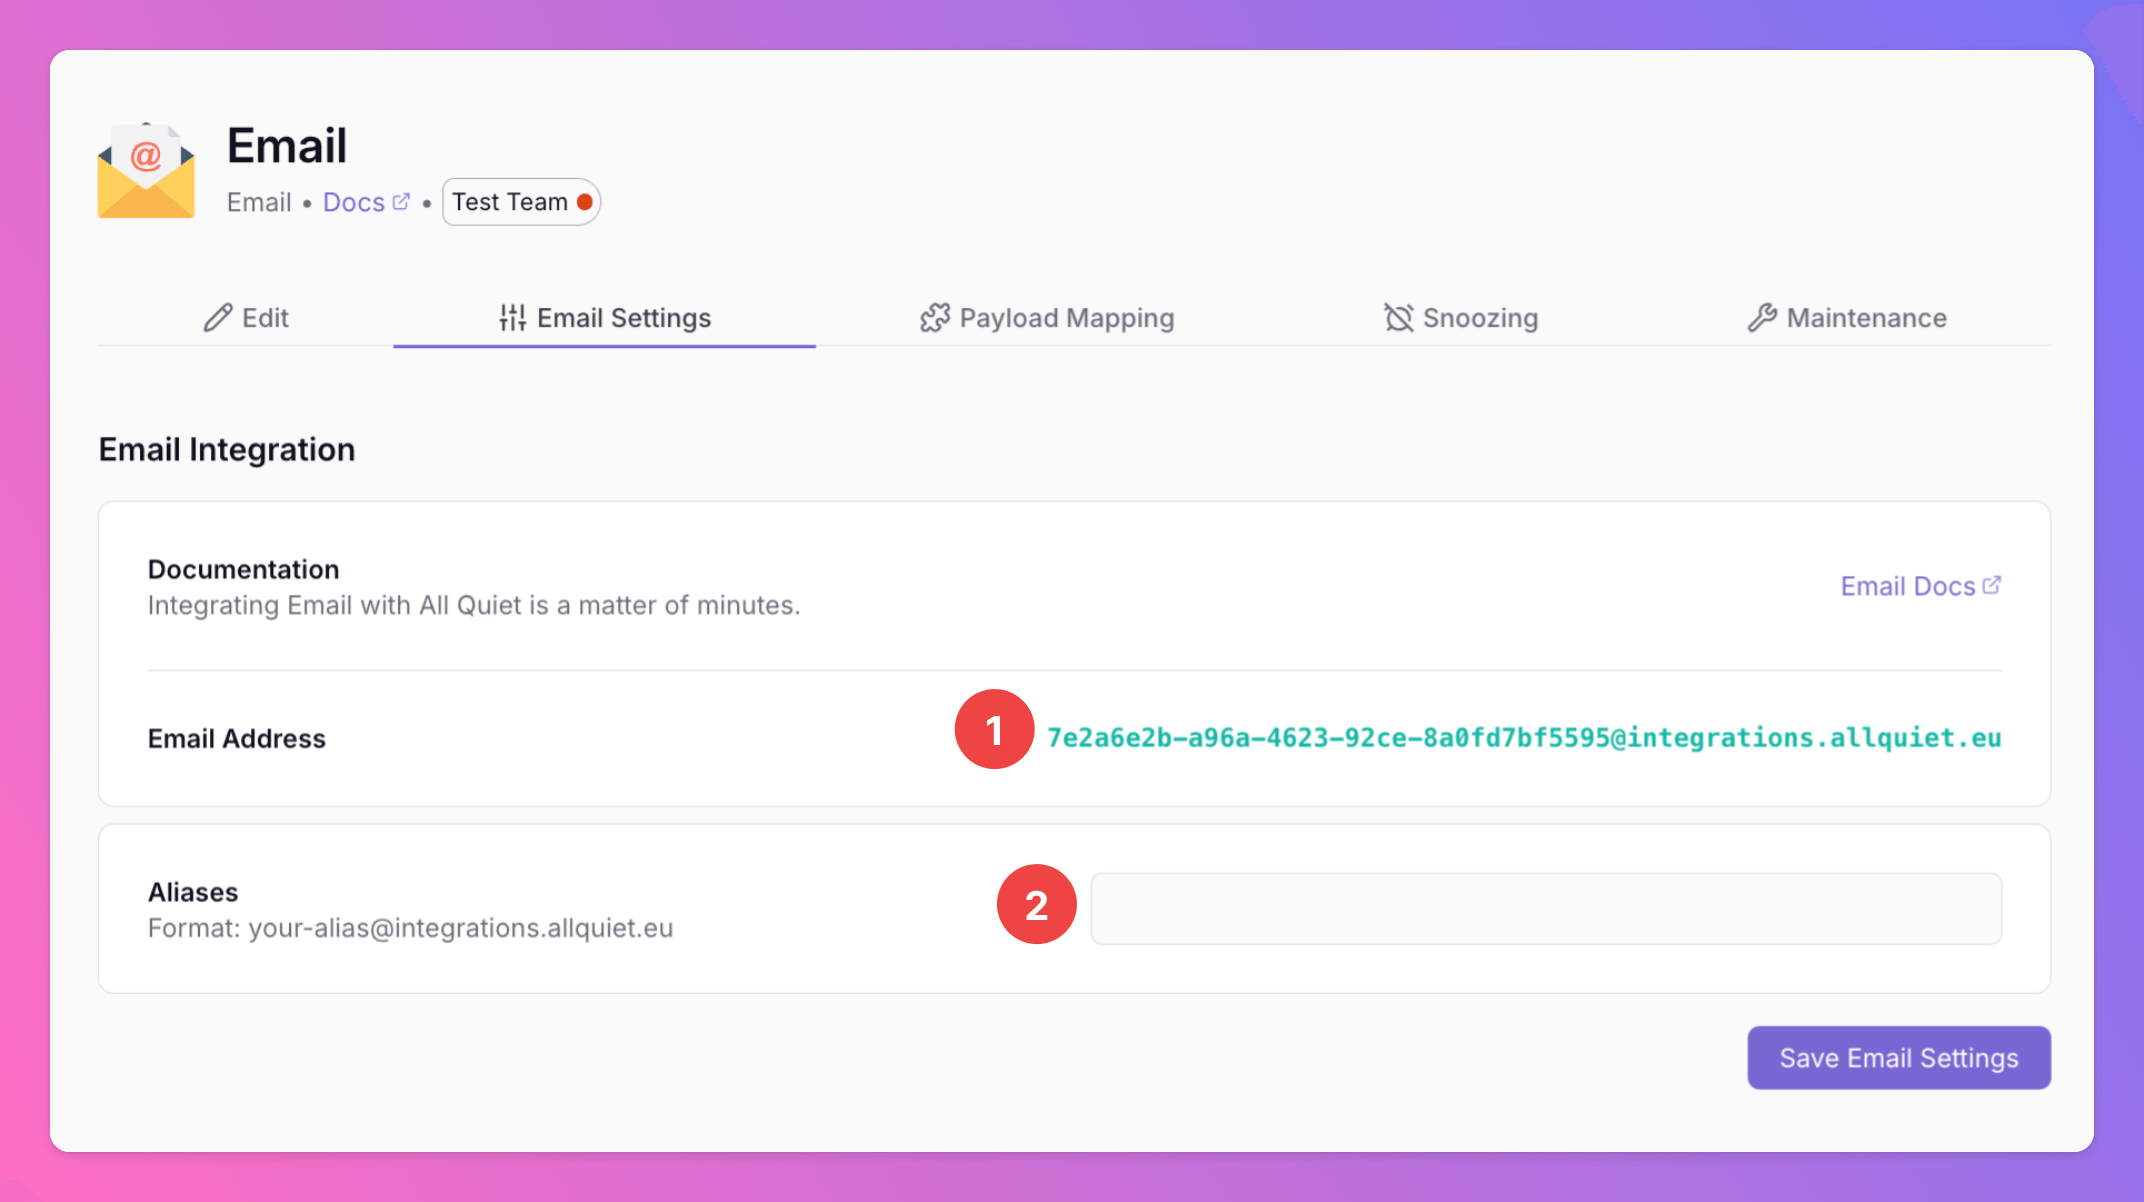
- Locate the unique email address under
Email Settings. This is the address you’ll use to send emails that automatically create incidents in the integration’s team. - If you prefer to use a different email address, you can set up aliases in here.
Send a Test Email
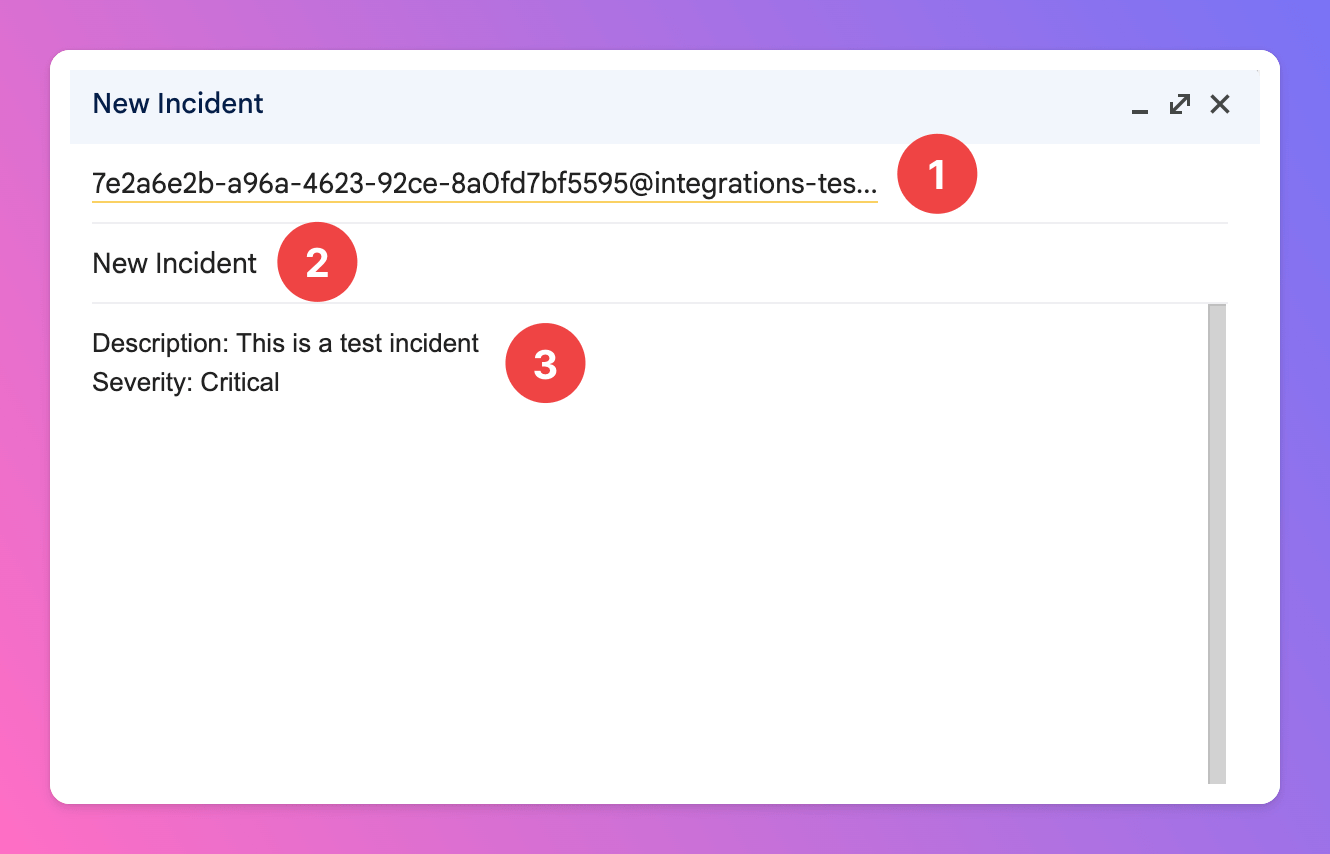
Begin by opening your preferred email client to compose a test message. This is simply a dry run to understand how emails are turned into structured incident reports in All Quiet. The exact content isn’t important - it’s just to illustrate the process. Once your email client is open, follow these steps:- As recepient, select the unique email address generated by your All Quiet email integration setup (or one the aliases you added).
- Compose a sample email, entering a subject such as
New Incidentto represent the title of incident you’d like to report. - In the email
Body, draft a mockup of incident details, for instance, adding a description and severity. You might as well add the environment it’s in.
Inspect Email Payload
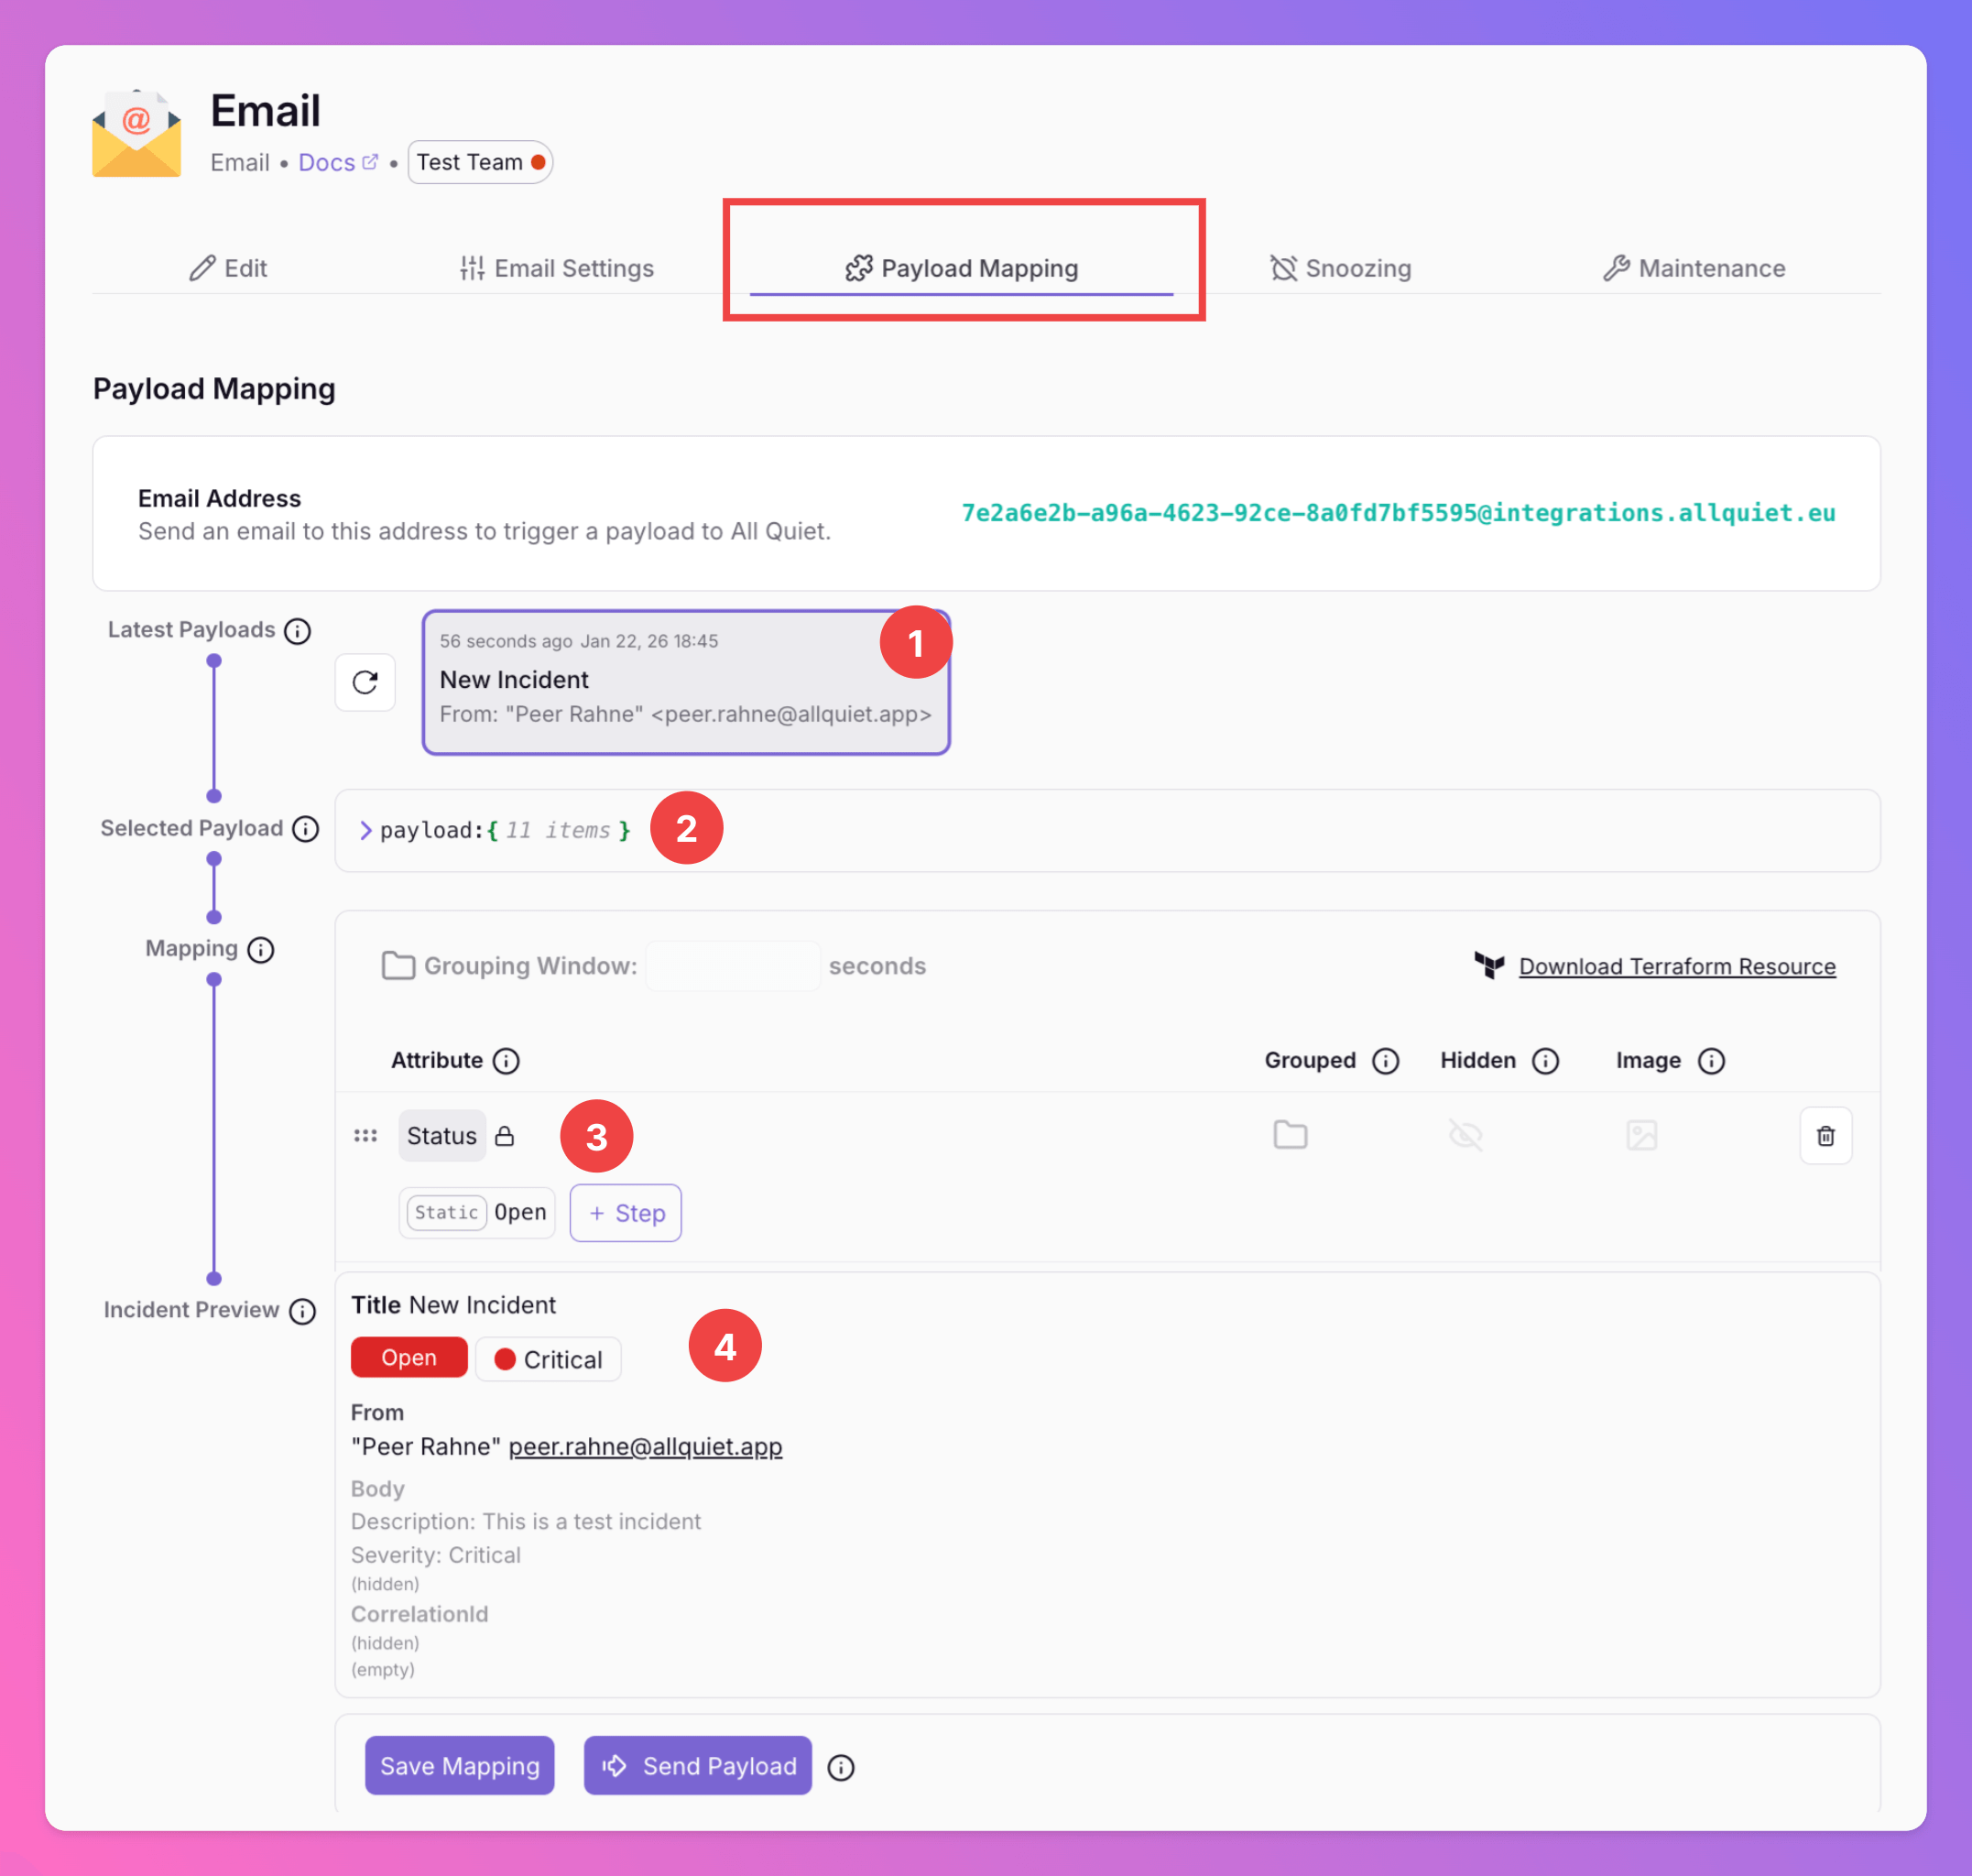
Back in All Quiet, open thePayload Mapping tab of your Email integration.
- You can see the email you just sent in latest email payloads received by the All Quiet platform.
- Open the selected payload for more details. In will contain the actual data sent from your email client, including fields such as ‘Message-ID’, ‘Subject’, and ‘To’.
- Use the payload mapping to ensure the content of the email is mapped to an All Quiet incident that work for you. More details below
- You can always see a preview of an All Quiet incident, based on the currently selected payload and your mapping.
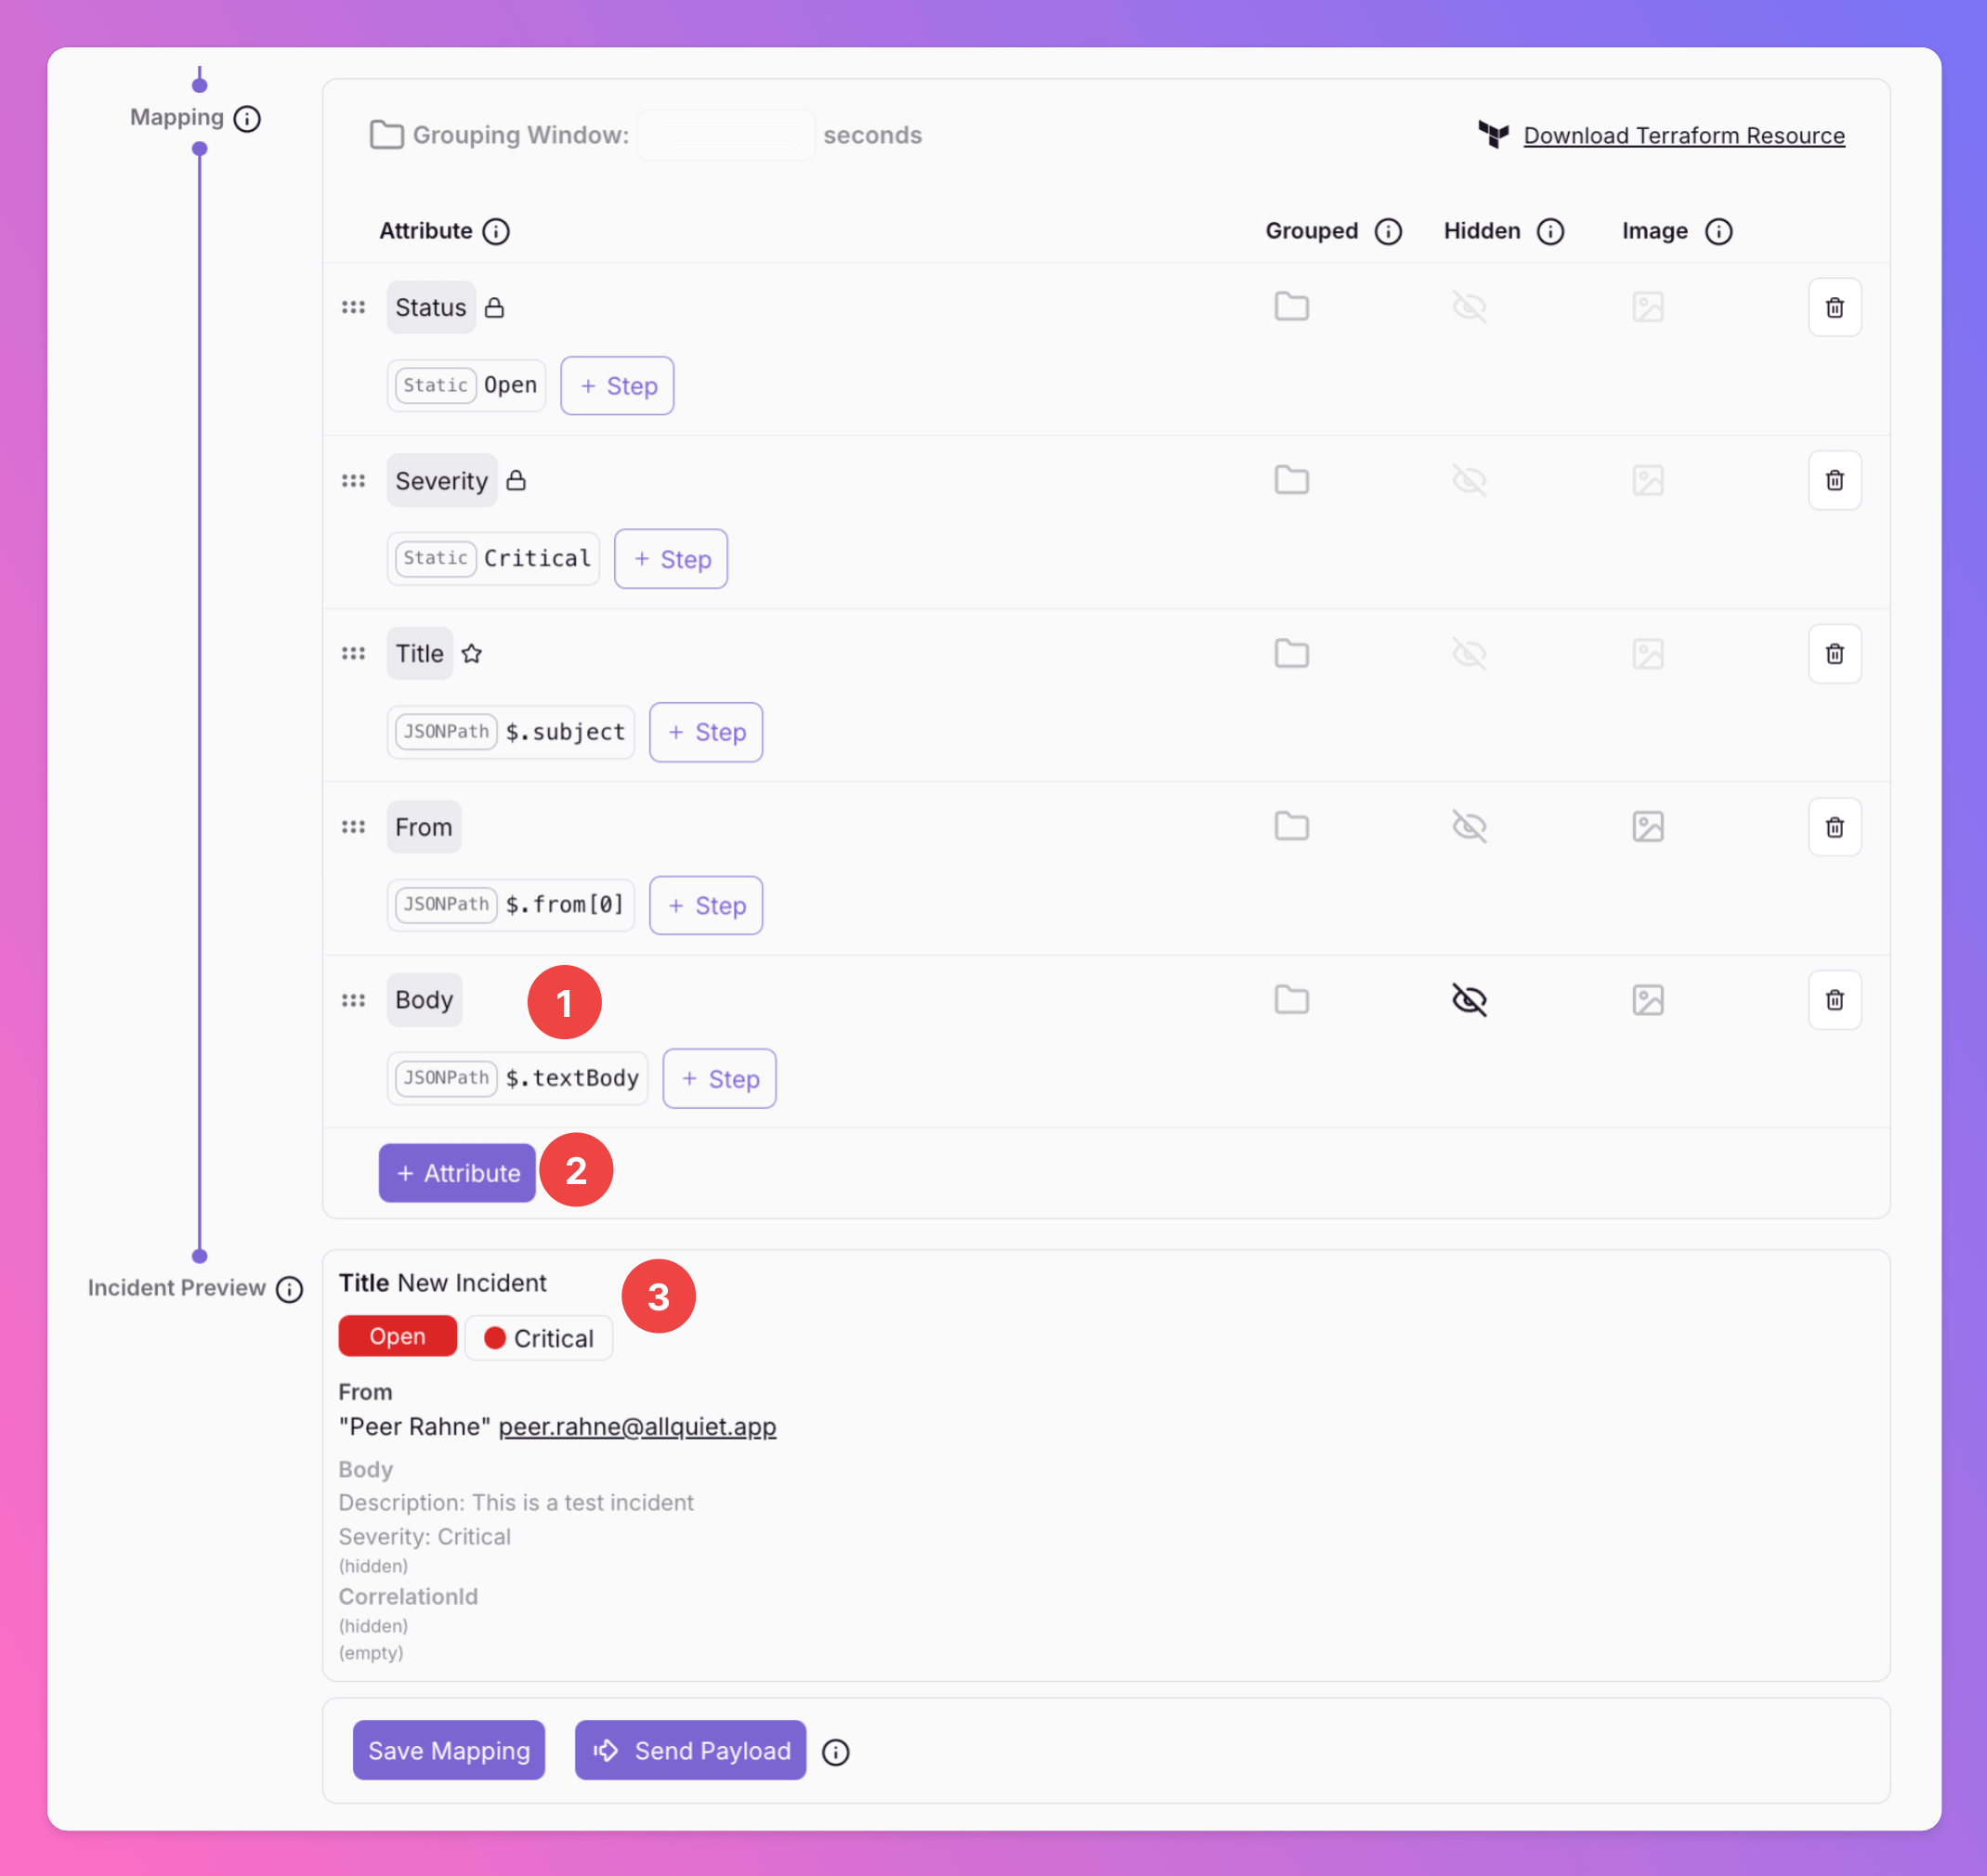
Map Payload Attributes
Review the attribute mapping configuration, which specifies how email content is mapped to incident attributes.- In this example, the
Bodyattribute contains the whole body content. You may want to adjust this by adding mapping steps to only extract a specific part. - Also, you can add additional attributes to enrich the incident with more info from the payload mappping.
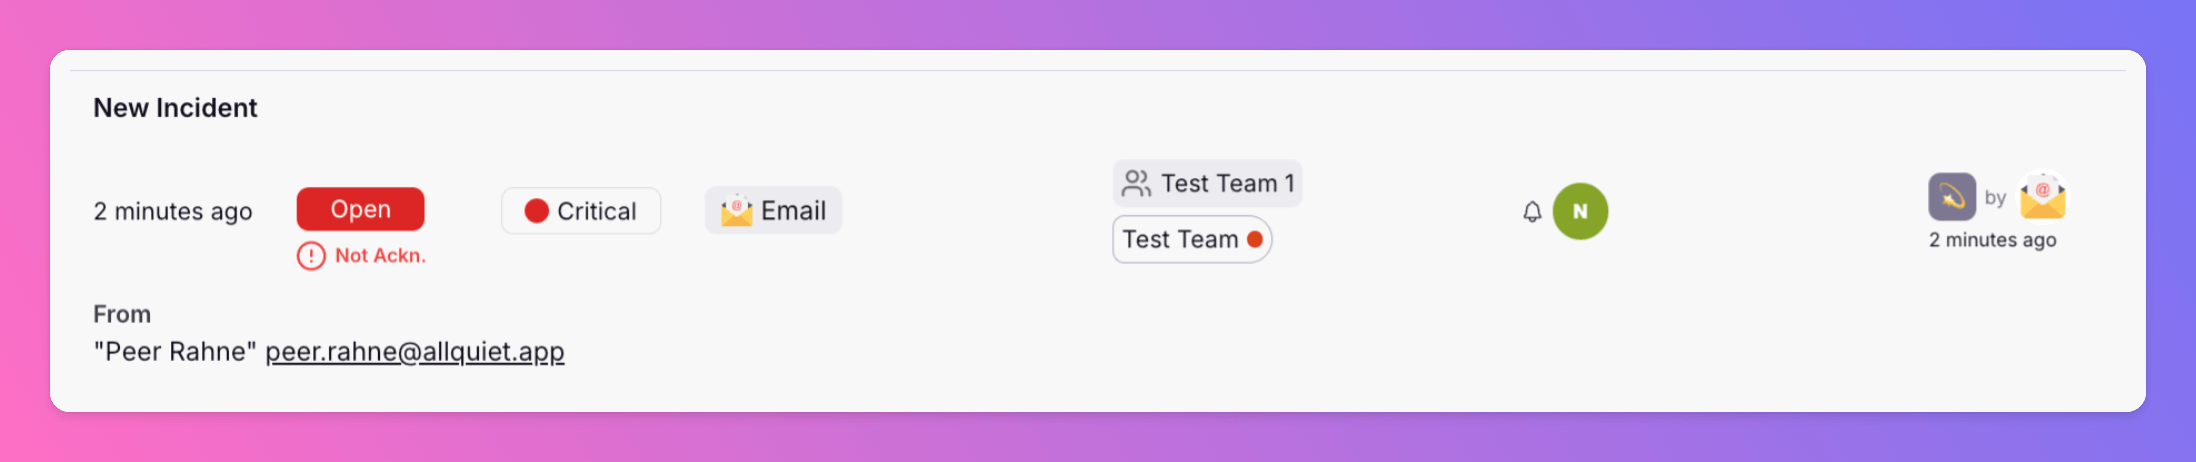
- Look at the incident preview in section to verify that the mapping has correctly transformed the email content into a structured incident, displaying fields such as
FromorBody. Note that due to the settings in this specific case, theBodyis marked asHiddenand, therefore, will only be shown in incident details and not on the overview.
Attribute mappings have simplified transforming standard emails into structured incidents in All Quiet, bridging the gap between observability alerts and All Quiet’s incident management for a smoother workflow.
Can emails automatically resolve an existing incident?
Yes — as long as your mapping can reliably setStatus to Resolved for “OK” / recovery emails and can correlate those emails to the same incident.
In practice, you typically configure:
CorrelationId: map a stable identifier (e.g. service, check name, host, environment) so follow-up emails update the same incident instead of creating a new one.Status: mapOpenvsResolvedbased on some field in the email payload (for example the subject or a status field extracted from the body).