Setup time: 5 Min
1. Create CrowdStrike Integration on All Quiet
Sign in to your All Quiet account.Create Integration
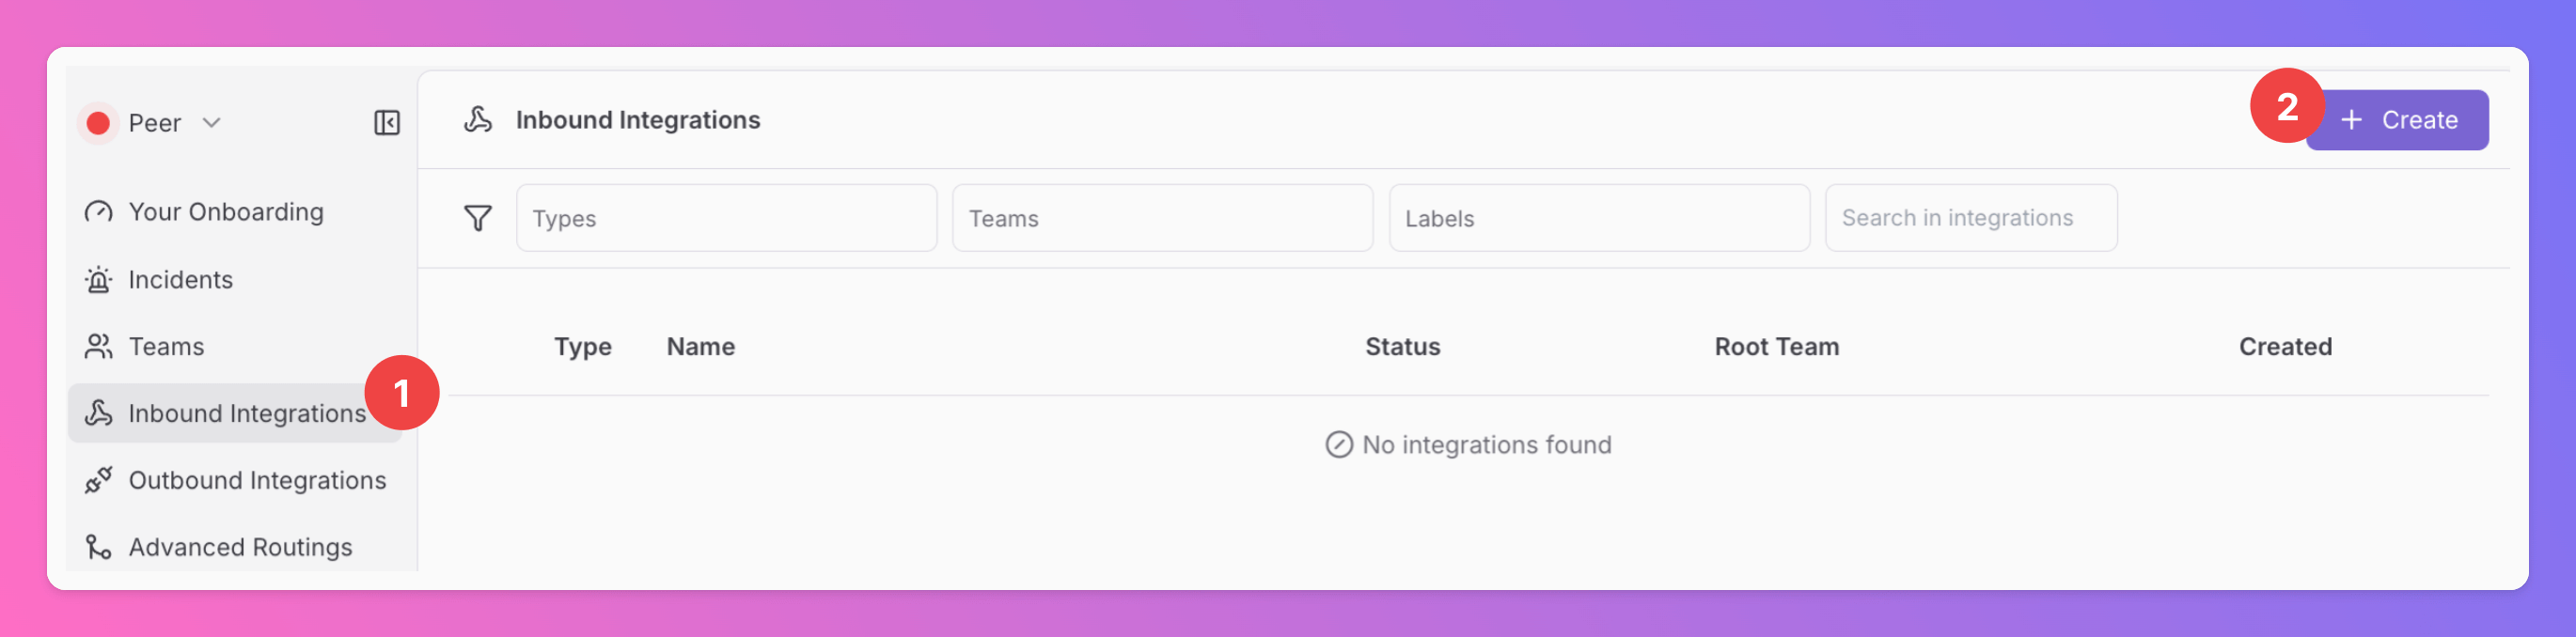
- Click on the
Inbound Integrationstab. - Click on
+ Create.
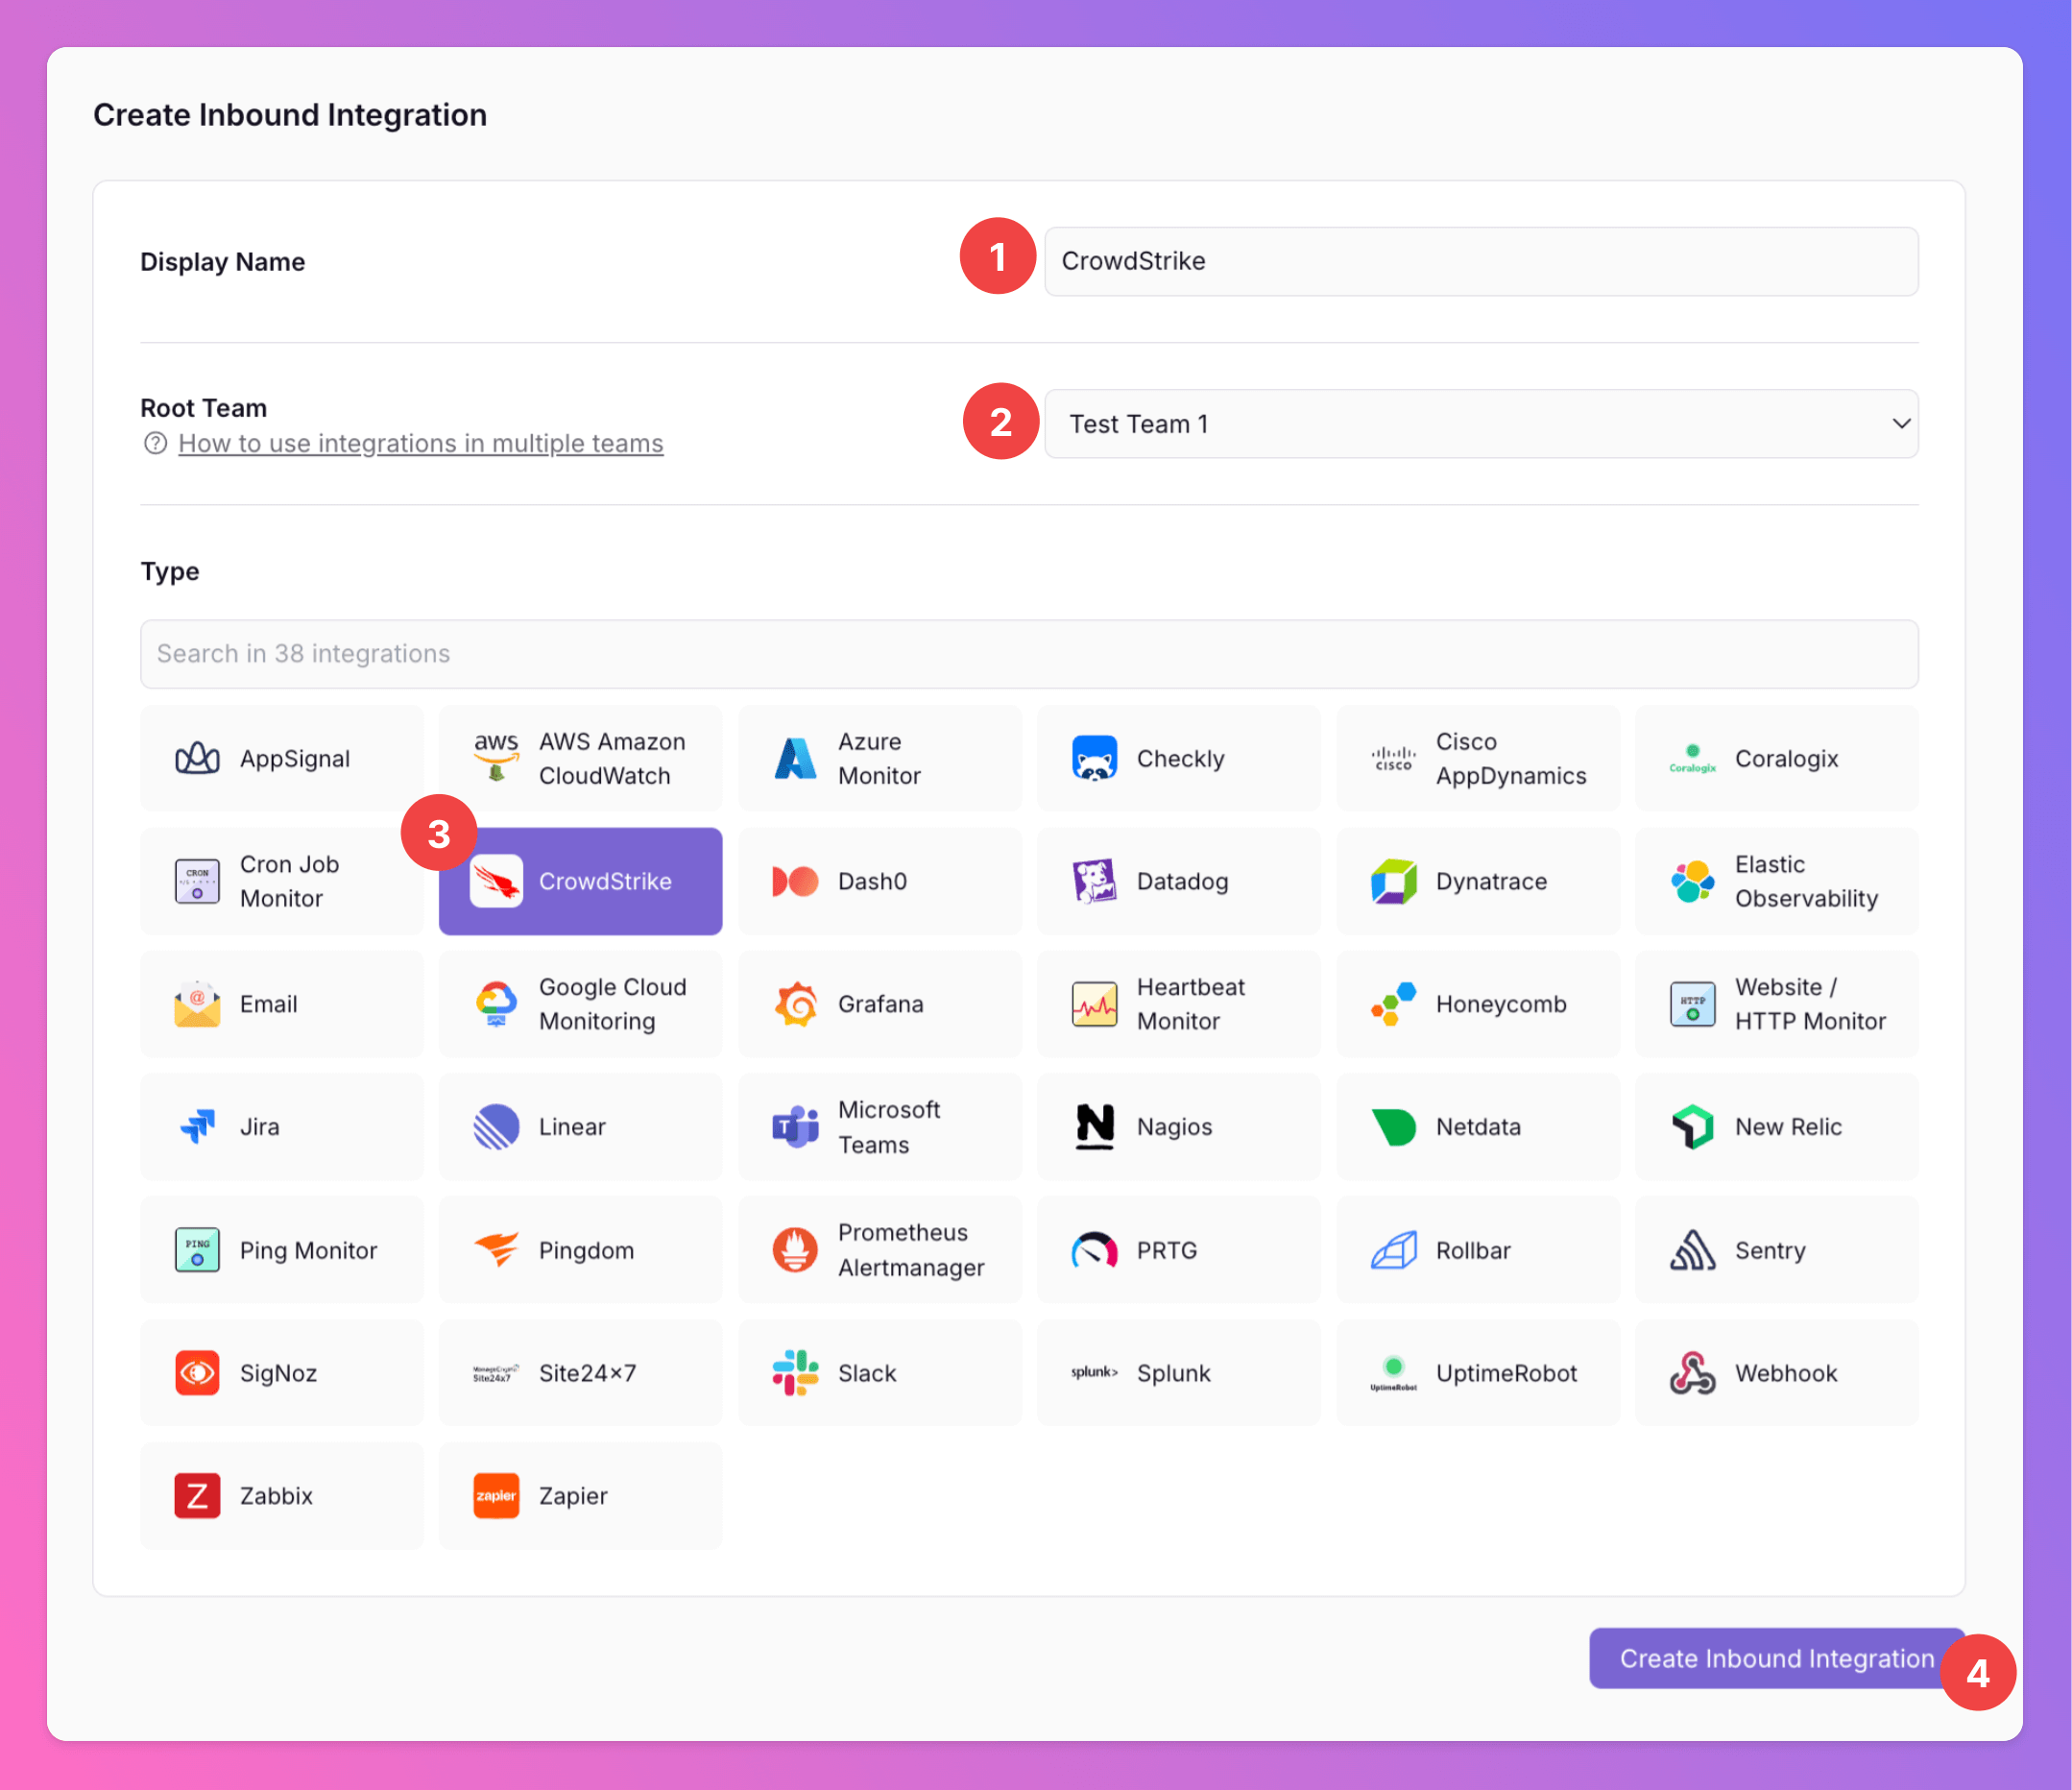
Select CrowdStrike as the integration’s type
- Enter a
Display Namefor your integration, e.g. “CrowdStrike”. - Select a
Team. - Select
CrowdStrikeas the integration’s type. - Click
Create Inbound Integration.
Get the All Quiet Webhook URL
After creating the integration on All Quiet, you can view and copy the webhook URL. You will require this URL in step 2 when configuring the custom integration on CrowdStrike.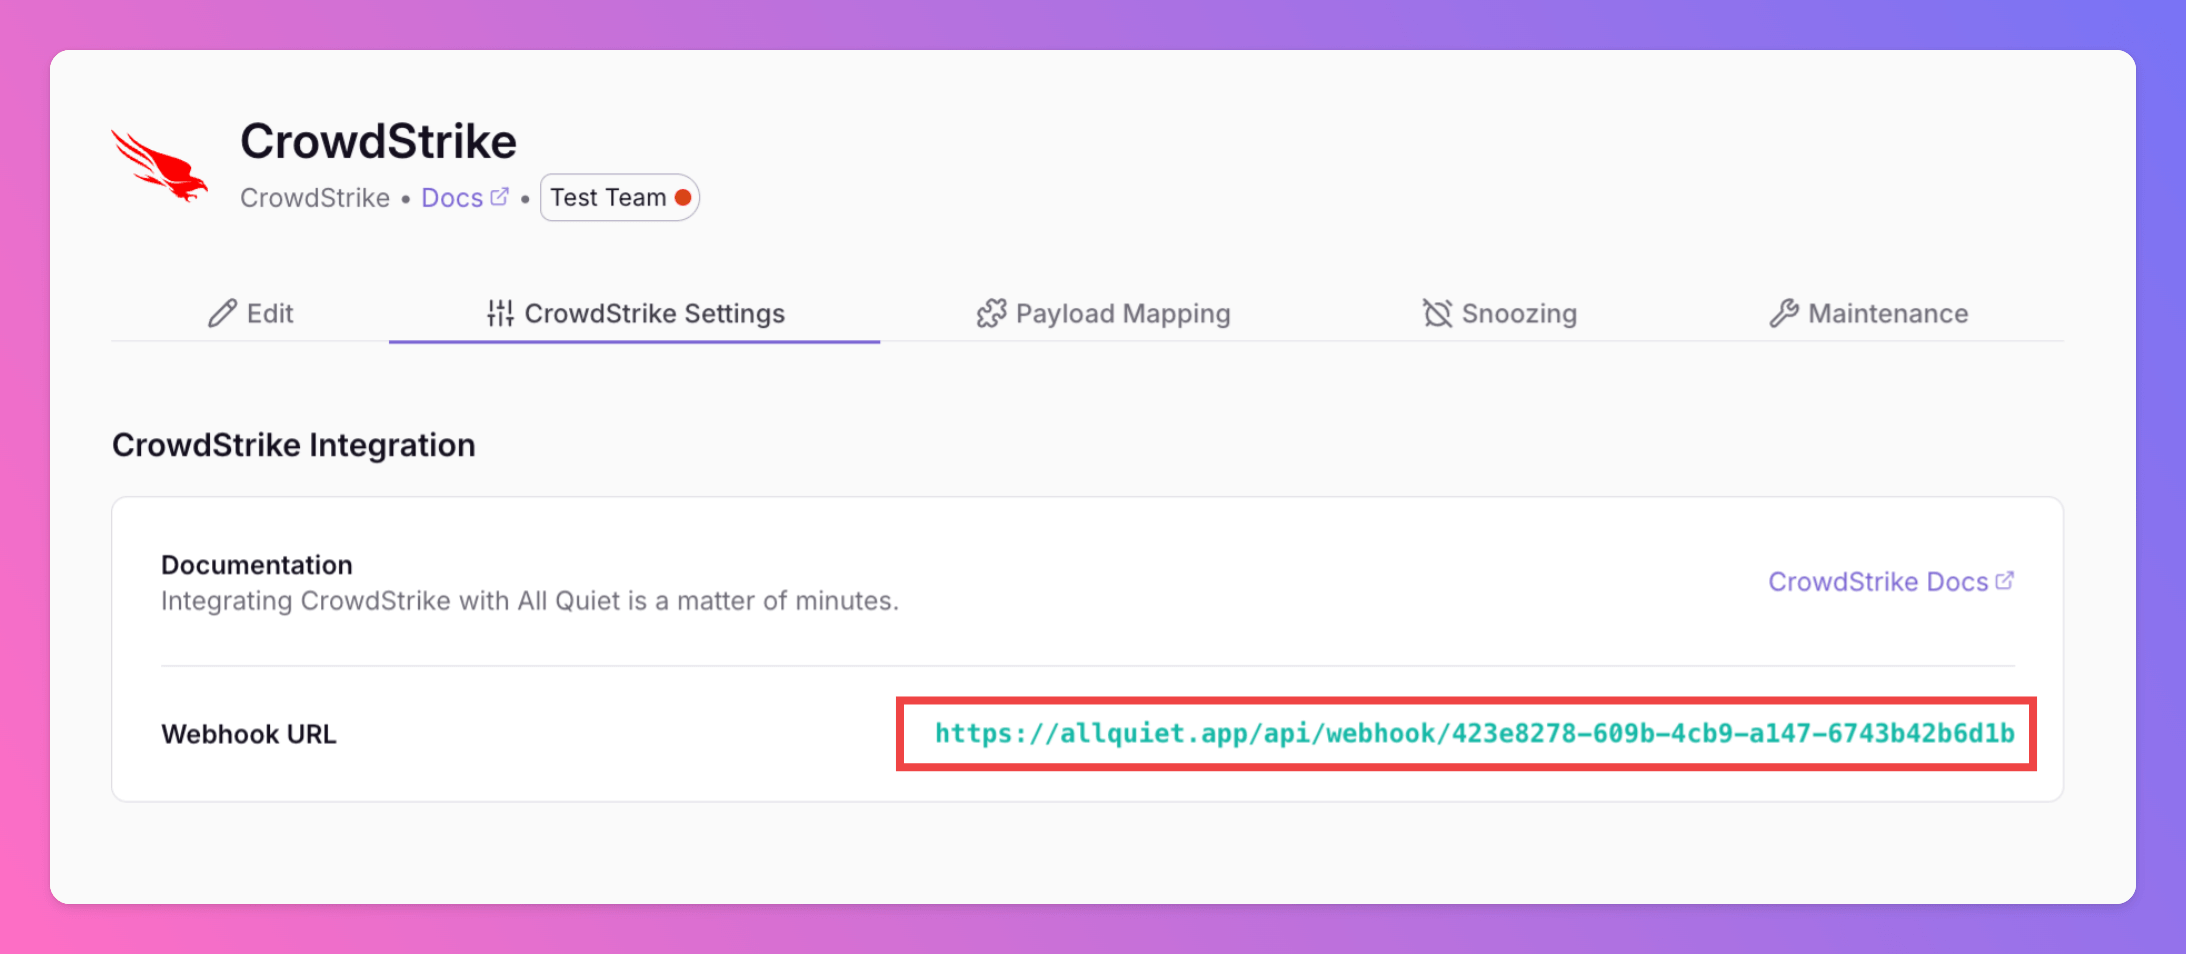
Optionally toggle
Enable additional Authentication & Security below the webhook URL to restrict who can POST payloads.- IP Filter — Allow requests only from specific IPs or CIDR ranges. Failed checks return 404 Not Found.
- Bearer authentication — Require
Authorization: Bearer YOUR_TOKEN. Missing or invalid tokens return 401 Unauthorized.
2. Configure the Integration with CrowdStrike
Once you’ve set up an integration of type “CrowdStrike” with All Quiet, it takes only three more steps in your CrowdStrike account to finish off your setup.Set up the Webhook to All Quiet
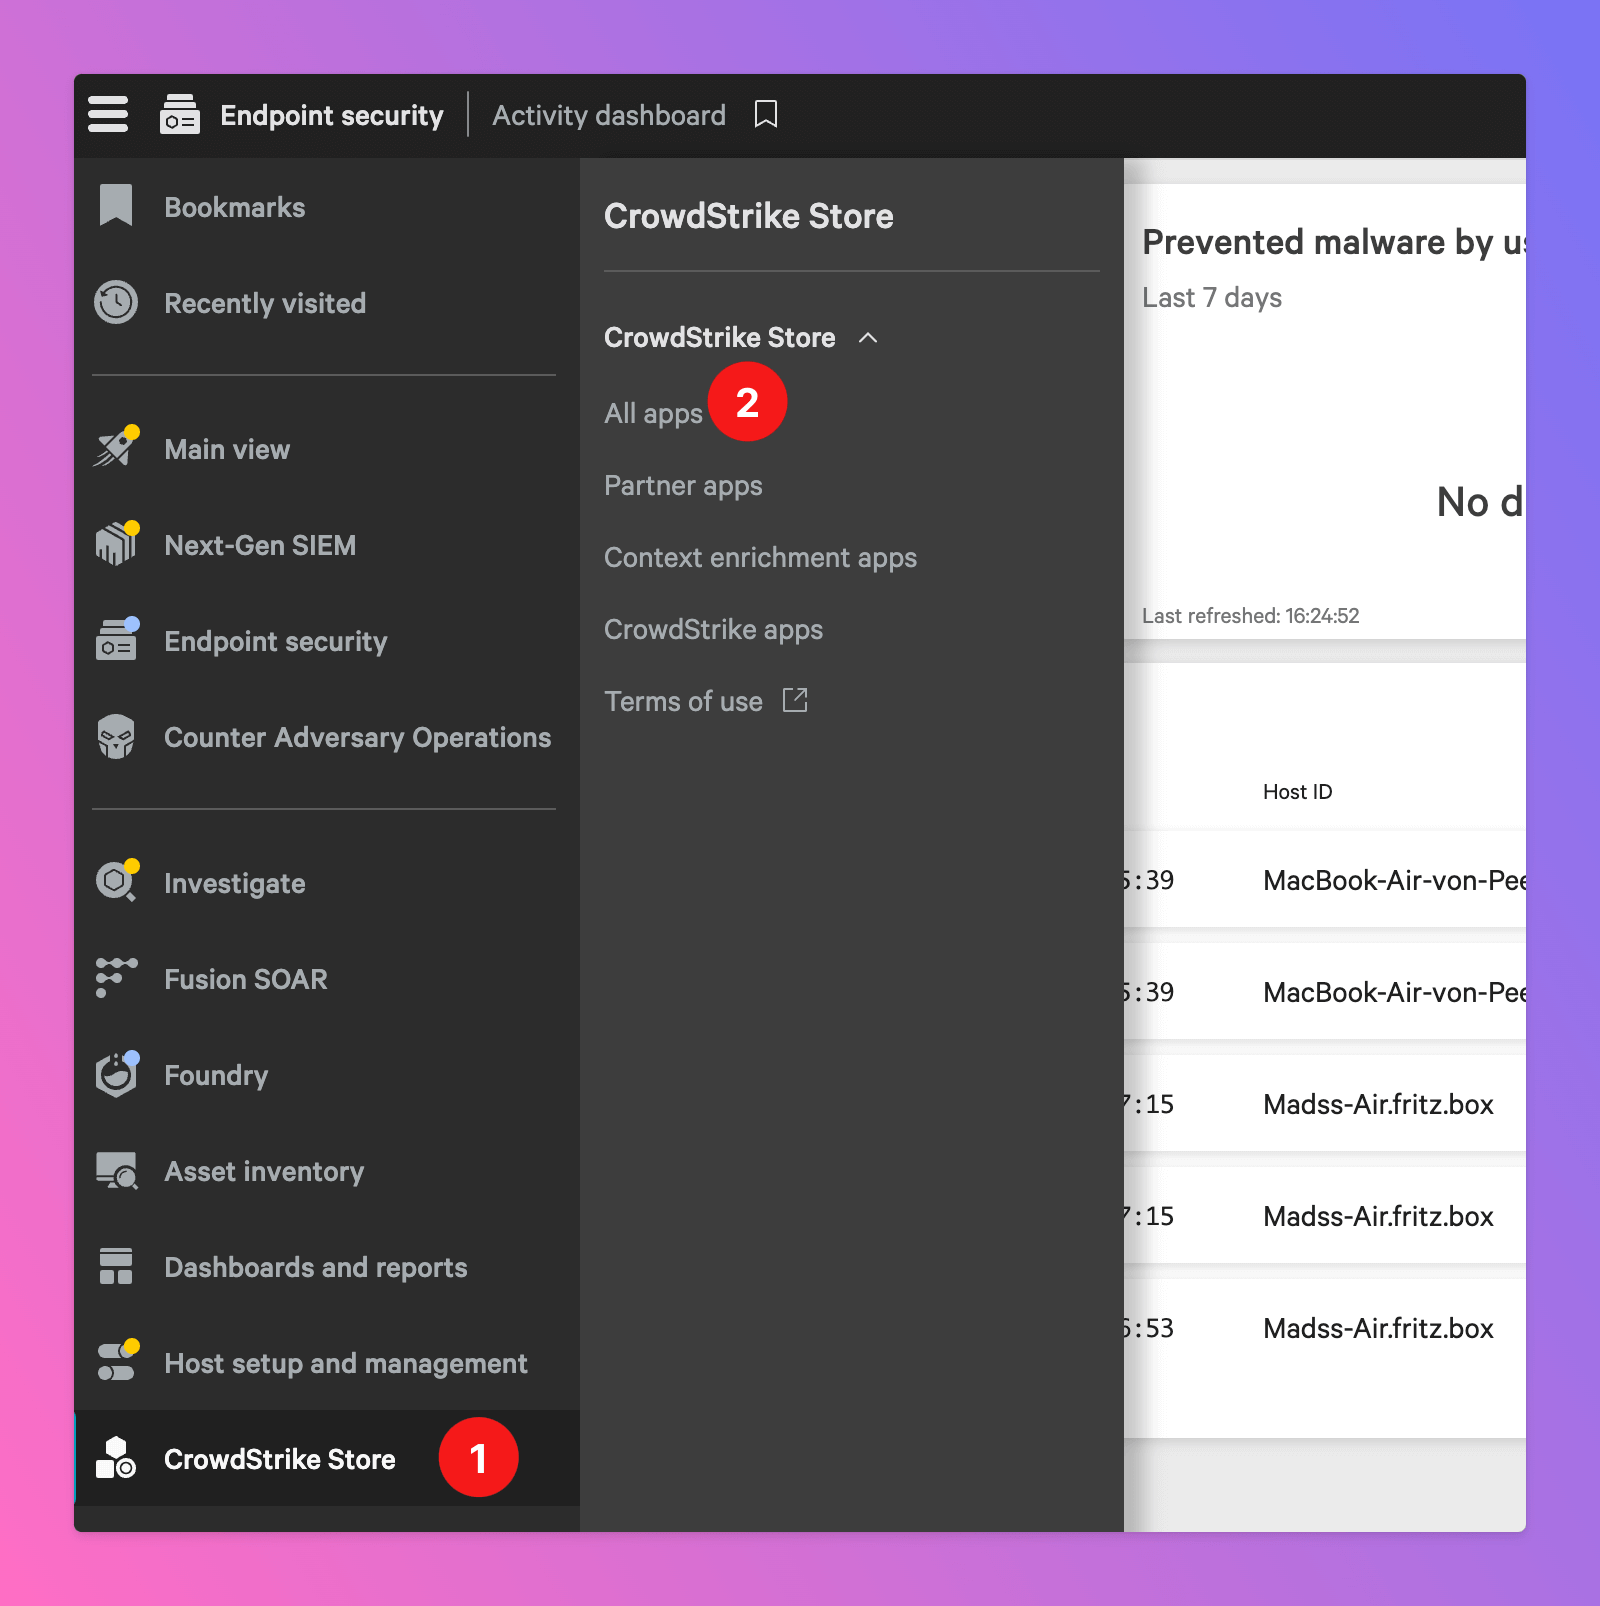
Sign in to your CrowdStrike Account. We first need to create the Webhook- From the home screen, open the side navigation and select
CrowdStrike Store - Select
All apps
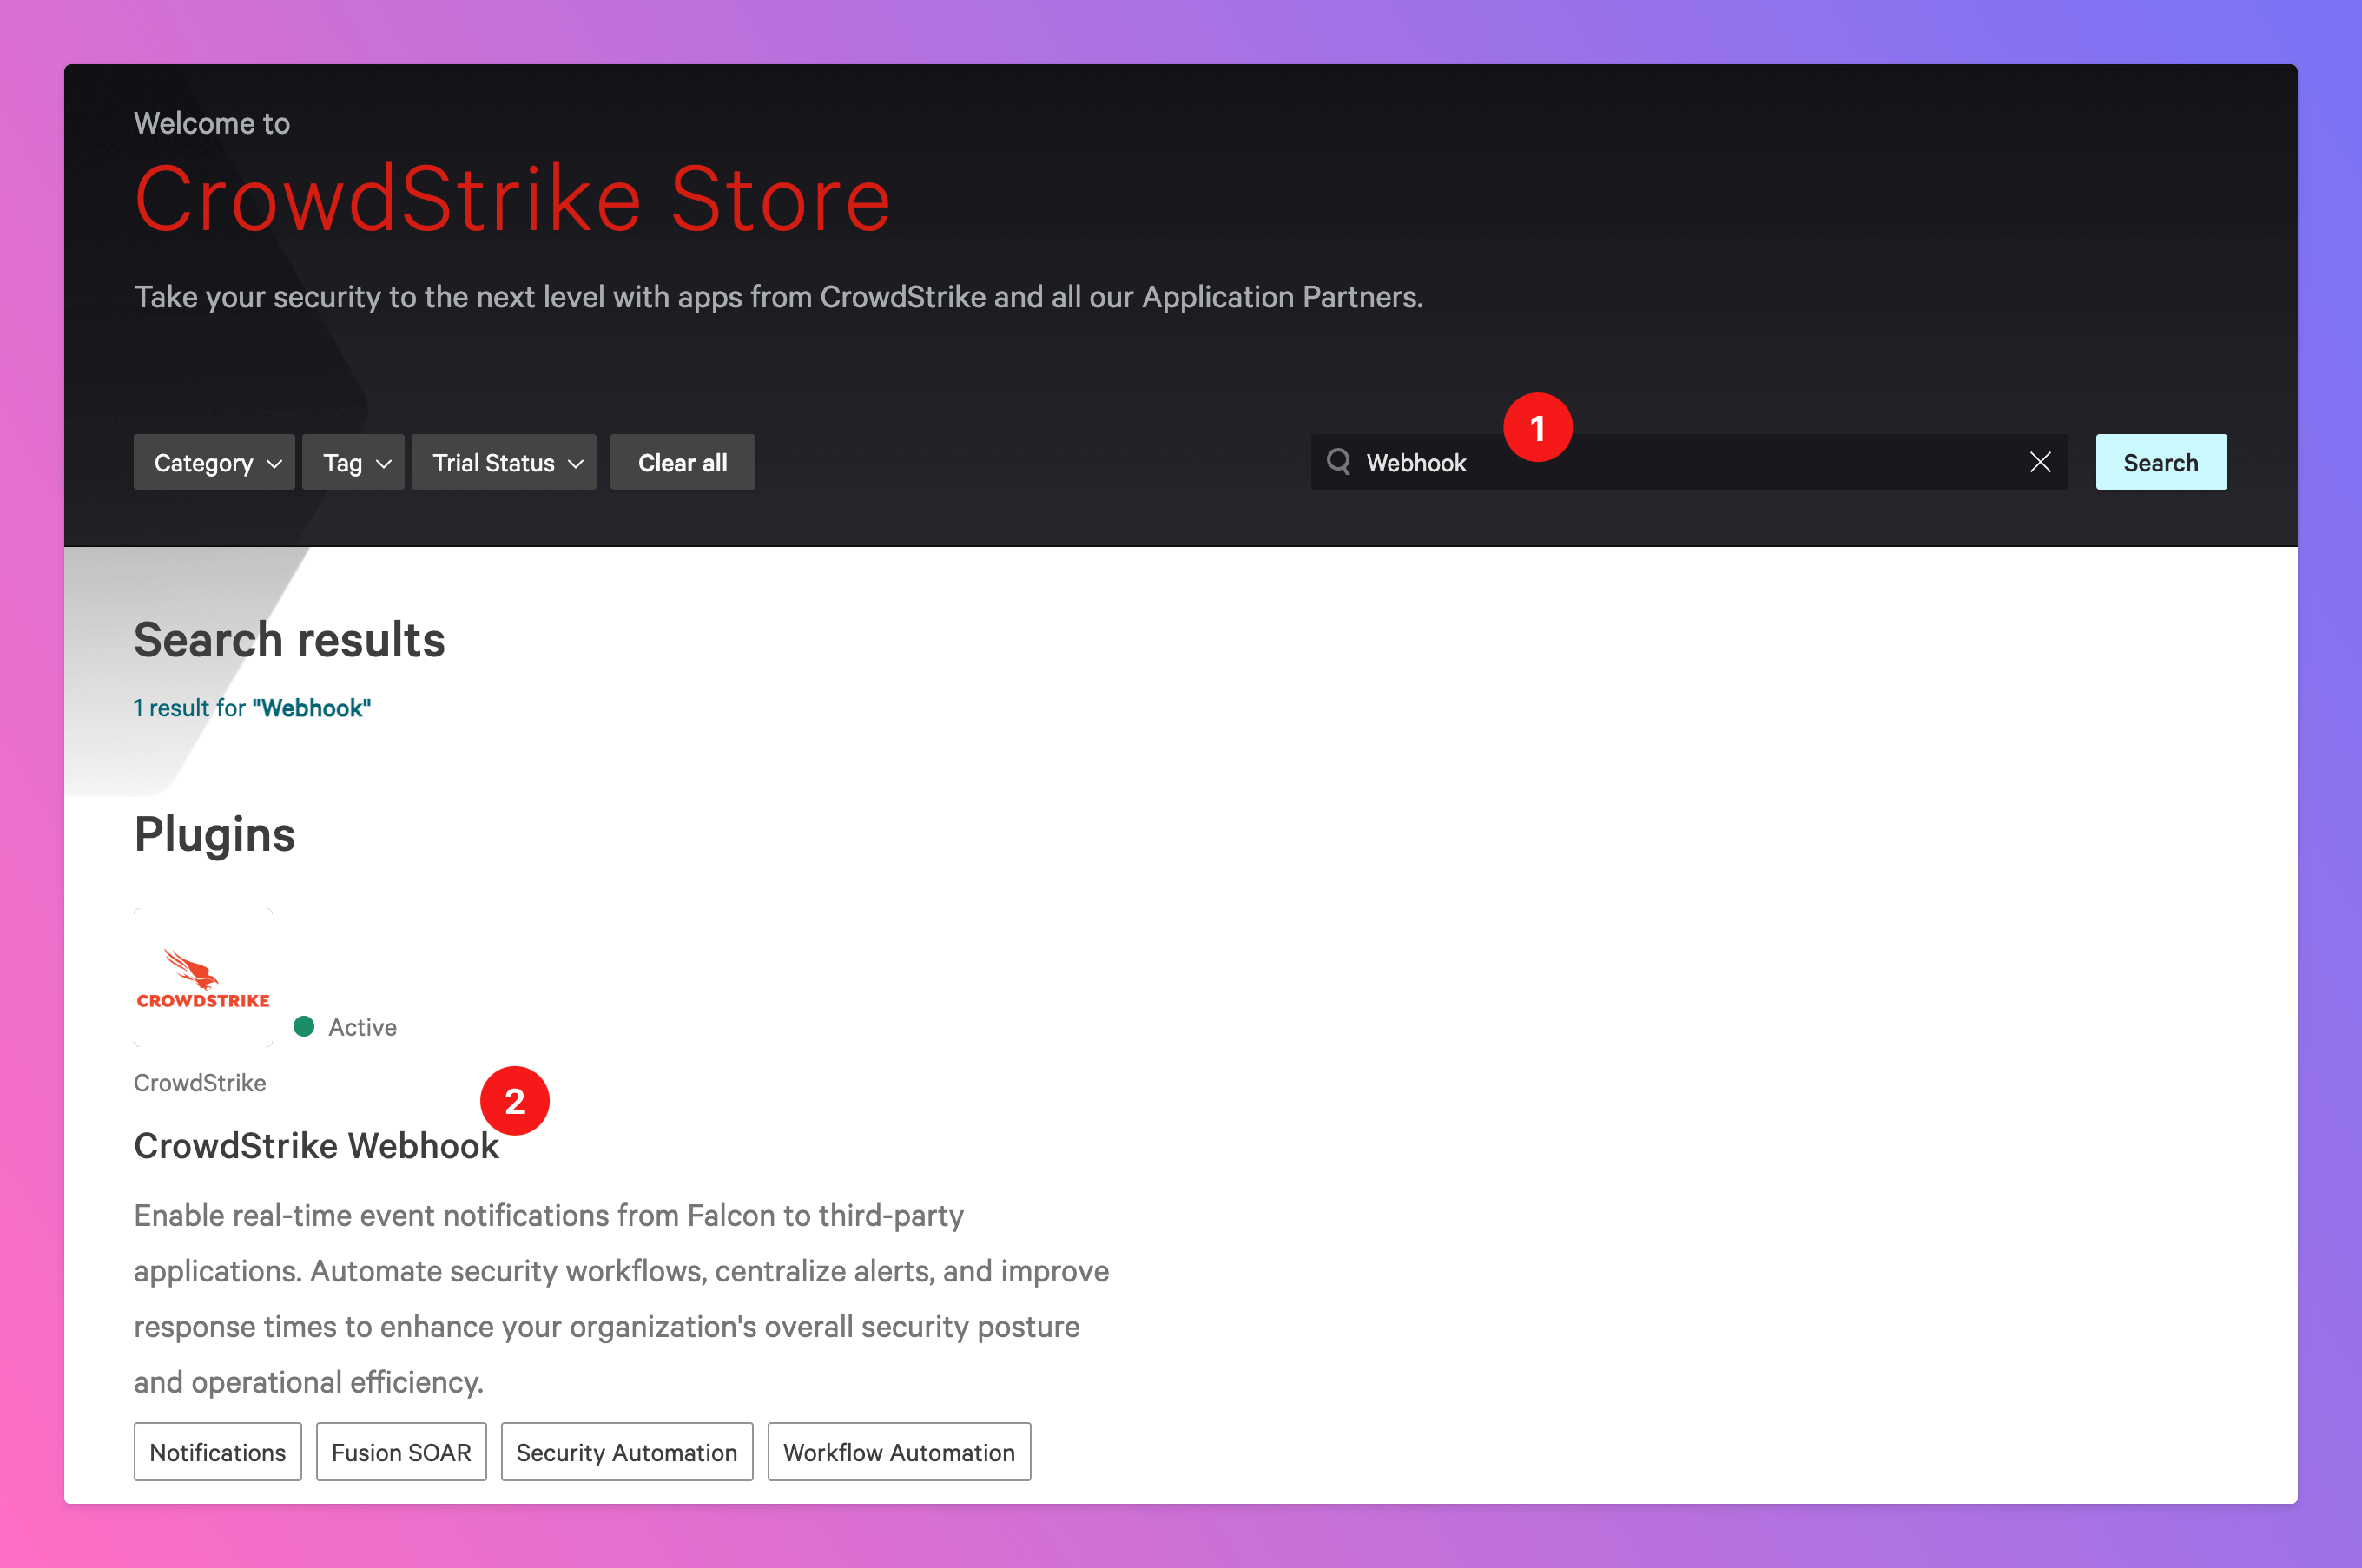
- In the store, search for `Webhook“
- Select the
CrowdStrike Webhook
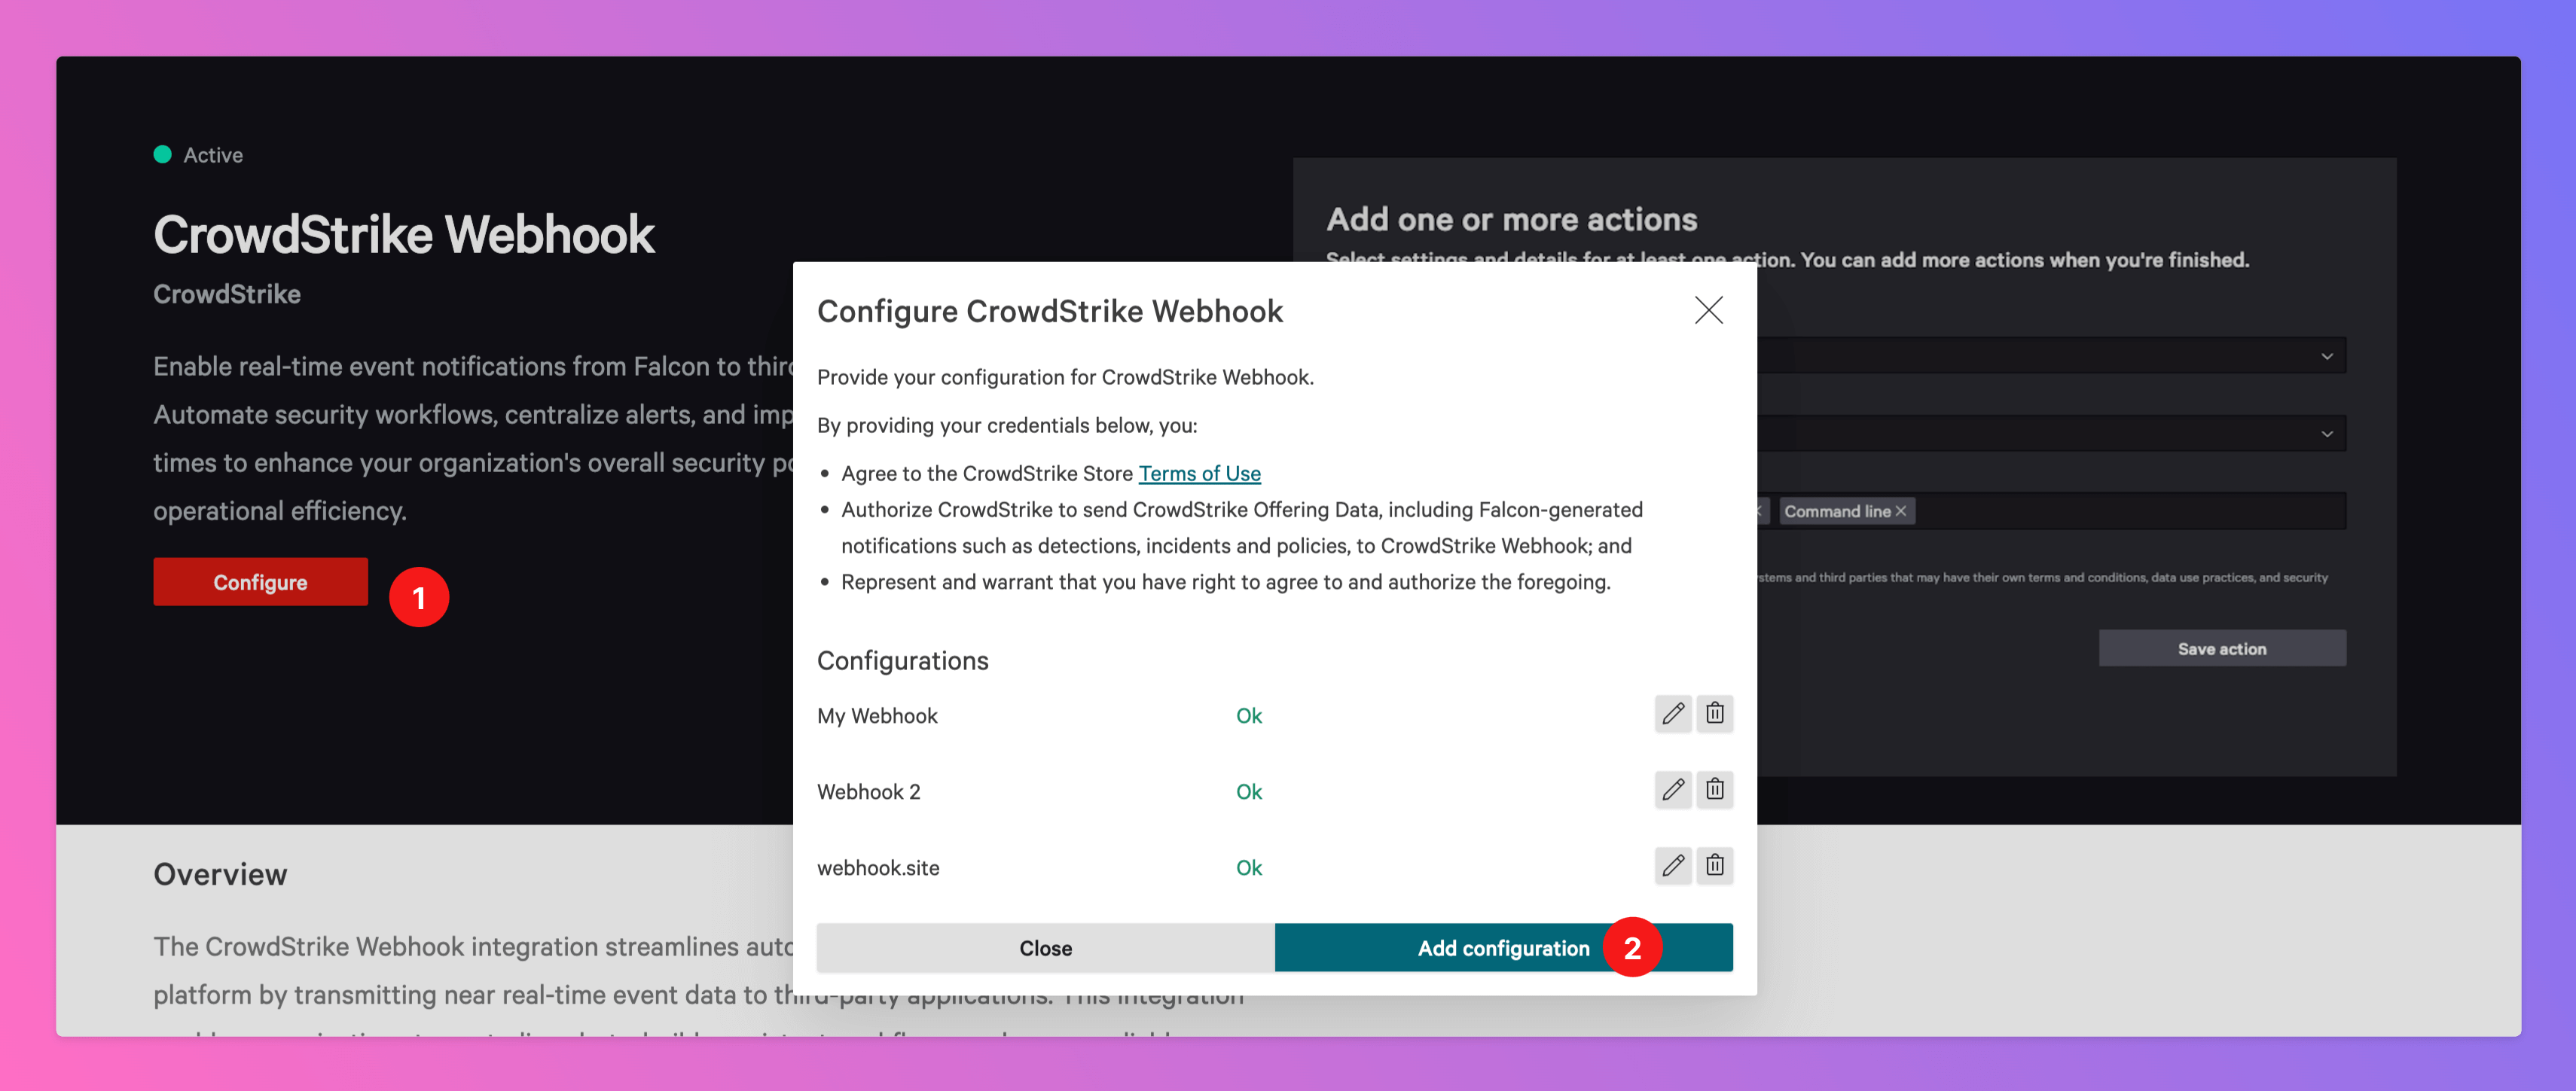
- Click
Configure - Select
Add configuration
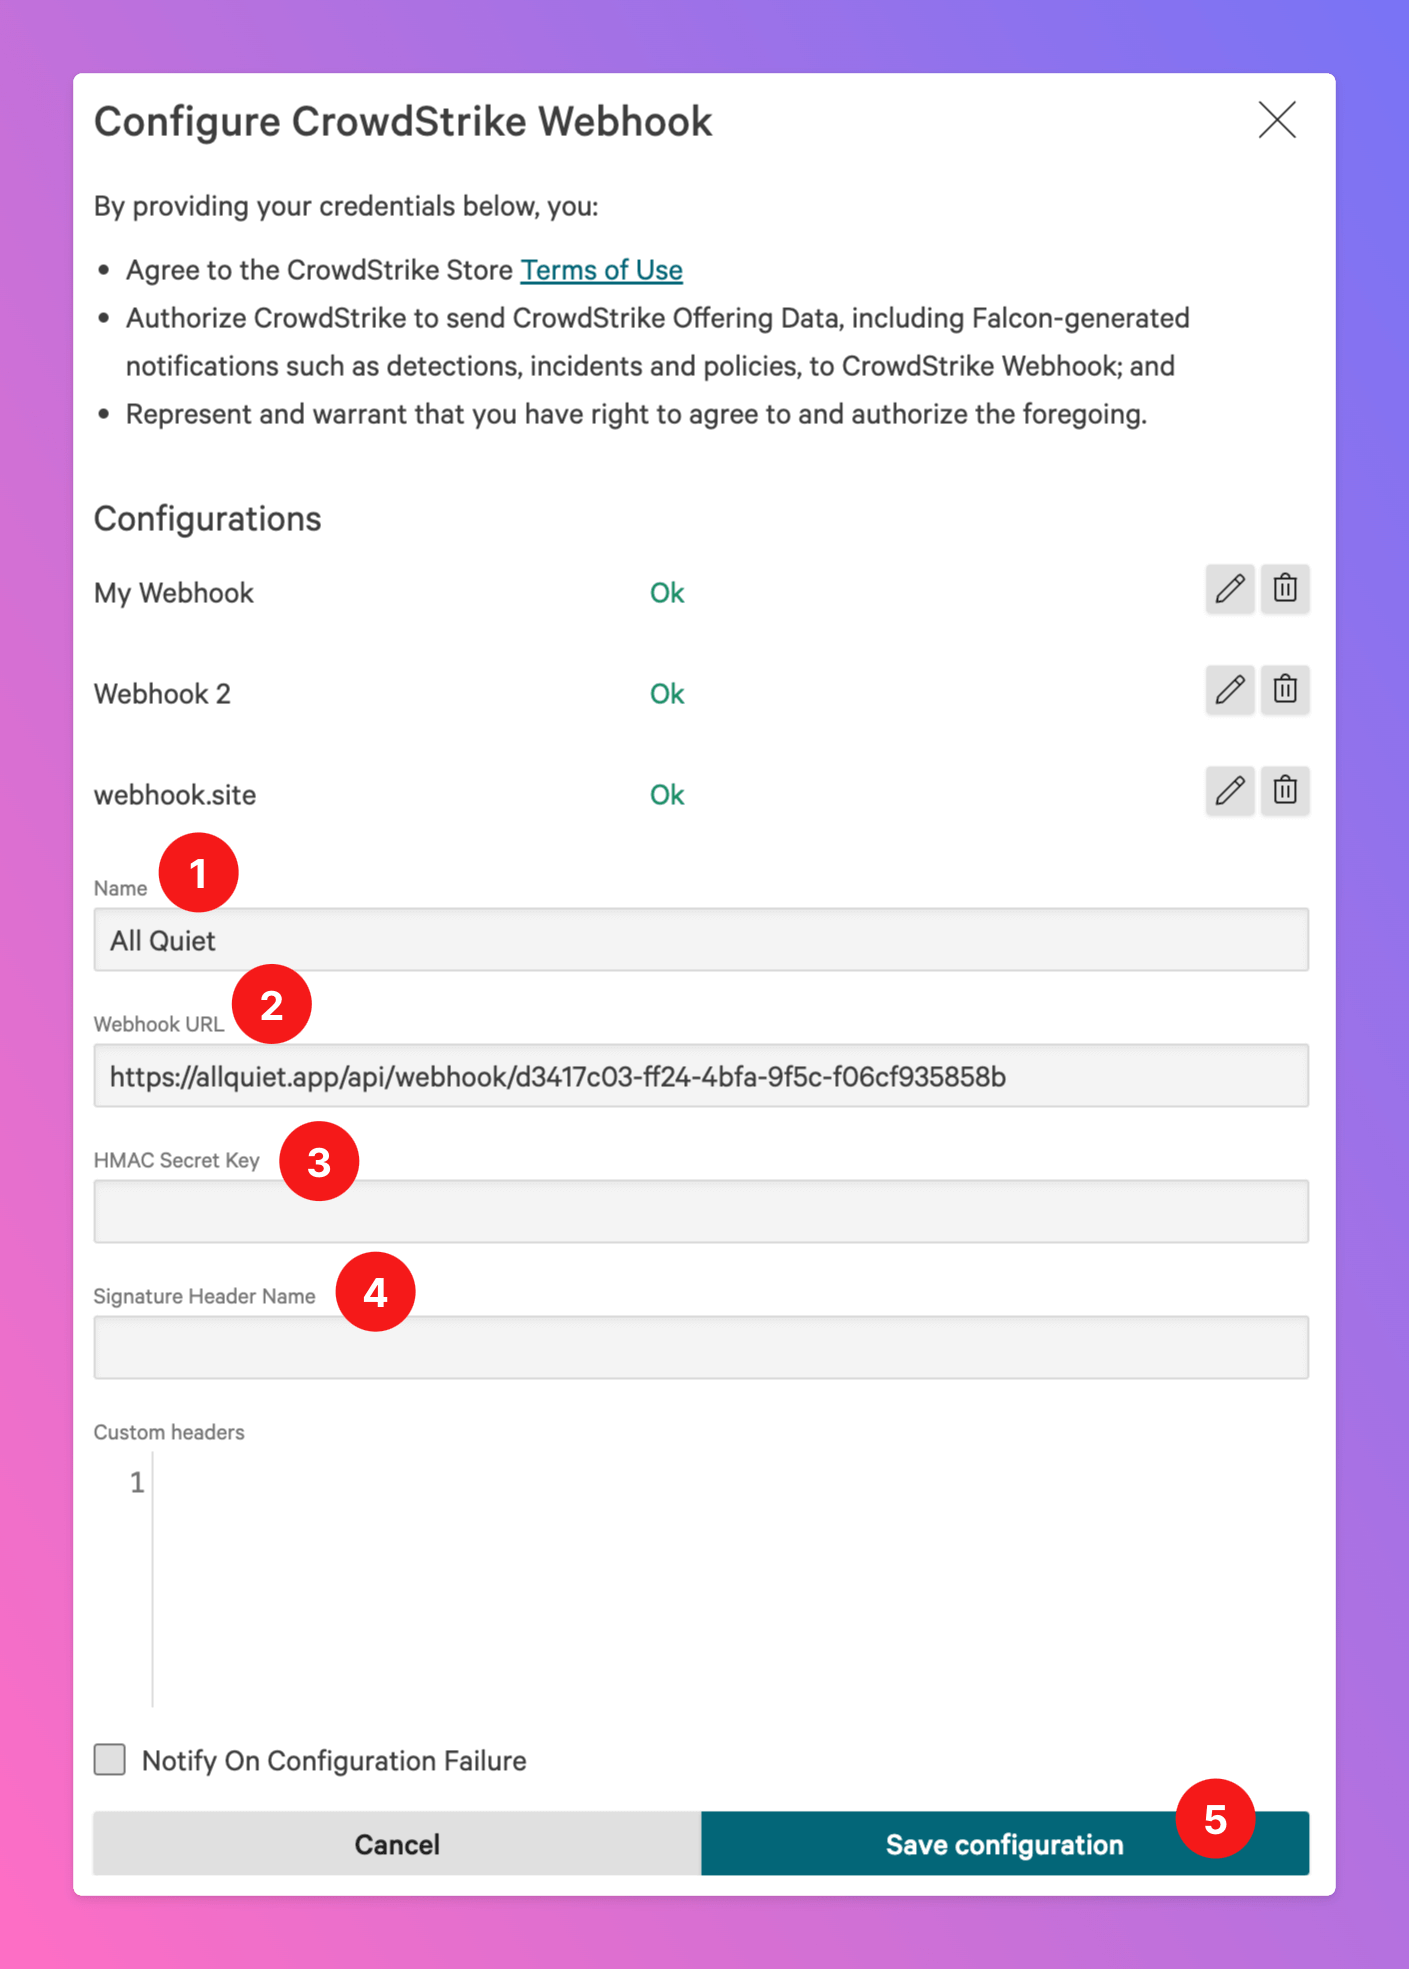
- Select a name for you Webhook, like
All Quiet - As
Webhook URL, paste in the All Quiet Webhook URL you’ve obtained in step Get the All Quiet Webhook URL. - Remove the
HMAC Secret Keys - Remove the
Signature Header Name - Save the Webhook.
You’ve successfully created the Webhook. Next, we need to set up a workflow to create All Quiet incidents from CrowdStrike, using the Webhook.
Set up Workflow for Incident Creation
Now, we need to set up a workflow to create All Quiet incidents from CrowdStrike.- In the sidebar navigation, select `Fusion SOAR“
- Open
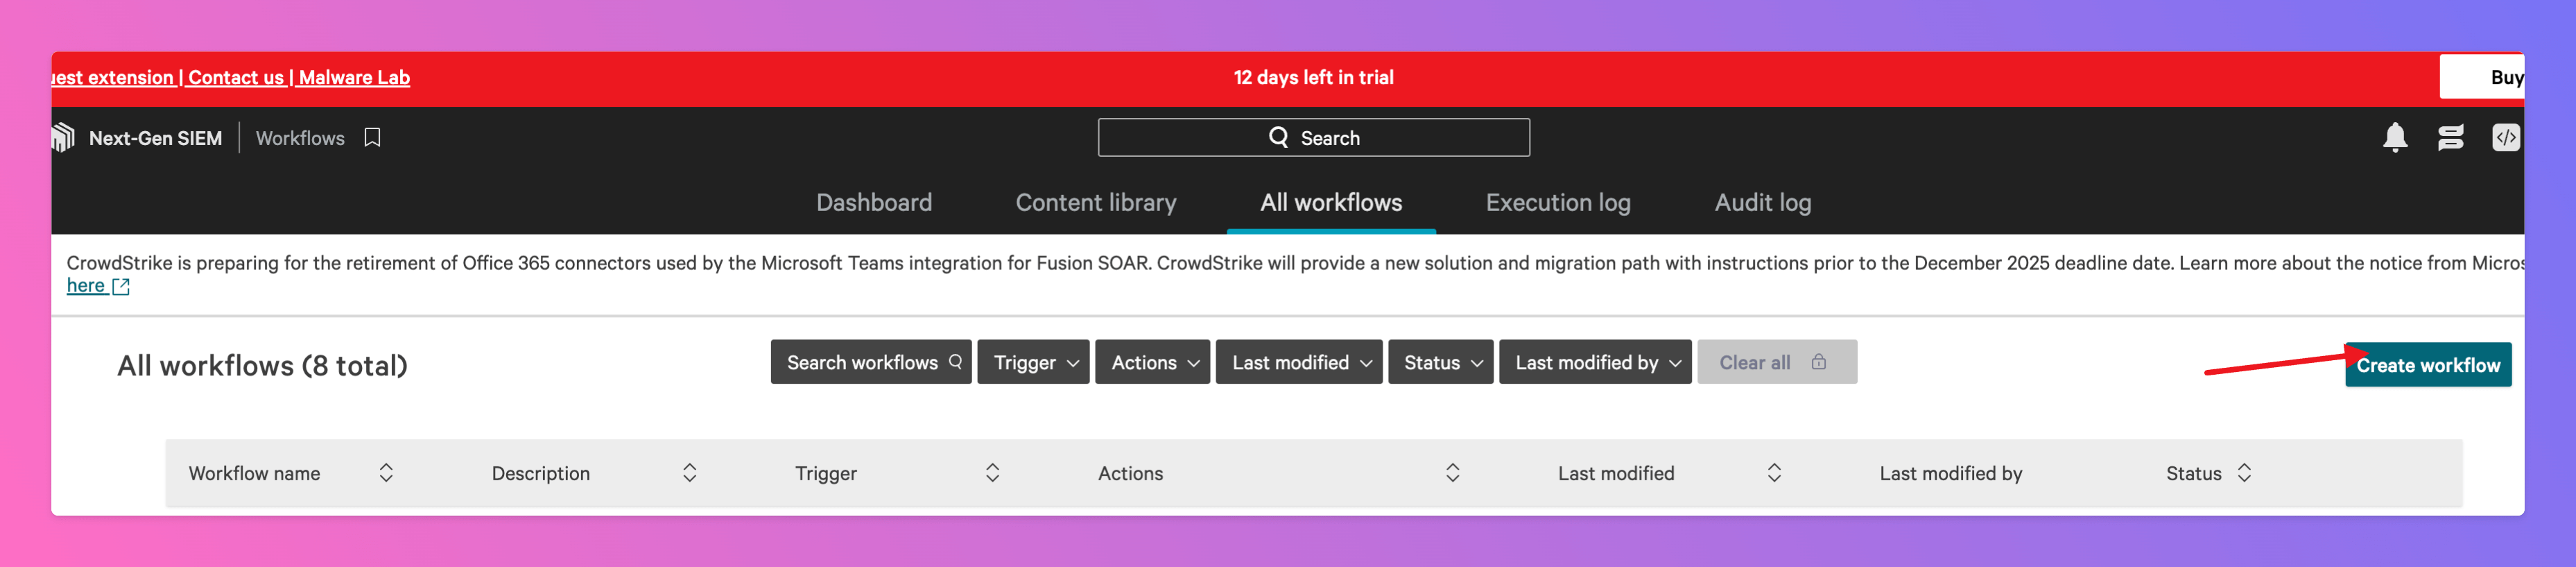
Workflows

Create workflow
- Select
Create workflow from scratch - Click
Next

- open the
Endpoint securitysection - and select
Alert/Detection. This selection differs from the worflow we will create later to update incidents that already got created
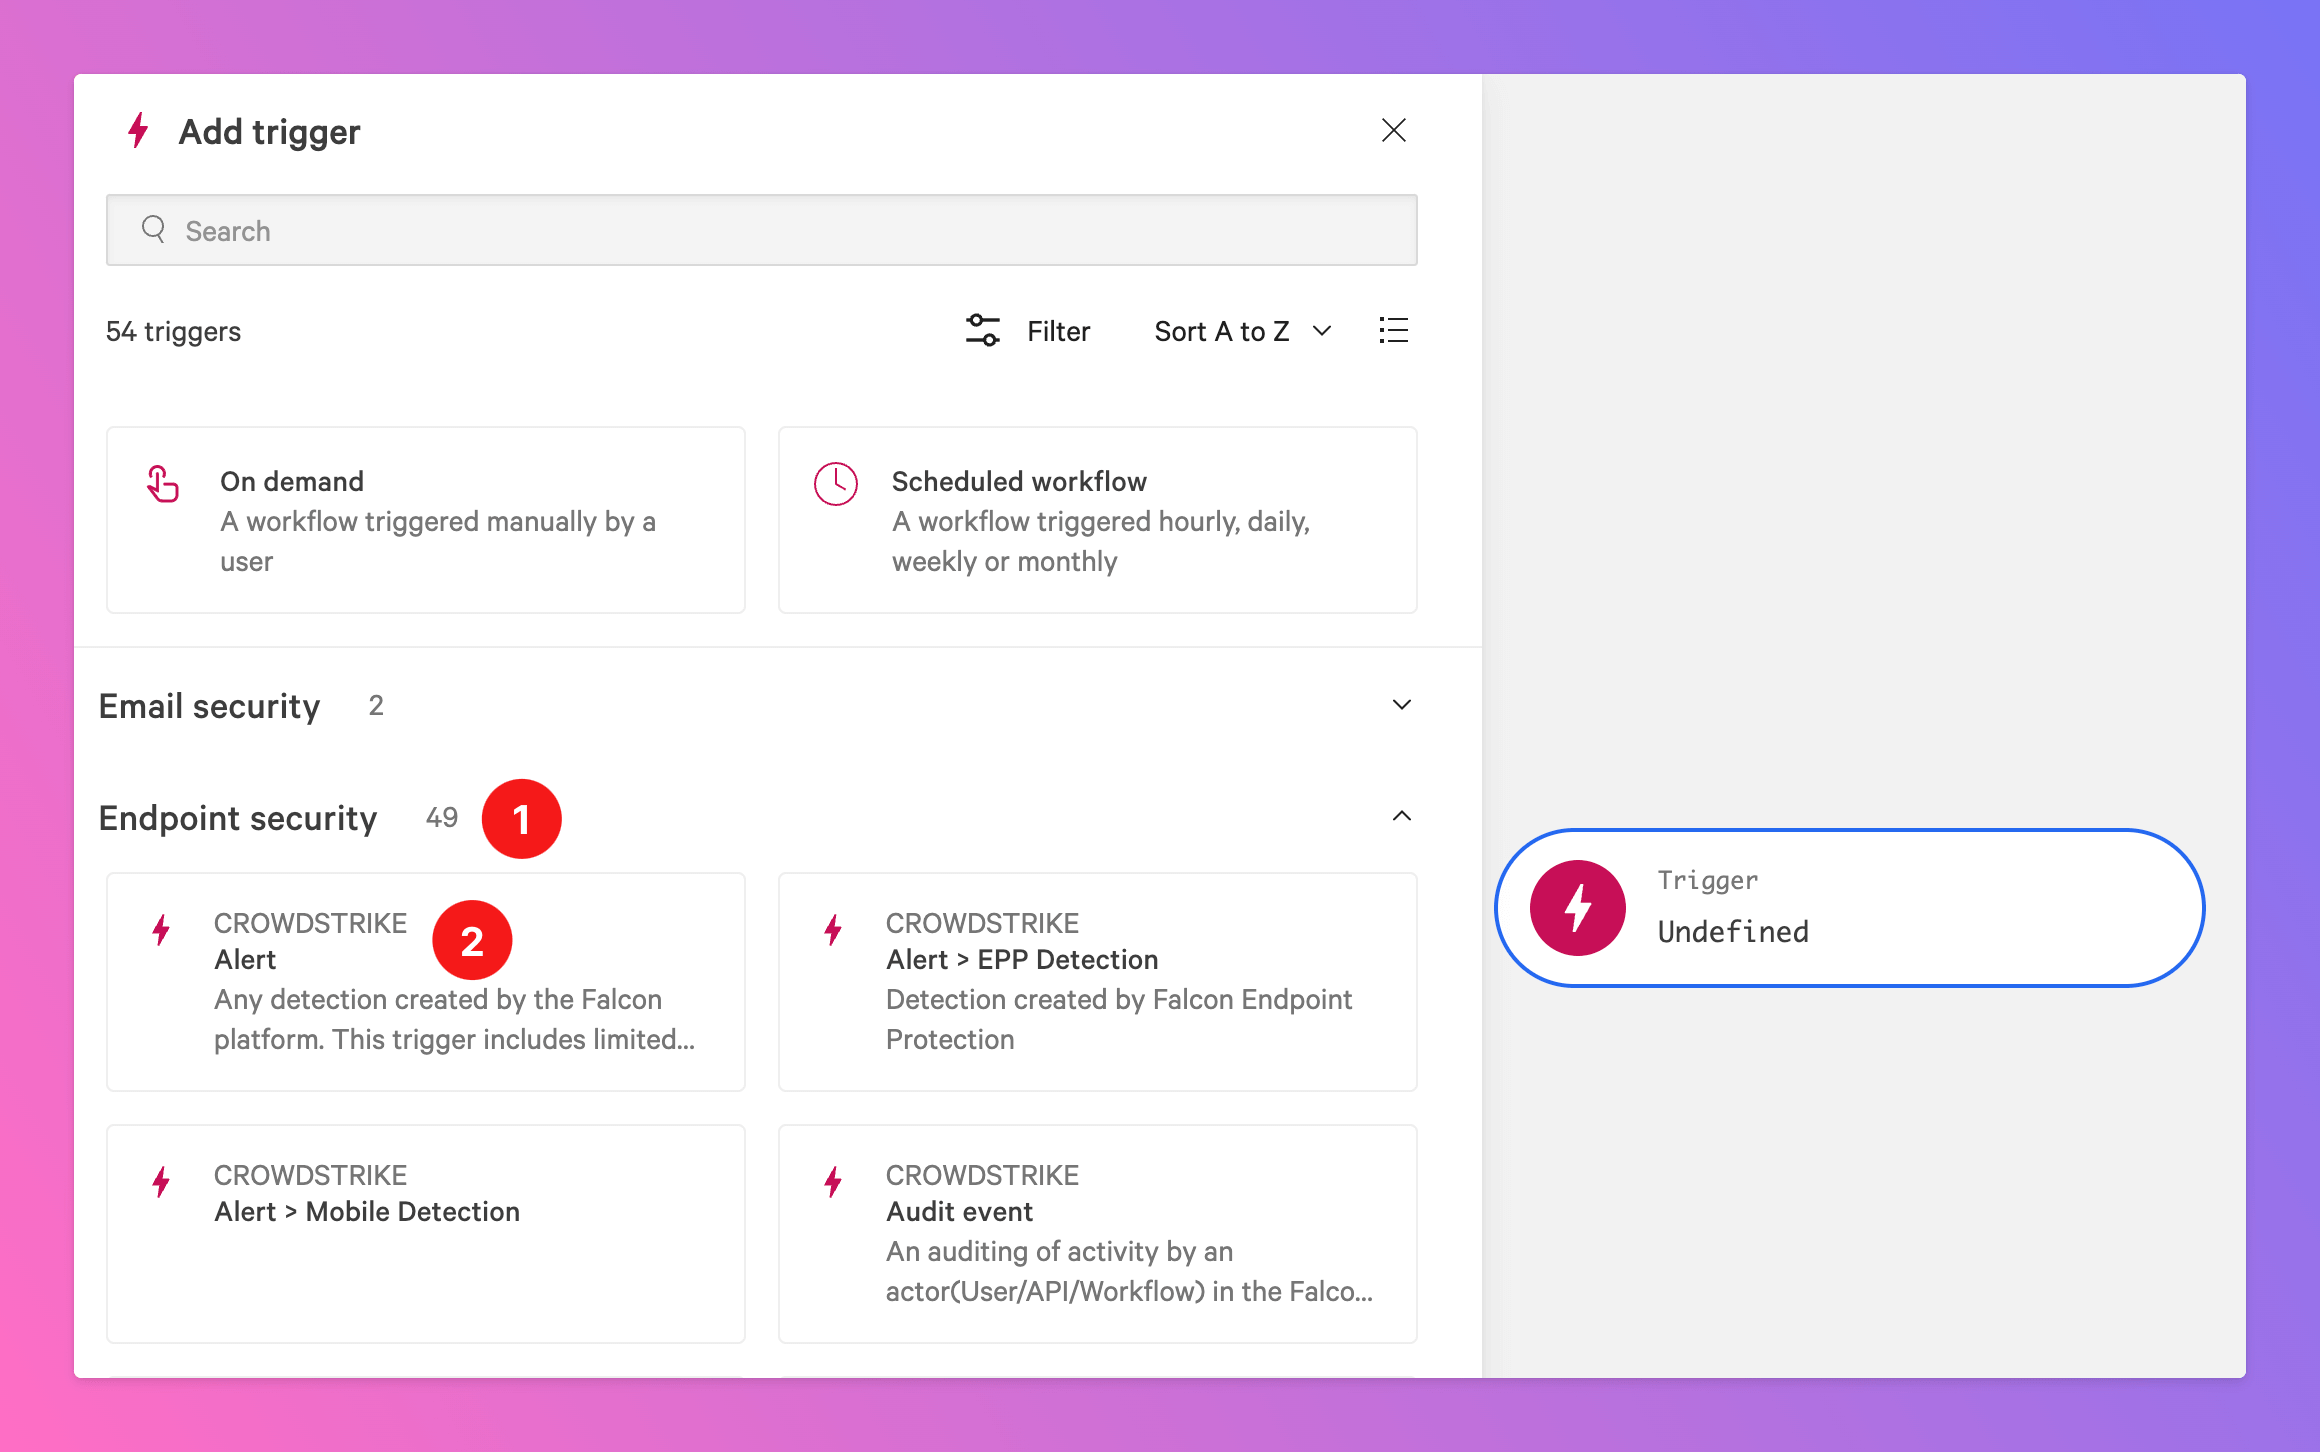
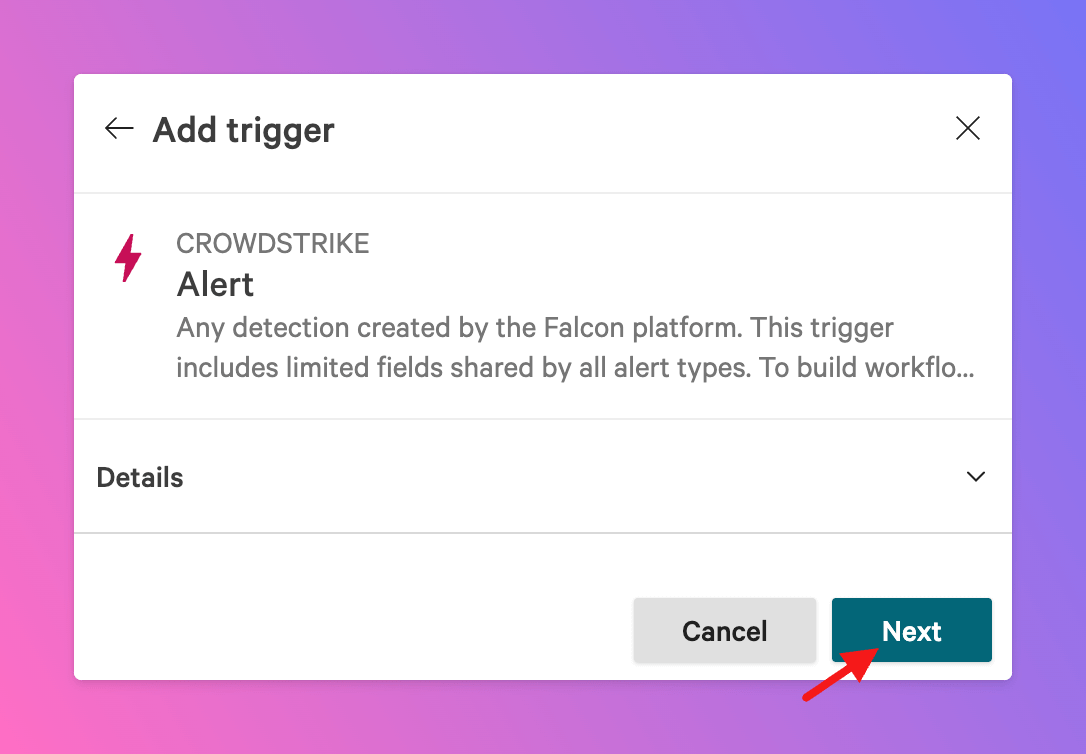
- After selecting
Alert/DetectionclickNext.
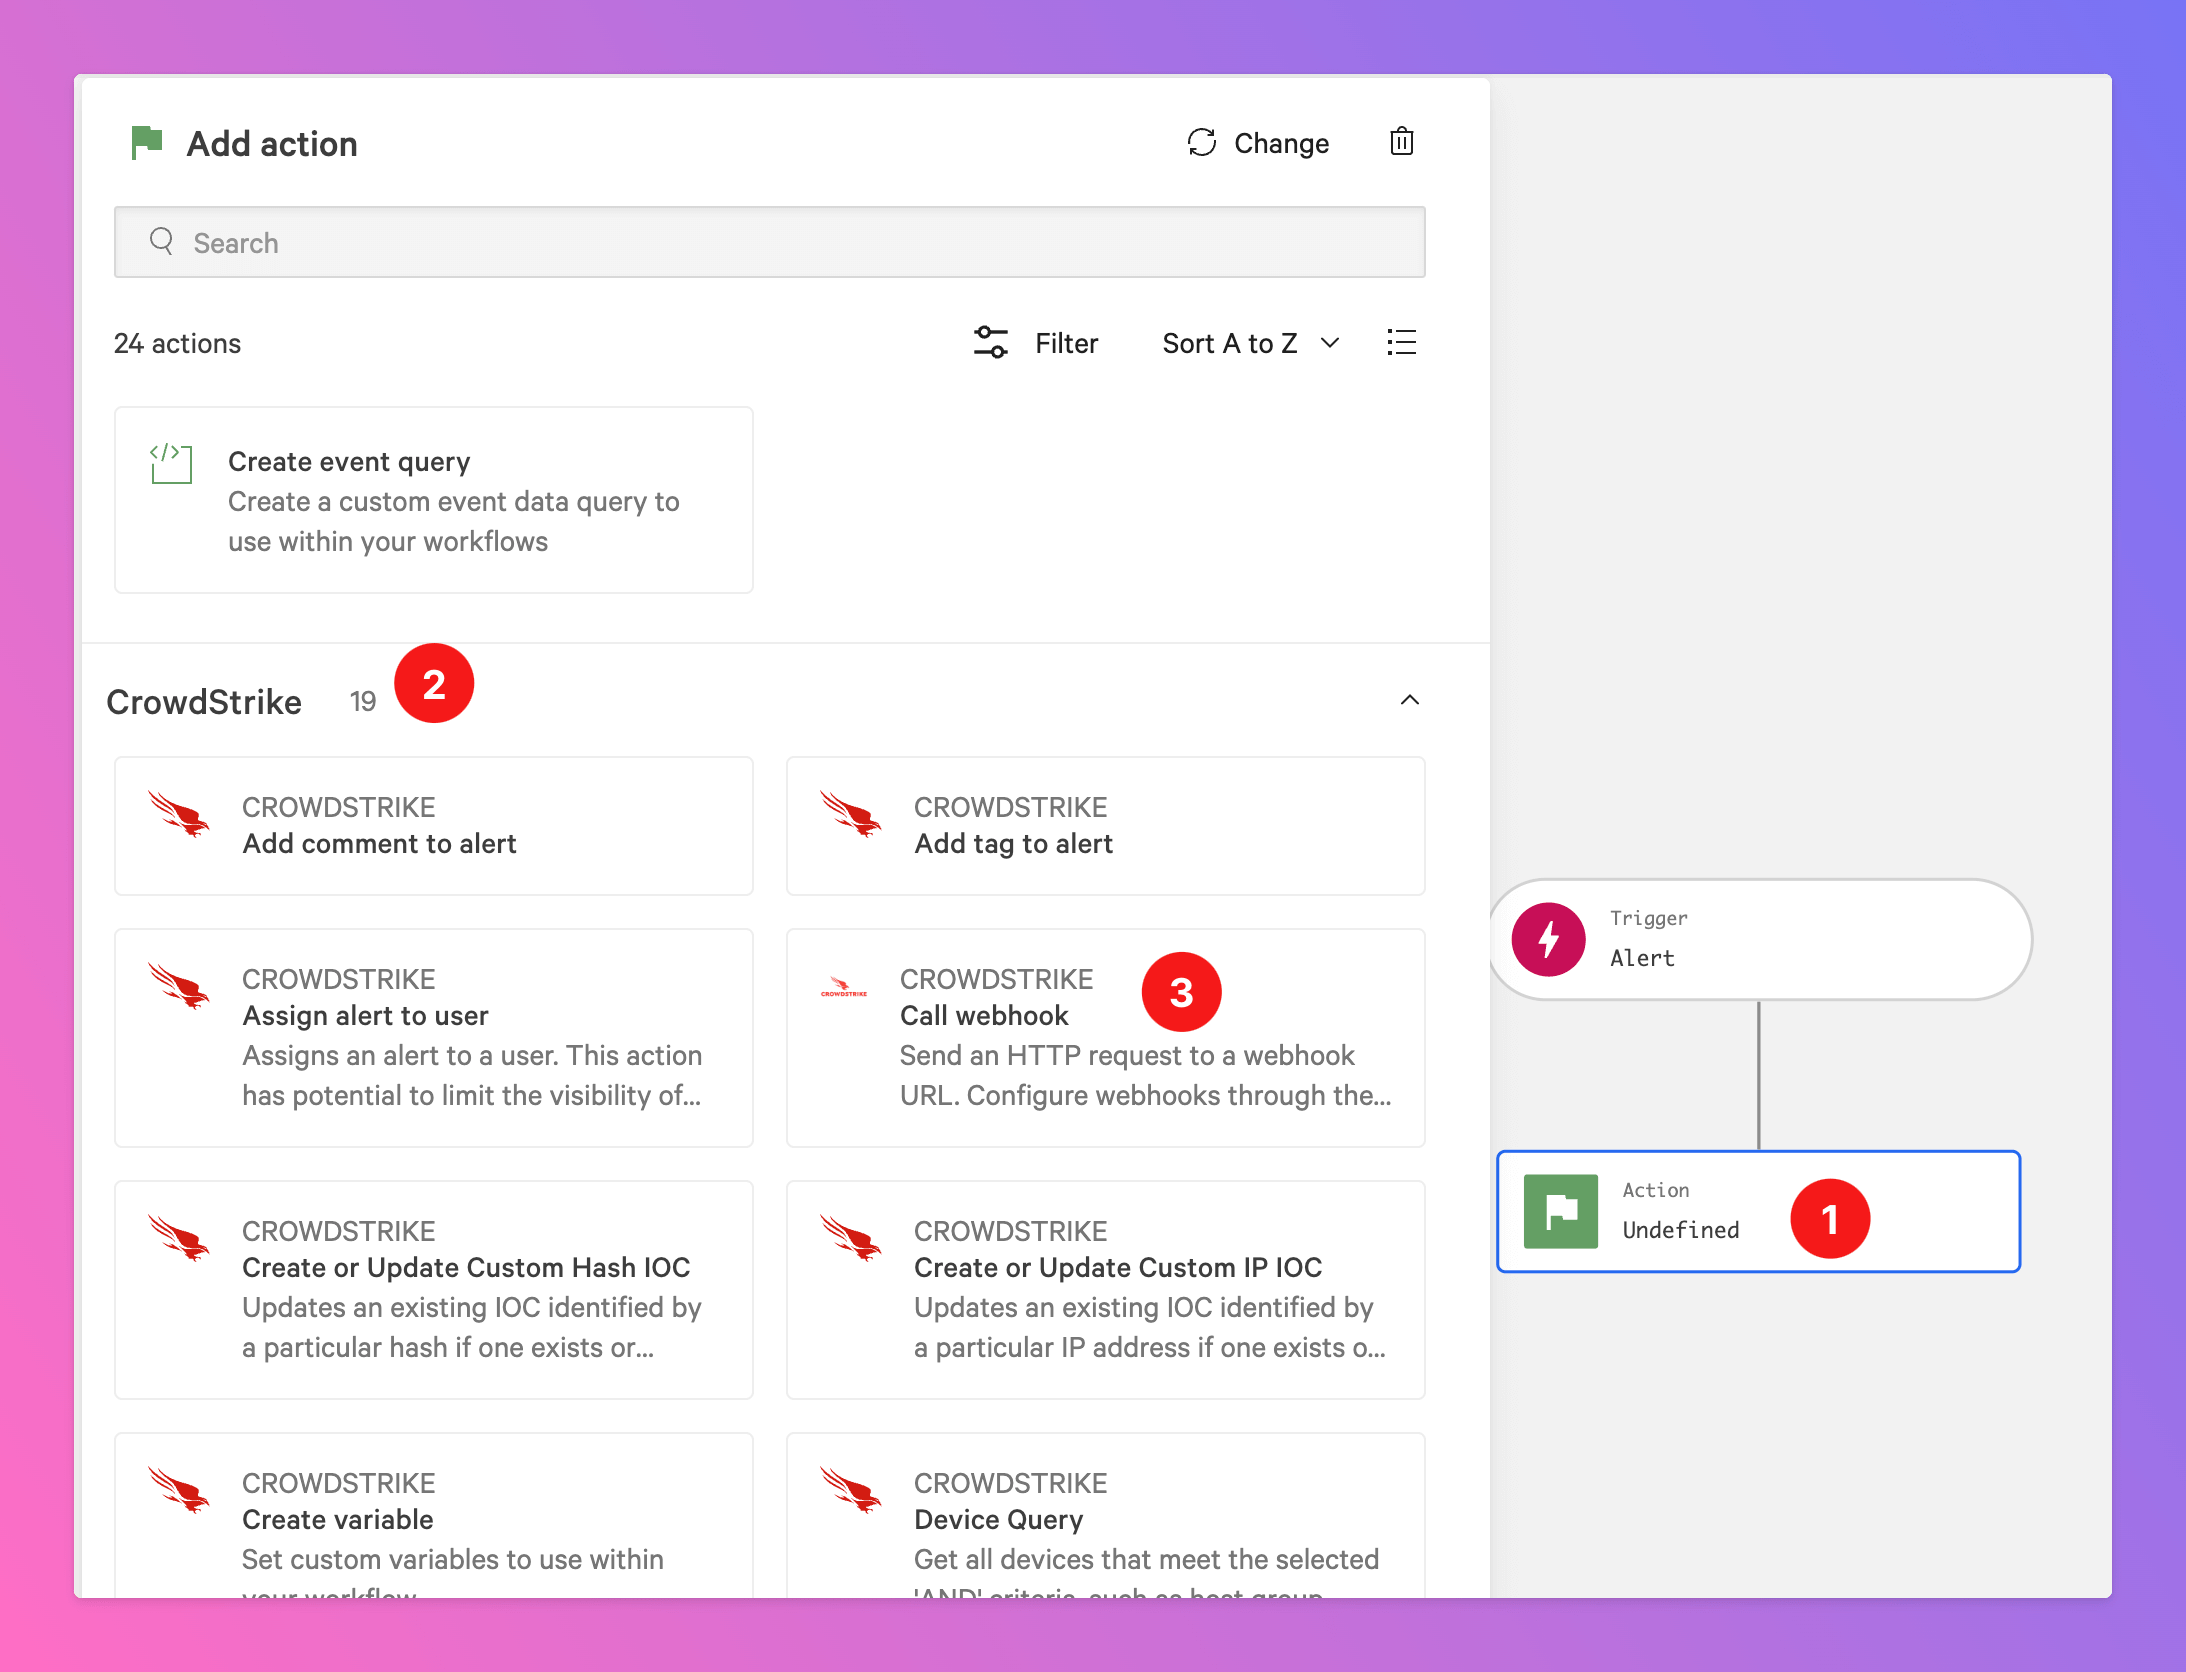
- Now, we need to add an
Actionto the triggering alert / detection. - Select the
CrowdStrikesection. - Select
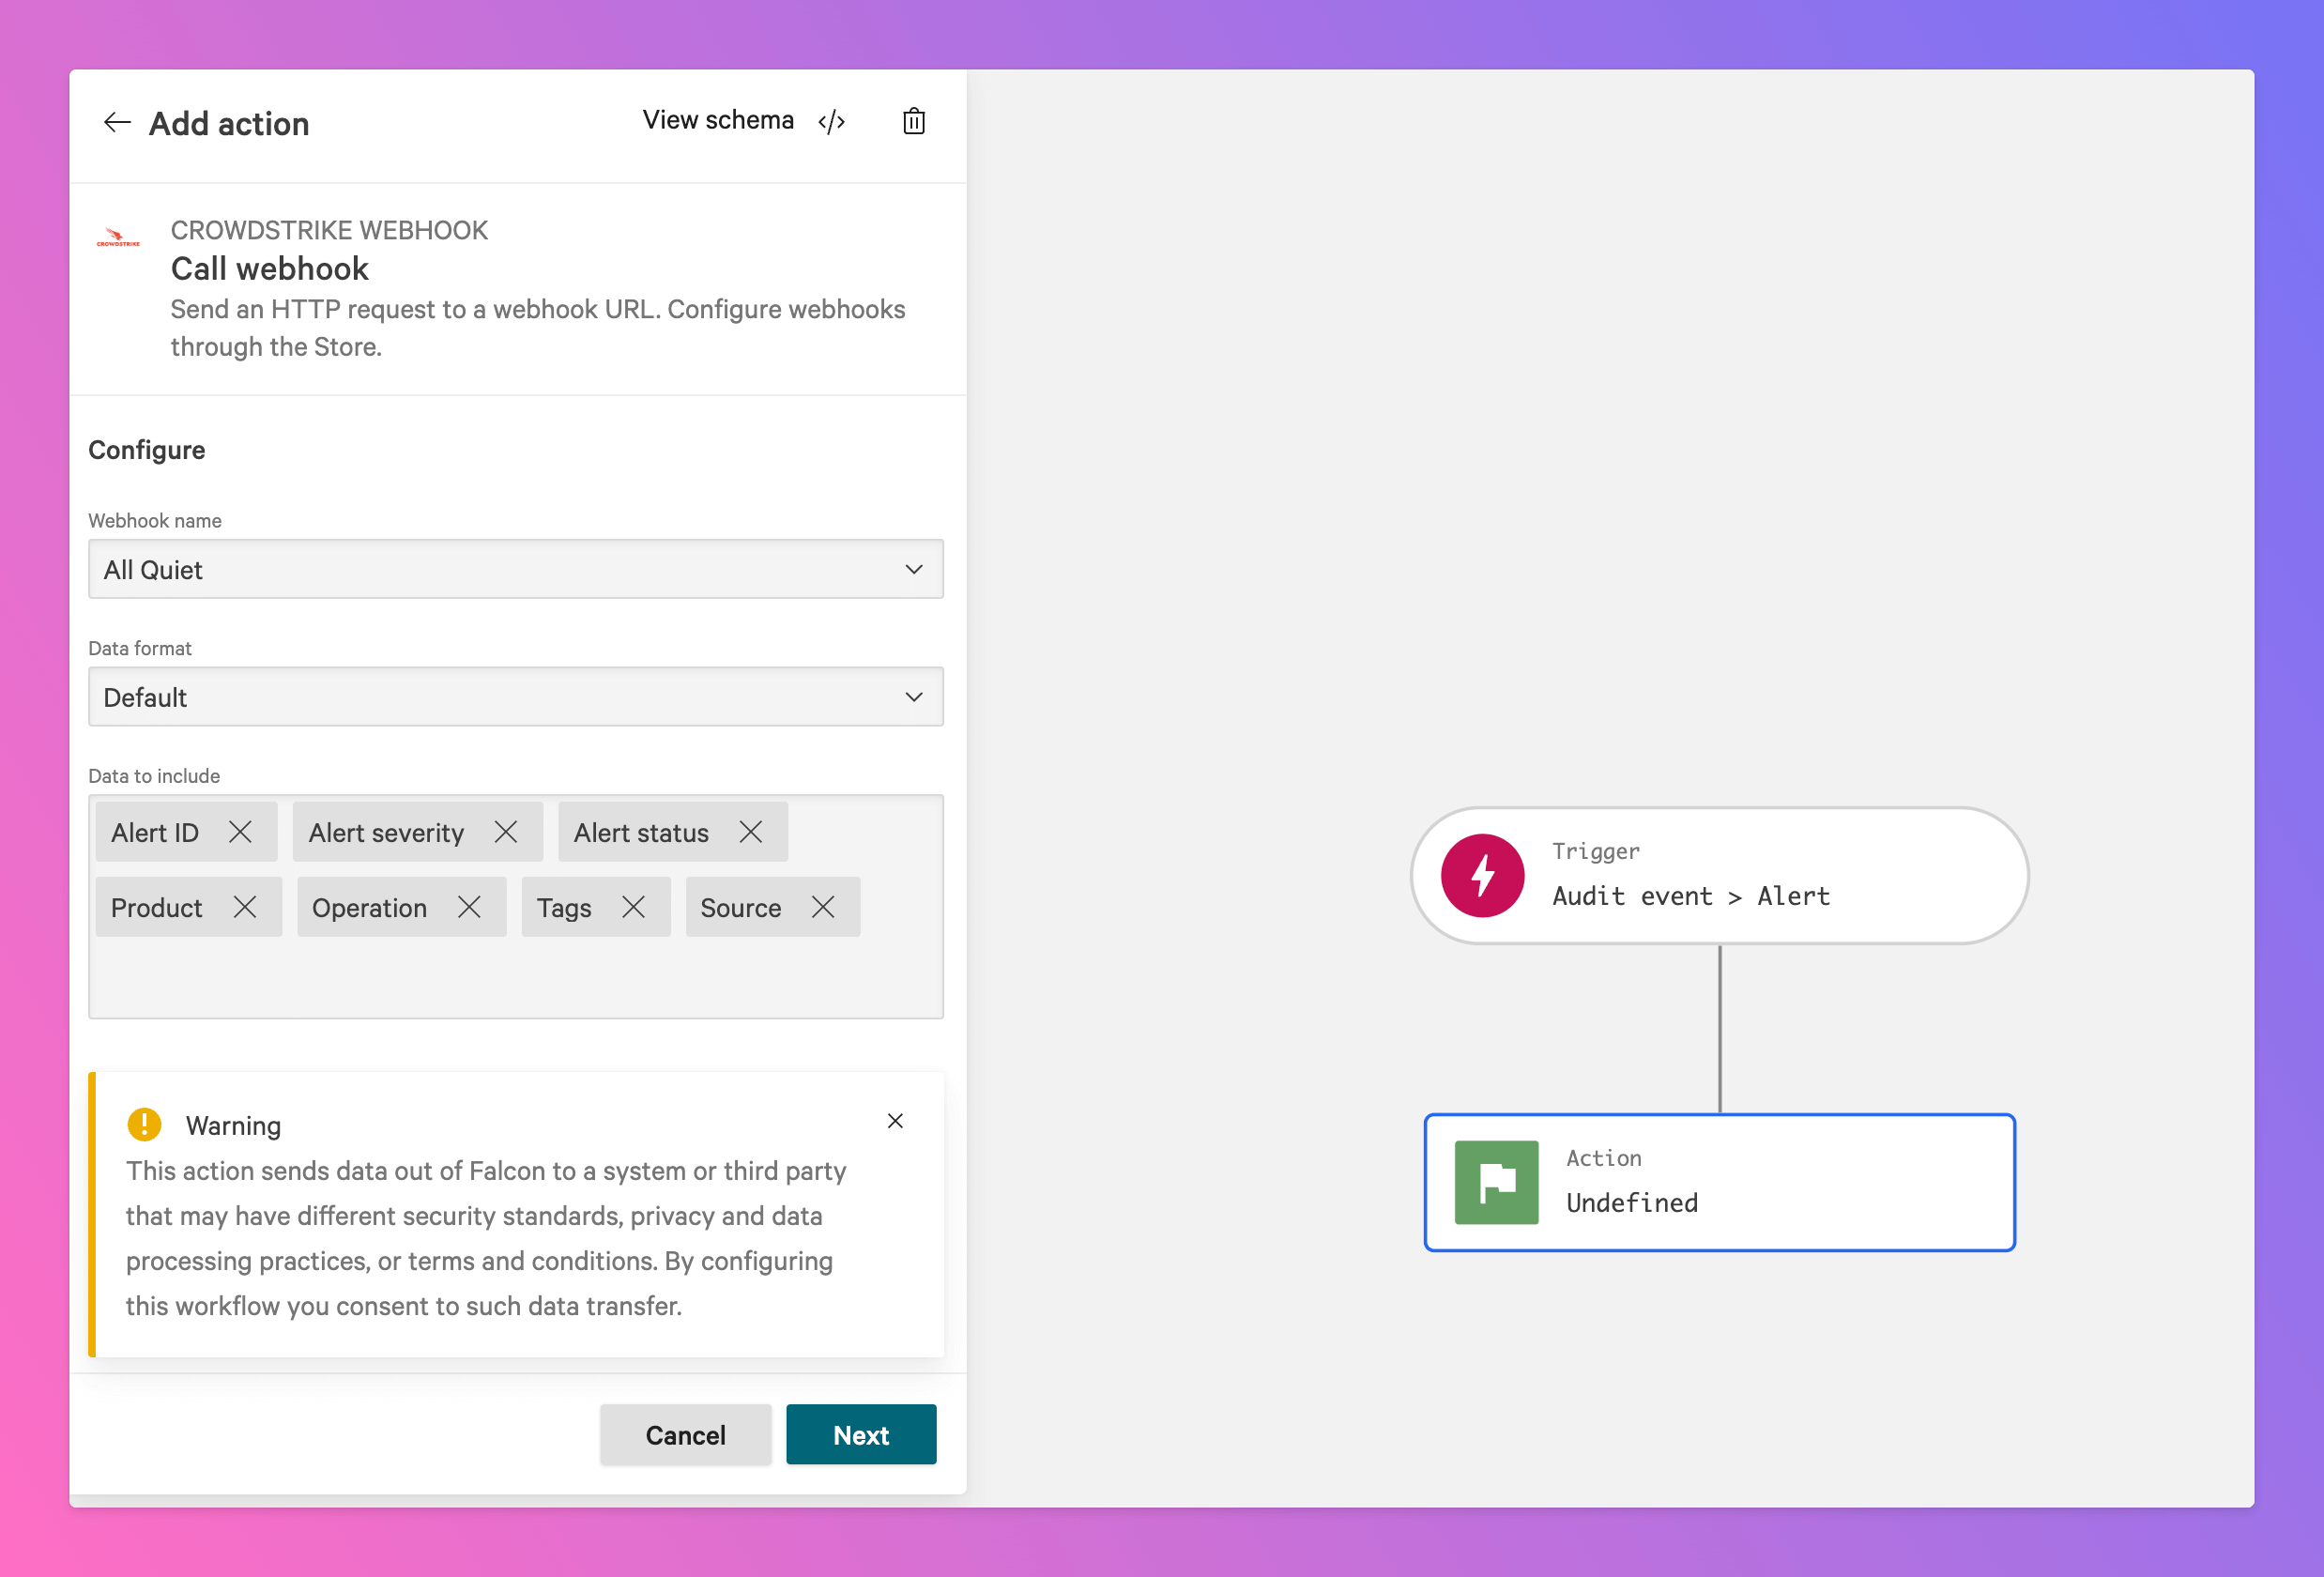
Call webhook.
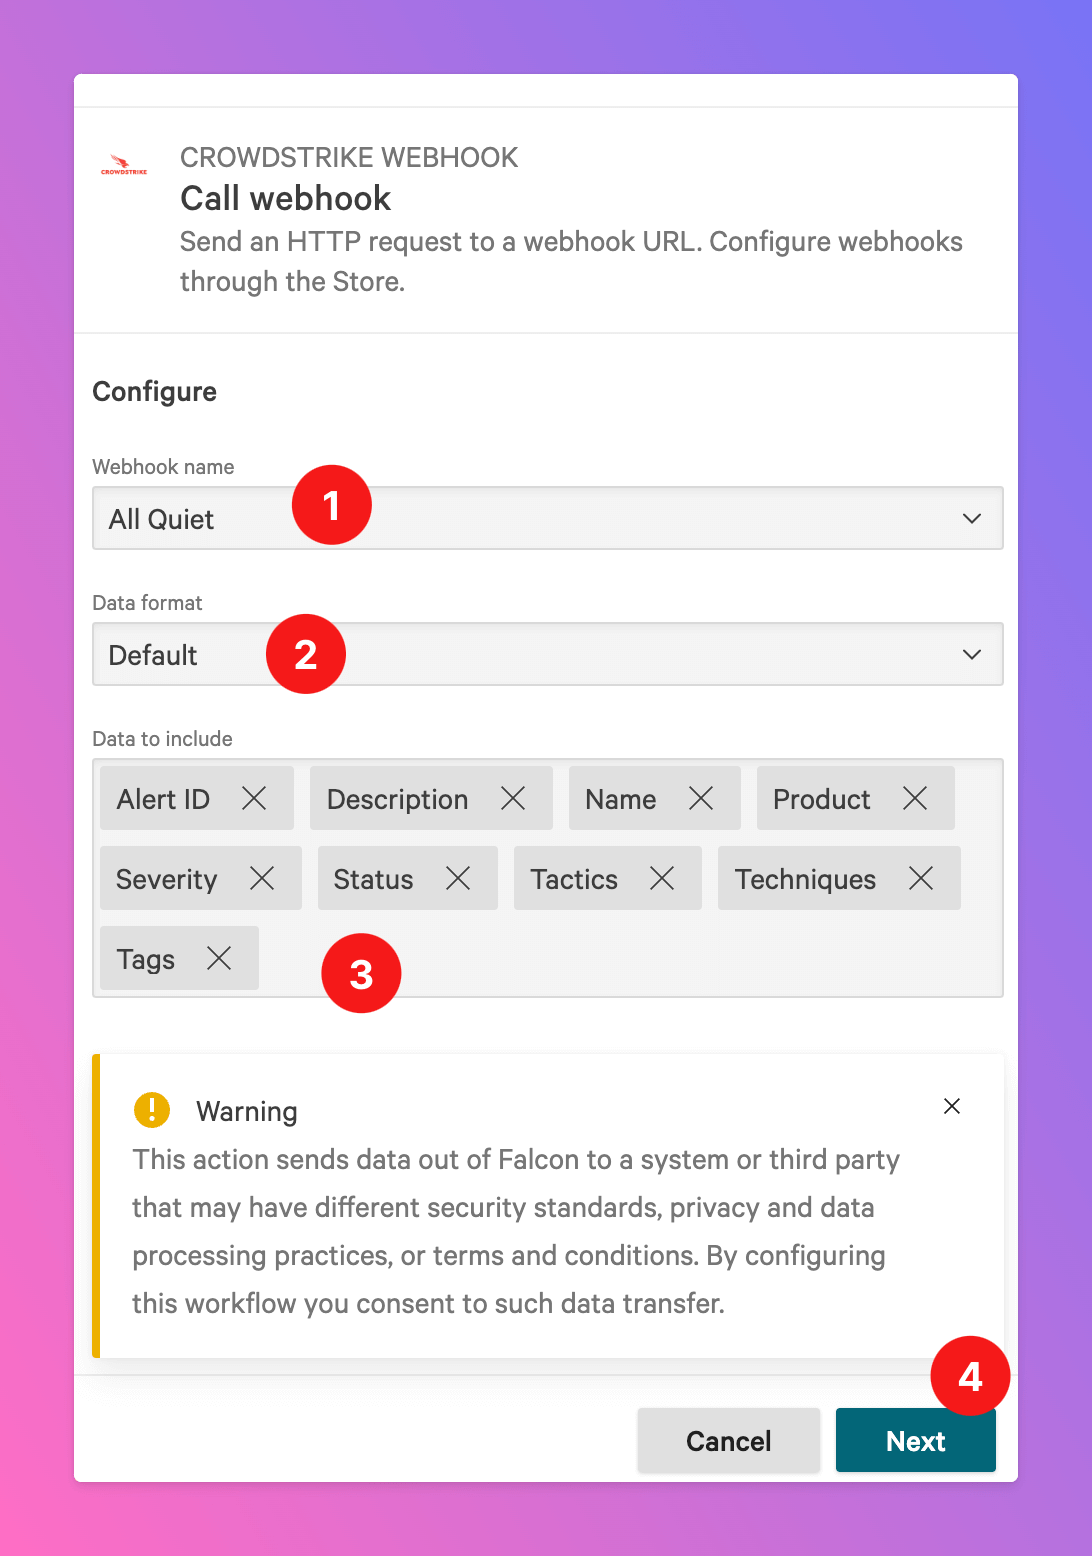
Call webhook action.
- As Webhook, select the
All QuietWebhook we configured in the previous step. - For Data format, select
Default. - As Data to include, select all
Alertobjects / allDetectionobjects from the dropdown and add them. - Click
Next.
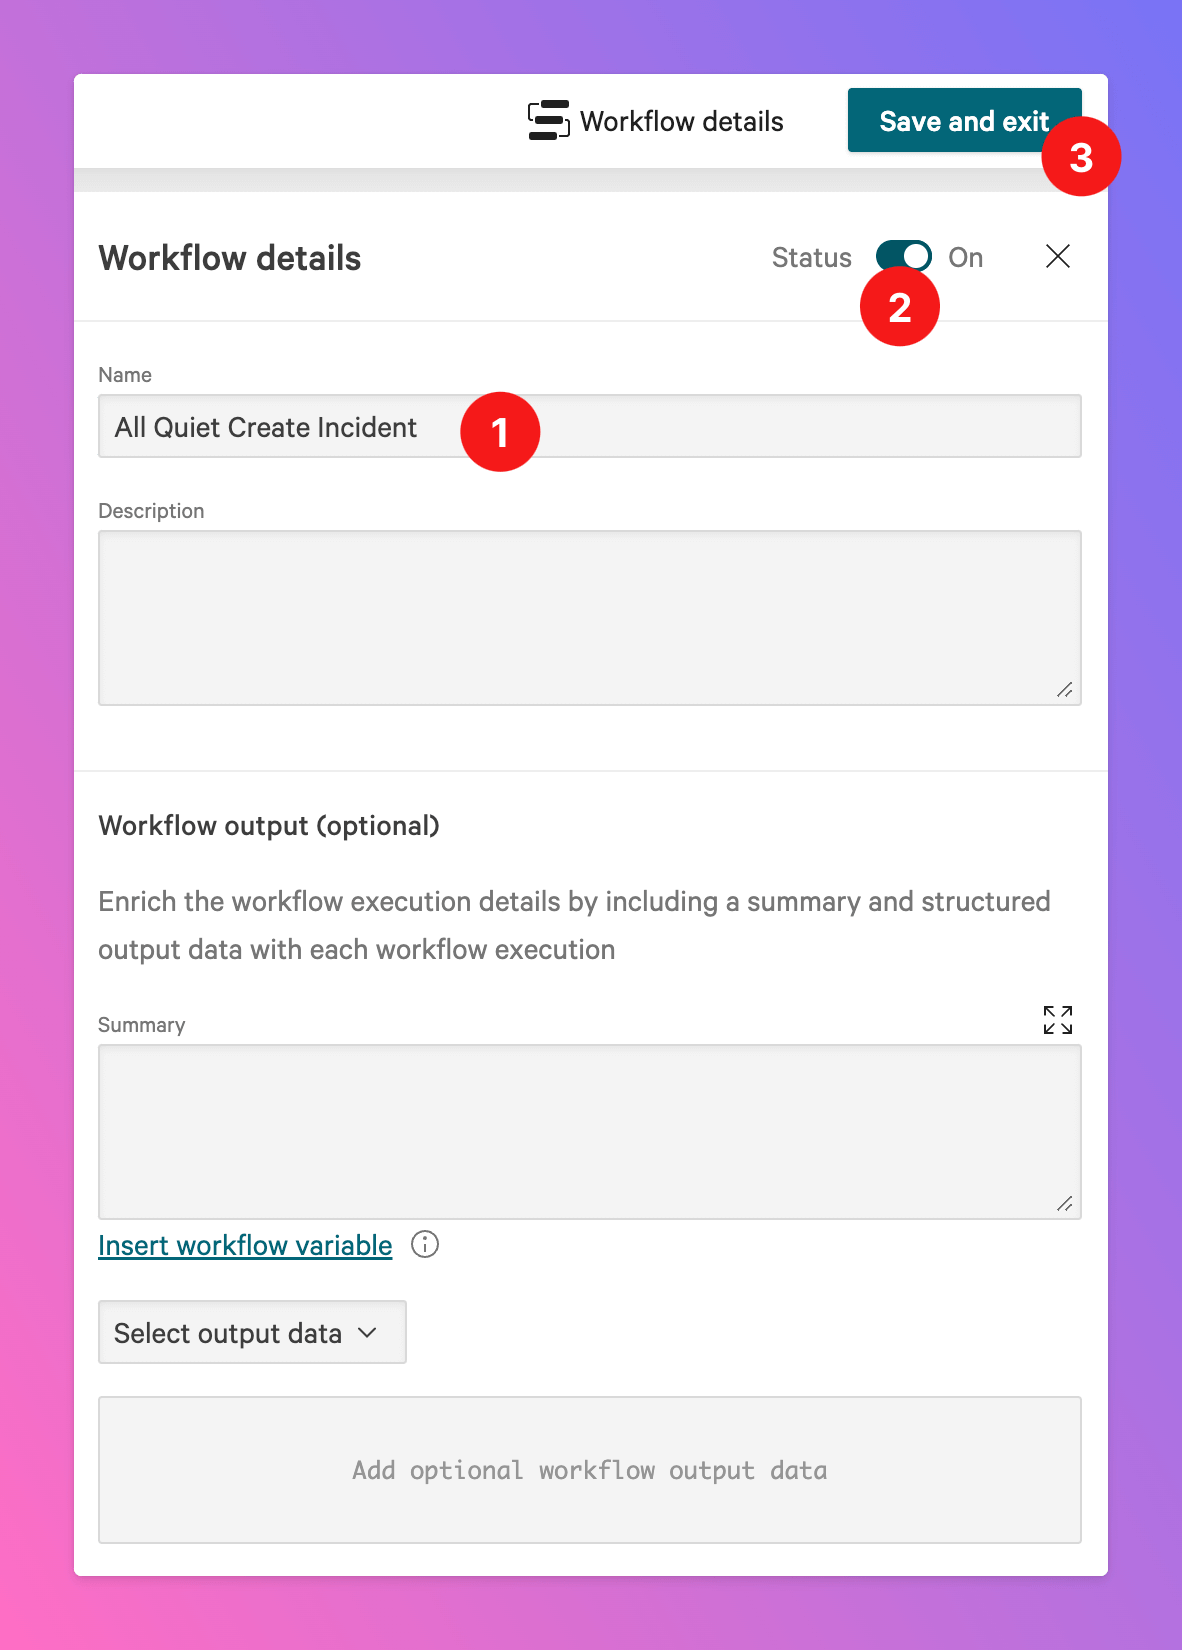
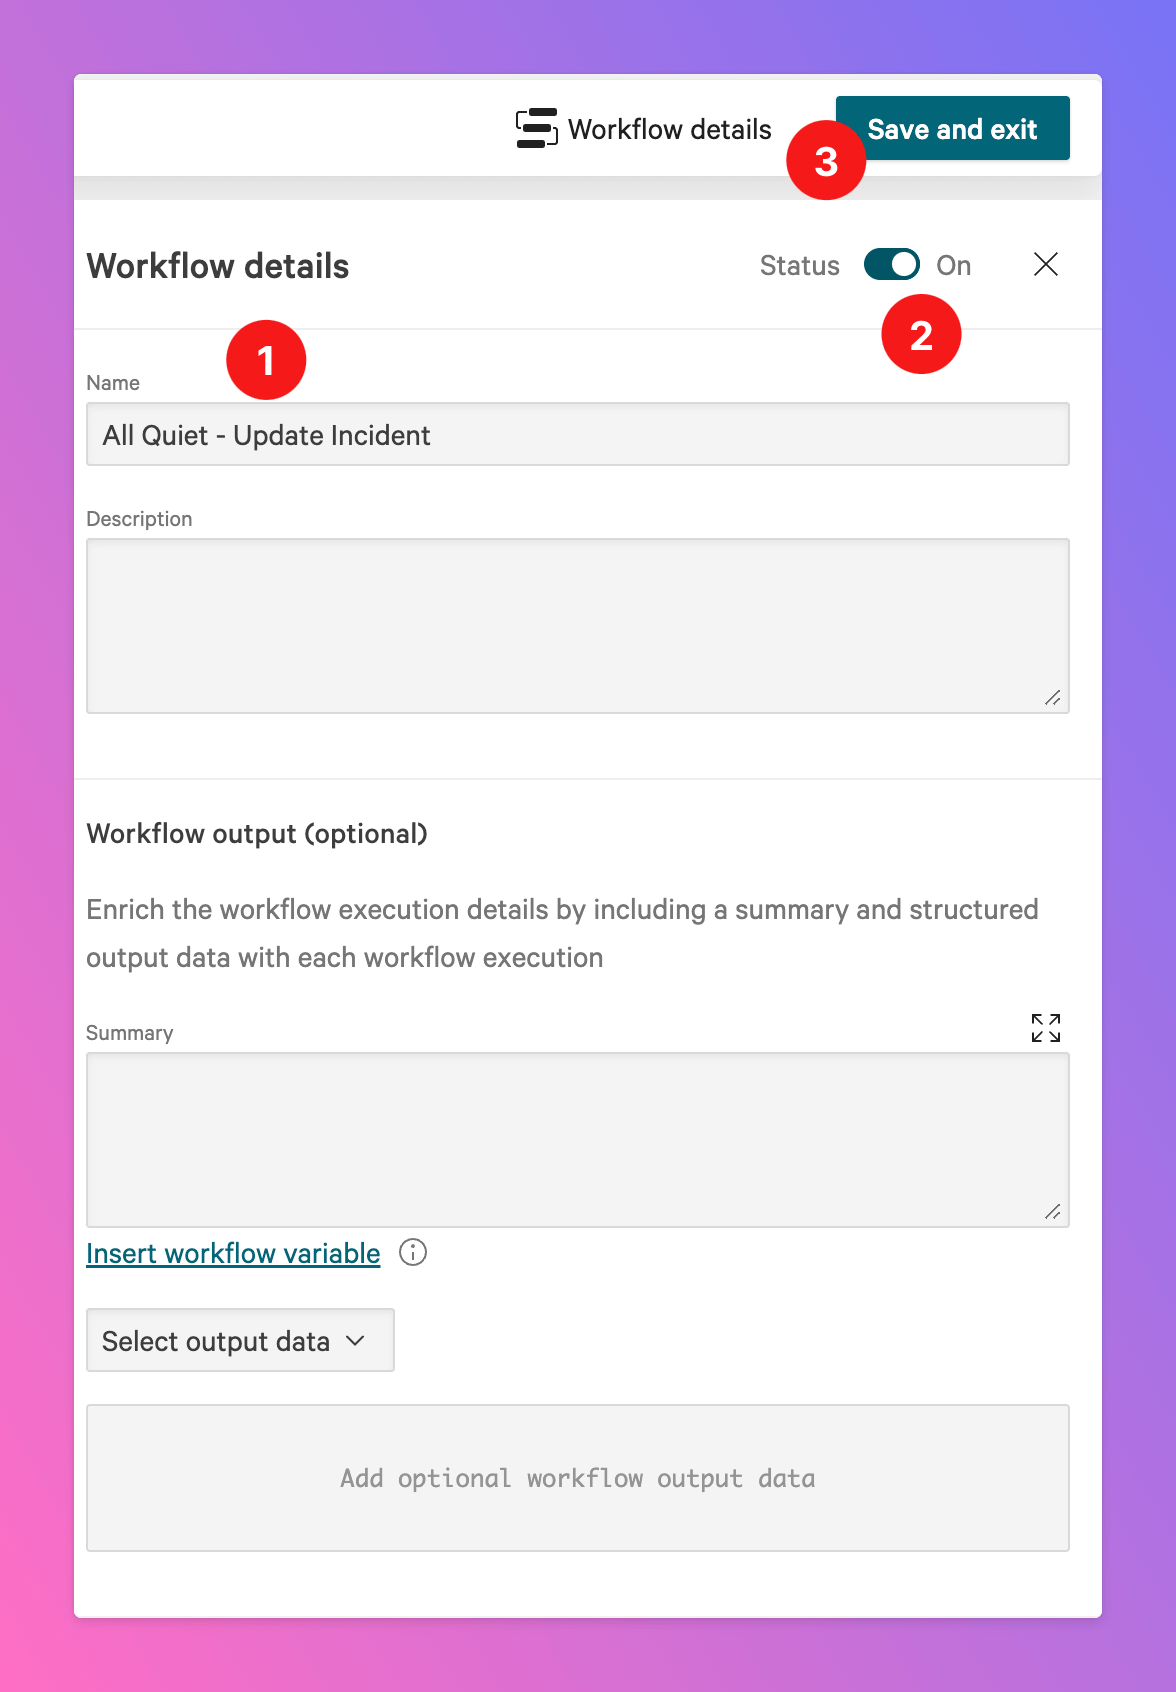
Save and exit the workflow.
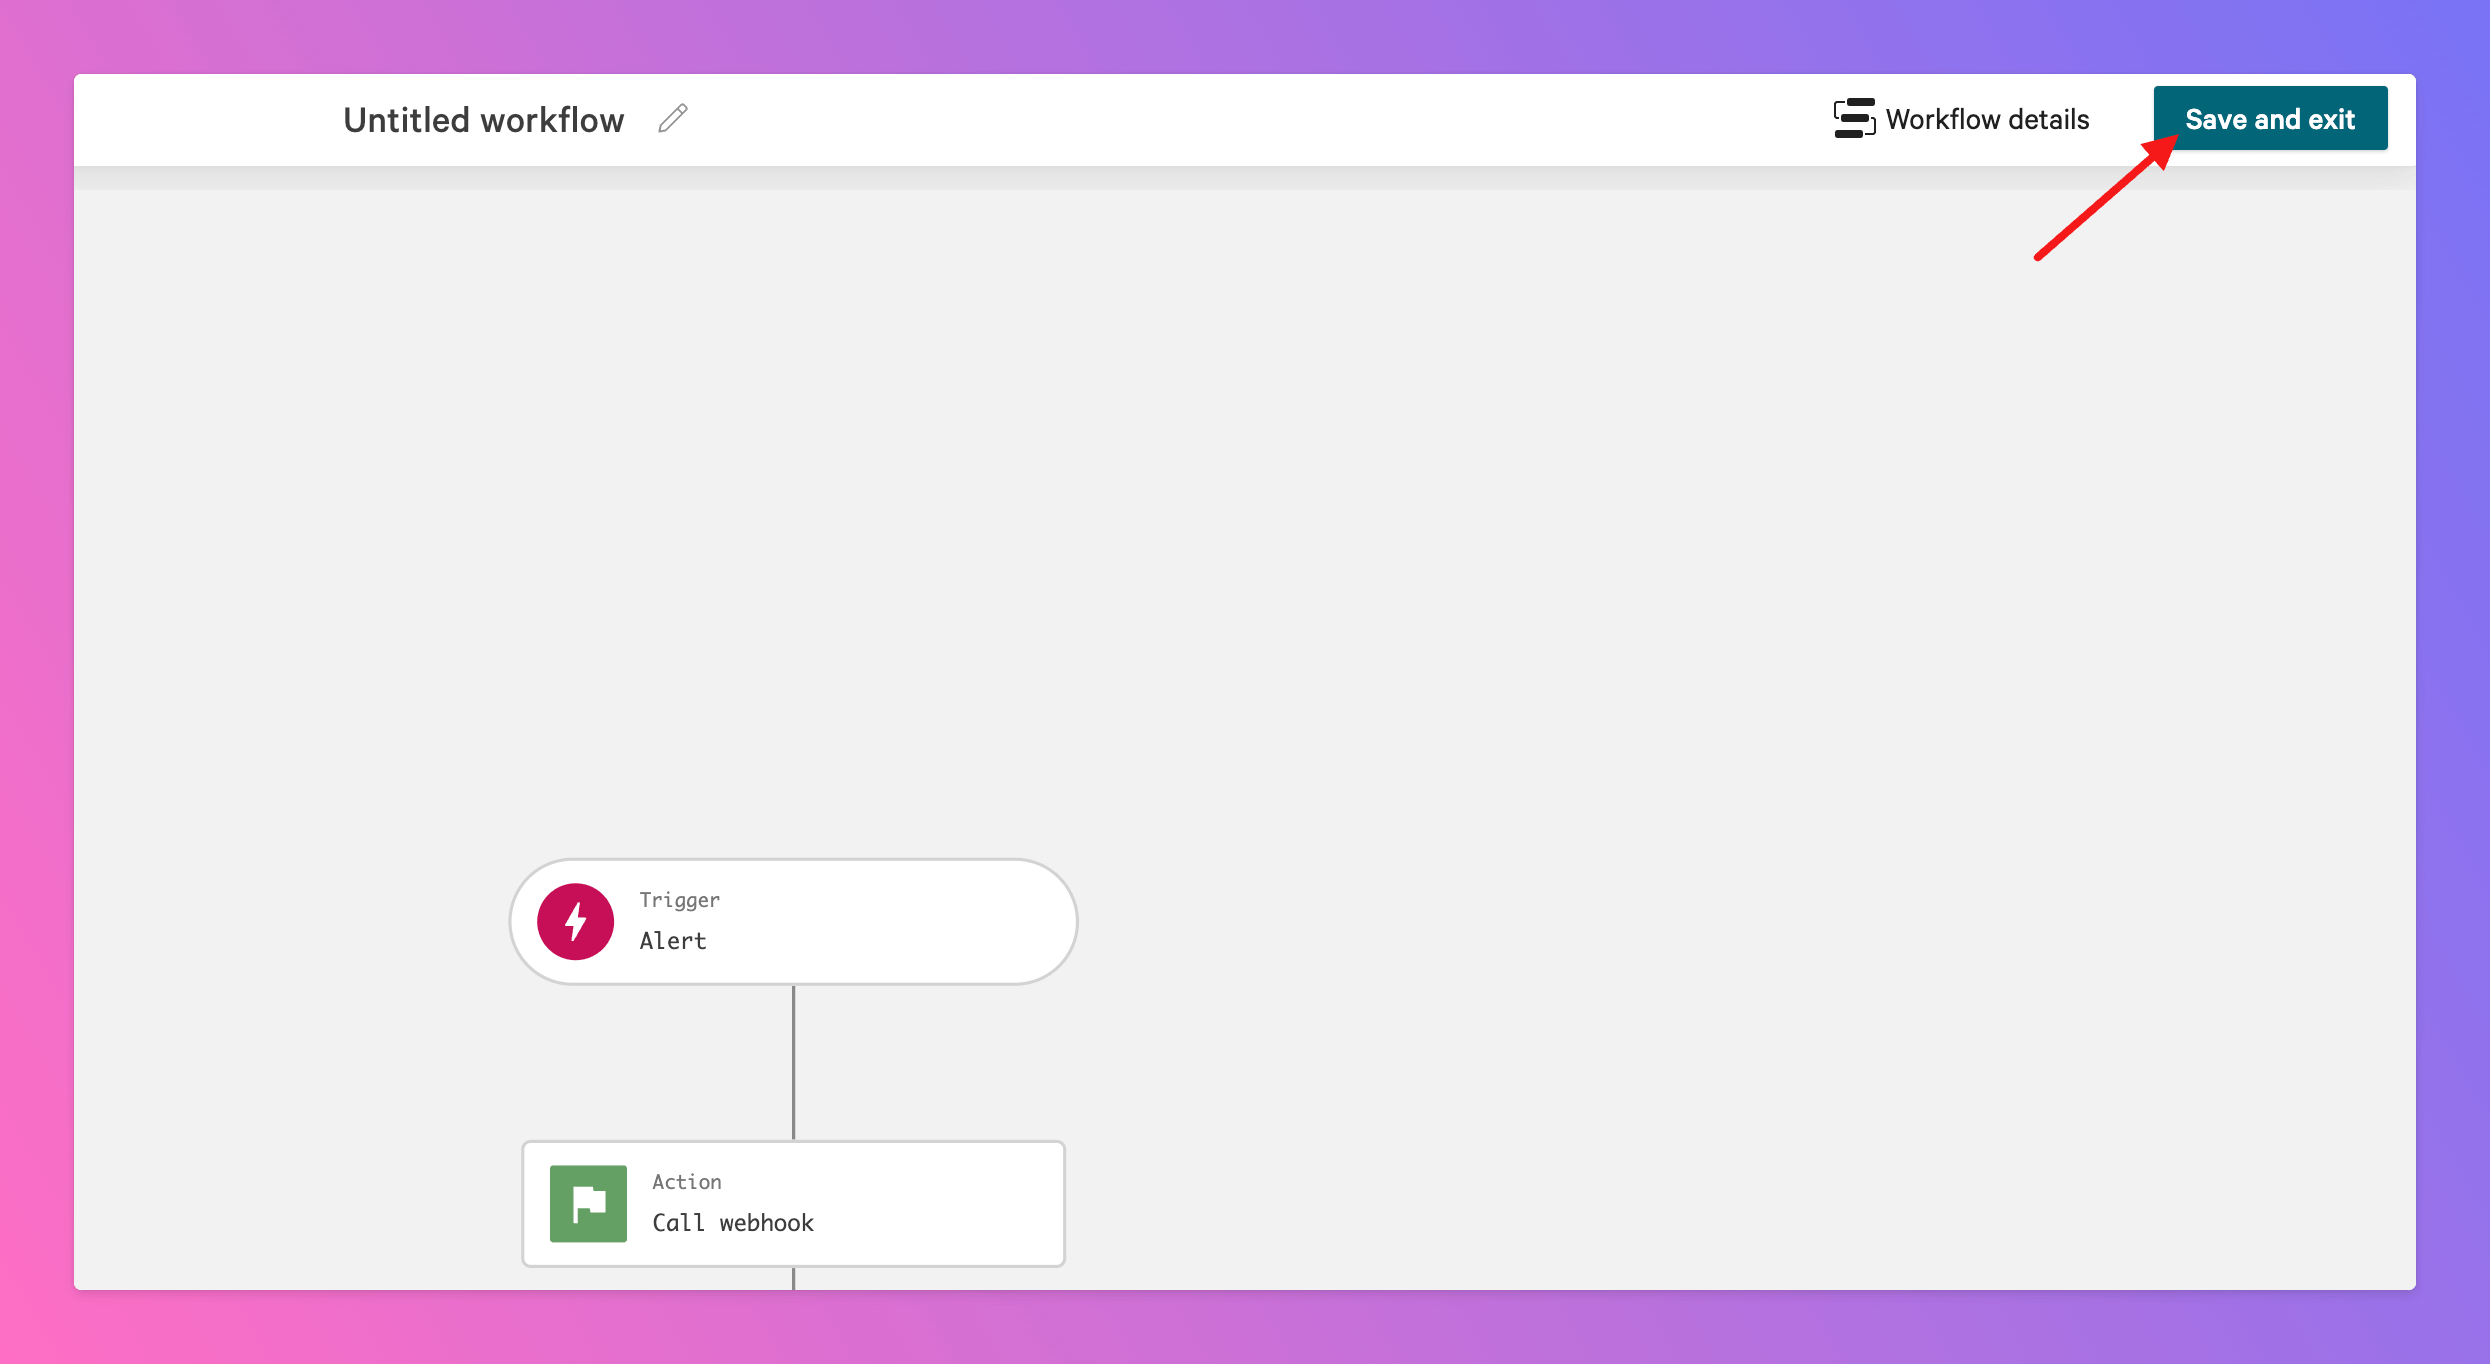
save and exit,
- Give your worflow a name, like
All Quiet Create Incident - Don’t forget to activate it.
- Confirm.
You’re now able to create All Quiet incidents from CrowdStrike. In order to being able to update - e.g resolve - them from CrowdStrike, we need to add an extra, pretty similar workflow in the next step.
Set up Workflow for Incident Updates
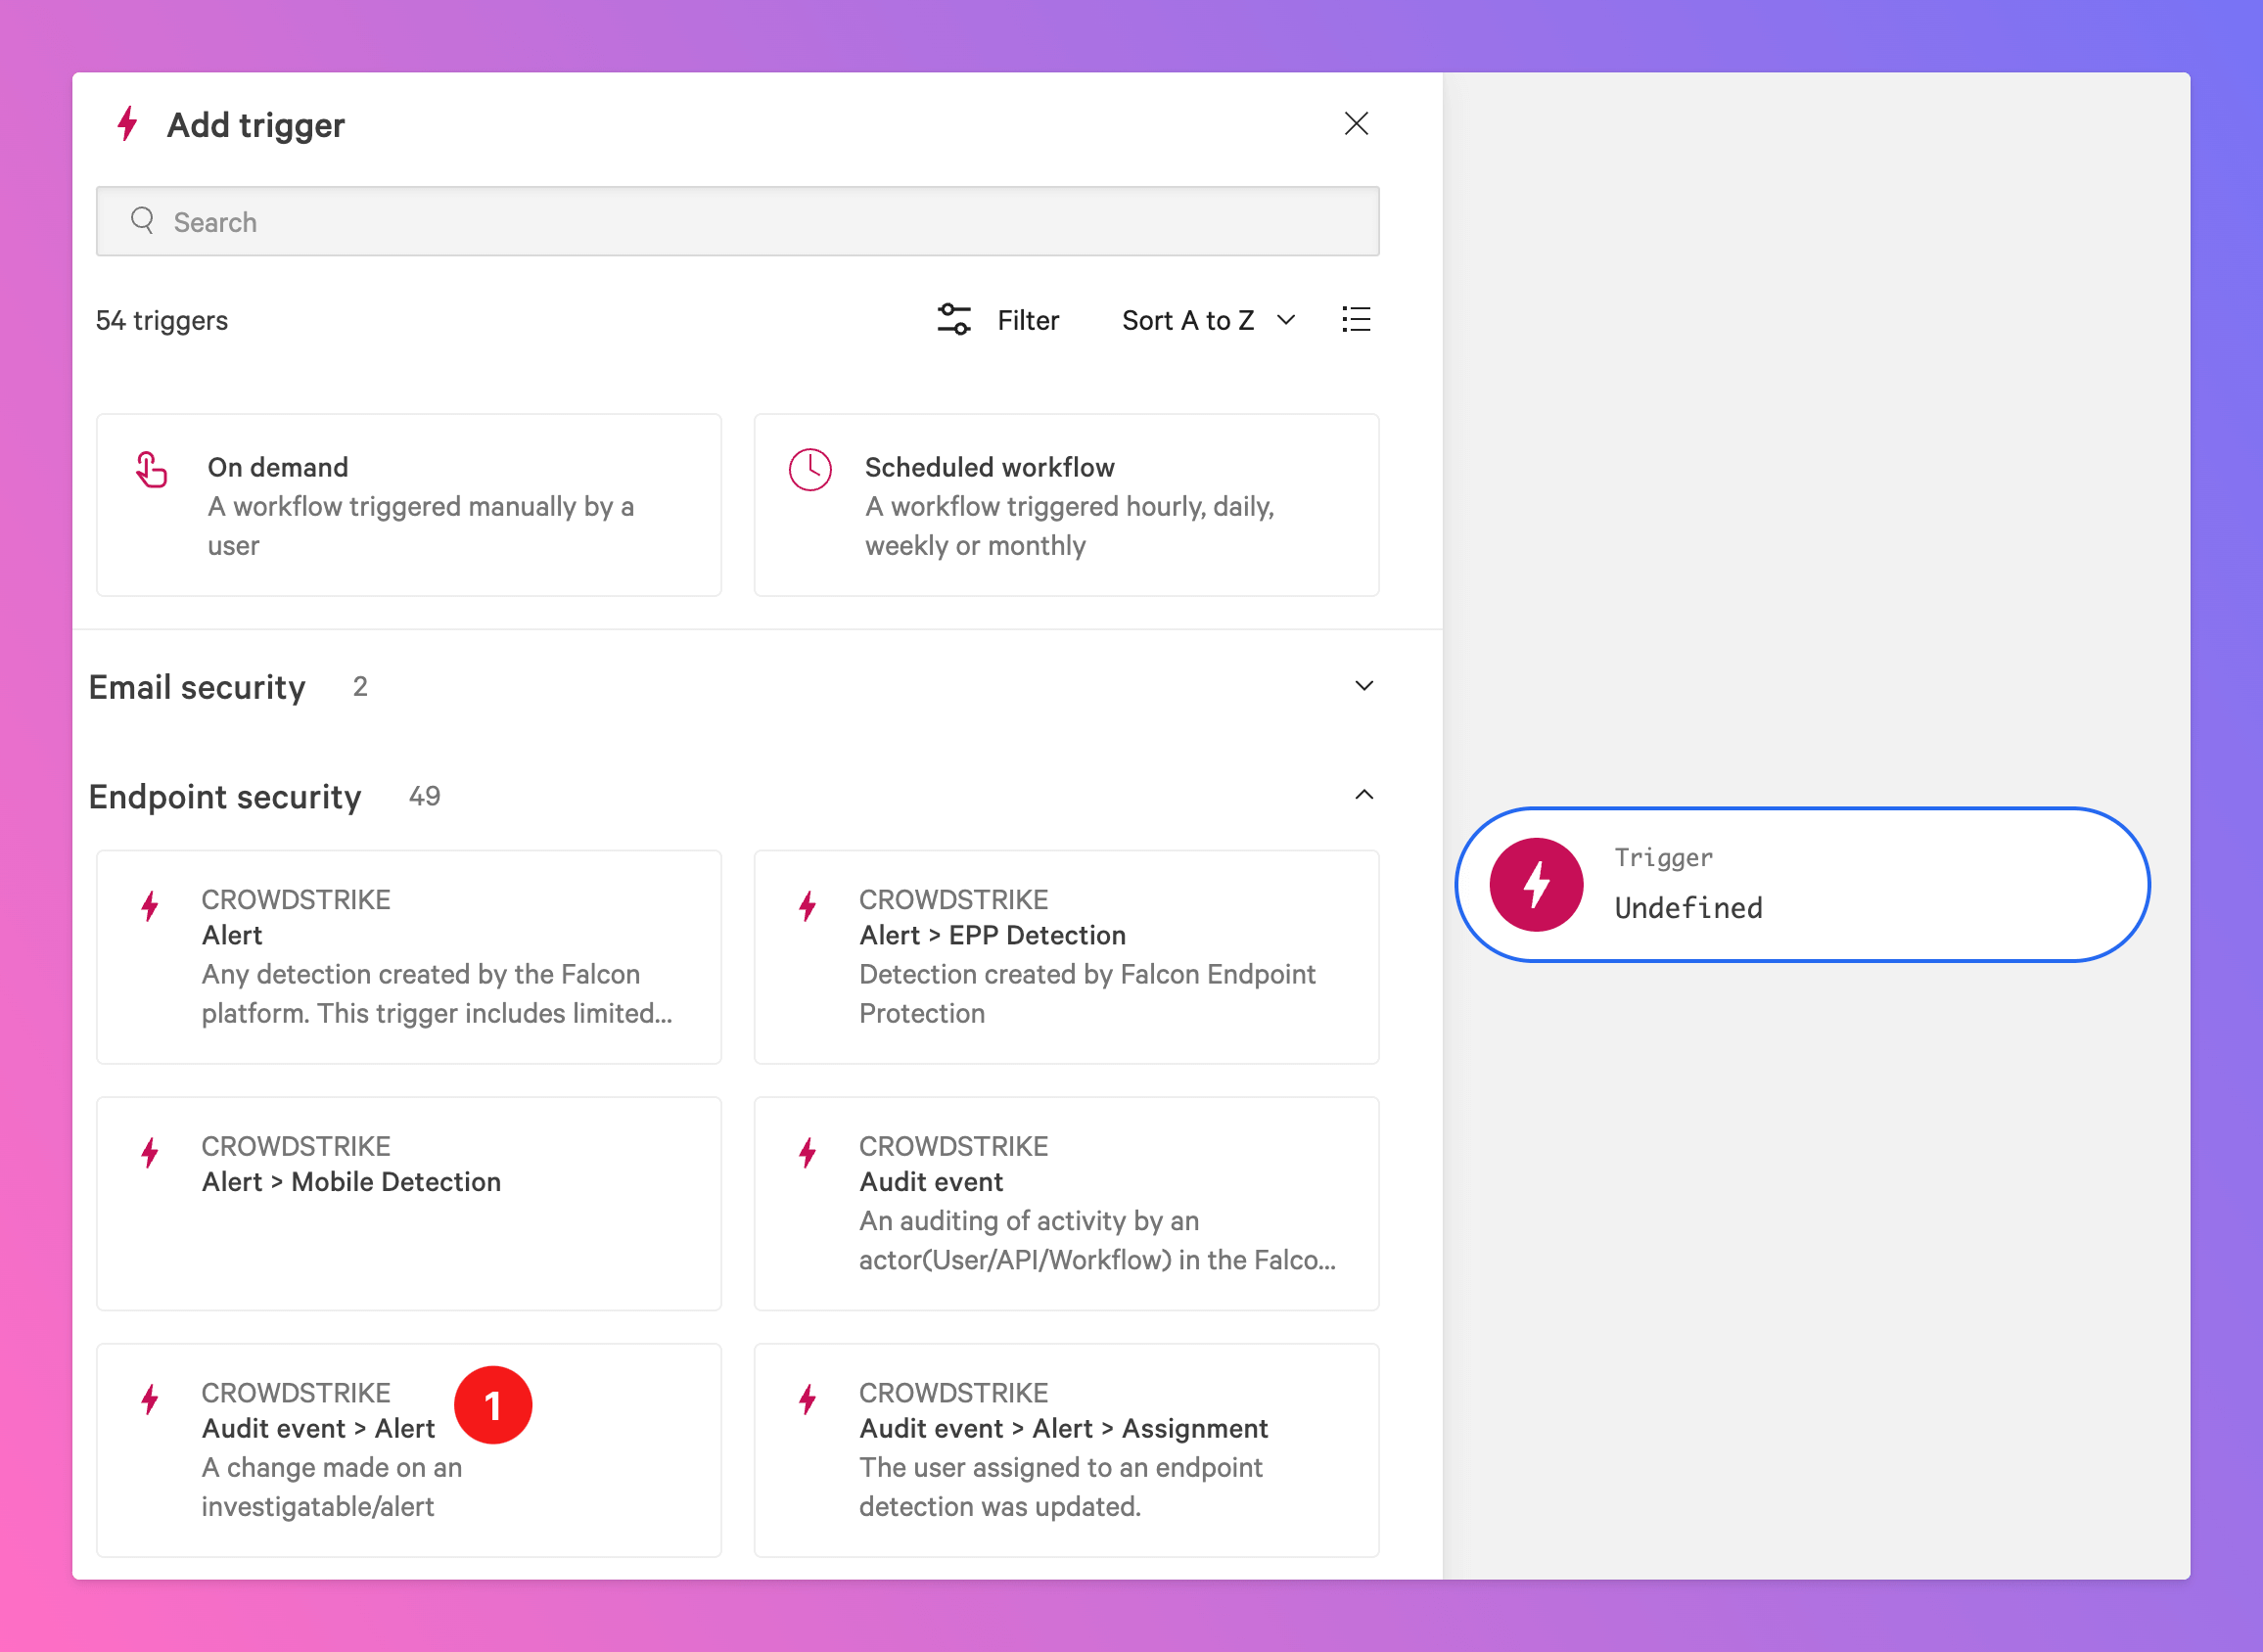
Add an extra Workflow.- This time, select
Audit event > Alert/Audit event > Detectionas trigger, as we want to listen to updates for existing incidents.
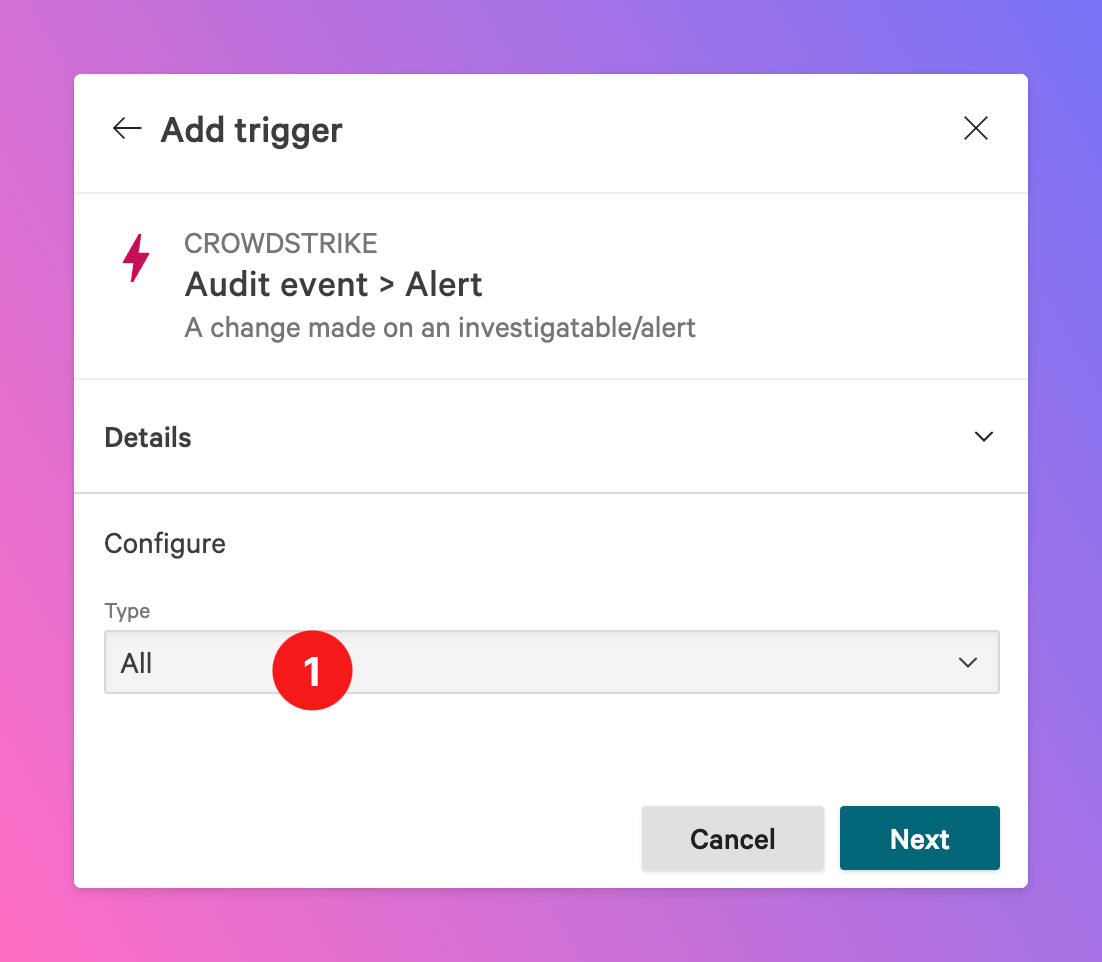
- As we want to listen to all kinds for updates, select
Allas type and continue.
- Make sure to add a suitable name, like
All Quiet - Update Incident. - Activate the workflow.
- And click
Save and exitto confirm.
You’re ready to go. If you set up your integration this way, CrowdStrike alerts / detections will automatically create and update All Quiet incidents.