Setup time: 2 Min
1. Create All Quiet Cron Job Monitor
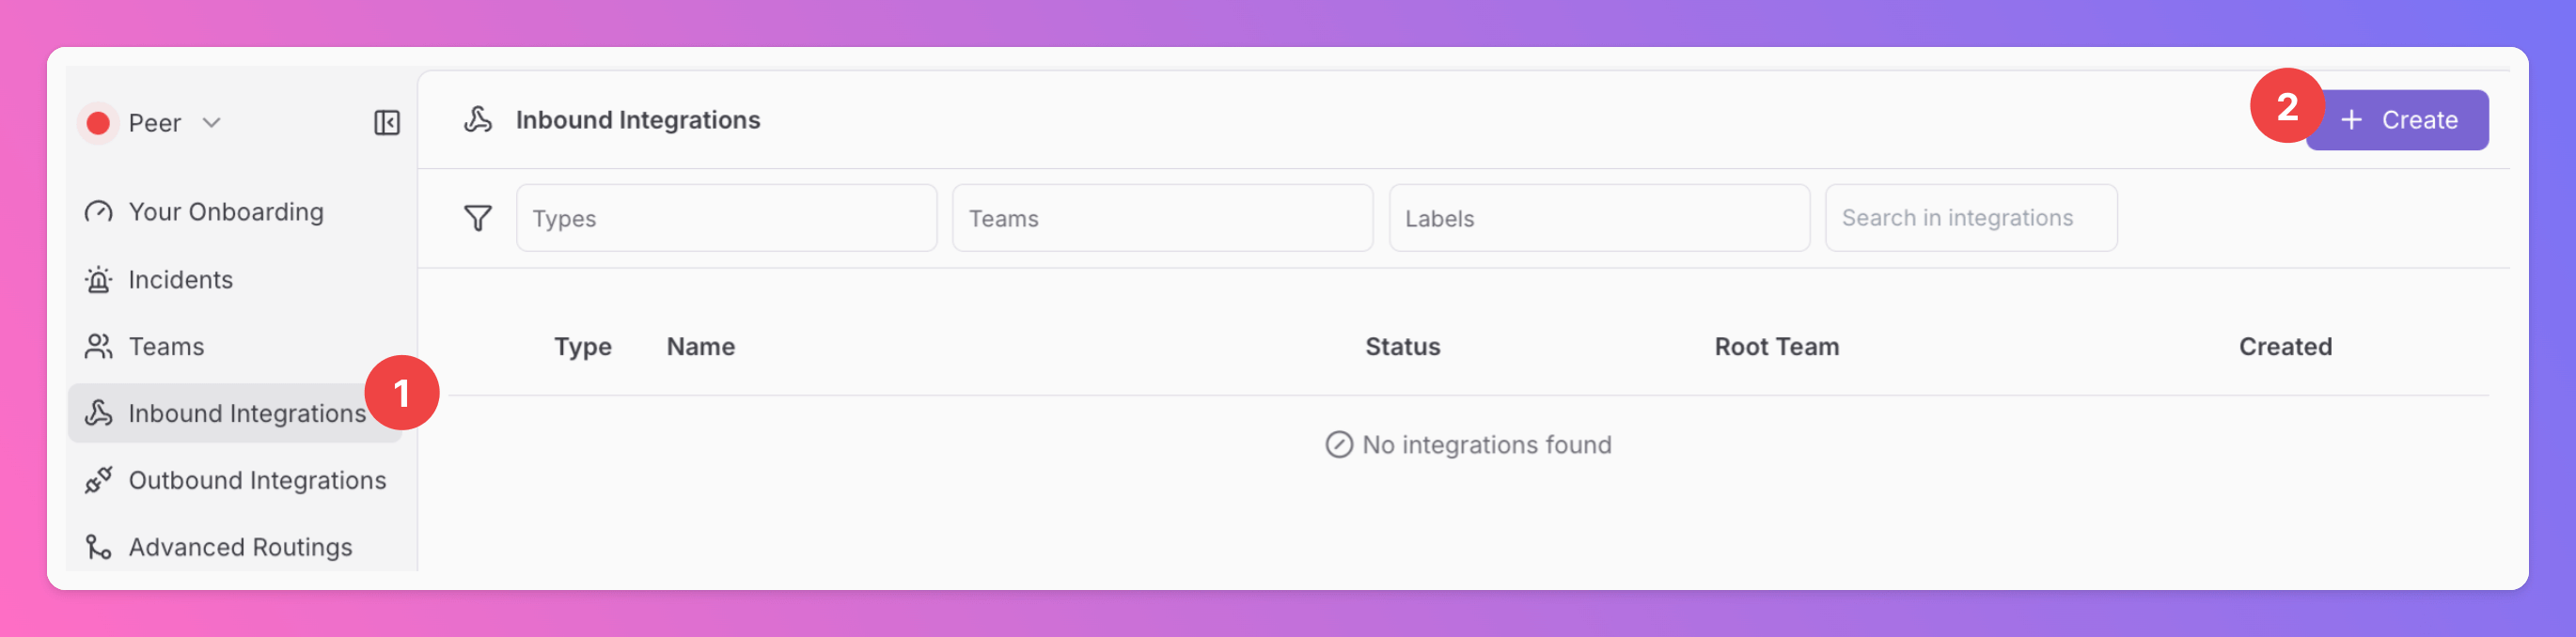
Sign in to your All Quiet account.Create Integration
- Click on the
Inbound Integrationstab. - Click on
+ Create.
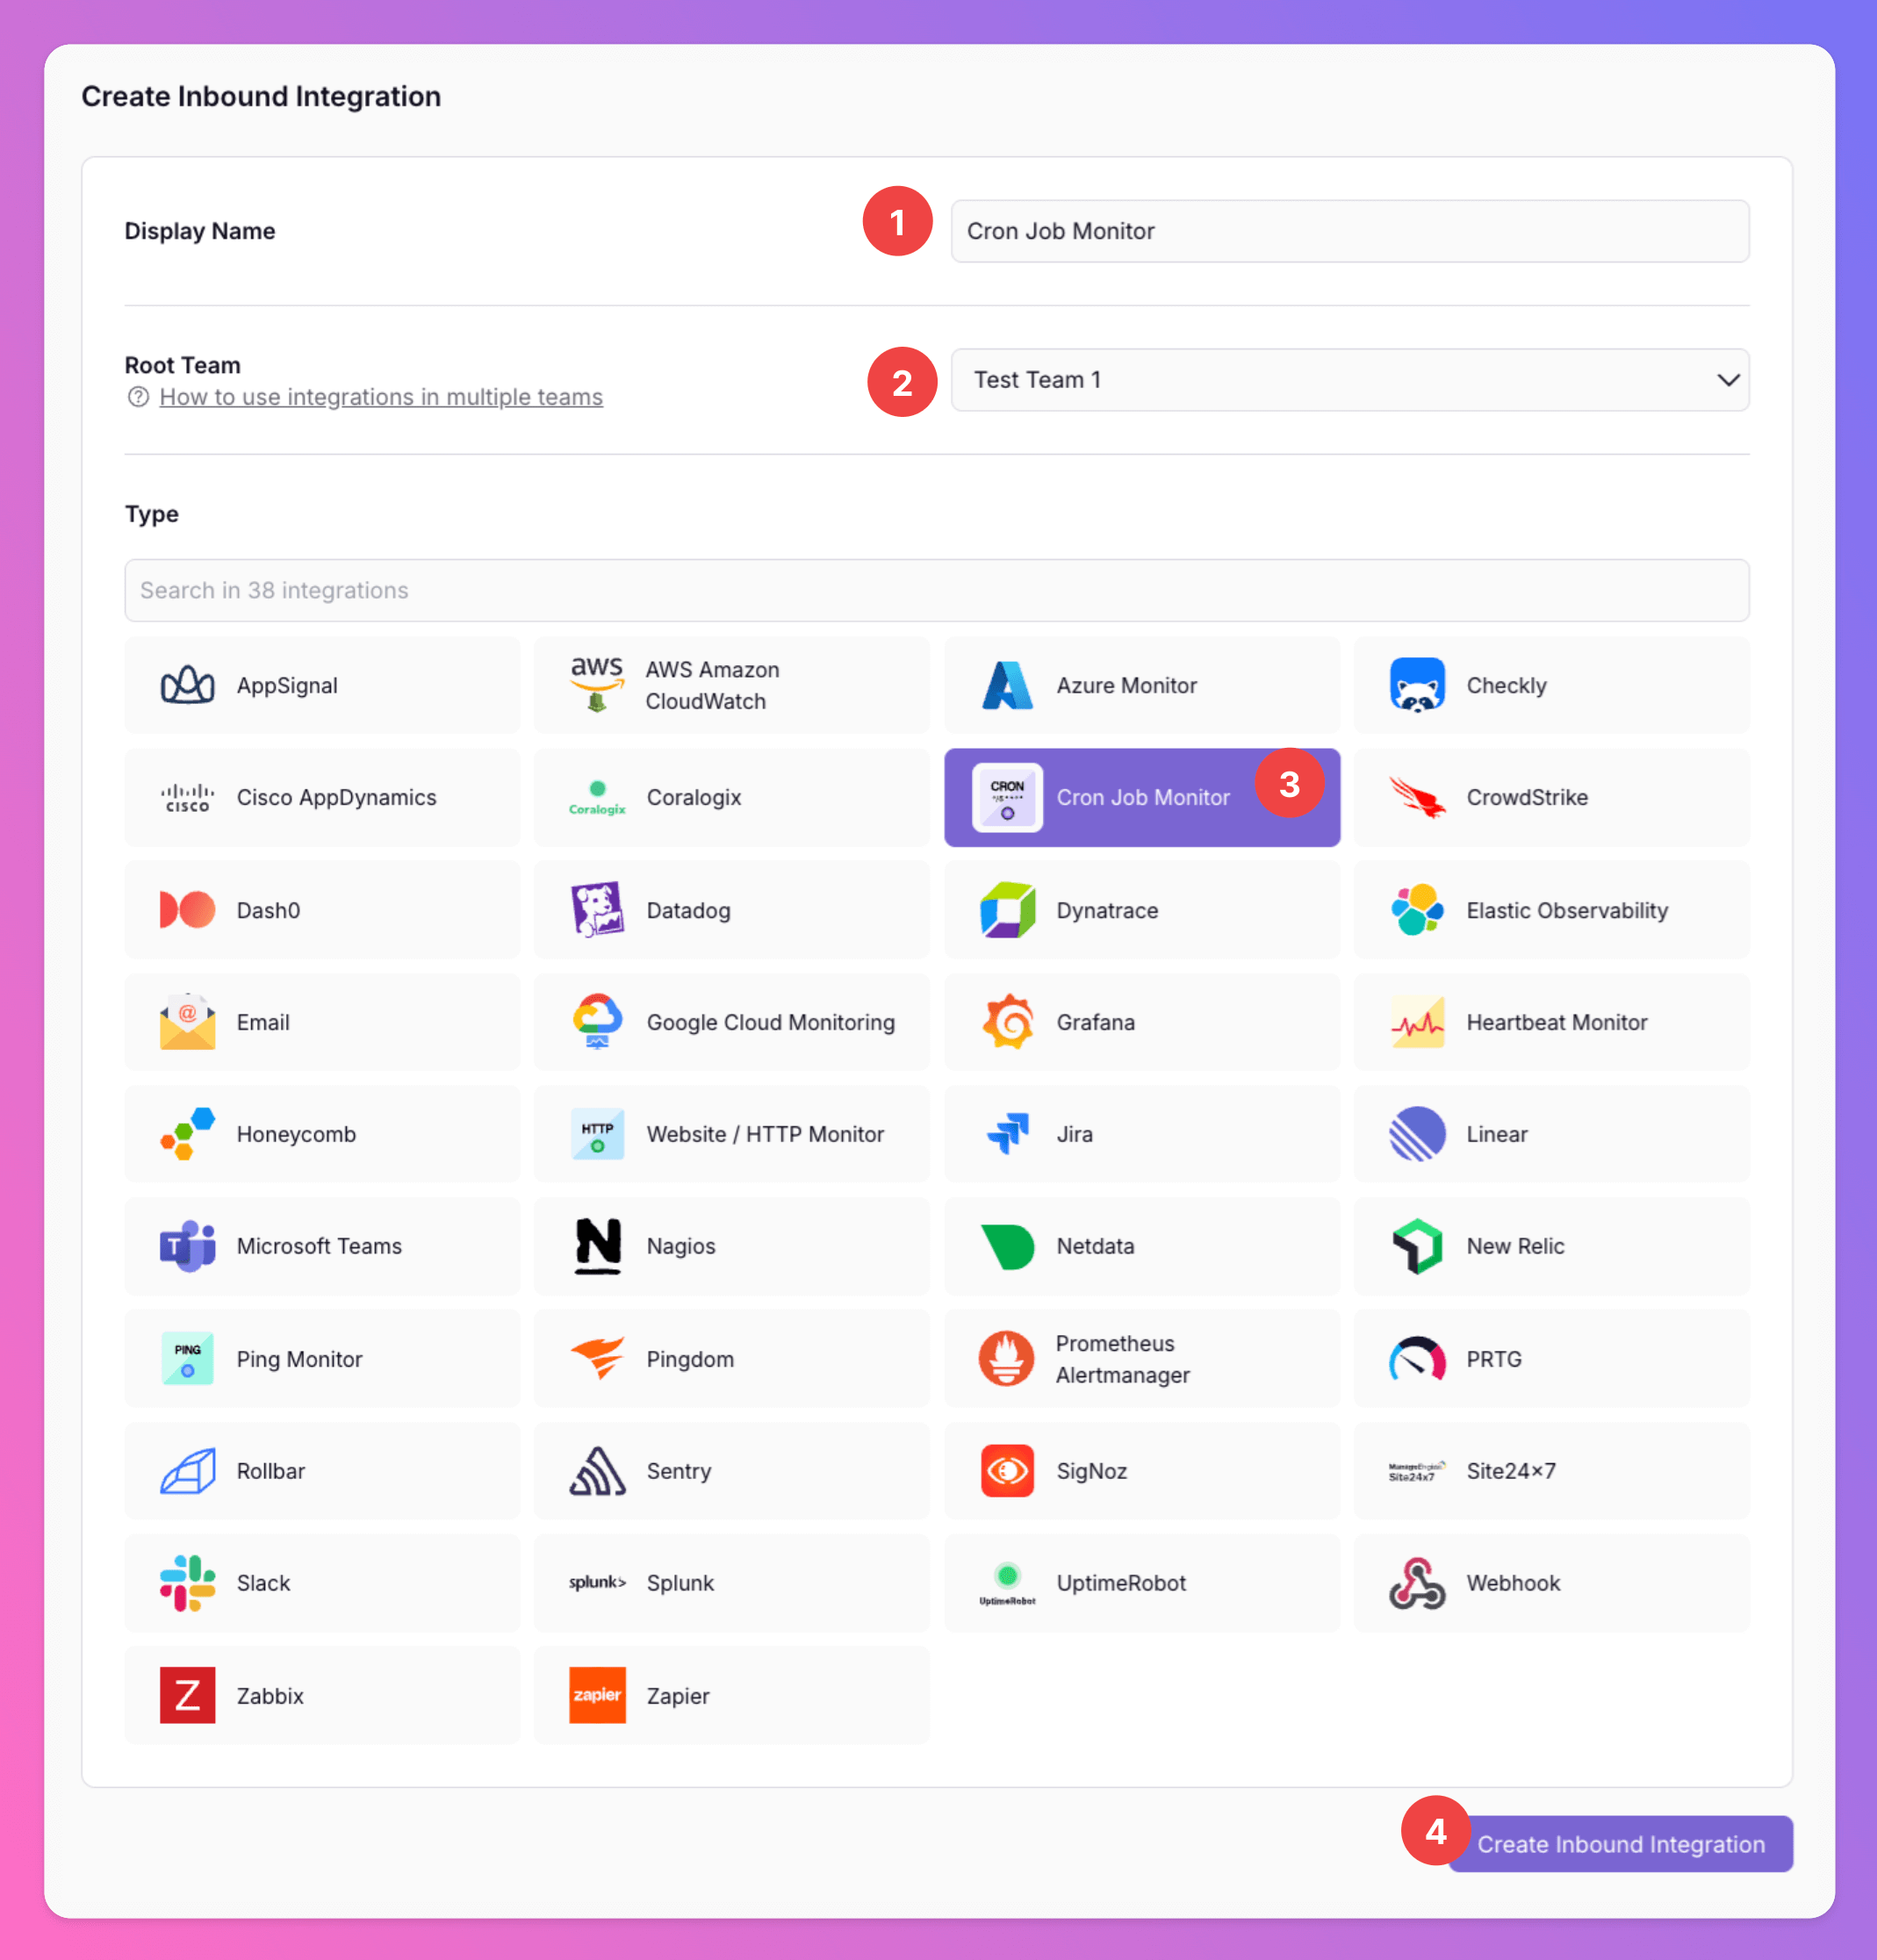
Select Cron Job Monitor as the integration’s type
-
Enter a
Display Namefor your integration, e.g. “Cron Job Monitor”. -
Select a
Team. -
Select
Cron Job Monitoras the integration’s type. -
Click
Create Inbound Integration.
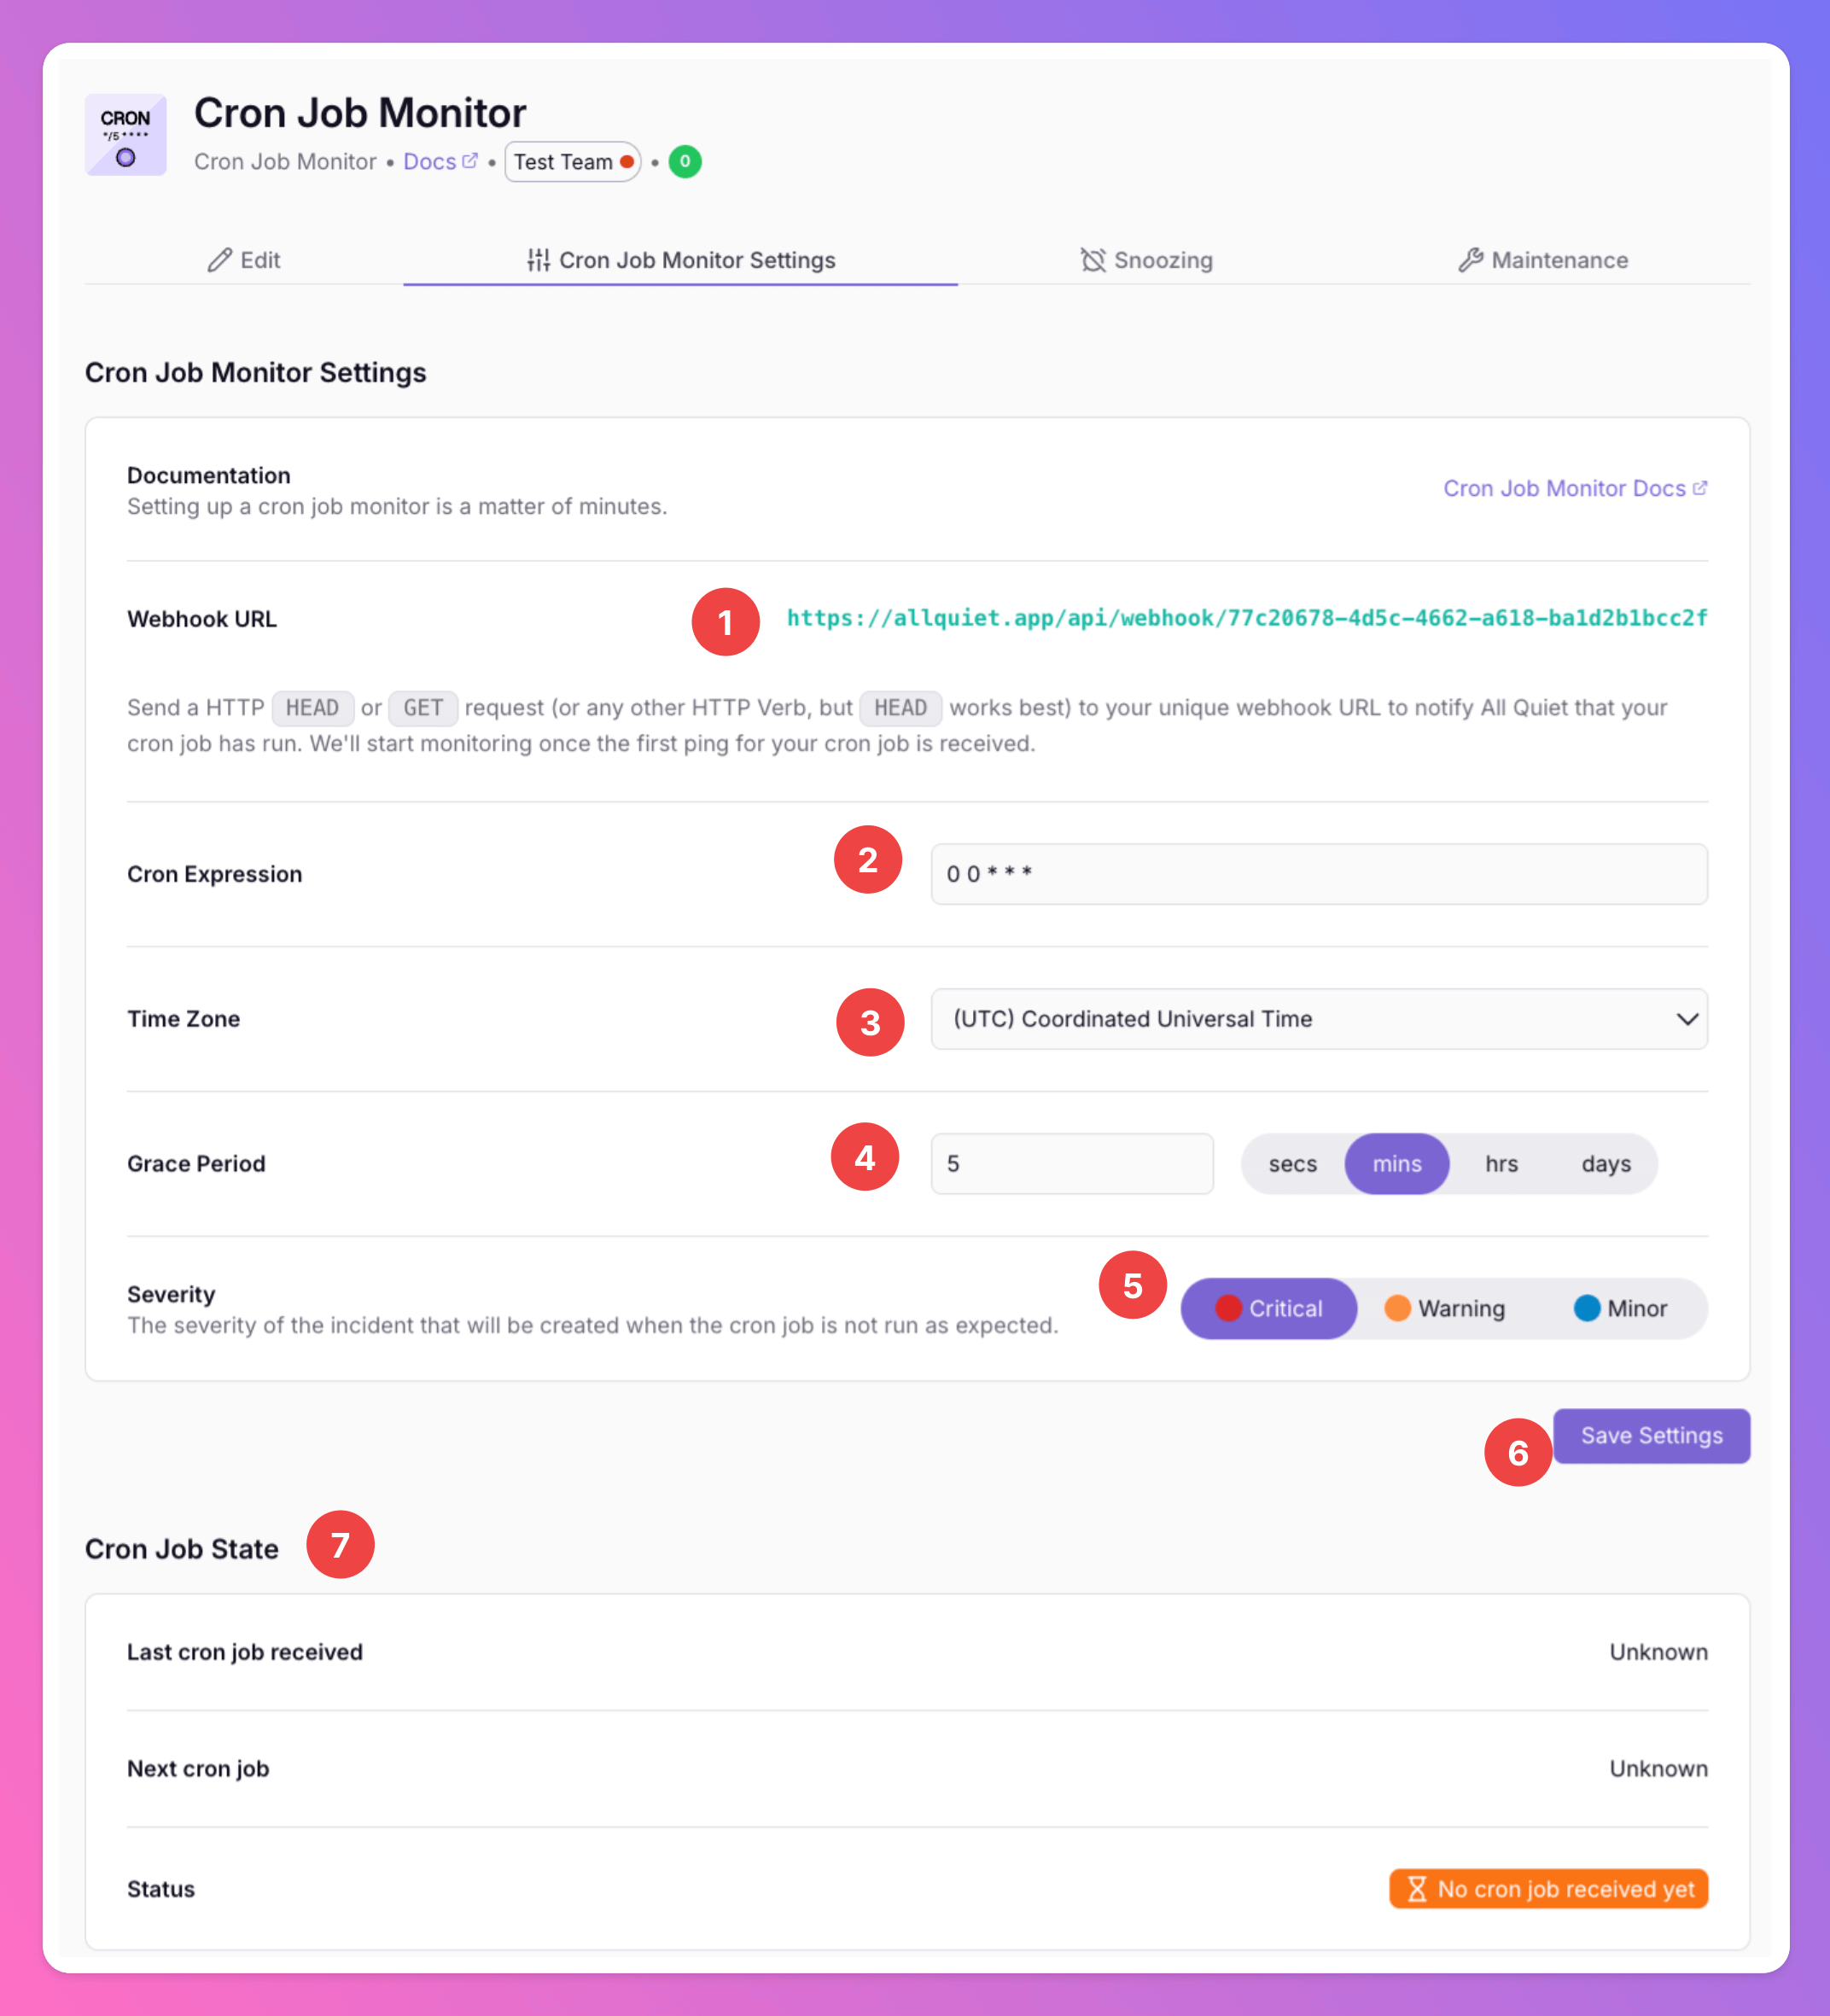
2. Configure your Cron Job Monitor
Once you’ve set up the “Cron Job Monitor”, it’s time to configure it. This can be done on the the integration’s page.- Here you find the unique Webhook URL that you need to ping.
- Add a
Cron Expressionto define when you’d expect your cron job to run and ping the Webhook URL. - Add the cron job’s timezone.
- You may add a
Gace Period. If the cron job is delayed but still finished and sending a ping to our Webhook URL within aGrace Period, we will not create an incident. - Define a severity for incidents being created if the cron job monitor fails.
Saveyour settings.- As you can see the monitor is not activated yet.
Optionally toggle
Enable additional Authentication & Security below the cron job settings to restrict who can POST payloads.- IP Filter — Allow requests only from specific IPs or CIDR ranges. Failed checks return 404 Not Found.
- Bearer authentication — Require
Authorization: Bearer YOUR_TOKEN. Missing or invalid tokens return 401 Unauthorized.
Your monitor is now set up and ready to be activated.
Start Cron Job Monitoring
To start monitoring, ping the Webhook URL you retrieved in the previous step. On the bottom of the page, you will see- The last time a ping was received.
- The next time a ping is expected based on your settings. If we don’t receive a ping until then, we’ll create an All Quiet incident and notify you.
- After the second ping, we will start showing the current status of the Monitor
On Timeif the last cron job was finished within the expected timeframe (plus optional grace period)Overdueif we created an incident because we didn’t receive the latest ping on time.
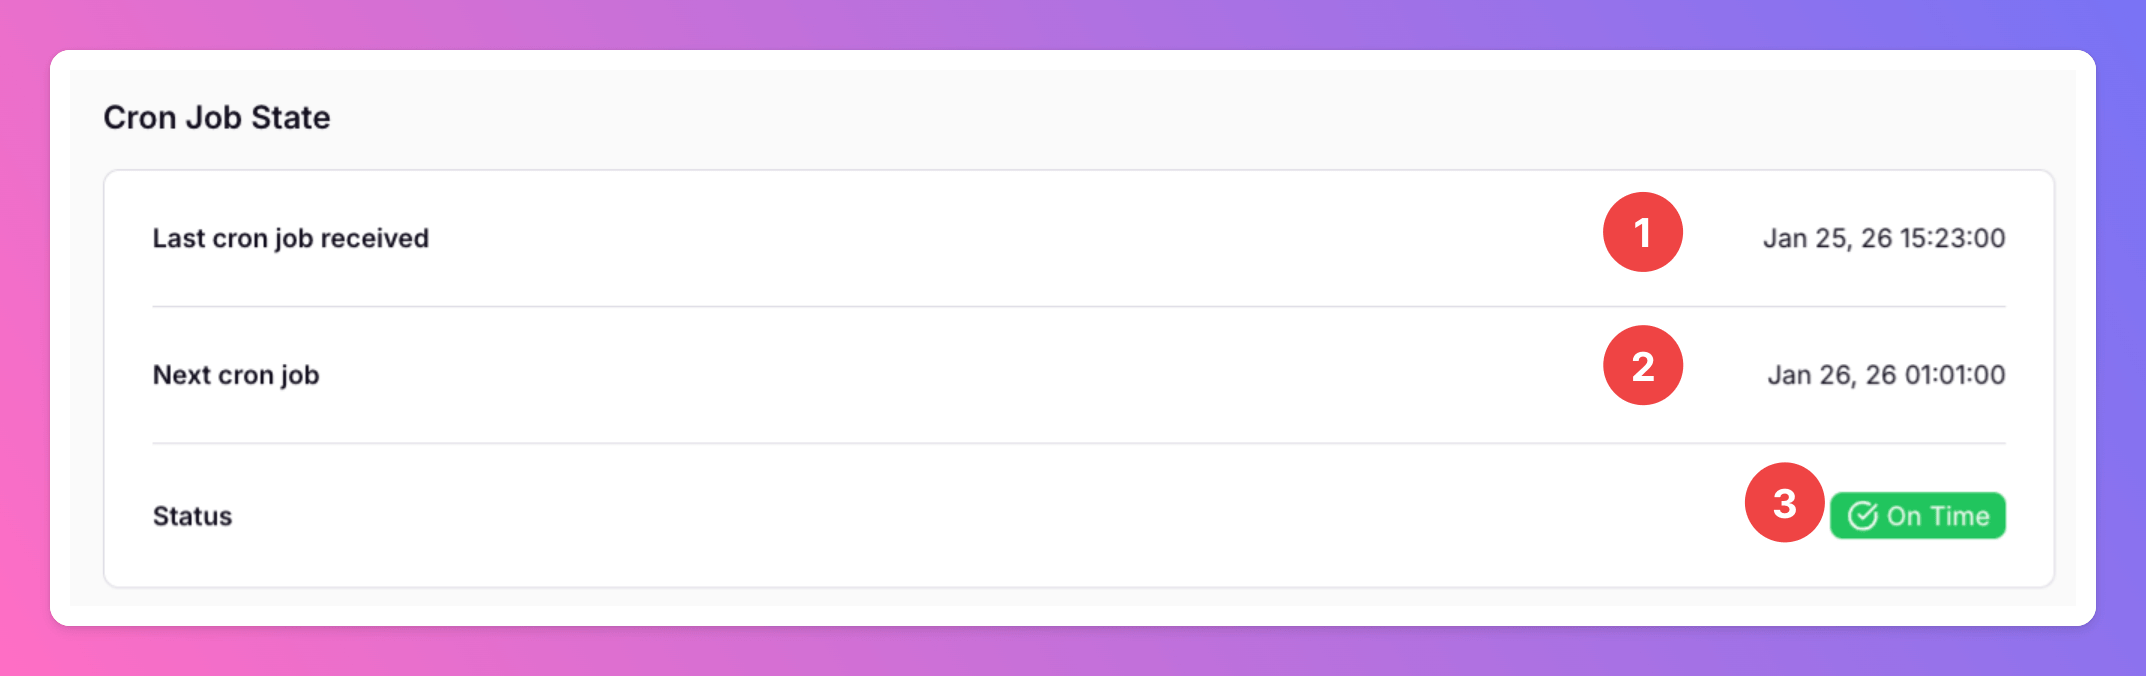
Your monitor is active.
After changing your monitor’s settings, you’ll need to reactivate it by sending a new ping to the Webhook URL.