Setup time: 2 Min
Create Outbound Integration
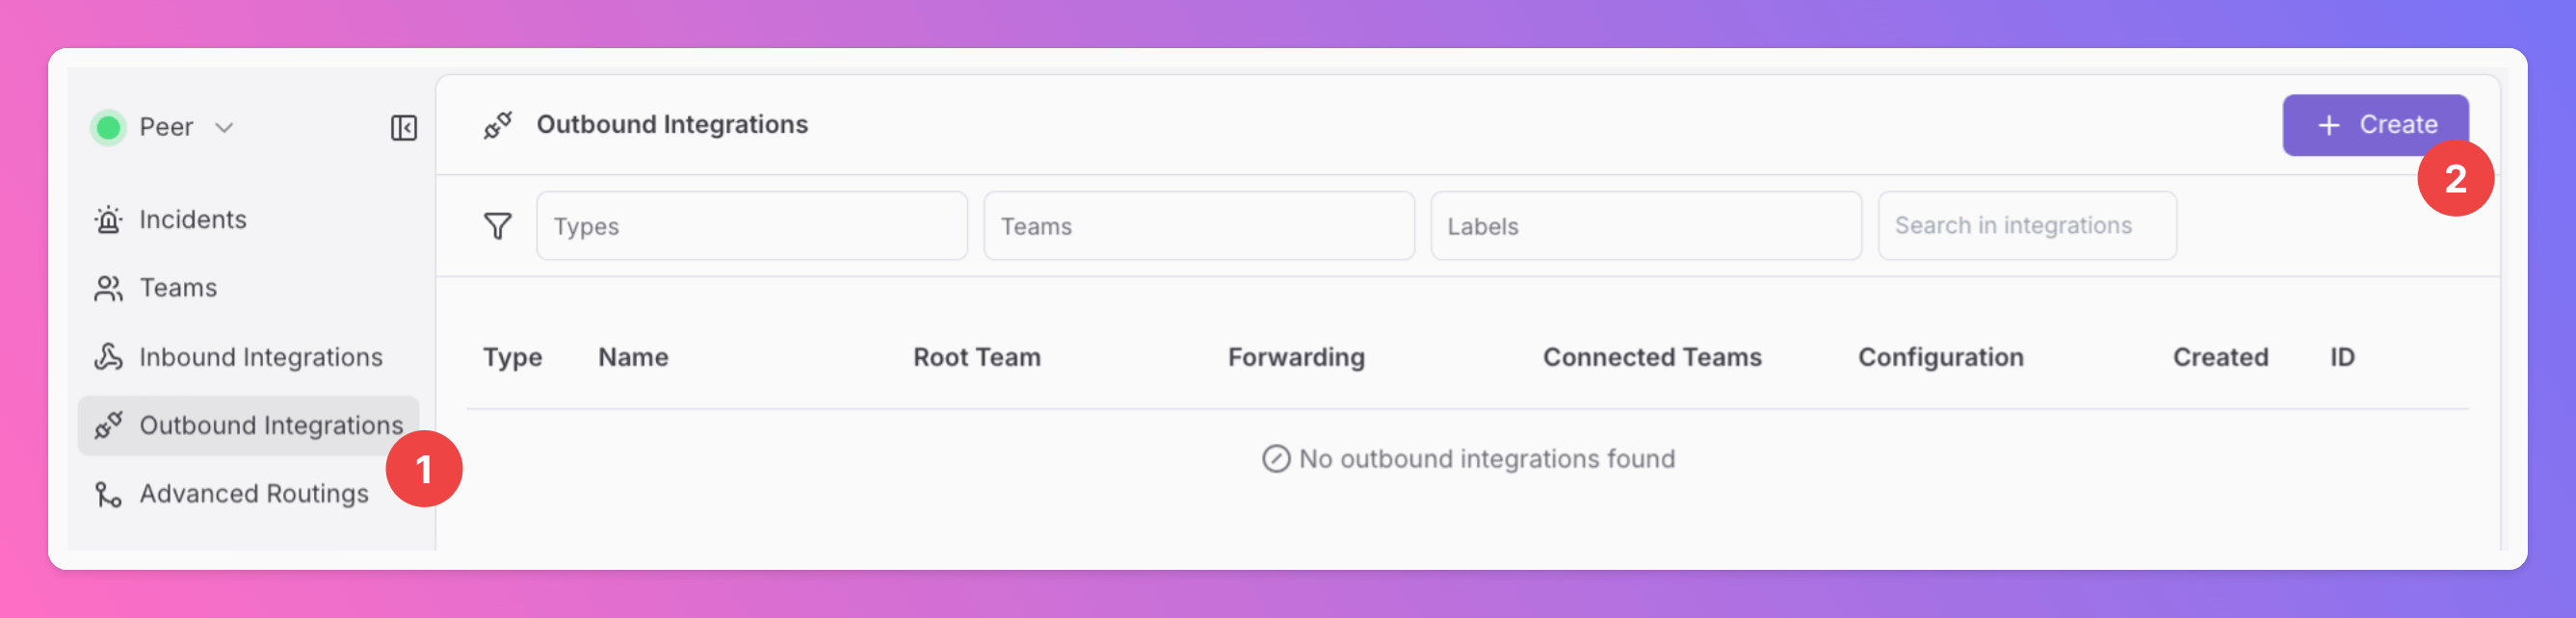
- Click on the
Outbound Integrationstab. - Click on
+ Create.
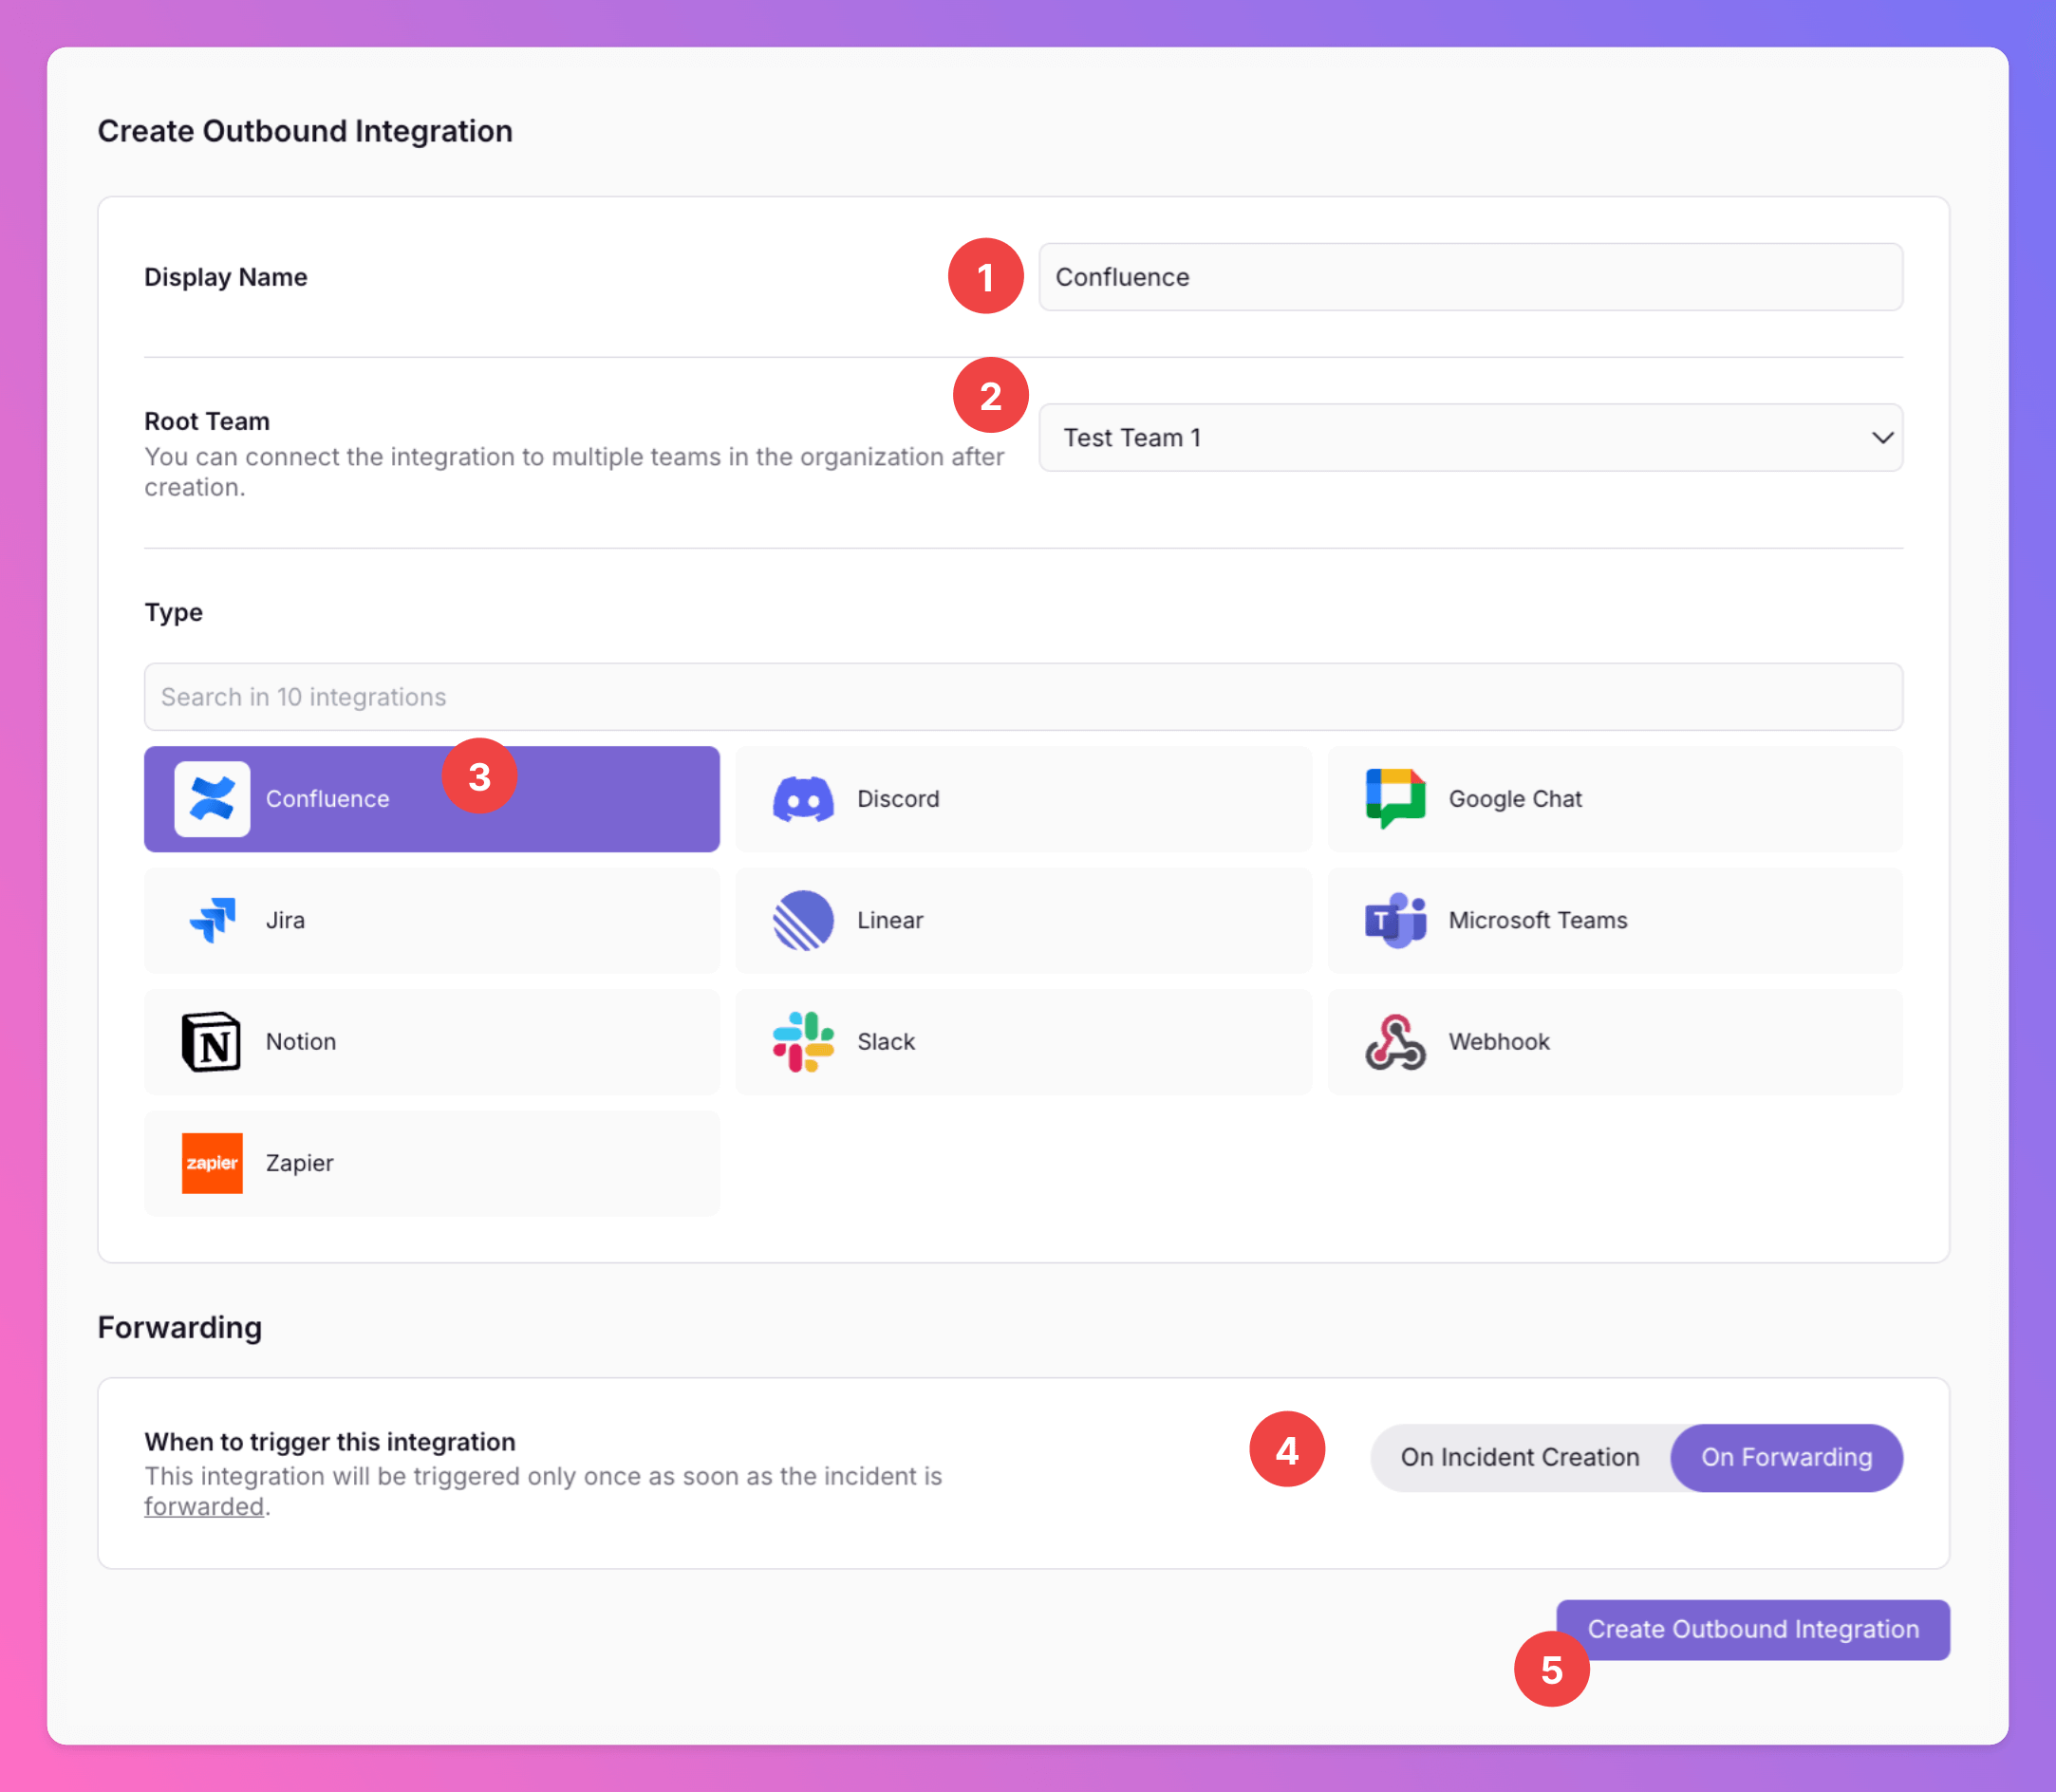
- Enter a
Display Namefor your integration, e.g. “Confluence”. - Select a
Team.For Organizations with Pro and Enterprise plan: This is going to be the root team of your integration. You will be able to add additional teams in the next step. - Select
Confluenceas the integration’s type. - Forwarding settings:
- Default:
On Forwarding- Pages will only be created if users manually forward specific incidents or if you set up advanced routing rules for your Confluence integration that automatically forward incidents in specific scenarios. - Alternative:
On Incident Creationwill automatically forward all incidents to Confluence as soon as they are created and create new Confluence pages.
- Default:
- Click
Create Outbound Integration.
Add All Quiet to your Confluence Space
Once you’ve successfully created your new outbound integration, you’ll automatically be redirected to itsSettings page.
- Observe that the installation status of the All Quiet integration is still pending.
- To complete the integration with your Confluence site, click
Add to Confluence.
In the
Edit tab, you can change general settings like the integration’s Forwarding settings.Only for Pro and Enterprise plan - Manage your
Team Connections: The root team is pre-selected, and you can add the integration to further teams within the root team’s organization. Team Administrators can add / remove those teams they are an Administrator in, Organization Administrators & Organization Owners can manage the connections to all teams of the organization. 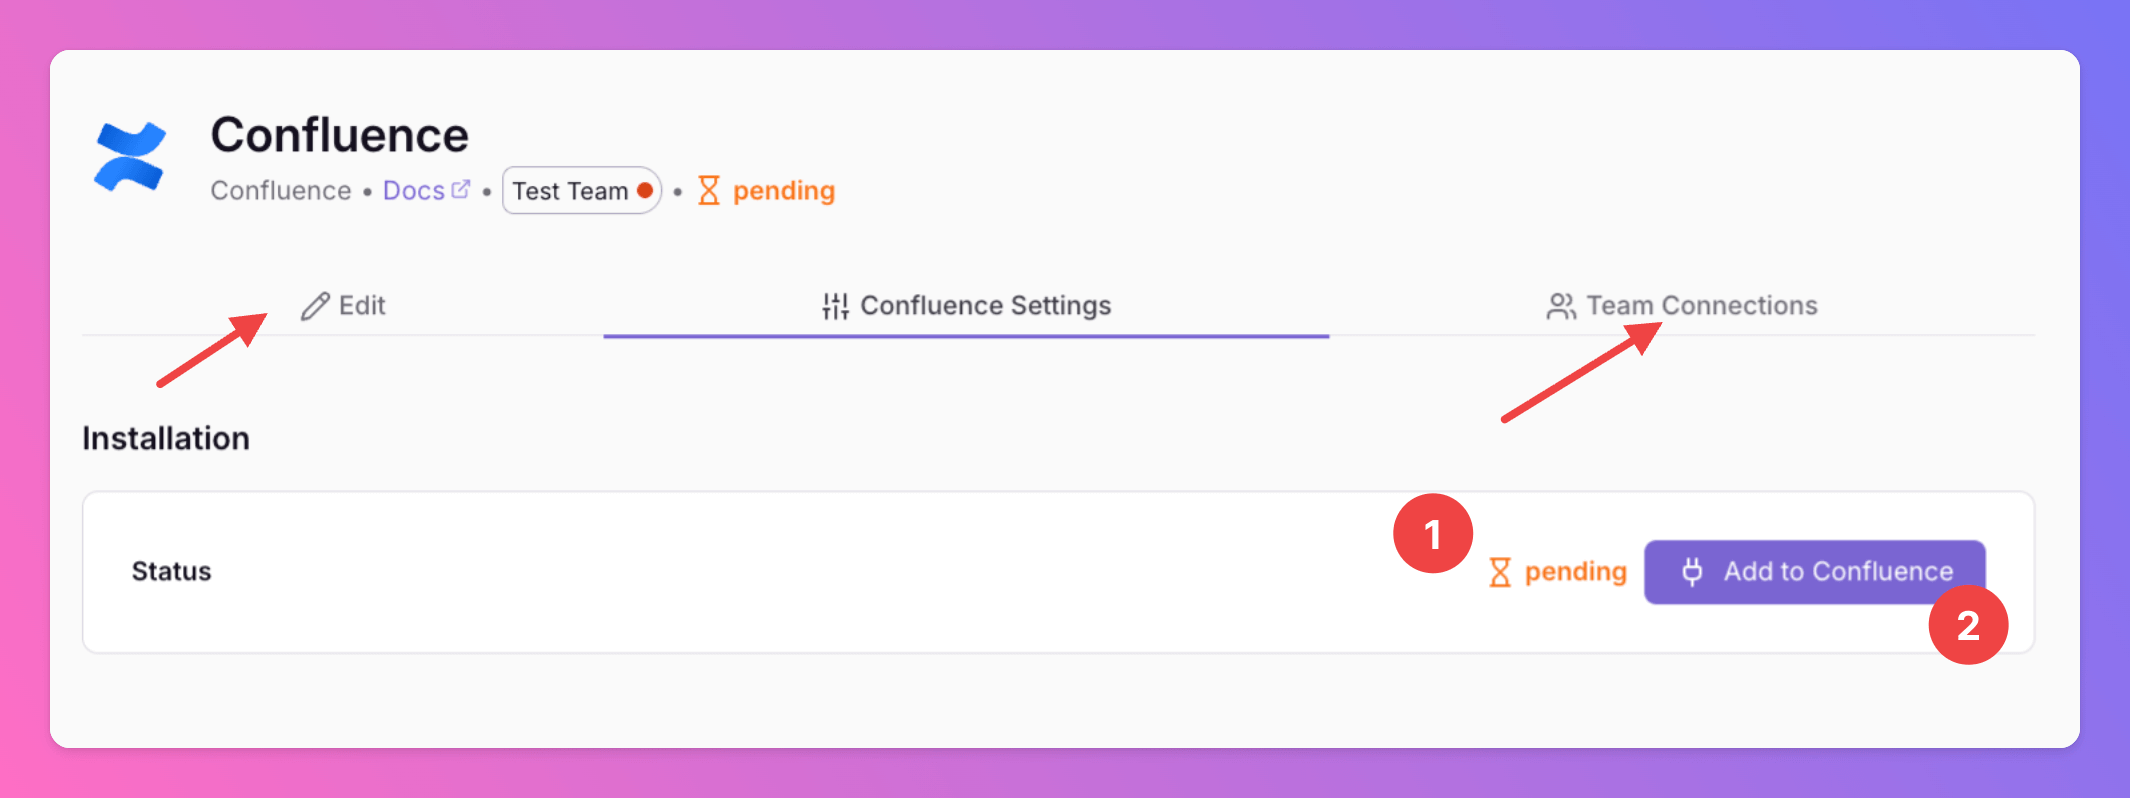
- If your Atlassian account is linked to more than one Confluence site, select the site you want to connect All Quiet to.
- Click
Accept.
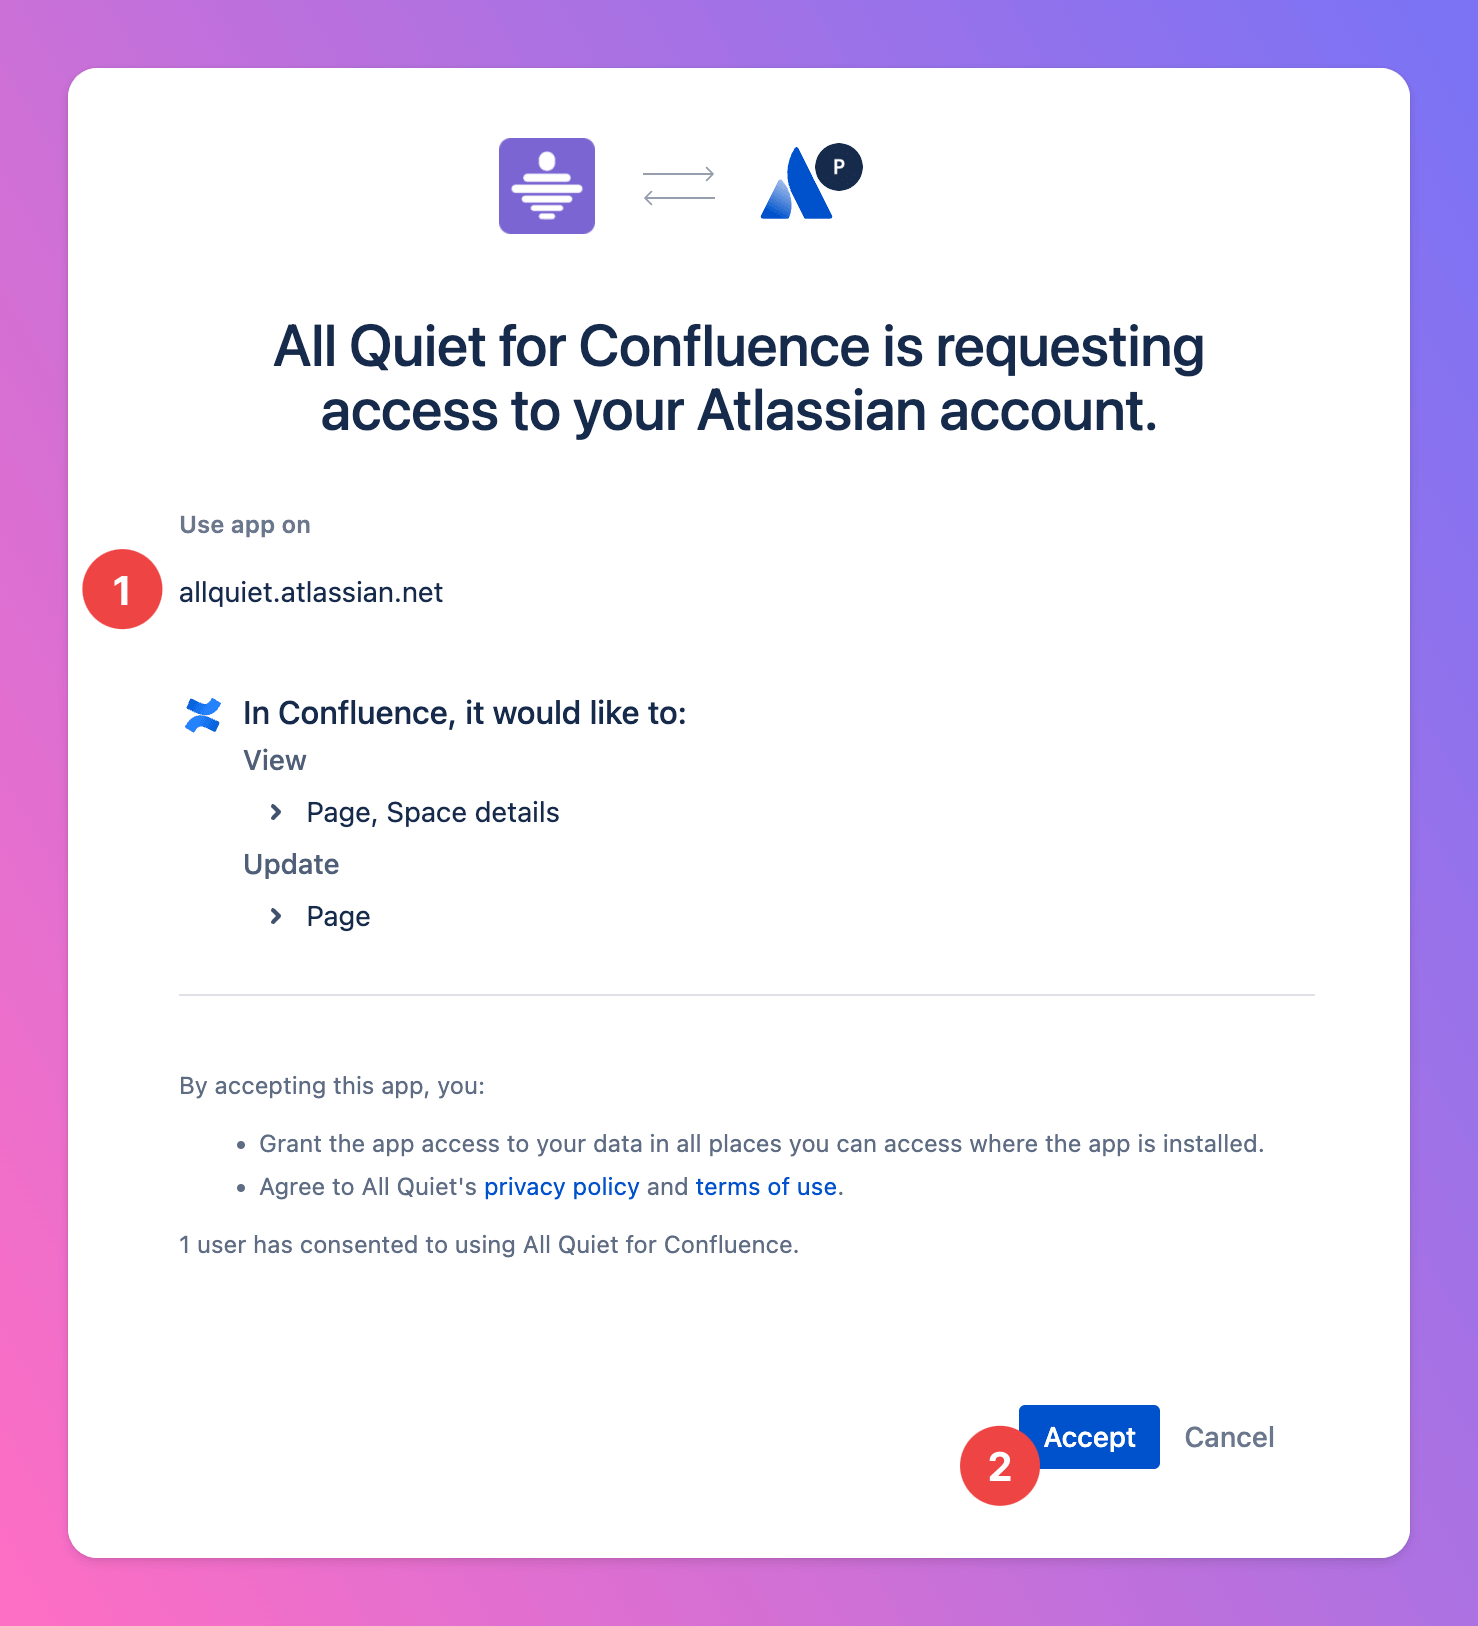
- As you can see, the Installation Status changed to
installed. - Select the Confluence Site you want to forward the All Quiet incidents to. You can only select those sites that you granted All Quiet permission to (see prior step).
- Select the Confluence space in which you want to create pages based on All Quiet incidents.
- Select the
Parent Pagefor the your incidents’ Confluence pages. - Make sure to
Save Confluence Settings, otherwise forwarding will not work.
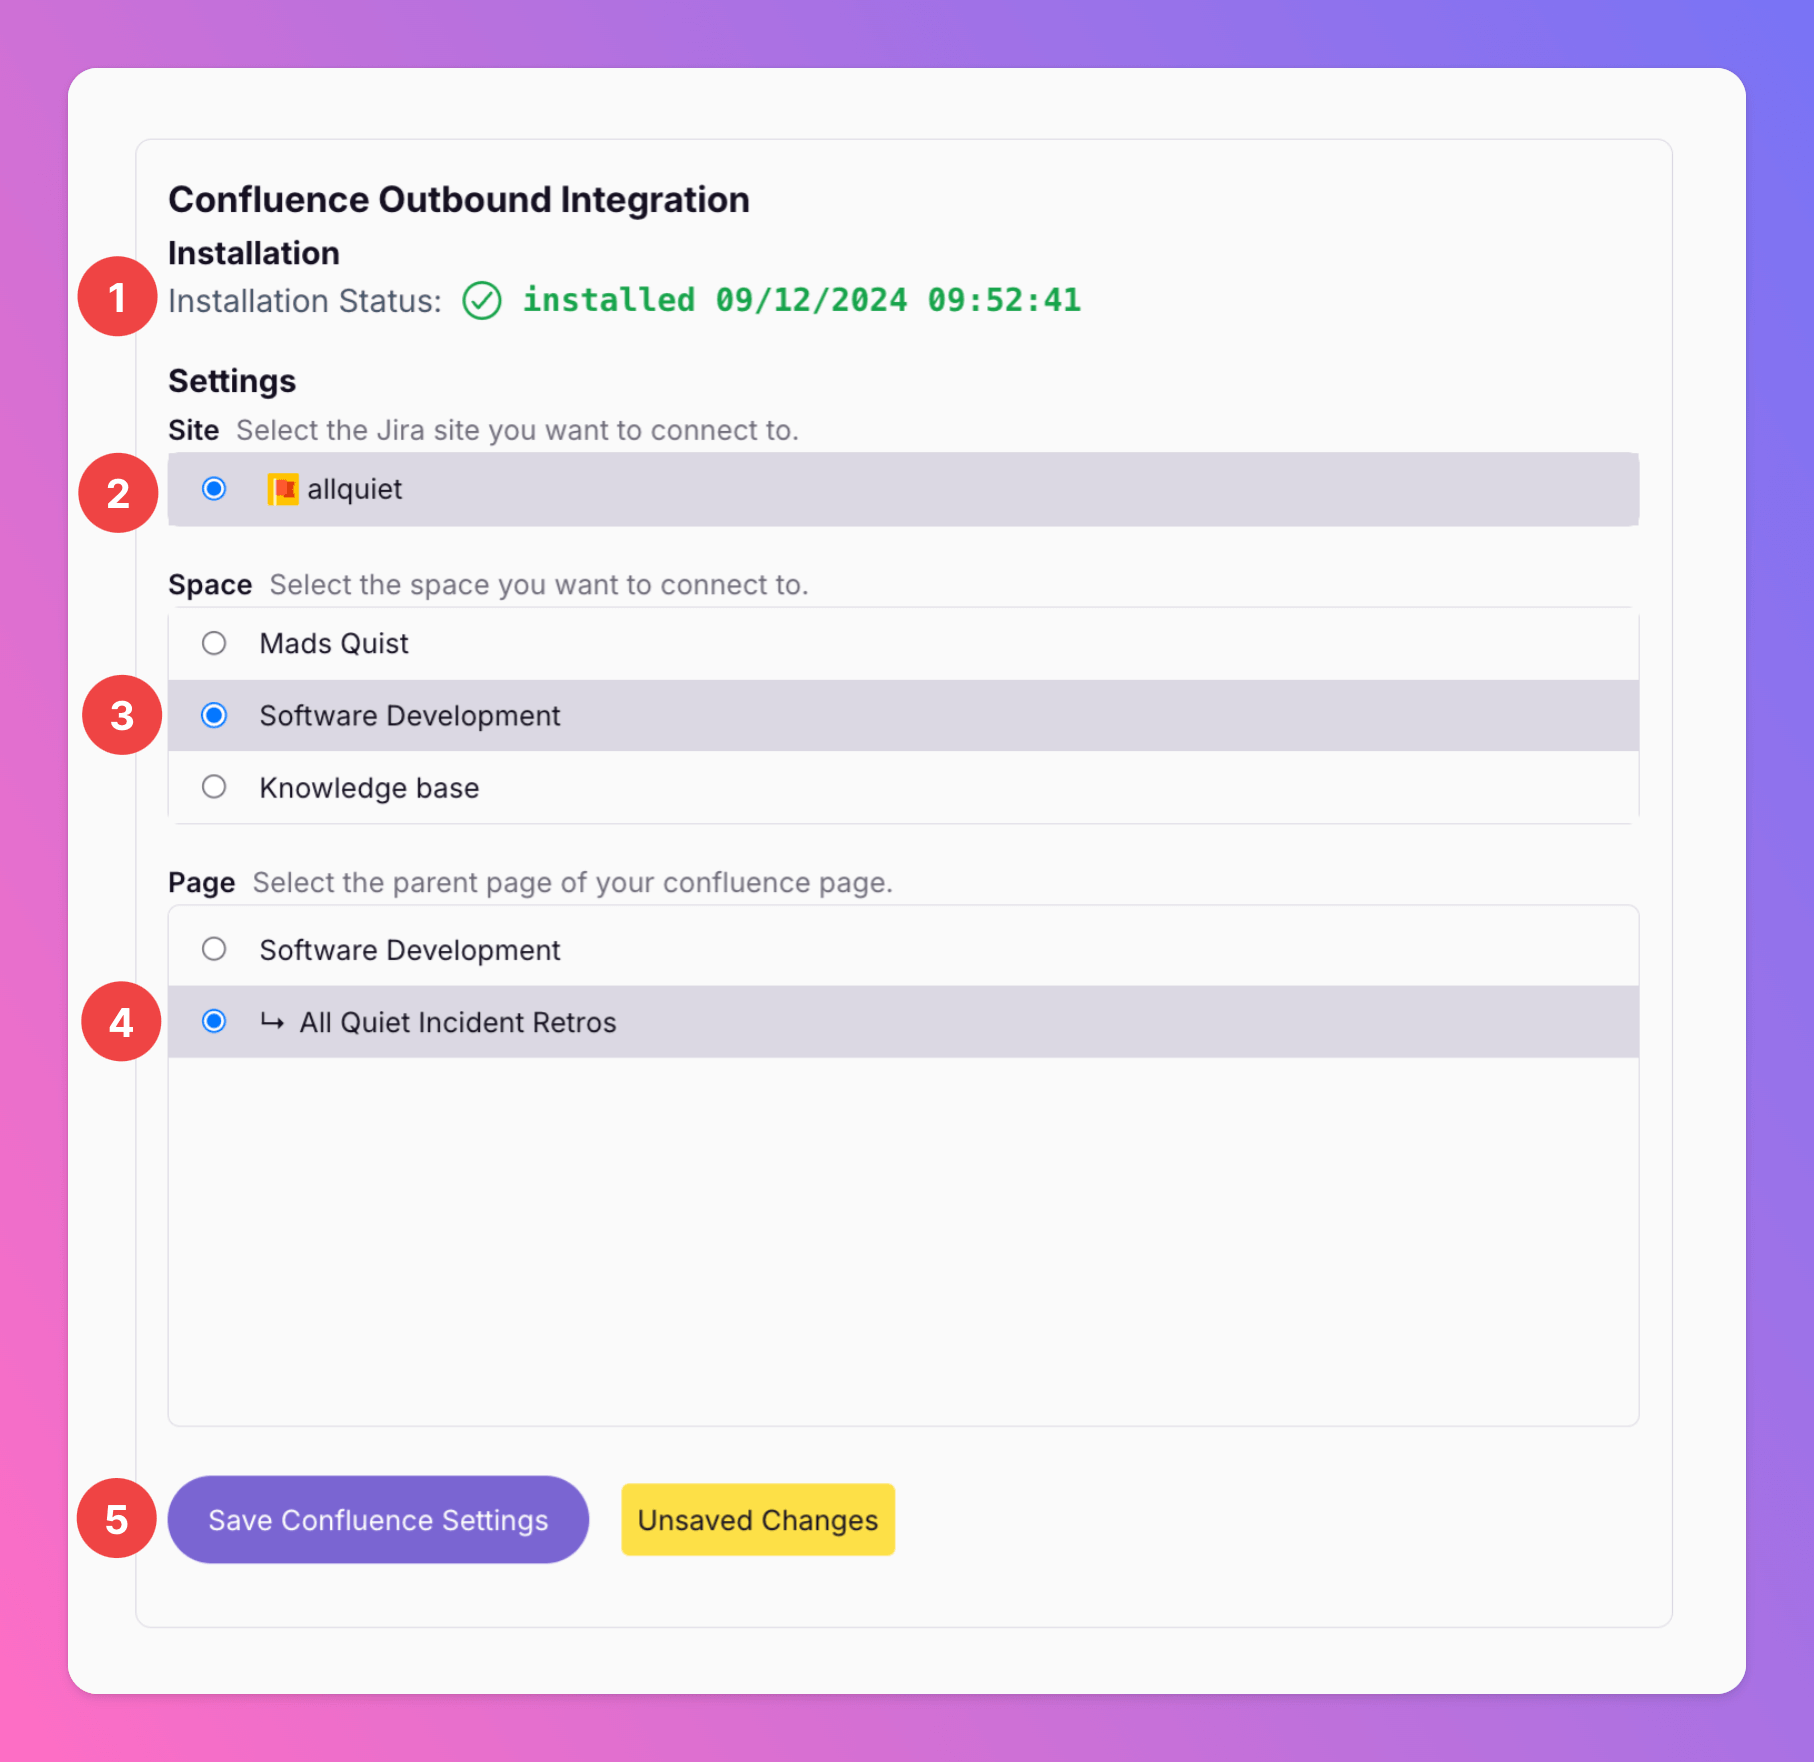
Confluence is now integrated with All Quiet. Depending on your setup, All Quiet incidents can now be forwarded manually to your Confluence space or automatically create pages.
Creating an Incident Retro Page in Confluence
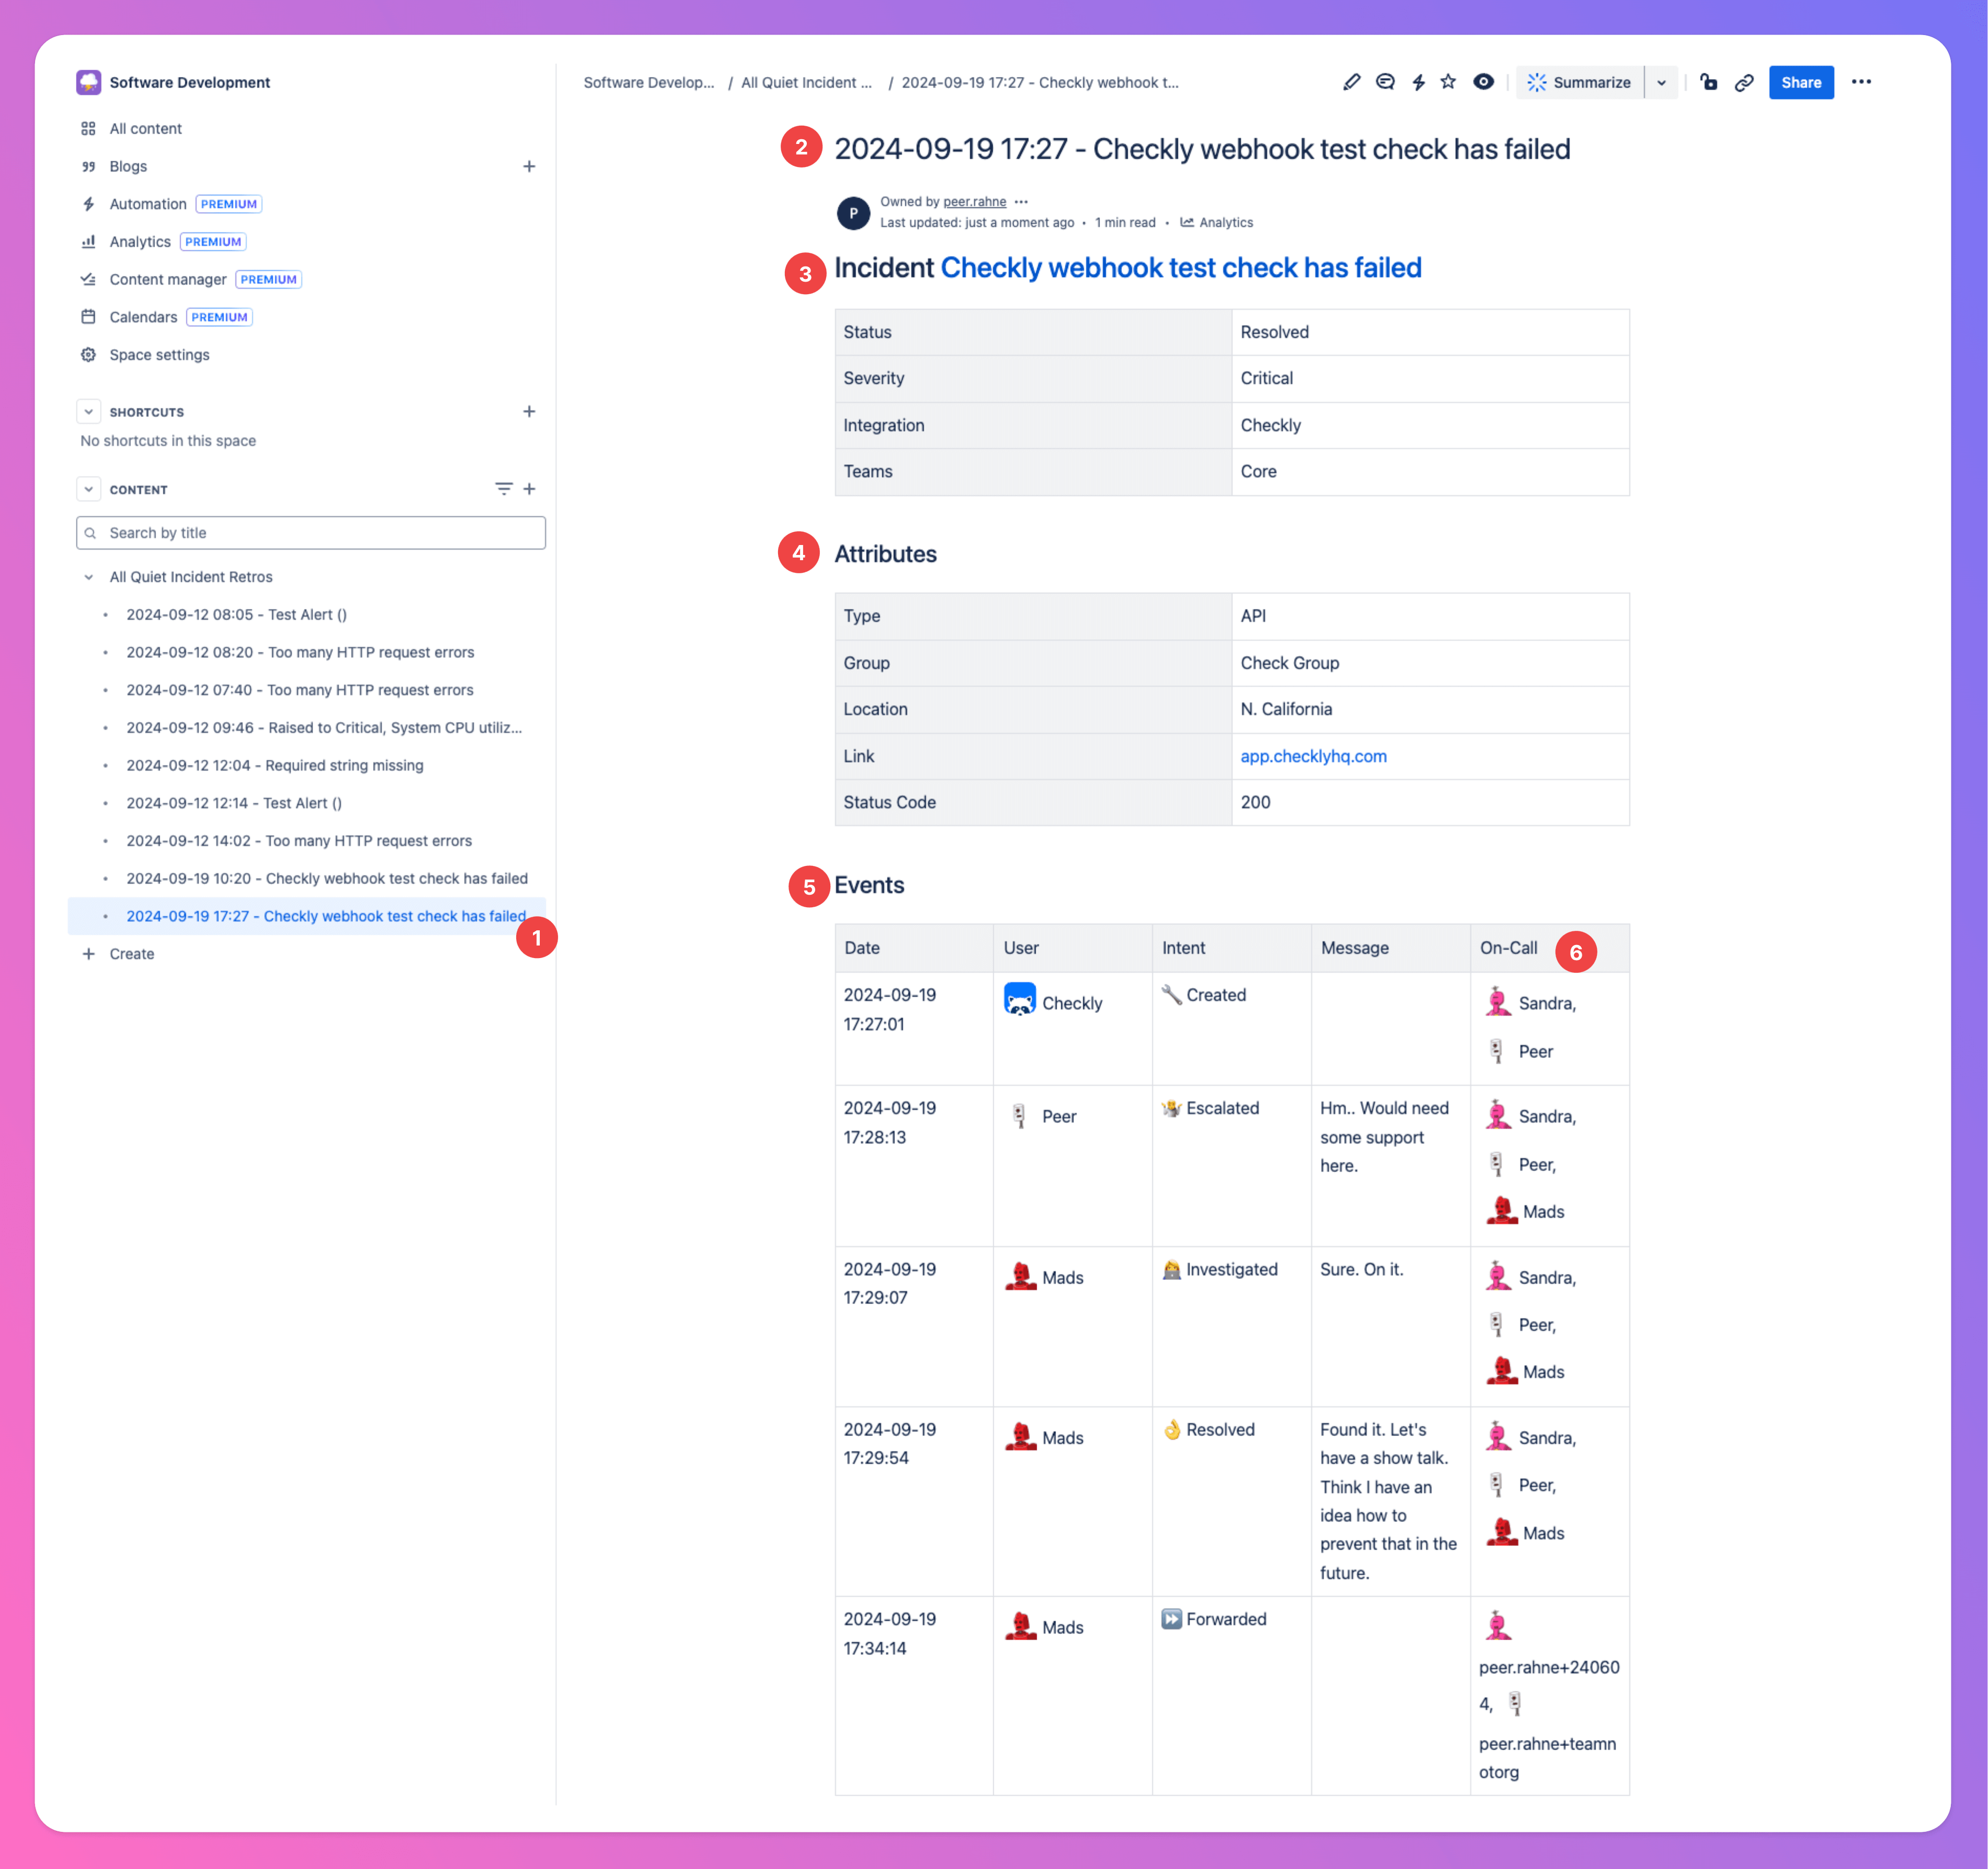
In the following part, we want to quickly demonstrate how a Confluence page created from an incident can look like. In the screenshot below, you can find an All Quiet incident.- There was some communication going on, and the team agreed to have a Retro for this incident. That’s why Mads forwarded it to Confluence.
- The Confluence page is linked.
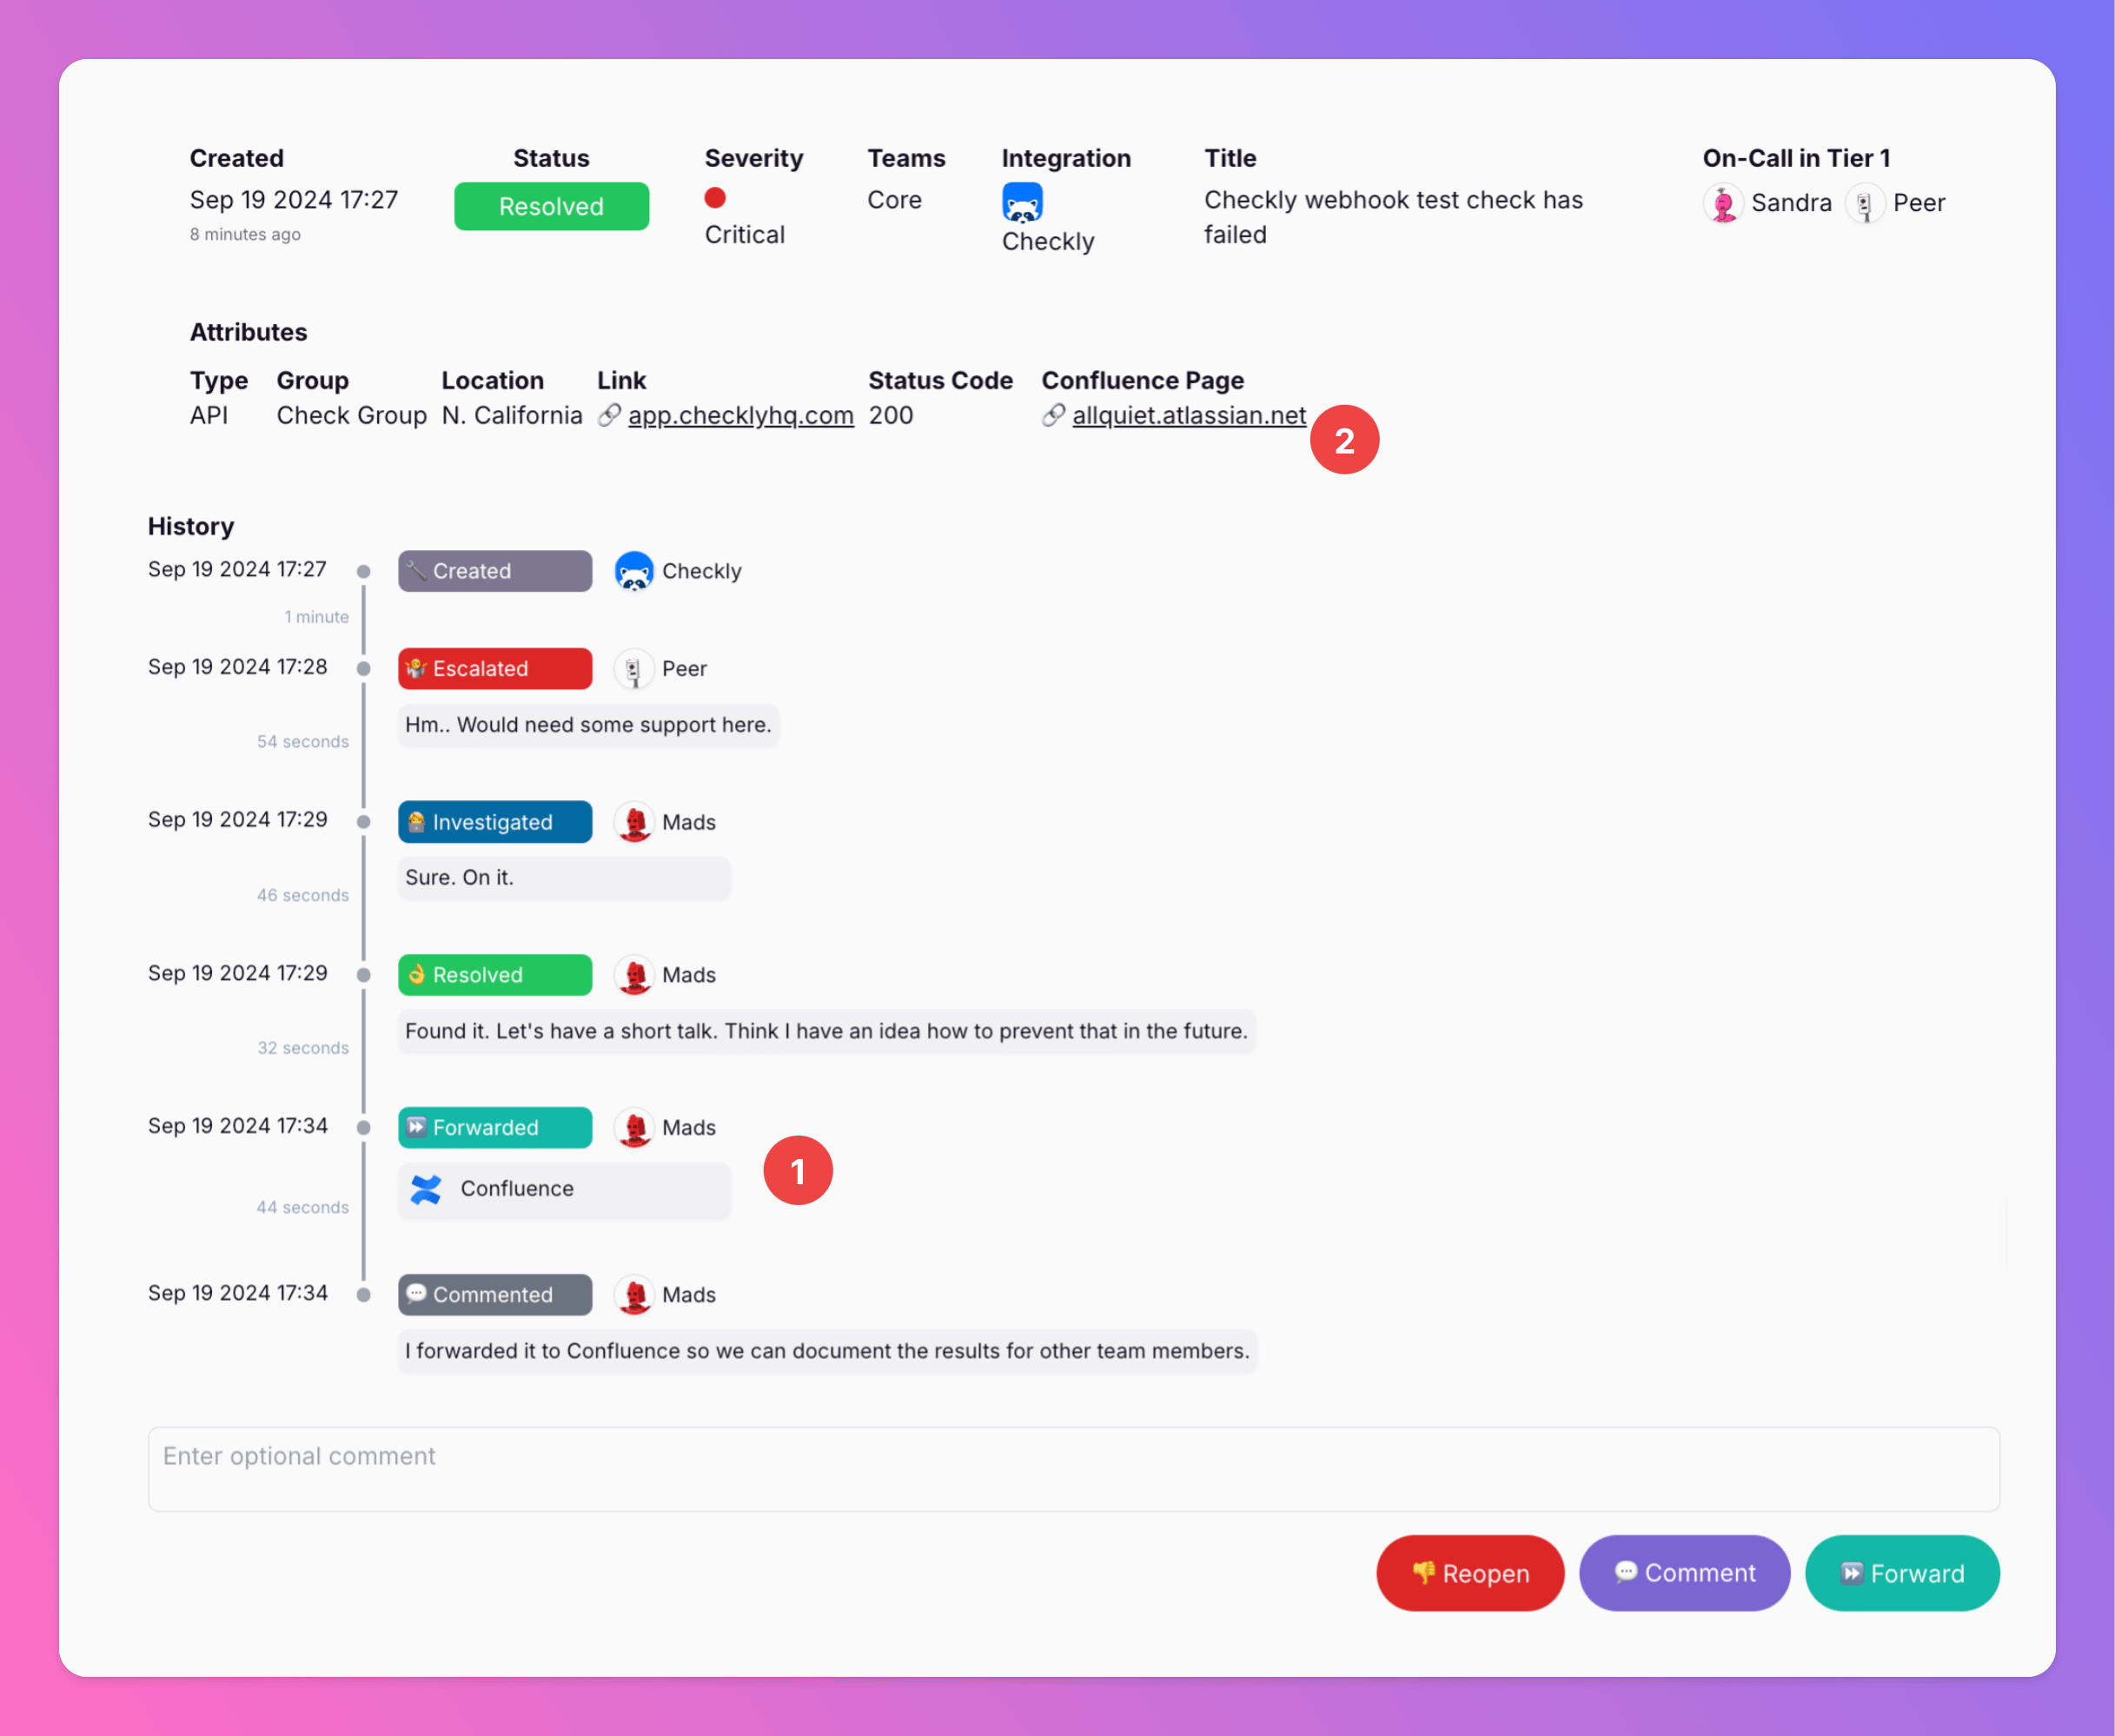
- As defined in my integration’s settings, the page got created below
Parent Page“All Quiet Incident Retros” - The title of the Confluence page is a combination of the timestamp of the incident’s creation and the incident title in All Quiet. Please note that timestamps in the title will always be based on your team’s timezone.
- In this section, you will find the main incident details, as well as a link to the incident in All Quiet (see section headline).
- This part features all additional incident attributes you previously defined in our mapping engine. Moreover, if there are further links related to the incident, they will be listed here.
- All events linked to the incident. Basically the communication in All Quiet.
- The team members that were on-call during each event. Only Tier 1 members and members from higher Tiers that got notified due to escalations are listed.