Setup time: 3 Min
1. Create Checkly Integration on All Quiet
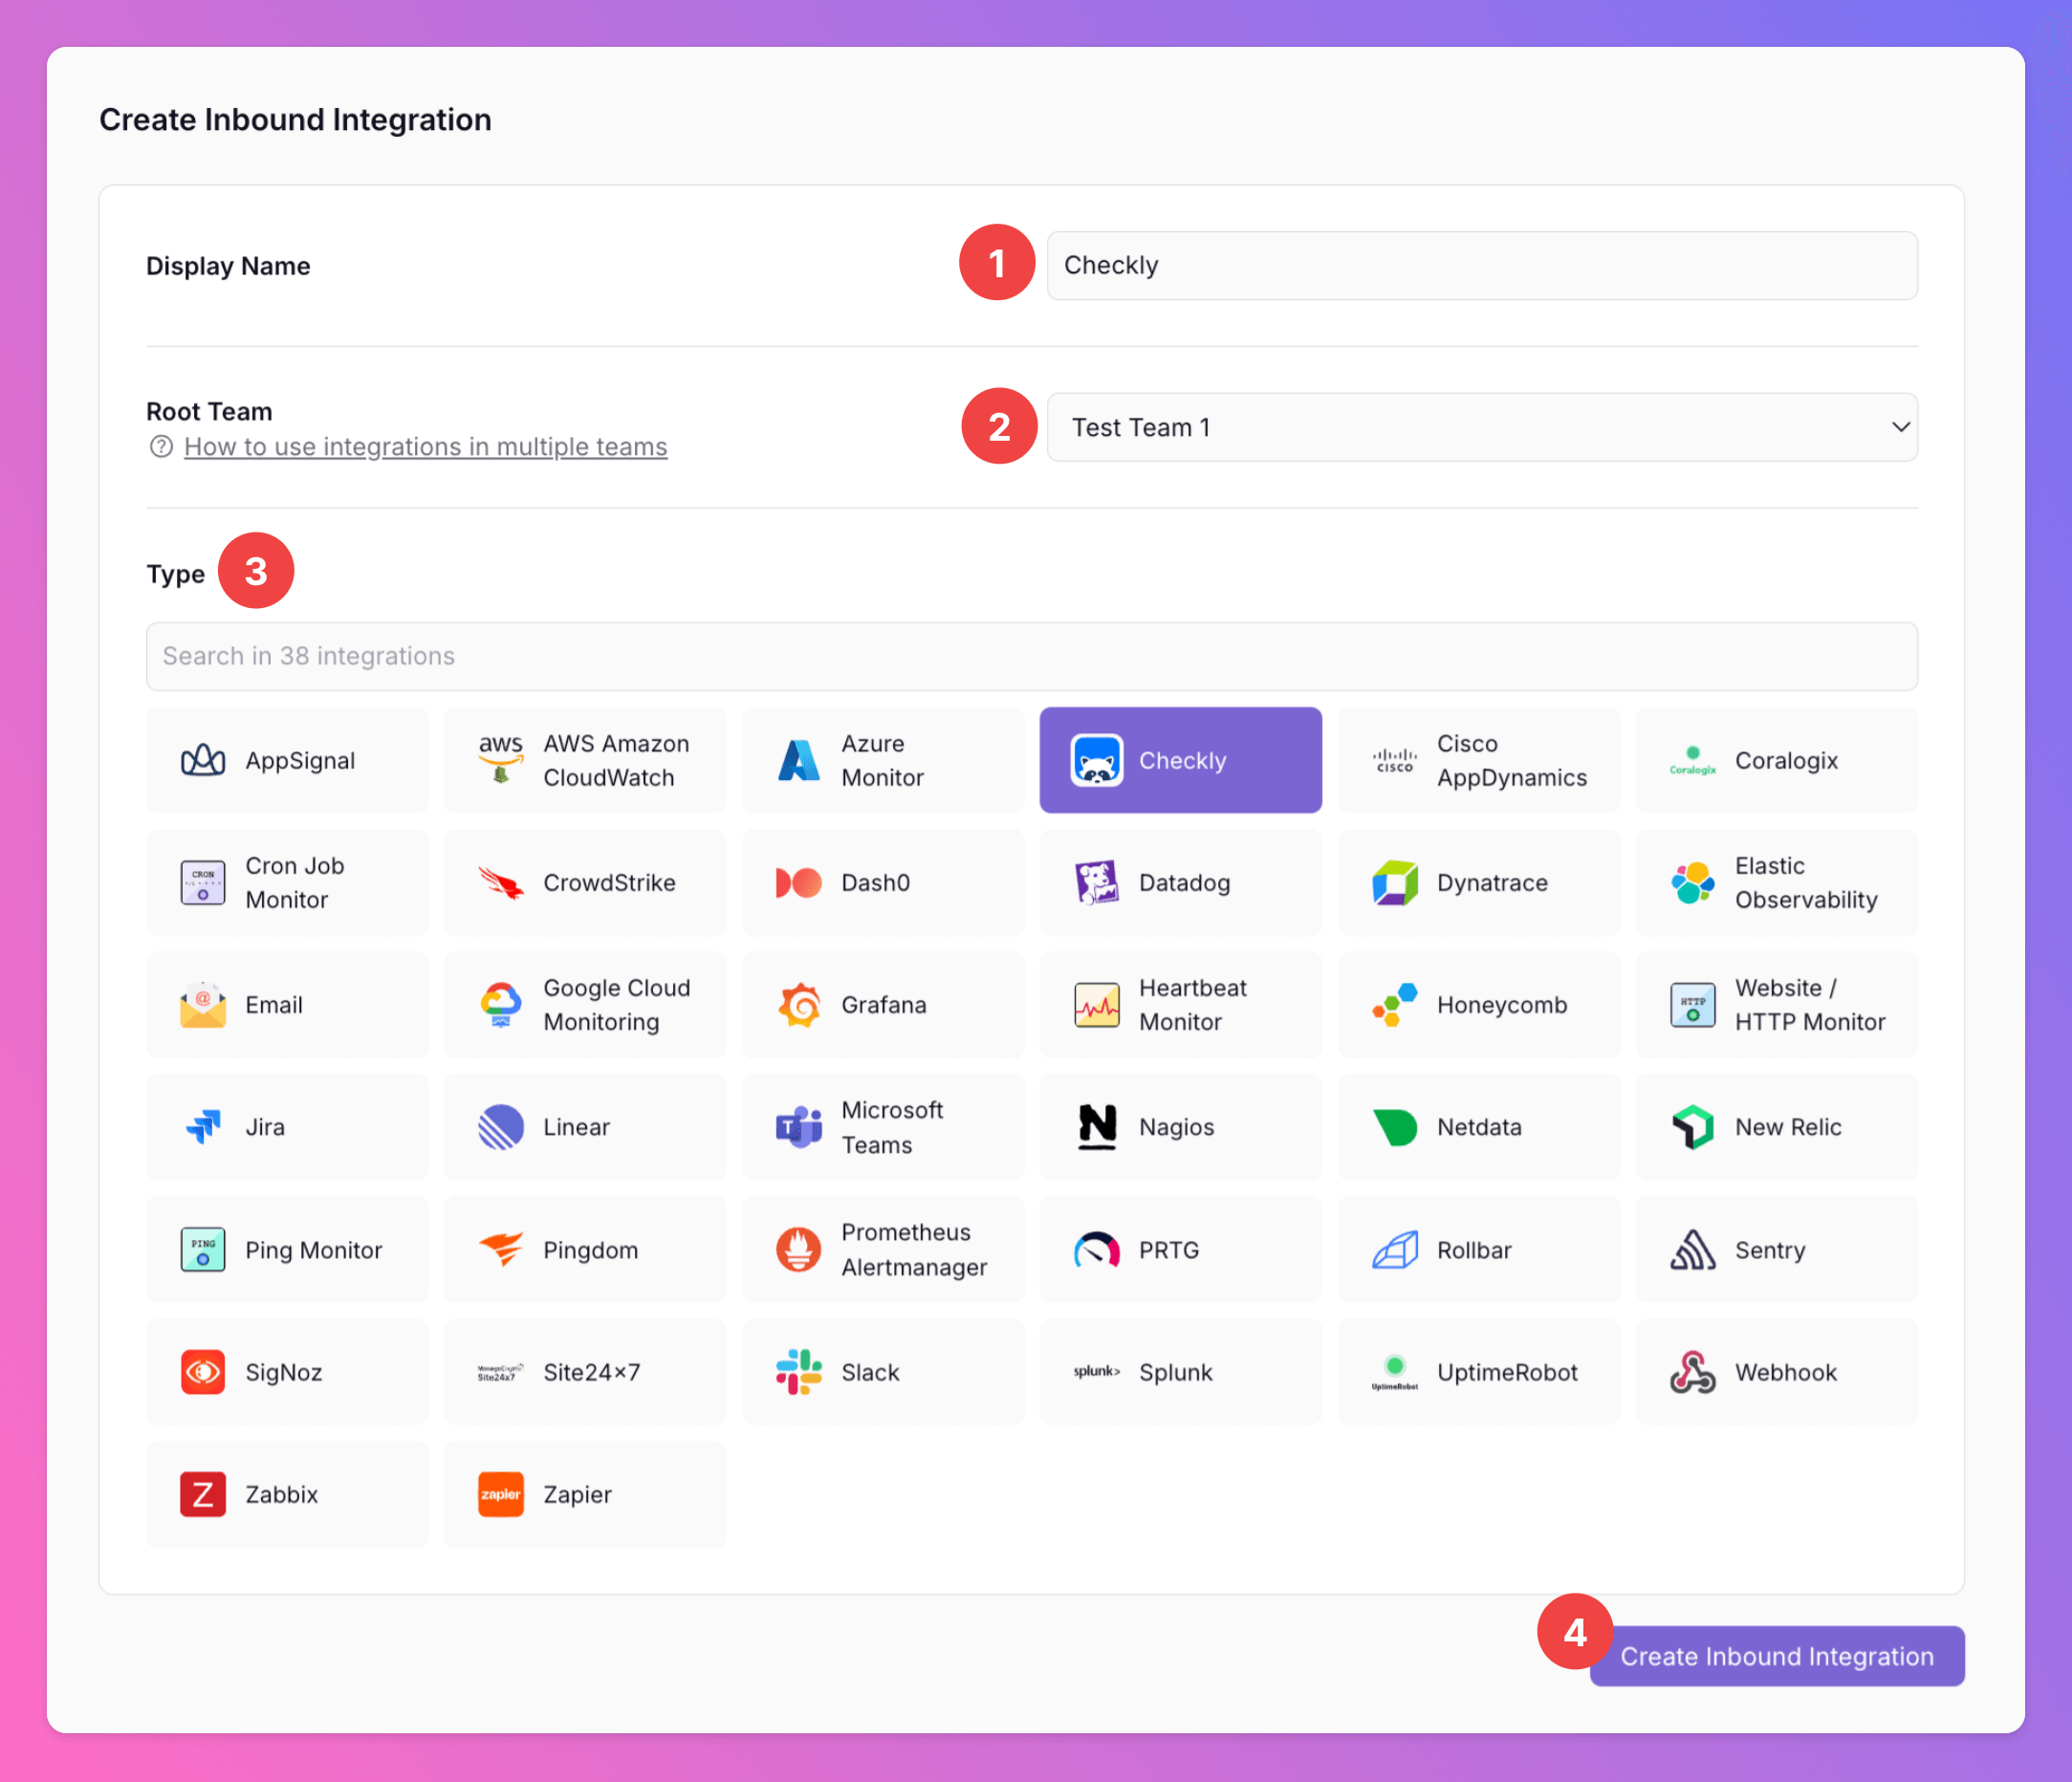
Sign in to your All Quiet account.Create Integration
- Click on the
Inbound Integrationstab. - Click on
+ Create.

Select Checkly as the integration’s type
- Enter a
Display Namefor your integration, e.g. “Checkly”. - Select a
Team. - Select
Checklyas the integration’s type. - Click
Create Inbound Integration.
Copy Webhook URL
After creating the integration on All Quiet, you can view and copy the webhook URL. You will require this URL in step 2 when configuring the custom integration on Checkly. If you choose to add a webhook secret in Checkly for increased security, you’ll need to add it here later.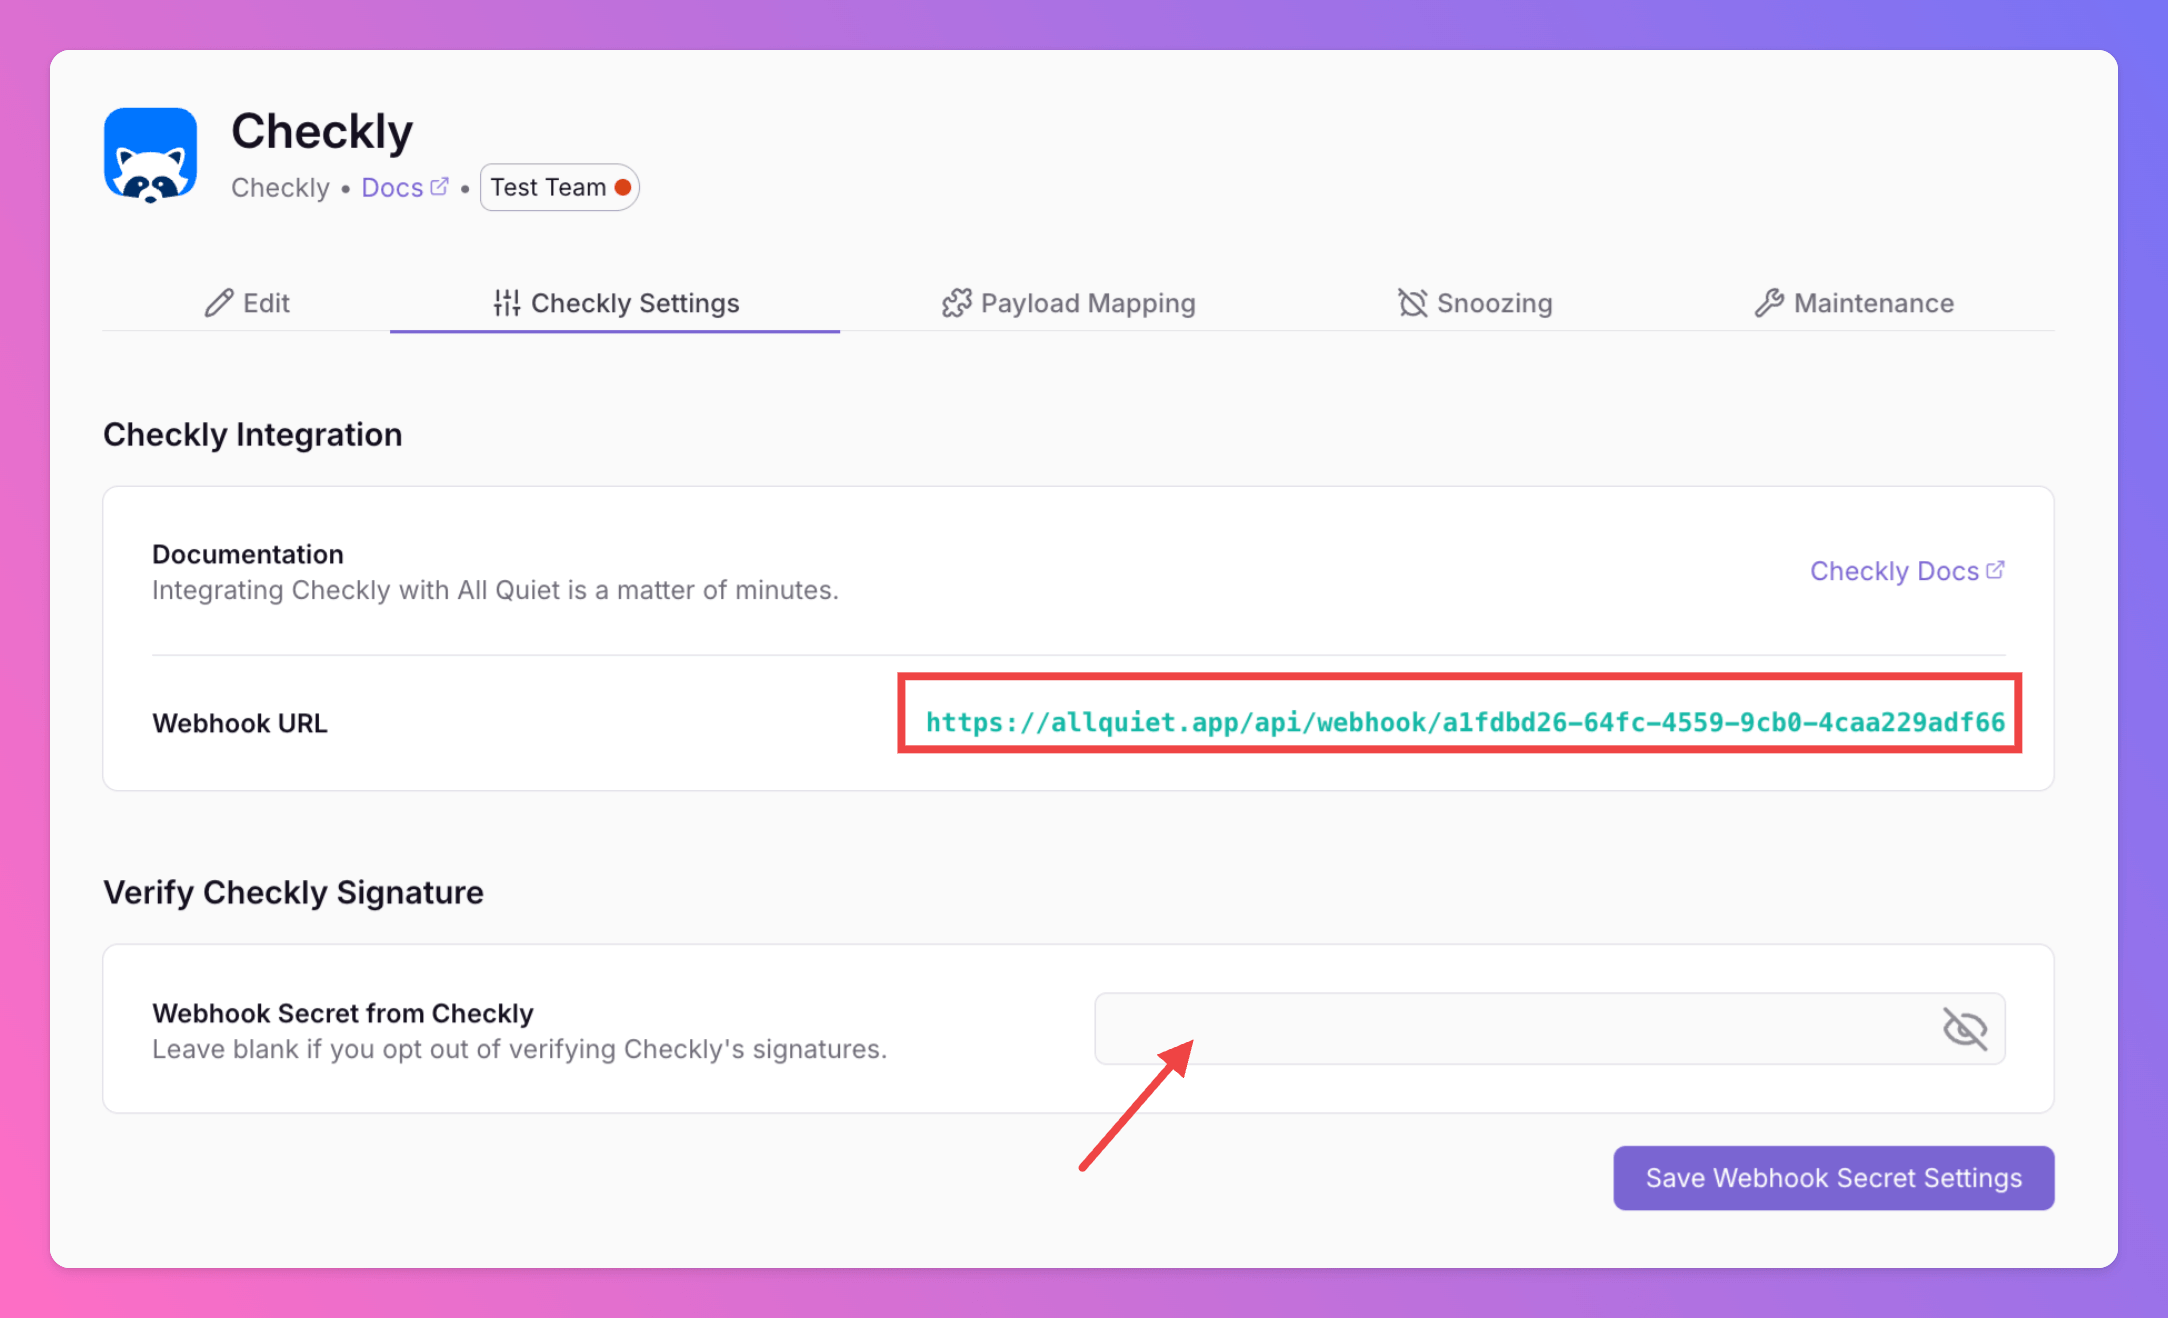
2. Configure a custom integration with Checkly
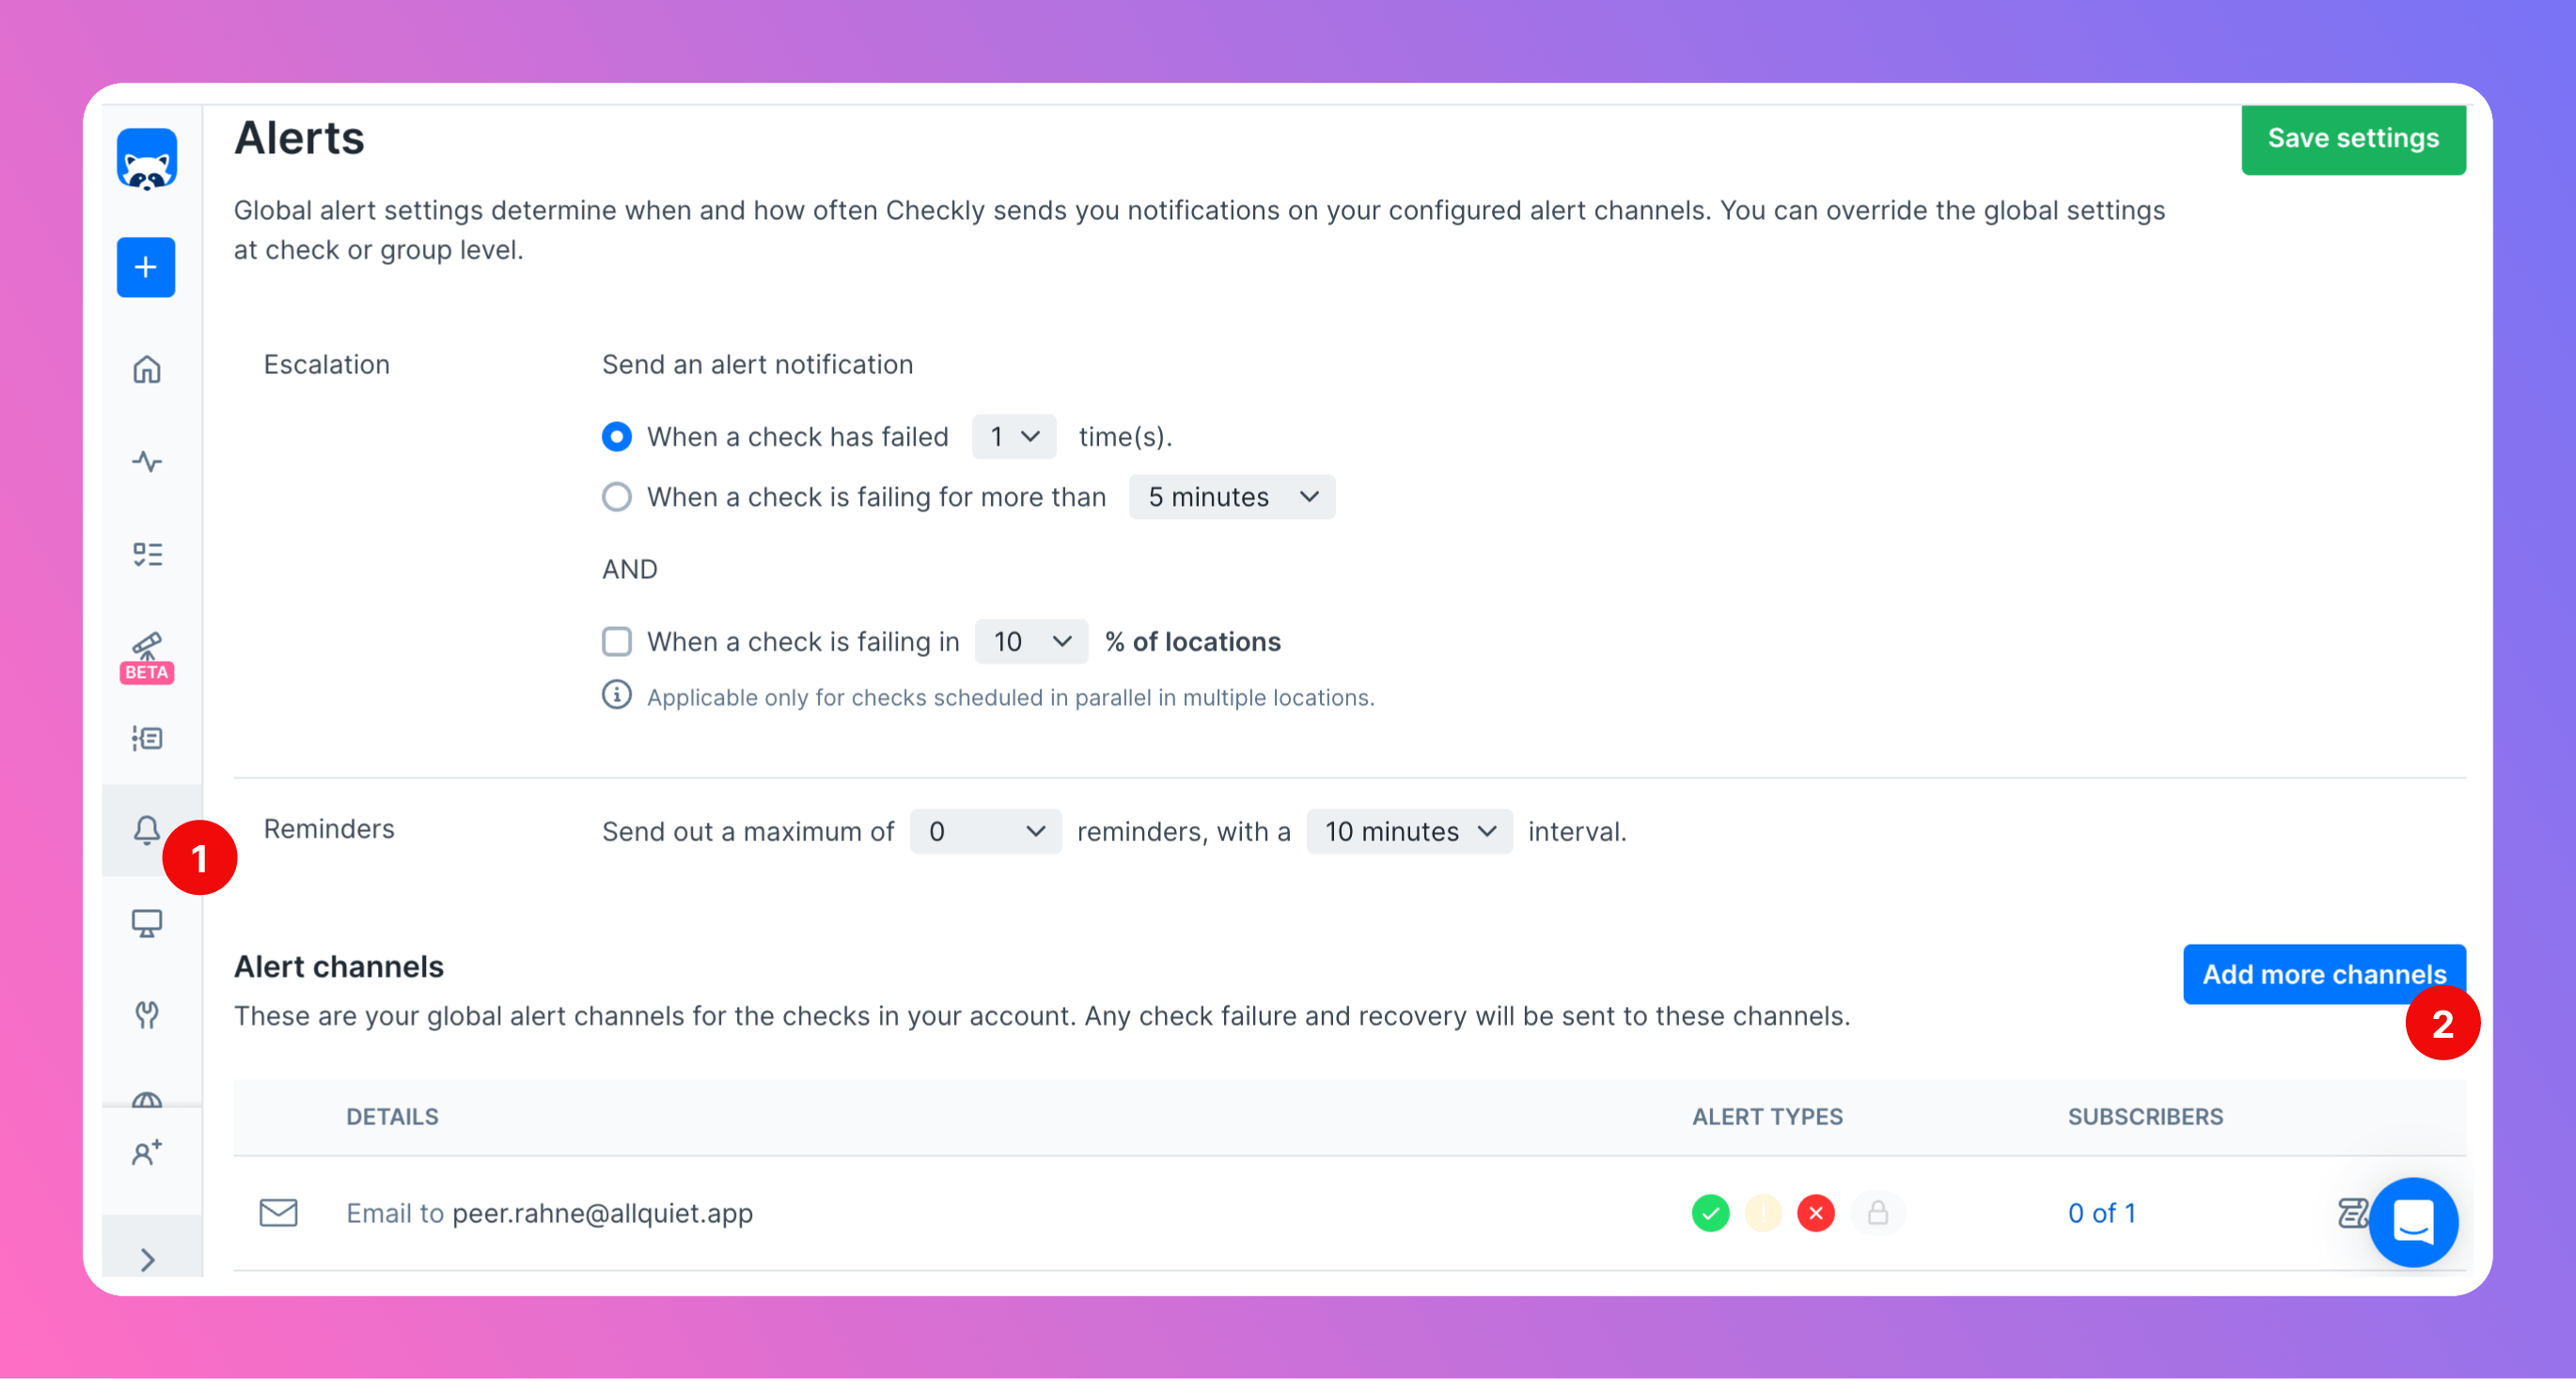
Once you’ve set up an integration of type “Checkly” with All Quiet, the next crucial steps involve configuring your Checkly alerts. This is essential for ensuring that your monitoring setup can effectively send incidents to the All Quiet webhook. First, you need to sign in to your Checkly Account.- Open
Alerts - Click
Add more channels
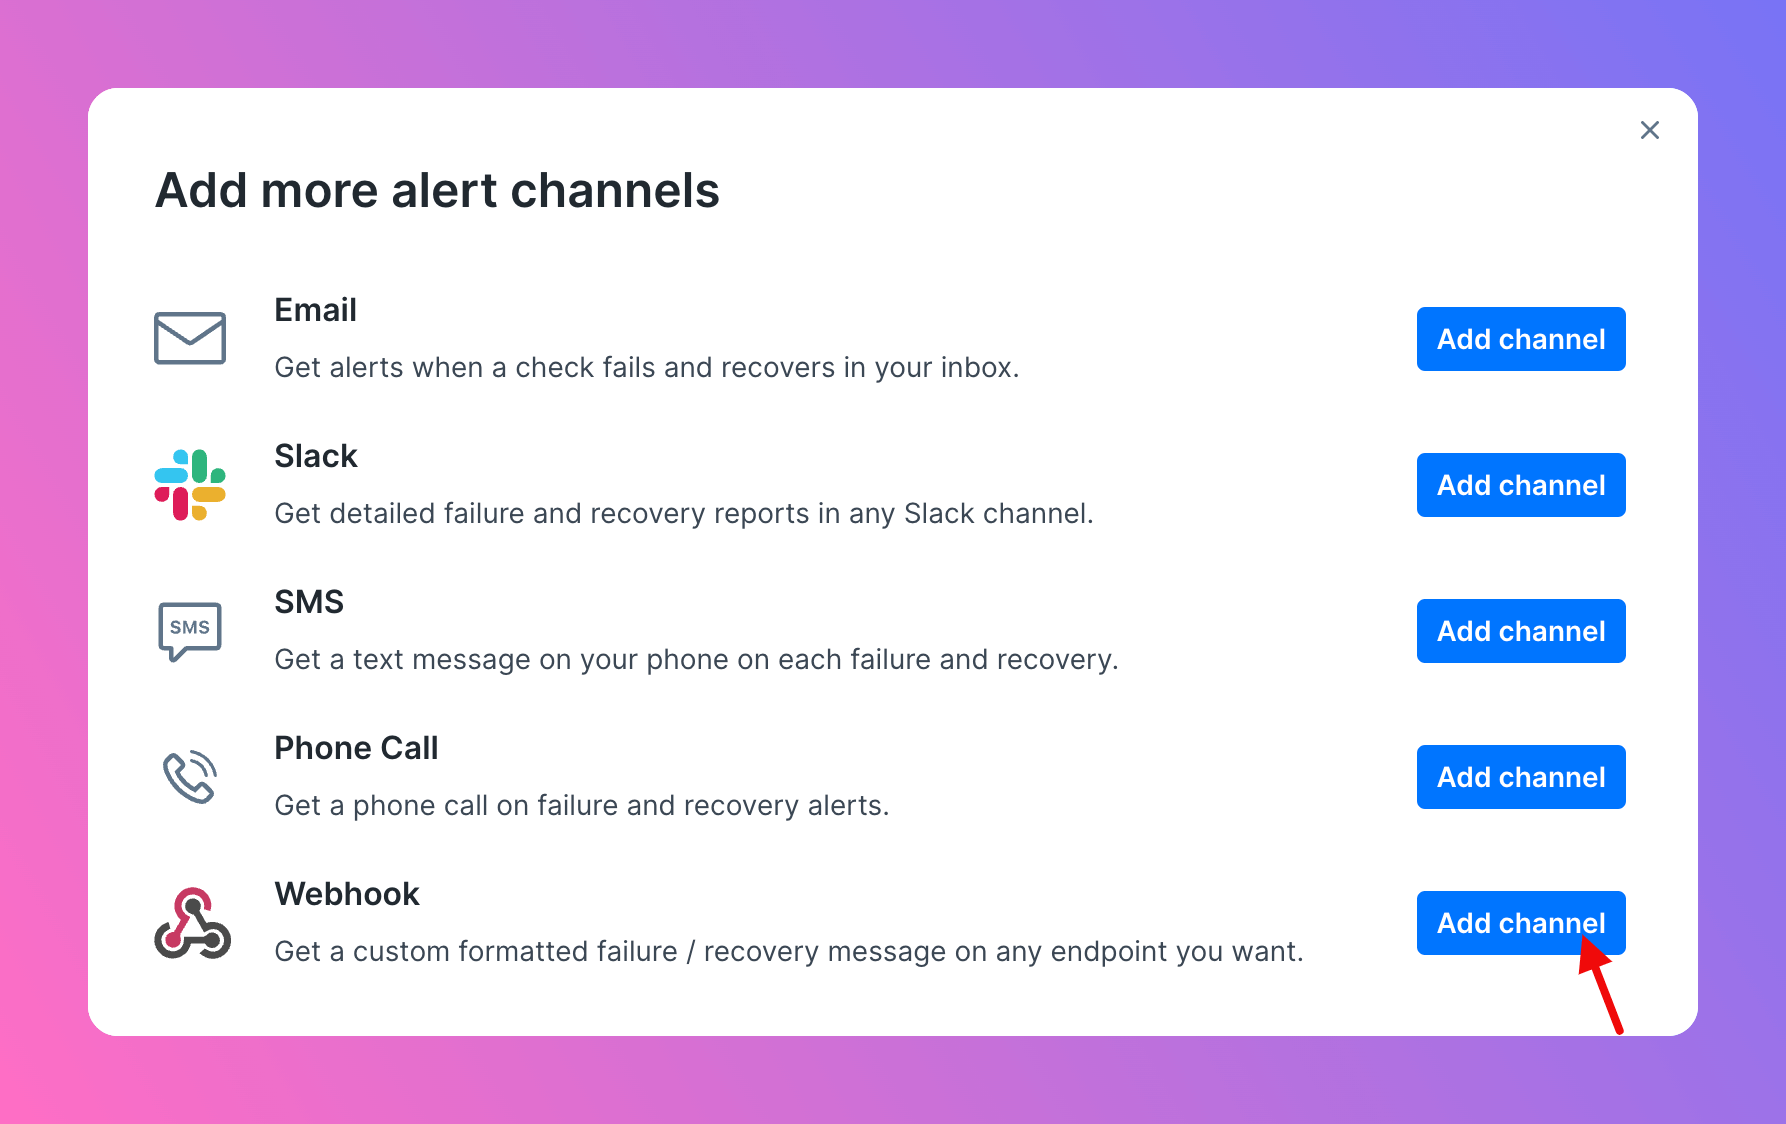
Webhook as the channel type.
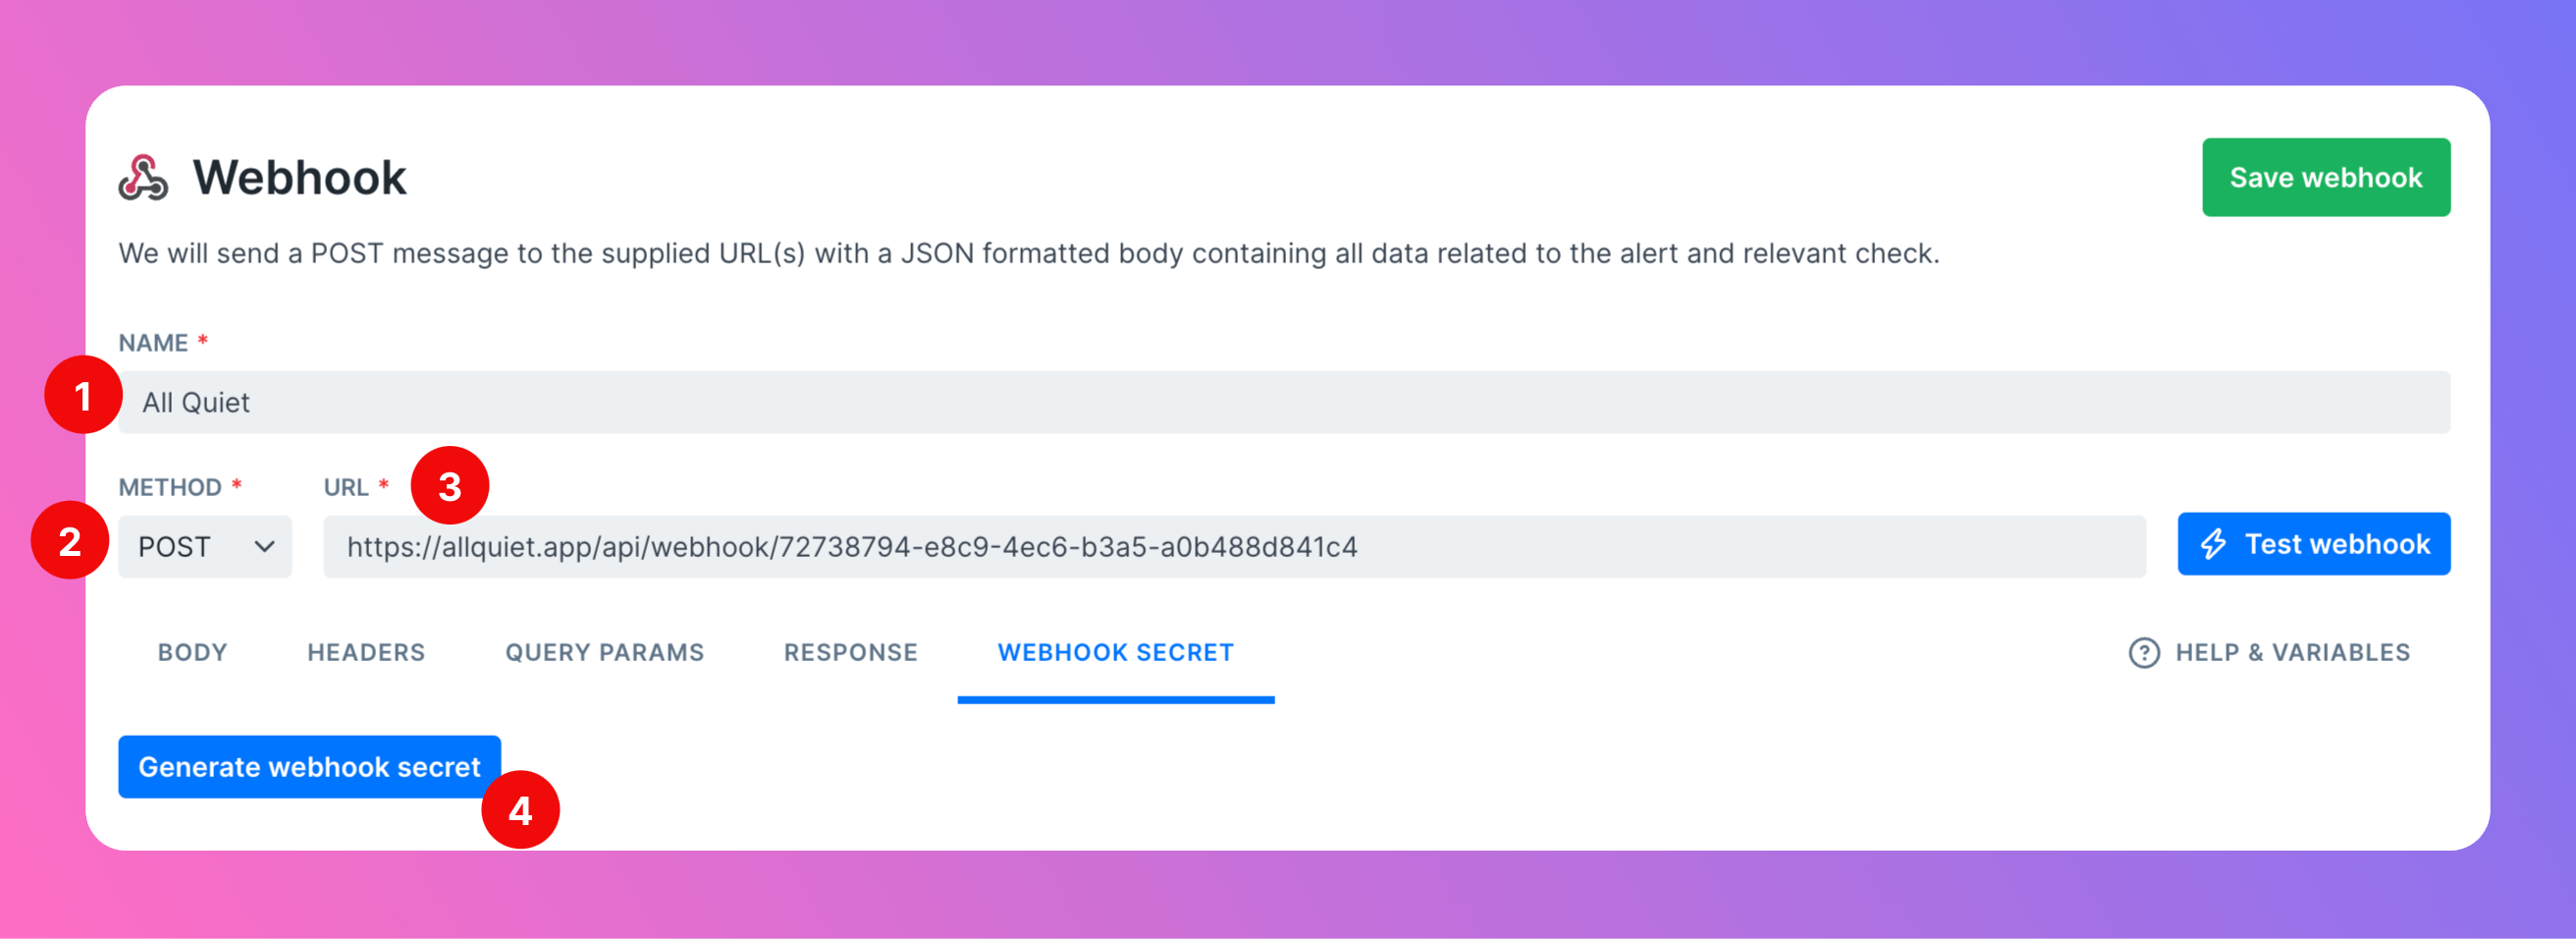
- Select a name for the webhook, e.g.
All Quiet. - Method should be
POSTas we want to forward alerts to All Quiet. - As URL, paste in the All Quiet webhook URL you’ve obtained in step Get The All Quiet Webhook URL.
- For extra security, you can select the tab
Webhook secretand generate a webhook secret.

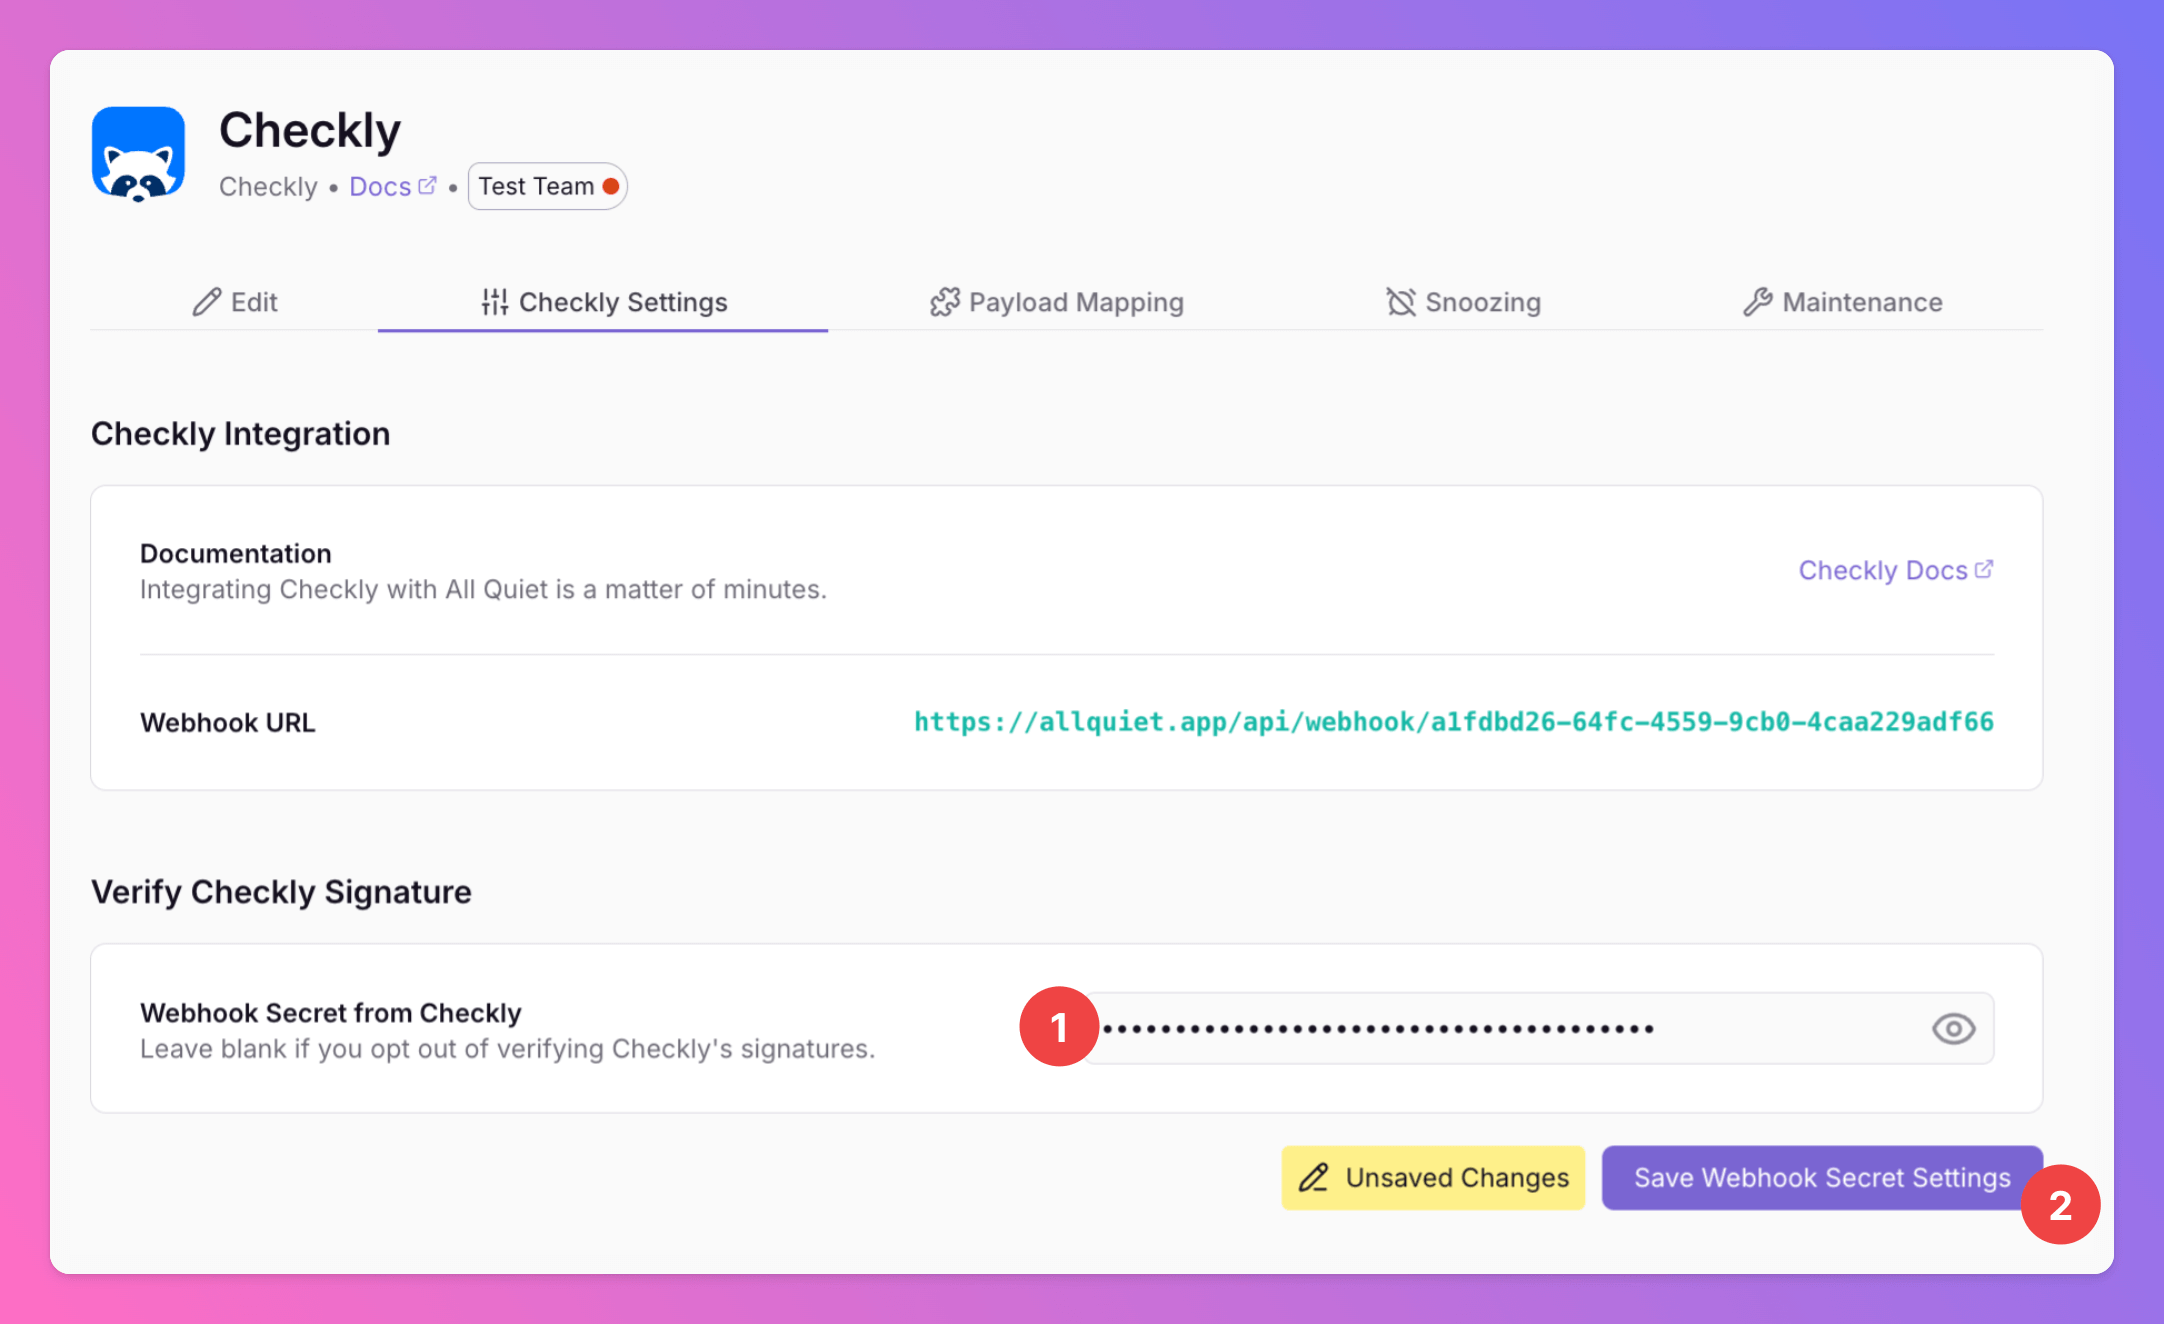
- Paste the webhook secret.
Save Webhook Secret Settings
BODY tab.
Paste the following payload into your checkly webhook template.

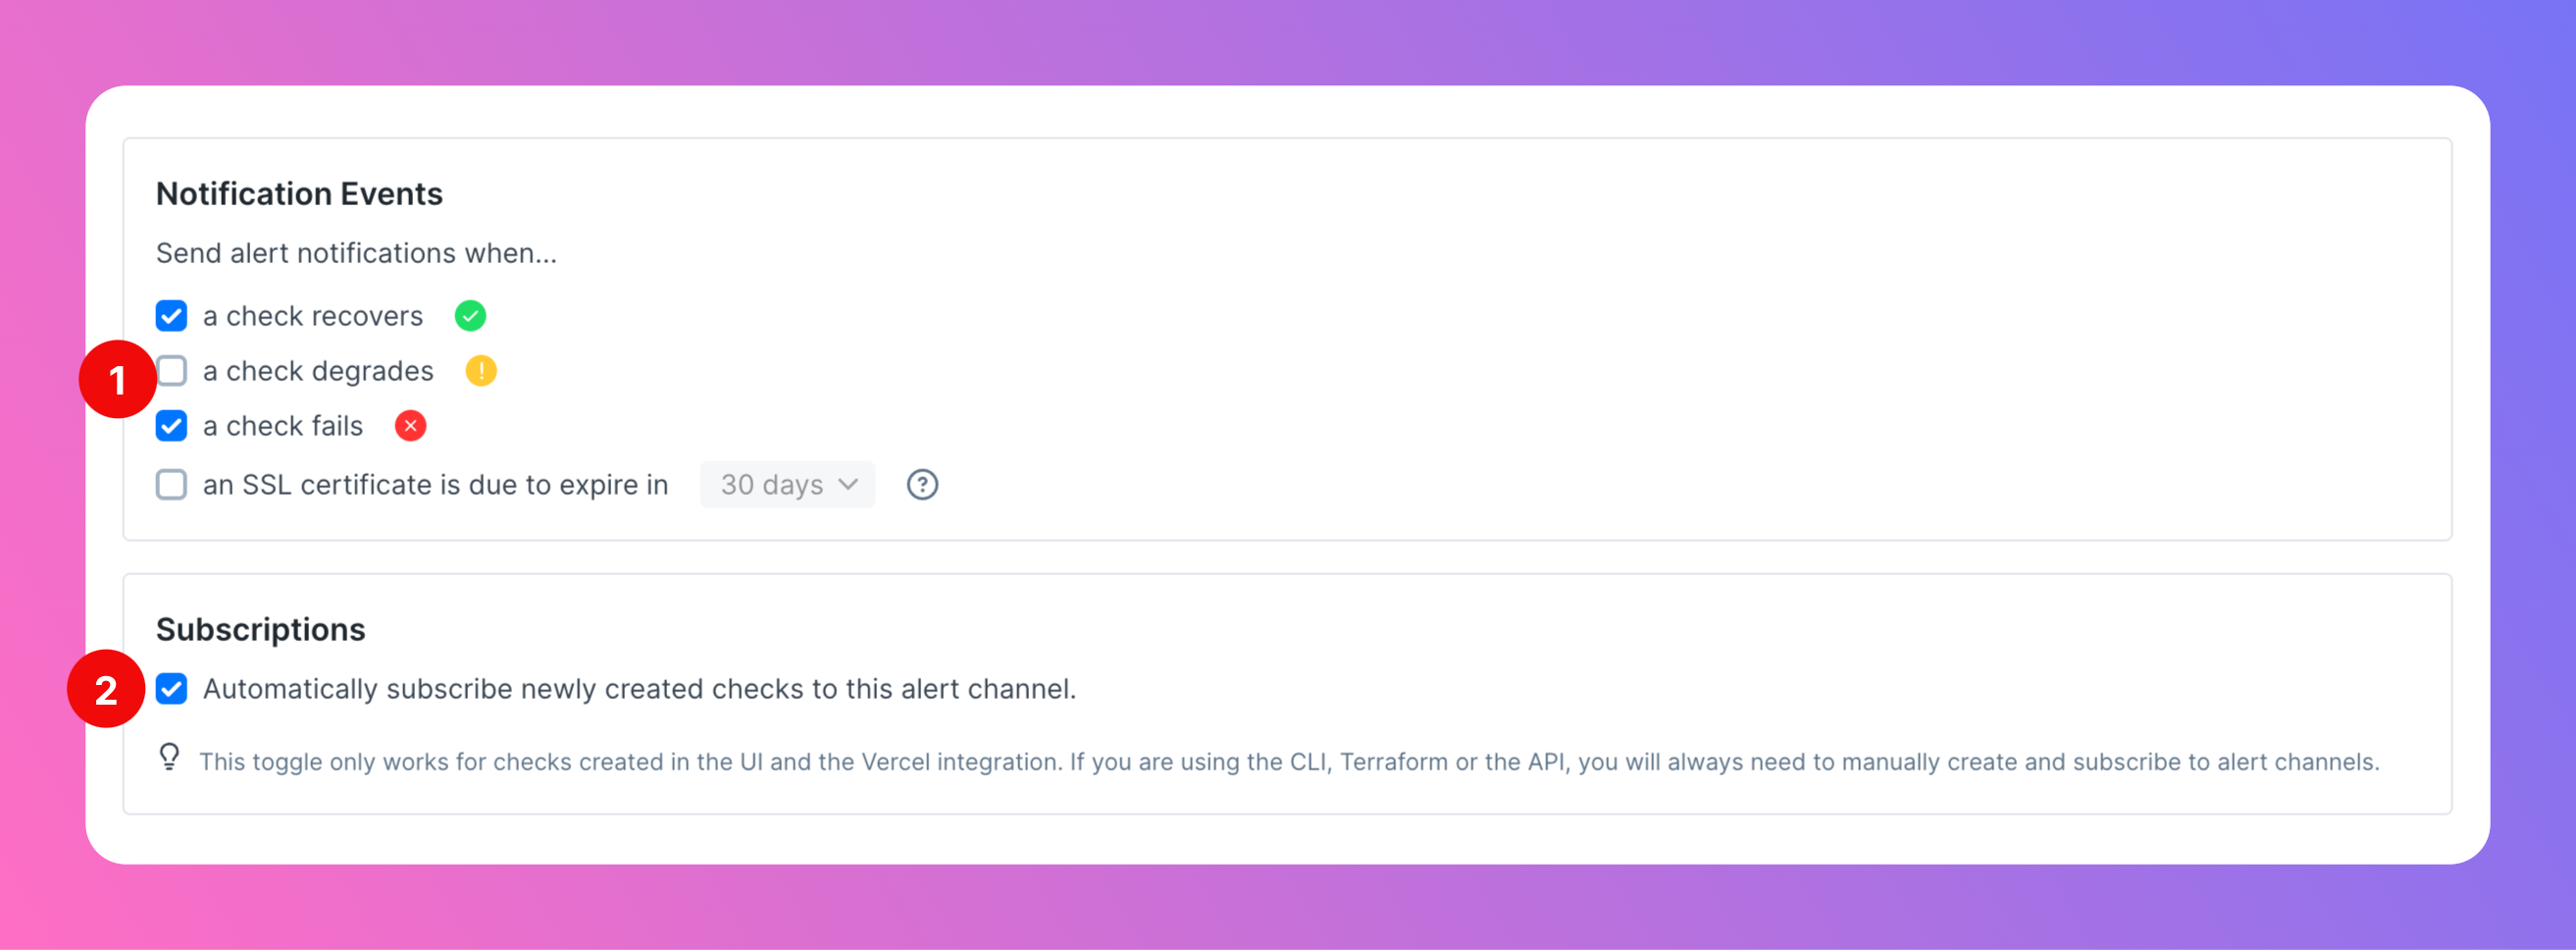
- Select the type of
Notification Eventsfor which you would like to create All Quiet alerts. - Activate
Subscriptionsif you want to make sure that alerts for newly created checks will also be sent to All Quiet.
- Test the Webhook. If successful, you will find the generated incident on your All Quiet incident overview (see 2nd screenshot).
- Save the webhook.


You’re ready to go. If you set up your integration this way, Checkly will send alerts for all of your checks to All Quiet.