Setup time: 5 Min
1. Create Coralogix Integration on All Quiet
Sign in to your All Quiet account.Create Integration
- Click on the
Inbound Integrationstab. - Click on
+ Create.

Select Dash0 as the integration’s type
- Enter a
Display Namefor your integration, e.g. “Coralogix”. - Select a
Team. - Select
Coralogixas the integration’s type. - Click
Create Inbound Integration.
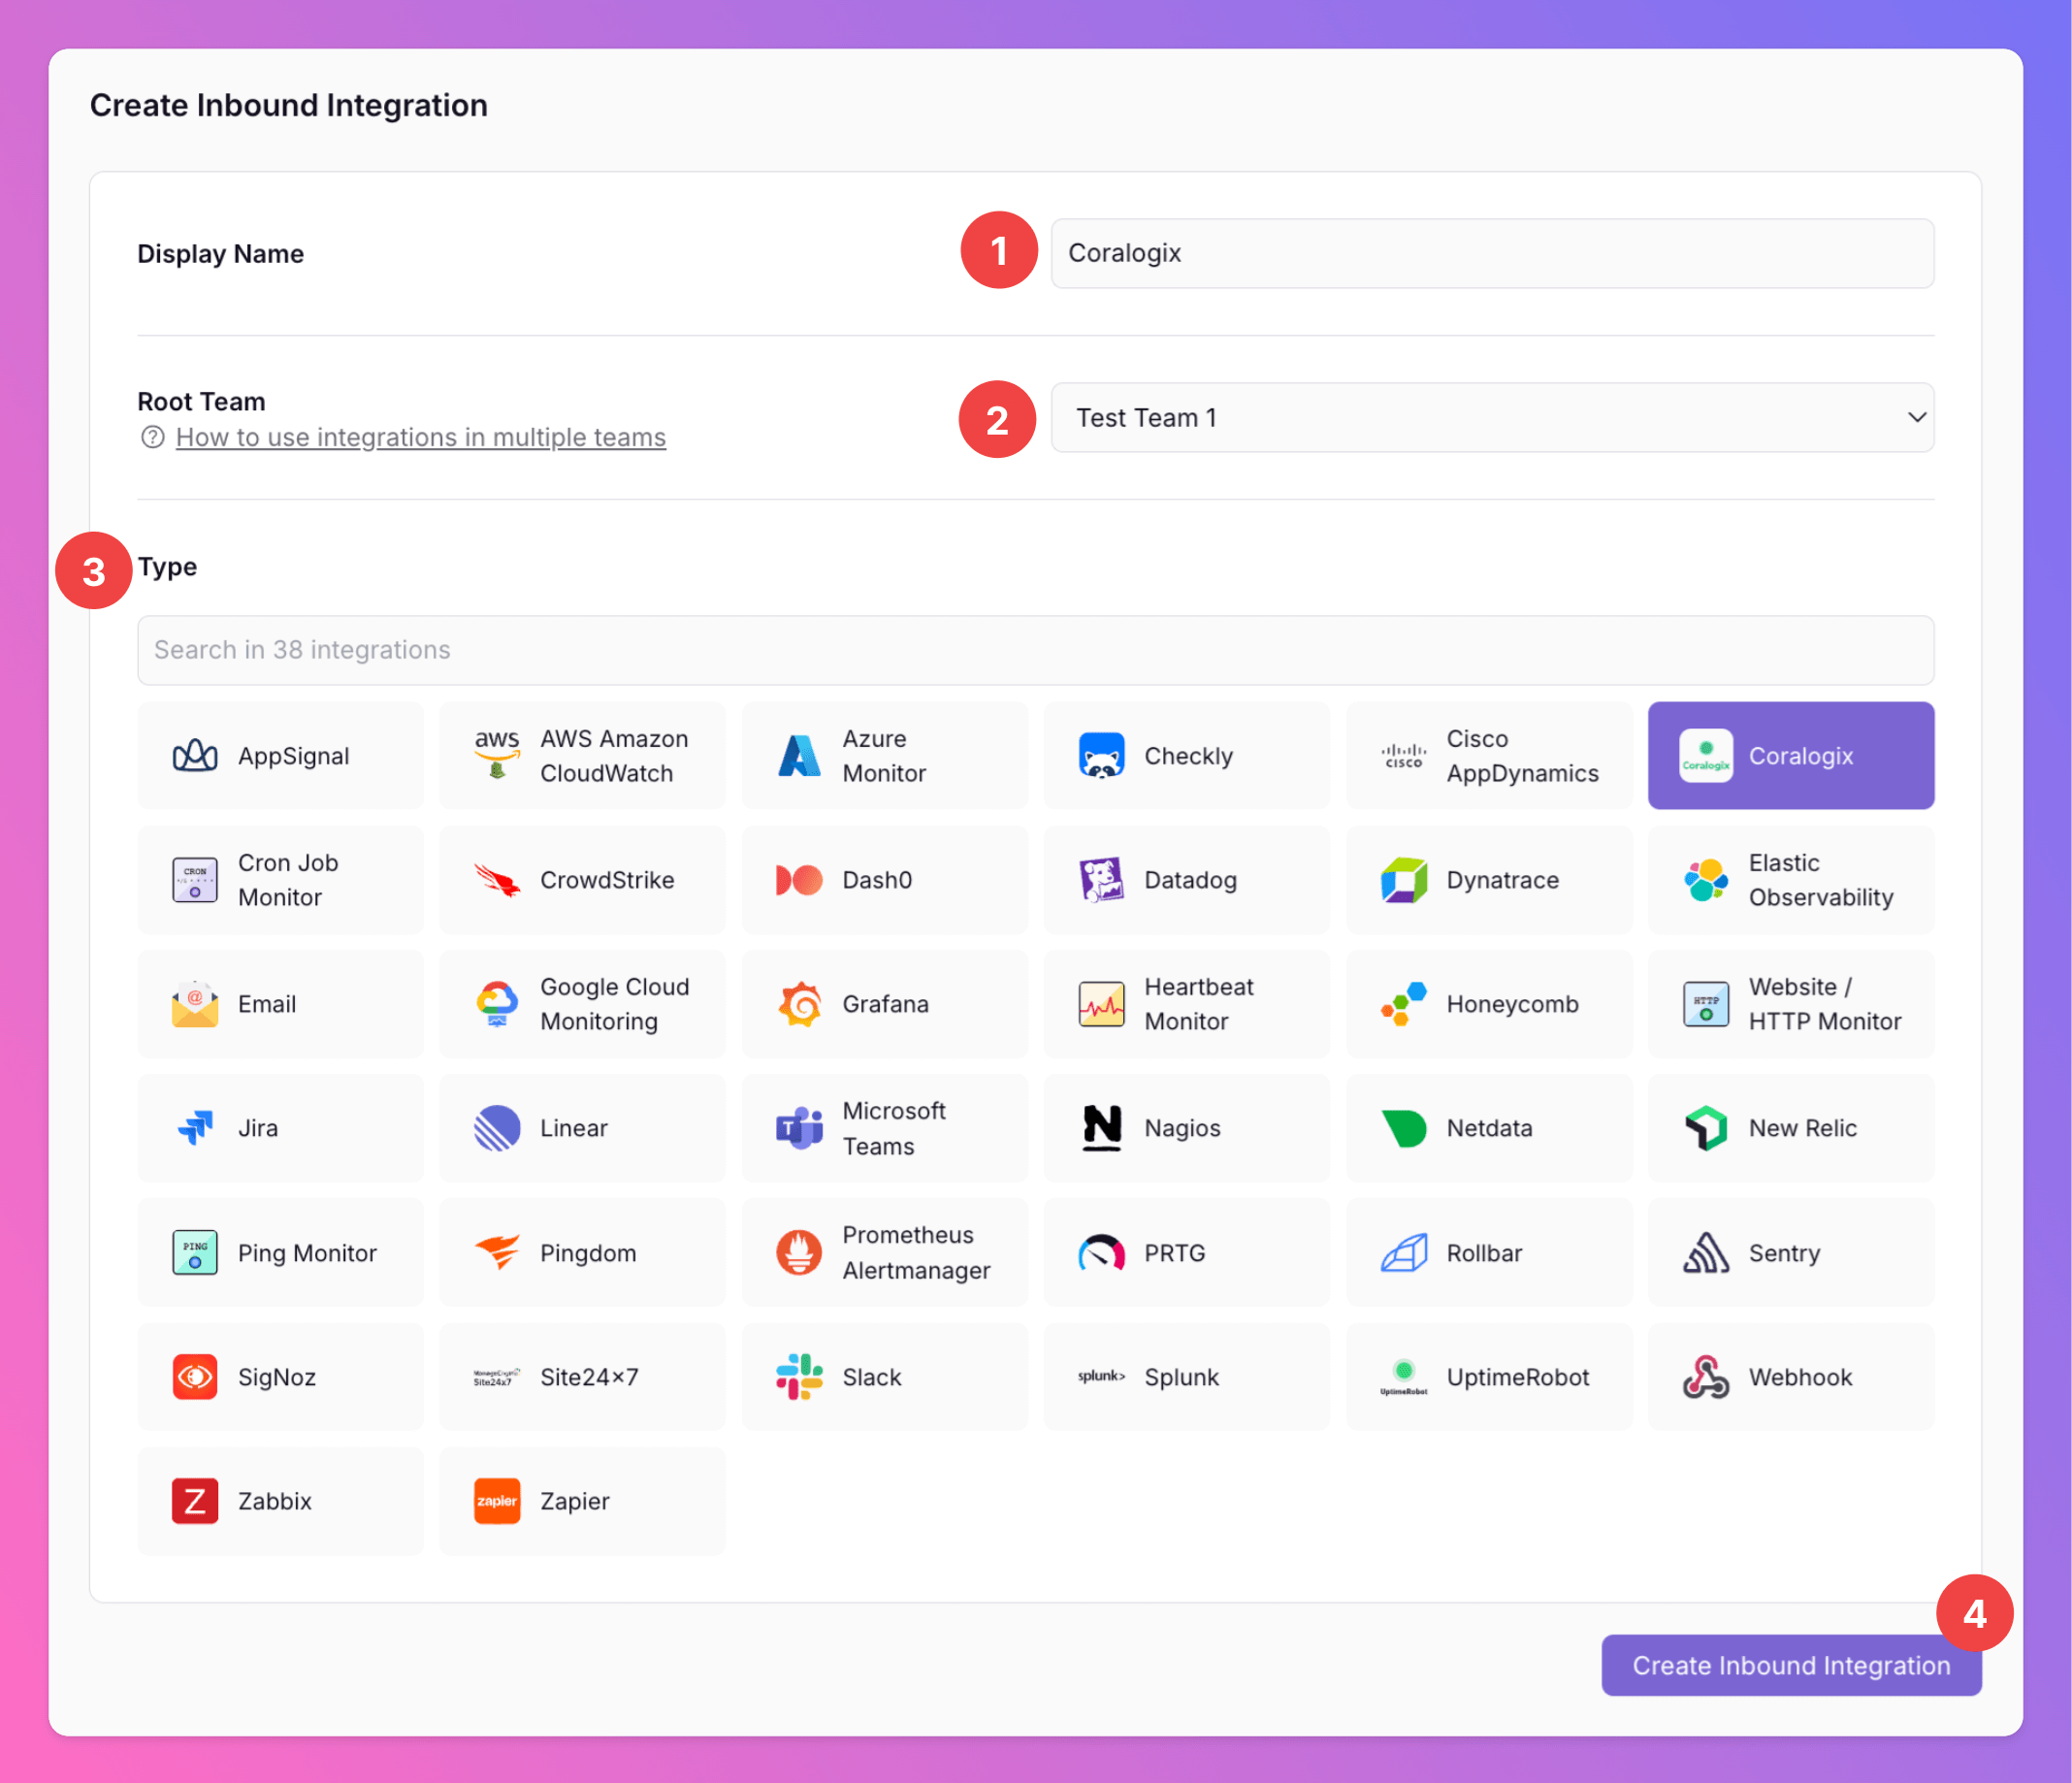
Get the All Quiet Webhook URL
After creating the integration on All Quiet, you can view and copy the webhook URL. You will require this URL in step 2 when configuring the custom integration on Coralogix.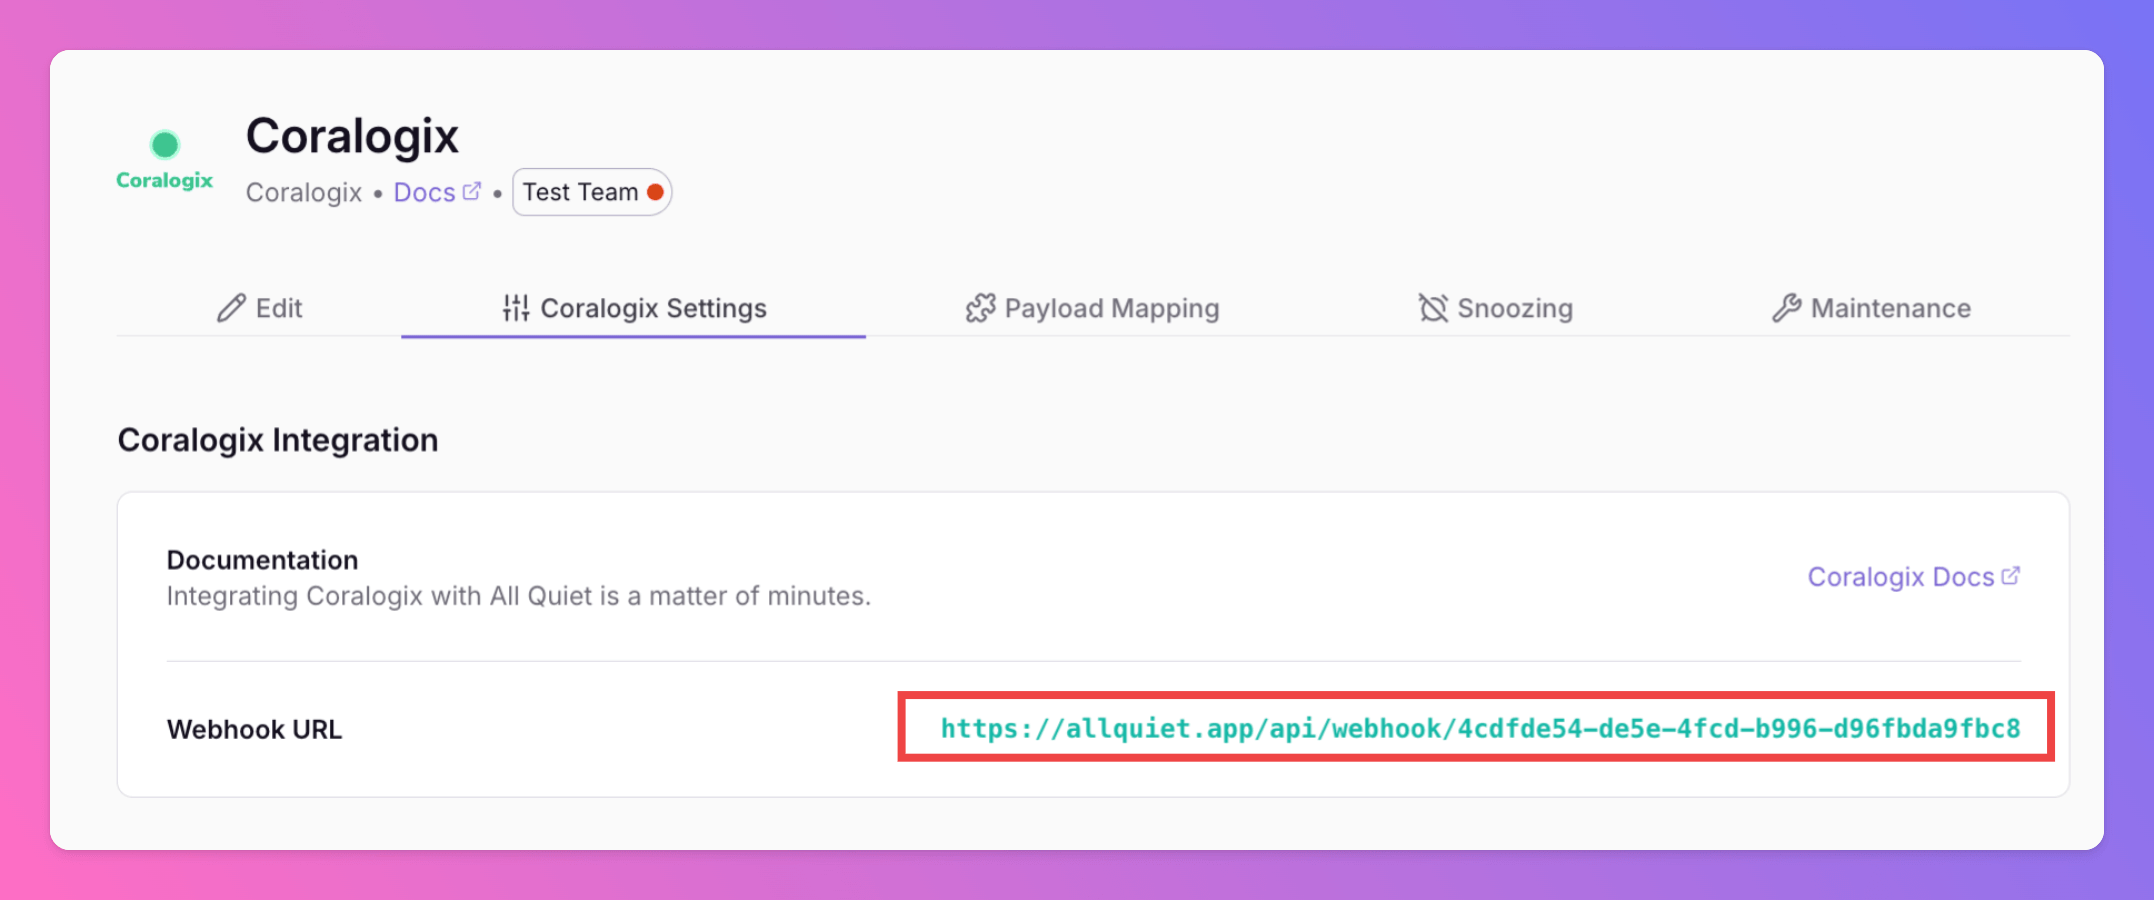
2. Configure the Integration with Coralogix
Once you’ve set up an integration of type “Coralogix” with All Quiet, it takes only a few more steps in your Coralogix account to finish off your setup.Add a Webhook Integration
From your dashboard in Coralogix, selectIntegrationsWebhooks
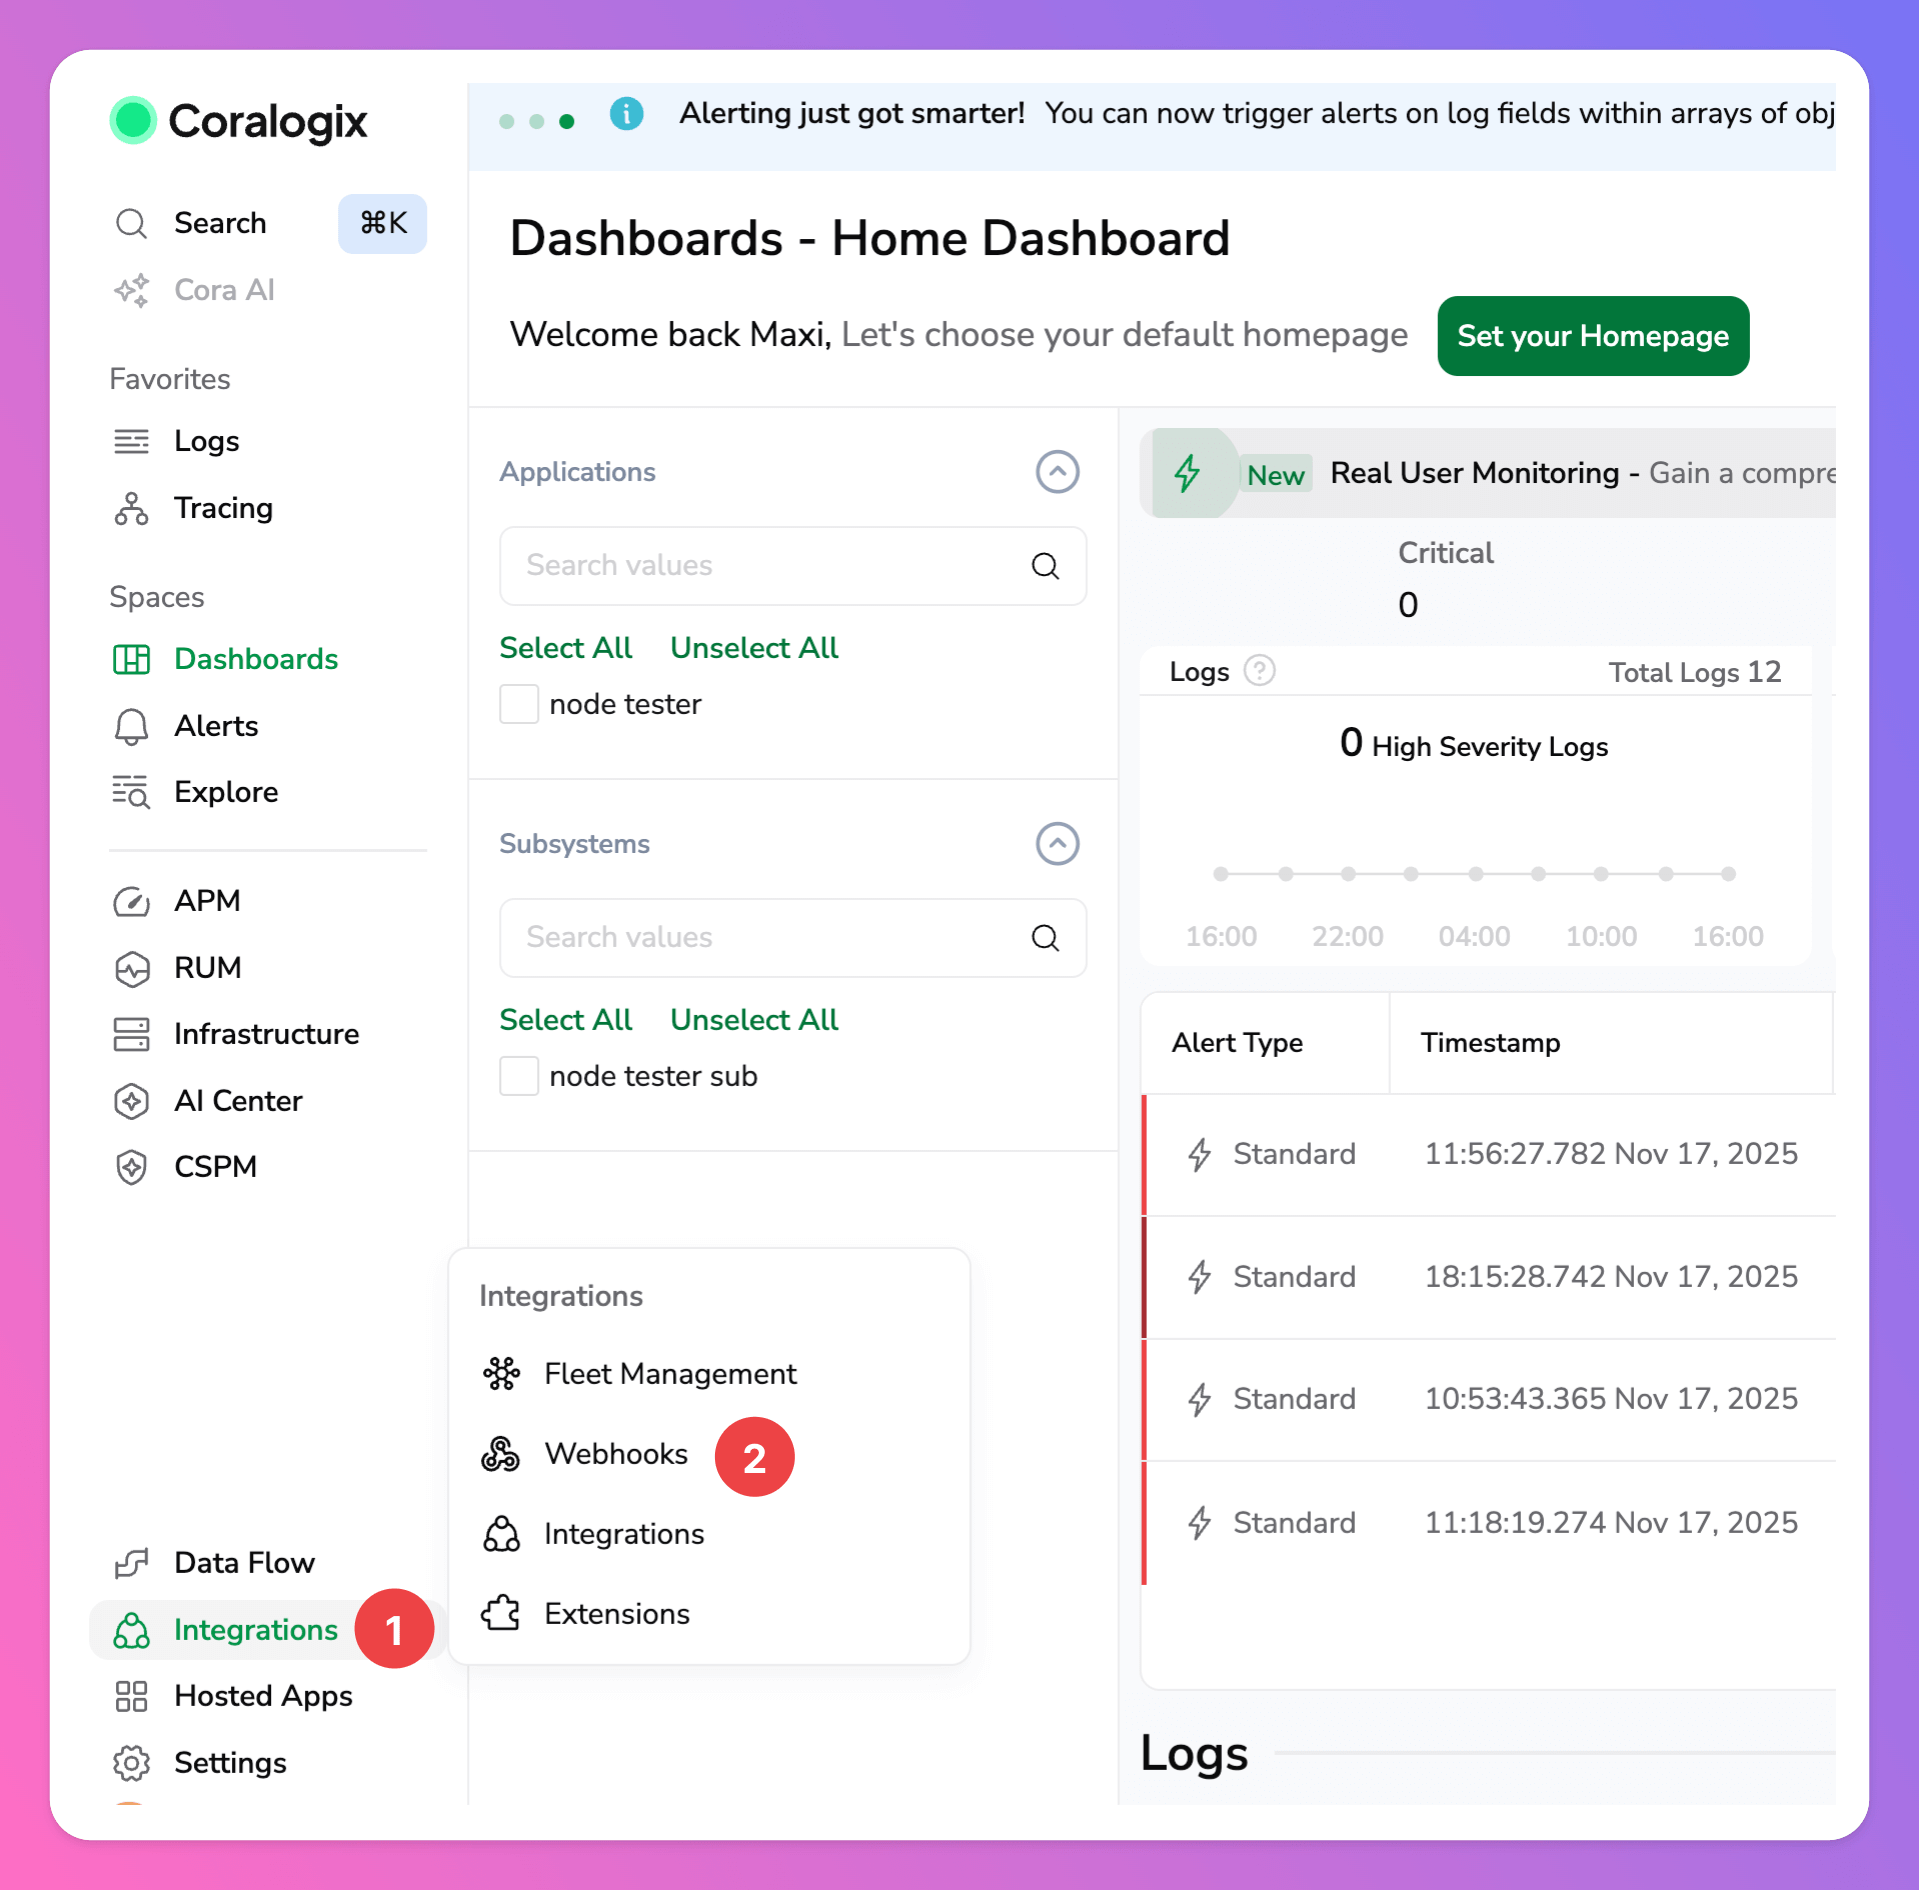
Generic Webhook as integration.
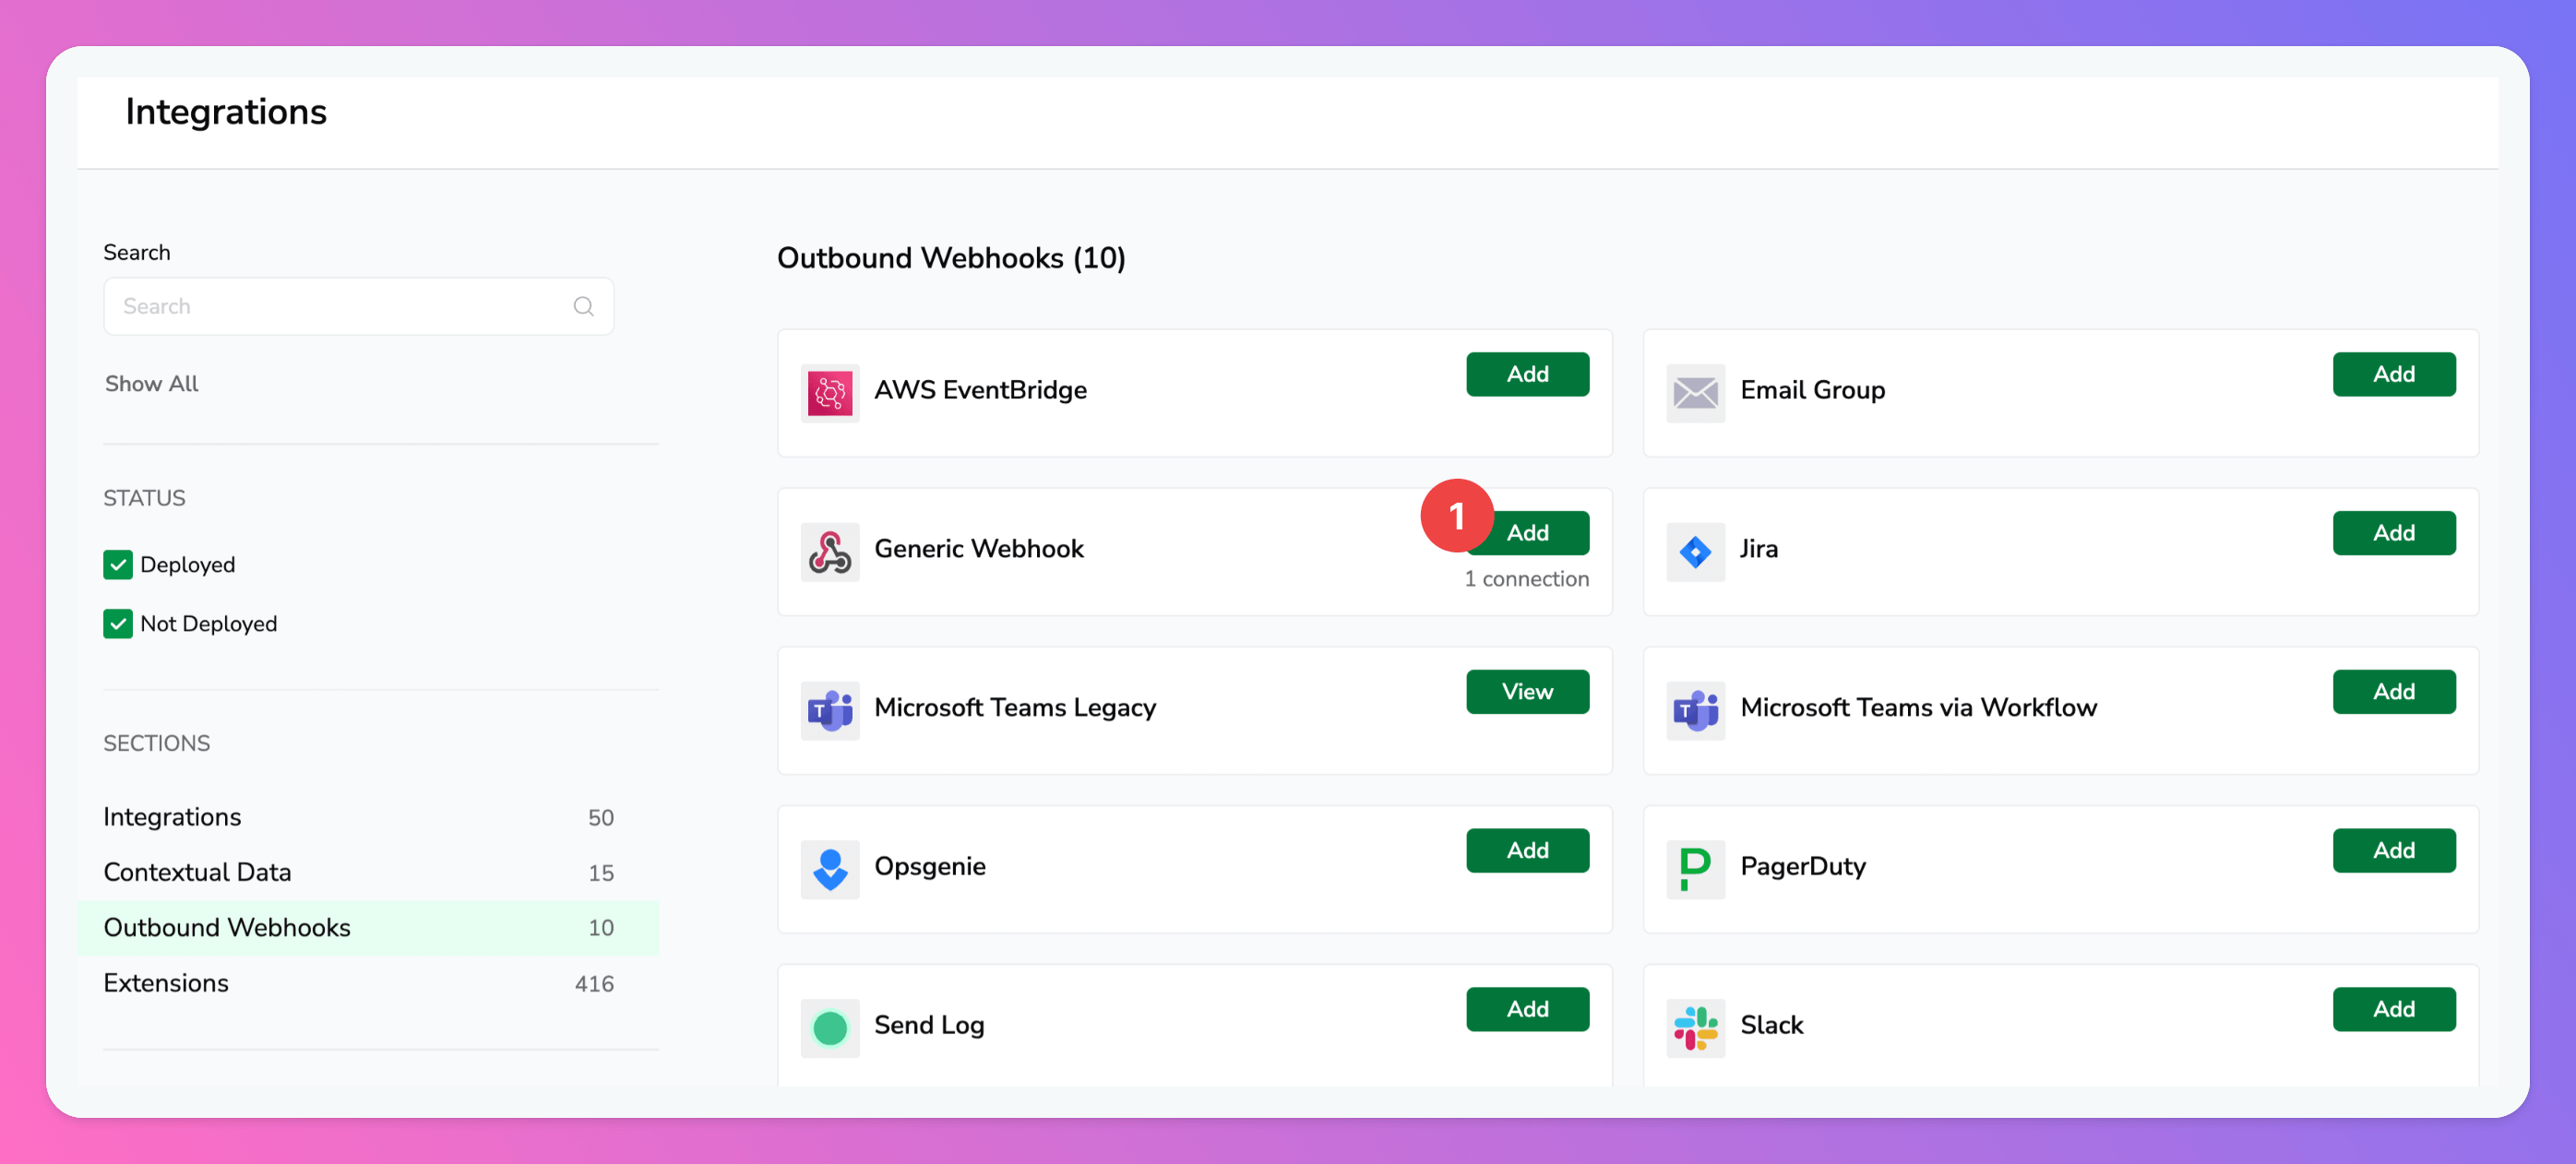
Add New.

Configure the Webhook to All Quiet
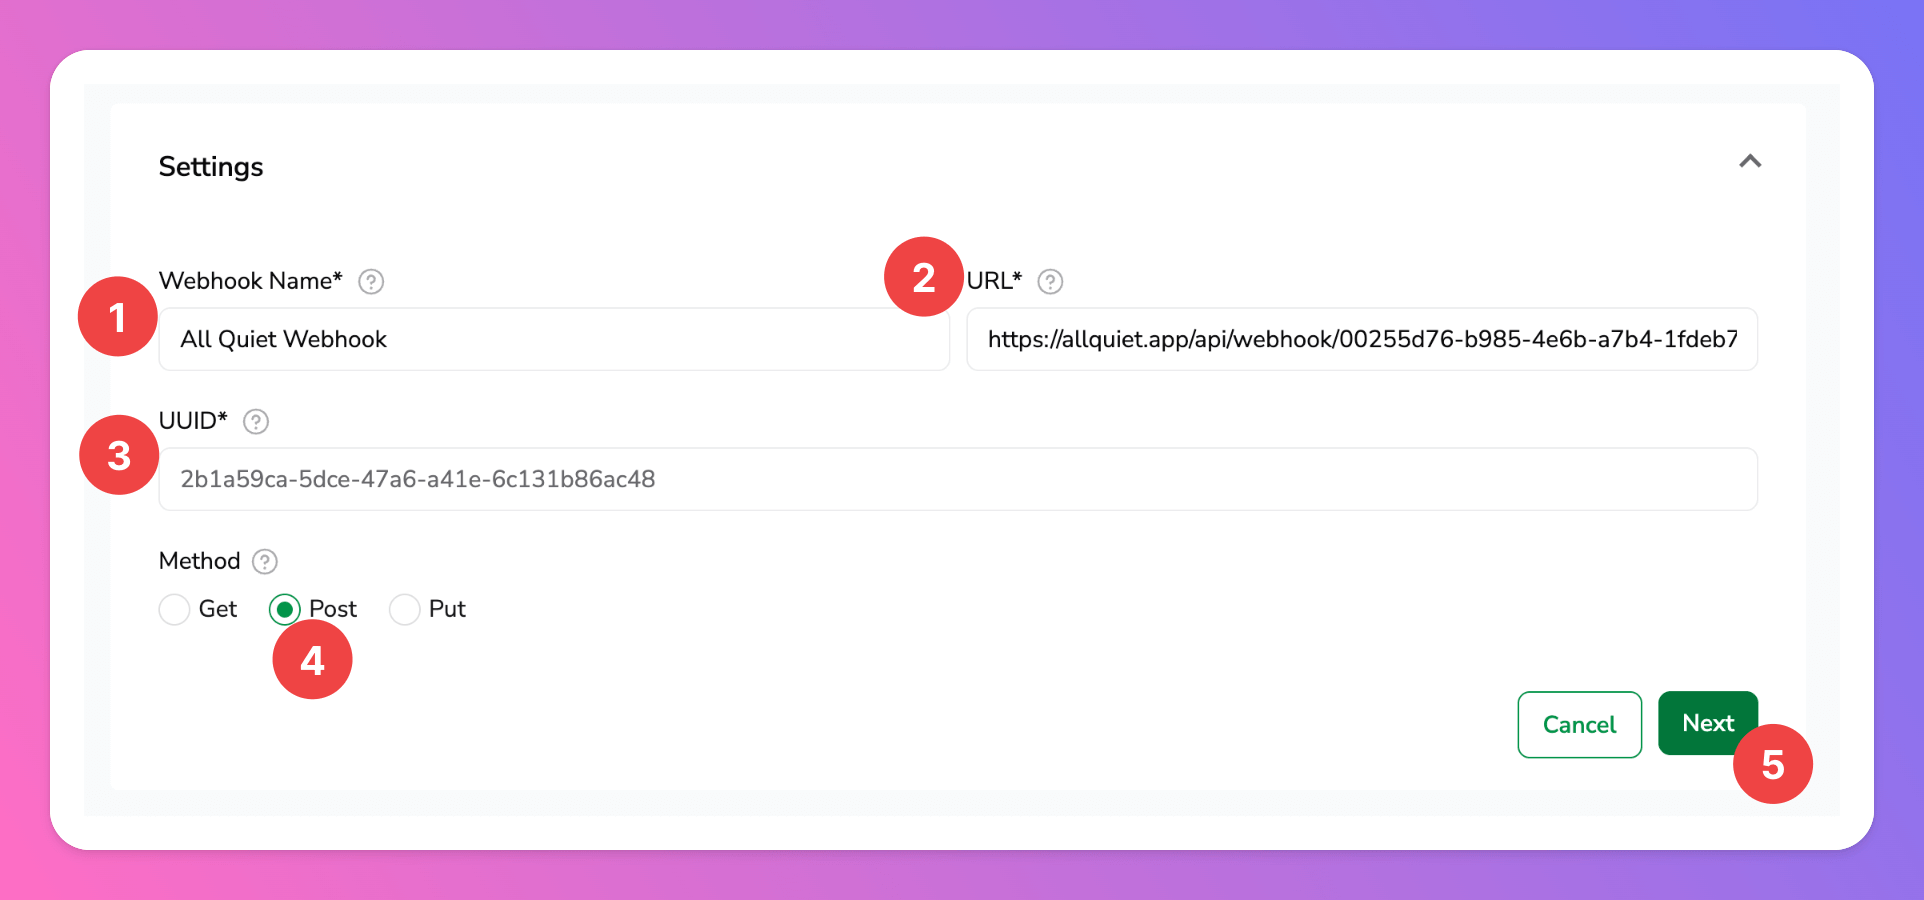
Before you can save the webhook integration, you need to configure it. On theSettings screen
- Add a
Webhook Name, e.g “All Quiet Webhook”. - As As
URL, paste in the All Quiet Webhook URL you’ve obtained in step Get the All Quiet Webhook URL. - The
UUIDis filled by default. - As
Method, select “Post”. - Click
Next.
- As
Headers, paste
Headers
- As
Body, paste
Body
- Next, click
Test & Save.

If you see a test incident in All Quiet, that means successfully set up the webhook integration. Next, we need to add your Coralogix Alerts to your integration to automatically forward them to All Quiet.

Send Coralogix Alerts to All Quiet
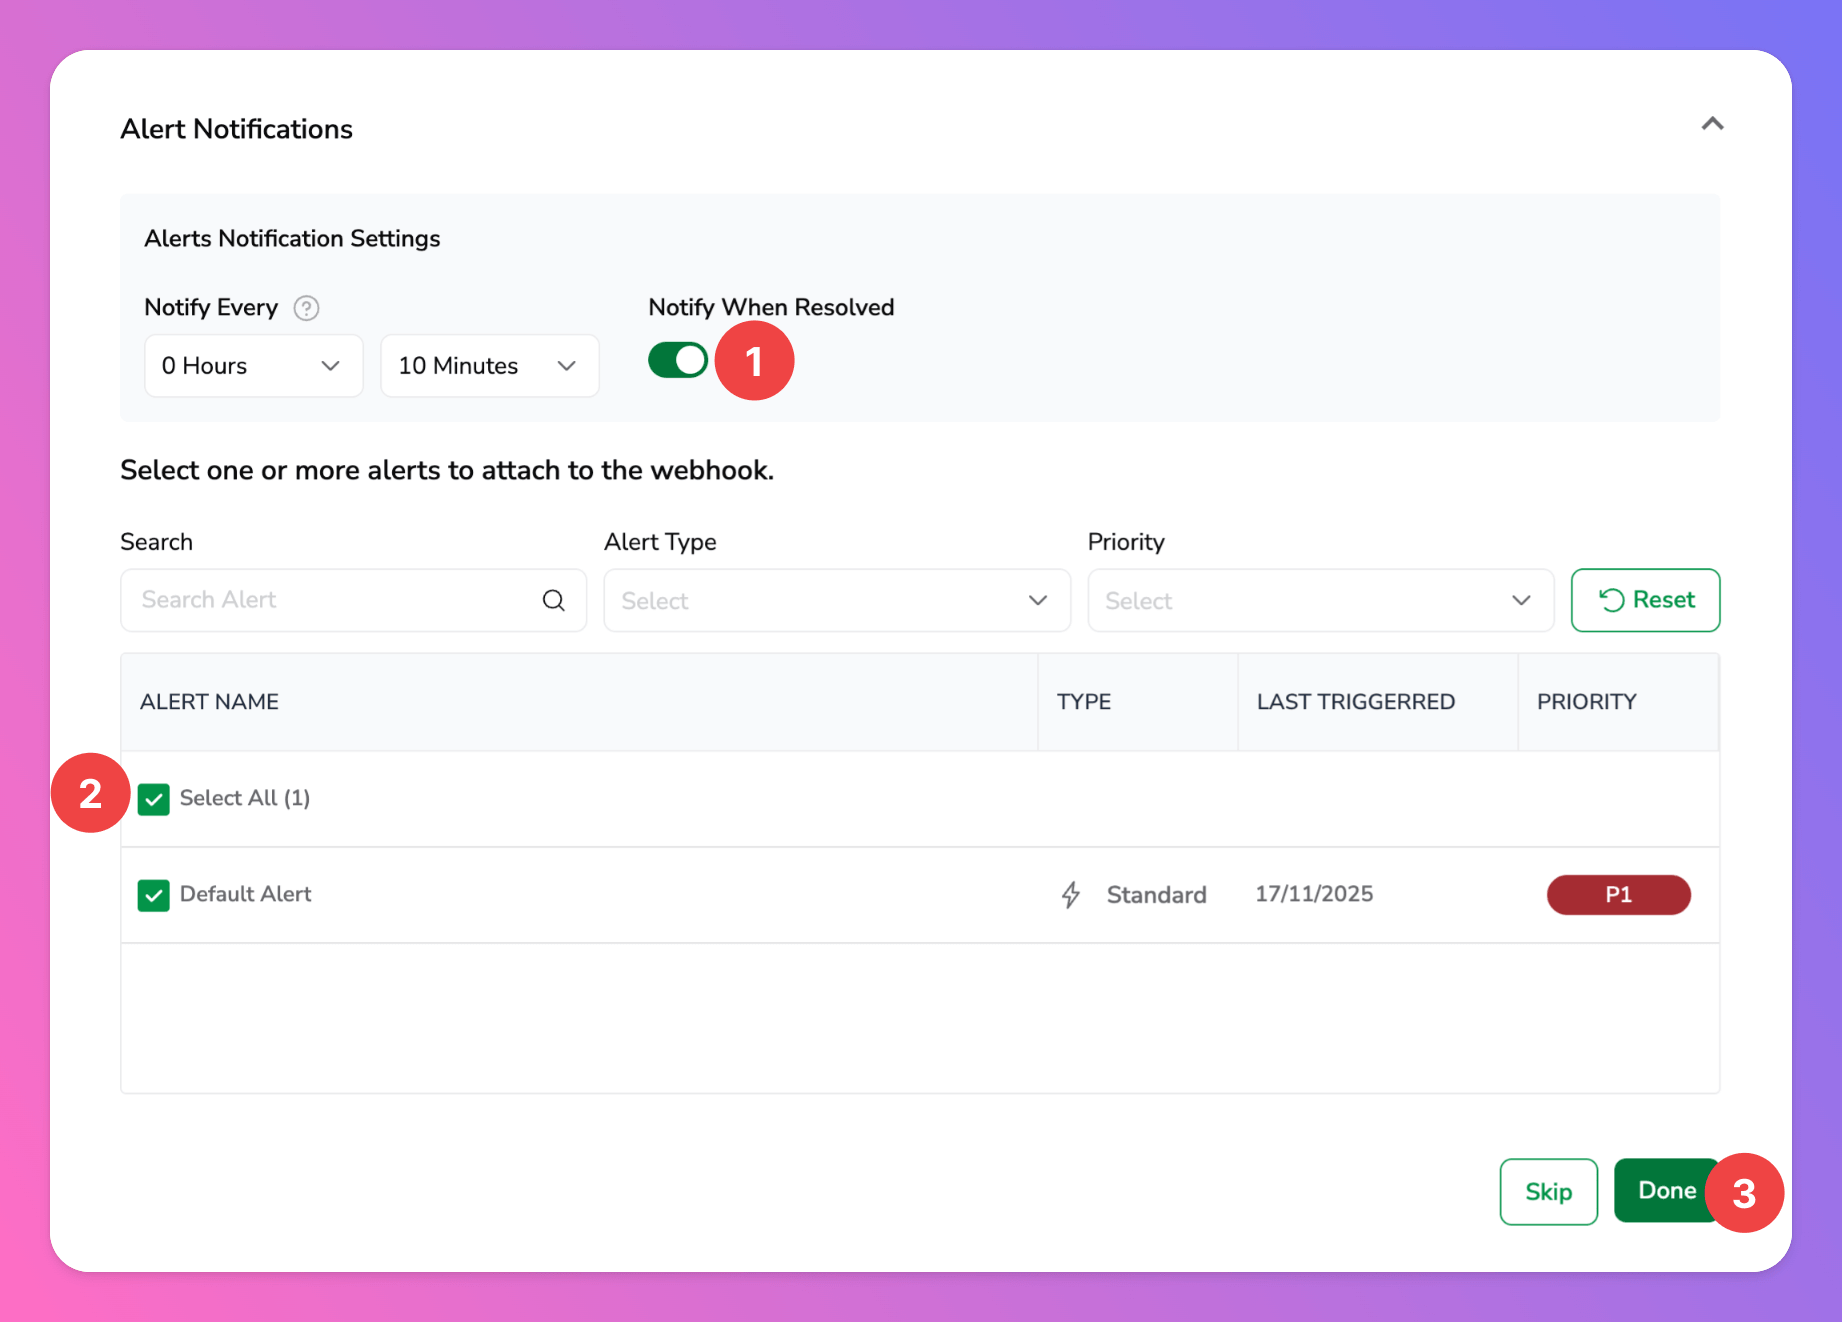
Back in your Coralogix webhook integration, you can add “Alert Notifications”.- Make sure to activate the
Notify When Resolvedtoggle to auto-resolve All Quiet incidents when the alert in Coralogix is resolved. - Select all alerts that you want to forward to All Quiet to create incidents using your webhook integration.
- Click
Doneto finish the setup.
You’re ready to go. If you set up your integration this way, Coralogix alerts will automatically create and update All Quiet incidents.