Setup time: 10 Min
1. Create Nagios Integration on All Quiet
Sign in to your All Quiet account.Create Integration
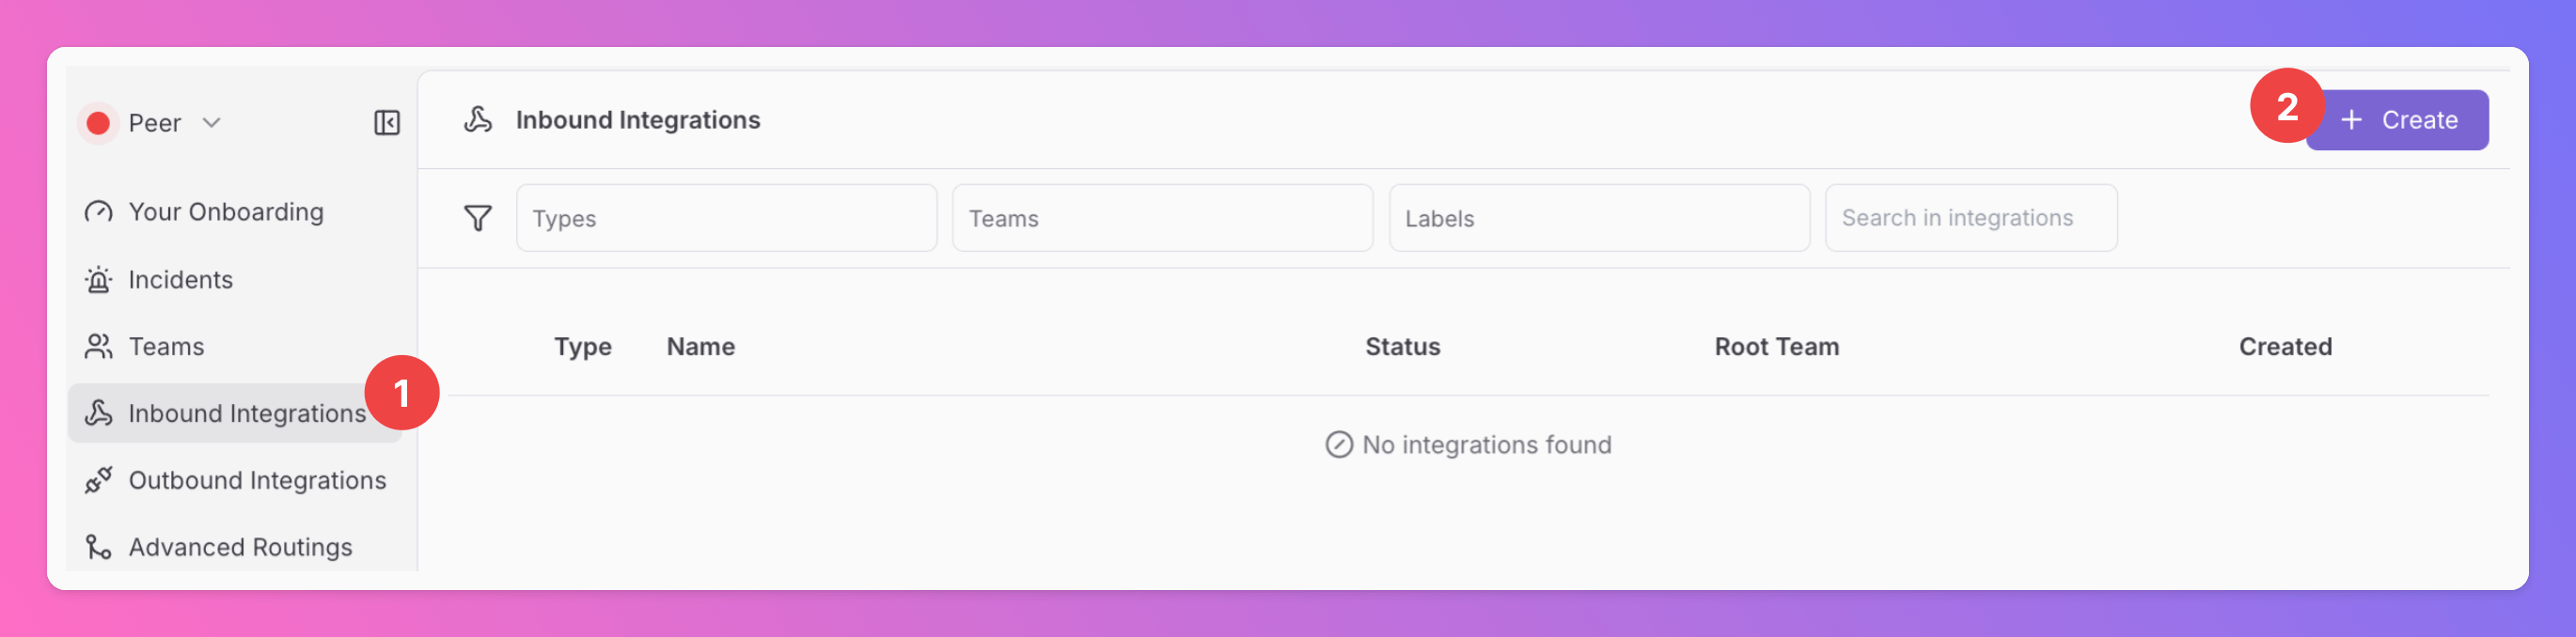
- Click on the
Inbound Integrationstab. - Click on
+ Create.
Select Nagios as the integration’s type
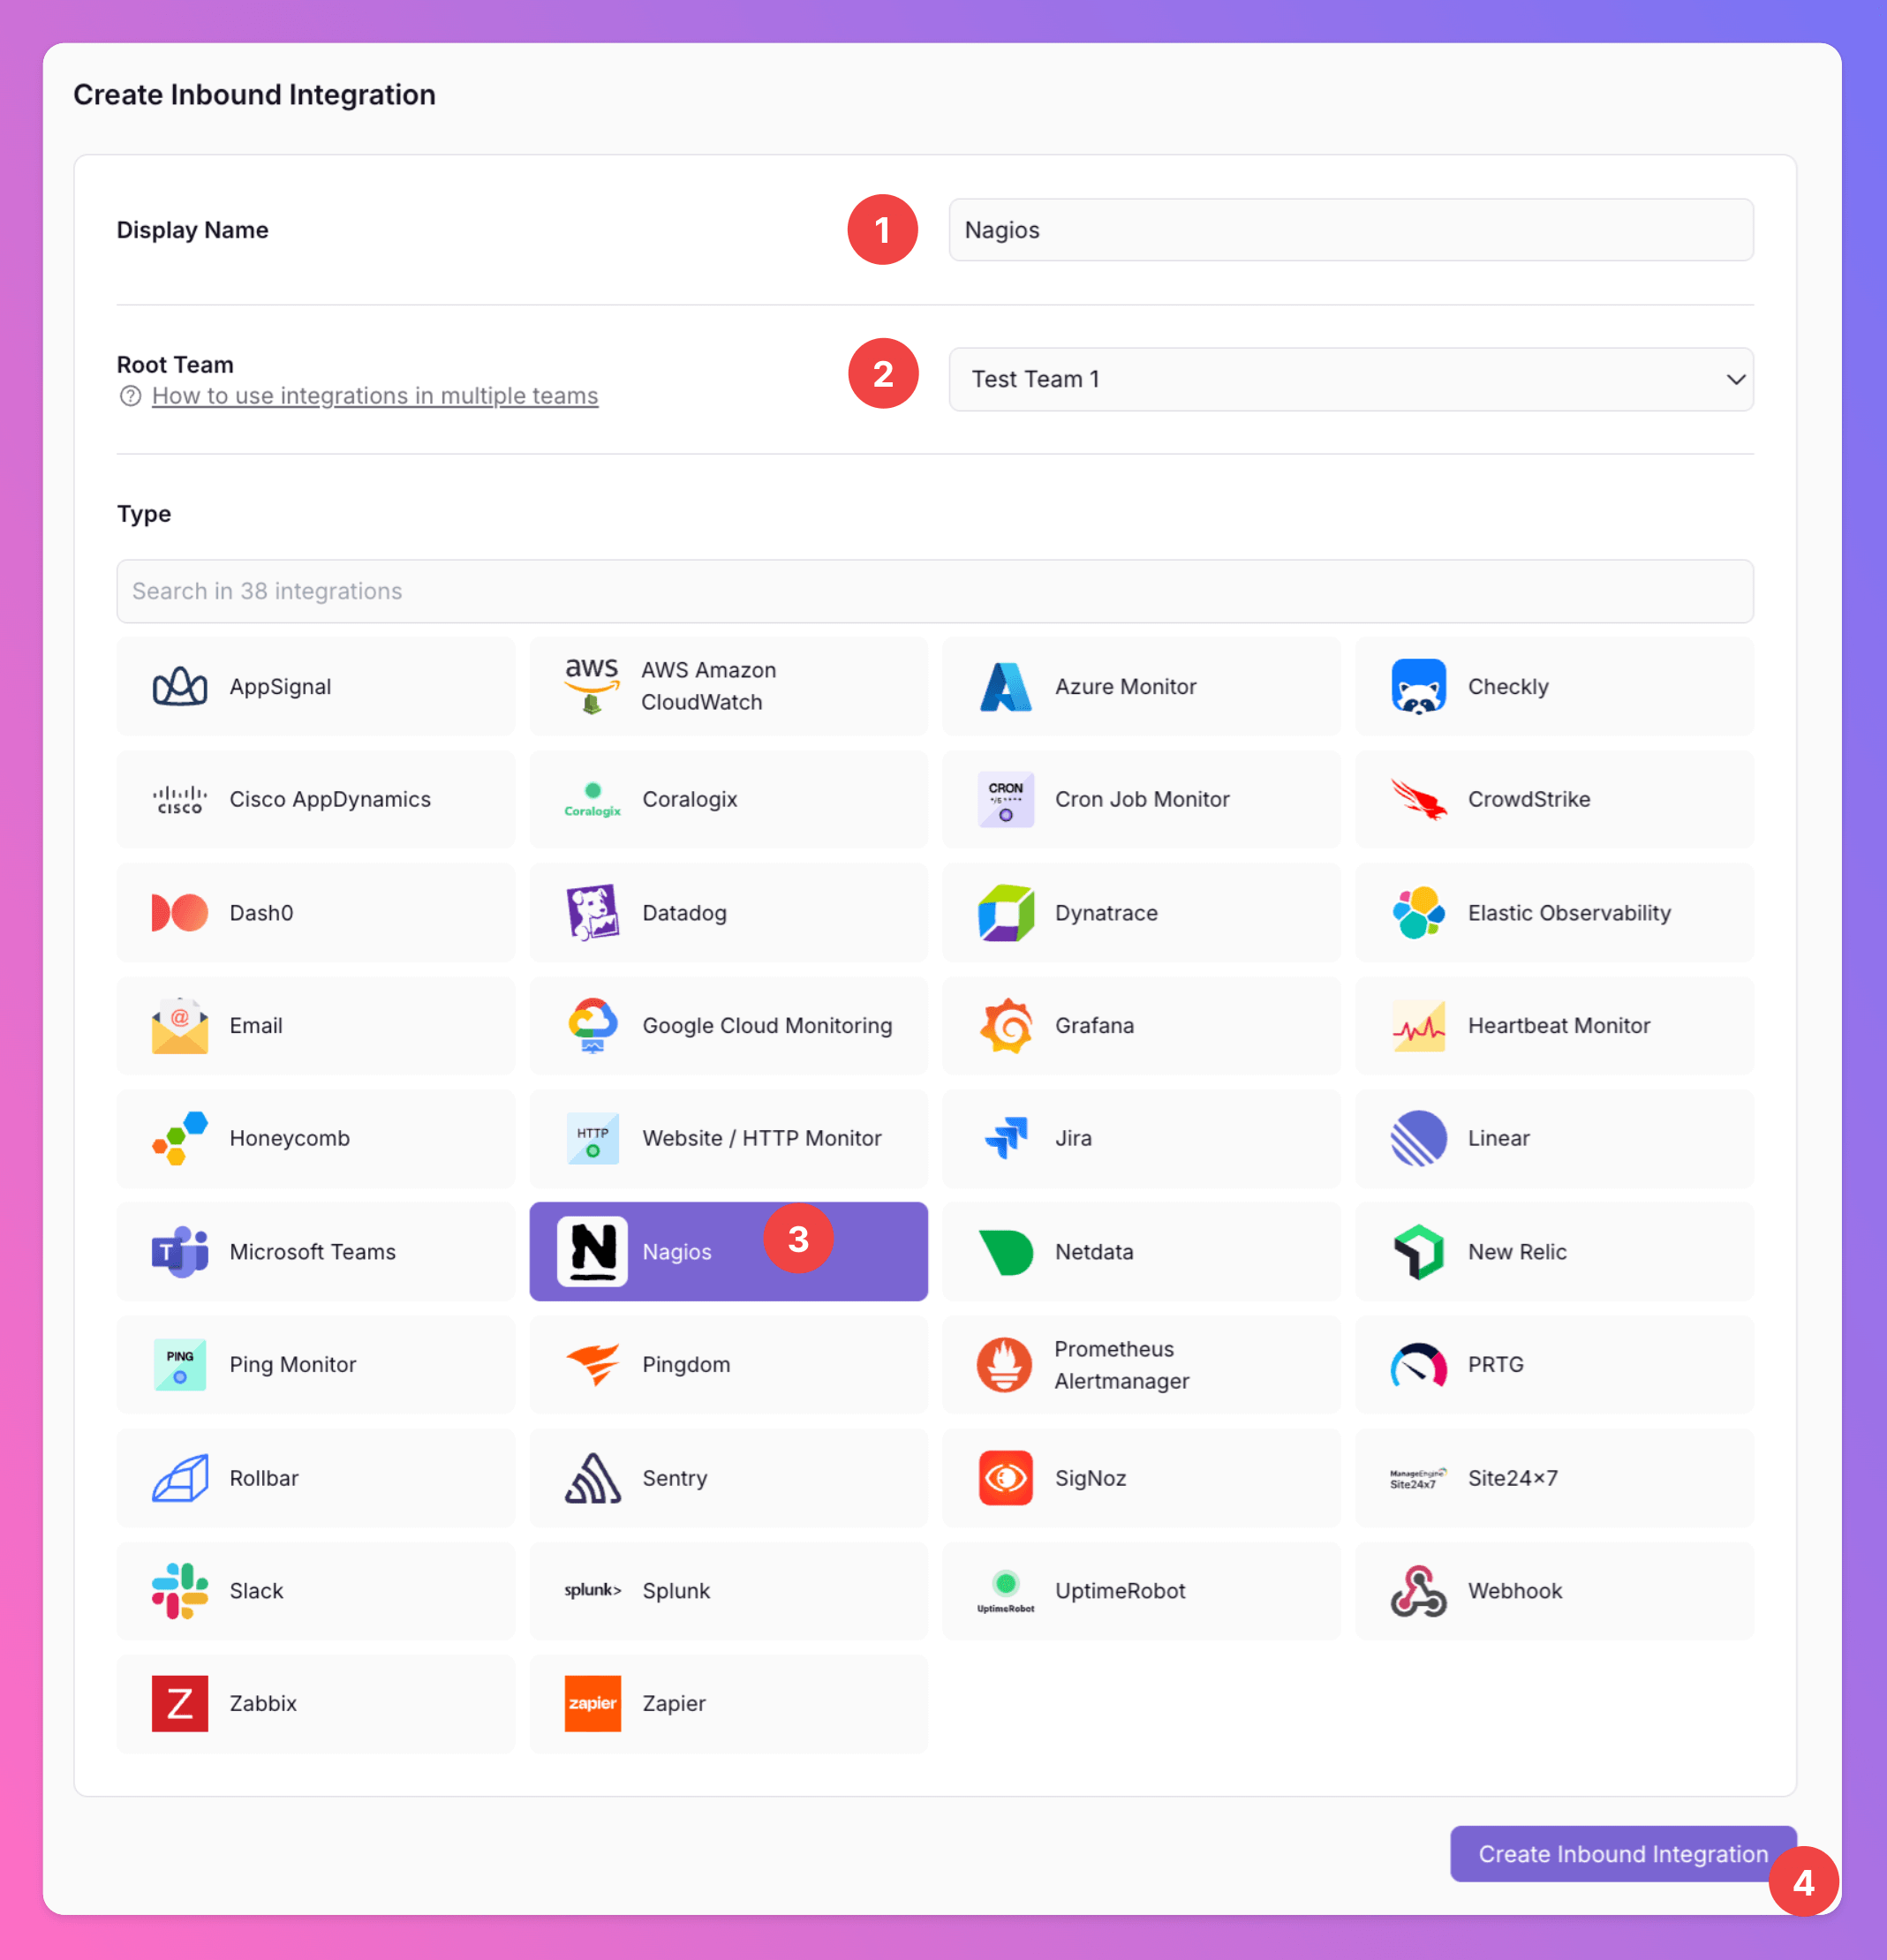
- Enter a
Display Namefor your integration, e.g. “Nagios”. - Select a
Team. - Select
Nagiosas the integration’s type. - Click
Create Inbound Integration.
Get the All Quiet Webhook URL
After creating the integration on All Quiet, you can view and copy the webhook URL. You will require this URL in step 2 when configuring the custom integration on Nagios.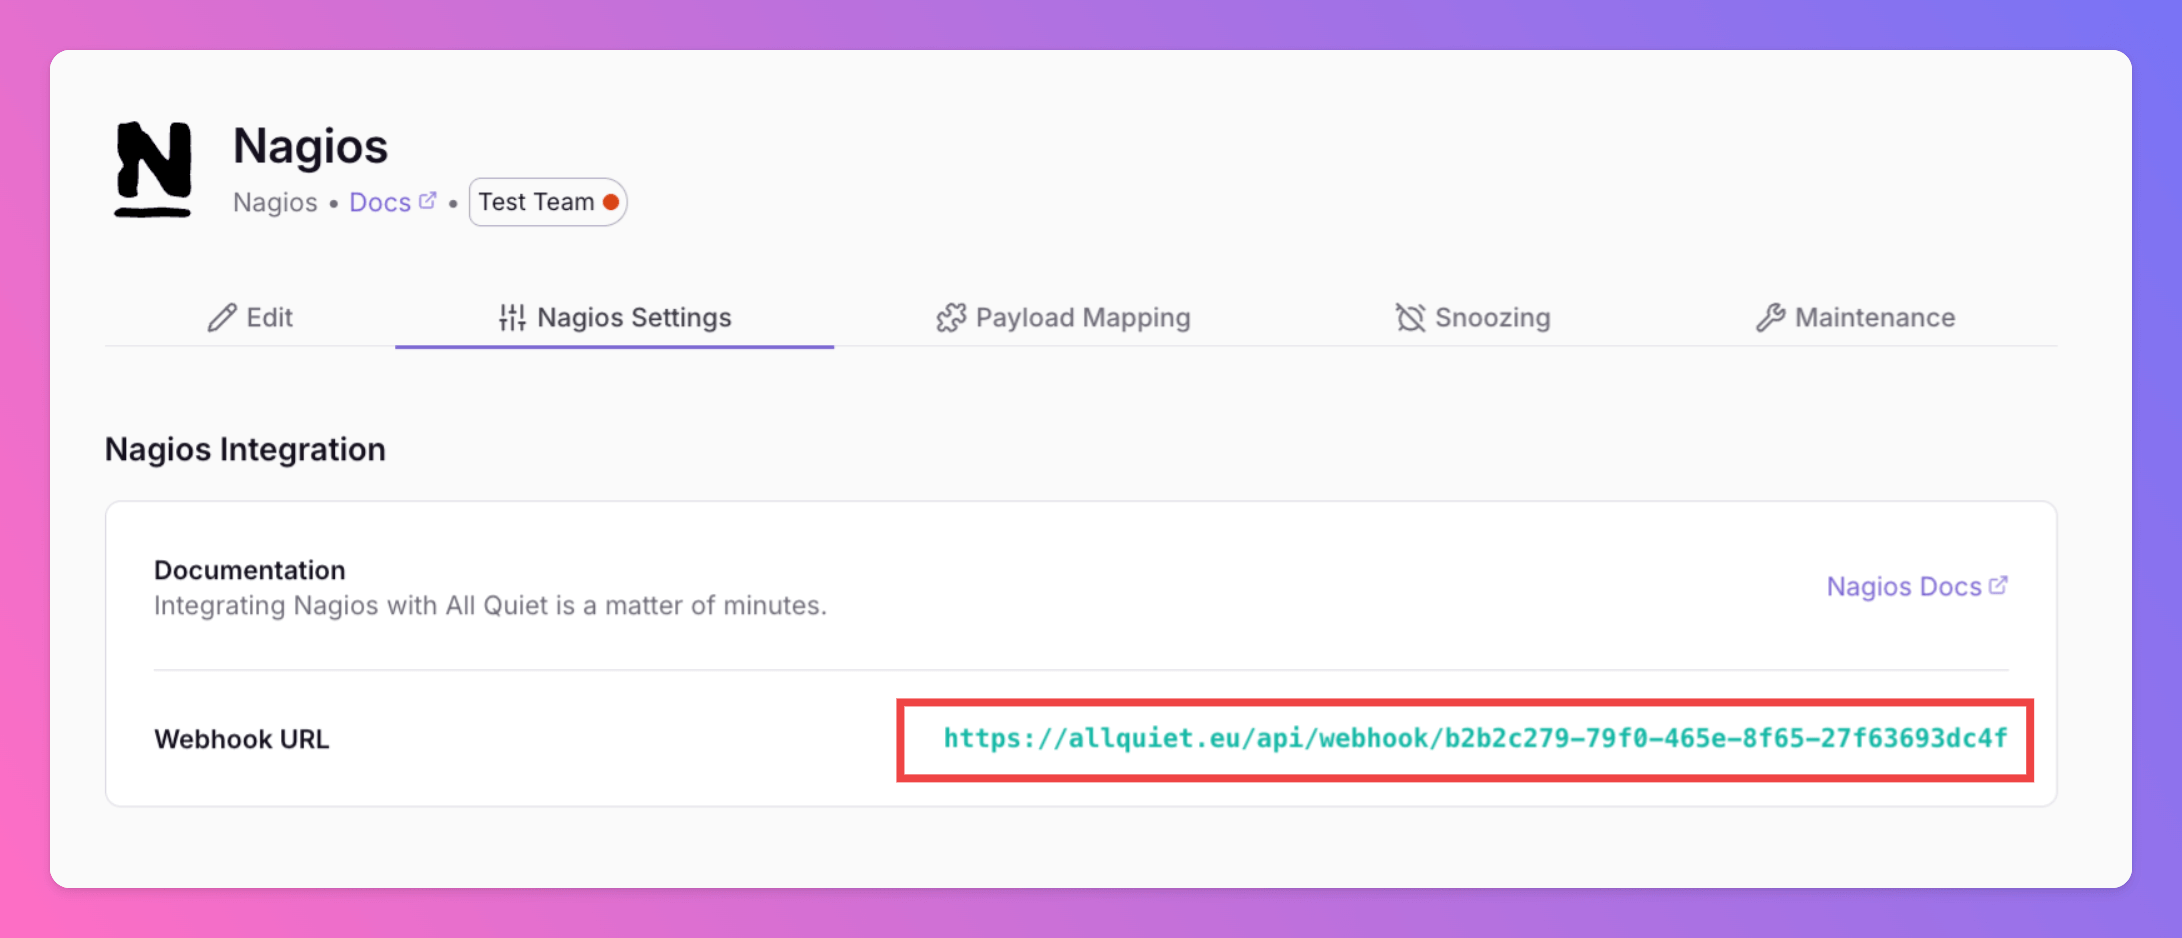
Optionally toggle
Enable additional Authentication & Security below the webhook URL to restrict who can POST payloads.- IP Filter — Allow requests only from specific IPs or CIDR ranges. Failed checks return 404 Not Found.
- Bearer authentication — Require
Authorization: Bearer YOUR_TOKEN. Missing or invalid tokens return 401 Unauthorized.
2. Configure the Integration with Nagios
Once you’ve set up an integration of type “Nagios” with All Quiet, it takes only four steps in your Nagios configuration to finish off your setup.Add All Quiet Notification Scripts for Nagios
Nagios differentiates betweenHosts and Services. Depending on which of these you want to monitor with All Quiet, you need to add the respective shell script from below to a folder where Nagios can execute it, for instance /usr/local/bin/allquiet/.
notify-allquiet-host.sh
notify-allquiet-service.sh
Commands for Service and Host files; here named notify-allquiet-service.sh and notify-allquiet-hosts.sh
Add Commands
Next, to send alerts to All Quiet, we need to define the commands. Here, Nagios also differentiates betweenHost and Service commands.
Below, you find templates for both types of commands that you can paste into your commands.cfg, depending on which type(s) your are using.
Service Command
Host Command
commands.cfg.
Add All Quiet Contact
Next, we need to add All Quiet as a contact to yourcontacts.cfg in Nagios.
Example Contact
contacts.cfg.
Add Contact to Your Services and Hosts
Last but not least, you need to add the contact (here:allquiet) to your defined Service(s) and / or Host(s), allowing you to trigger the Nagios Commands if your Services or Hosts report an issue.
Add Contact to Your Services and Hosts
You’re ready to go. If you set up your integration this way, Nagios alerts will automatically create and update All Quiet incidents.