Setup time: 2 Min
Create Outbound Integration
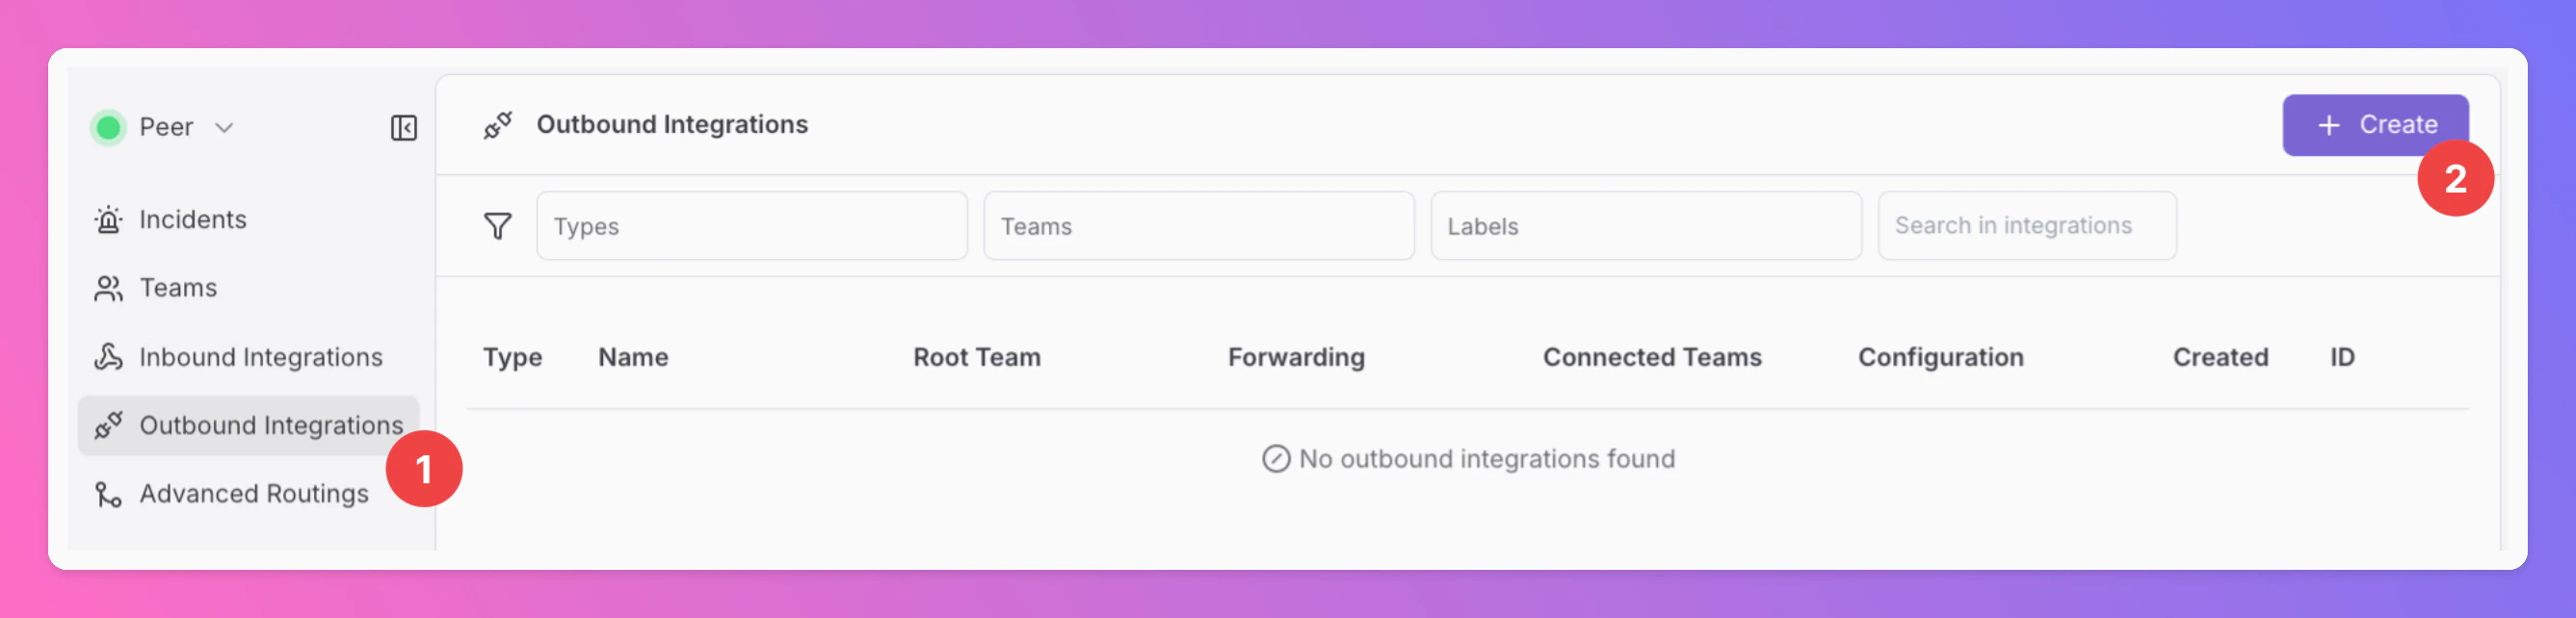
- Click on the
Outbound Integrationstab. - Click on
+ Create.
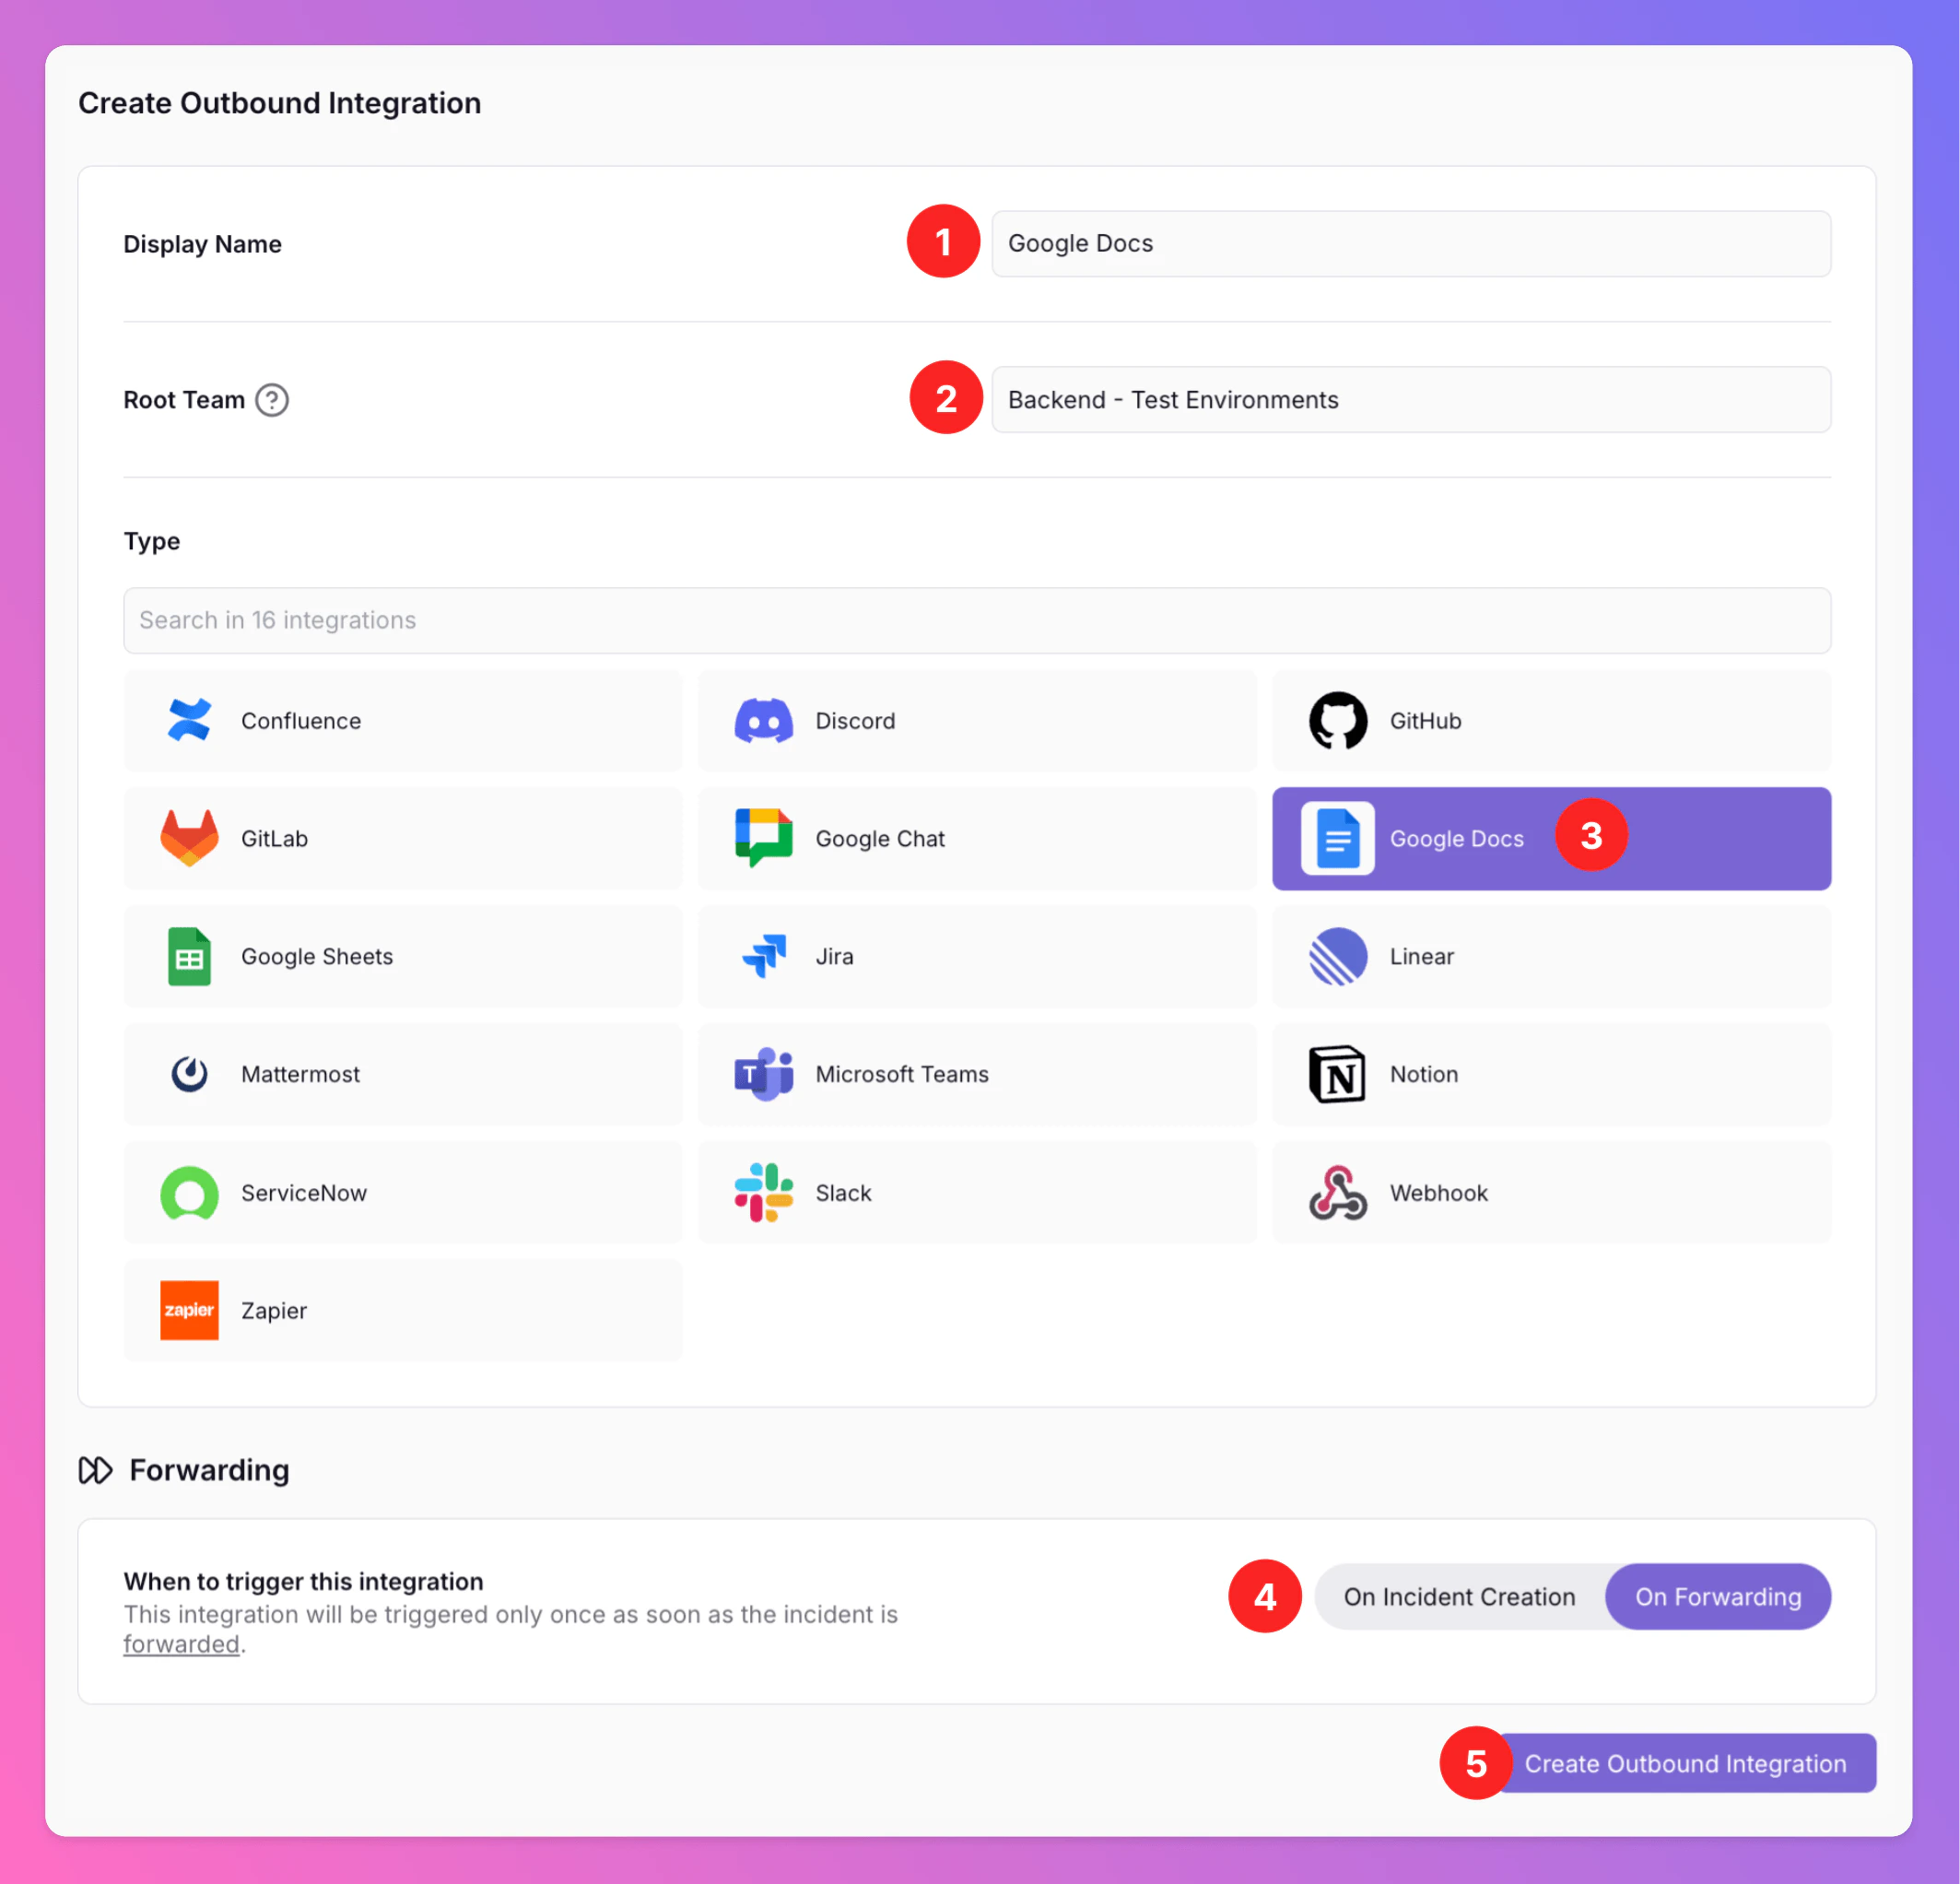
- Enter a
Display Namefor your integration, e.g. “Google Docs”. - Select a
Root Team.For Organizations with Pro and Enterprise plan: You will be able to add additional teams in the next step. - Select
Google Docsas the integration’s type. - Forwarding settings:
- Default:
On Forwarding- Google documents will only be created if users manually forward specific incidents or if you set up advanced routing rules for your Google Docs integration that automatically forward incidents in specific scenarios. - Alternative:
On Incident Creationwill automatically forward all incidents to Google Docs as soon as they are created and create new documents.
- Default:
- Click
Create Outbound Integration.
Connect Google and configure Google Docs
Once you’ve successfully created your new outbound integration, you’ll automatically be redirected to itsSettings page.
- Observe that the installation status of the All Quiet integration is still pending.
- To complete the integration with your Google account, click
Connect Google(or the Google sign-in action shown in the product).
In the
Edit tab, you can change general settings like the integration’s Forwarding settings.Only for Pro and Enterprise plan - Manage your
Team Connections: The root team is pre-selected, and you can add the integration to further teams within the root team’s organization. Team Administrators can add / remove those teams they are an Administrator in, Organization Administrators & Organization Owners can manage the connections to all teams of the organization. 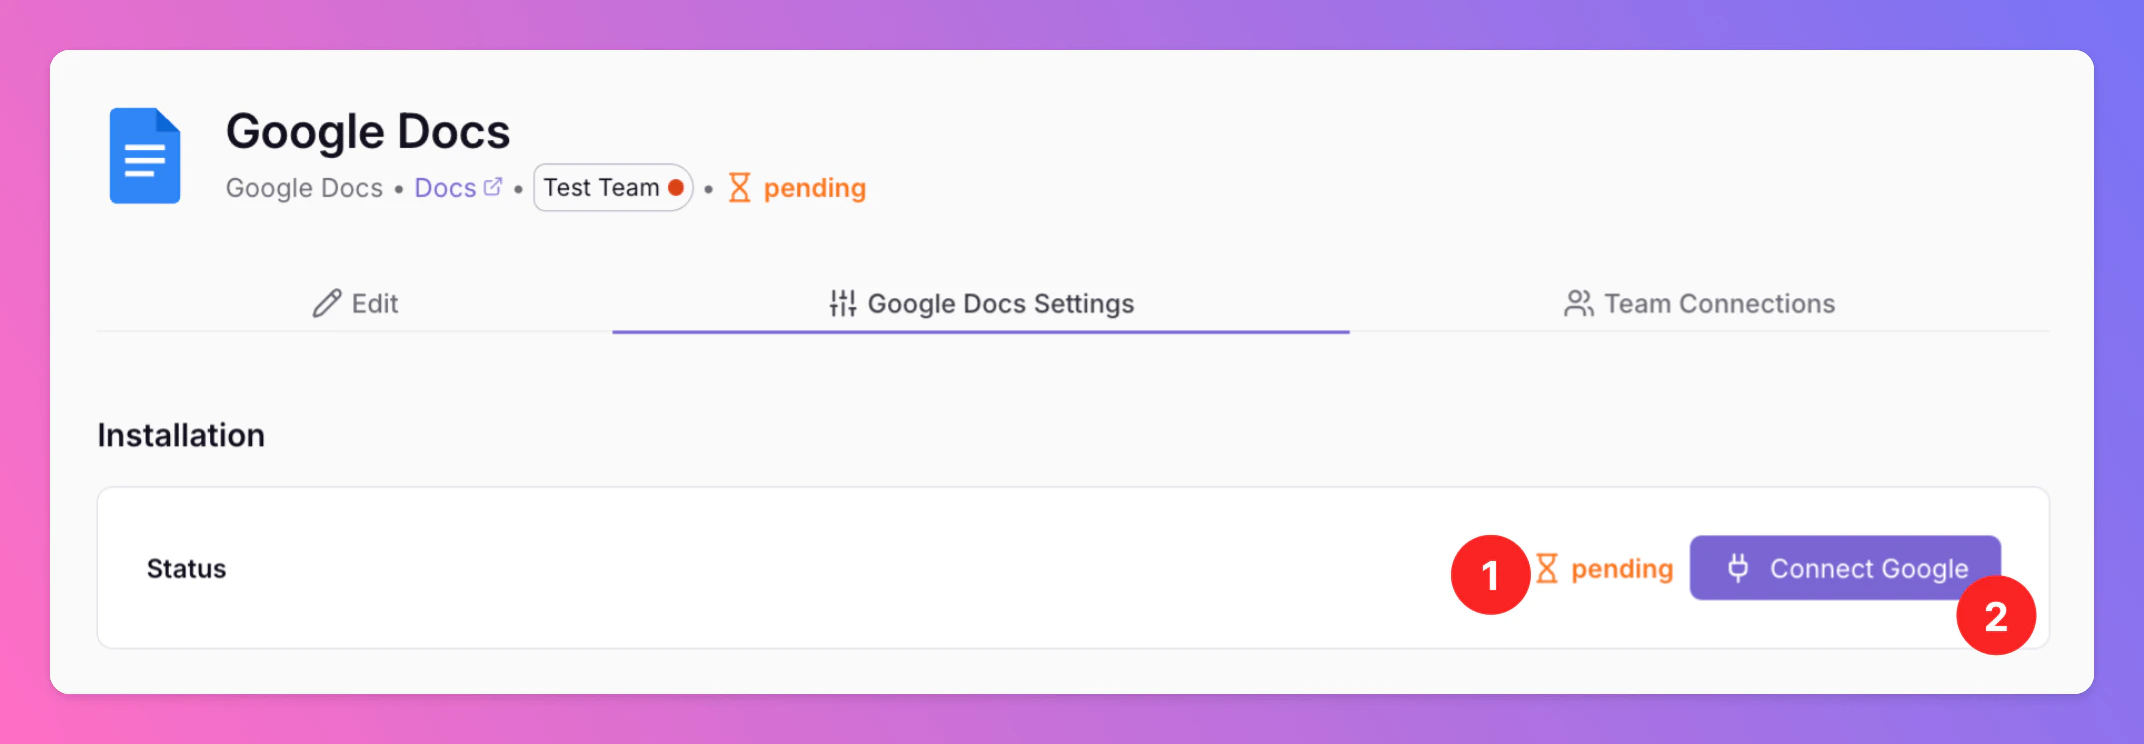
Connect Google, you’ll be redirected to Google, where you may need to sign in. After sign-in, grant All Quiet the permissions required to create and manage documents on your behalf.
We request only the permissions essential for All Quiet to operate correctly. These permissions are utilized solely when you interact with the app and are never used for any other purpose.
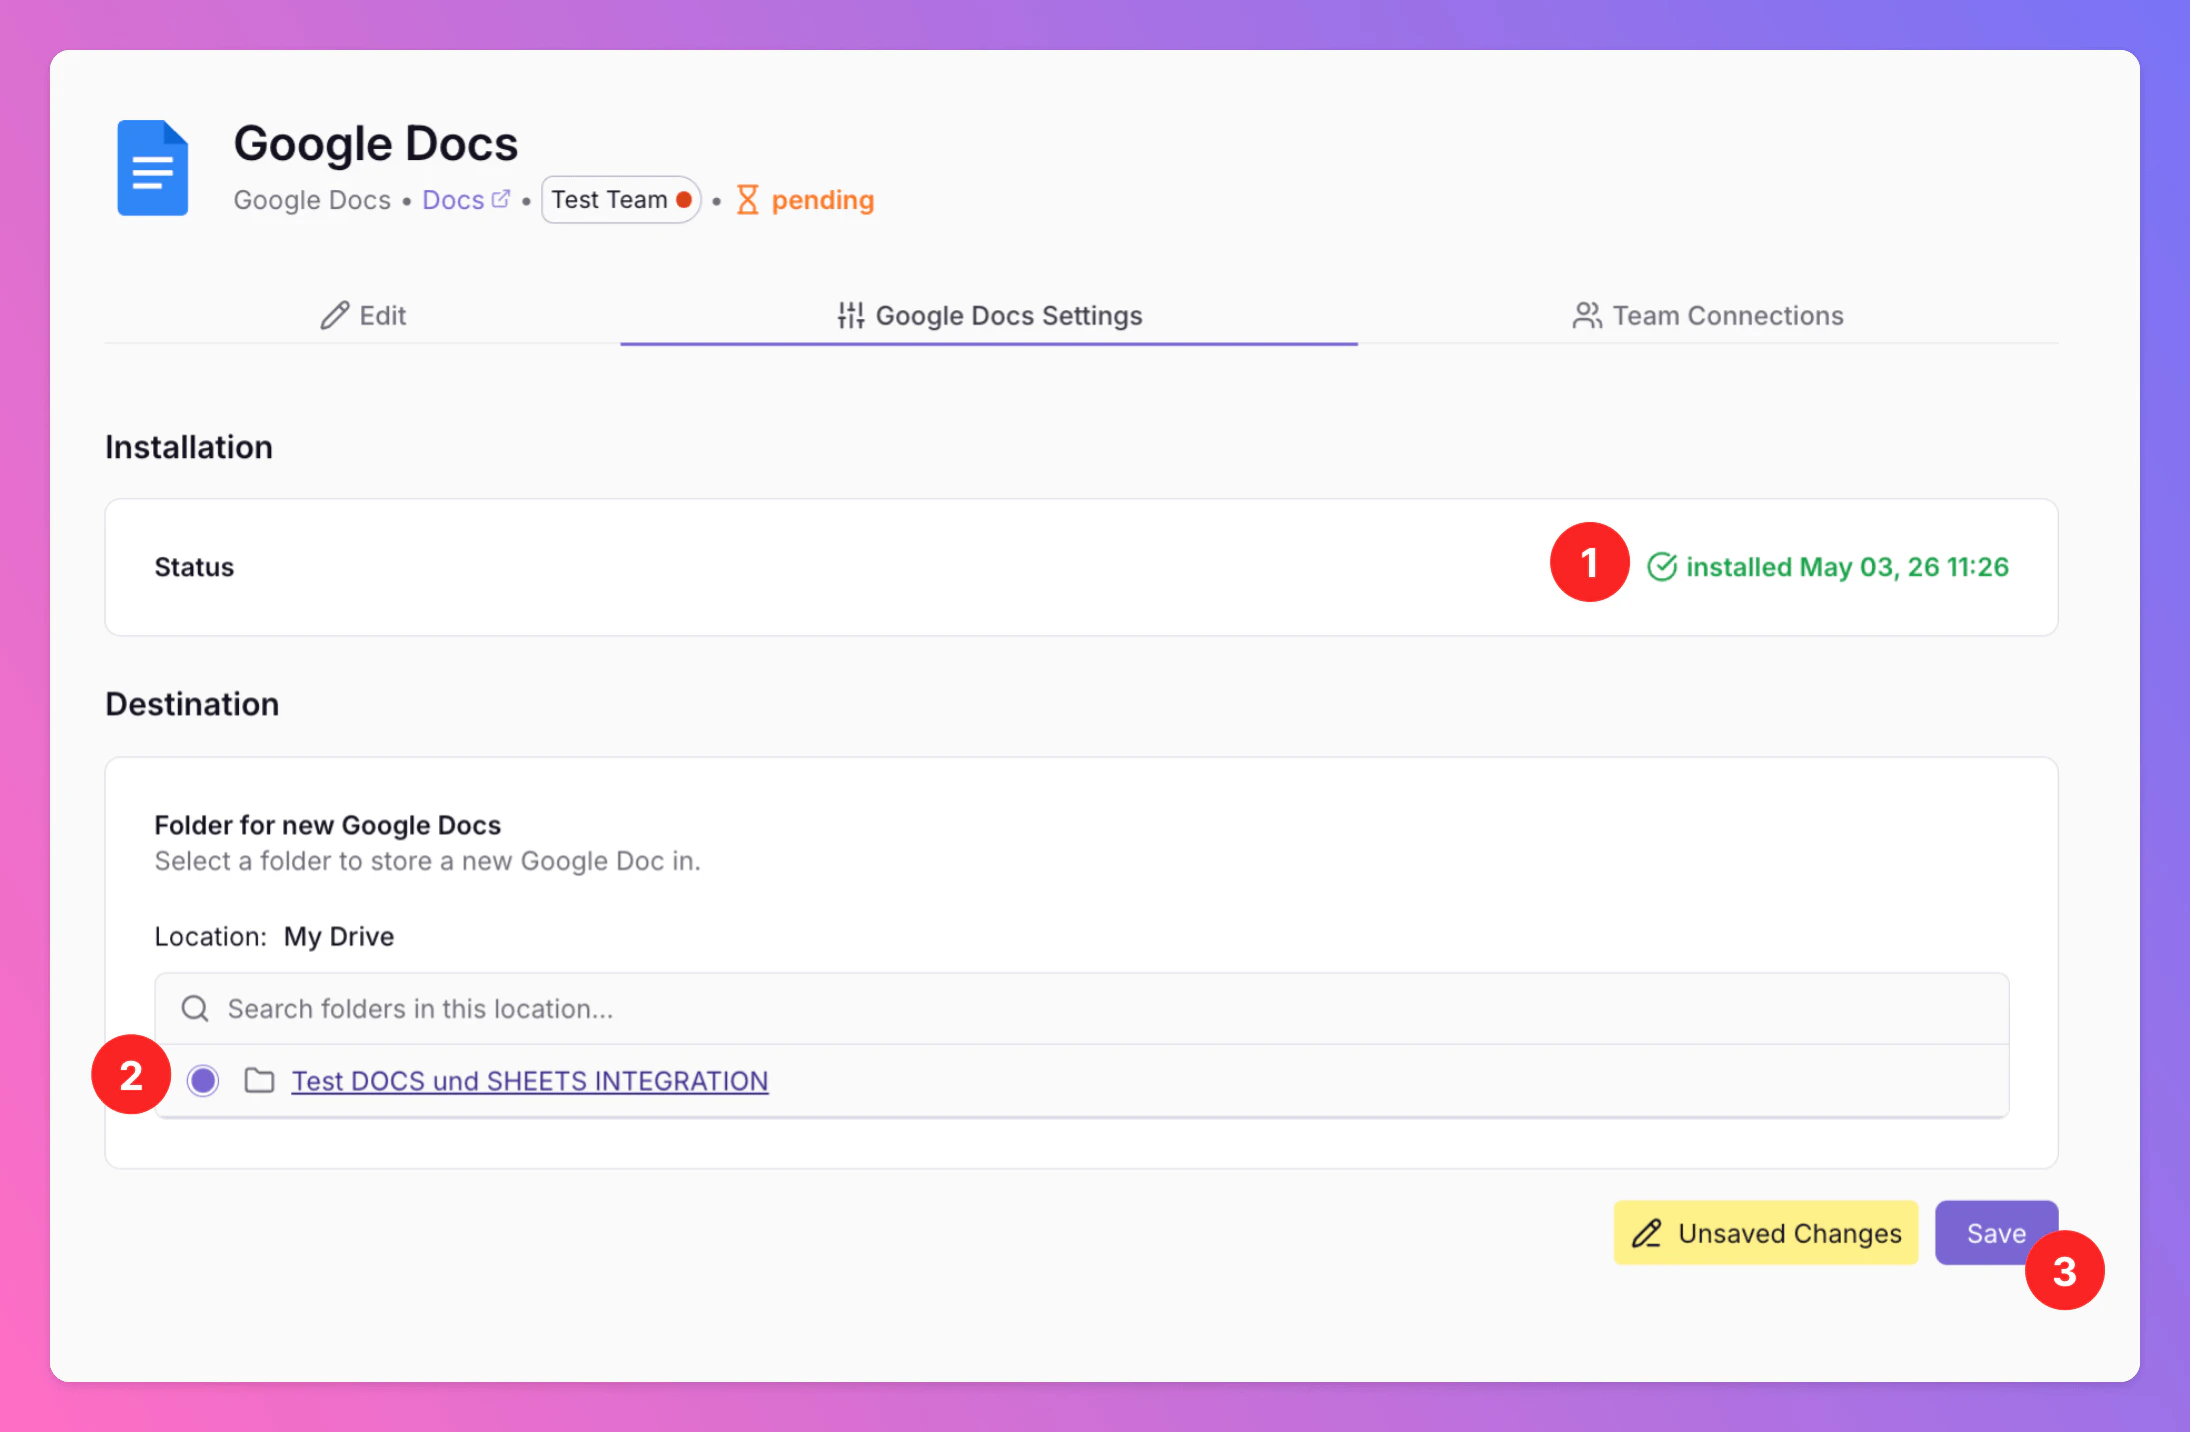
After giving All Quiet the required rights in your Google Workspace, you are then redirected back to your Google Docs integration’s details page in All Quiet. Next, configure where new documents should be created.
- As you can see, the Installation Status changed to
installed. - Select the Google Drive Folder All Quiet should write and add new Google Docs to. You can also navigate to and select subfolders within your Drive by clicking on the underlined title of a folder. 3Í. Make sure to save your Google Docs settings, otherwise forwarding will not work.
Google Docs is now integrated with All Quiet. Depending on your setup, All Quiet incidents can now be forwarded manually to Google Drive as new Google documents, or documents can be created automatically according to your forwarding option.
Creating an incident document in Google Docs
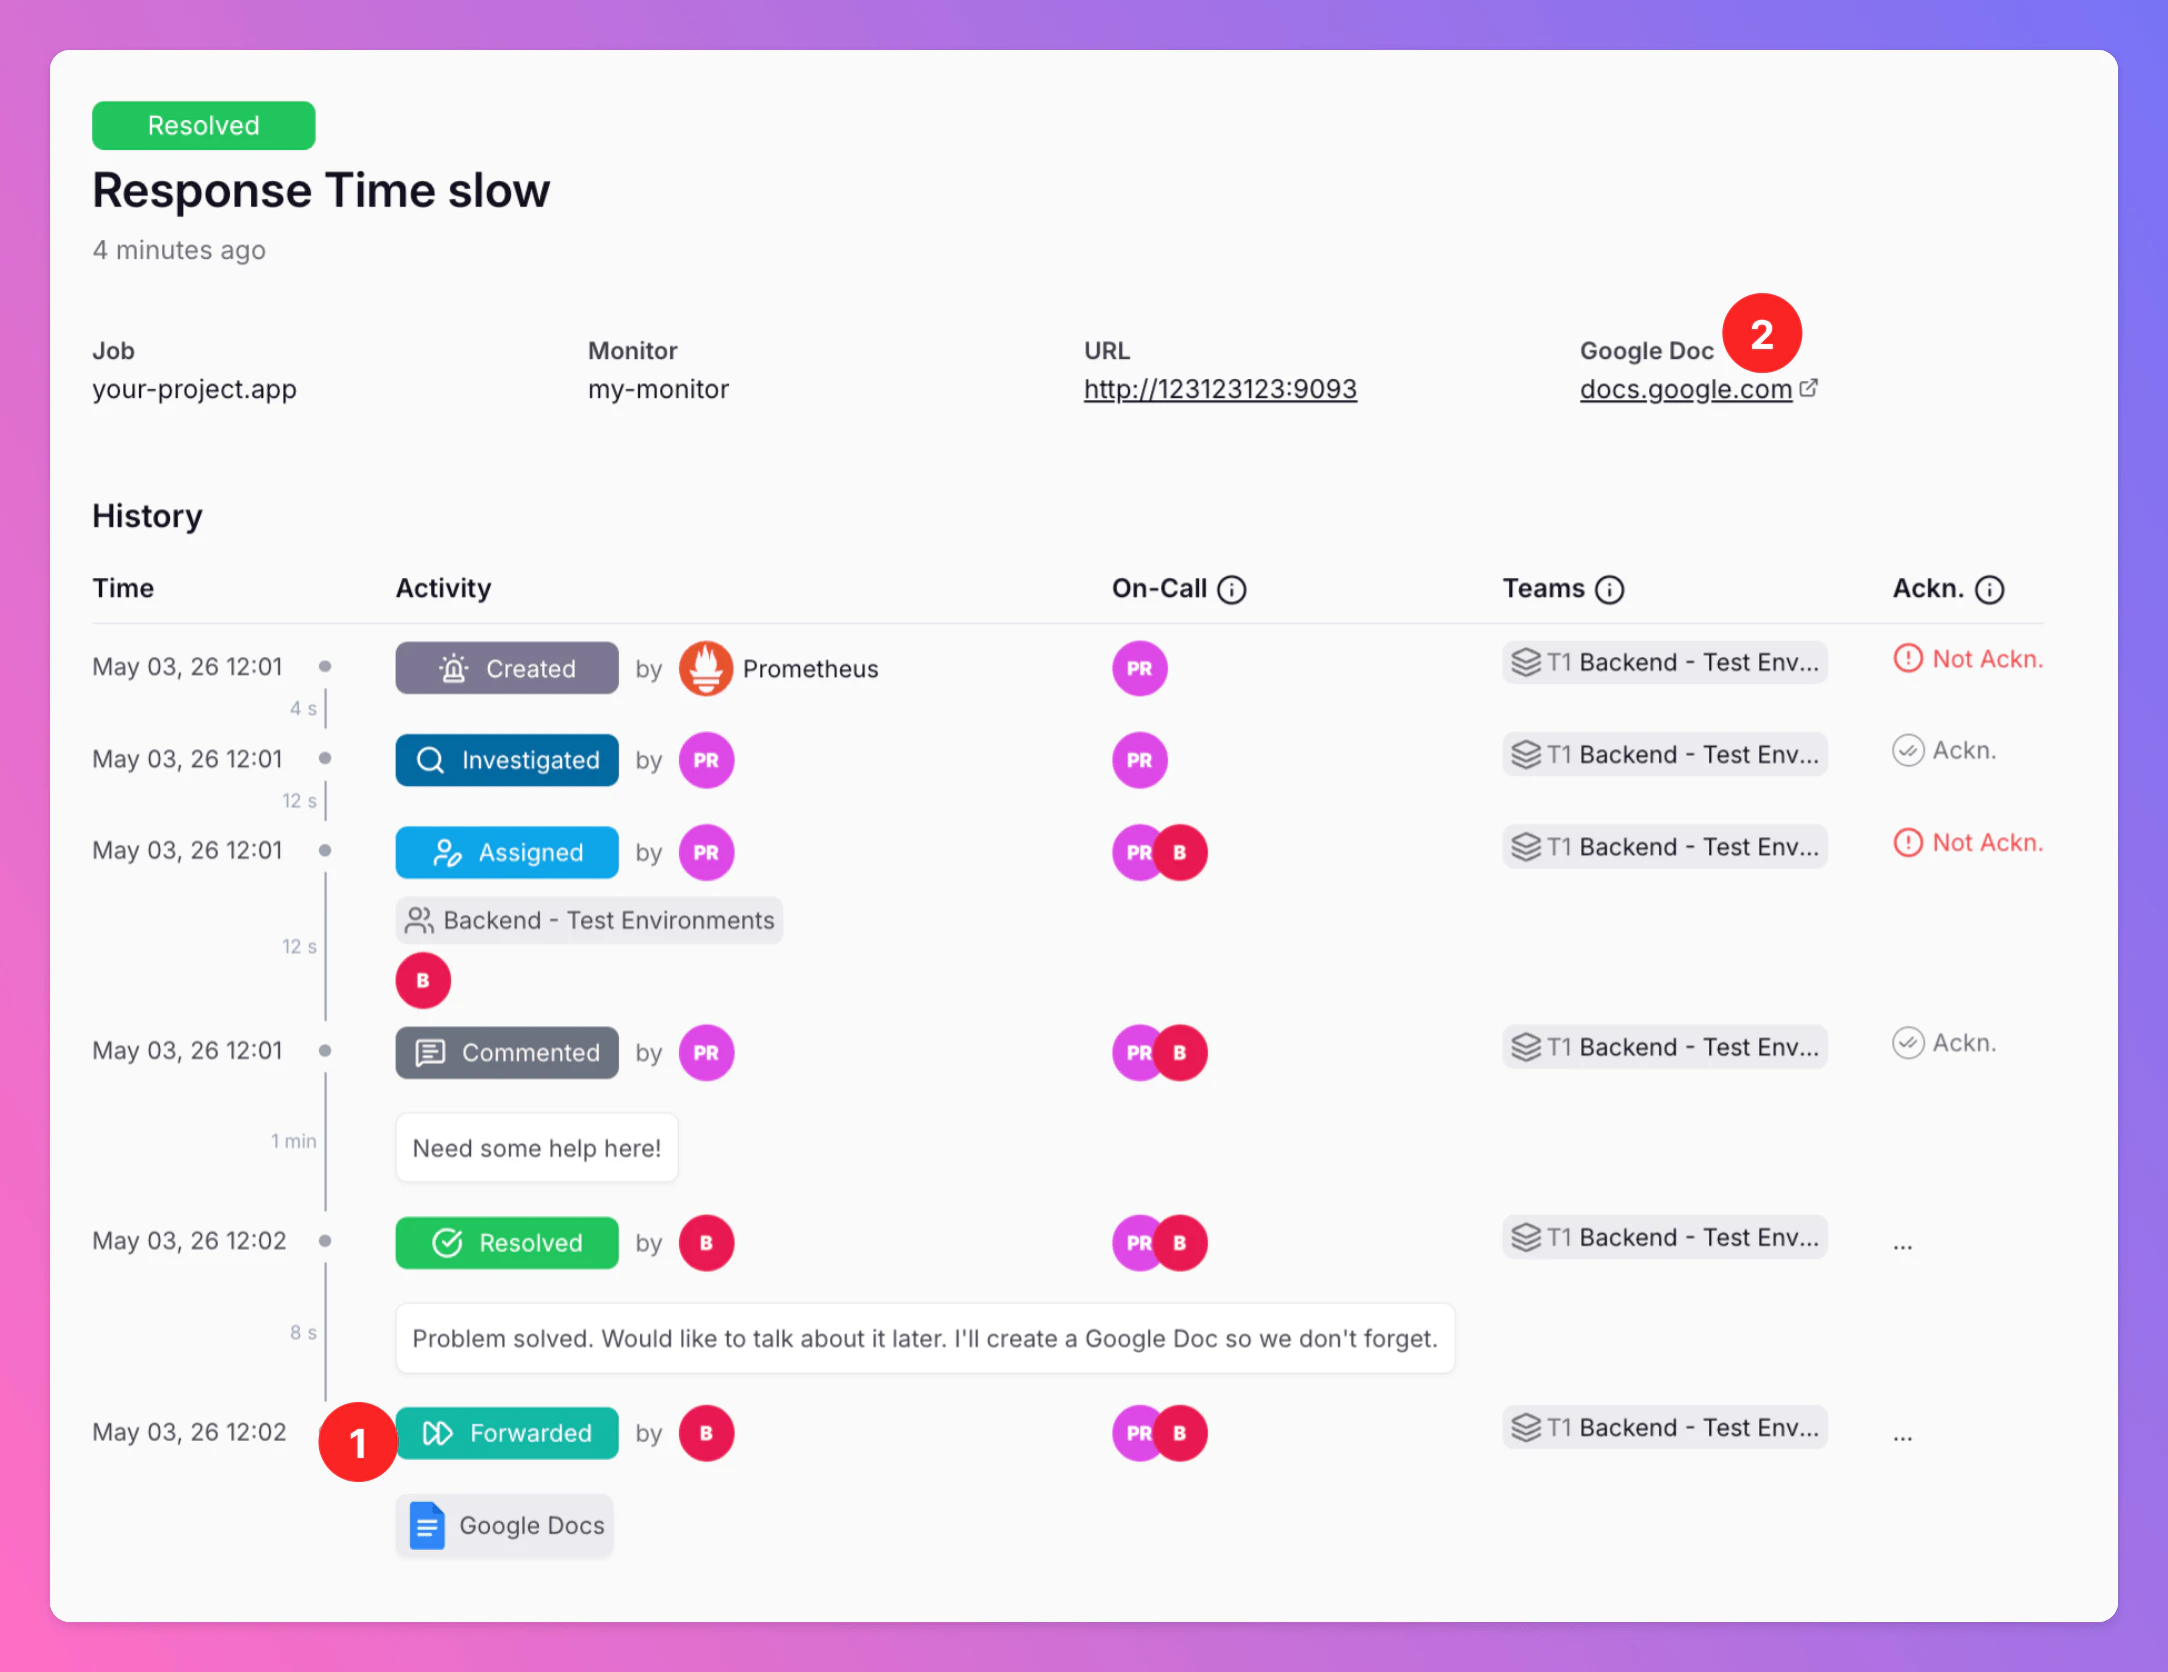
The following section describes what a Google document created from an incident typically contains.- When the team decides to capture a retro or handoff in writing, an incident can be forwarded to Google Docs. A link to the new document appears on the incident in All Quiet.
- Click on the link to open the Google Document and to review it.
As defined in your integration settings, the file is created in the folder (or context) you selected in All Quiet. The document title is a combination of the timestamp of the incident’s creation and the incident title in All Quiet. Timestamps in the title are based on your team’s timezone. Only team members with respective access rights to the Google document / drive folder open the link.
- A section with the main incident details and a link back to the incident in All Quiet.
- Any additional incident attributes you defined in the mapping engine, plus related links when present.
- The incident history, including all events and on-call information until the incident was exported.