Setup time: 2 Min
1. Create SigNoz Integration on All Quiet
Sign in to your All Quiet account.Create Integration
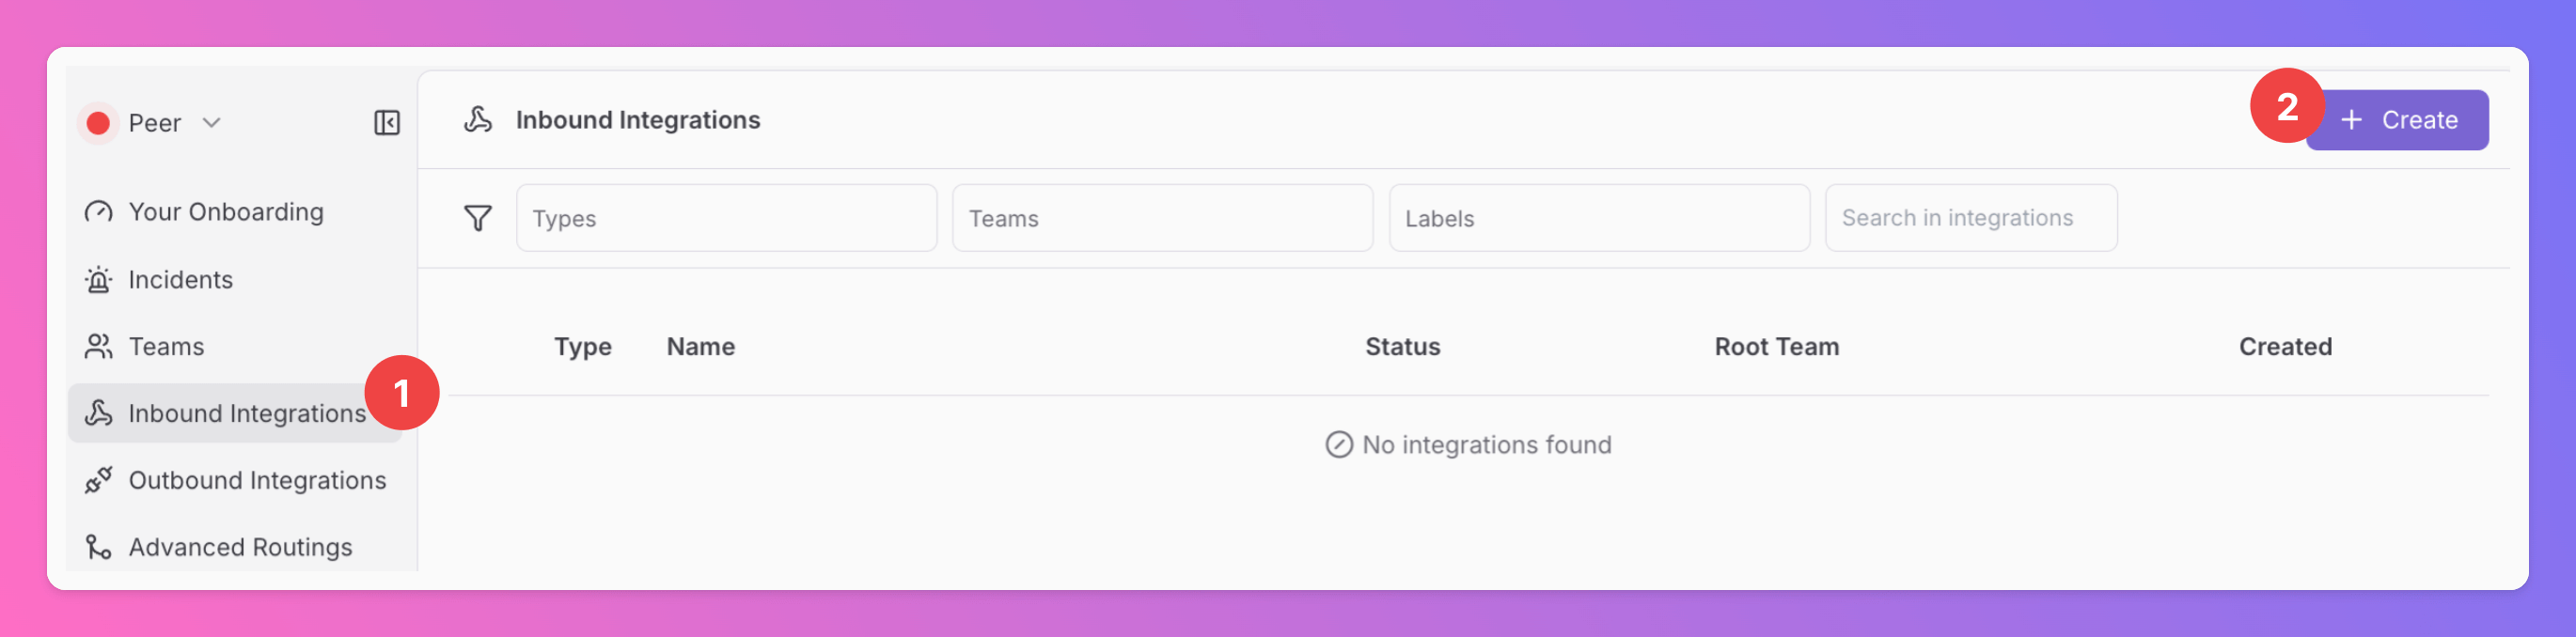
- Click on the
Inbound Integrationstab. - Click on
+ Create.
Select SigNoz as the integration’s type
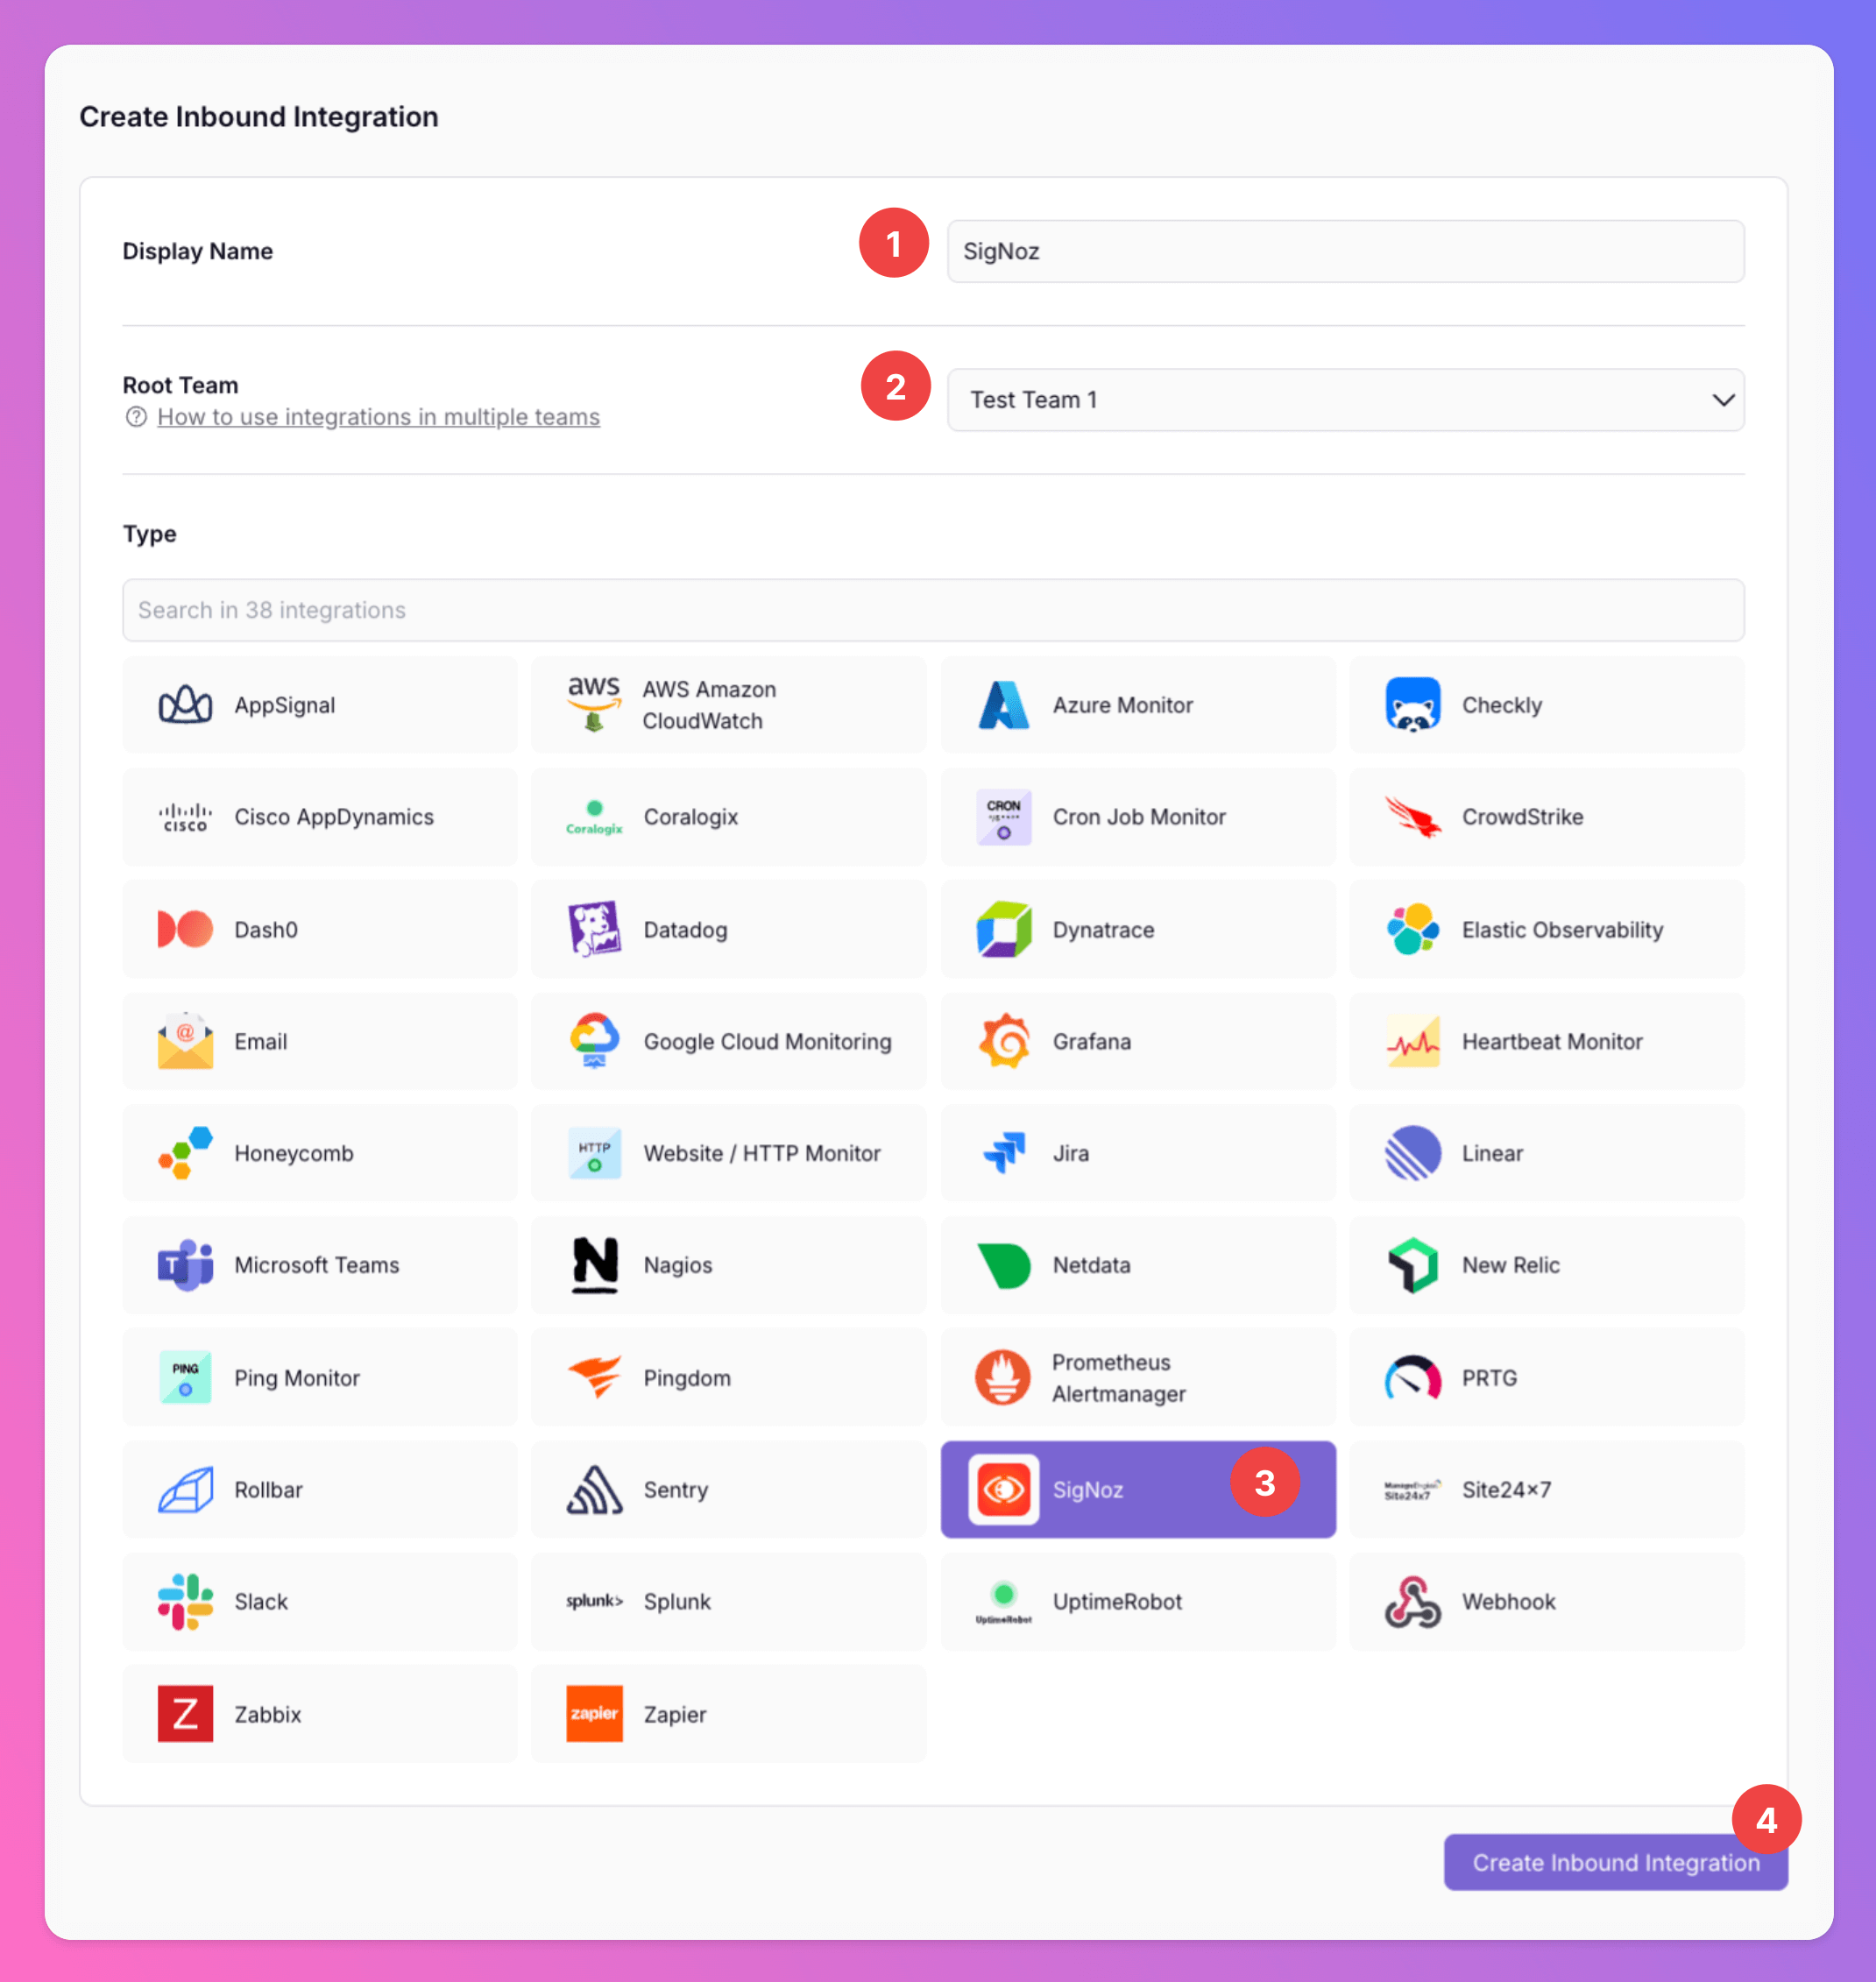
- Enter a
Display Namefor your integration, e.g. “SigNoz”. - Select a
Team. - Select
SigNozas the integration’s type. - Click
Create Inbound Integration.
Get the All Quiet Webhook URL
After creating the integration on All Quiet, you can view the unique All Quiet Webhook URL of your SigNoz integration. You will require it in step 2 when configuring the custom integration on SigNoz.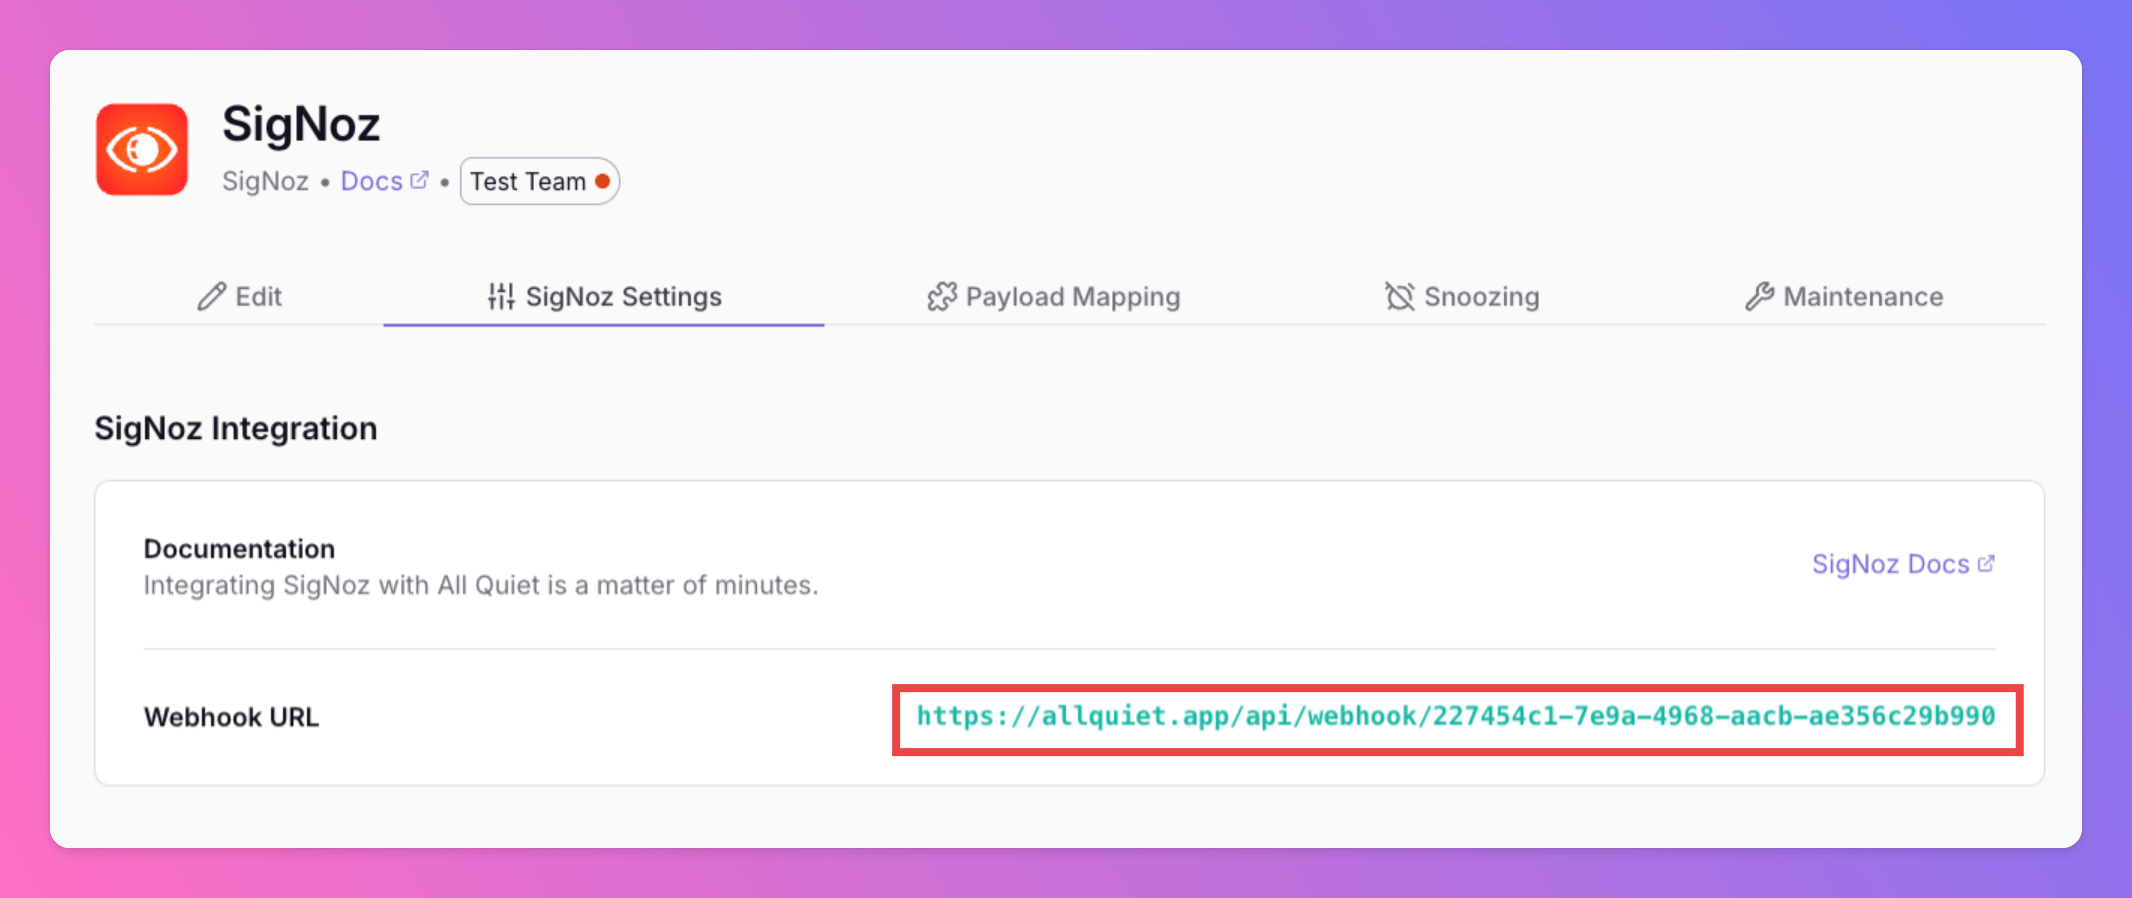
Optionally toggle
Enable additional Authentication & Security below the webhook URL to restrict who can POST payloads.- IP Filter — Allow requests only from specific IPs or CIDR ranges. Failed checks return 404 Not Found.
- Bearer authentication — Require
Authorization: Bearer YOUR_TOKEN. Missing or invalid tokens return 401 Unauthorized.
2. Configure a custom integration with SigNoz
Once you’ve set up an integration of type “SigNoz” with All Quiet, the next step is to add a new alerting channel to your SigNoz account. This ensures all your SigNoz alerts will be forwarded to All Quiet. Sign in to your SigNoz Account.- Open
Settings - Select the tab
Alert Channels - Click
New Alert Channel

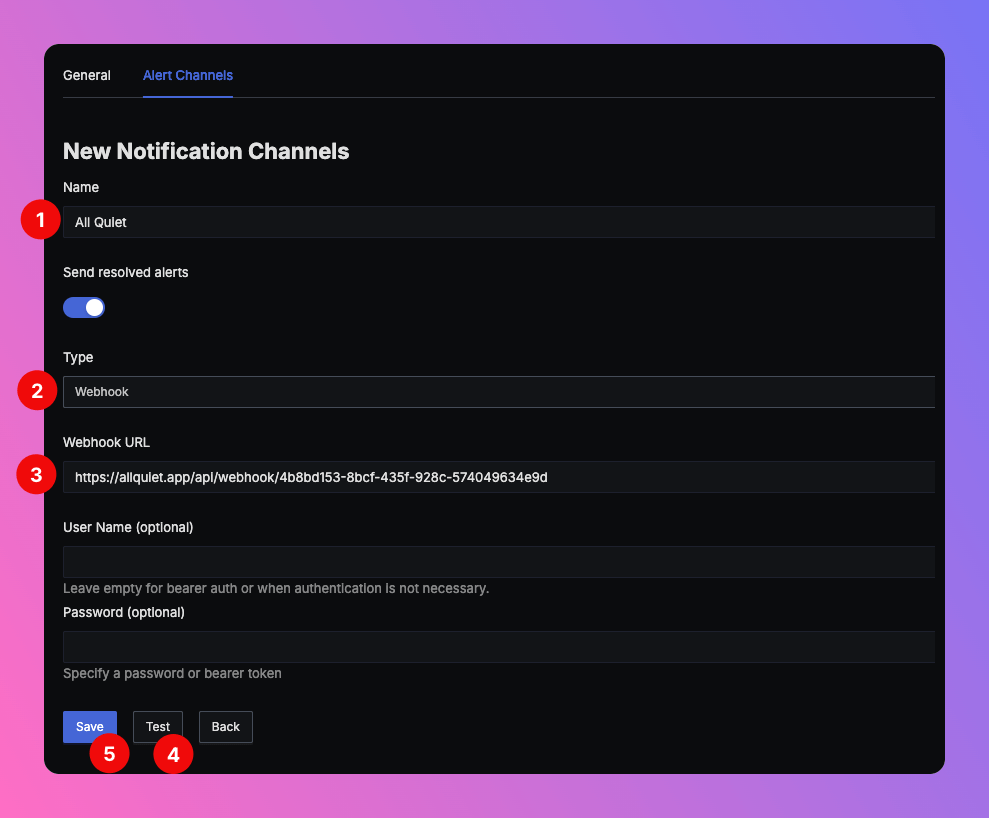
- Select a name, e.g.
All Quiet - As type, select
Webhook - As
Webhook URL, paste in the All Quiet Webhook URL you’ve obtained in step Get the All Quiet Webhook URL. - Test your alerting channel. If successful, you will find a test incident in All Quiet, created by SigNoz (see 2nd screenshot below).
- Then, save the channel.

You’re ready. All Quiet will now create incidents based on all your SigNoz alerts.