> ## Documentation Index
> Fetch the complete documentation index at: https://docs.allquiet.app/llms.txt
> Use this file to discover all available pages before exploring further.
# Zapier
> Send All Quiet Incidents to Almost Any App Using Zapier
Setup time: 10 Min
Zapier's claim is "More Integrations Than Anyone".
With this integration, you can connect All Quiet with any of Zapier's listed integrations.
Want to use Zapier as an Inbound Integration to create incidents? Follow the first part of this outbound documentation to create the integration. Then, follow the [Zapier Inbound Integration Documentation](/integrations/inbound/zapier).
## Create Outbound Integration
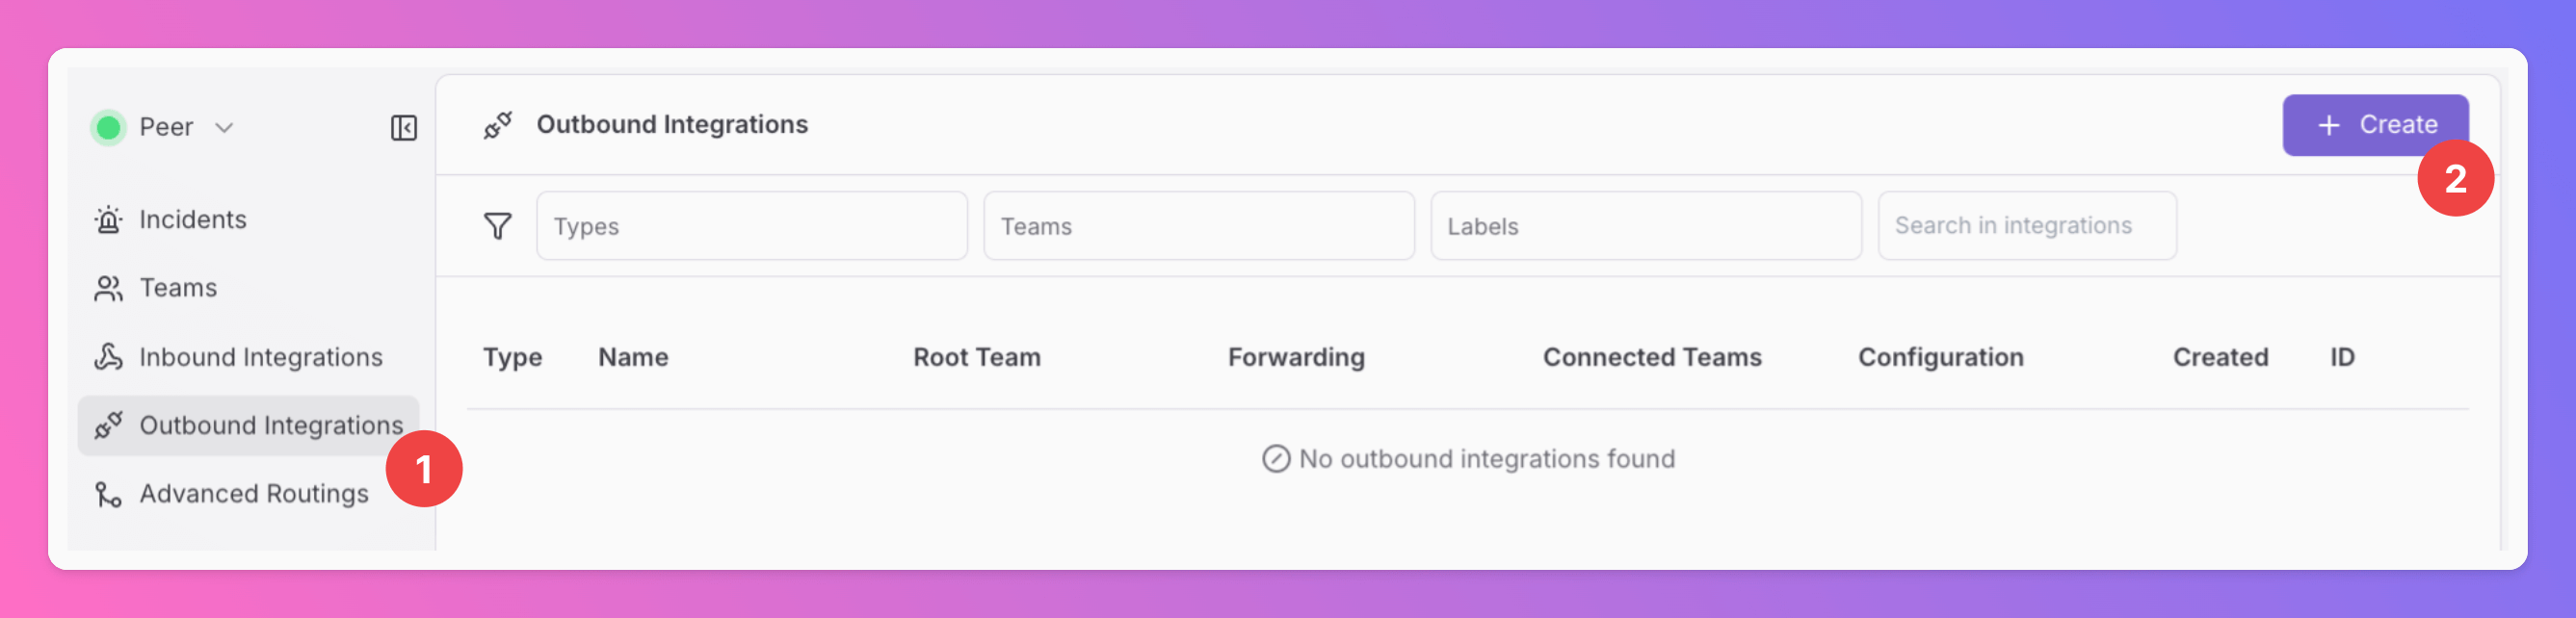
1. Click on the `Outbound Integrations` tab.
2. Click on `+ Create`.
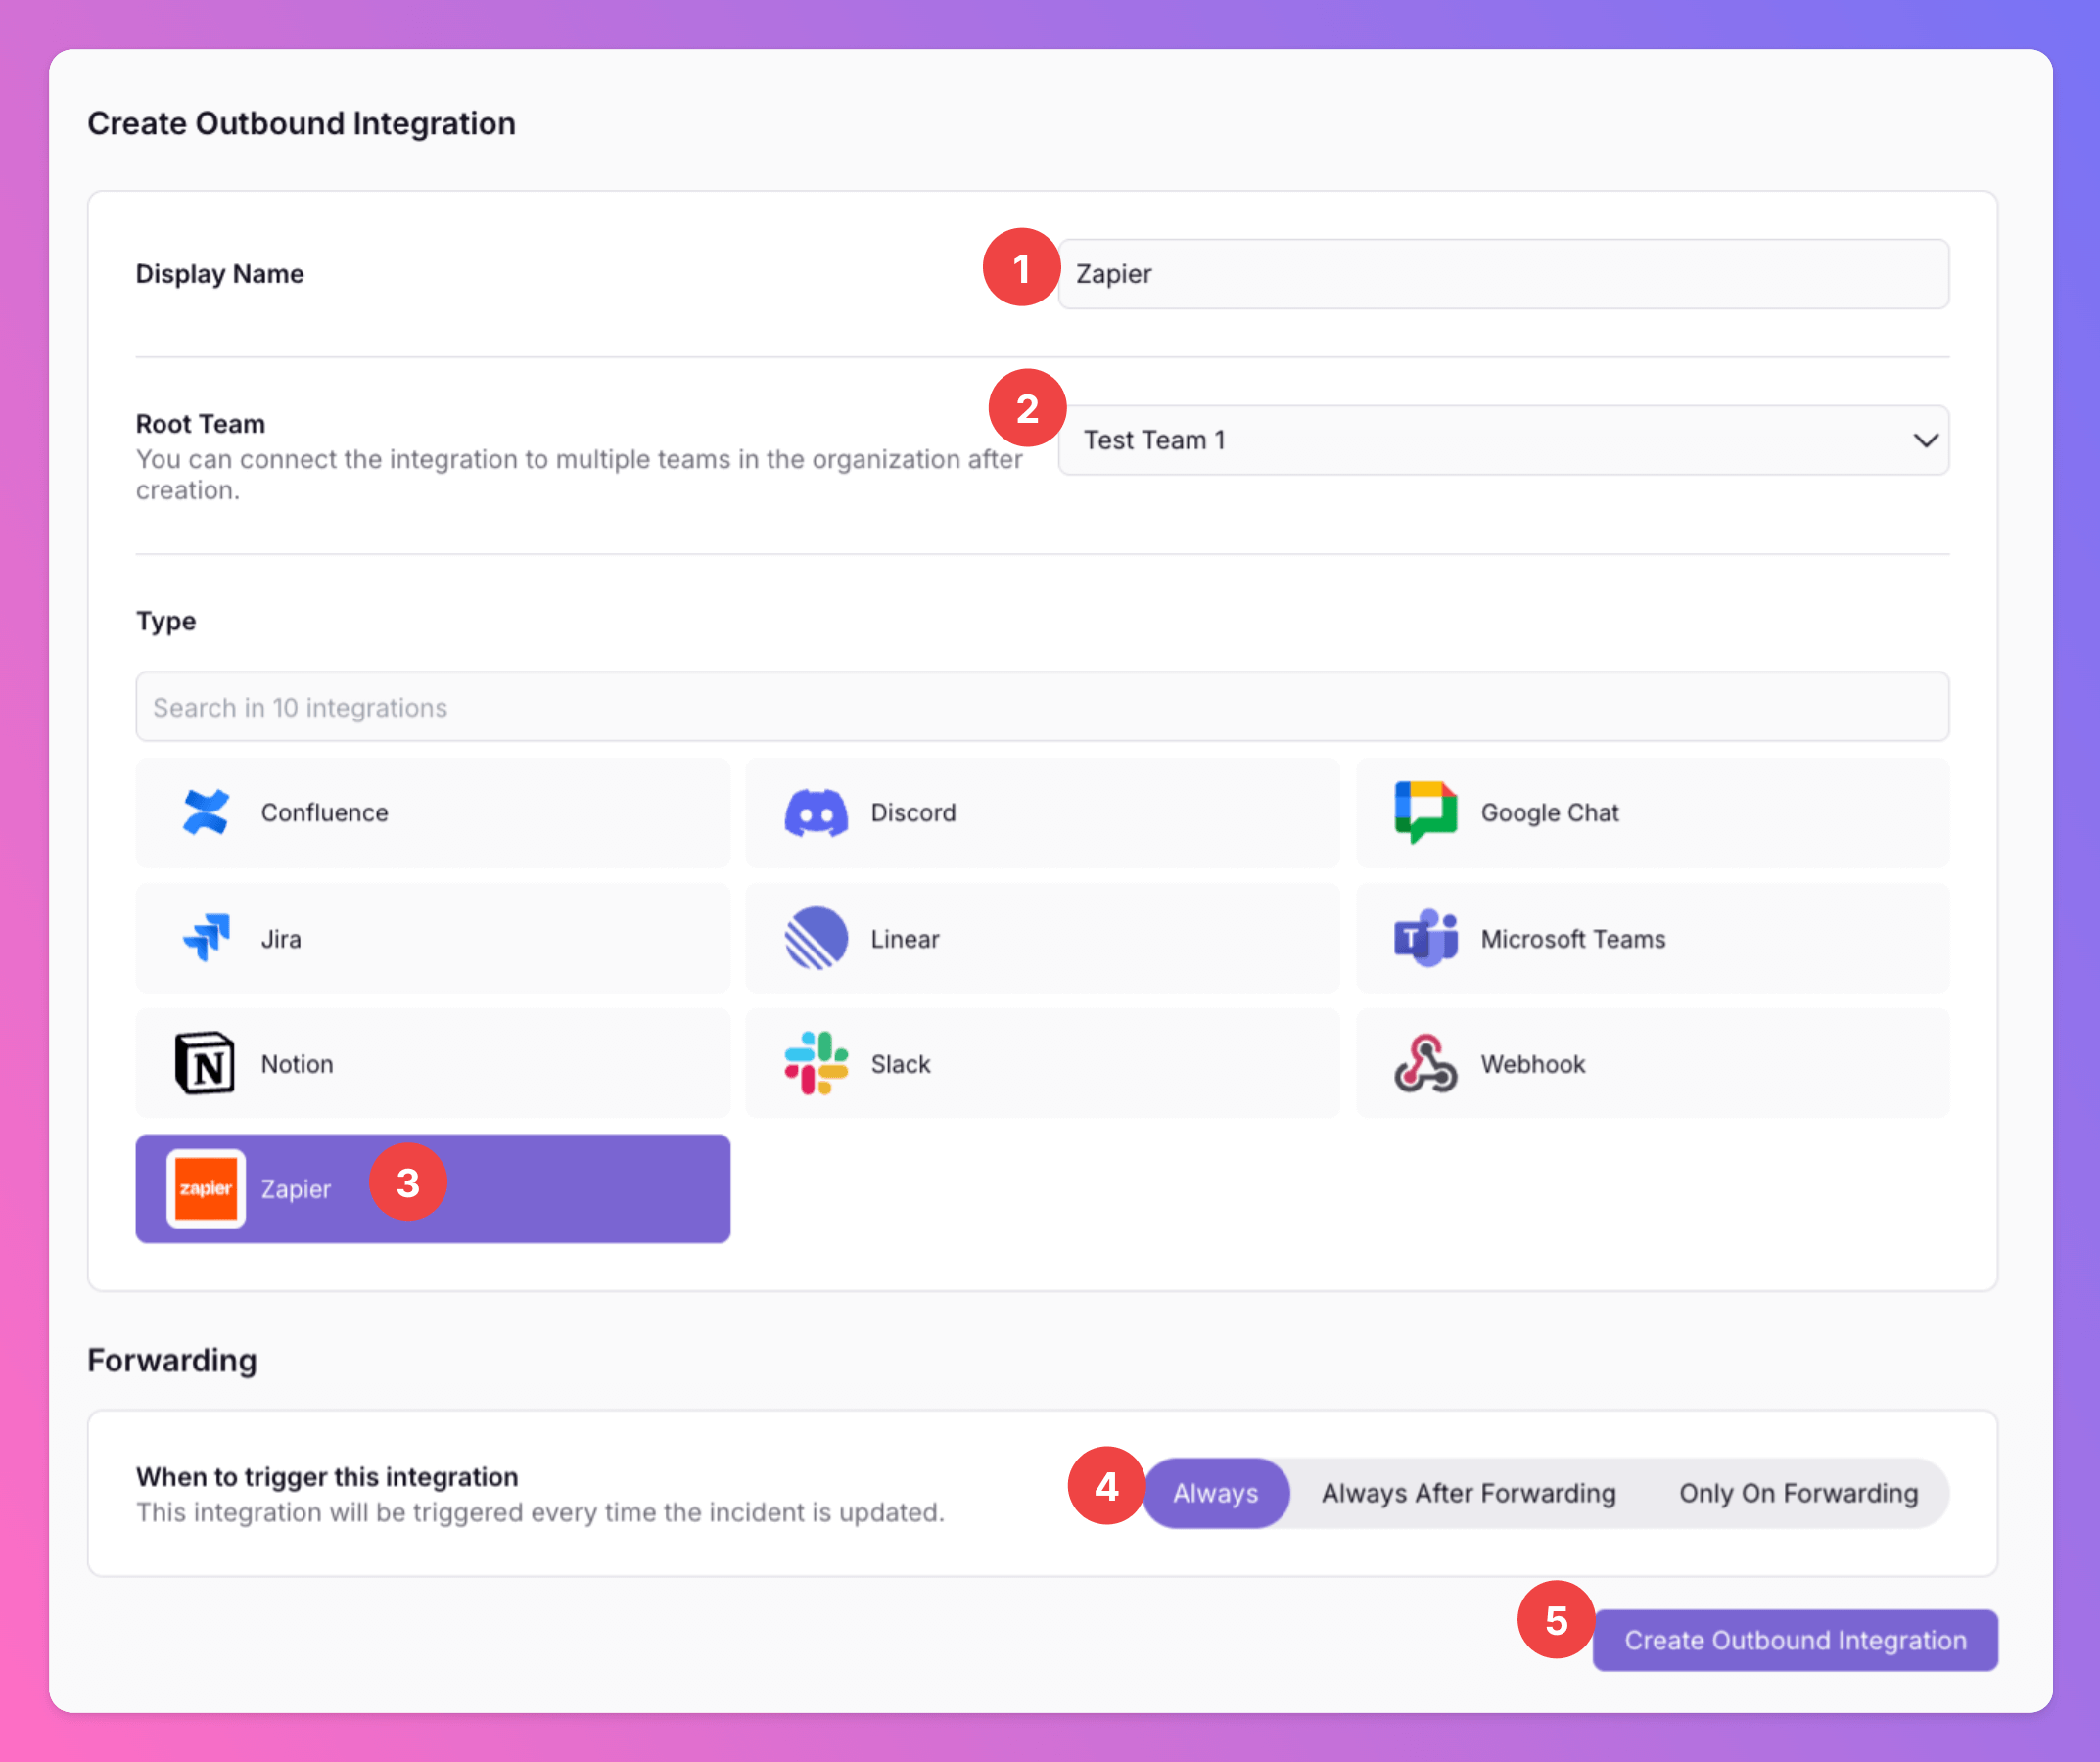
 1. Enter a `Display Name` for your integration, e.g. "Outbound Webhook".
2. Select a `Team`. For Organizations with Pro and Enterprise plan: This is going to be the root team of your integration. You will be able to add additional teams in the next step.
3. Select `Webhook` as the integration's type.
4. Forwarding settings:
1. **Default:** `Always` will automatically forward all incidents to your Zaps, unless excluded by additional [advanced routing rules](/advanced/routing).
2. **Alternative 1**: `Always After Forwarding` will only sent requests if users [manually forward specific incidents](/essentials/incident#forwarding) or if you set up [advanced routing rules](/advanced/routing) for your Webhook Outbound integration that automatically forward incidents in specific scenarios. **After Forwarding, all updates** of the incident **will also be pushed to the Outbound Webhook**.
3. **Alternative 2**: `Only On Forwarding` will only forward a snapshot of the current incident history to your Zaps in the moment users [manually forward specific incidents](/essentials/incident#forwarding) or if you set up [advanced routing rules](/advanced/routing) for your Zapier Outbound integration that automatically forward incidents in specific scenarios. We will **not send** any incident **updates** to your Zaps, **afterwards**.
You can change your selection anytime.
5. Click `Create Outbound Integration`.
1. Enter a `Display Name` for your integration, e.g. "Outbound Webhook".
2. Select a `Team`. For Organizations with Pro and Enterprise plan: This is going to be the root team of your integration. You will be able to add additional teams in the next step.
3. Select `Webhook` as the integration's type.
4. Forwarding settings:
1. **Default:** `Always` will automatically forward all incidents to your Zaps, unless excluded by additional [advanced routing rules](/advanced/routing).
2. **Alternative 1**: `Always After Forwarding` will only sent requests if users [manually forward specific incidents](/essentials/incident#forwarding) or if you set up [advanced routing rules](/advanced/routing) for your Webhook Outbound integration that automatically forward incidents in specific scenarios. **After Forwarding, all updates** of the incident **will also be pushed to the Outbound Webhook**.
3. **Alternative 2**: `Only On Forwarding` will only forward a snapshot of the current incident history to your Zaps in the moment users [manually forward specific incidents](/essentials/incident#forwarding) or if you set up [advanced routing rules](/advanced/routing) for your Zapier Outbound integration that automatically forward incidents in specific scenarios. We will **not send** any incident **updates** to your Zaps, **afterwards**.
You can change your selection anytime.
5. Click `Create Outbound Integration`.
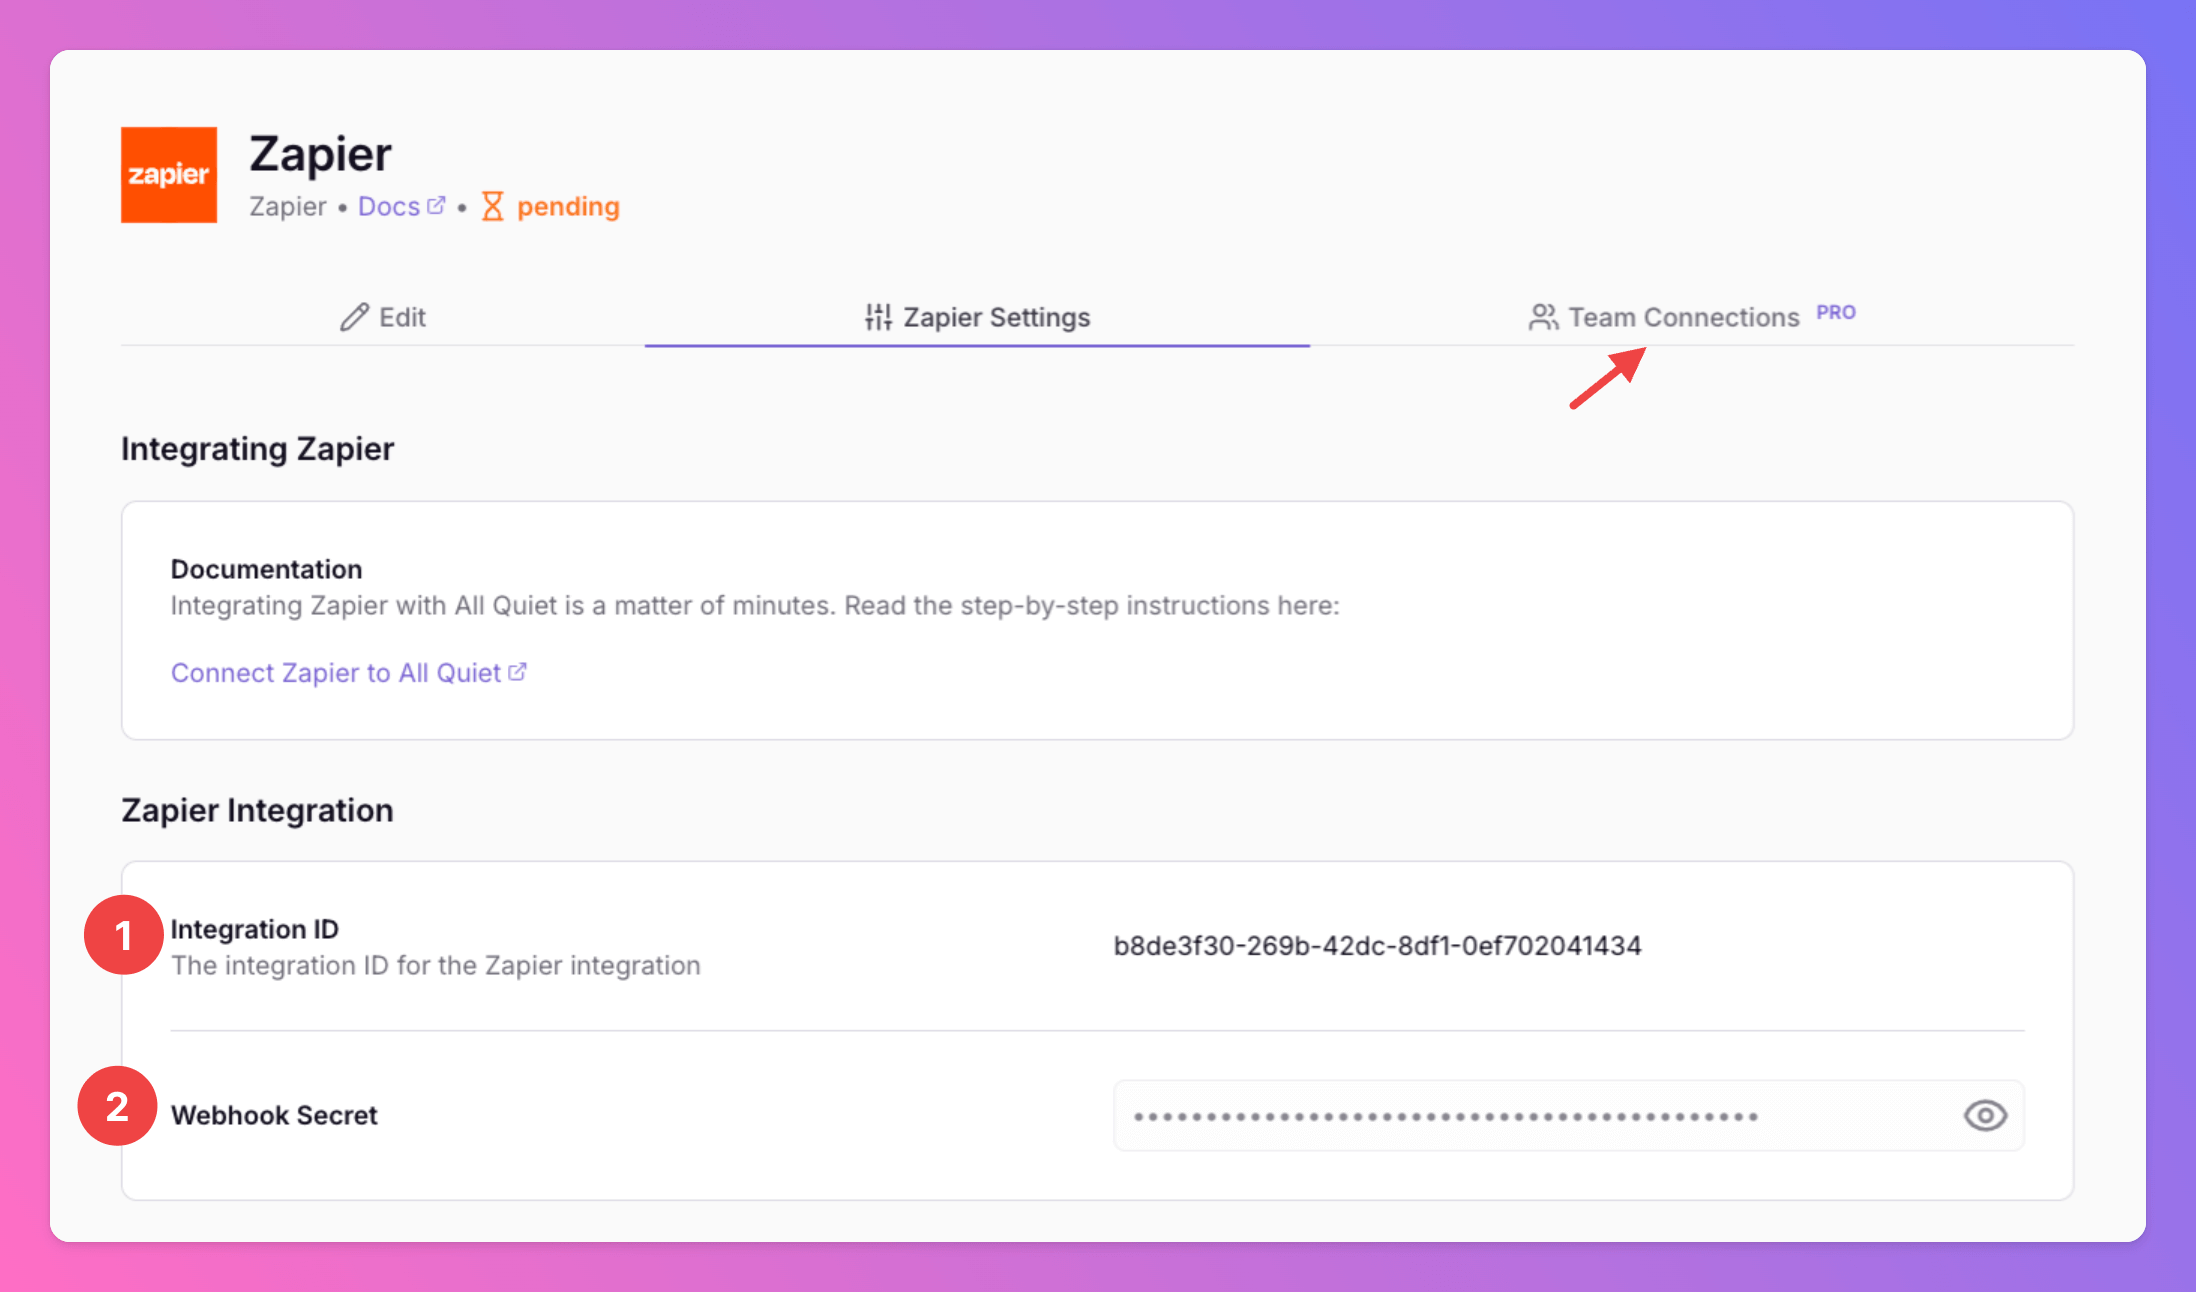
 Once you've successfully created your new outbound integration, you'll automatically be redirected to its `Settings` page.
1. You receive the `Integration ID` that you will need on Zapier's site to connect with All Quiet.
2. You receive the `Webhook Secret` that you will need on Zapier's site to connect with All Quiet, too.
**Only for Pro and Enterprise plan:** The root team is pre-selected, and you can add the integration to further teams within the root team's organization. *Team Administrators* can add / remove those teams they are an admin in, *Organization Administrators* & *Organization Owners* can manage the connections to all teams of the organization.
Once you've successfully created your new outbound integration, you'll automatically be redirected to its `Settings` page.
1. You receive the `Integration ID` that you will need on Zapier's site to connect with All Quiet.
2. You receive the `Webhook Secret` that you will need on Zapier's site to connect with All Quiet, too.
**Only for Pro and Enterprise plan:** The root team is pre-selected, and you can add the integration to further teams within the root team's organization. *Team Administrators* can add / remove those teams they are an admin in, *Organization Administrators* & *Organization Owners* can manage the connections to all teams of the organization.
 The following part of this documentation will explain how to use an All Quiet incident to Trigger a Zap. If you want to create an incident in All Quiet using a Zapier Action, please refer to the [Zapier Inbound Documentation](/integrations/inbound/zapier).
## Use All Quiet as a Trigger in Zapier
You can use Zapier to connect other outbound tools to your All Quiet workflows than those for that we have [direct outbound integrations](/integrations/overview#outbound-integrations) already.
First, log in to your Zapier account.
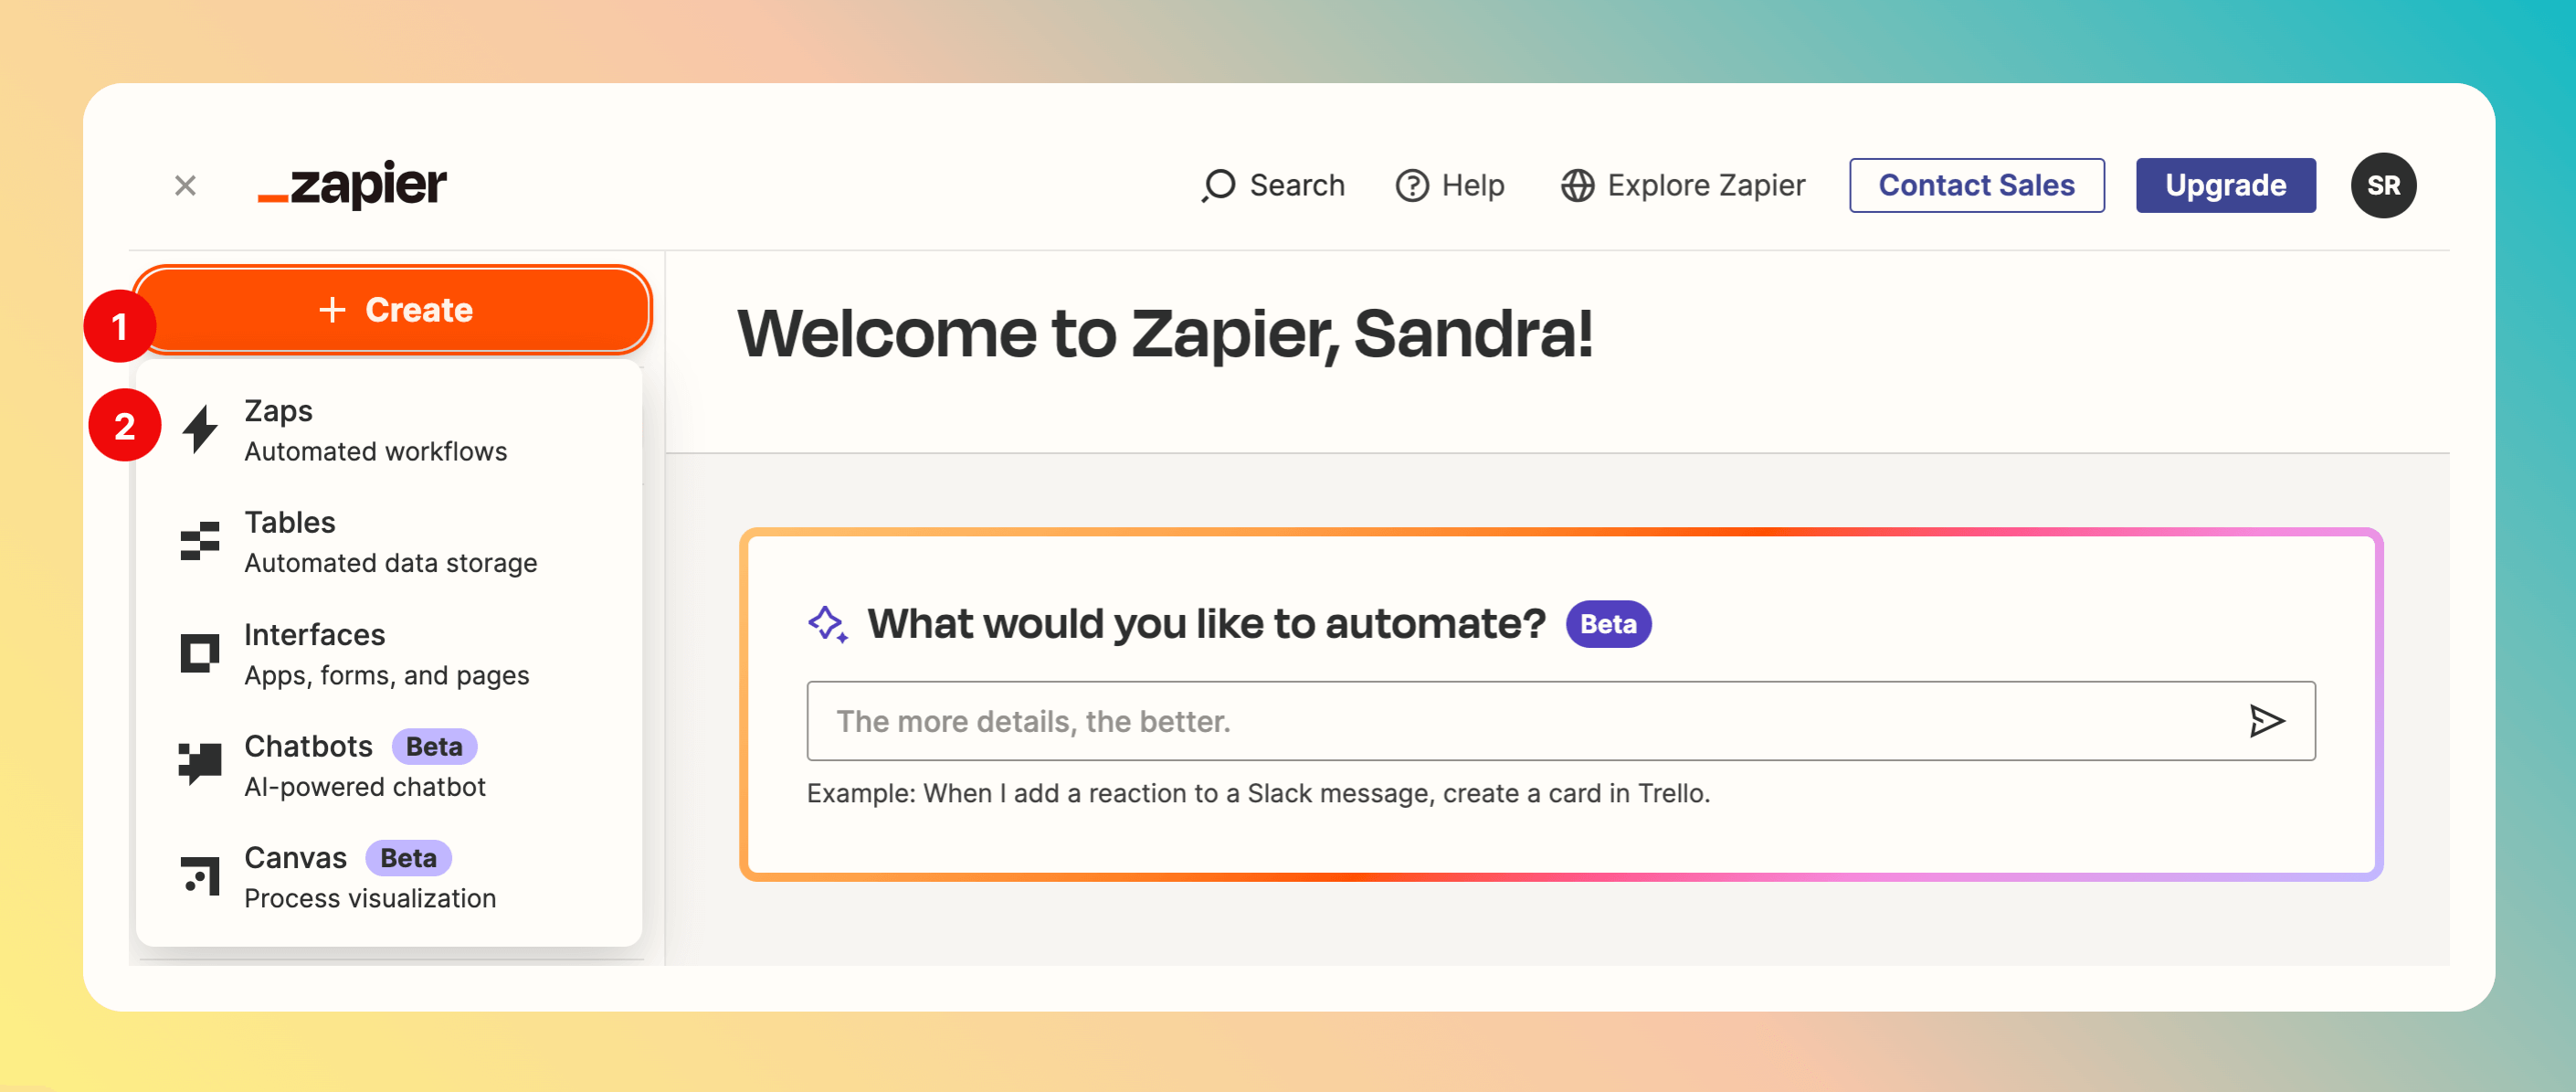
1. On the home screen, click `Create`.
2. Select `Zaps`.
The following part of this documentation will explain how to use an All Quiet incident to Trigger a Zap. If you want to create an incident in All Quiet using a Zapier Action, please refer to the [Zapier Inbound Documentation](/integrations/inbound/zapier).
## Use All Quiet as a Trigger in Zapier
You can use Zapier to connect other outbound tools to your All Quiet workflows than those for that we have [direct outbound integrations](/integrations/overview#outbound-integrations) already.
First, log in to your Zapier account.
1. On the home screen, click `Create`.
2. Select `Zaps`.
 After the Zap is created, select the Trigger.
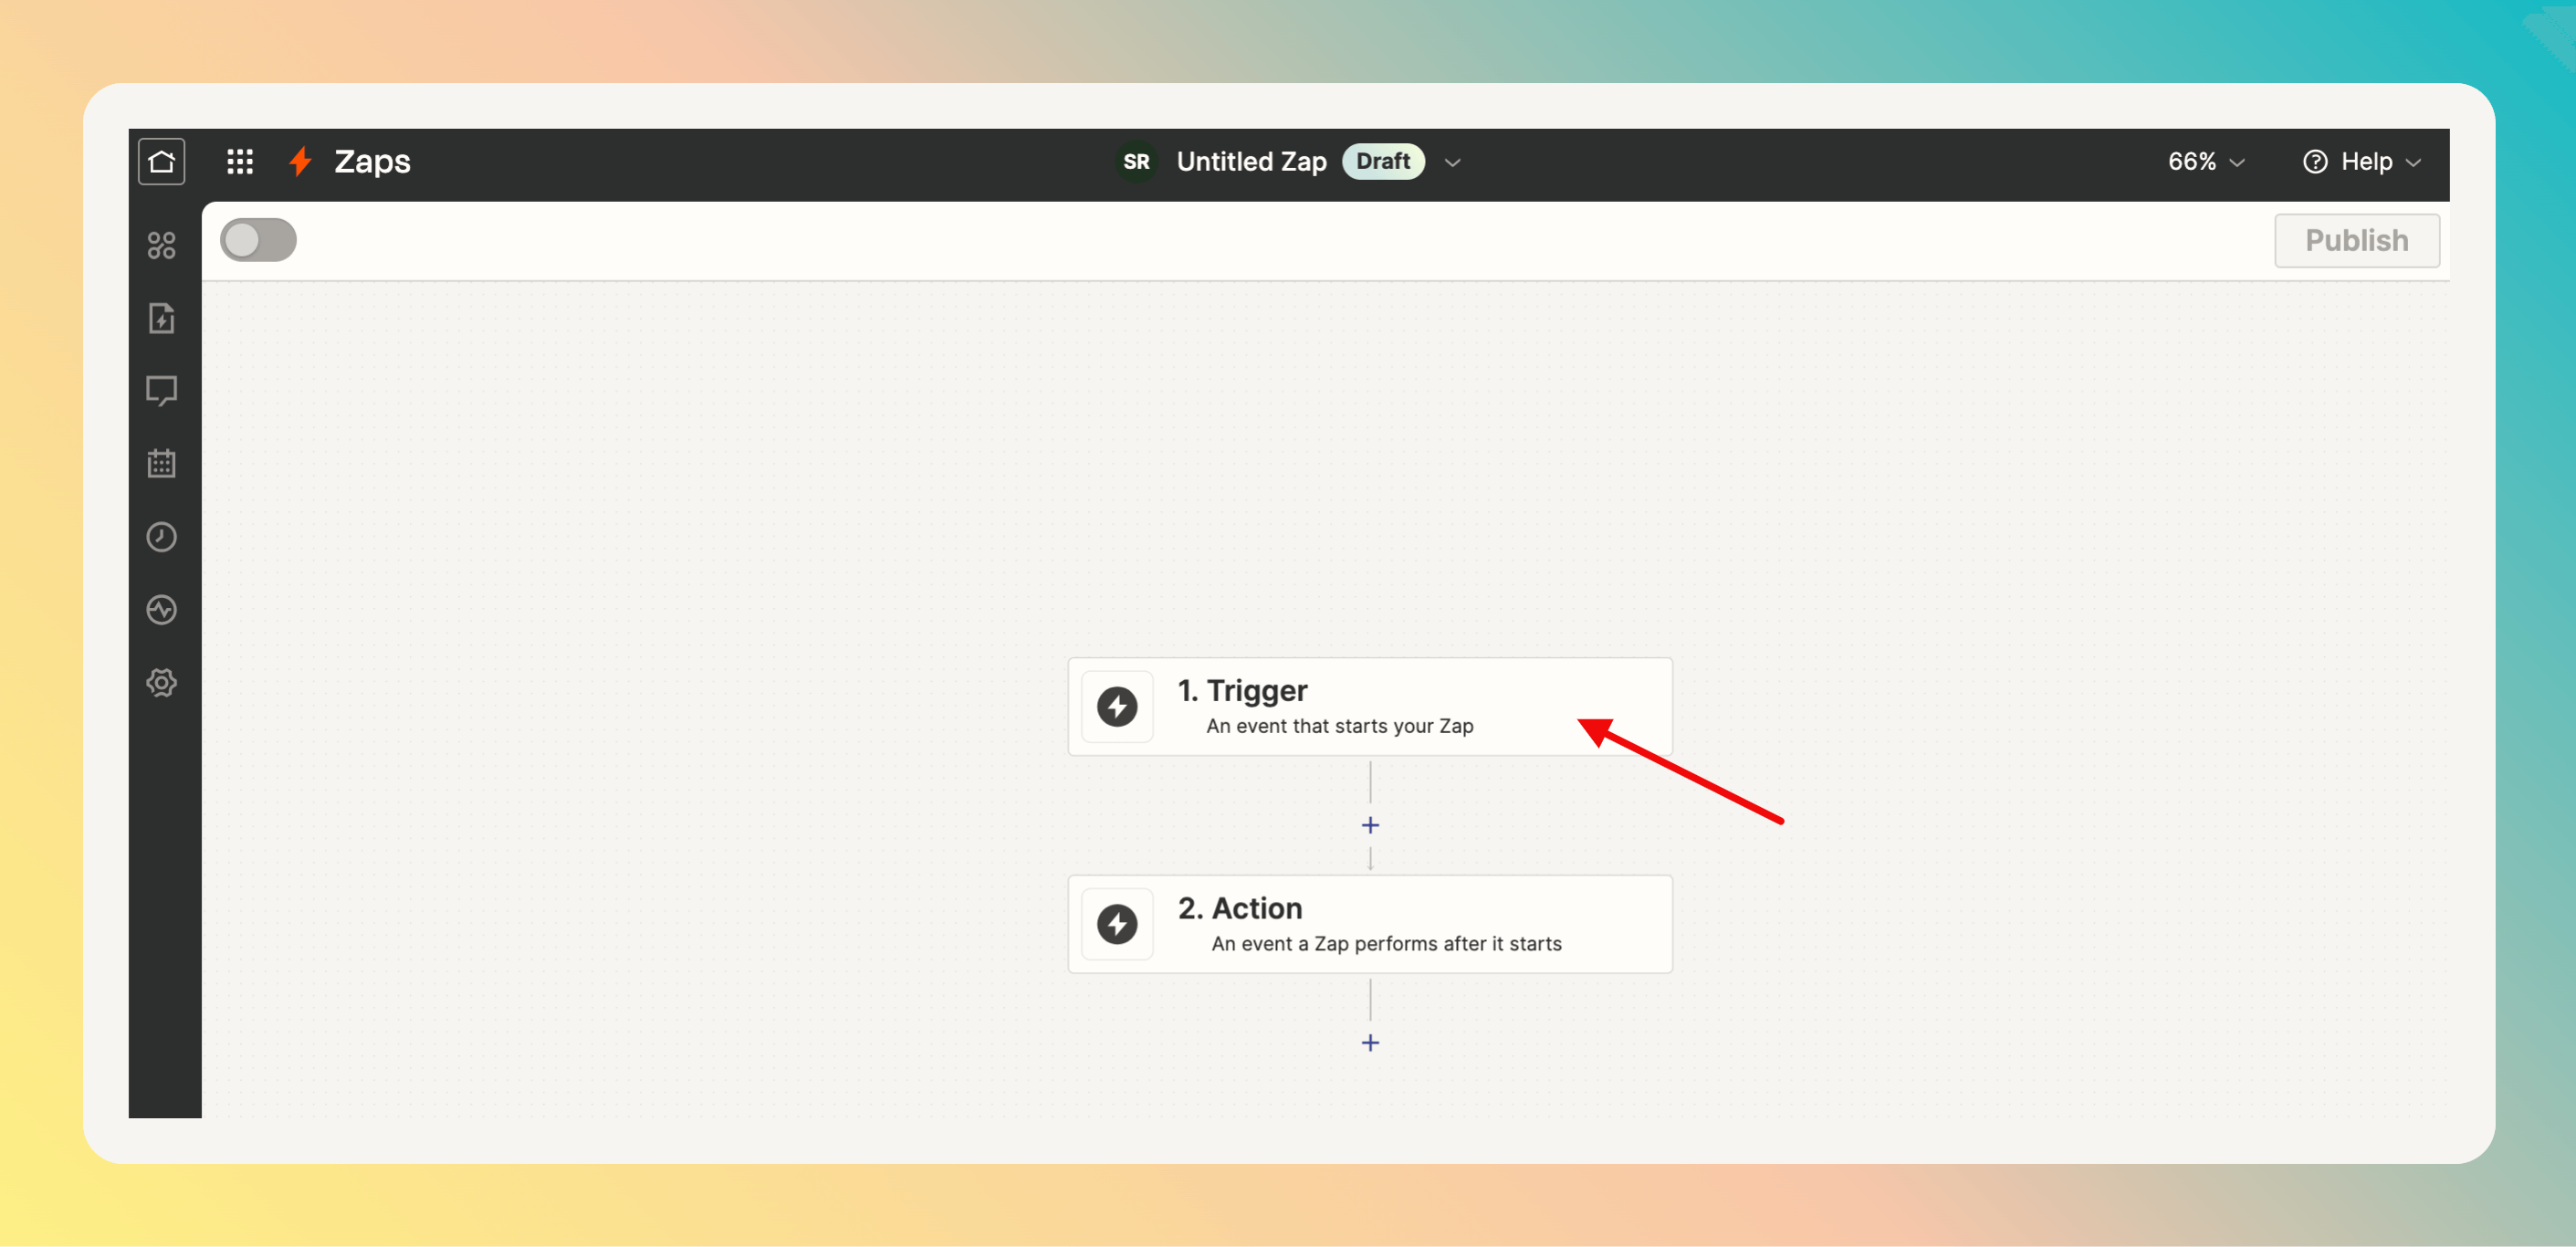 1. Search for `All Quiet`.
2. Select it.
1. Search for `All Quiet`.
2. Select it.
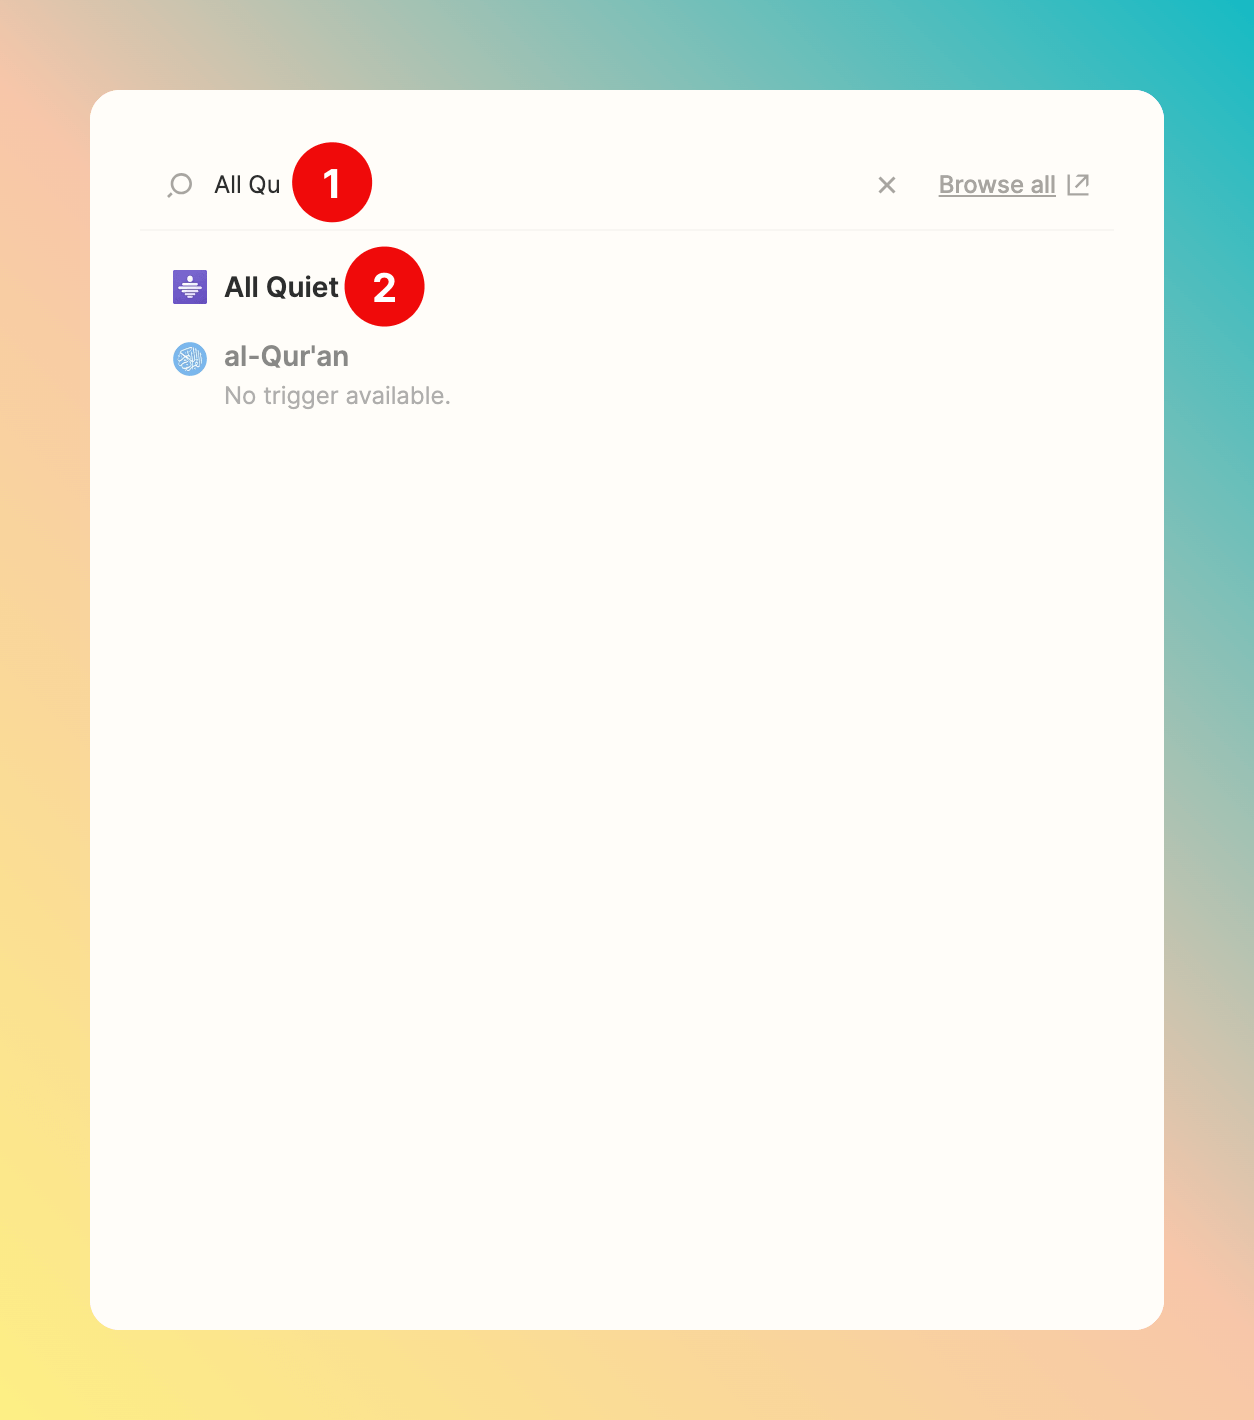 1. After selecting the app, you need to choose an Event. As you selected All Quiet as a Trigger, you can only select `New Incident Intent`.
2. After selection, click `Continue`.
1. After selecting the app, you need to choose an Event. As you selected All Quiet as a Trigger, you can only select `New Incident Intent`.
2. After selection, click `Continue`.
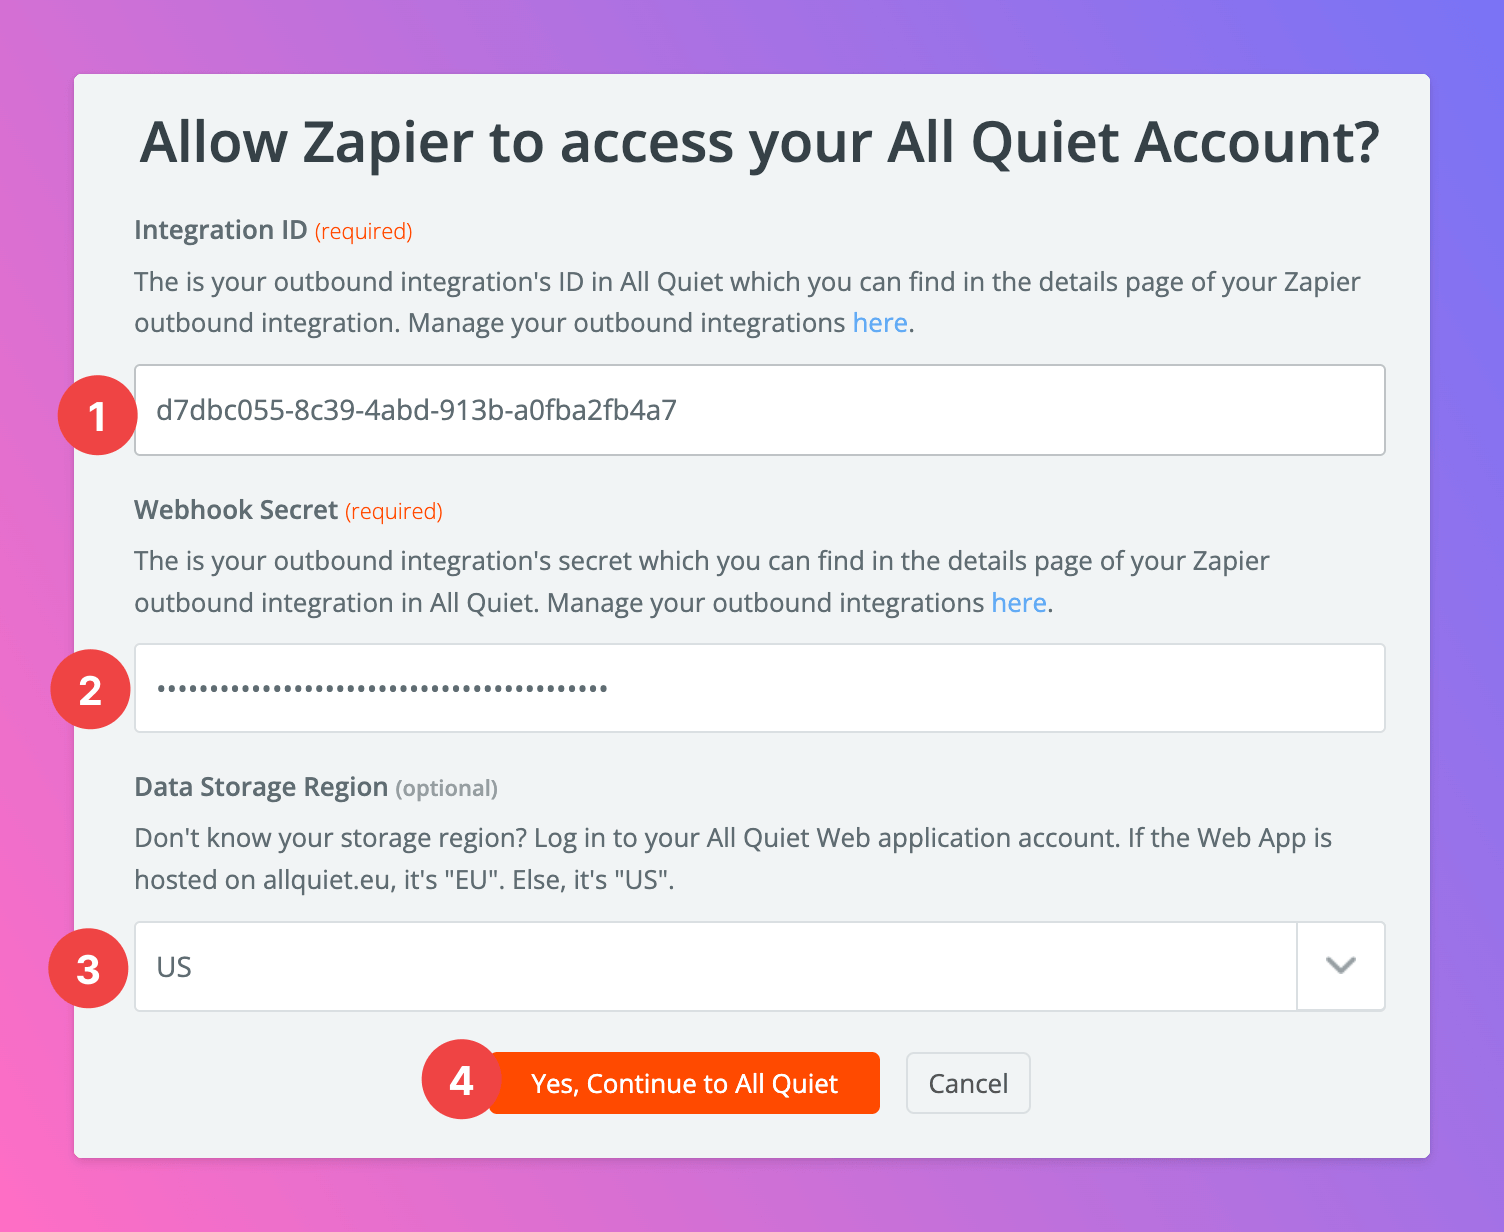
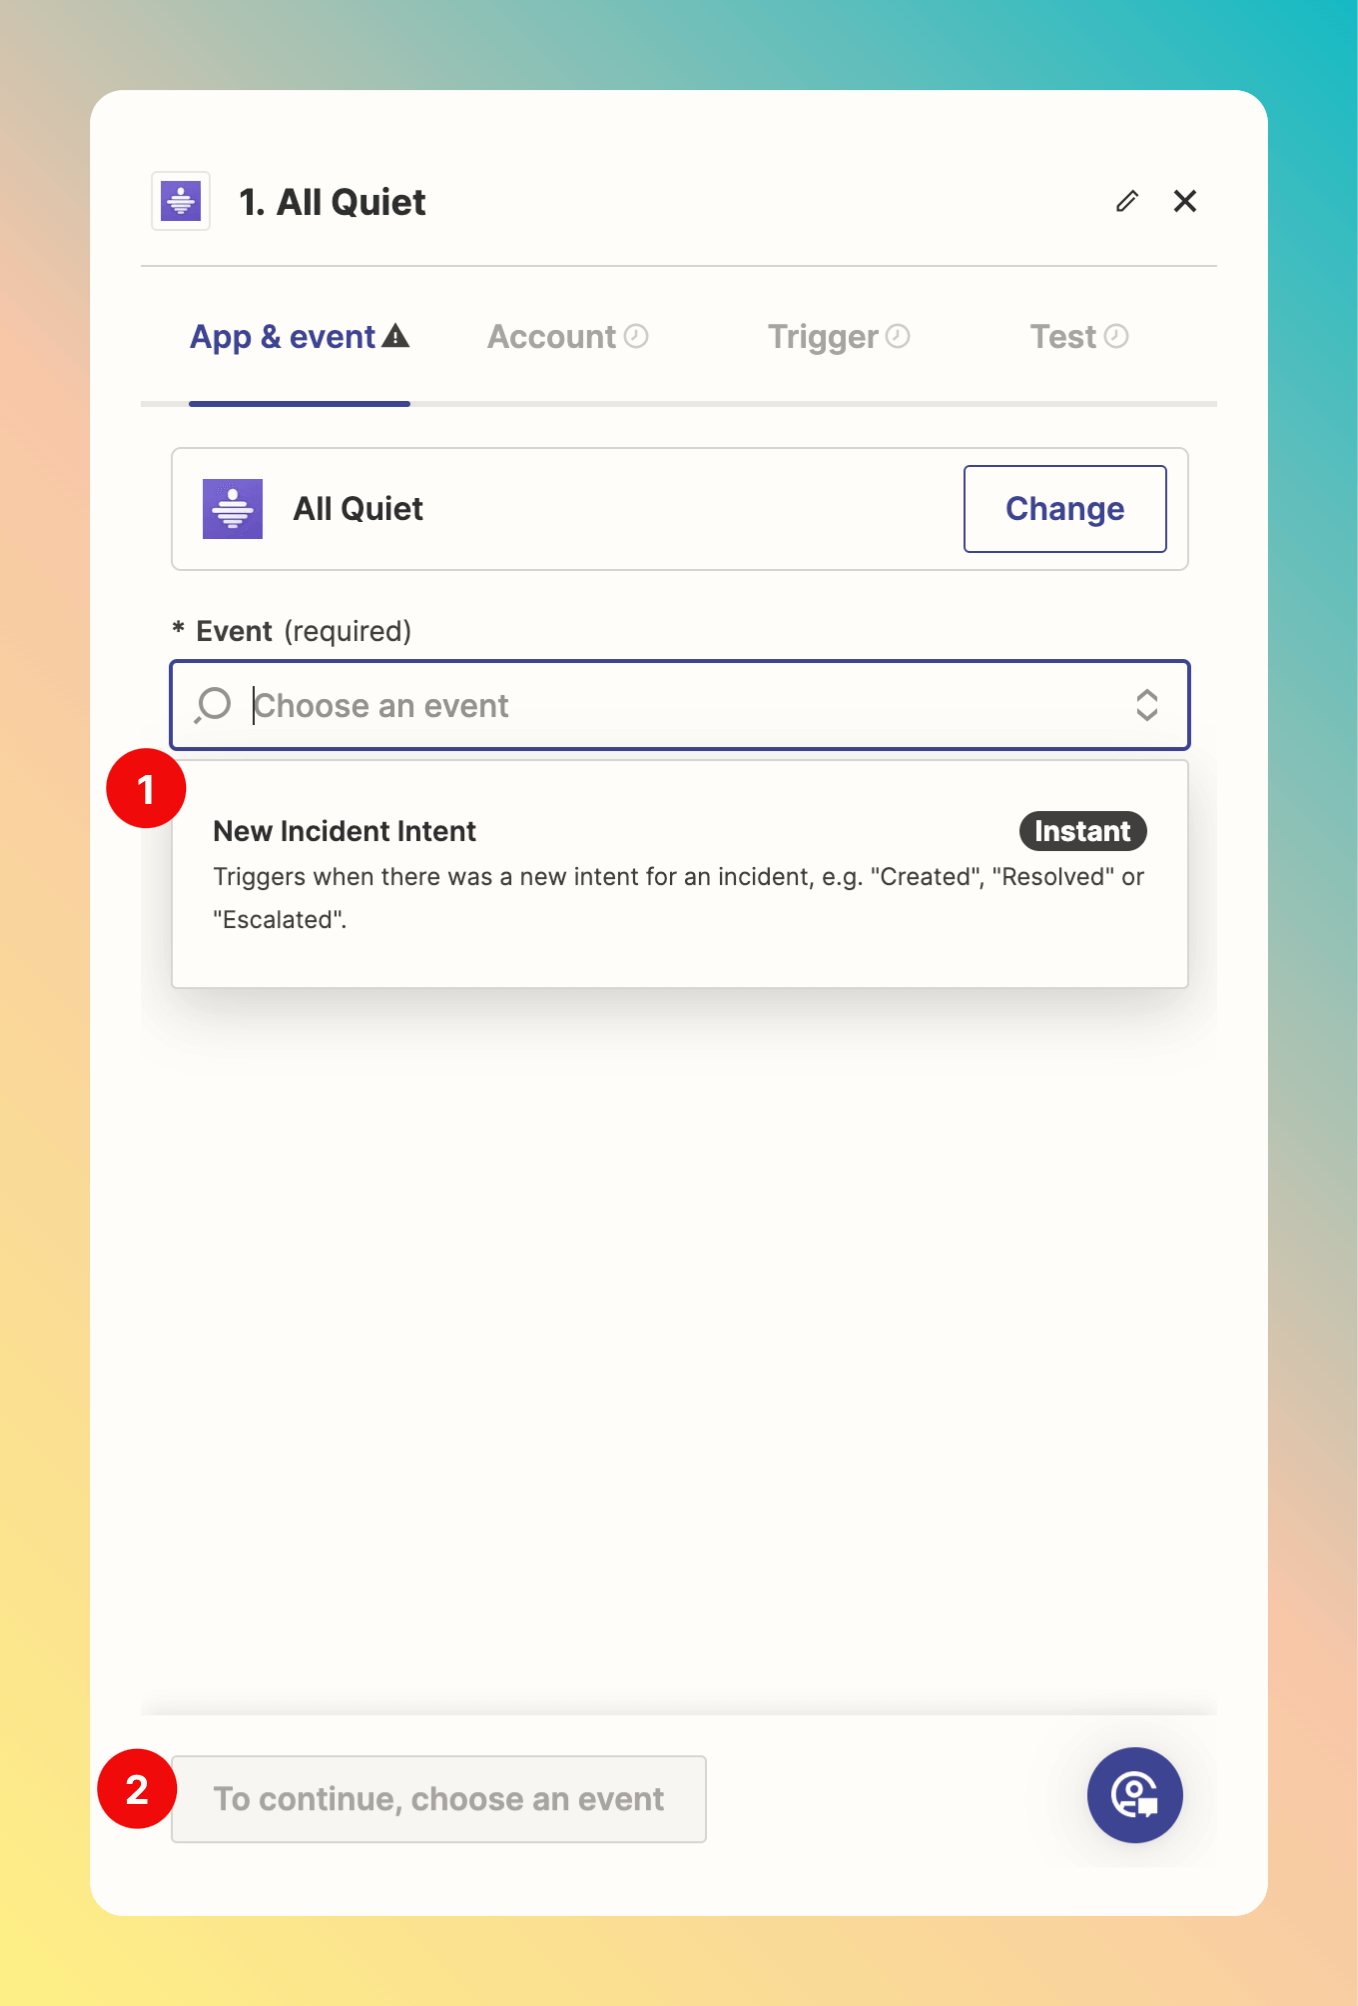 Now, you need to sign in to you All Quiet Account to connect it with Zapier.
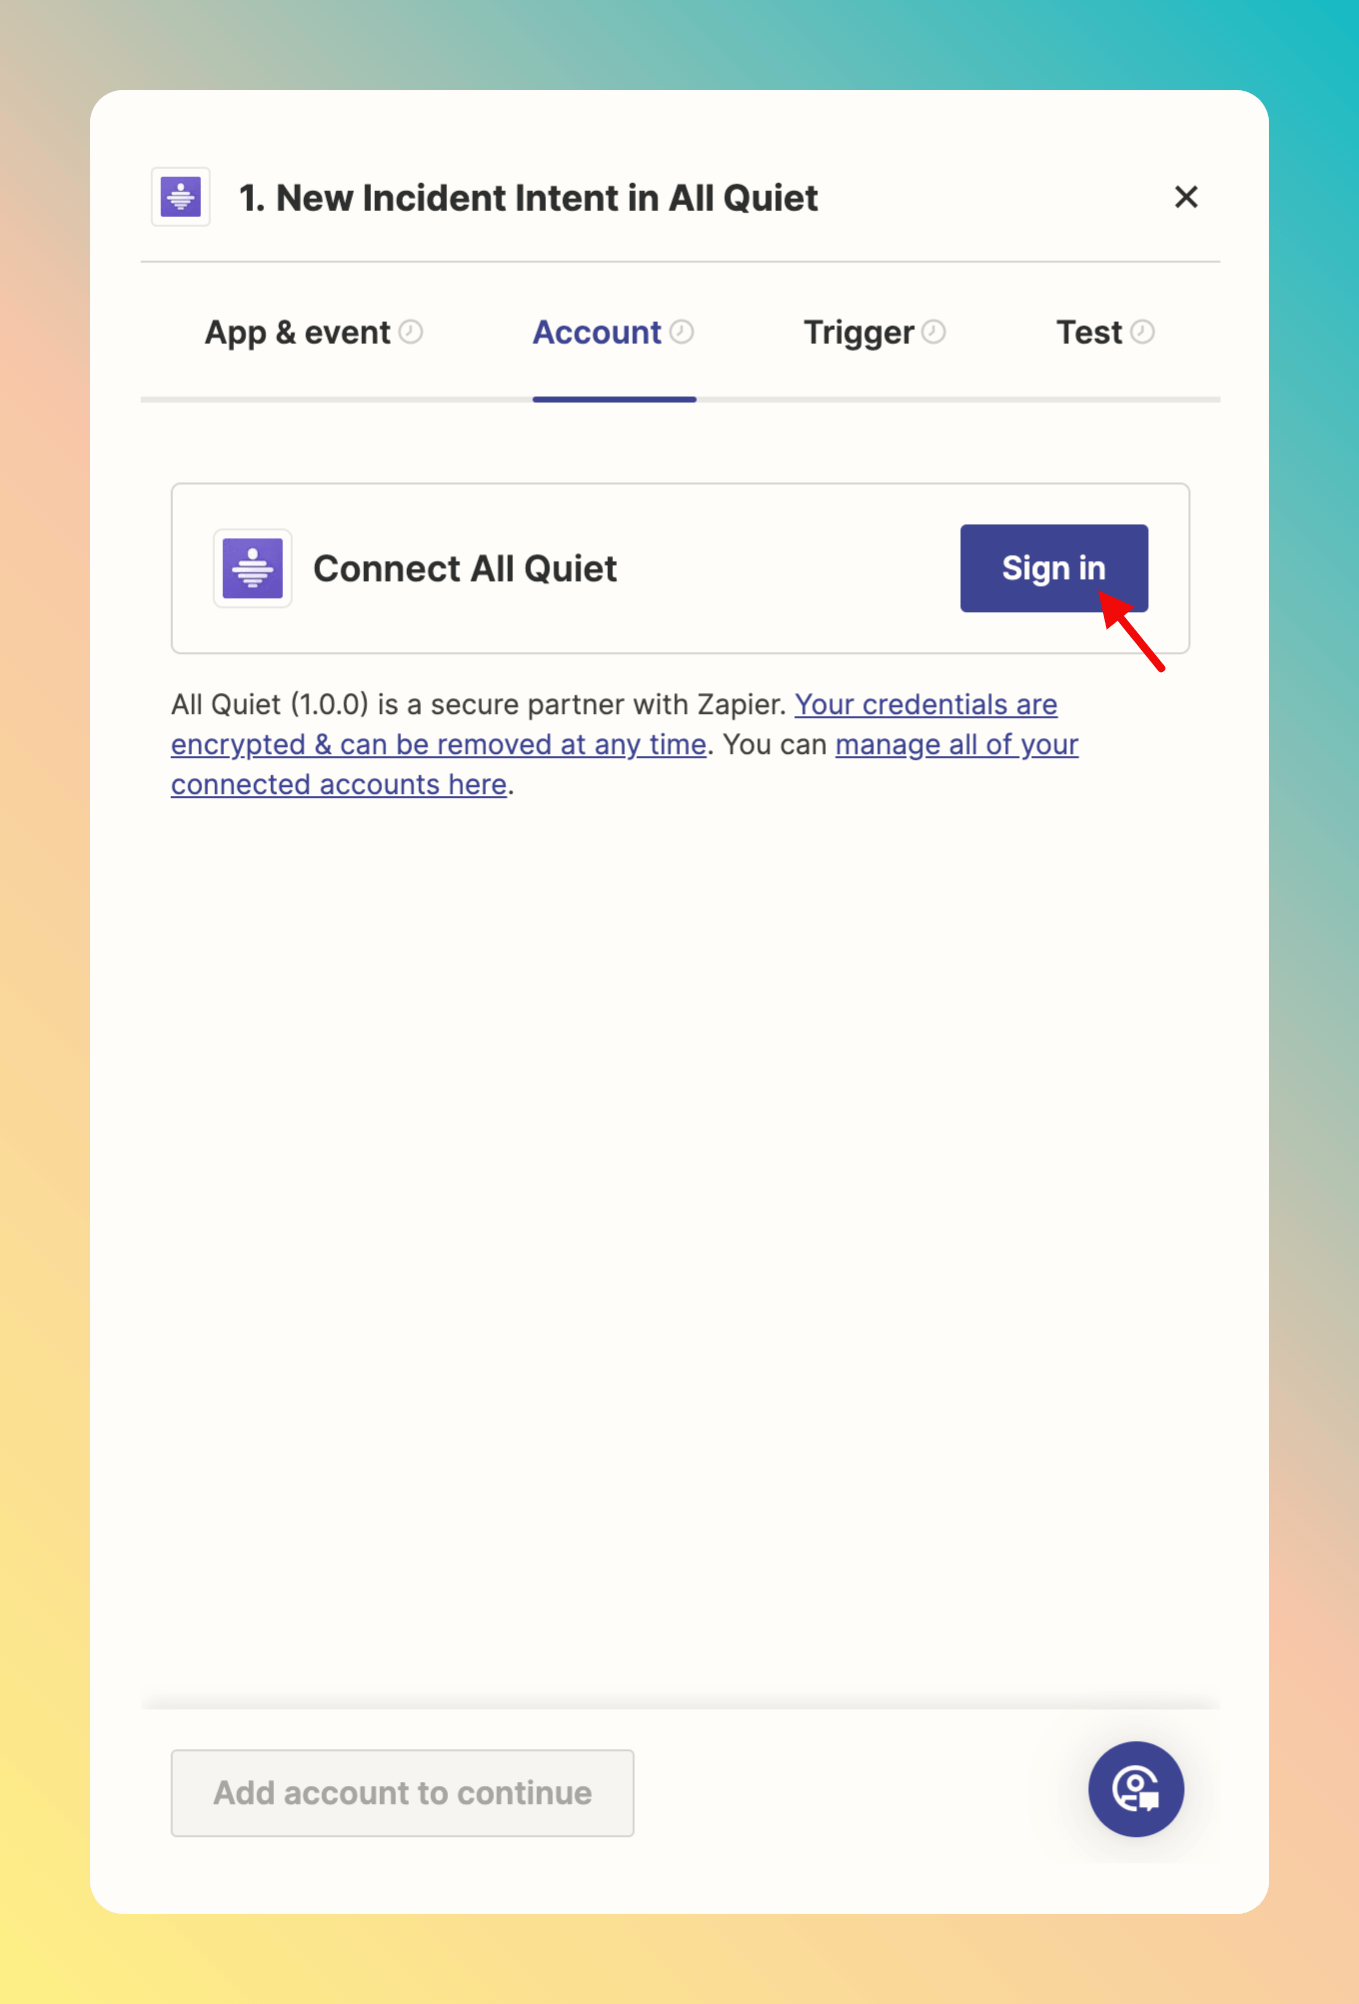 You will have to provide your
1. Integration ID and
2. Webhook Secret
that you received after creating the outbound integration in All Quiet.
3. Also, provide your `Data Storage Region`, either `US` or `EU`.
4. After providing the credentials, click `Yes, Continue to All Quiet`.
You will have to provide your
1. Integration ID and
2. Webhook Secret
that you received after creating the outbound integration in All Quiet.
3. Also, provide your `Data Storage Region`, either `US` or `EU`.
4. After providing the credentials, click `Yes, Continue to All Quiet`.
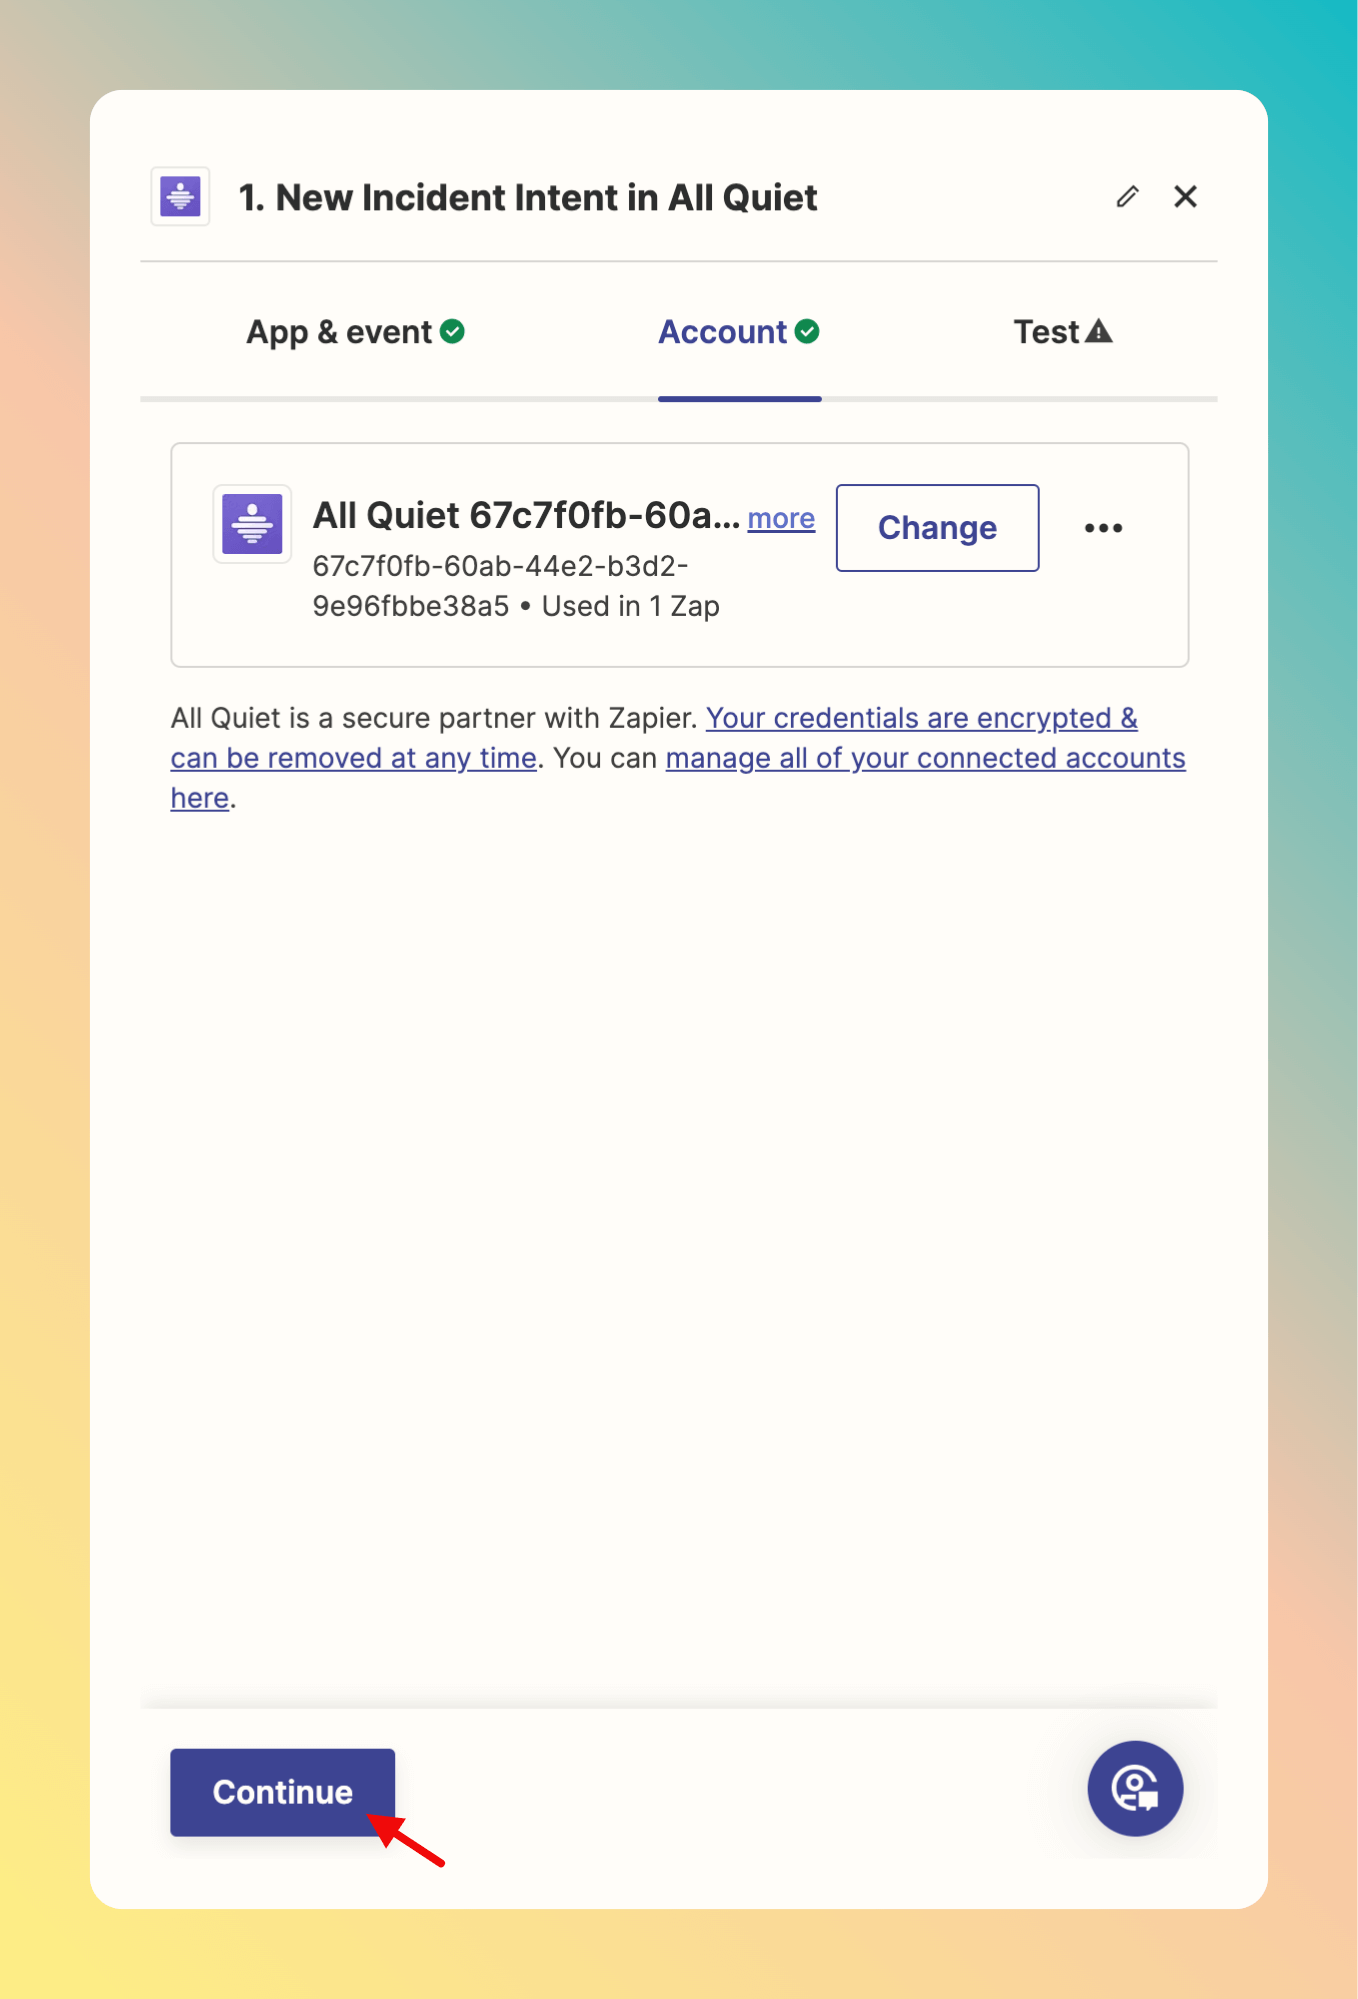
 After signing in with All Quiet, you can continue.
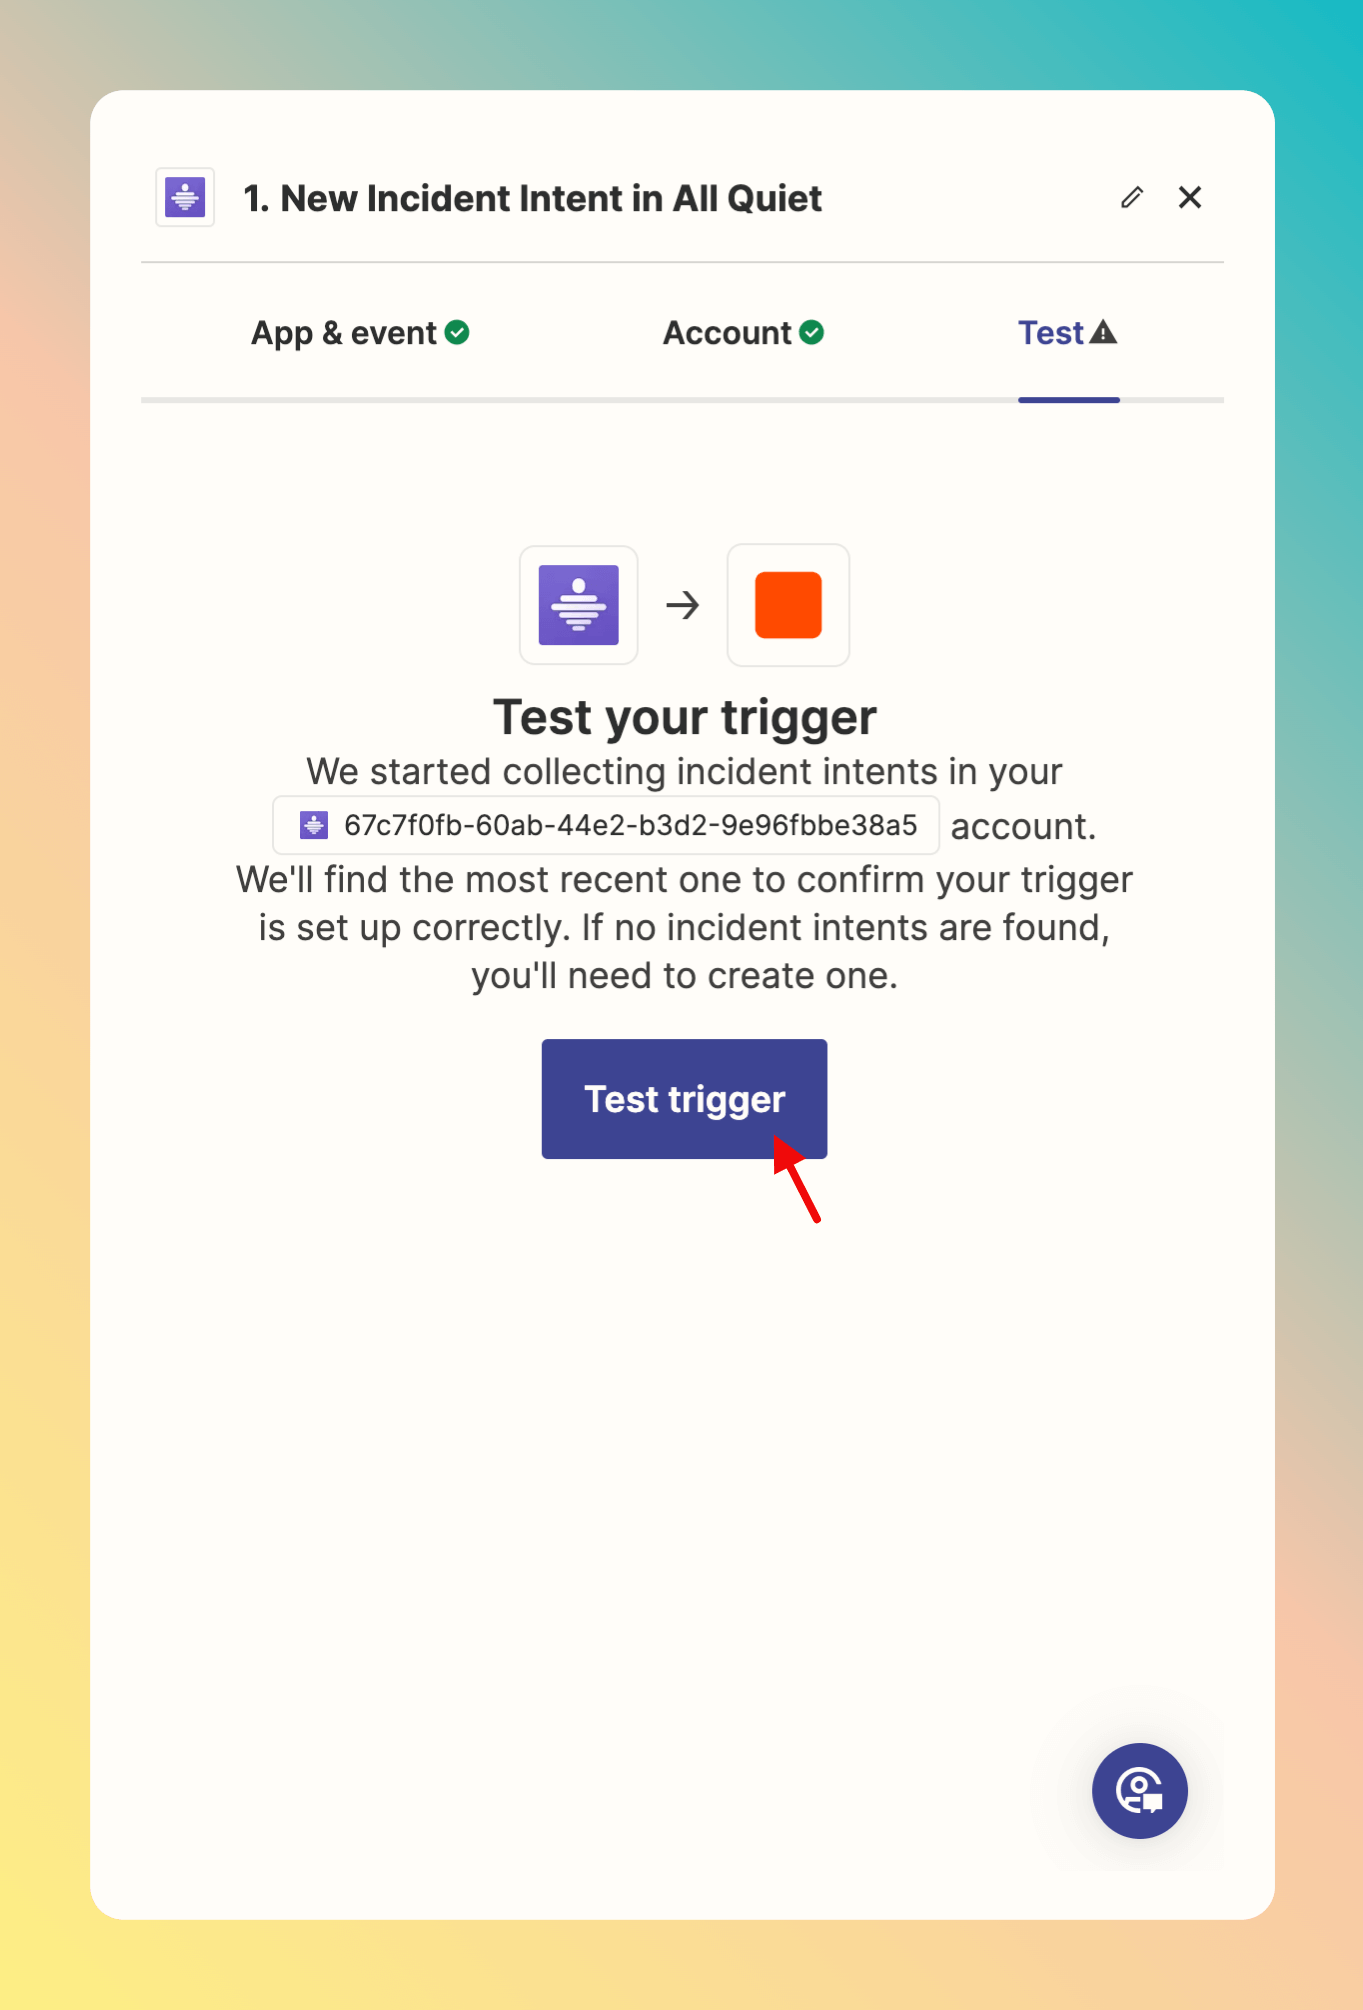
 Test the Trigger to see if you can load an All Quiet incident into Zapier.
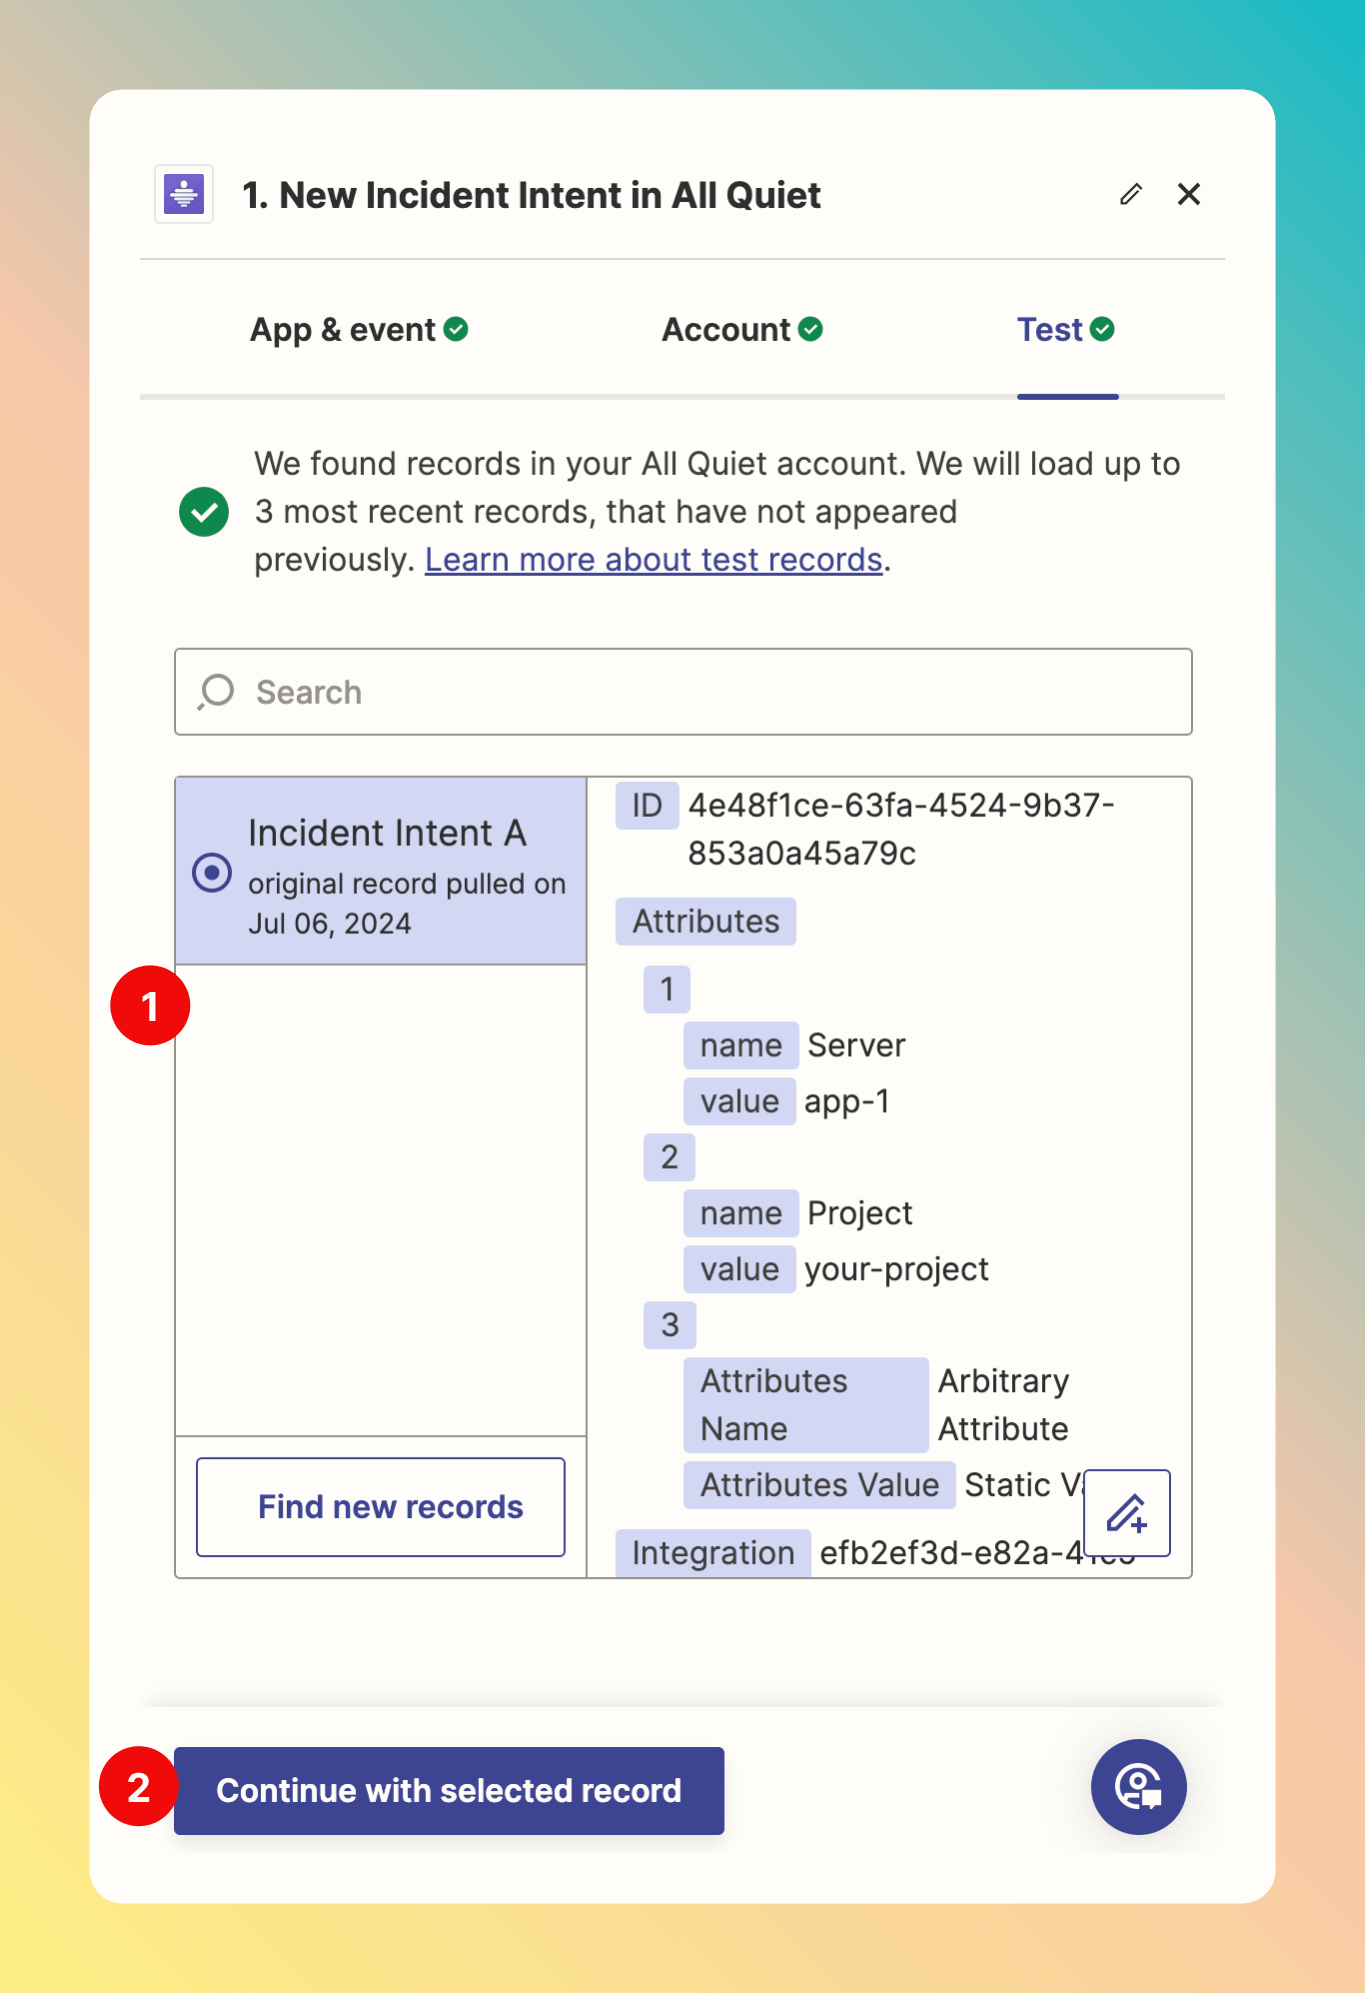
 1. You can select a payload that you would like to use for the test.
2. `Continue with selected record`.
1. You can select a payload that you would like to use for the test.
2. `Continue with selected record`.
 ## Add an Action based on the All Quiet Trigger
Now, you can select a Zap Action to trigger with you All Quiet incident.
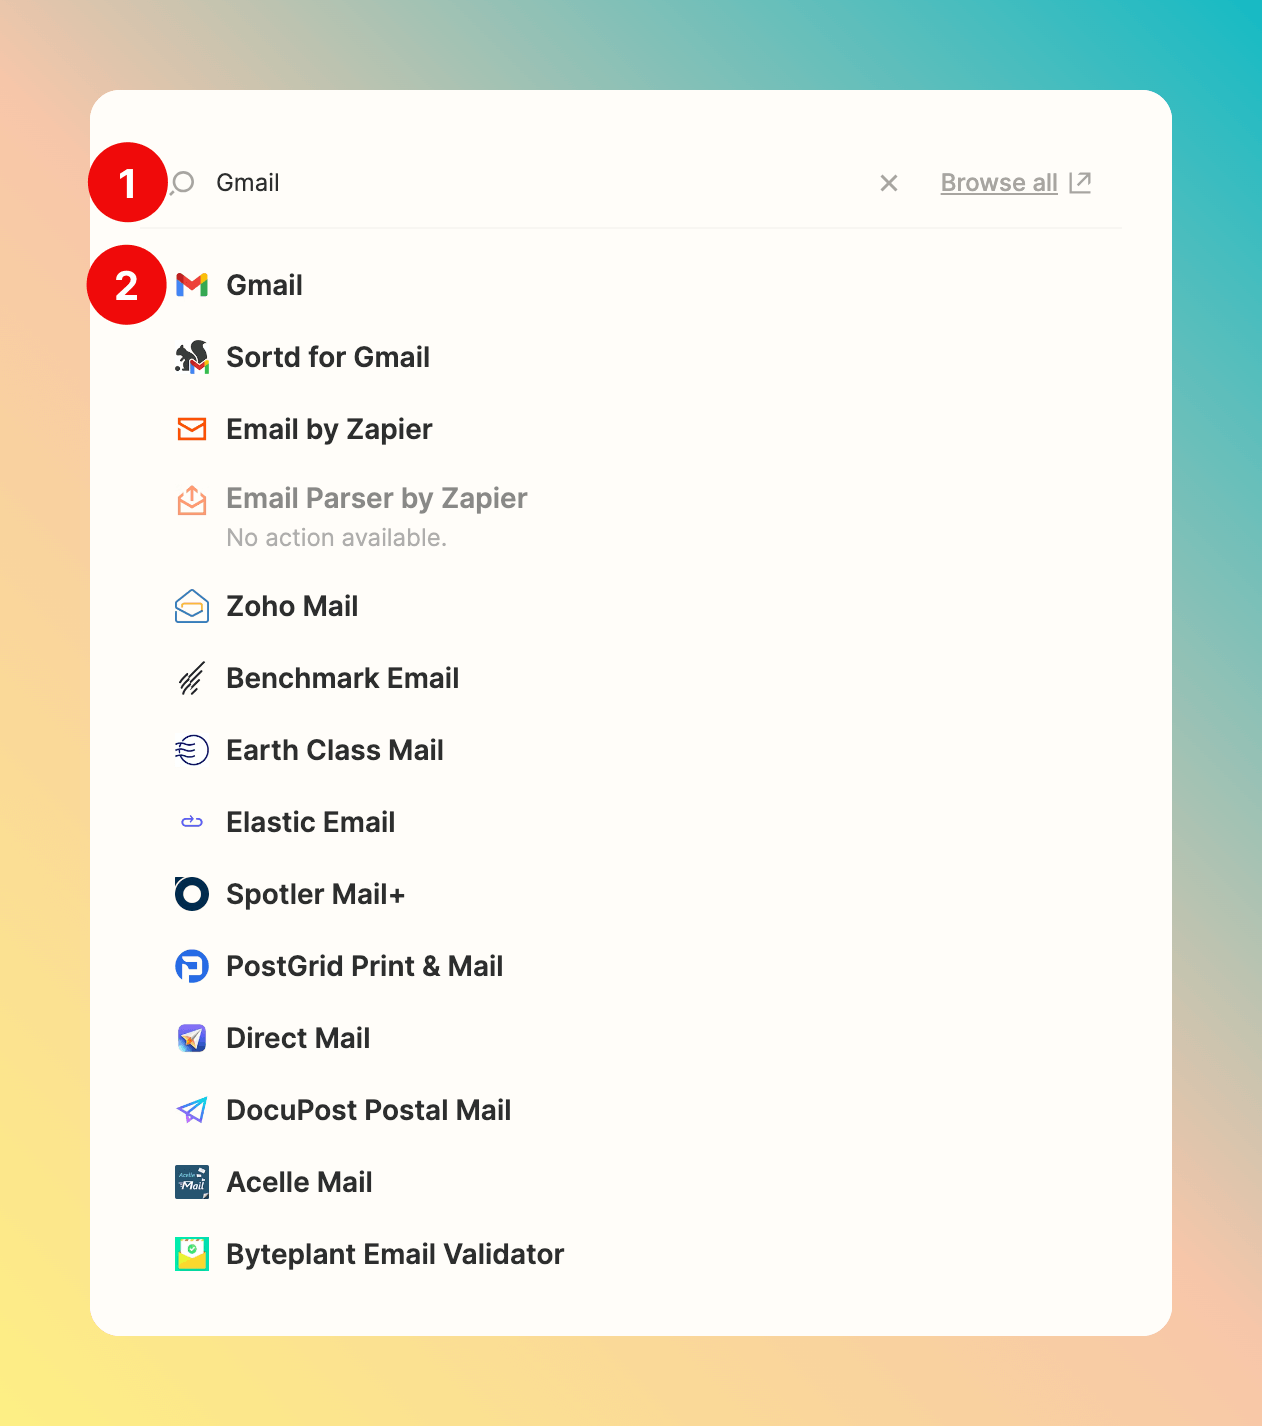
In this example, we want to use the All Quiet Trigger to send a new email via the Zapier Gmail integration. Instead of using Gmail, you could also use other Zapier integrations for an Action.
1. Search for Gmail.
2. Select it.
## Add an Action based on the All Quiet Trigger
Now, you can select a Zap Action to trigger with you All Quiet incident.
In this example, we want to use the All Quiet Trigger to send a new email via the Zapier Gmail integration. Instead of using Gmail, you could also use other Zapier integrations for an Action.
1. Search for Gmail.
2. Select it.
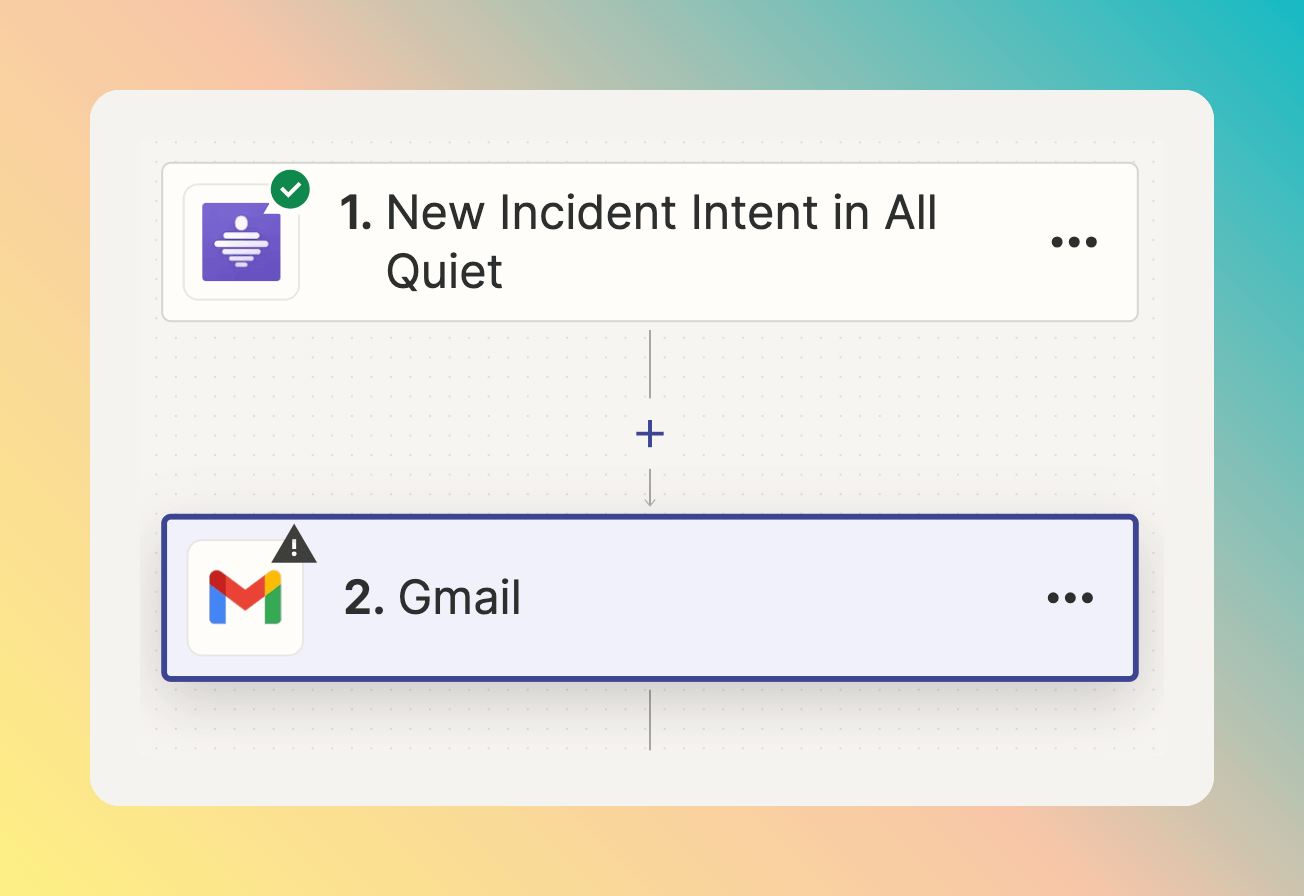
 Gmail is added as integration to create an Action in our Zap. Now, we have to configure it in order to use it.
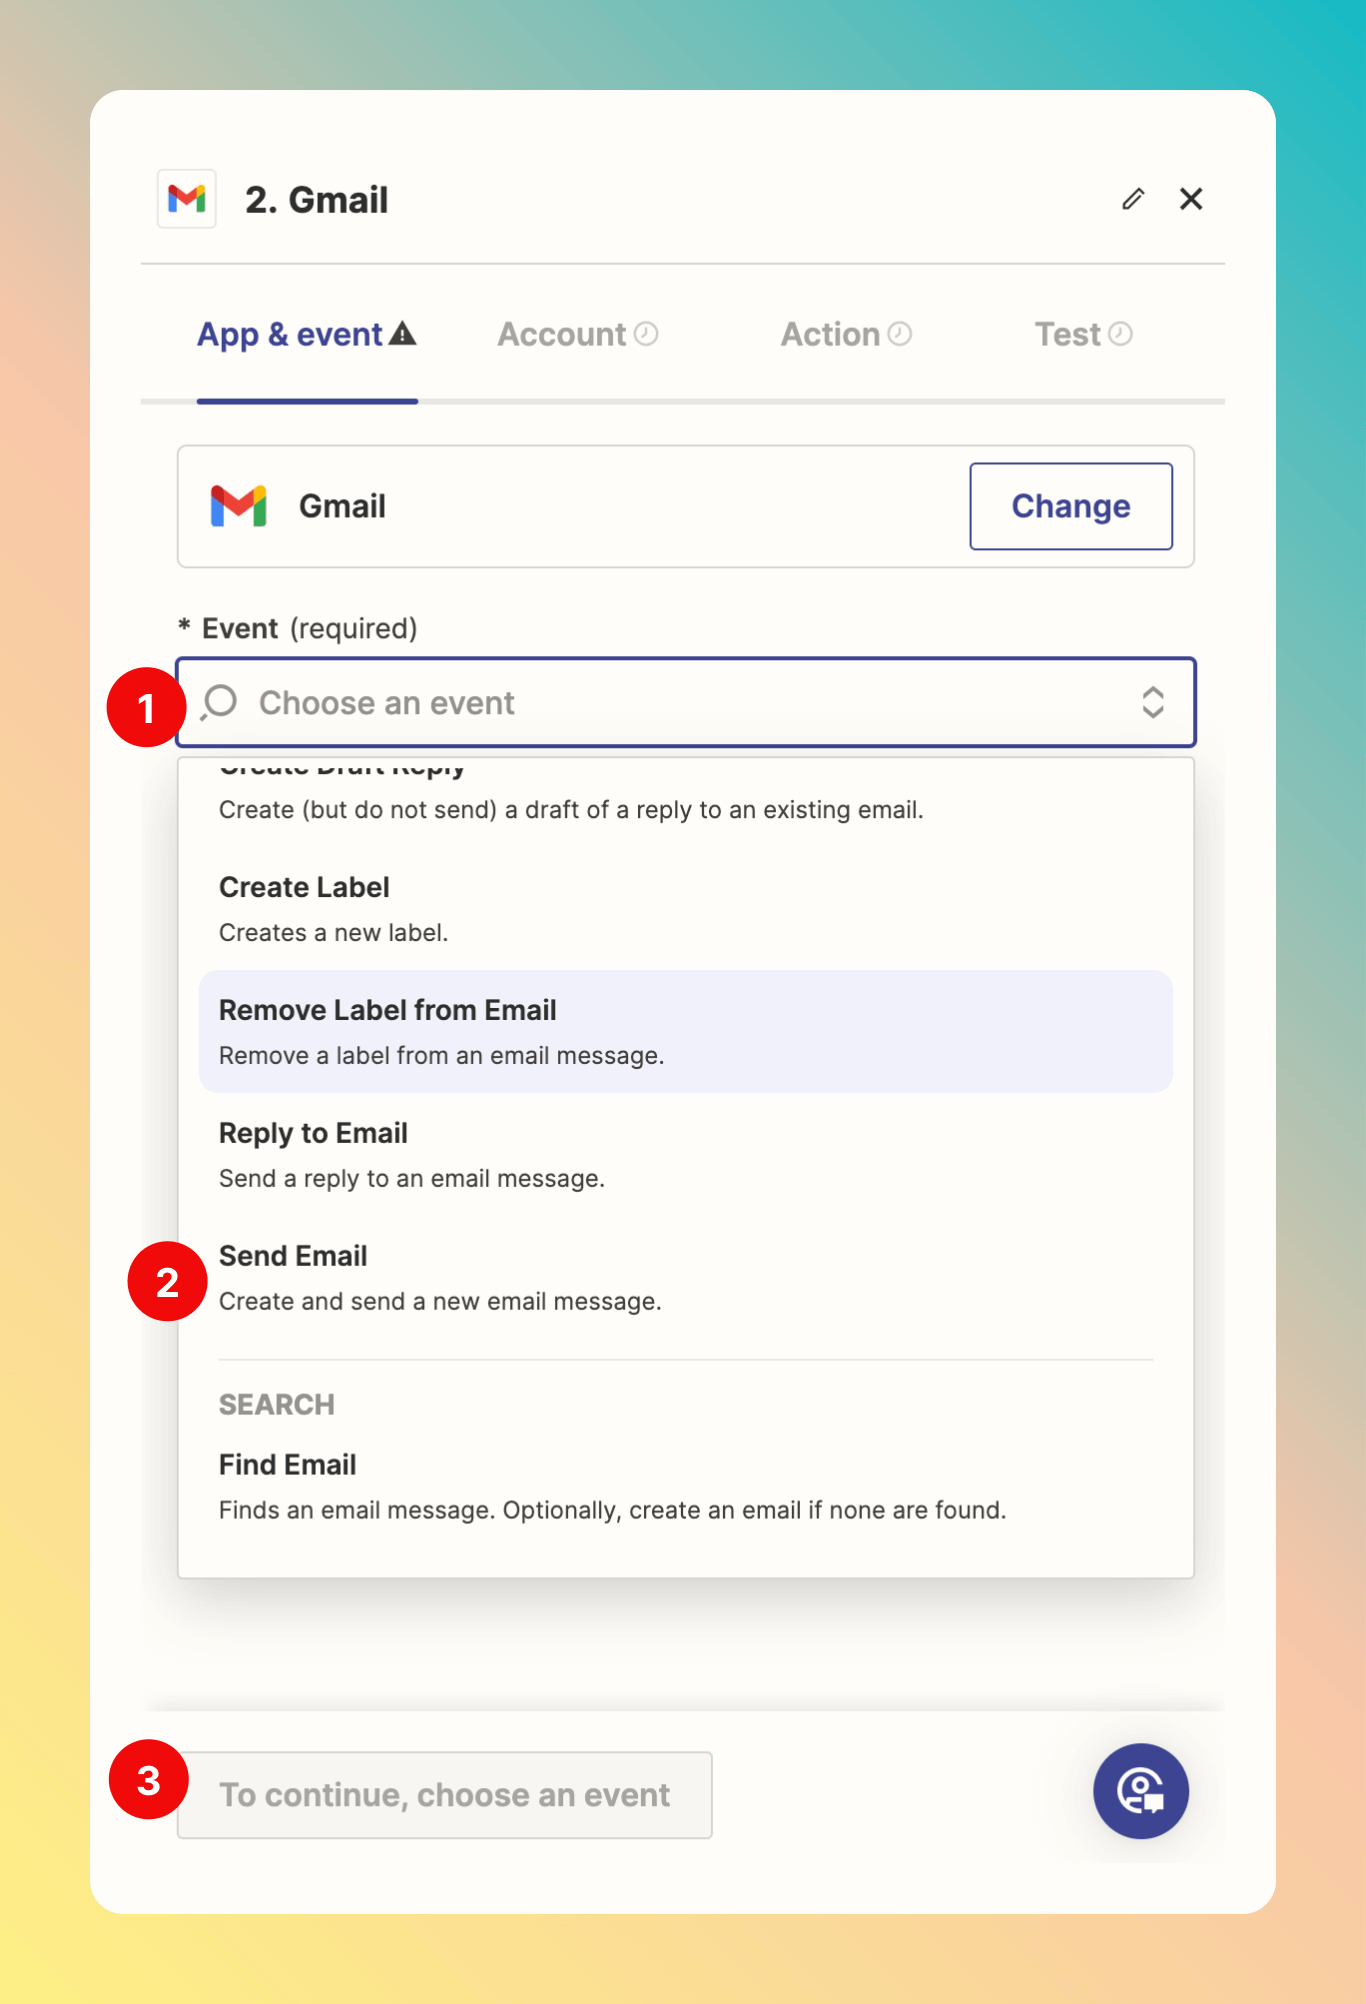
 1. Select an Event supported by the Gmail integration.
2. Here, we choose "Send Email".
3. Click `Continue`.
1. Select an Event supported by the Gmail integration.
2. Here, we choose "Send Email".
3. Click `Continue`.
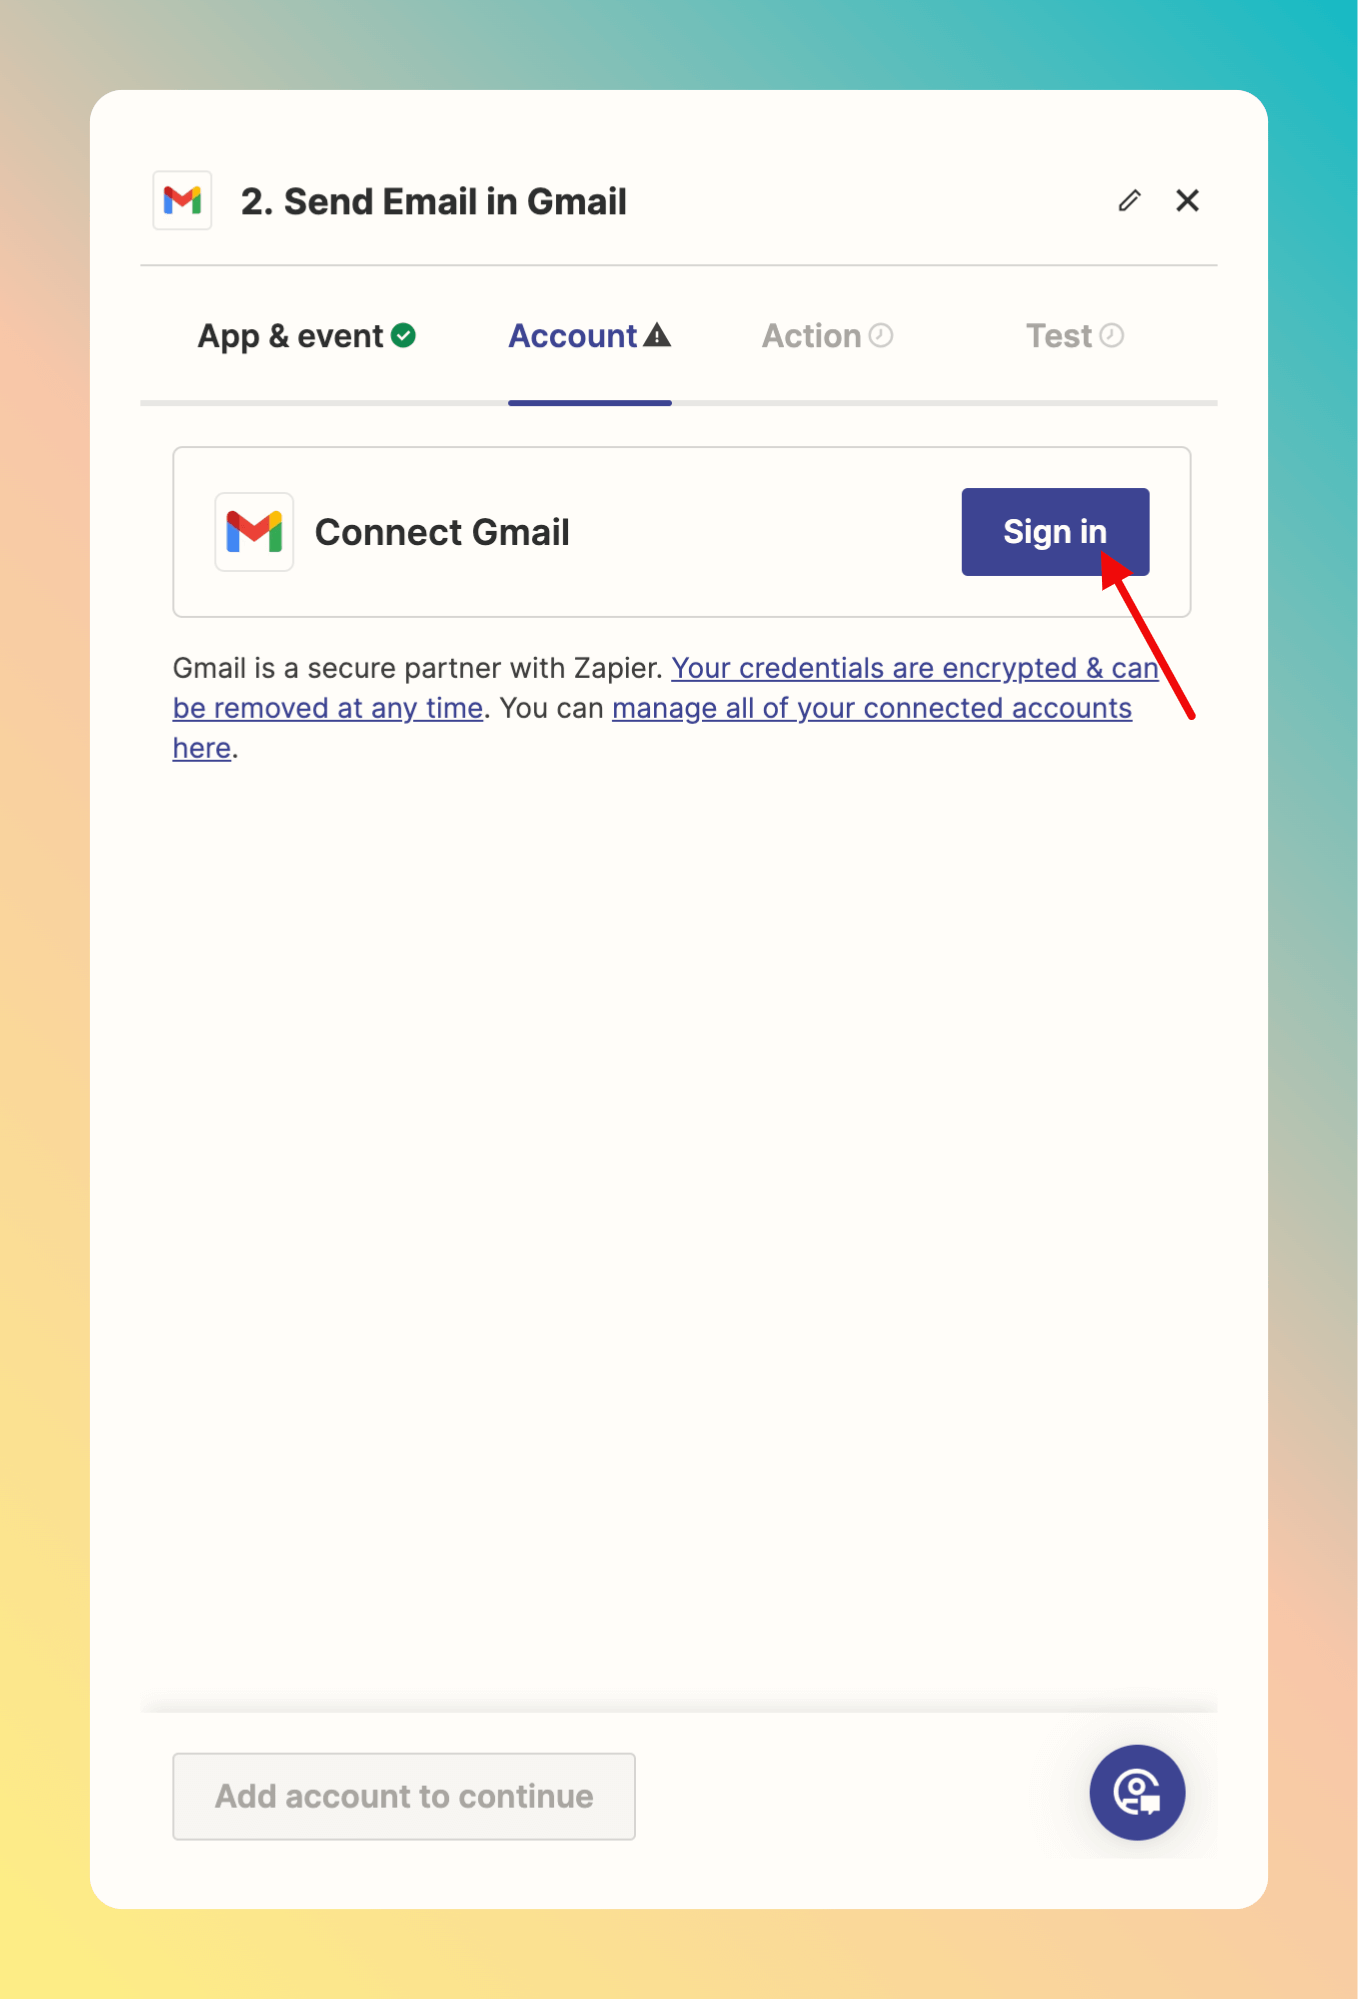
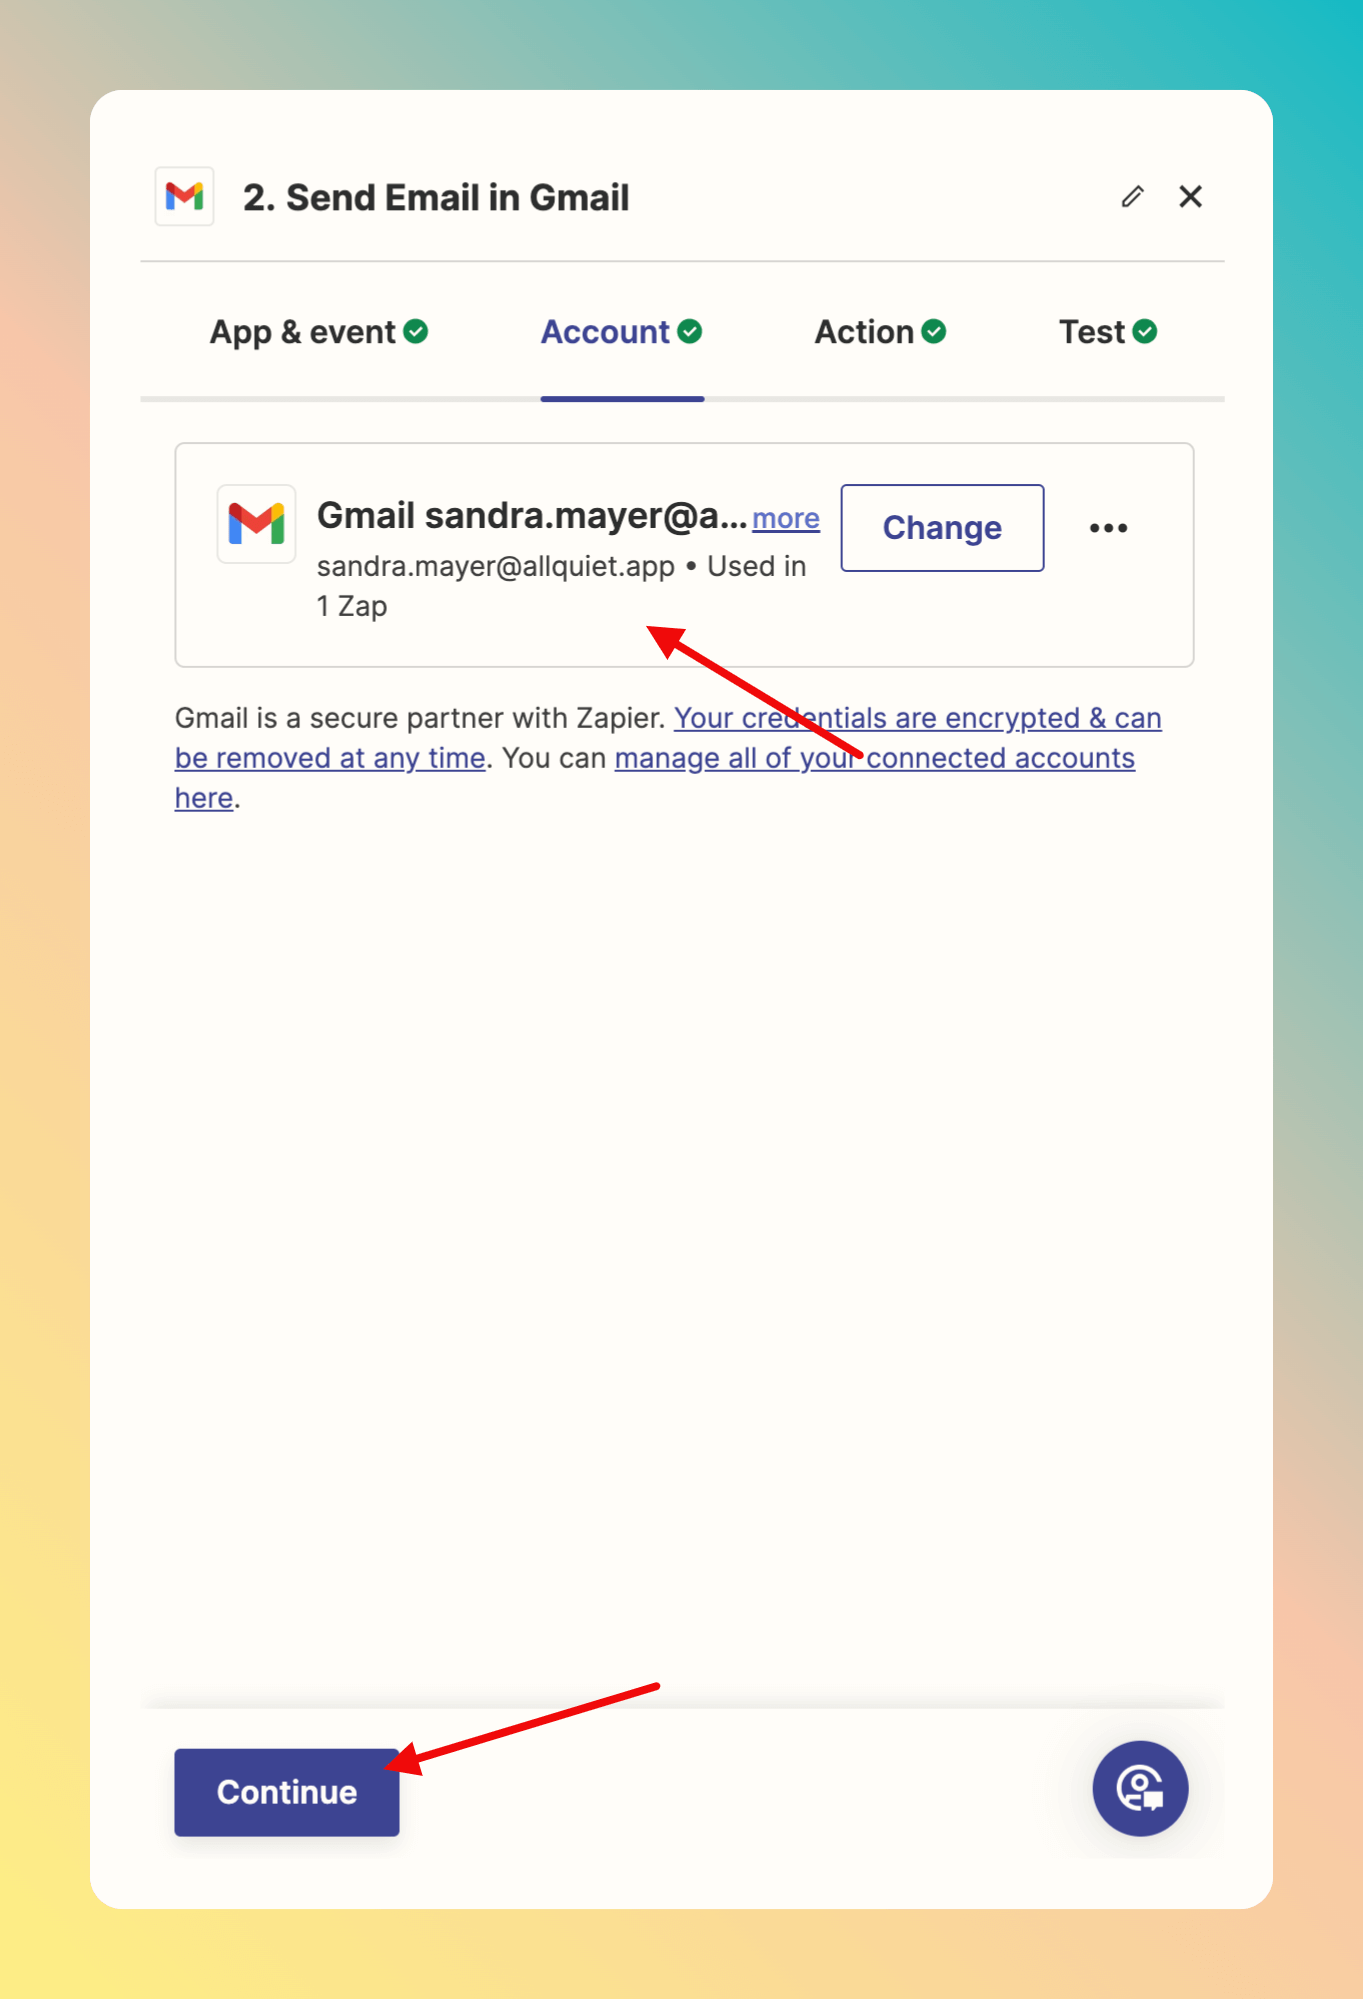
 Sign in to the Gmail account you want to use to send the email.
 After successful sign in, you will see the connected Gmail Account in Zapier. From here, click `Continue` to configure your action.
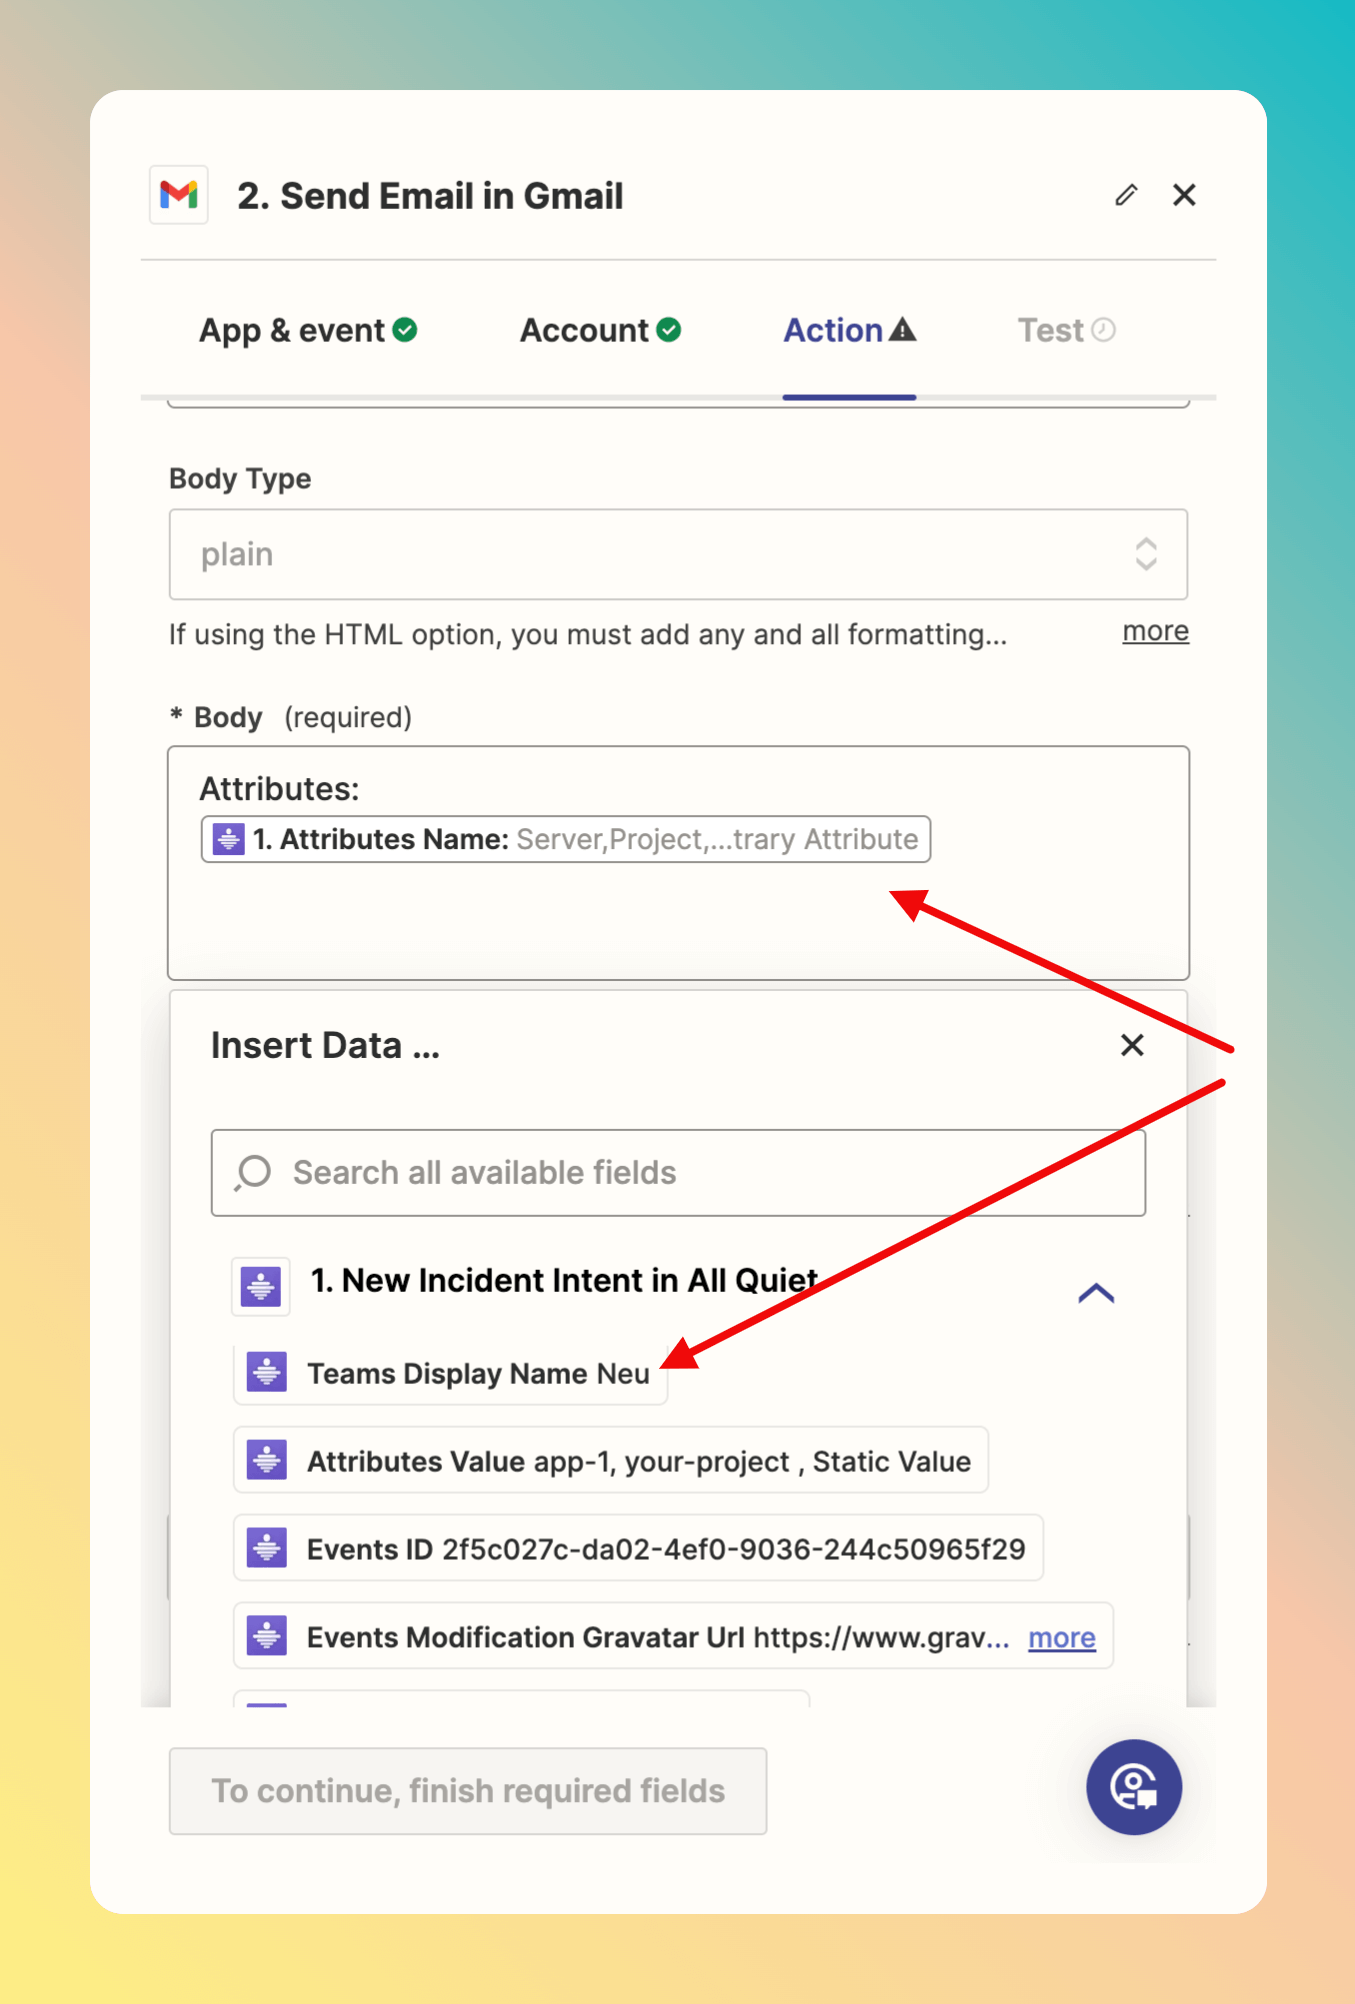
 As we previously selected the Event "Send Email", we can now configure the email's elements. We can combine text with the elements from All Quiet incidents. Here, we see the example payload elements from the [Trigger we set up ealier](/integrations/outbound/zapier#use-all-quiet-as-a-trigger-in-zapier).
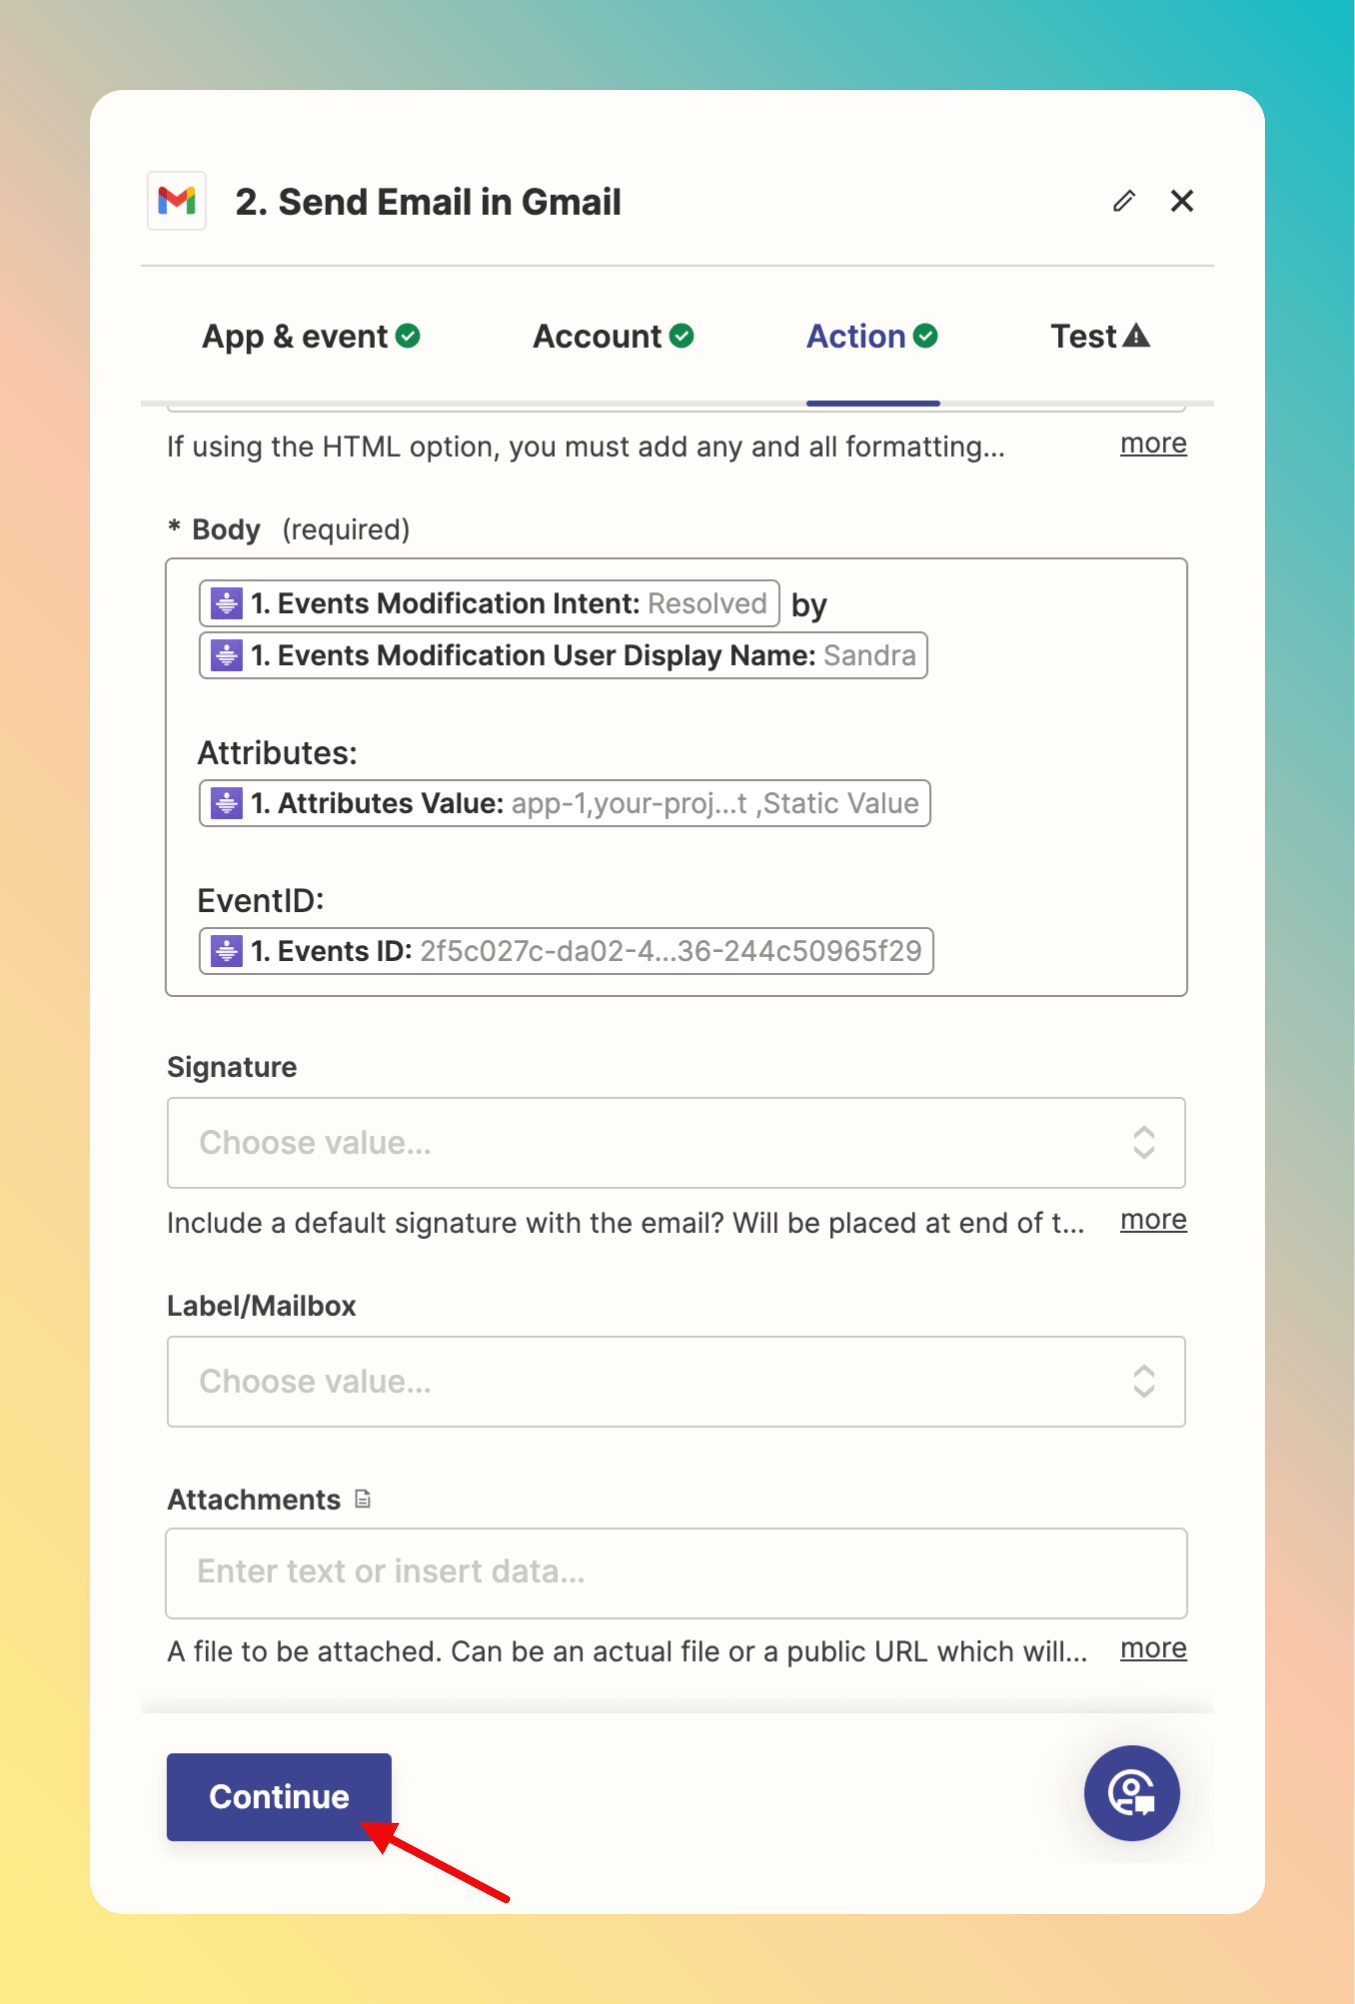
 After setting up your mail, click `Continue`.
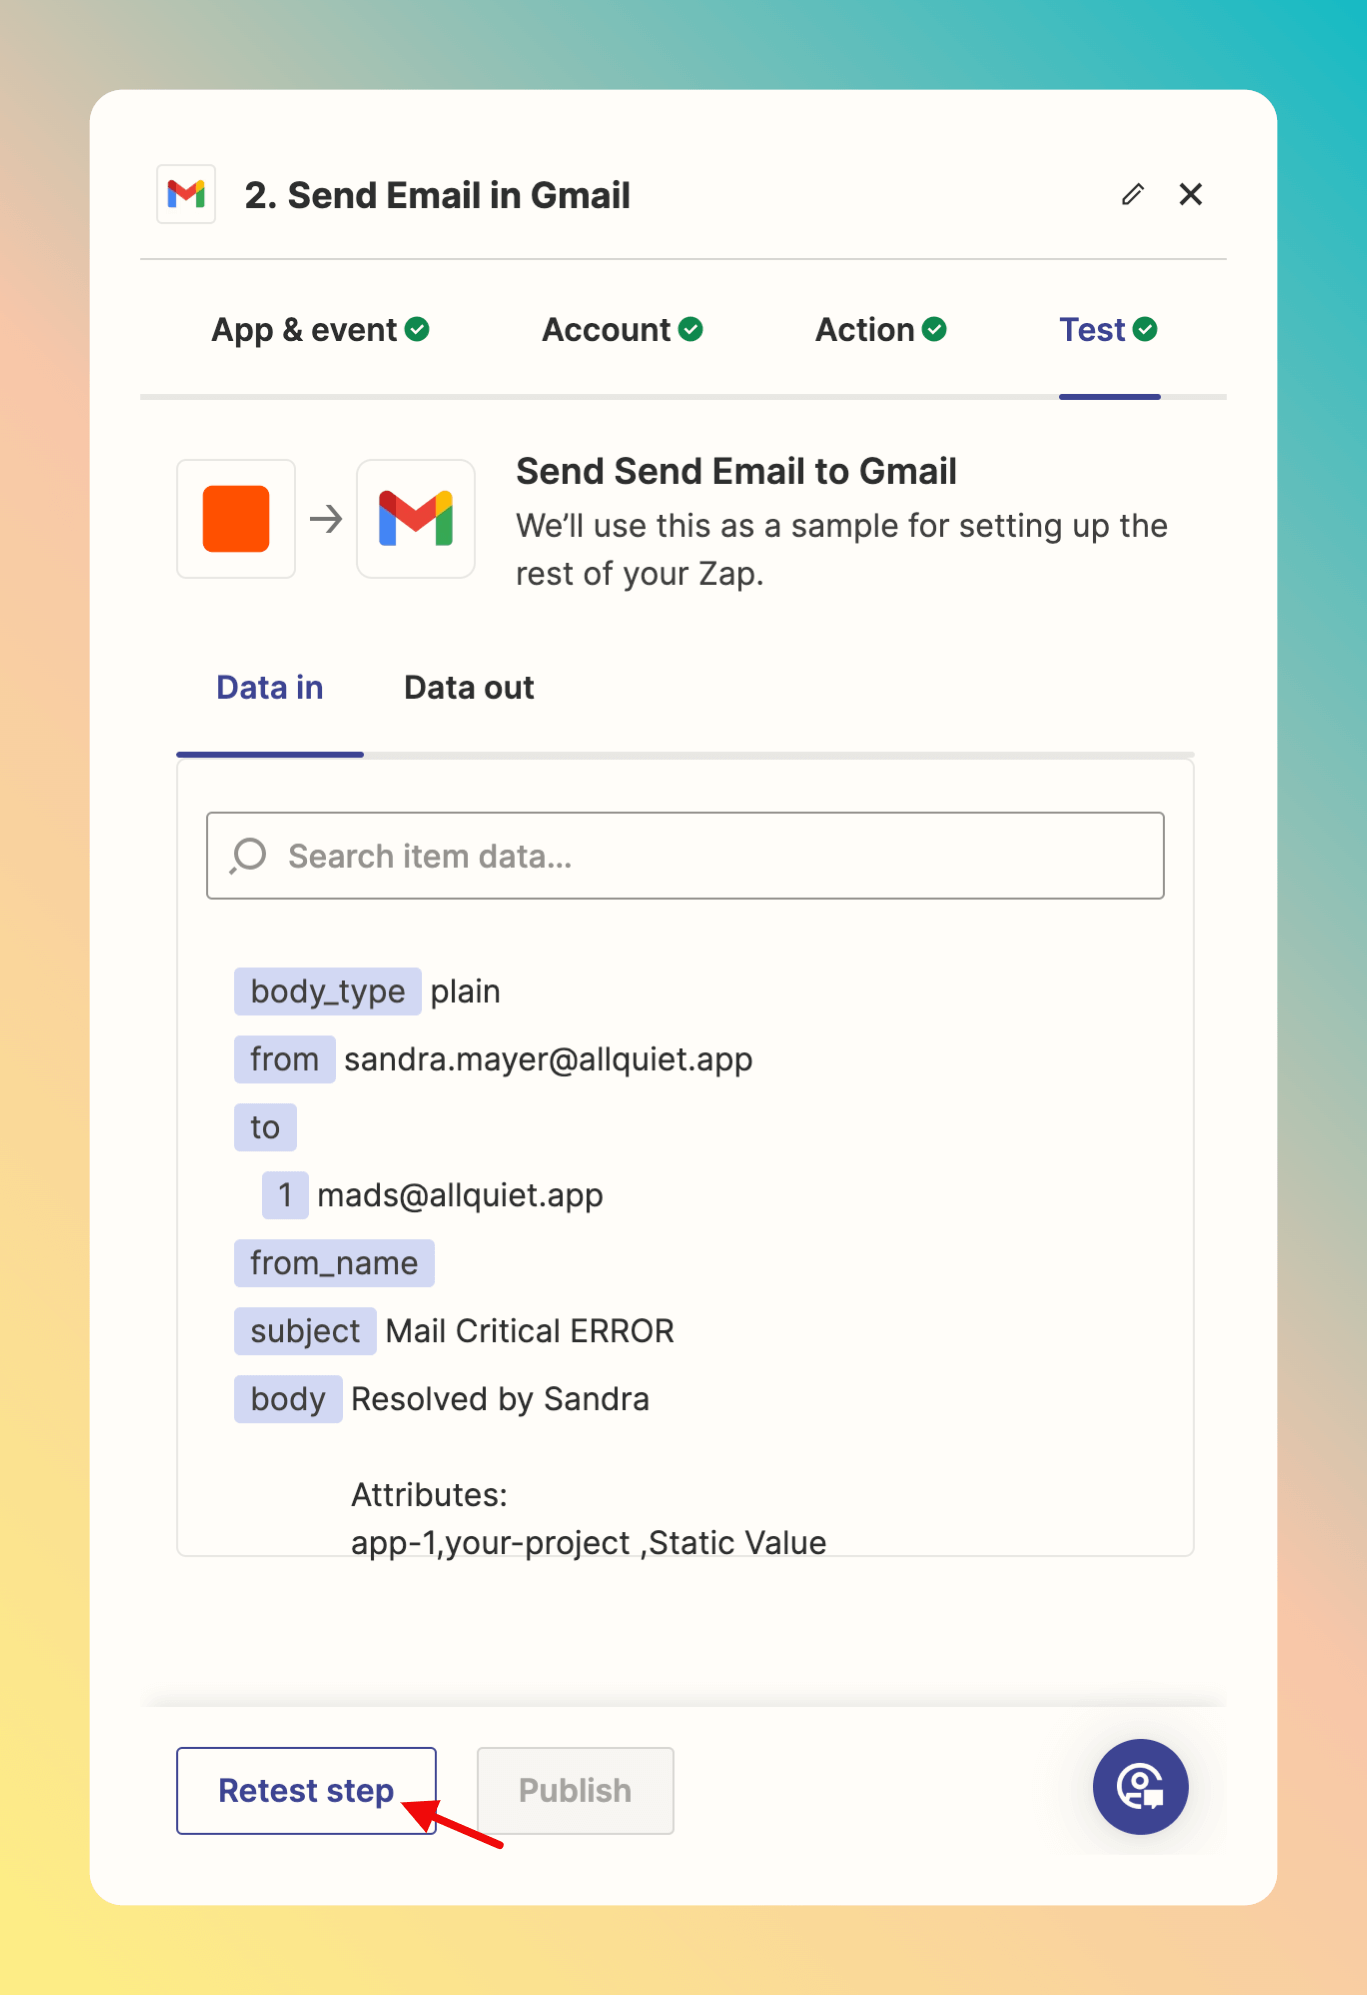
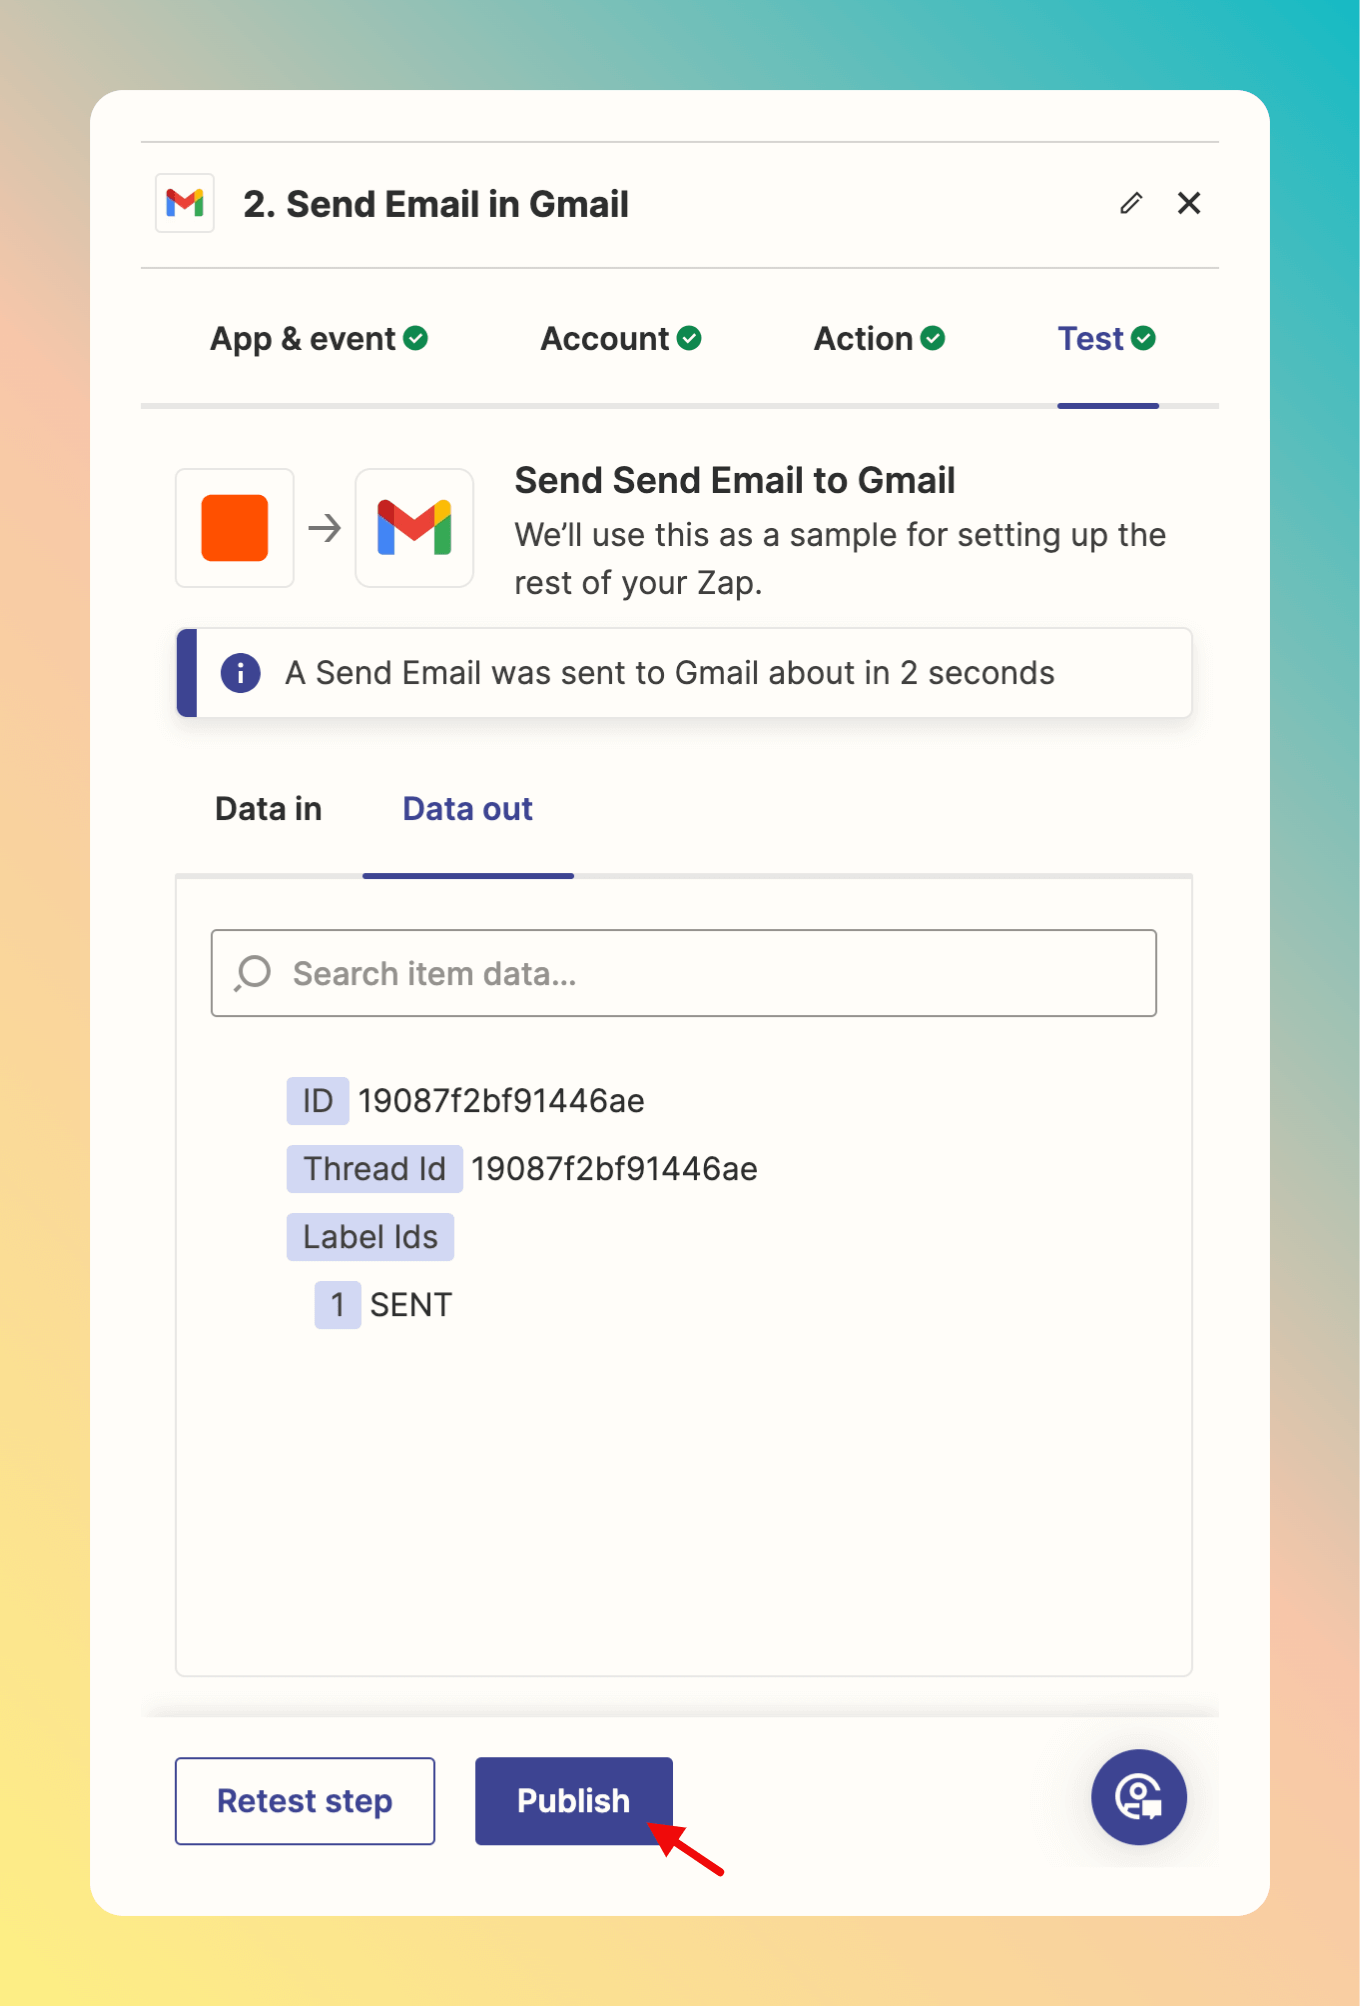
 Now, you can test your Zap by sending a test mail based on your configuration and the example payload.
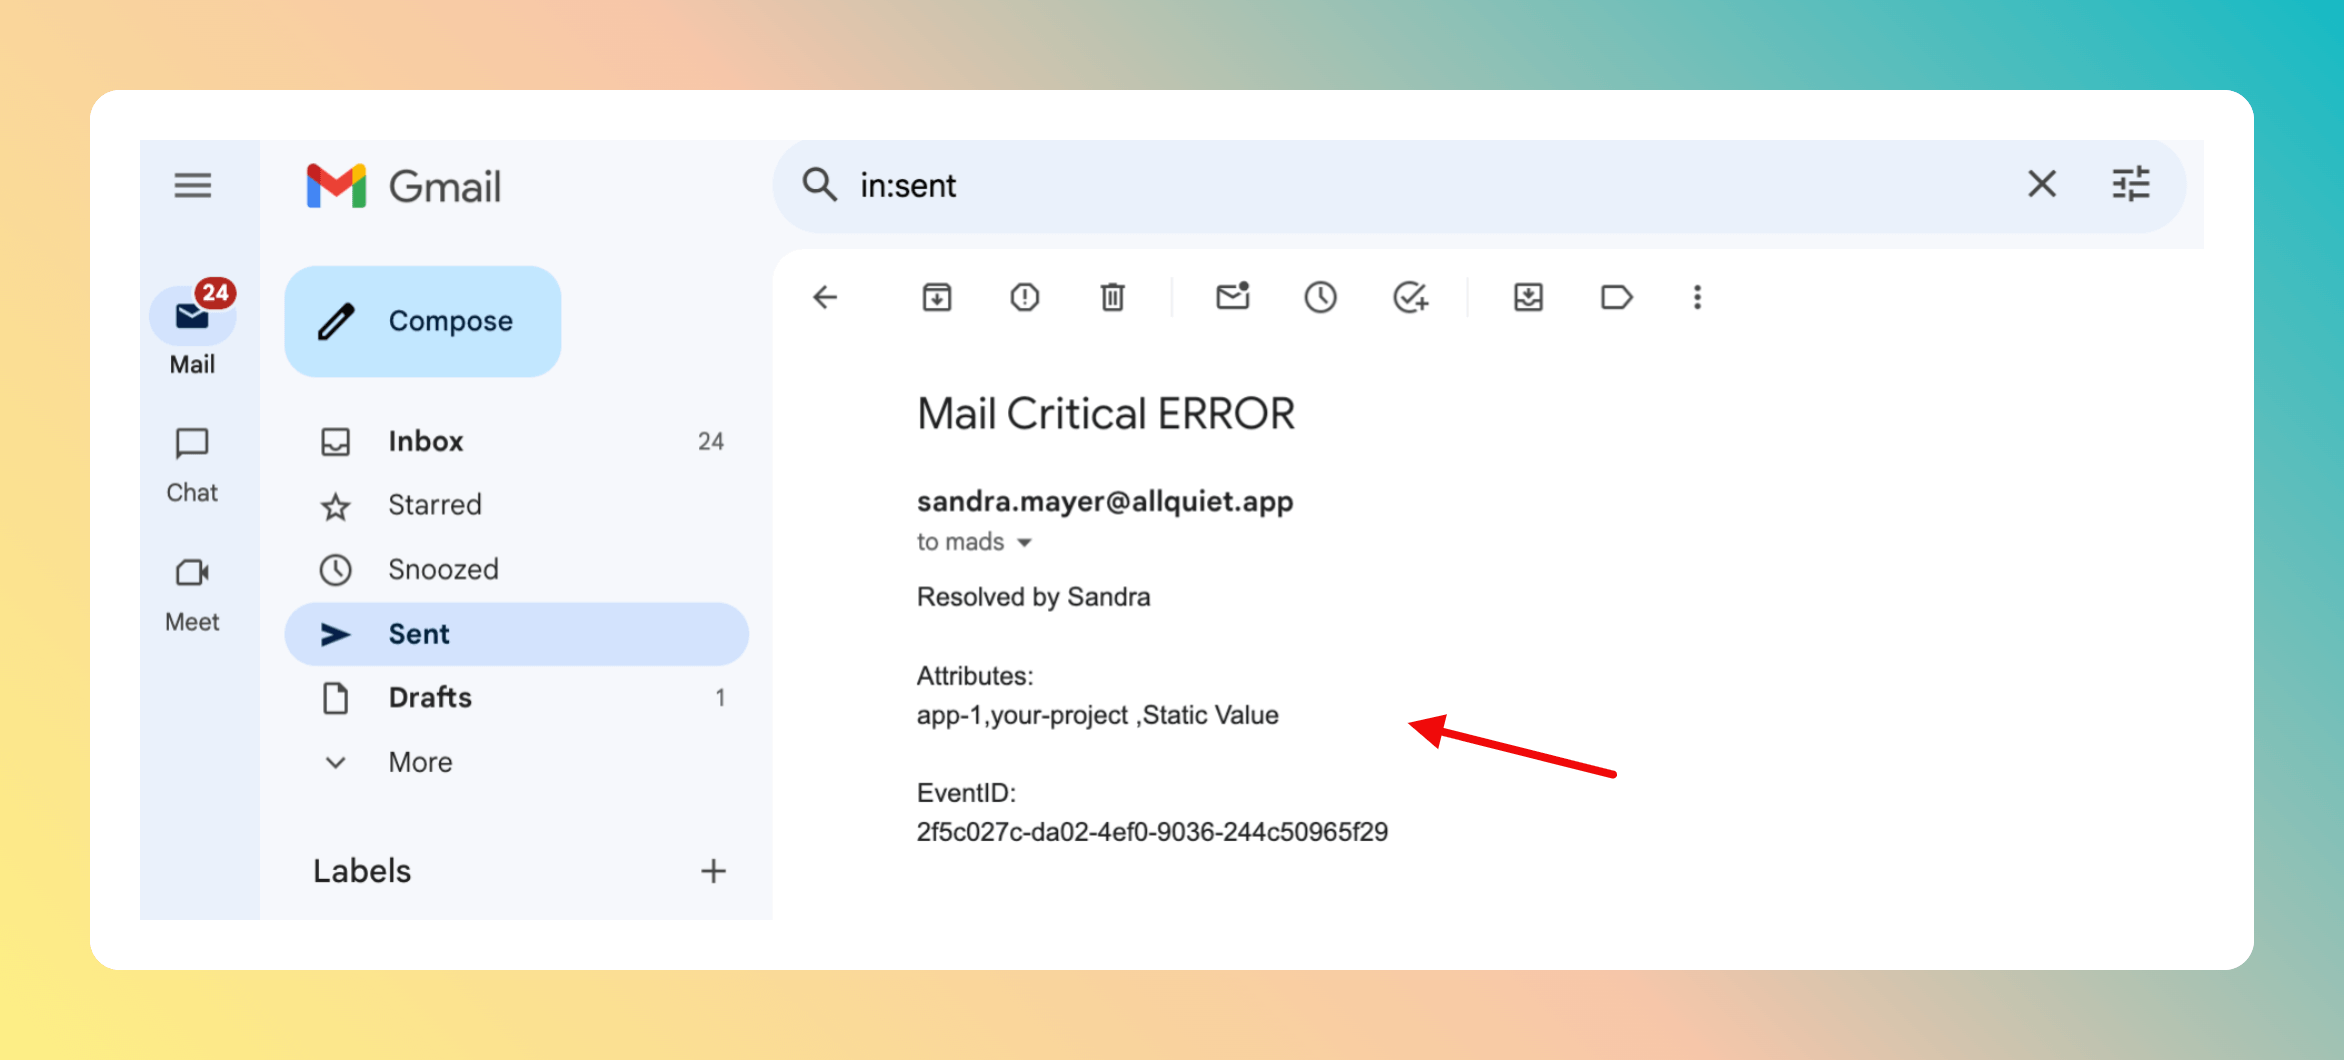
 The result in Gmail.
 If you're happy with the result, publish your Zap.
 You successfully set up your Zapier Outbound Integration!
To create new incidents in All Quiet using Zapier, check our [Zapier Inbound Integration](/integrations/inbound/zapier) documentation.
## Troubleshooting
**Team Administrators**, **Organization Administrators**, and **Organization Owners** can troubleshoot this integration using the **History** tab (**Outbound History**) on the integration details page. See **[Outbound History](/essentials/outbound#outbound-history)** for what is logged, who can access it, and how to read outcomes. For broader checks when outbound tools do not fire, see **[Outbound integrations — Troubleshooting](/essentials/outbound#outbound-troubleshooting-routing)** and **[advanced routing](/advanced/routing)**.
You successfully set up your Zapier Outbound Integration!
To create new incidents in All Quiet using Zapier, check our [Zapier Inbound Integration](/integrations/inbound/zapier) documentation.
## Troubleshooting
**Team Administrators**, **Organization Administrators**, and **Organization Owners** can troubleshoot this integration using the **History** tab (**Outbound History**) on the integration details page. See **[Outbound History](/essentials/outbound#outbound-history)** for what is logged, who can access it, and how to read outcomes. For broader checks when outbound tools do not fire, see **[Outbound integrations — Troubleshooting](/essentials/outbound#outbound-troubleshooting-routing)** and **[advanced routing](/advanced/routing)**.