> ## Documentation Index
> Fetch the complete documentation index at: https://docs.allquiet.app/llms.txt
> Use this file to discover all available pages before exploring further.
# Zapier
> Create and Update Incidents in All Quiet Using Zapier Actions
Please set up our [Zapier Outbound Integration](/integrations/outbound/zapier), first.
If you want to use Zapier to send All Quiet incidents to other apps, please refer to the outbound documentation, too. **For Pro and Enterprise plan users:** No matter which teams you added when setting up the [outbound integration](/integrations/outbound/zapier#create-outbound-integration), all All Quiet incidents will always be created in the integration's root team.
You might want to use our Zapier inbound integration to connect All Quiet to an observability tool that you use but we do not support, just yet. Here, you can find the list of [Server Monitoring tools integrated in Zapier](https://zapier.com/apps/categories/server-monitoring).
Or, like in the example we are going to showcase, you might want to create and update incidents in All Quiet based on Gmail labeling. The options are almost endless.
## Create Incident Action
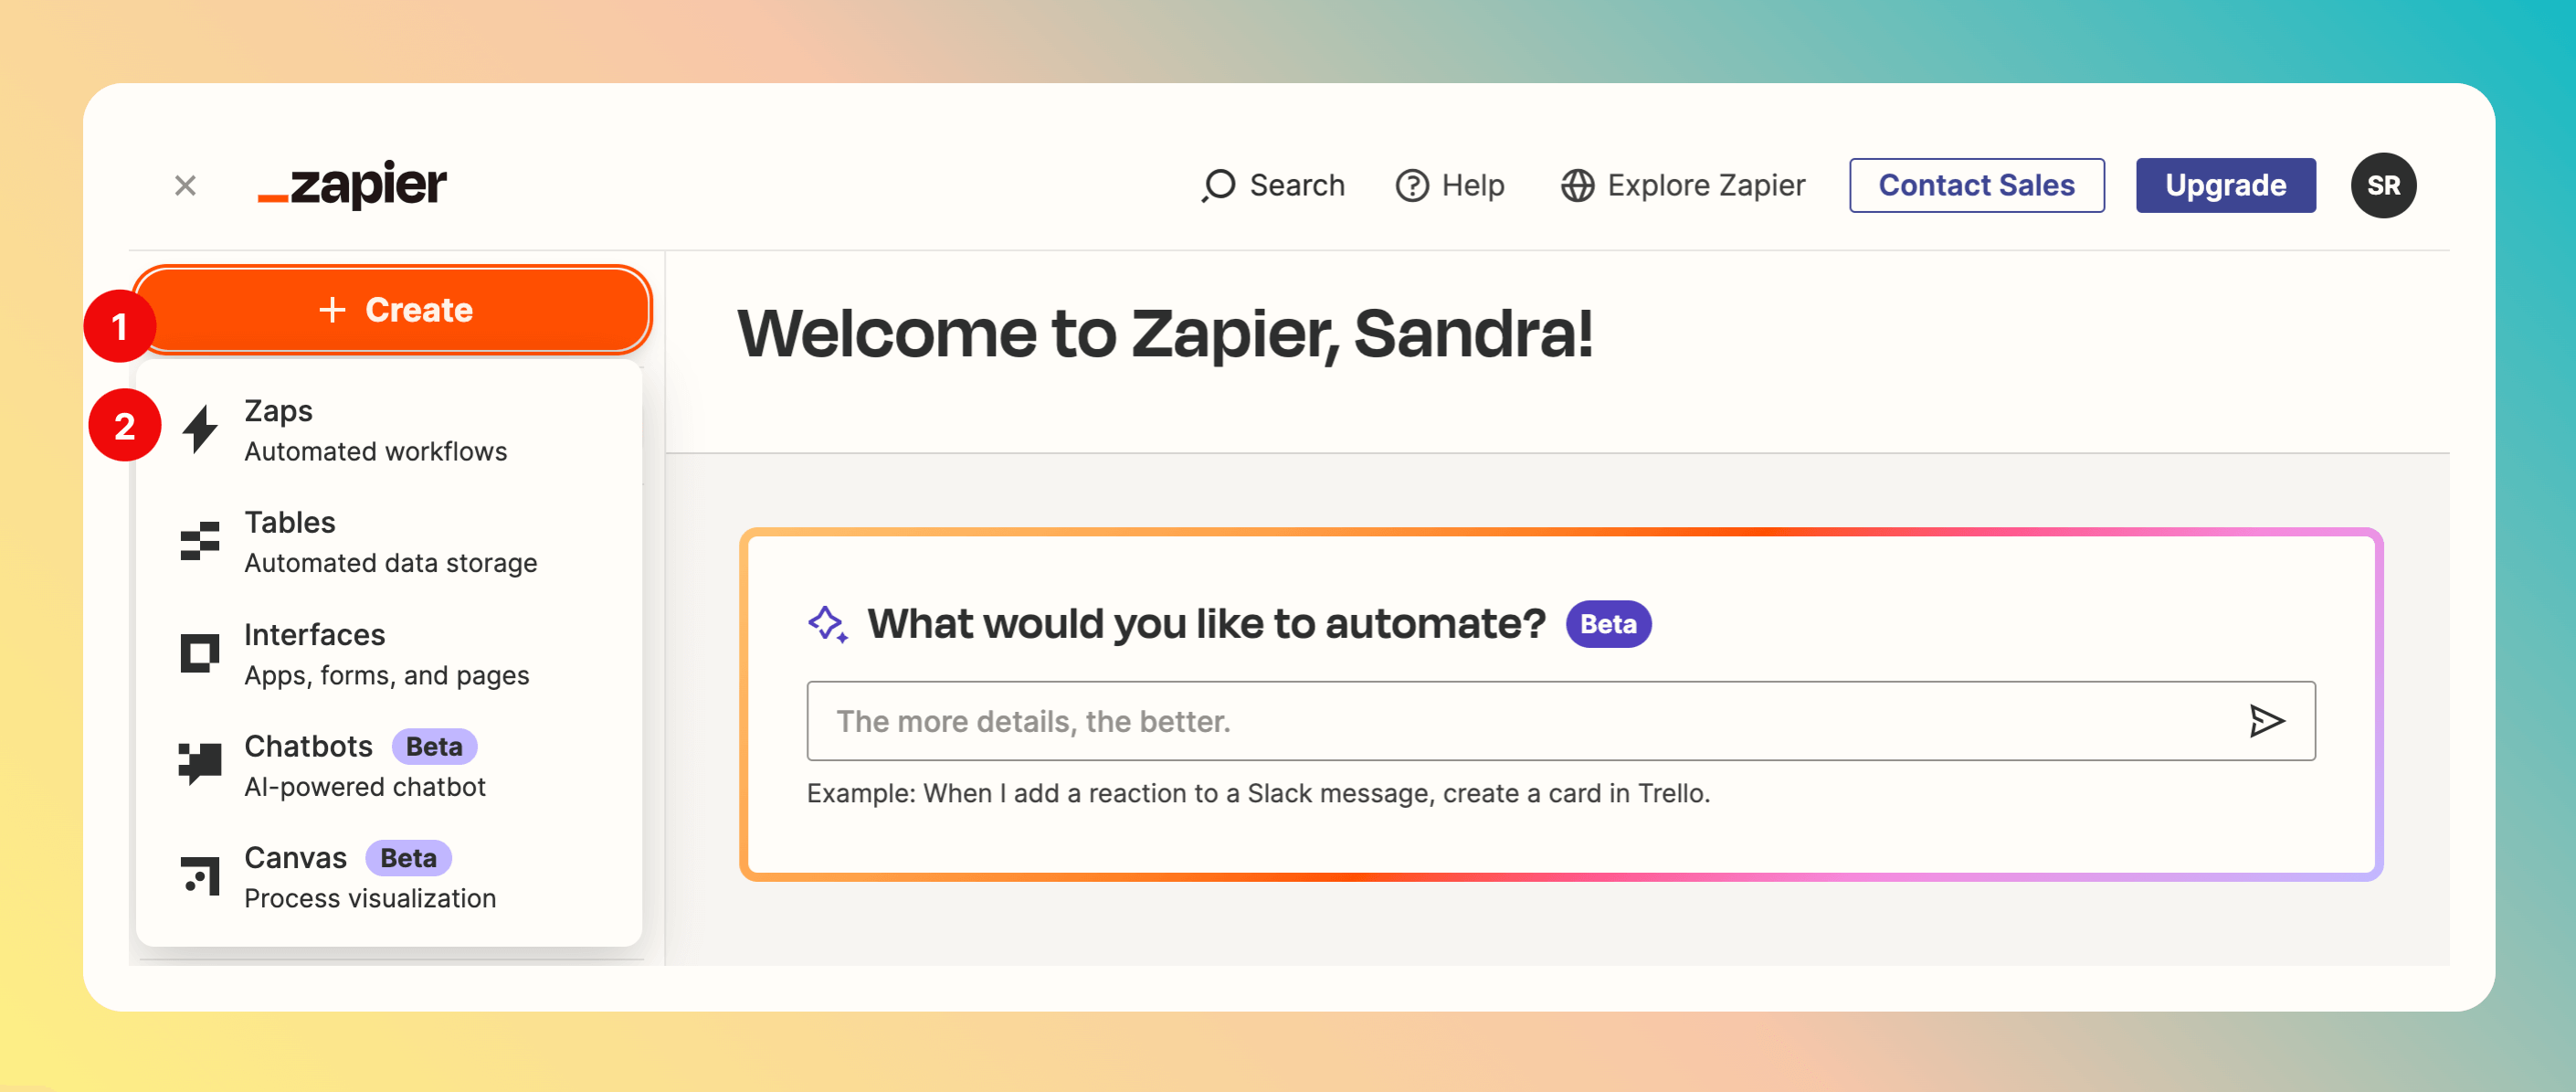
1. On the home screen, click `Create`.
2. Select `Zaps`.
 After the Zap is created, select the Trigger.
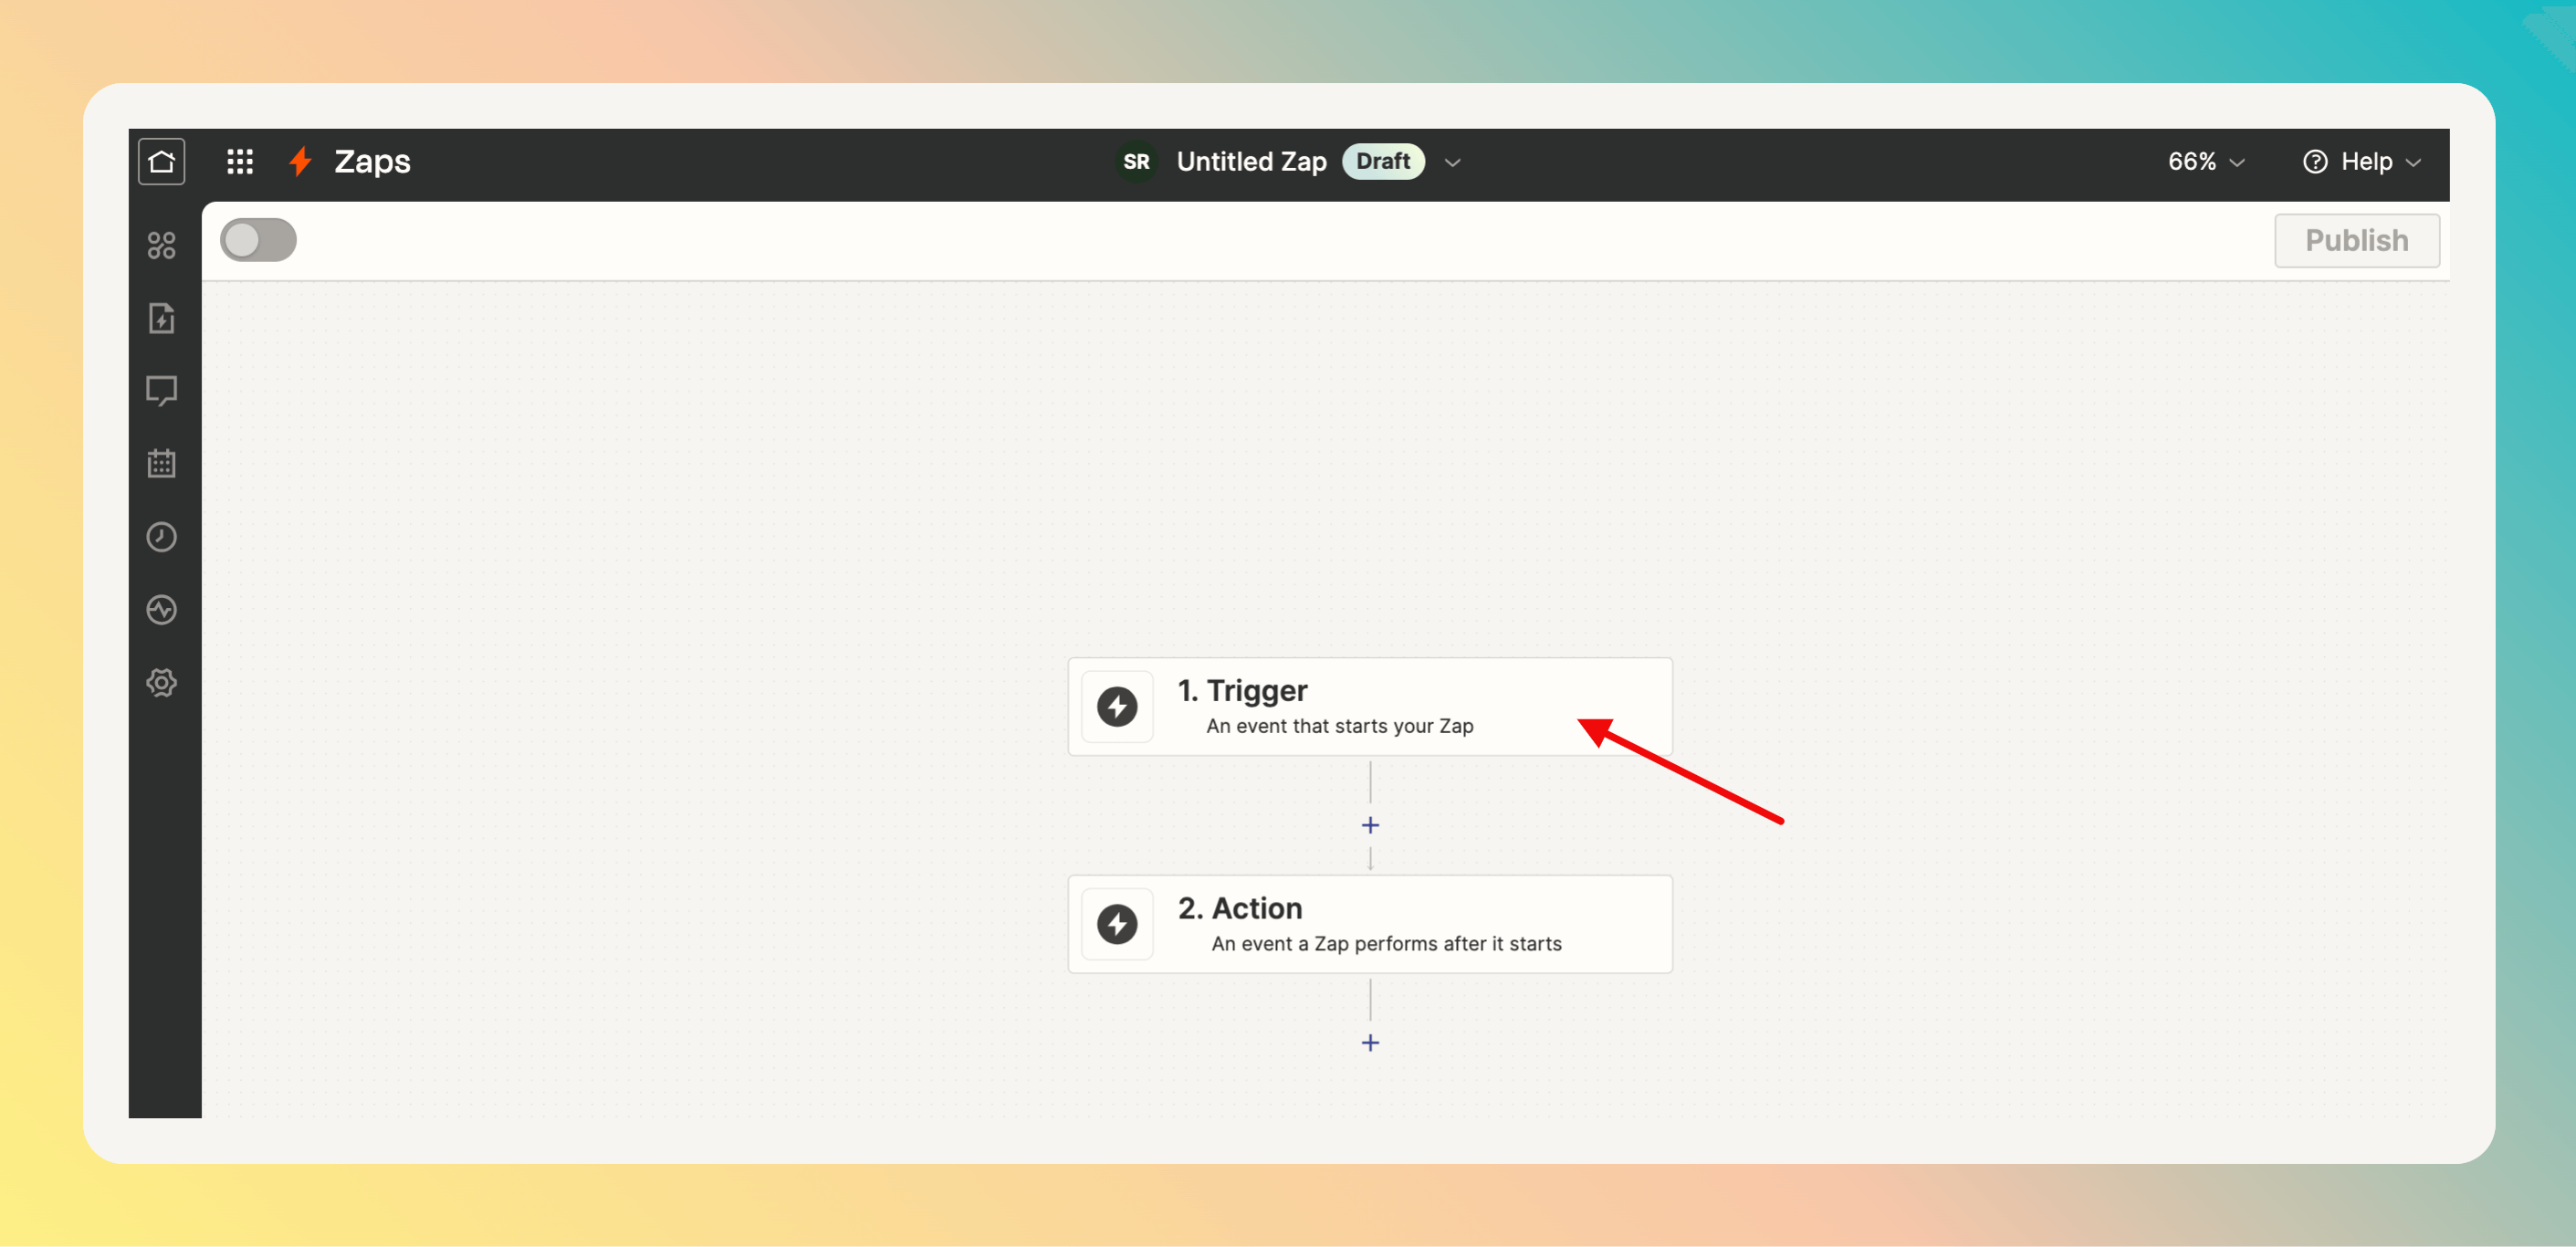 In this example, we want to Trigger a new incident via Gmail. Instead of using Gmail, you could also use other Zapier integrations as a Trigger.
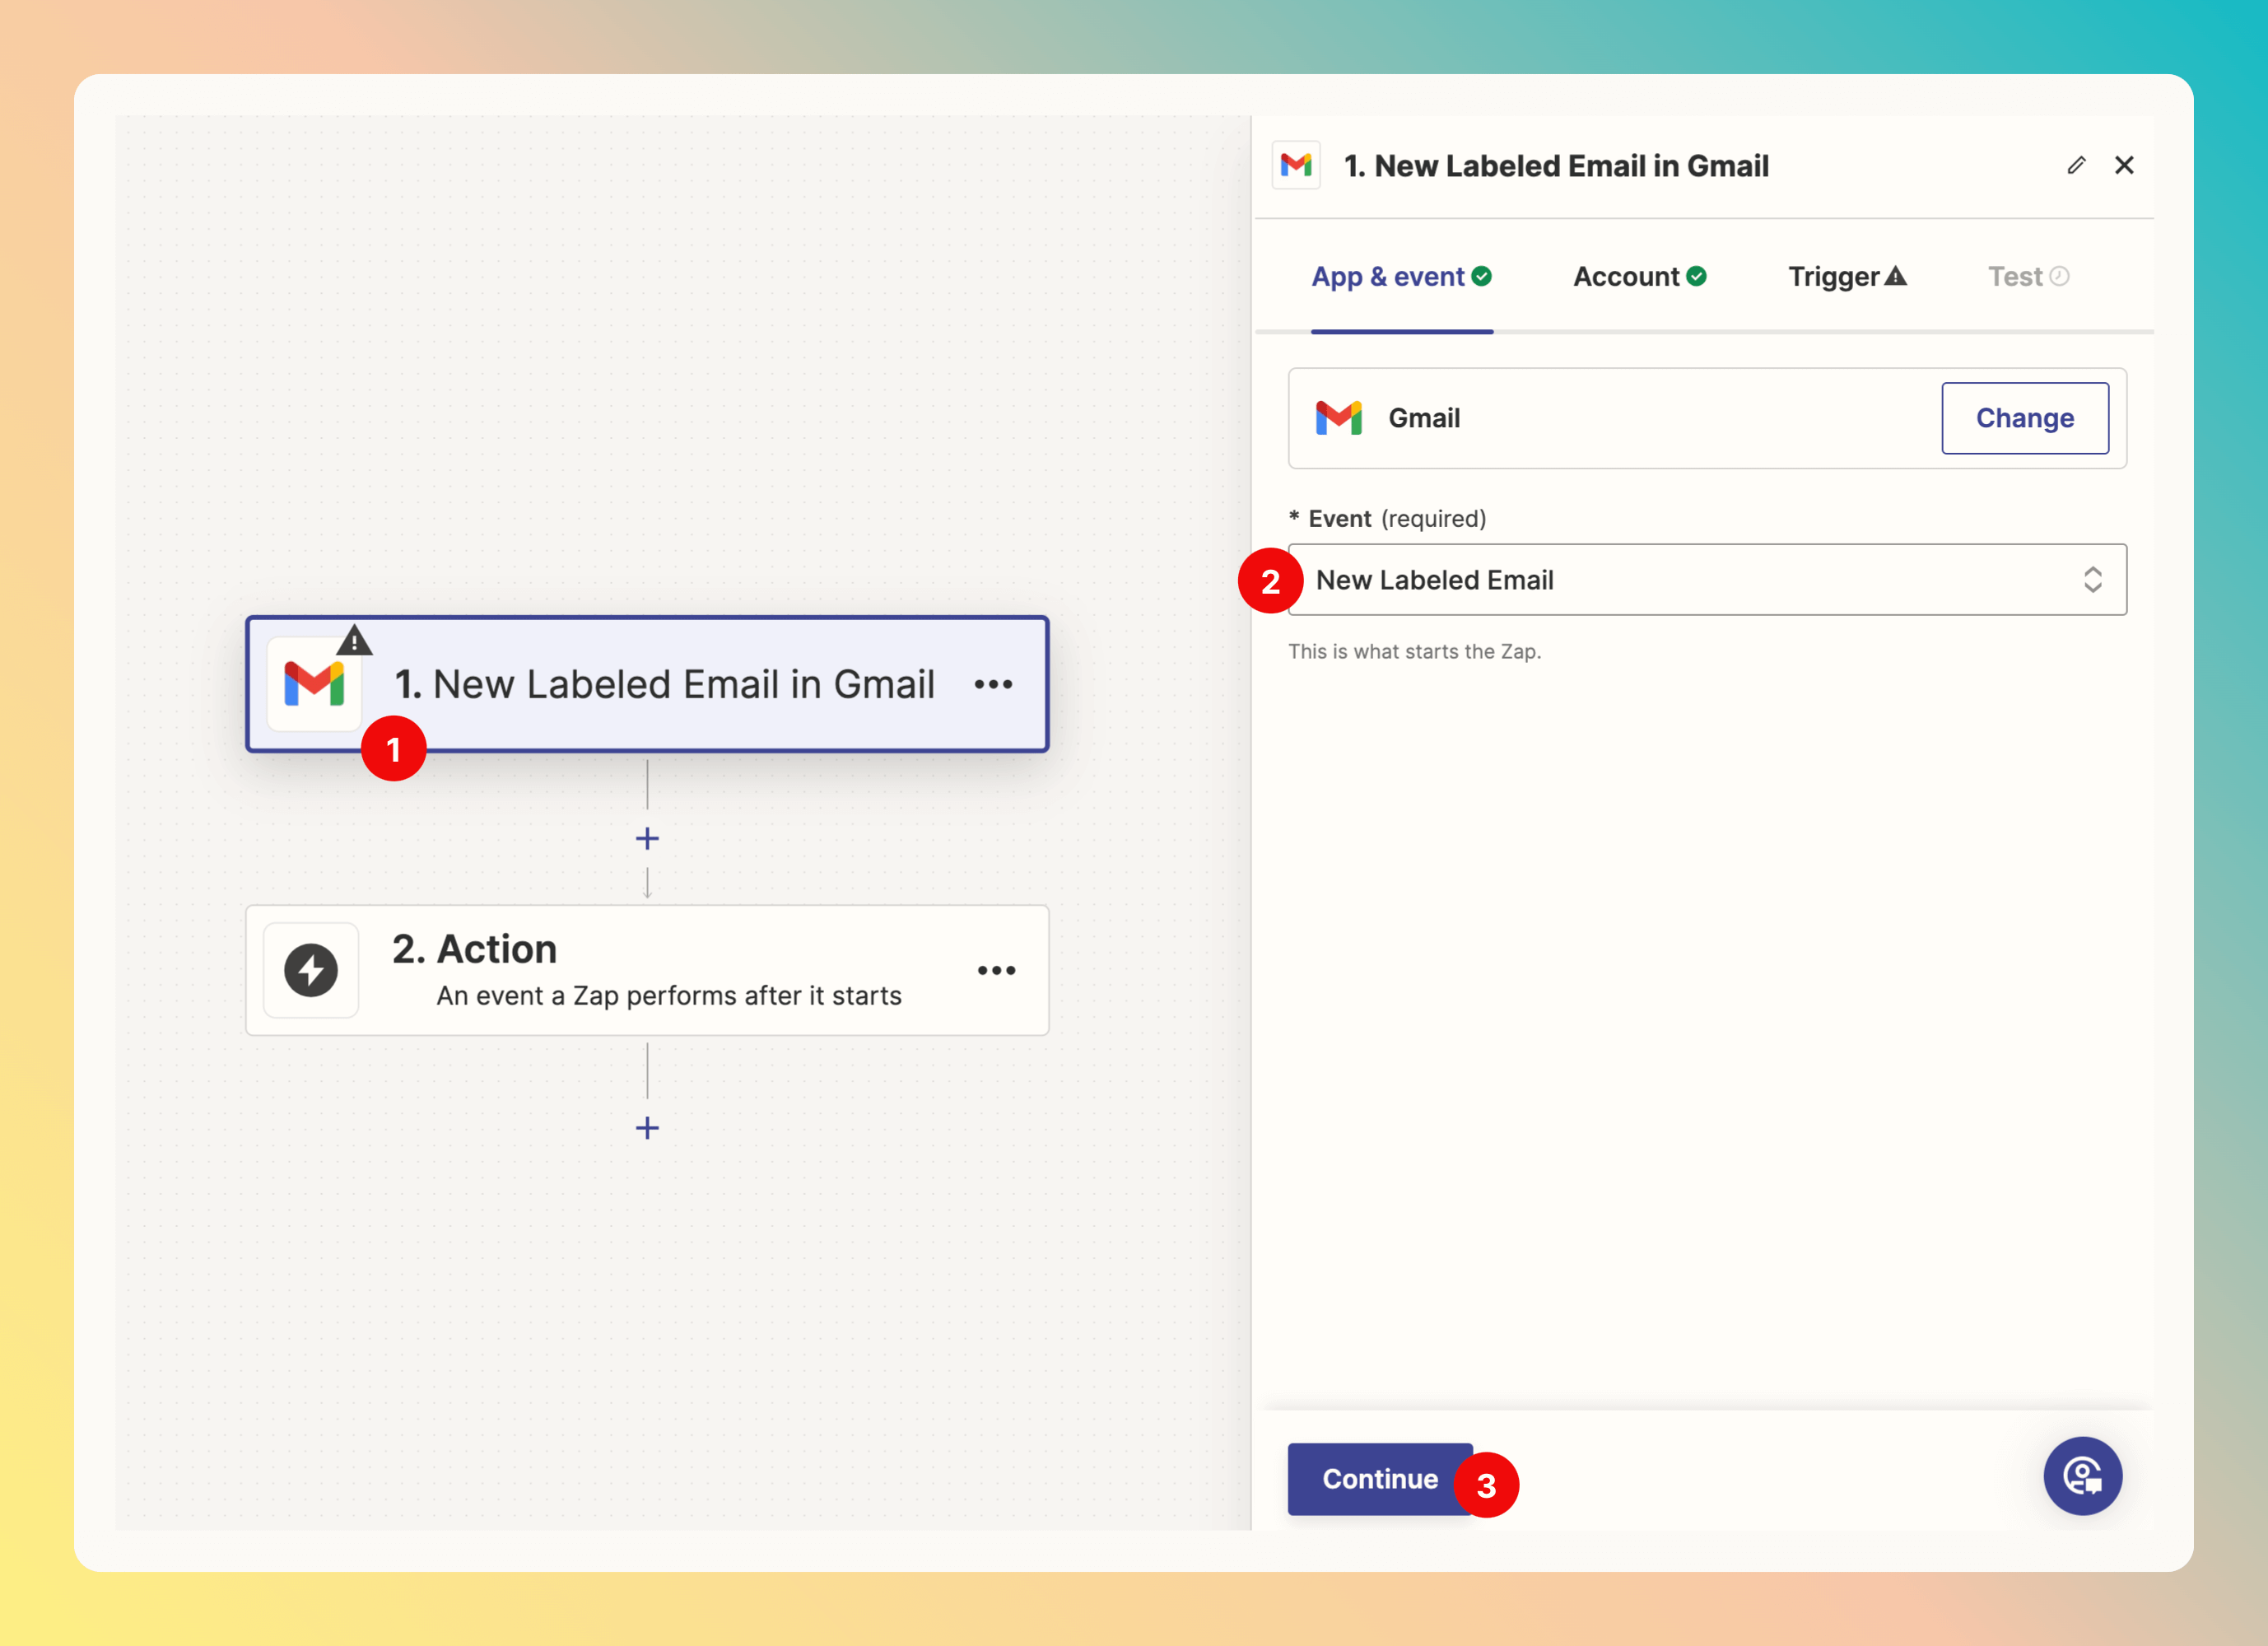
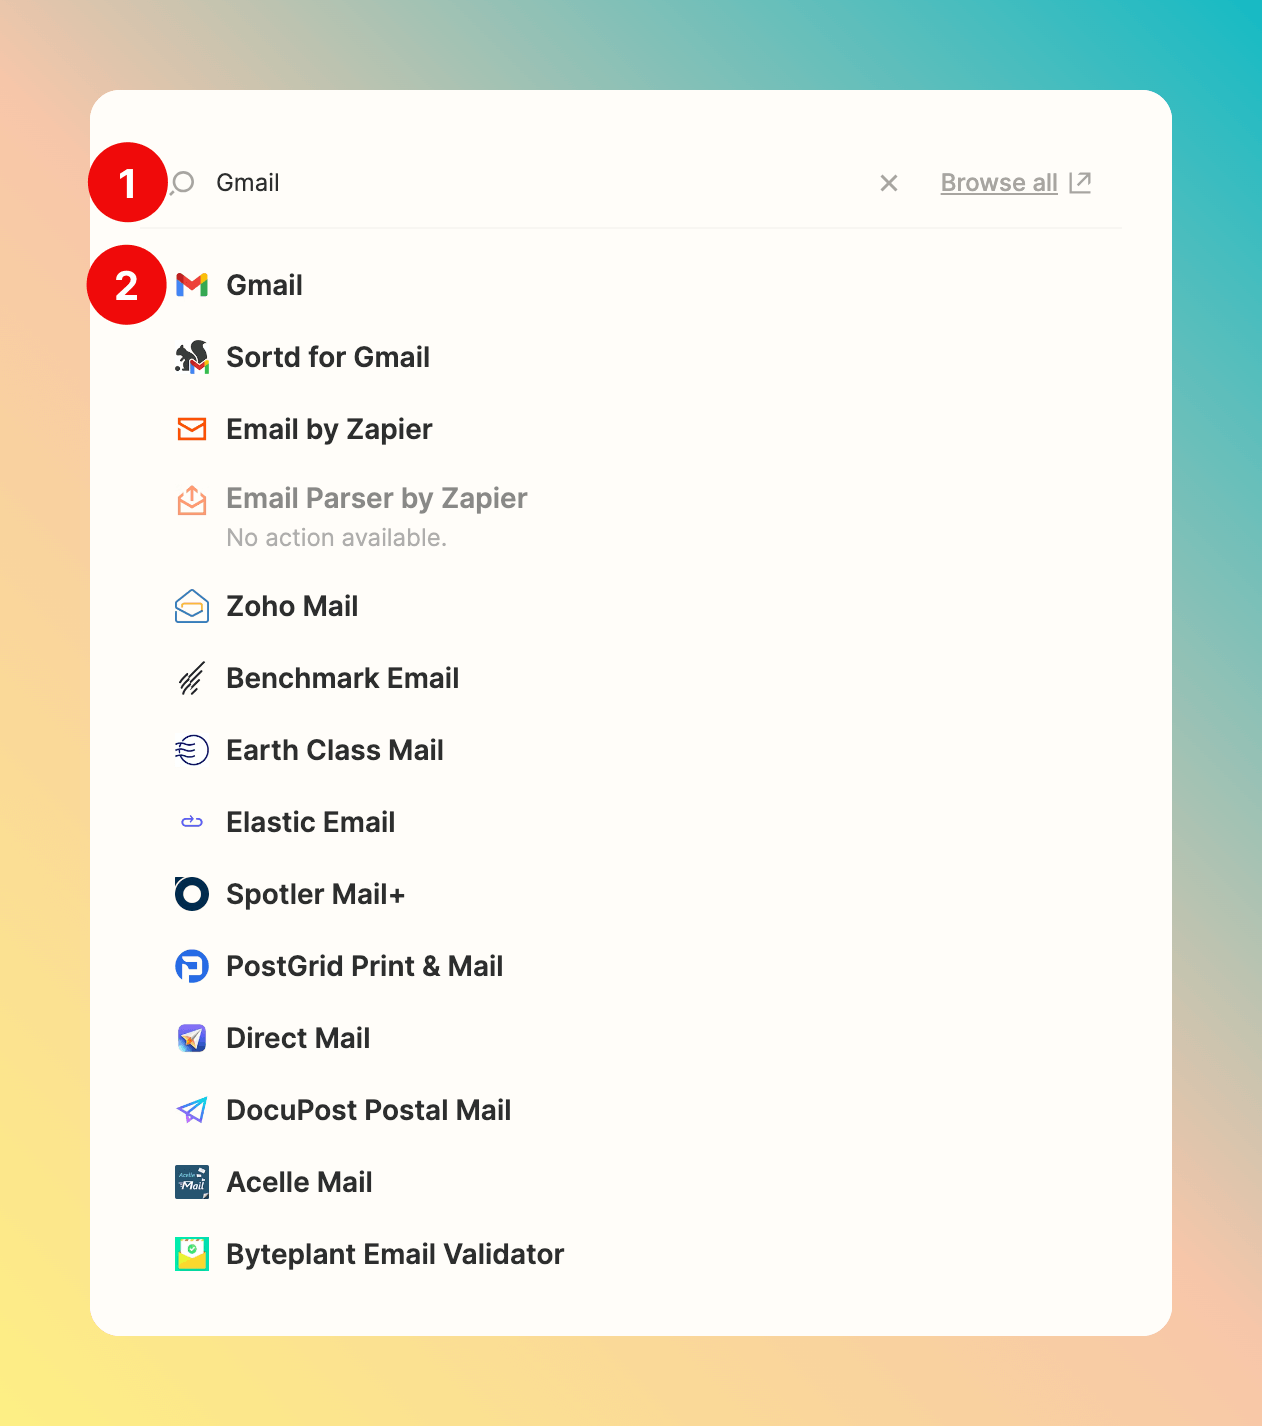 We want to create the incidents by labeling email, that's why we pick the `New Labeled Email` Event (2) after selecting Gmail as Trigger (1).
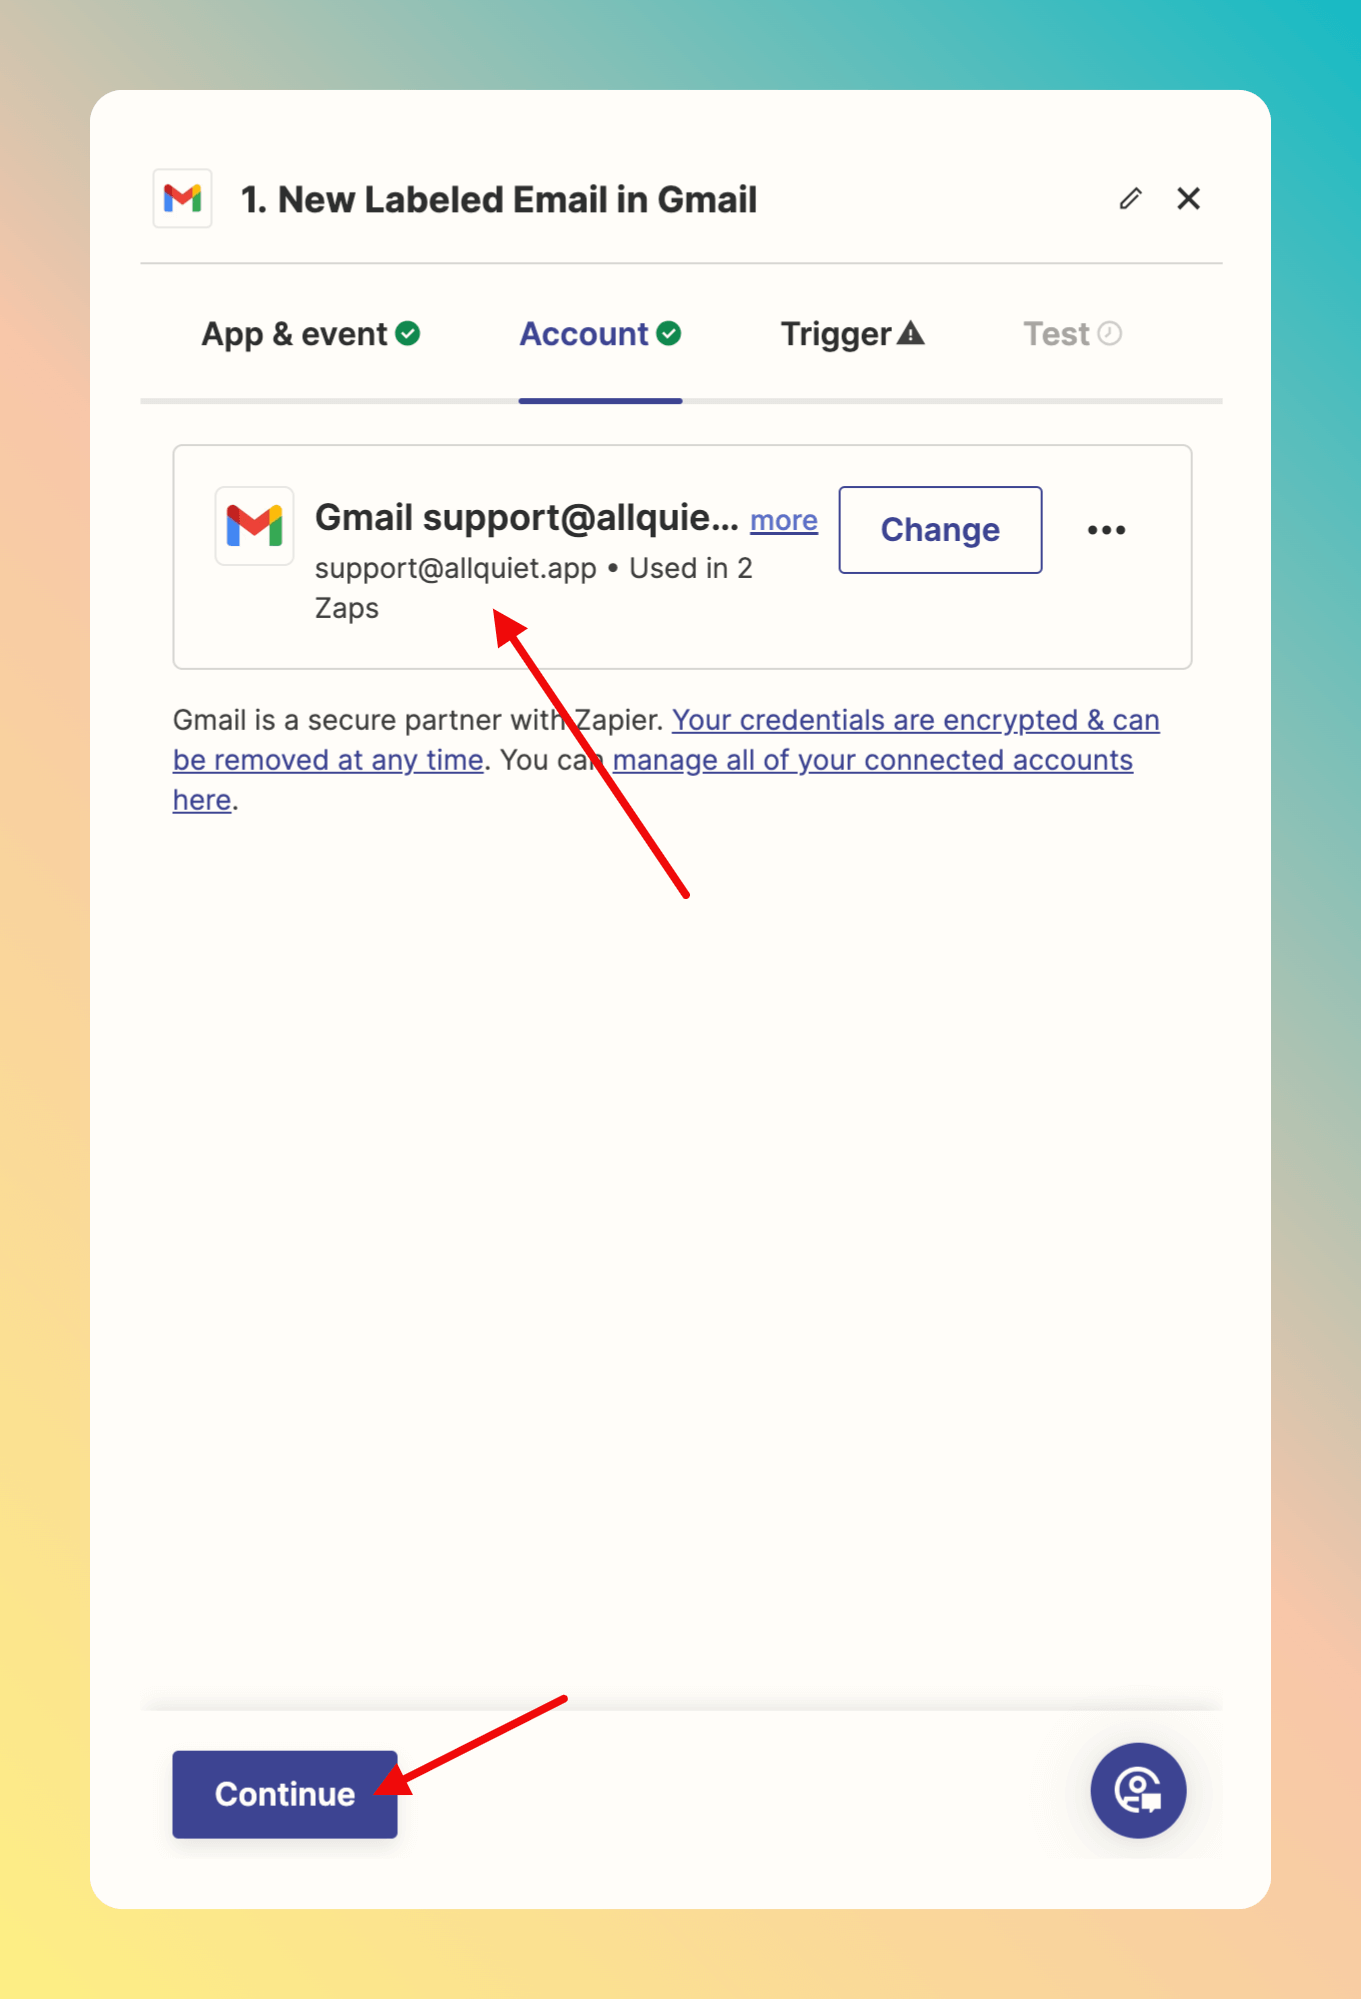
 Next, we need to sign in to the Gmail account we want to use to create incidents via labeling.
Here, we already signed in with our support email address.
After sign in, click `Continue`.
Next, we need to sign in to the Gmail account we want to use to create incidents via labeling.
Here, we already signed in with our support email address.
After sign in, click `Continue`.
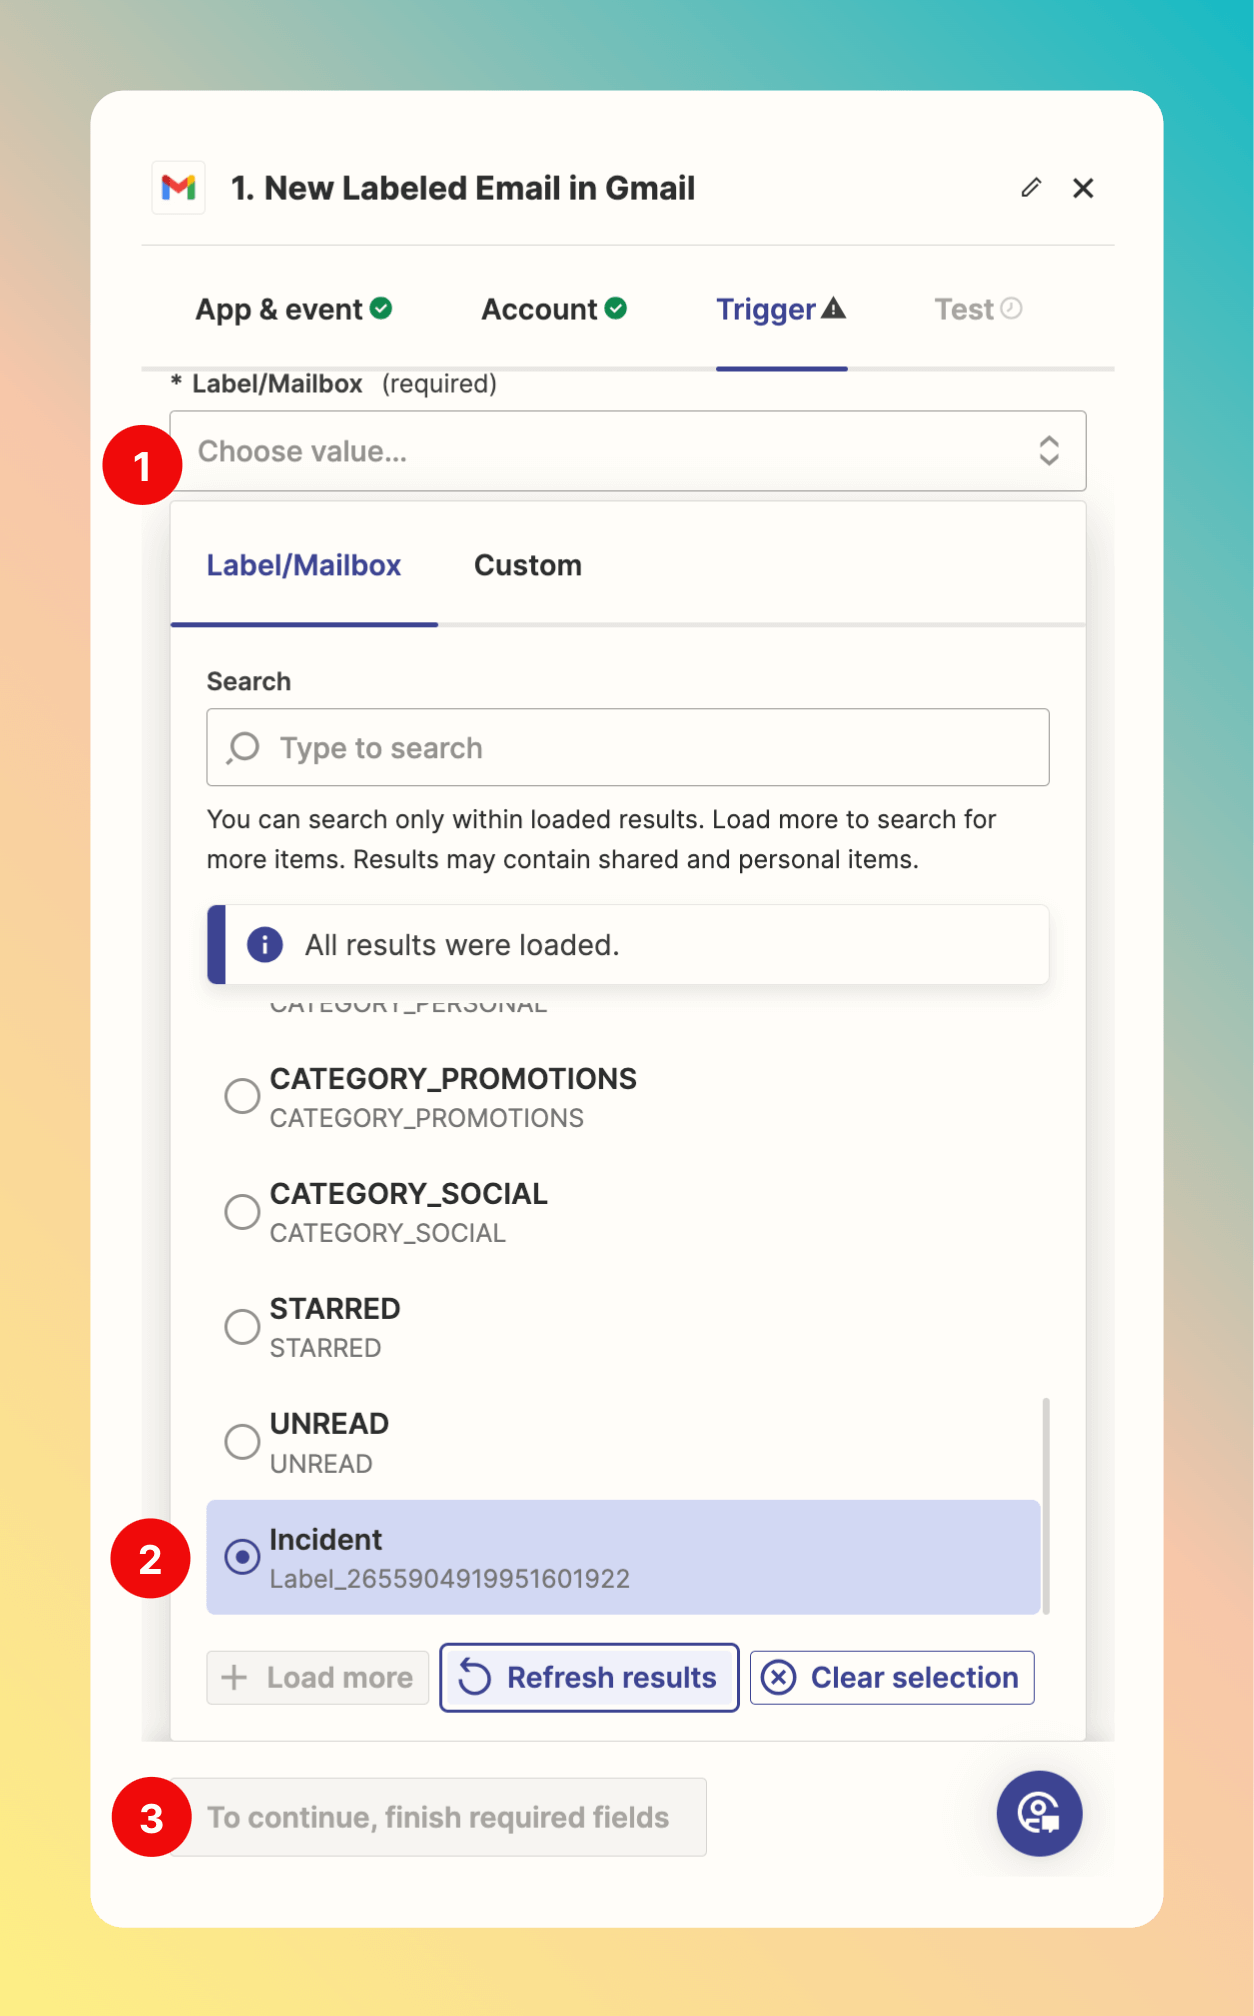
 Now, we need to define the actual trigger. Here, we decided to label emails as `Incident` to trigger an All Quiet incident.
After selection, click `Continue`.
Now, we need to define the actual trigger. Here, we decided to label emails as `Incident` to trigger an All Quiet incident.
After selection, click `Continue`.
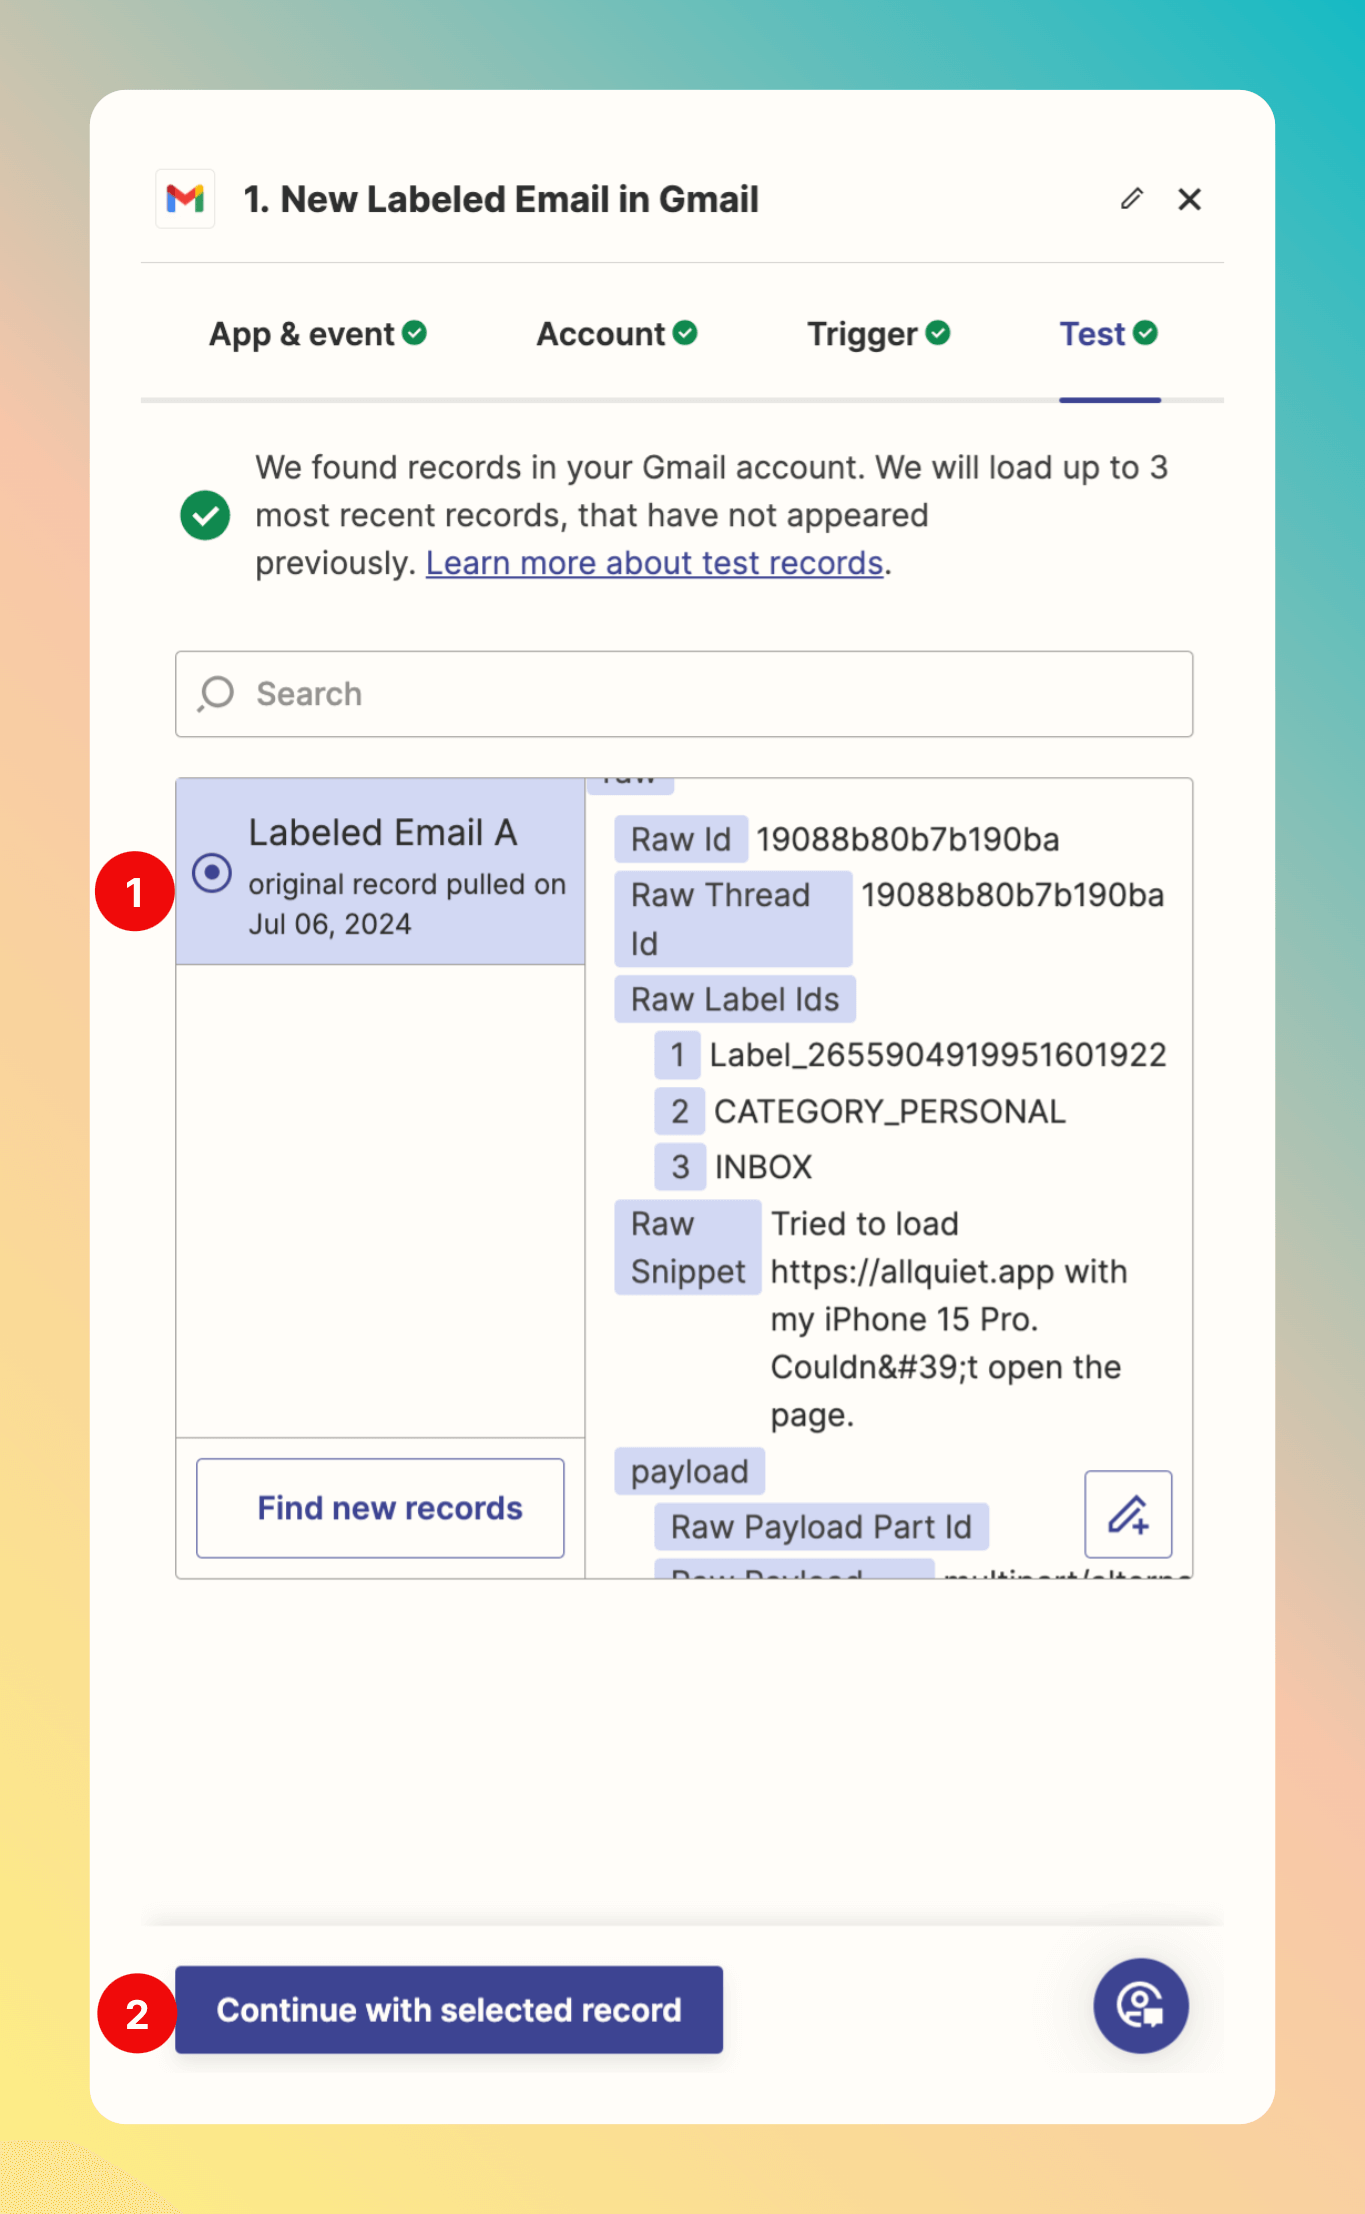
 Next, we can see emails that are labeled as `Incident` in our connected Gmail account.
1. We have to select the email we want to use for a test.
2. Then, we can `Continue with the selected record`.
Next, we can see emails that are labeled as `Incident` in our connected Gmail account.
1. We have to select the email we want to use for a test.
2. Then, we can `Continue with the selected record`.
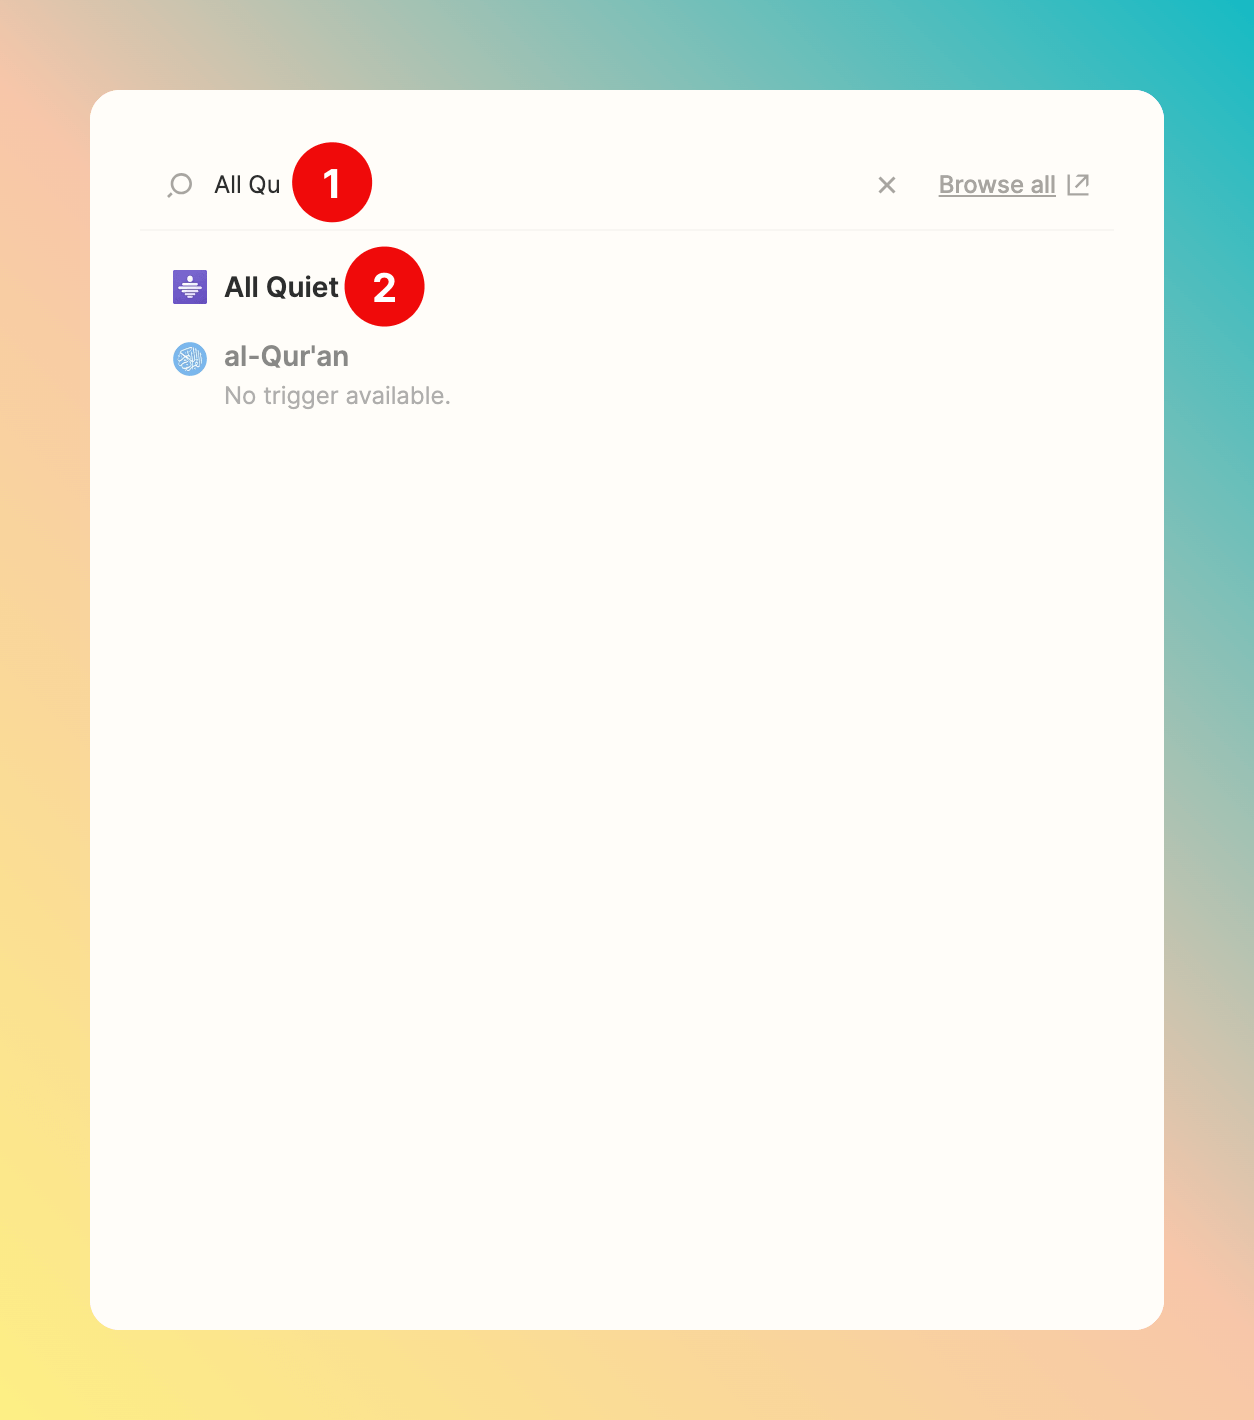
 Now, we need to set up the action we want to trigger with the labeling - the new incident in All Quiet.
This has to be done regardless of choosing Gmail or any other integration as a Trigger.
1. Search for `All Quiet`.
2. Select it.
Now, we need to set up the action we want to trigger with the labeling - the new incident in All Quiet.
This has to be done regardless of choosing Gmail or any other integration as a Trigger.
1. Search for `All Quiet`.
2. Select it.
 You can select between two different Action types.
1. `Create Incident`
2. `Create Incident Intent`
For now, we select the `Create Incident` Action. To learn more about `Create Incident Intent` Action, see [Create Incident Intent Action section](/integrations/inbound/zapier#create-incident-intent-action).
You can select between two different Action types.
1. `Create Incident`
2. `Create Incident Intent`
For now, we select the `Create Incident` Action. To learn more about `Create Incident Intent` Action, see [Create Incident Intent Action section](/integrations/inbound/zapier#create-incident-intent-action).
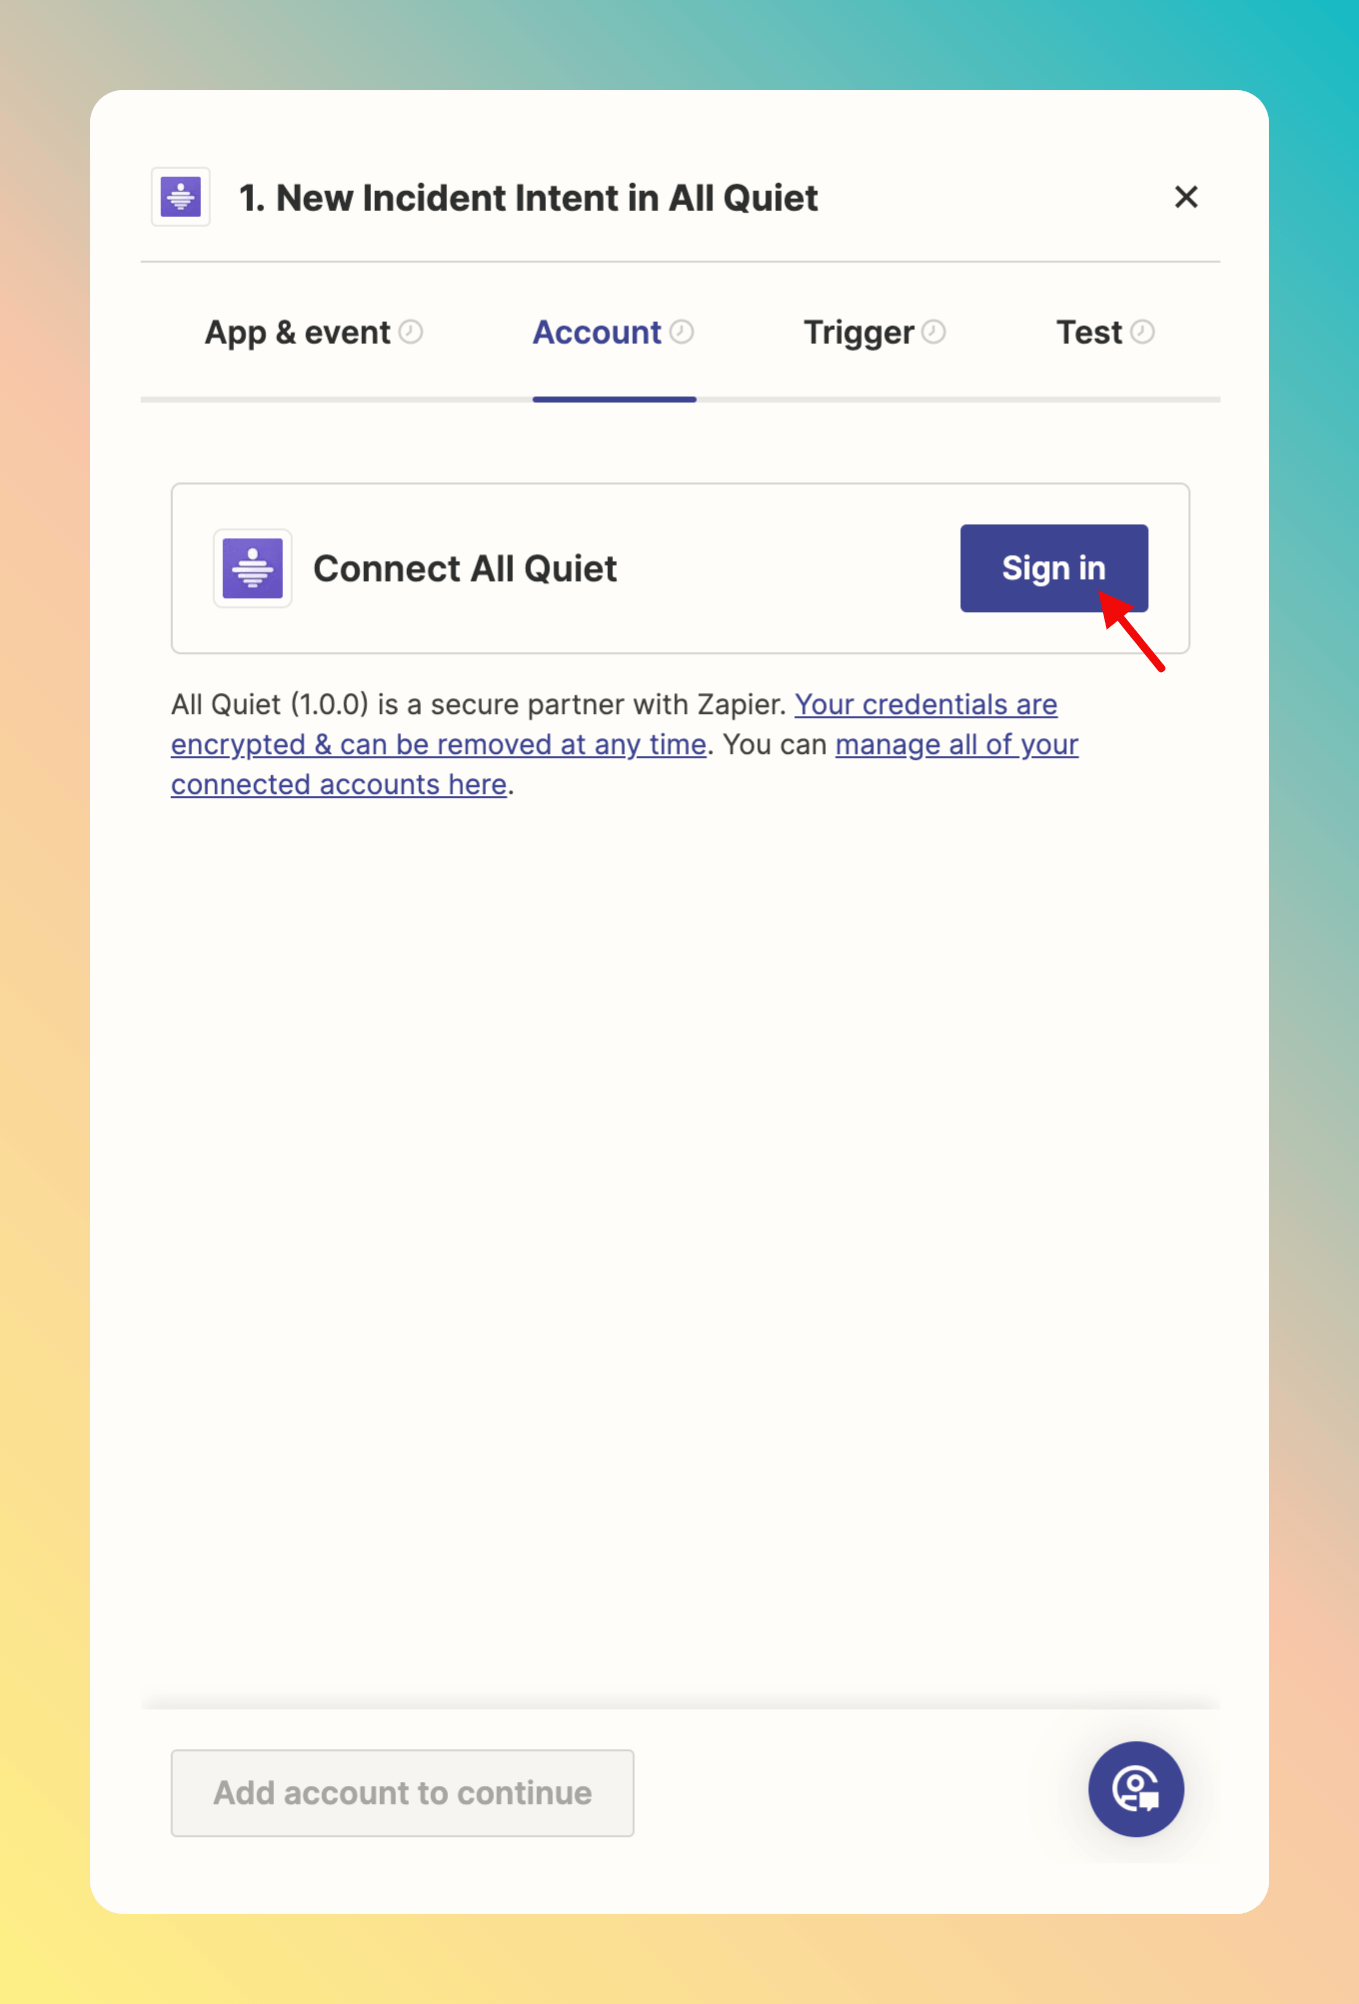
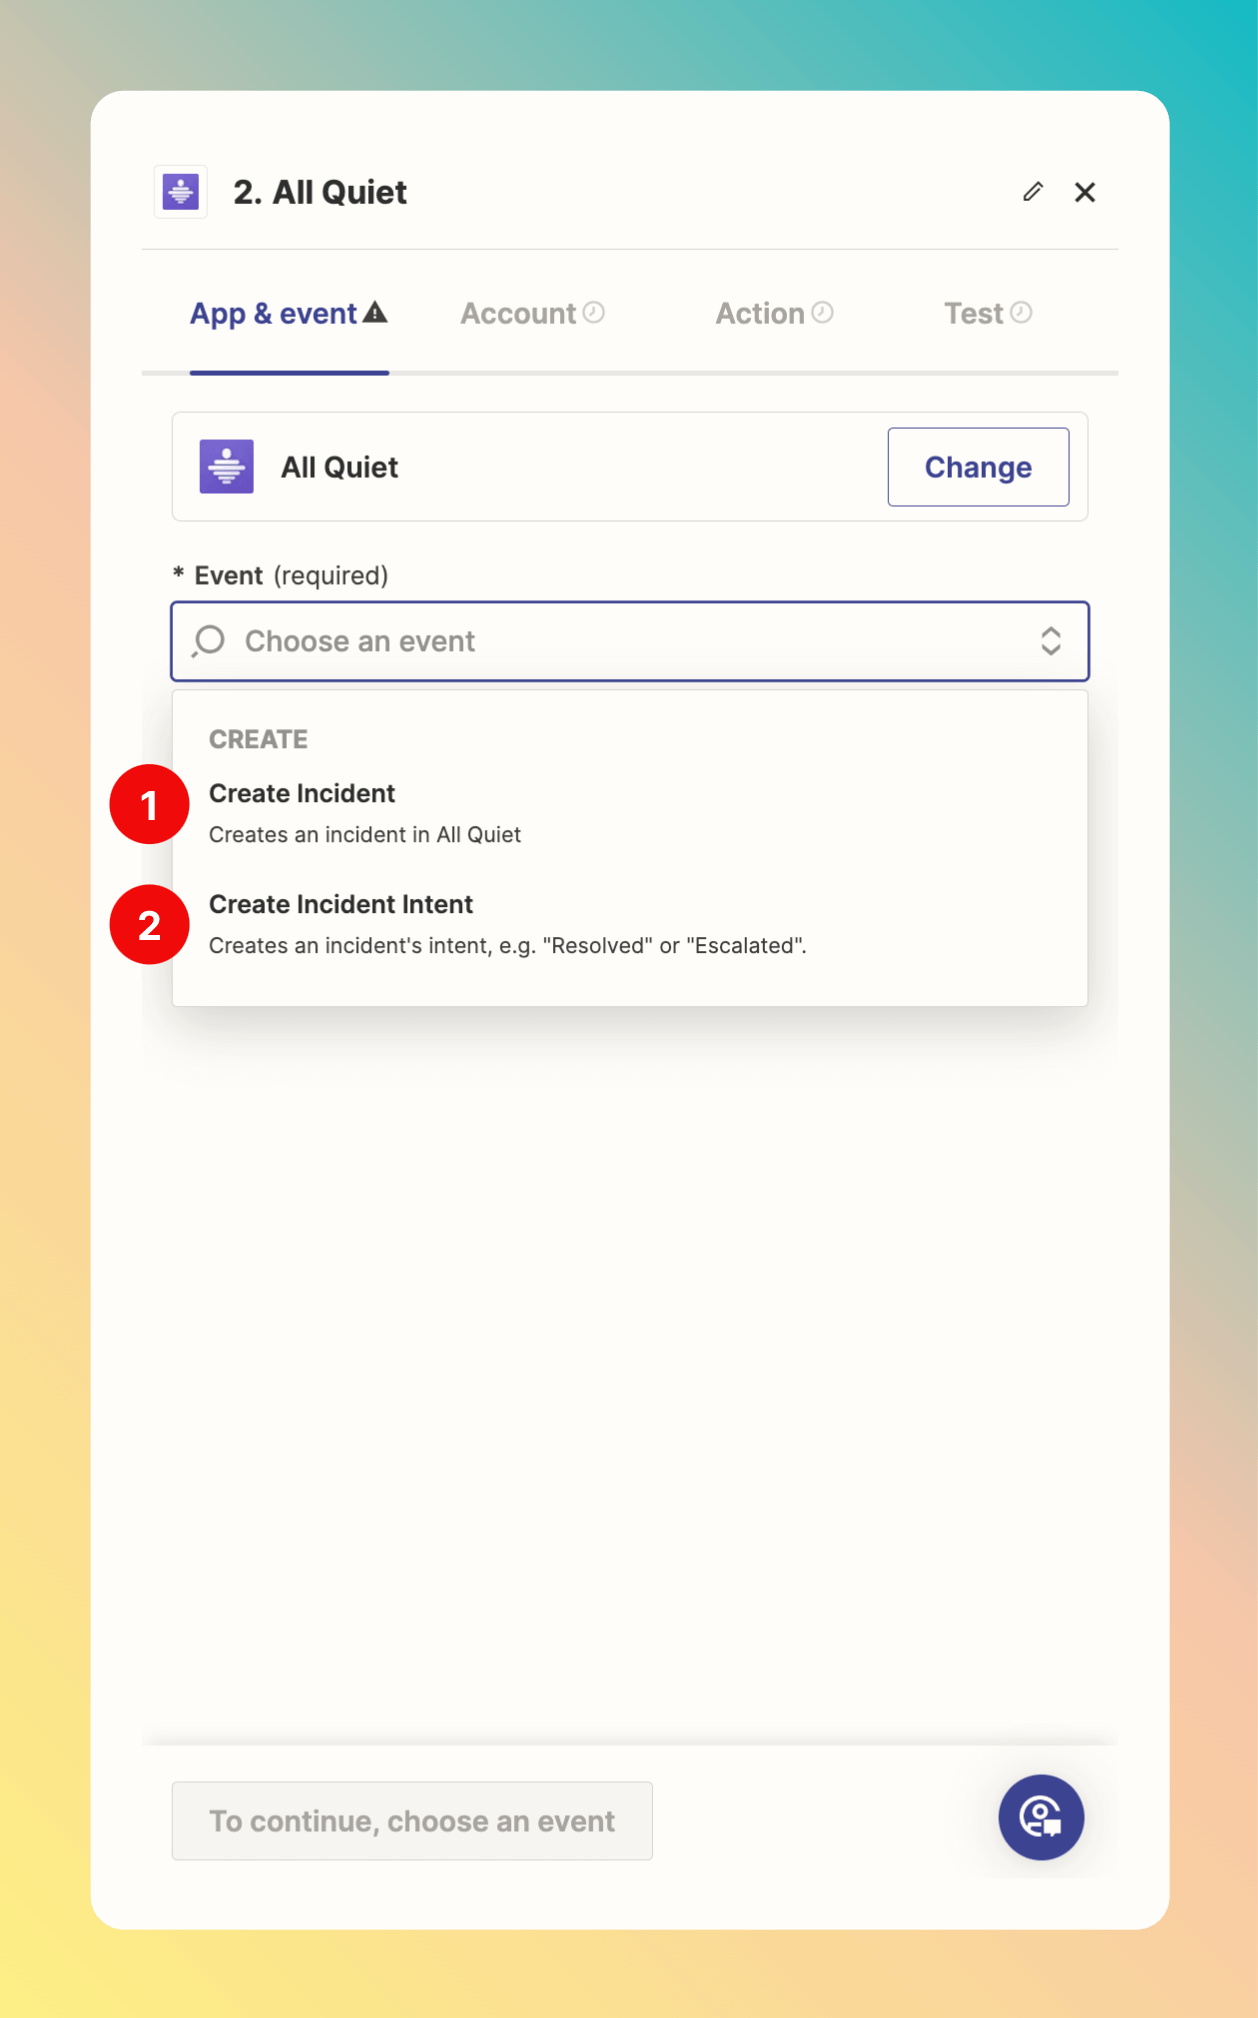 After selecting `Create Incident` and clicking `Continue`, we need to sign in to our All Quiet Account to connect it with Zapier.
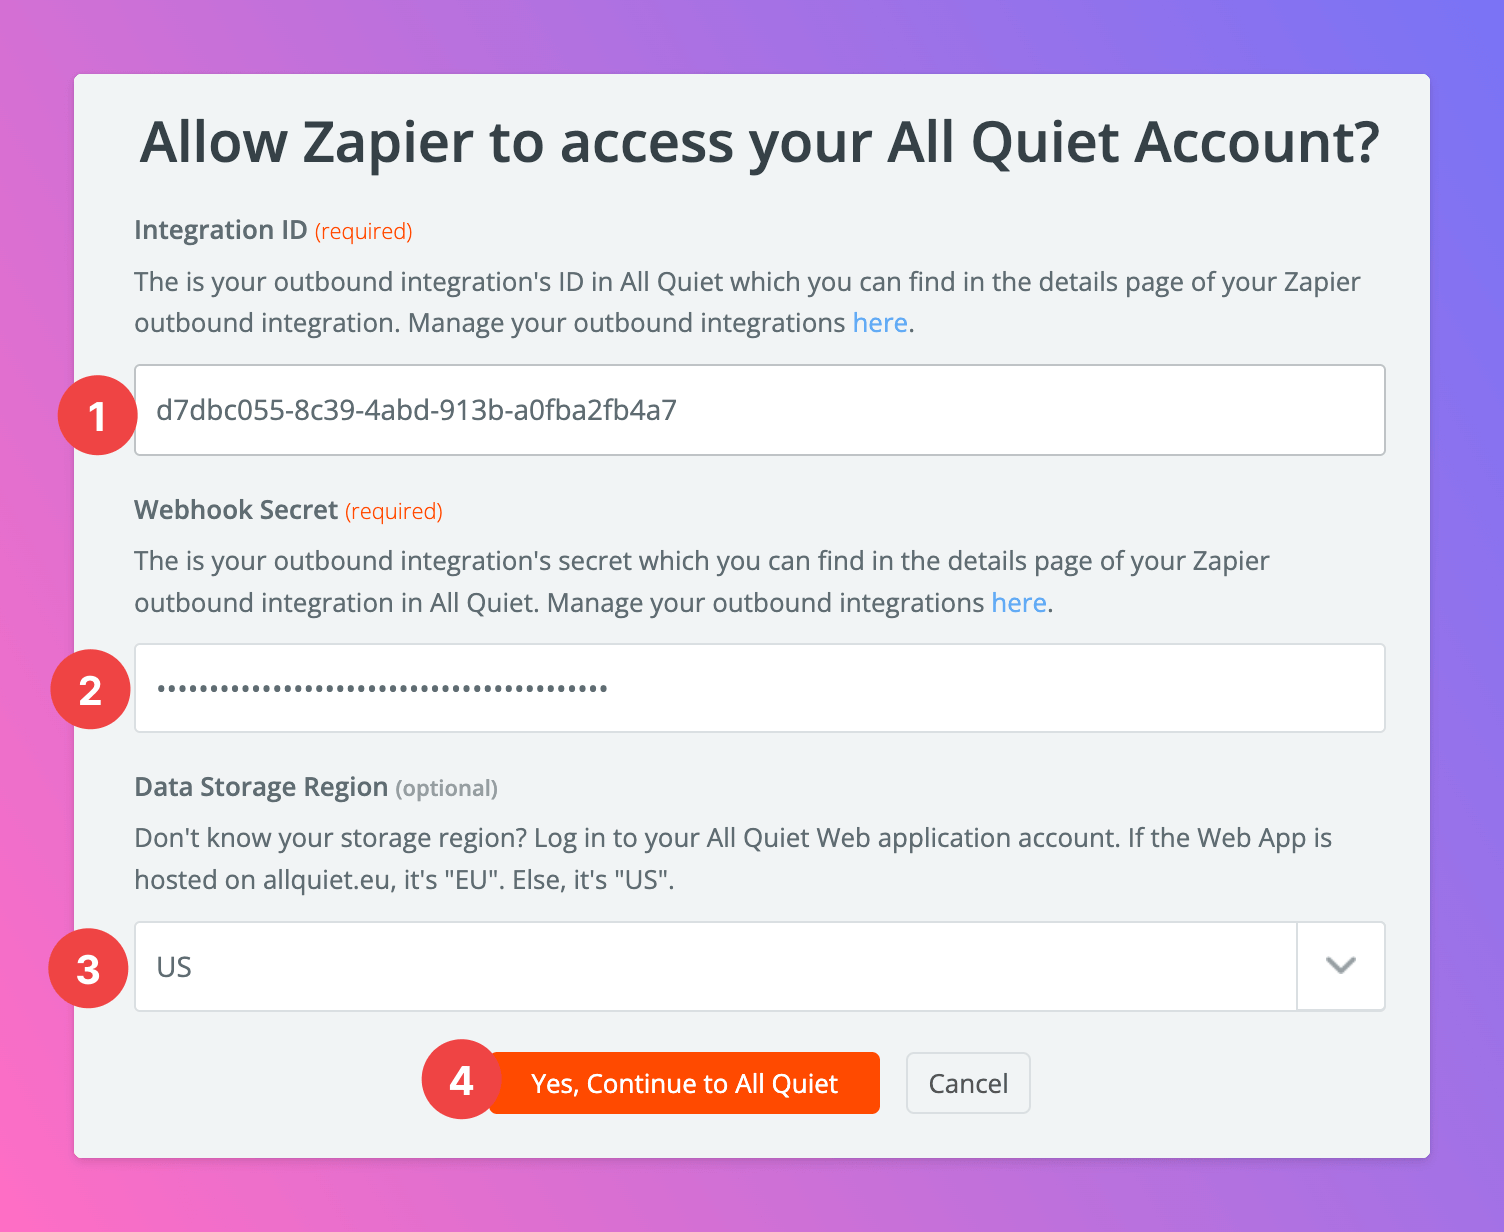
 You will have to provide your
1. Integration ID and
2. Webhook Secret
that you received after [creating the outbound integration in All Quiet](/integrations/outbound/zapier#create-outbound-integration).
3. Also, provide your `Data Storage Region`, either `US` or `EU`.
4. After providing the credentials, click `Yes, Continue to All Quiet`.
You will have to provide your
1. Integration ID and
2. Webhook Secret
that you received after [creating the outbound integration in All Quiet](/integrations/outbound/zapier#create-outbound-integration).
3. Also, provide your `Data Storage Region`, either `US` or `EU`.
4. After providing the credentials, click `Yes, Continue to All Quiet`.
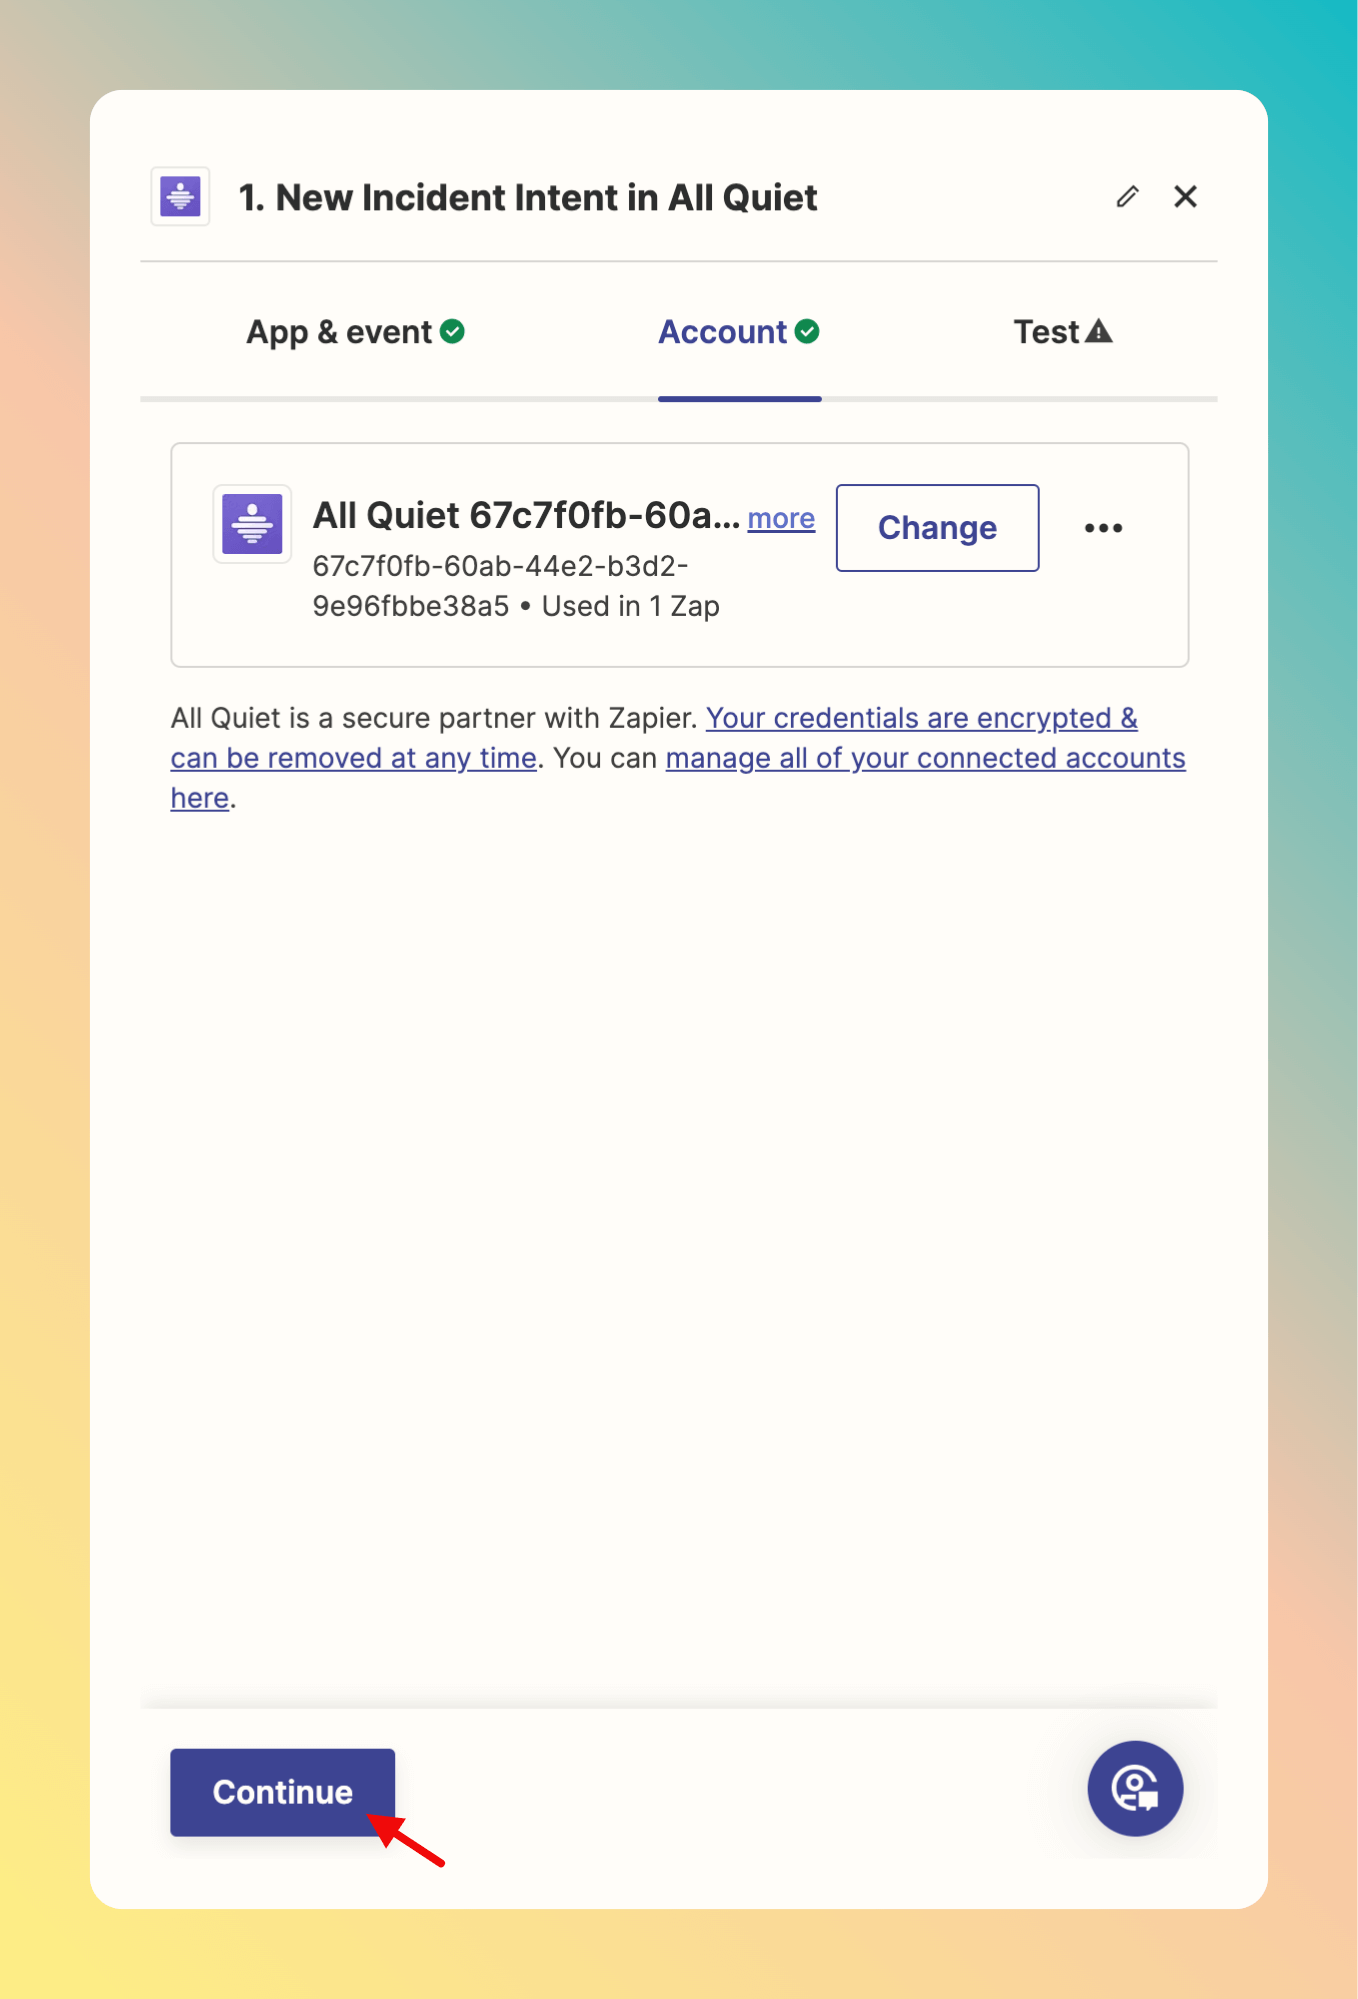
 After signing in with All Quiet, we can continue.
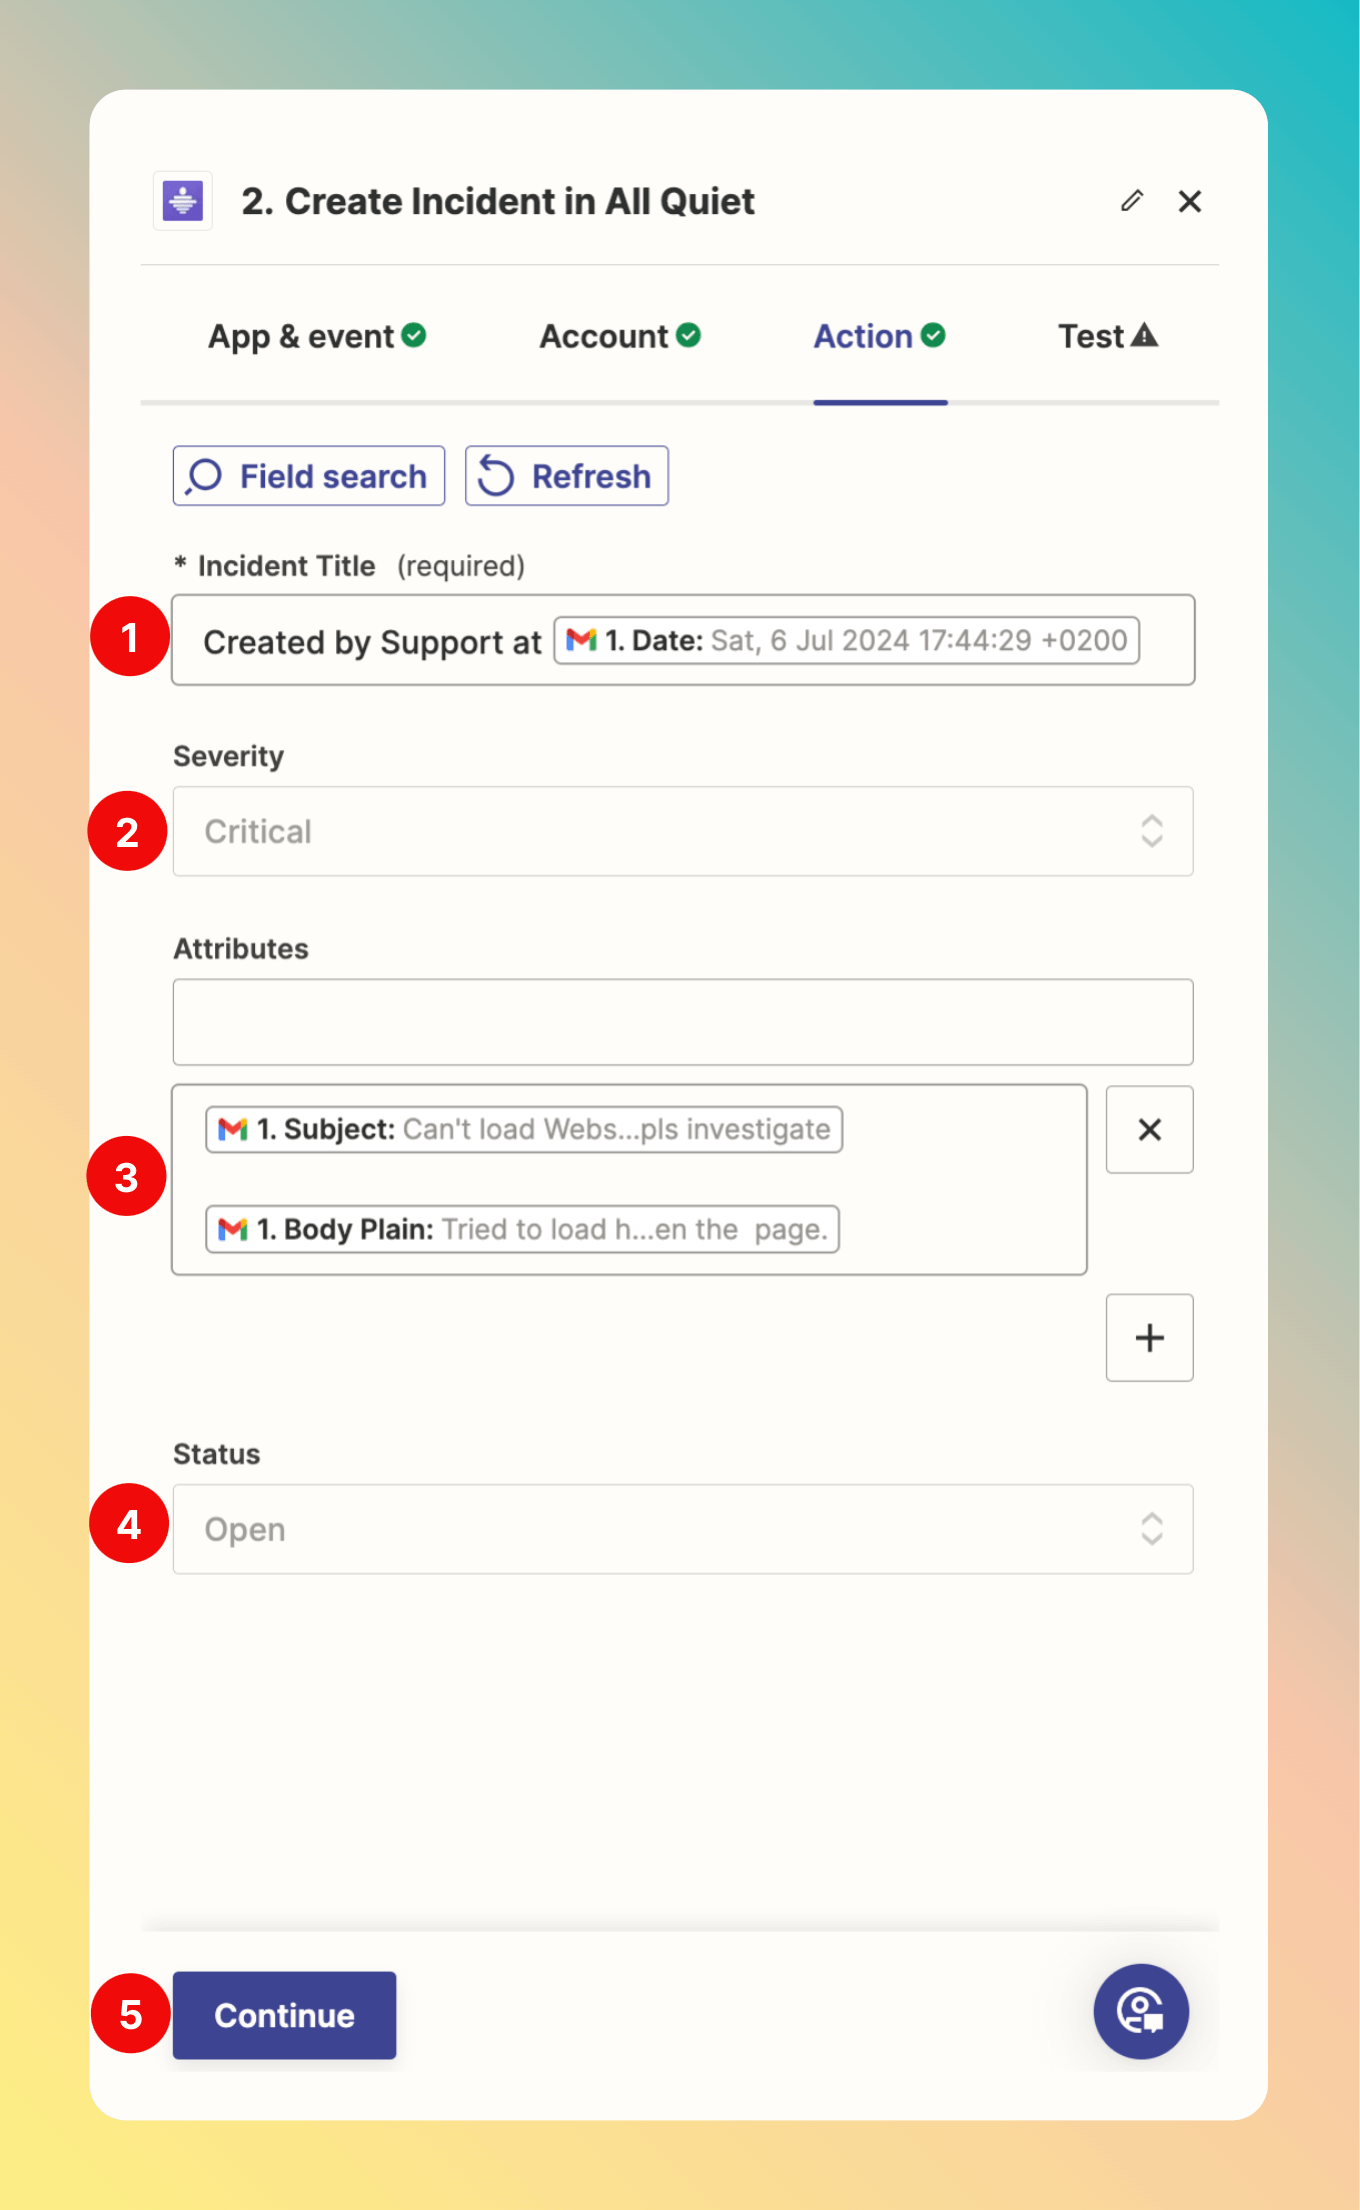
 Next, it's time to define the incident.
This has to be done regardless of choosing Gmail or any other integration as a Trigger. The available variables, however, differ by the selected integration and use case.
1. Create a `Incident Title`. Here, we use a combination of text and, in this use case, email variables provided by the Gmail Trigger.
2. Define the `Severity` that incidents created by labeling emails as `Incident` should have. Here, we selected "Critical". If you want to have different severities for different mails, you could go ahead and create different labels instead of one `Incident` label.
3. Define the `Attributes` of the incident. Here, we added the Subject & Description of the email.
4. Define the `Status` of the incident. As the incident is created by the labeling, we set the status to `Open`.
5. After configuring the incident, click `Continue.`
Next, it's time to define the incident.
This has to be done regardless of choosing Gmail or any other integration as a Trigger. The available variables, however, differ by the selected integration and use case.
1. Create a `Incident Title`. Here, we use a combination of text and, in this use case, email variables provided by the Gmail Trigger.
2. Define the `Severity` that incidents created by labeling emails as `Incident` should have. Here, we selected "Critical". If you want to have different severities for different mails, you could go ahead and create different labels instead of one `Incident` label.
3. Define the `Attributes` of the incident. Here, we added the Subject & Description of the email.
4. Define the `Status` of the incident. As the incident is created by the labeling, we set the status to `Open`.
5. After configuring the incident, click `Continue.`
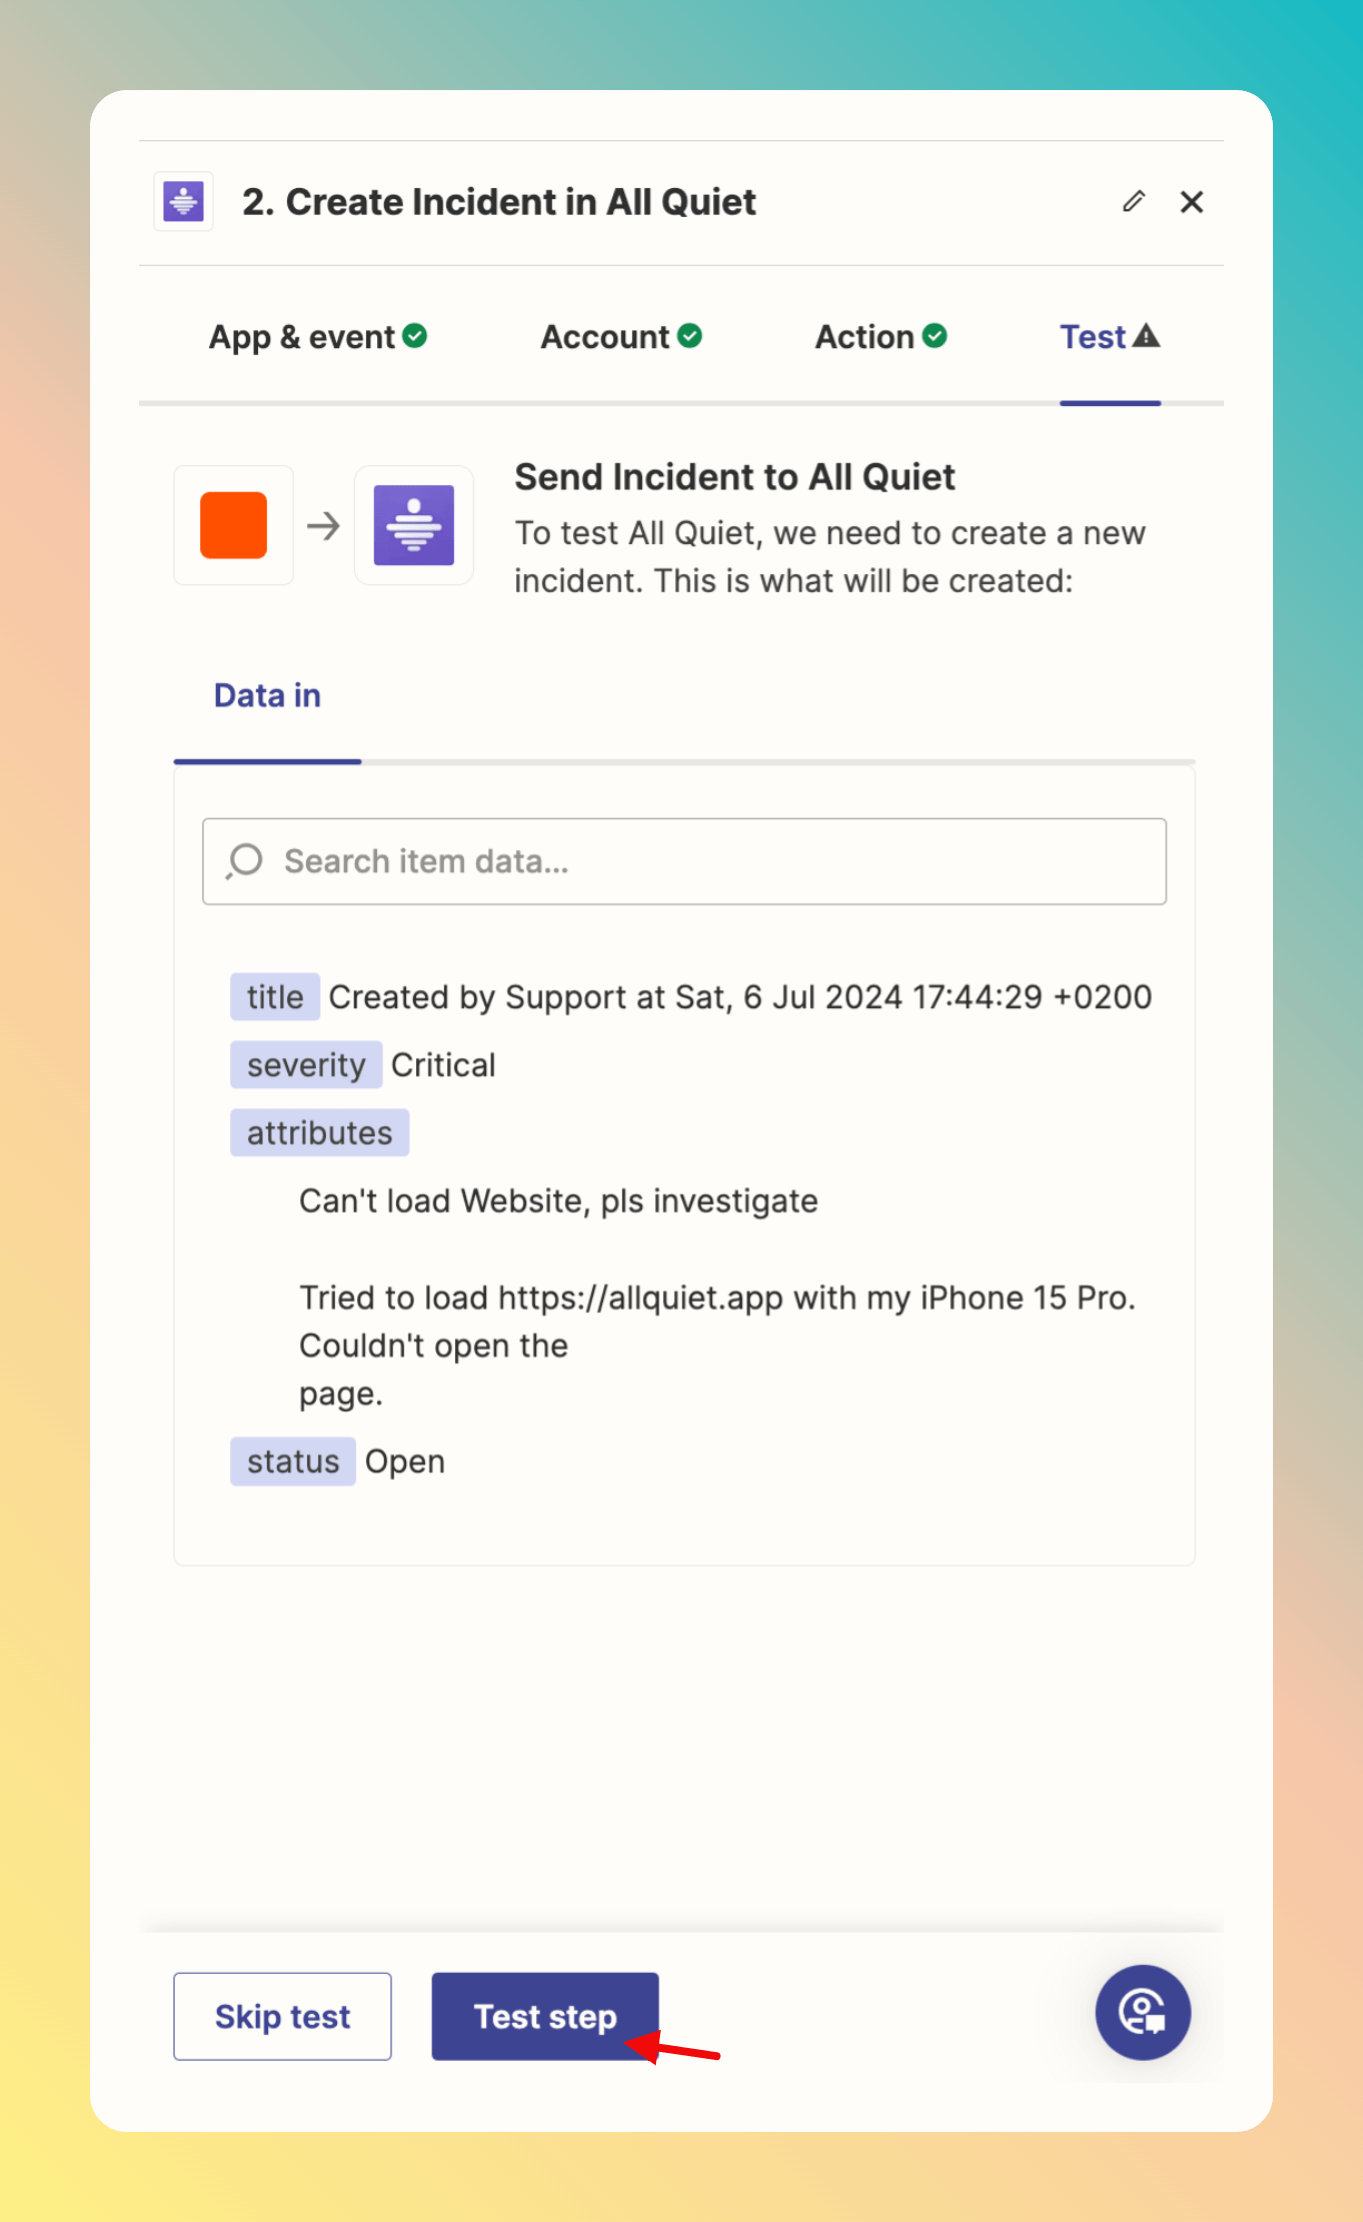
 Now, we can test if incident creation works by labeling in Gmail. Click `Test step`.
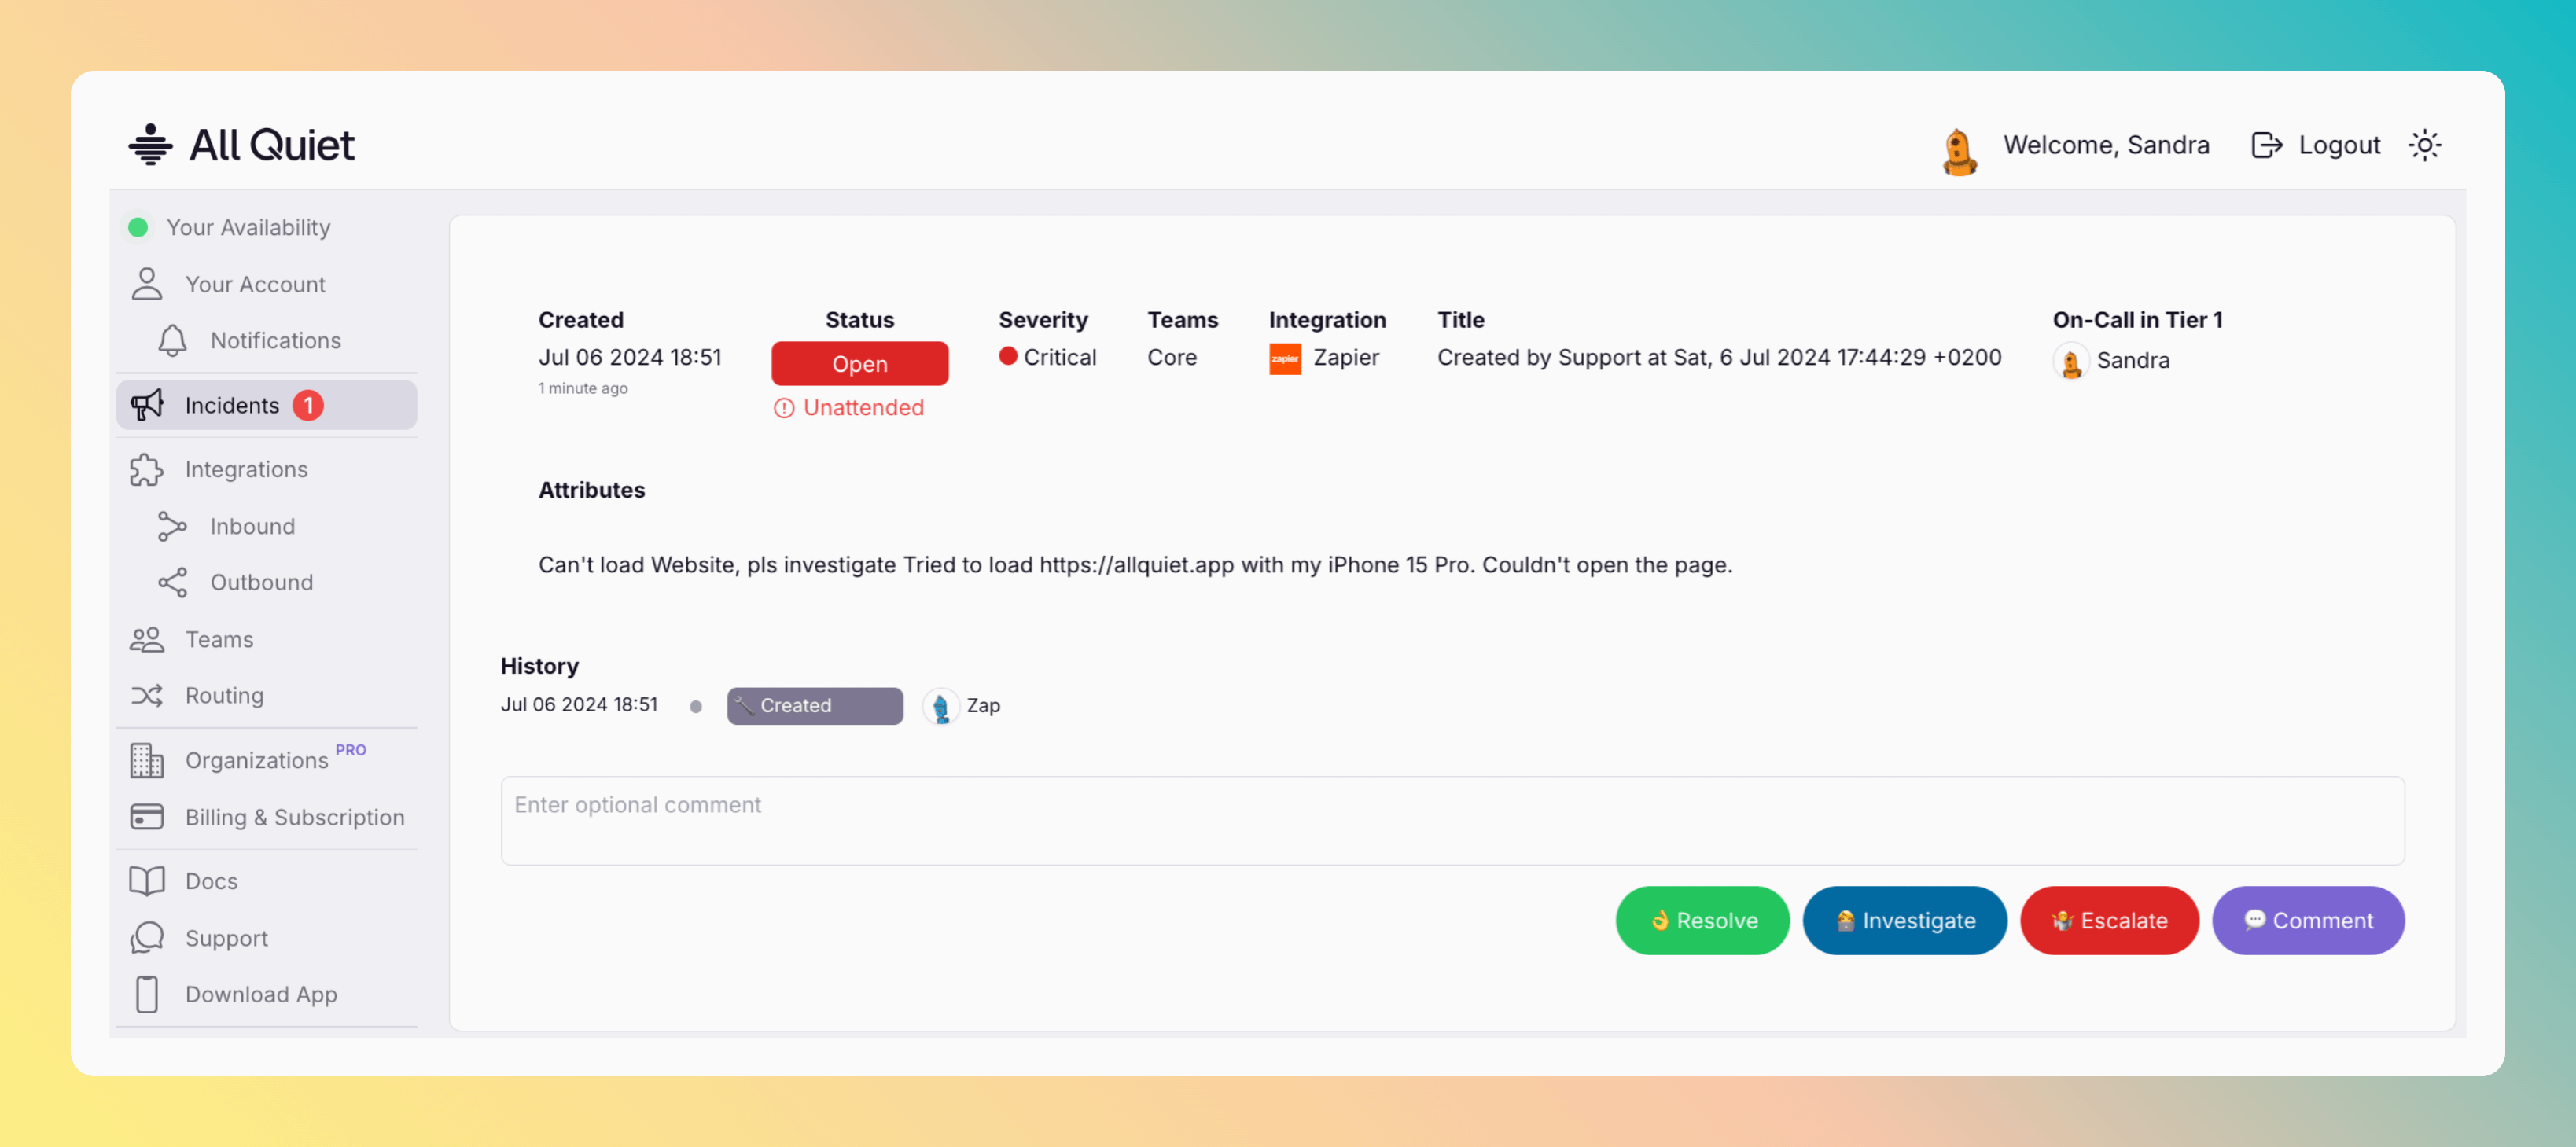
 Opening All Quiet, we can see that the incident was created as expected.
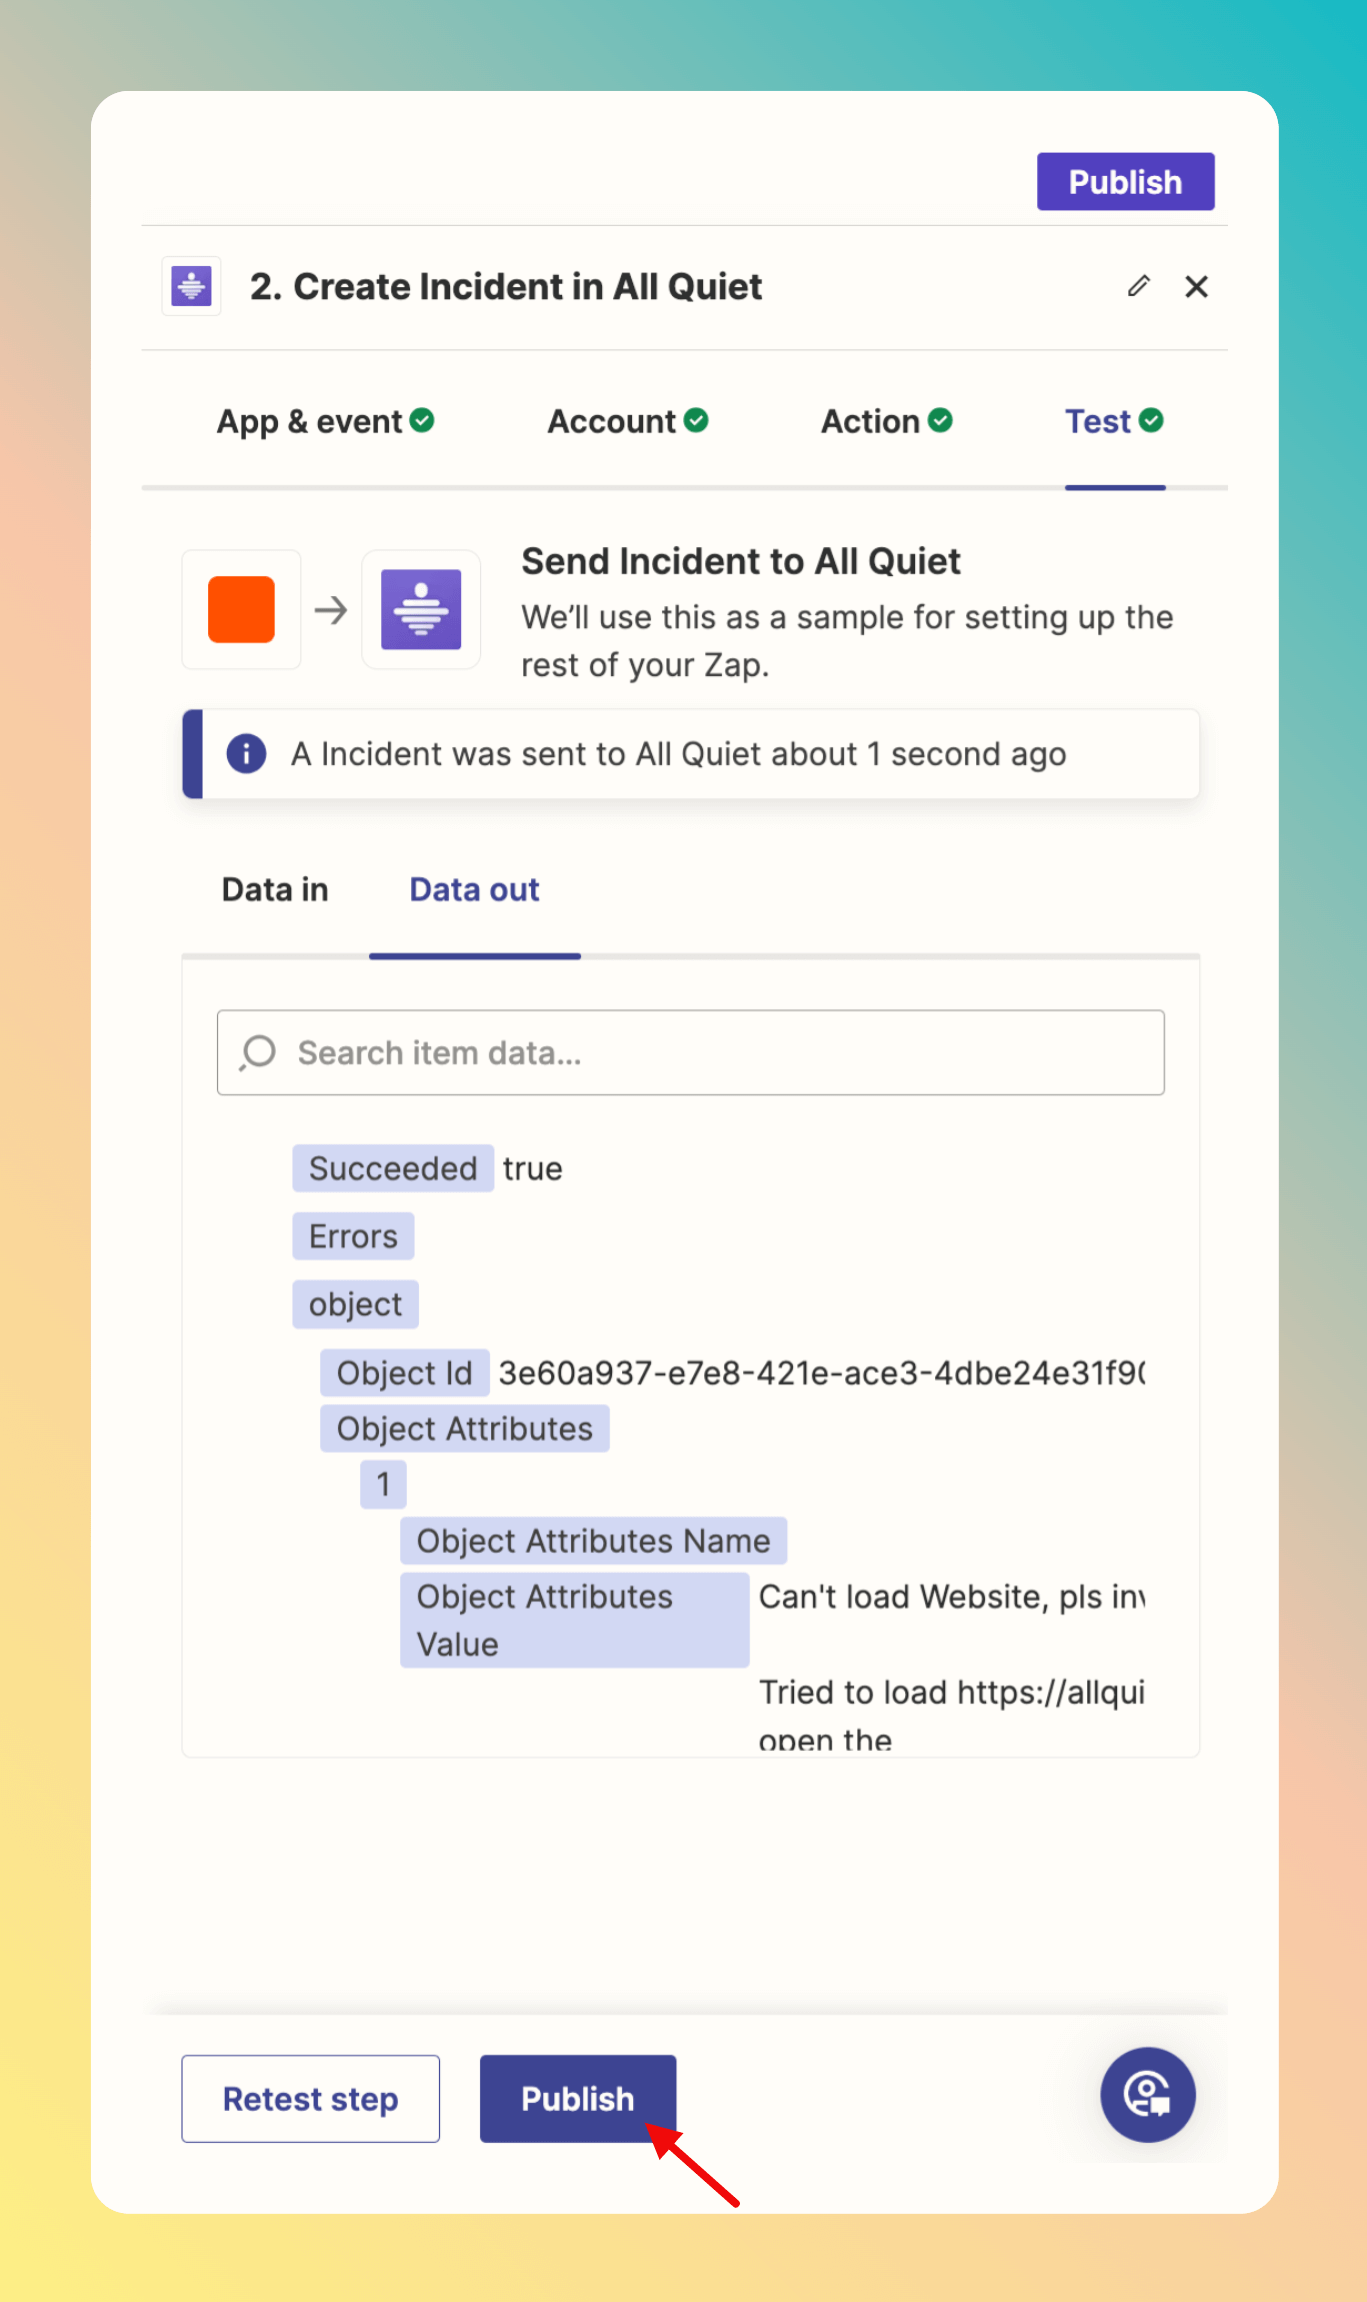
 Now, we can publish our Zap to use it for automatic incident creation.
 You have successfully created an All Quiet incident via Zapier.
## Create Incident Intent Action
Now, we want demonstrate how to create a Zap to update an an existing incident.
We will keep working with the Gmail Integration to demonstrate a usecase. Feeld free to use any other Zapier Integration that suits your case as a Trigger.
This Zap will update the status of the incident we created [earlier](/integrations/inbound/zapier#create-incident-action) to `Resolved`, by re-labeling the correonding email in Gmail.
Again, we need to start with setting up the Gmail Trigger. We will not document all steps again, but focus on what's different.
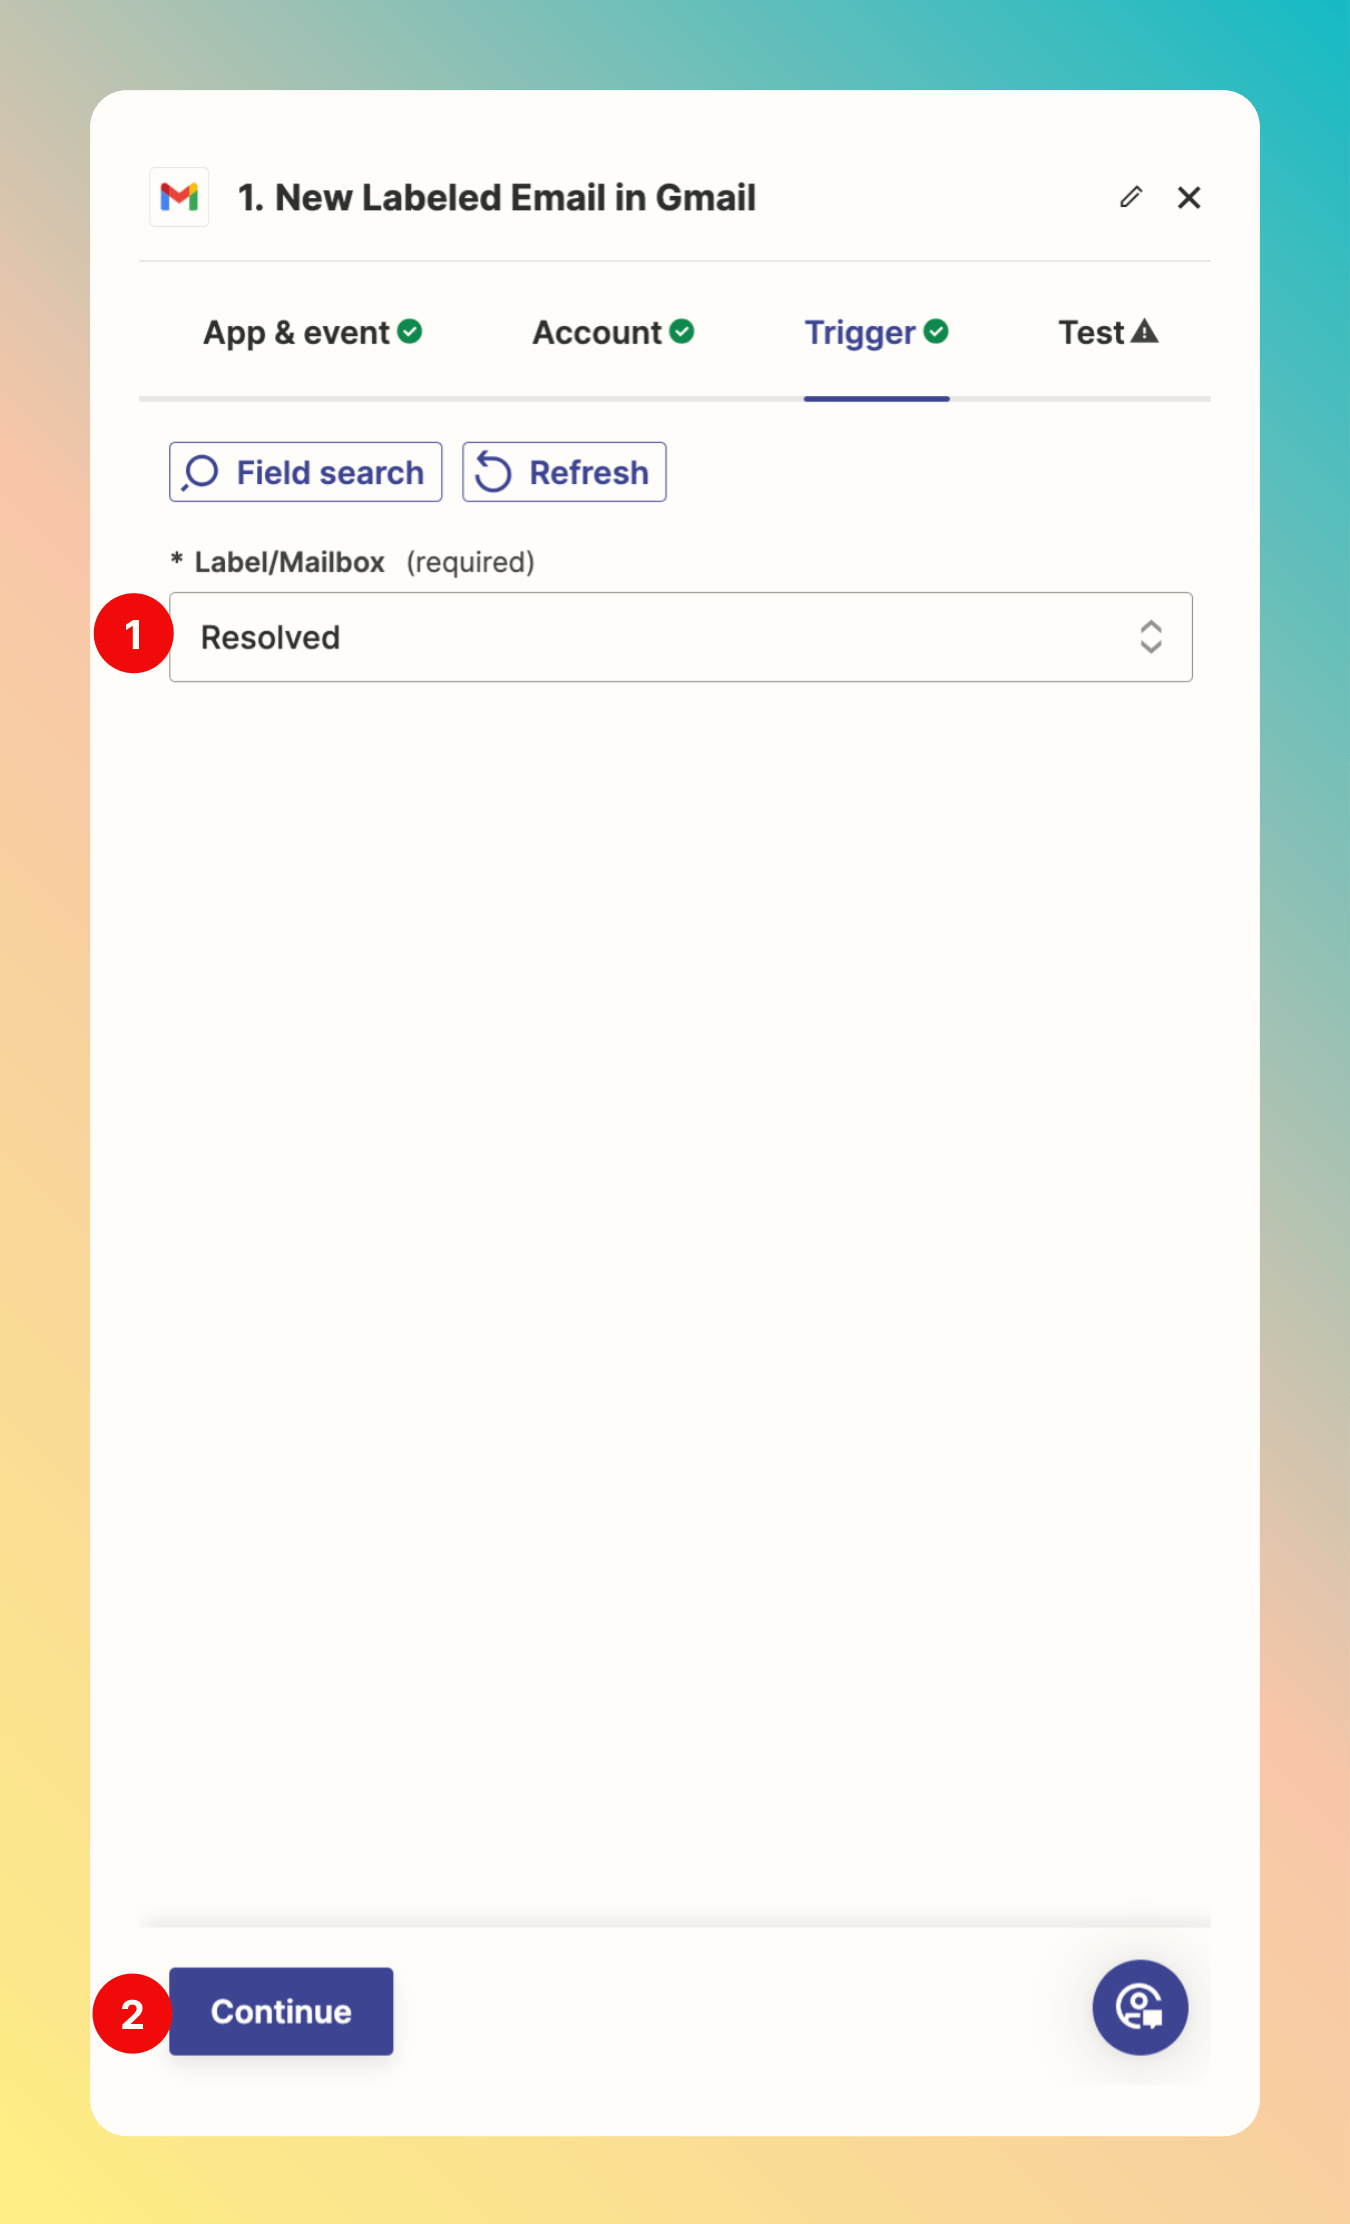
After selecting the "New Labeled Email" Event and the Gmail Account we want to use, we set up a new Trigger to react to emails with the label `Resolved`.
You have successfully created an All Quiet incident via Zapier.
## Create Incident Intent Action
Now, we want demonstrate how to create a Zap to update an an existing incident.
We will keep working with the Gmail Integration to demonstrate a usecase. Feeld free to use any other Zapier Integration that suits your case as a Trigger.
This Zap will update the status of the incident we created [earlier](/integrations/inbound/zapier#create-incident-action) to `Resolved`, by re-labeling the correonding email in Gmail.
Again, we need to start with setting up the Gmail Trigger. We will not document all steps again, but focus on what's different.
After selecting the "New Labeled Email" Event and the Gmail Account we want to use, we set up a new Trigger to react to emails with the label `Resolved`.
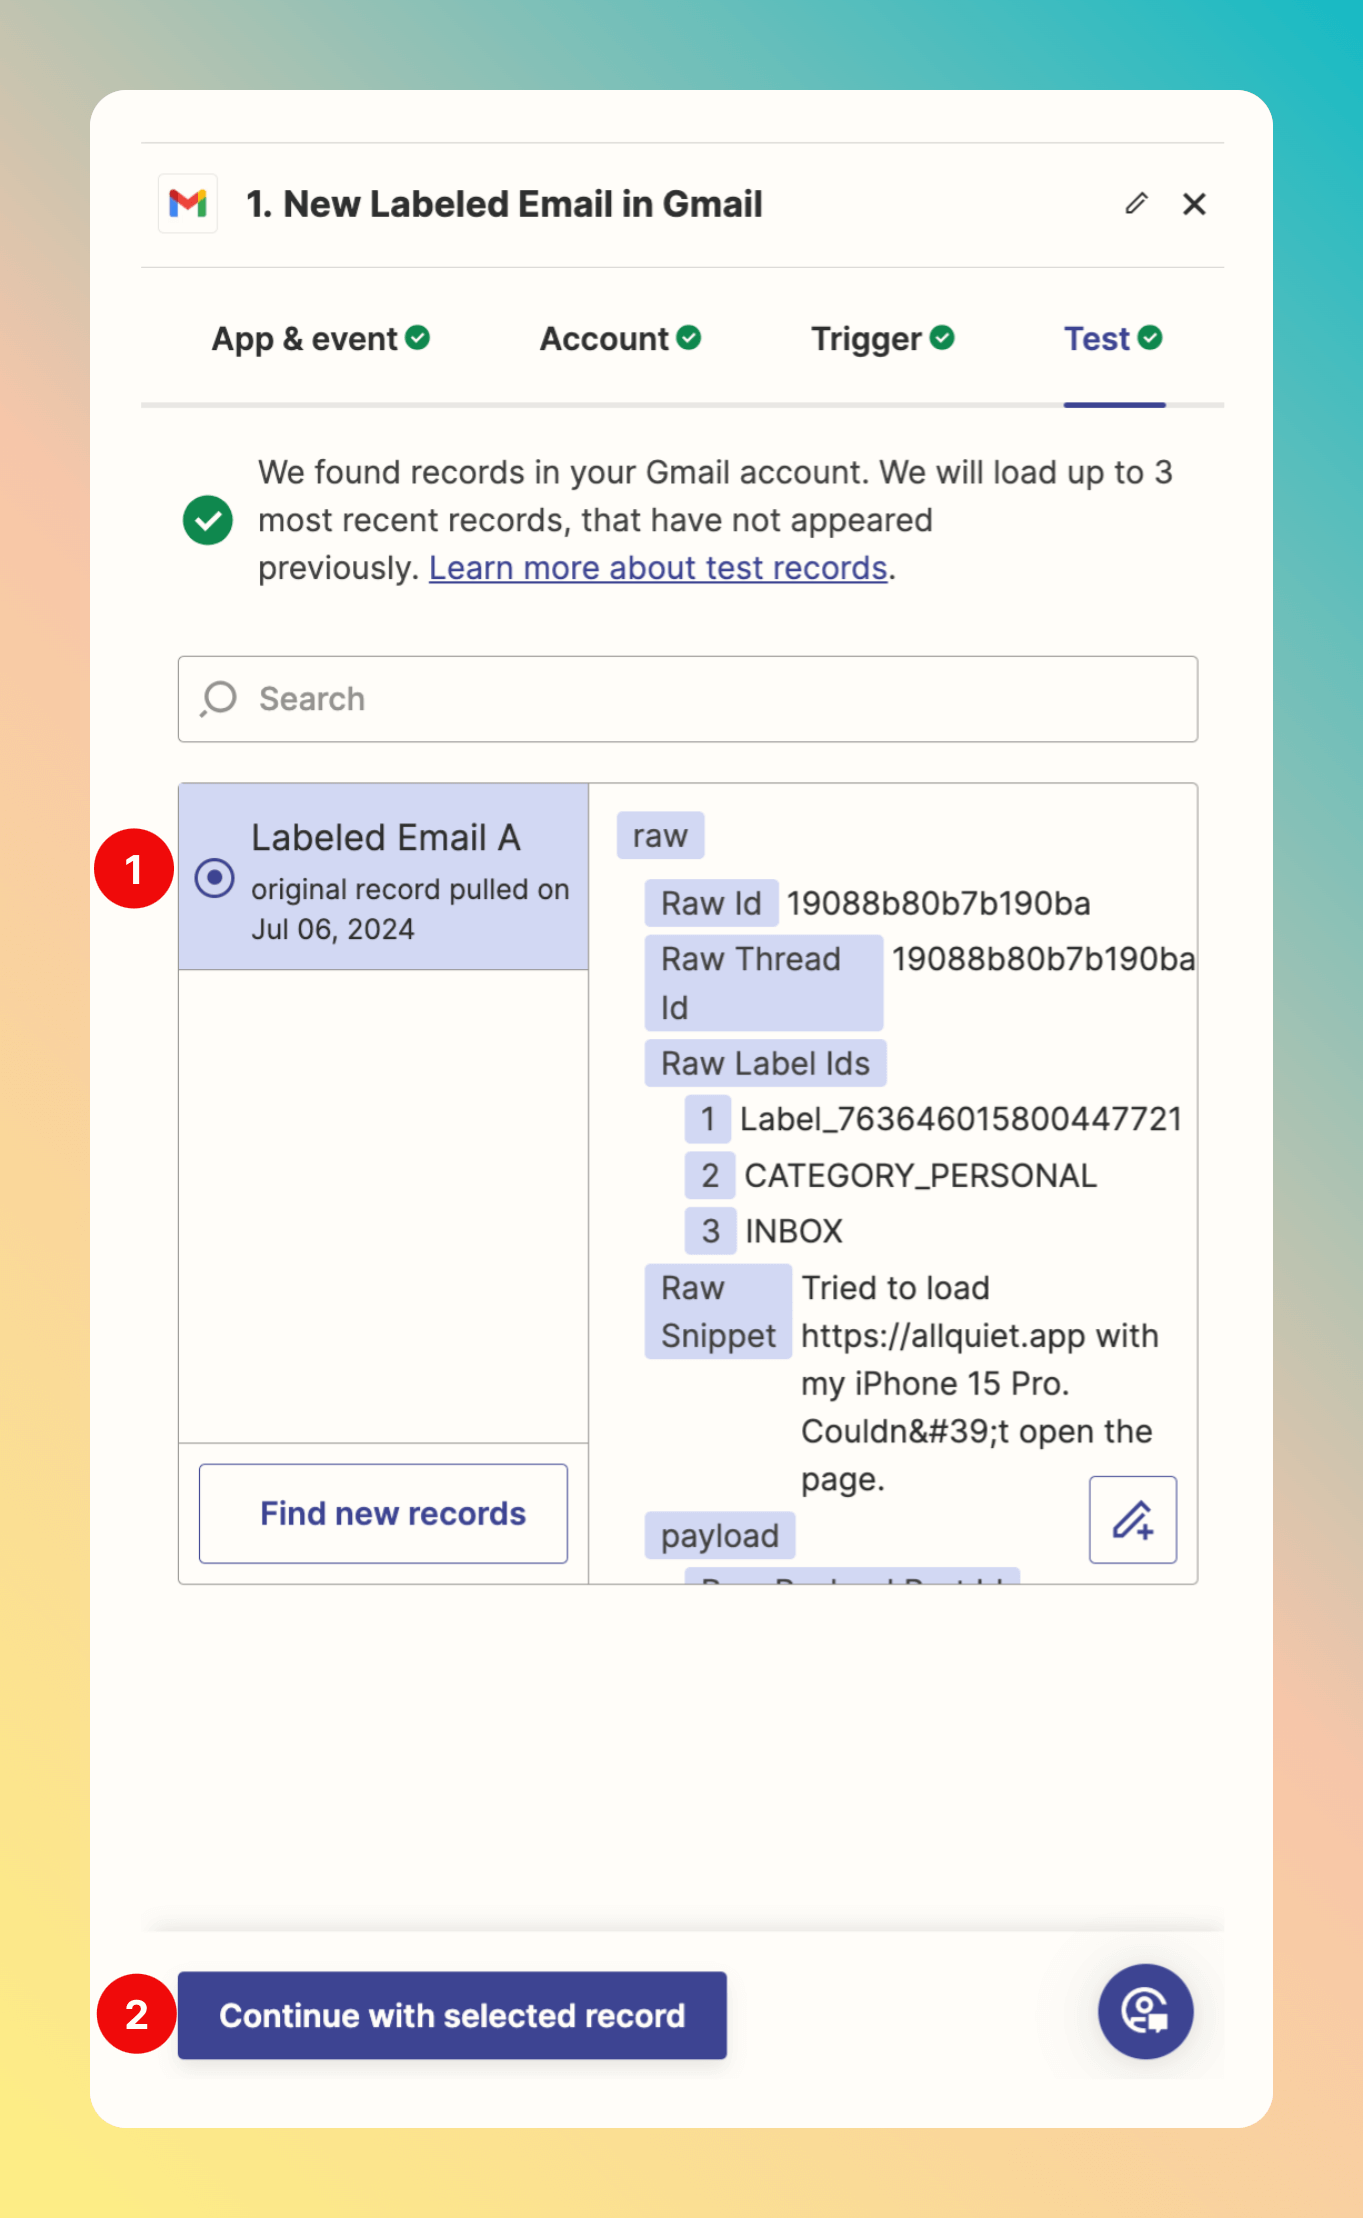
 In Gmail, we already added an email to the label to make sure we have values to test the zap.
1. Select the email we want to use to test.
2. Click `Continue with selected record`.
In Gmail, we already added an email to the label to make sure we have values to test the zap.
1. Select the email we want to use to test.
2. Click `Continue with selected record`.
 Next, we add the All Quiet Action. This time, we select Action Type
`Create Incident Intent` (2) and continue.
This has to be done regardless of choosing Gmail or any other integration as a Trigger.
The All Quiet Account is already connected, so we can move on with configuring the Action.
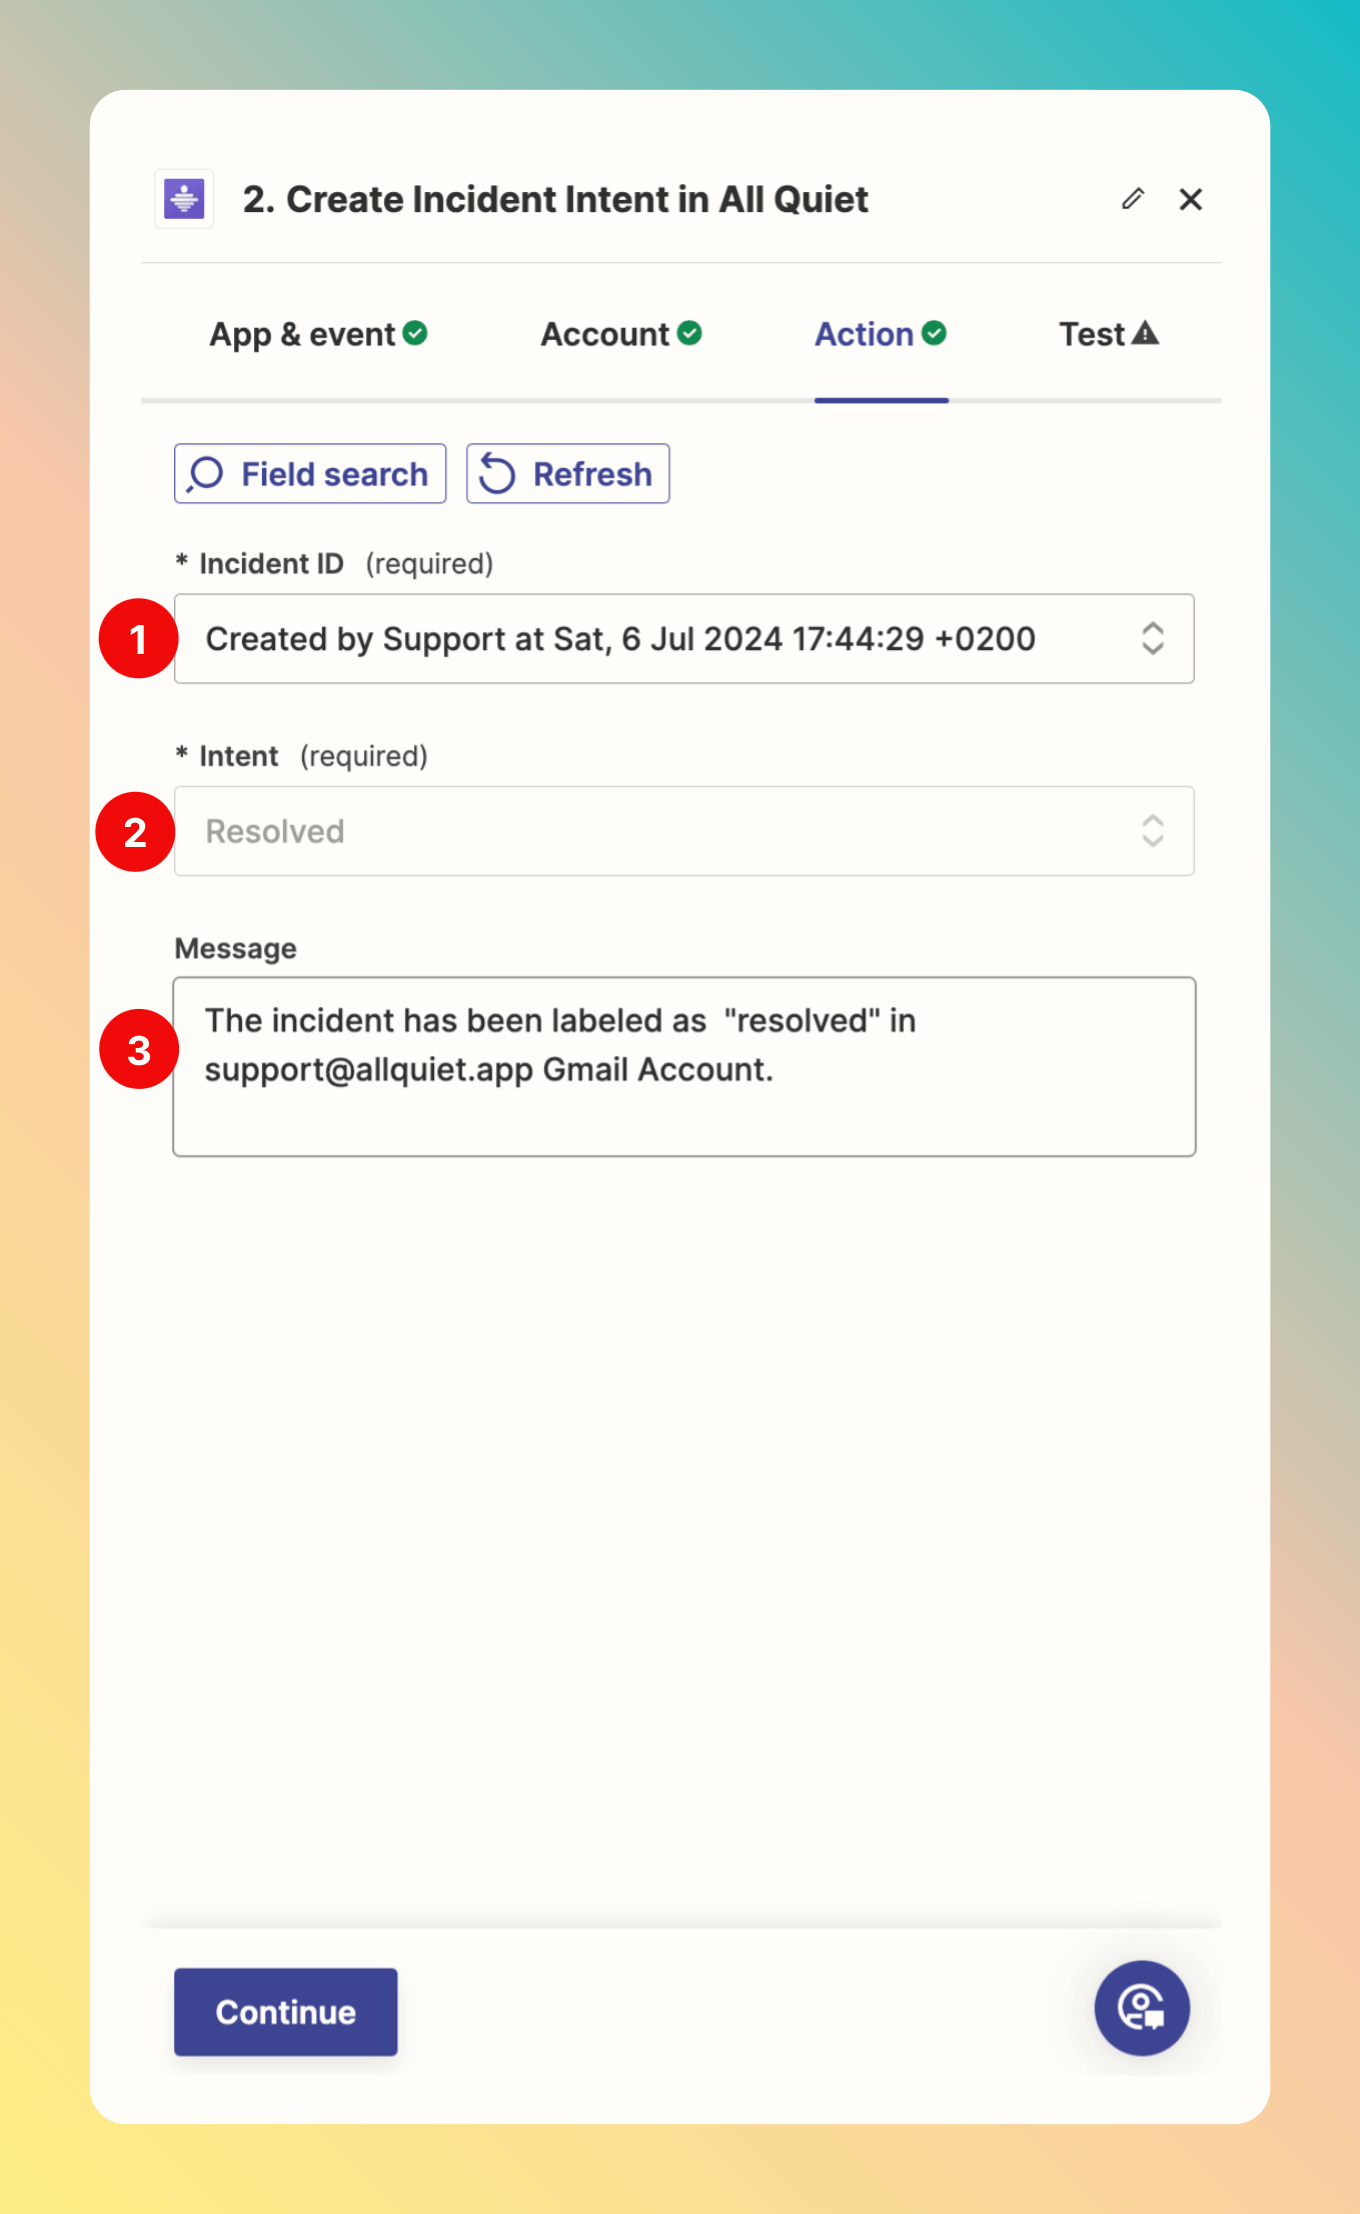
1. We Select an `Incident ID`. Simplest way is you use one of those already provided by the Gmail Trigger.
2. We select our `Intent`. Remember, we want to resolve incidents if the incident triggering mail was re-labeled as `Resolved`.
3. We can add a `Message` that is added to the intent. We stuck to text, here, but you can use variables, too.
`Continue`.
Next, we add the All Quiet Action. This time, we select Action Type
`Create Incident Intent` (2) and continue.
This has to be done regardless of choosing Gmail or any other integration as a Trigger.
The All Quiet Account is already connected, so we can move on with configuring the Action.
1. We Select an `Incident ID`. Simplest way is you use one of those already provided by the Gmail Trigger.
2. We select our `Intent`. Remember, we want to resolve incidents if the incident triggering mail was re-labeled as `Resolved`.
3. We can add a `Message` that is added to the intent. We stuck to text, here, but you can use variables, too.
`Continue`.
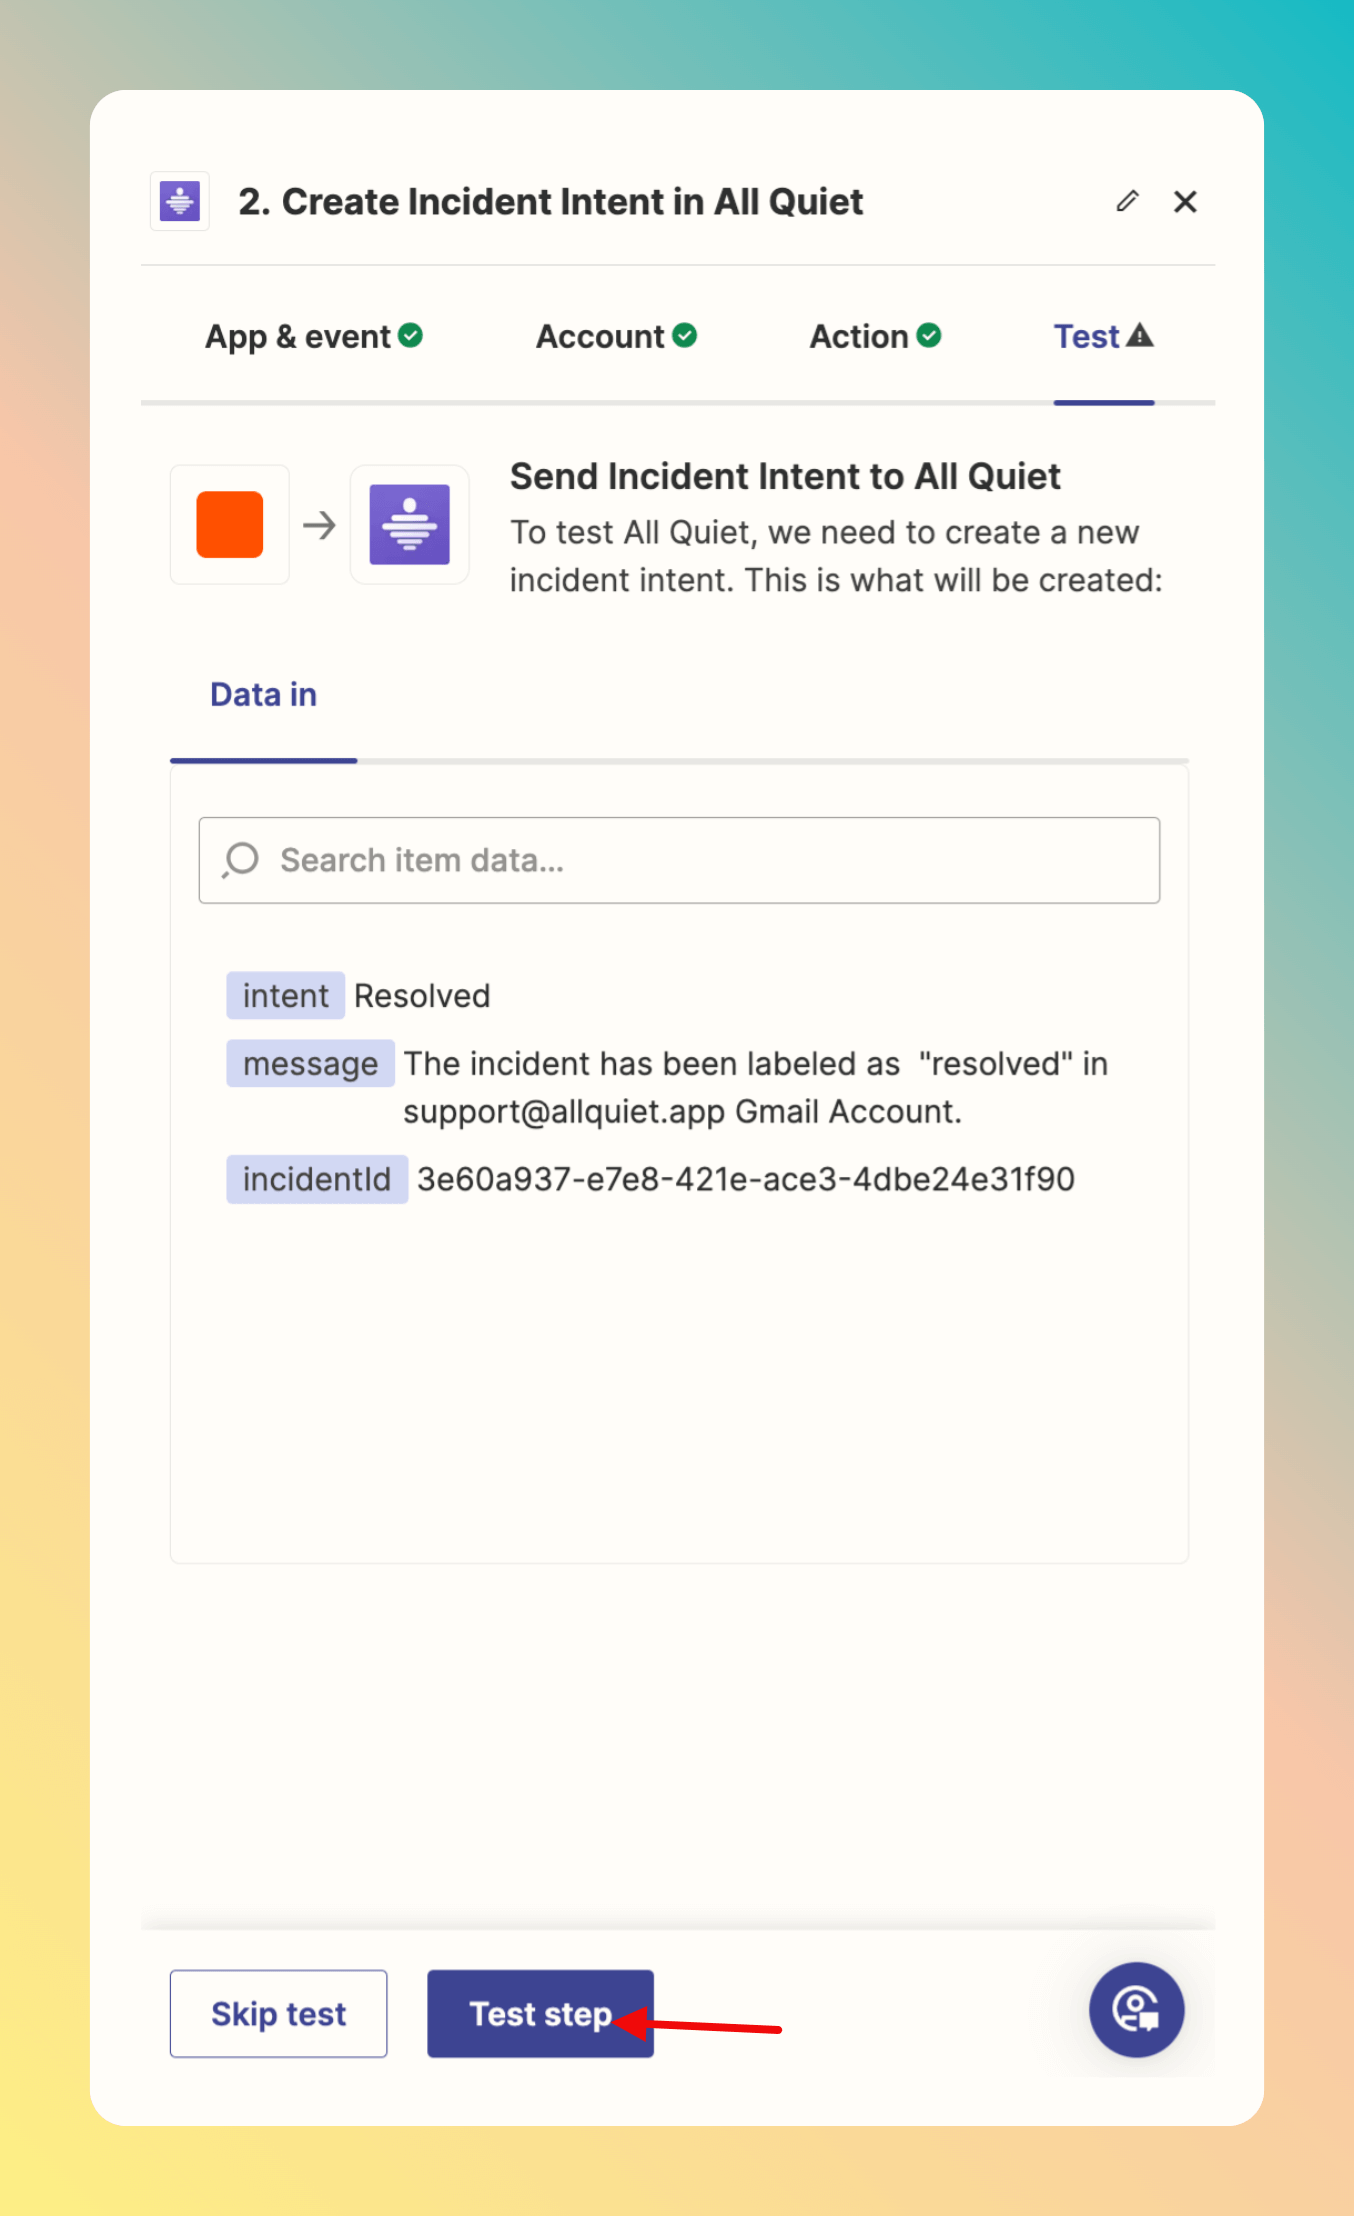
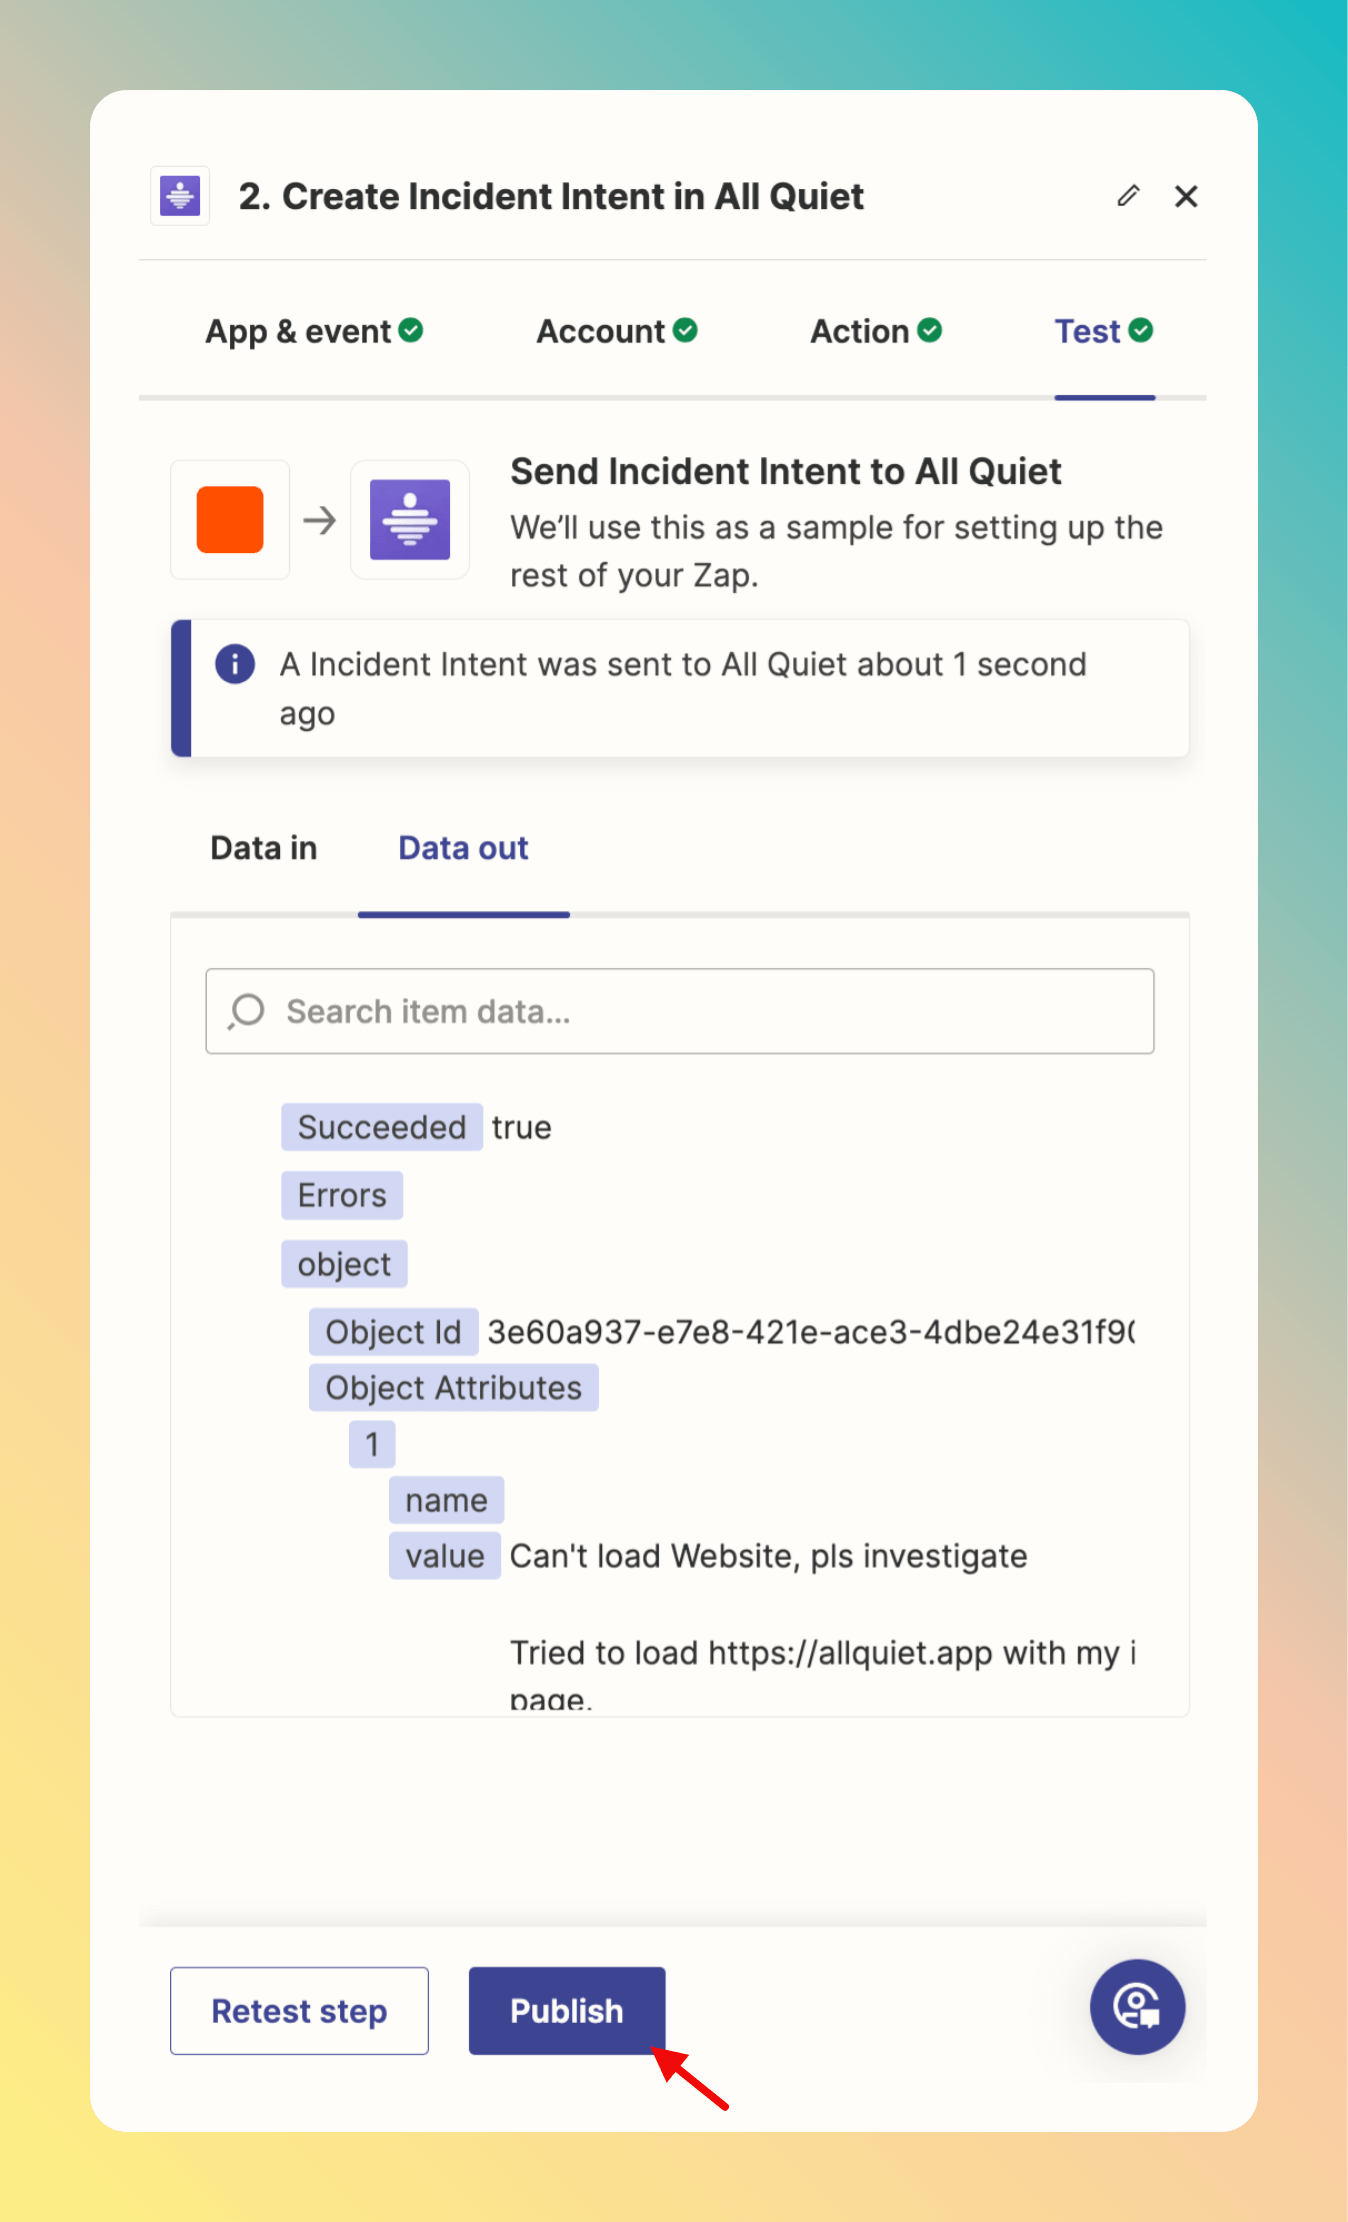
 Click `Test step` to test your Zap.
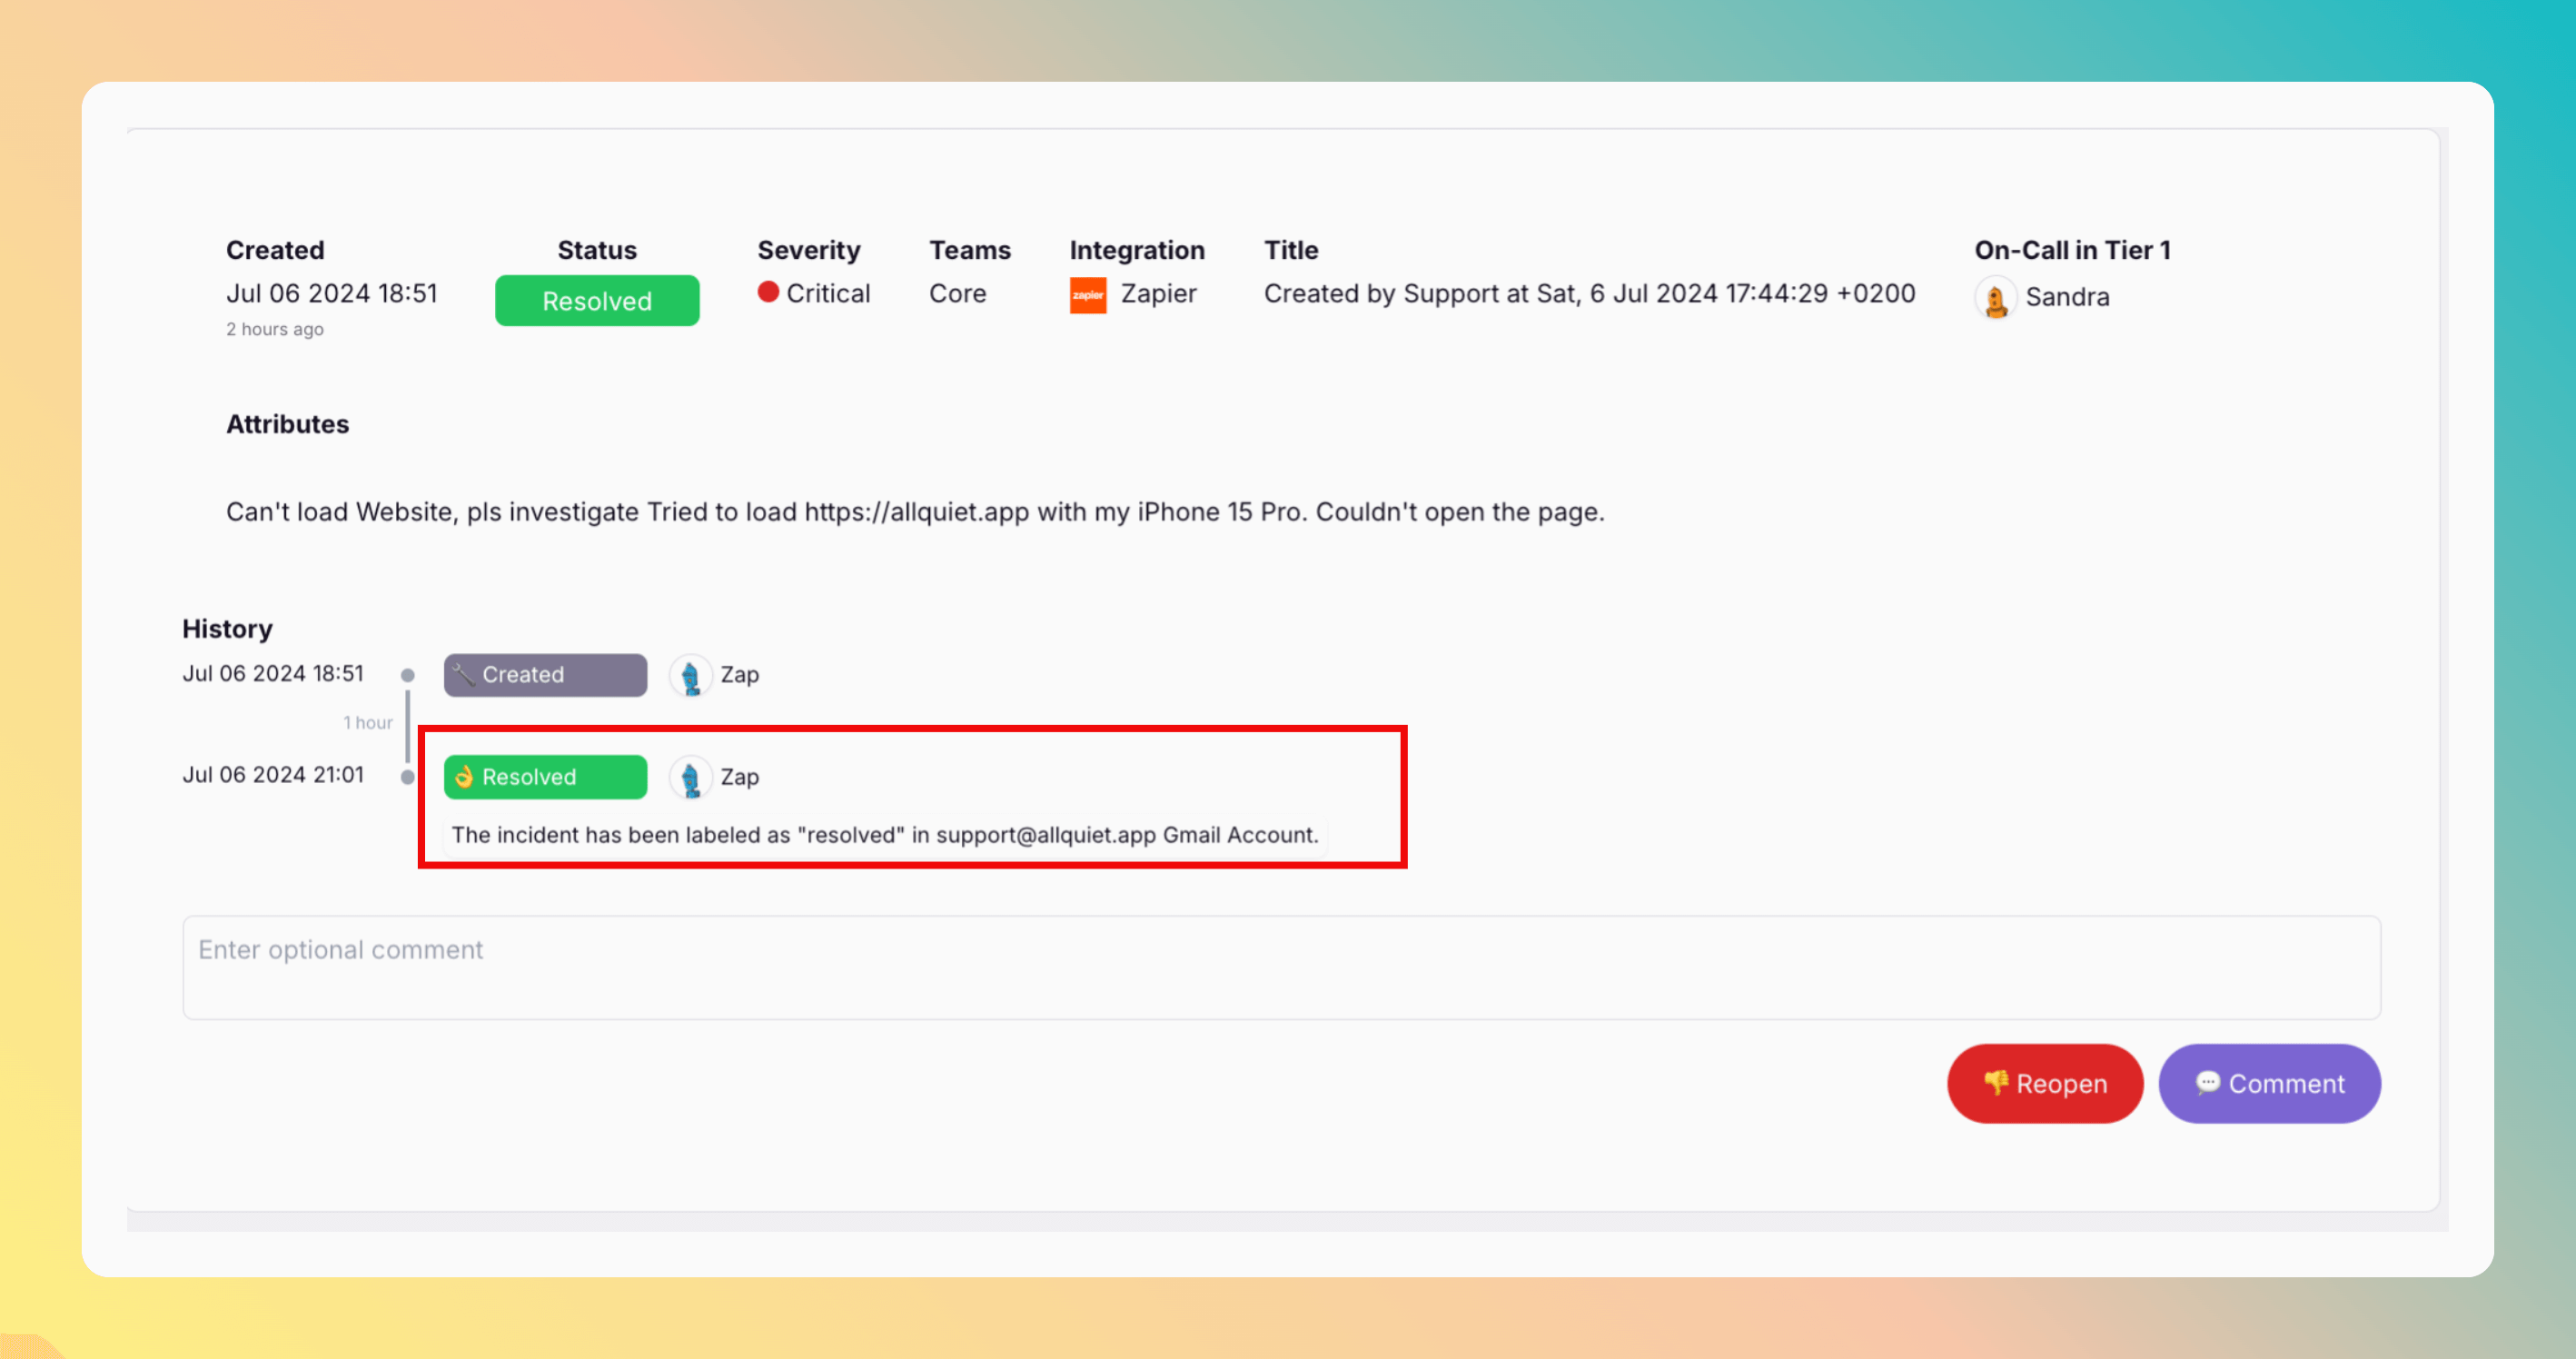
 Entering All Quiet, you can check if the incidents got updates as expected by looking into the incident details.
 `Publish` the Zap if you liked the result.
 You have successfully updated an All Quiet incident via Zapier.